
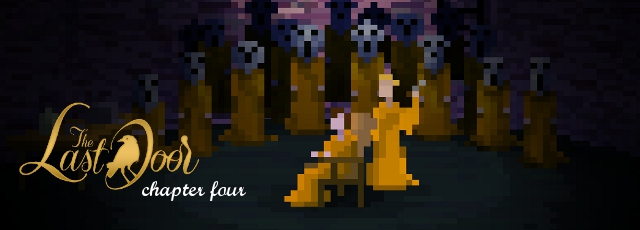
![]() The final installment of season one of The Game Kitchen's popular point-and-click horror adventure series has finally been made available to everyone, and The Last Door Chapter 4 races towards its unthinkable conclusion. In Chapter One a letter from a childhood friend brought you to their seemingly abandoned estate, and Chapter Two sent you back to a place you barely remembered to search for answers you might wish you never learned, while Chapter Three continued down a dark path into the woods. Now, it seems as if our hero Devitt has finally caught up with someone who can give him answers, but at what cost? To play, just click to interact, and the changing cursor will represent the action you can try to take. Click the magnifying glass to use it to examine items you're carrying, or just click the item itself to ready it for use. You can also try to combine things you're carrying by first clicking on one item, and then another... they'll automatically merge if they're supposed to. Once you've already been through a door or other area transition, the next time you want to go through it, just double-click it and you can immediately skip to the next area instead of needing to wait for Devitt to walk there. Just make sure you have played the first three chapters before you play this, or nothing will make any sense!
The final installment of season one of The Game Kitchen's popular point-and-click horror adventure series has finally been made available to everyone, and The Last Door Chapter 4 races towards its unthinkable conclusion. In Chapter One a letter from a childhood friend brought you to their seemingly abandoned estate, and Chapter Two sent you back to a place you barely remembered to search for answers you might wish you never learned, while Chapter Three continued down a dark path into the woods. Now, it seems as if our hero Devitt has finally caught up with someone who can give him answers, but at what cost? To play, just click to interact, and the changing cursor will represent the action you can try to take. Click the magnifying glass to use it to examine items you're carrying, or just click the item itself to ready it for use. You can also try to combine things you're carrying by first clicking on one item, and then another... they'll automatically merge if they're supposed to. Once you've already been through a door or other area transition, the next time you want to go through it, just double-click it and you can immediately skip to the next area instead of needing to wait for Devitt to walk there. Just make sure you have played the first three chapters before you play this, or nothing will make any sense!
 Chapter 4 of The Game Kitchen's wonderfully, creepily Lovecraftian horror series has a lot of work to do when it comes to wrapping up the game's story, though thankfully it does a solid job of balancing exposition and story with exploration and puzzle solving, even if most of your time is spent wandering around a location that's a bit too similar to the first chapter. While most of the gameplay is fairly logical, there's a lot of backtracking, and at least one instance where progress depends on discovering that something new has triggered in an old location for no reason whatsoever other than the game wouldn't proceed if it didn't, and you need a gruesome (if somewhat silly) solution to one of the game's puzzles. While Chapter 4 offers up jump scares like its predecessors, they're extremely well executed, and the atmosphere is heavy with tension and unsettling dread. Doctor Who fans will probably spend a while on the edge of their seat at one point. If you're expecting a lot of answers, however, you're out of luck, since this installment offers few and feels like it mostly exists to set up the second season rather than actually resolving anything. Engaging, creepy, and compelling? Yes. Satisfying from a narrative point of view? Ehhhhh. As of this writing, episode one of season two has been released, but is currently only available to people who donate, though as usual it will be released for free once the following chapter comes out. (Which, of course, is when we'll review it with you!) Though this finale might not bring quite enough answers to its eerie tale compared to the questions it raises, it's as beautifully executed a piece of Lovecraftian style horror as ever, and perfect for playing with the lights down and the sound up.


Walkthrough Guide
(Please allow page to fully load for spoiler tags to be functional.)
The Last Door: Chapter 4 Walkthrough
Introduction
You begin the game inside of a Basement. Click Devitt, the man sitting in the chair.
Click the table at the left side of the room.
Click Devitt a second time.
After the credits, the scene will change to the inside of a train, playing as the doctor. Ask all of the available questions to complete the scene.
Explore the Upper Floor of the Manor
Walk left to exit the forest and approach the manor.
Click the front door once to knock and then a second time to open it, then go inside.
When you enter the Foyer, take a few steps in any direction to hear a noise upstairs.
Inspect the grandfather clock beside the stairway. Note that it's missing one of the hands on the face of the clock.
Click the stairs to go up to the Hallway.
Go through the open door near the top of the stairs to enter the Bedroom.
Click Alexandre to try to speak with him. Select all the available dialogue options.
Next, read the note on top of the bed at the left side of the room.
Inspect the cuckoo clock hanging on the wall to the right of the door.
Note that the clock is missing the cuckoo bird and that the face of the clock has been rotated left 90 degrees.
Exit the room to return to the Hallway.
Click the archway on the right side of the screen to walk to the right half of the Hallway.
Examine the chest under the portrait of the old man.
Open the lid and take the IRON HOOK inside to add it to your inventory.
You will also discover a note with the hook.
Collect the First Half of the Photo Development Materials
Walk through the first door on your right to enter the Photo Lab Room.
Inspect the shattered red glass on the floor. It was used to cover the lightbulb during development of the photographs.
Take the jar of CYANIDE from the table.
Read the paper on the floor at the right end of the room.
Note the instructions to develop a positive on the second page:
The first step is vitriol.
The second step is cyanide.
The third step is water.
Exit the room and walk to door at the end of the hall to enter the Study.
Look inside the fireplace to find the black ENVELOPE.
Inspect the item in your inventory to find that it can't be opened under white light.
Read the letter on the corner of the desk and the invoice on the left side of the desk.
Note the important information on the invoice:
The cuckoo clock will only sound at a quarter past six in the afternoon.
All of the cuckoo clocks in the house have been synchronized.
Exit the room, walk all the way left, then click the stairway to go downstairs. From there, walk through the archway into the Living Room.
Explore the Lower Floor and Outside of the Manor
Open the door at the left end of the Living Room and enter the Basement.
Take the glowing oil LAMP from the table at the center of the dark room.
Walk to the left side of the room and read the diary on the table.
Open the door at the right side of the room to go outside to the Backyard.
Click the well once to inspect it, then a second time to take the broken ROPE.
Combine the ROPE and HOOK in your inventory.
Use the HOOK & ROPE on the well to fish out the bucket, where you'll find the BIRD inside.
Open the small side door at the right end of the wall to reach the front yard.
Collect the Second Half of the Photo Development Materials
Walk right to the entrance of the Greenhouse.
Examine the iron bar in front of the Greenhouse door on the right side of the screen. Click the bar again to remove it.
Open the door and enter the Greenhouse.
Walk all the way right to the end of the room.
Pick up the bottle of VITRIOL oil on the pedestal between the angel statues.
Exit the Greenhouse and re-enter the manor through the front door.
Go upstairs and return to the Photo Lab Room.
Now that you have the LAMP in your inventory, you can click the other lamp hanging from the ceiling and remove the LIGHTBULB.
Walk back downstairs and exit the manor through the front door once again.
Follow the right path between the trees to enter the forest.
Move right until you find the corpse of the deer beside the ruins.
Use the LIGHTBULB on the deer's blood to coat the bulb red.
Return to the manor and go upstairs to the Photo Lab Room.
Develop the Photograph
Once inside the Photo Lab Room, place the blood LIGHTBULB into the lamp hanging from the ceiling.
The room will now be lit red, making it safe for you to use the black ENVELOPE on the sink, which reveals the photo plate.
Follow the instructions from the chemistry recipe page on the floor of this room.
First, pour the VITRIOL on the plate.
Next, use the CYANIDE on the photo plate.
Lastly, click the sink faucet to rinse the plate with water.
After you finish developing, the PHOTO is added to your inventory.
Exit the Photo Lab Room and return to the Bedroom.
Fix the Cuckoo Clocks
When you enter the Bedroom, show the PHOTO to Alexandre.
Pick up the CLOCK HAND that Alexandre drops on the floor beside his wheelchair.
Put the BIRD from your inventory into the cuckoo clock on the wall.
Exit the Bedroom and walk downstairs.
Attach the CLOCK HAND from your inventory to the grandfather clock beside the stairway.
Click the grandfather clock to take a closer look.
Set the grandfather clock to the correct time to sound the cuckoo alarm:
Remember the invoice from the Study? It said that the cuckoo clock will only go off if the time is set to a quarter past six, or 6:15.
Keep in mind that the clocks are synchronized and that the cuckoo clock upstairs is rotated 90 degrees left.
Therefore, the grandfather clock needs to be altered 90 degrees to the right!
Click the left side of the clock to move the hands clockwise or the right side of the clock to move the hands counter-clockwise.
Set the time to 3:00, then click the small lever on the right to submit your solution.
If you entered the correct time, you should hear the cuckoo clock from upstairs.
Go back up to the Bedroom.
Explore the Cellar & Search the Grave
Pick up the cuckoo BIRD on the floor behind Alexandre's wheelchair.
Look inside the BIRD to find a KEY.
Leave the bedroom and go downstairs. Exit the manor through the front door, then walk left to the Backyard.
Use the KEY to open the cellar doors under the window, then click to go down inside.
Walk left to the cupboard.
Open the drawer to find the SHOVEL.
Leave the Cellar to return to the Backyard. Go to the grave on the left side of the yard.
Use the SHOVEL to dig up the dirt, then click the dug up grave to look inside.
Pour the bottle of VITRIOL acid on the padlock to burn through the lock.
Examine the skeleton of "Old Mike" and read the paper leaf at the lower right corner of the crate.
Take the rolled up CANVAS from the skeleton's hand.
Click the item in your inventory to view the constellation map.
Note the large square points in the three constellations that make up the "Summer Triangle".
Walk a few steps towards the house until you hear Alexandre's scream.
Find & Use the Telescope
Go back inside the manor and up the stairs to the Bedroom.
Read the diary pages on the seat of Alexandre's wheelchair.
Click the open windows to go out to the balcony.
Take the CRISTAL lens from the angel statue's hands.
Leave the room and go all the way back to the Cellar.
After taking a few steps to the left while inside the cellar, you should hear a loud noise in the distance.
Go all the way left to the end of the room. Click the small doorway to enter the Laboratory.
Read the book on the corner of the table beside the door.
Walk to the right side of the room. Look carefully behind the desk in the middle of the archway to find a hidden doorway.
Click the hidden doorway to enter the Observatory.
Read the letter inside the envelope on the ground, located in the lower right area of the room.
Attach the Cristal lens to the telescope.
Before you click the telescope, examine the CANVAS if you haven't already!
Once you're ready, click the telescope to look through the lens.
Select the three correct stars in the sky to locate the Summer Triangle seen on the constellation map.
Solution.
After the puzzle is solved, note the three symbols besides the stars of the Summer Triangle.
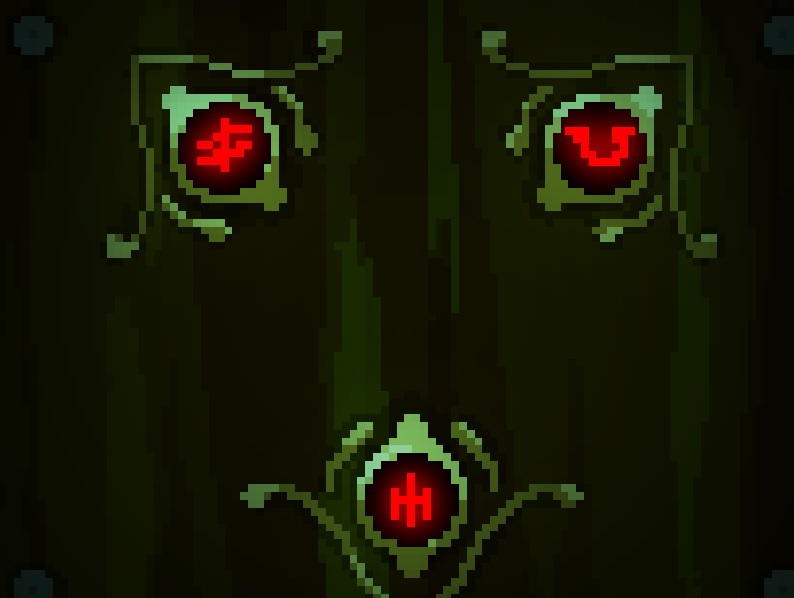
Click the desk beside the telescope for a close-up view of the lock.
Select the three symbols of the summer triangle and enter them into the corresponding places on the lock.
Solution.
Take the SYRINGE from the opened desk.
Click the pit in the middle of the floor to climb down.
Conclusion
Once you reach the bottom of the pit, show the SYRINGE to Alexandre.
Click the chair to sit down.
Give Alexandre the SYRINGE from your inventory.
Walk to the right through the fog until you reach Alexandre.
Posted by: Trinn |
November 8, 2014 2:01 PM
|
November 8, 2014 2:01 PM