
Jayisgames really needs your help to continue providing quality content. Click for details
Welcome in 2021! It's escaping time!
It's a new year already but the load of Christmas themed games was bigger than the Christmas Special could absorb, and so three of four games in this WE are still holidayish. At first, Amajeto wants you to escape from nicely decorated apartment. Then you pop up in tomoLaSiDo's living room where you need to collect six key parts and also find a secret passage. Pixel Kobo invites you to a tropical island you've already visited - for a short while though - and Neat Escape invites you to a party which doesn't go as expected...
Have a good time and enjoy!
Escape from 2020

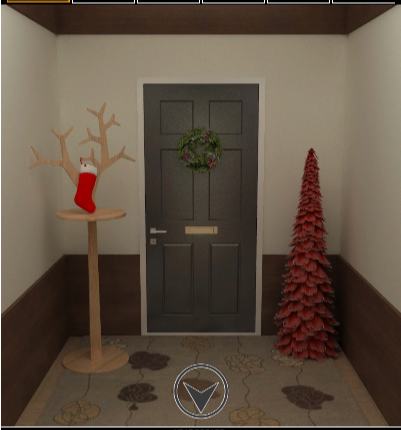
Amajeto locked you up in their apartment consisting of several rooms, and from each you see one wall only - and you are supposed to escape it. It's not just the apartment what you're escaping from - it's year 2020 which you will hopefully leave behind and that worth the effort! Any Christmas decoration you can think about is there - the tree, the wreath, candles etc., and all puzzles you can think about too. Can you escape
 |
 |
TomoLaSiDo's room doesn't seem very Christmasy, right? Well, it is - there is a secret entrance to another one with decorated Christmas tree, and you need to solve several puzzles to discover it. You won't be dissapointed as the second room nicely adds to the game's length and number of codes you can think about. You need to find ten clappers for perfect end; one usable plus nine.
The cursor isn't changing, no save button, one ending.
Note: the game needs time to load properly
Last year, in February, we set on the journey with Pixel Kobo. You can find Chapter 1 in WE N°247, and below the link to Chapter 2 which is surprisingly short considering the amount of effort put into creating the setting. Now it's clear why. In Chapter 9 we are back on the tropical island and finally can appreciate well made 3D surroundings and puzzles. Notice, that the game consists of two parts - at one point the game seemingly finishes and follows the background story. Roll down the page of dialogues and at the bottom you find a play button which returns you to the island to finish the chapter properly.
The cursor isn't changing, autosave, one ending.
 |
 |
You were invited to a Christmas party to your friend's house, and ended up locked in an empty apartment. No party. No friends. Not even a small notice...and it's not for the first time. Neat Escape makes jokes like this quite often...however, the apartment is comfortable and tidy, and you have no choice anyway. So start with exploring right now and remember, one key fits two locks and the ending depends on which you choose...and there is a party awaing you, after all. If you choose the longer ending.
The cursor isn't changing, autosave + save option, two endings
We love escape games, and our readers love talking about them and sharing hints! How about you? Let us know what you think, ask for clues, or help out other players in the comments below.


can't wait for these
Did you like the current one? What else would you like to see?
i was referring to the walkthroughs czar.
Amajeto have been getting tougher. Even after watching the walkthrough, I didn't get
where the code 1944 came from. The 4x4 grid code was a bit obscure too.
May be someone can help kksl1der20?
In the Amajeto
The diagram behind the picture is a math equation
About the code
as Brf said it's a math equation
the clue is behind one of the pictures next to the tv screen
what could be puzzling for some players is the star symbol
...which stands for multiplication
think about a clock face
12*3*6*9
=1944
The 4x4 grid
the clue is in the second room
on the gingerbread house
look at the windows
they are in two rows and some squares are empty and some aren't
x o x o
o x o x
o x o x
x o x o
x = full square o = empty square
Neat Escape was fun as heck. Three endings if you include that one gives 2 presents and you can only select one. Here's the only spoiler you may need to find all 3 endings a bit easier:
SAVE BEFORE ever using the BLUE key
Hope the walkthroughs will be here for these games soon.
I only have one walkthrough done at the moment:
Escape from 2020
I thought this was just another Christmas game!
Exploration
Of the four cupboard compartments here, only two are locked. There's also a row of Santas over some colored cups, and looking in the cookies you find a tiny red cap. Beside the tree on the left is a brownish square tile.
Open the door to the next room.
Above the couch is a TV surrounded by four pictures, and the top-right picture can be flipped over to reveal a clue. The small table on the left has a gingerbread house and man, and a square tile.
Next room. A picture is missing some tiles, and the toy sleigh has a yellow cap on it. All three drawers are locked.
Next room! There are two more locked compartments, and you can set the clock.
Two buttons / Exploration 2
Use the clue from the Santa figures to unlock the top drawer in the third room.
The hats point RLRRRL.
Take a key, and unlock the last door. And you're out!
Above a locked door are some flashing lights. The wall shelf has four gnomes under four stars. And the large reindeer hides a square tile on the ground.
First room puzzles
Clues:
Stars on last screen, gingerbread house on second screen.
For the left compartment:
Match the star heights by clicking the bars
0 3 1 2 times.
For the right compartment:
Imagine the large grid as being made out of four 2x2 grids. Each window represents one subgrid.
The top windows (on the front of the house) have snow in a different pattern from the bottom windows (on the side of the house).
Putting those together gets you
				W _ W _

				_ W _ W

				_ W _ W

				W _ W _
Take a gnome with green boots, and 2 square tiles.
Puzzles on fourth screen
(That's the one with the clock.)
Clues:
The cups on first screen, the picture on second screen, and another object.
For the left compartment:
The blue, red, yellow, green cups are decorated with the shapes
Flower Diamond Heart Star
(2 1 7 3 clicks)
For the right compartment:
The drawing represents the object you should be looking for.
Something round, with four points at the top, bottom, left and right.
It's the clock, and the asterisks indicate multiplication.
Work out 12*3*6*9 = 1944.
You find 2 square tiles, a blue cap and a clue with a weird shape.
For the clock:
The clue in the left compartment is the time.
Click the left button 3 times and the right button 9 times.
Take a green cap.
Two drawers
Use the clue from the
flashing lights on the last screen
to unlock the bottom drawer on the third screen:
LCRCLC
Take a remote, and use it on the TV to view a clue with stockings.
Use that clue to unlock the middle drawer:
The initials spell out
GIFT
Take the last square tile.
Complete
Place all 8 square tiles in the picture on the third screen, and rotate the tiles until they align. (Hint: For the top corners, try to get the background to match.)
3 1 1 2
2 2 1 3
3 2 3 2
1 3 1 2
Take a pink cap.
On the screen, place the gnome on the shelf and then the caps on them.
Looks like none of them match. You can fix that!
Click each pair of hats to swap them.
1st 4th
then
4th 5th
then
4th 3rd
then
4th 2nd
Take a key, unlock the last door, and you win!
I'll be back for the other three, but probably not this weekend.
Thanks for the walkthrough,kk. Can't wait fr the others.
I'm also experimenting with a small change in my workflow, so hopefully it'll be slightly faster after this one!
Escape Challenge 125: Room with Clappers
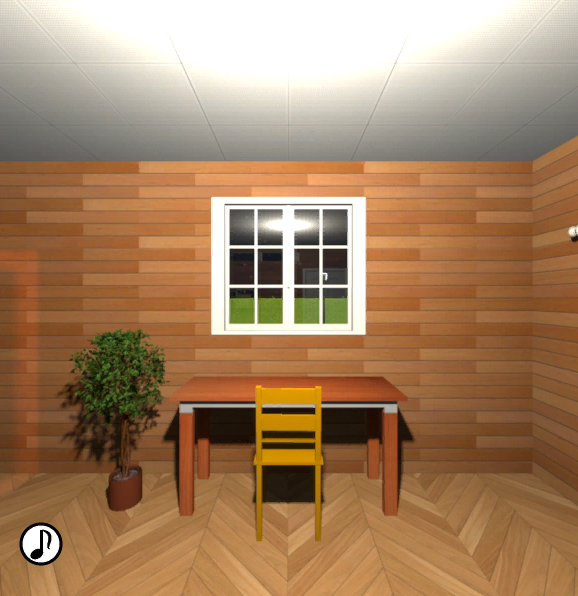
Don't be distracted by the narrow wooden strips everywhere.
Exploration
The first screen has a window, table, chair and potted plant. The table has a clue on it.
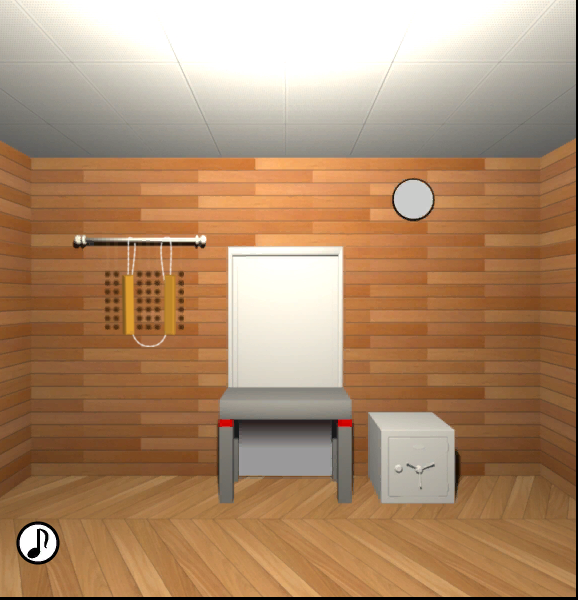
Turn right to face a door blocked by a table. The door has a complicated mechanism on top and a mocking face below. Take a clapper among the beads hanging on the left. The clock has no hands but its face reads "clock", and the safe below has a slider and a button.
Turn right to face a locked door, a wall box, a chest of drawers and a blue bin. You're not seeing wrong, the drawers have a pane of glass that traps a capsule beneath.
Turn right to face a switch that controls a small shutter in the wall, and a large machine with a four-digit lock.
Enter the corridor to the toilet, where you can sit down, look right, look up and look left to find a cool drawing.
Valuable
Let's start with the safe. Use the clue from the table to unlock it.
The table clue alternates between instructions for the slider and the button.
Move the slider all the way right, then push the button.
Move the slider to the middle, then push the button.
Move the slider left, then push the button.
The safe is empty except for a weird picture. Were you too late?
First puzzles
You've seen a clue
in the chains of hanging beads
and you can get another clue by
clicking the screen on the big machine.
For the big machine itself:
Count the green speech bubbles and the yellow clapper sounds:
3 2 5 2
You get a clapper (item).
For the top drawer:
The roofs in the animation match the
CRLRC buttons.
For the bottom drawer:
The beads come in groups of
2 3 1
Take 2 clappers. (Or should it be 2 pairs of clappers?)
Use it!
Use the clapper to remove the capsule on top of the drawers. You get a key piece.
Use the clapper to weigh down the handle near the big machine. You get another clapper.
And finally, place the clapper on the upper section of the door. Pushing the yellow arrow releases another key piece.
As the clue behind the key piece indicates, all the switches need to be up. First, push the small blue light.
Push the yellow arrow again to restore the clapper, then flip each switch, then push the yellow arrow again.
Ugh, the door just ate your clapper. Examine the lower portion of the door to find a tunnel with numbers.
Exploration 2
Climb through to the next room, which has a tree, a picture on the left and a round dial device on the right.
Turn right to find a safe with a button grid, a box with a capsule wedged between wood blocks, and some colored strips hanging near the window above.
Turn right to find a fireplace, a stopped clock, and a glass case with some wrapped presents inside.
Turn right to find a lot of objects. You can only zoom in on the windowsill and take a clapper.
Second puzzles:
Clues: basically everything in the second room.
For the dial on the wall:
To get the sequence of colors shown, click the left half of the dial 4 times and then the right half 4 times.
You get a key piece.
For the left box on the table:
Enter the "QR cord" by clicking the top-left, right, bottom squares.
You get a key piece.
For the right box on the table:
The screen with the triangular Christmas tree has a square picture frame on the left, and a circle dial on the right, which makes the shapes
Square Triangle Circle
You get a key piece, and then the clapper that was holding it.
For the wall box beside the fireplace:
The ribbons are
Yellow Red Blue
(1 2 3 clicks)
Take 3 clappers.
Rewind
Crawl back through the fireplace. The last puzzle is the wall box and the last clues are
the wall clocks.
The clock in the 2nd room has the hands, but its writing is mirrored. So the second hand is pointing to 2, not 10, and the minute hand is pointing to 5, not 7.
The code is
12 2 5
Take the last key piece.
Now that you're done with the second room, perhaps you can get that clapper item back?
Follow the order shown on the tunnel to tap the shutter at the top of the door:
(Top-right Bottom-left Top-left Bottom-right)
Push the arrow, and pick up the clapper.
Leave through the door to end the game.
Item list
6 key pieces:
Top left: on drawers in first room
Top middle: on door puzzle
Top right: in left box in second room
Bottom left: in wall box in first room
Bottom middle: in right box in second room
Bottom right: from dial in second room
and 10 clappers:
1 item from big machine
1 hanging with beads
1 in top drawer
1 in bottom drawer
1 in wall beside big machine
1 on windowsill in 2nd room
1 in right box in 2nd room
3 in wall box in 2nd room
Thanks again,KK. awesome job as always.
Reoda: Chapter 9
Chapter-02: Southern Island Again
Last time, you saw some lights from the top of a mountain and decided that it must be the heliport on the southern island. A second chance against its weird puzzles!
Exploration
You start off just outside the helicopter.
Turn right. Nothing. Turn right again and you find a floor panel beside the helicopter.
Turn right (nothing) and turn right again to face the corridor of trees.
Walk through the trees to face a small tree. You can turn left or right here.
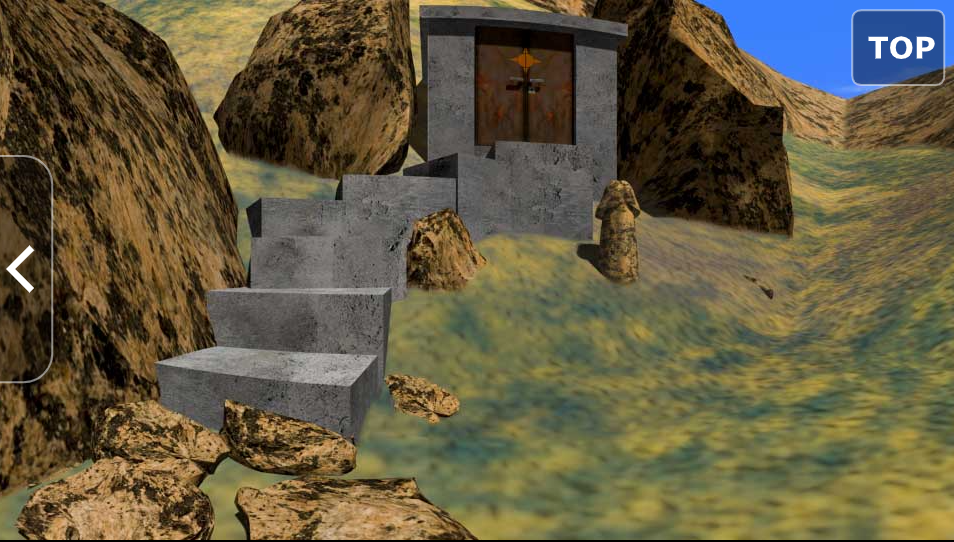
Turn right, head up the hill and turn left. A rock covers a metal trapdoor, and a staircase leads to a locked door.
Go back down the hill and walk across to the building. A rock to the right of the entrance covers another metal trapdoor.
Inside, there's a trapdoor on the floor connected to a cannon with colorful buttons nearby. Further in, there's a key panel in front of the door.
Bring a clue
The first puzzle is the panel by the helicopter, and you've seen the clue somewhere…
The story at the end of the previous chapter (or at the start of this chapter) shows the sequence of arrows above the helipad.
LLRLRL
Take key 1, and use it (by clicking) under the keyboard panel. What did that do?
Greenery
The trapdoor beside the building entrance is now open, and you find a set of green buttons in it.
The clue for this is
the path of trees.
As indicated above the buttons, the lights represent the tall trees.
From the stairs to the helicopter, the trees appear on the RLLRLRLR, so you should push the
DUUDUDUD buttons.
Take key 2 and use it under the keyboard panel.
Diagram
This time, it's the trapdoor on the hill that's open, and you take a handy photo of the diagram.
Use that clue to unlock the cannon:
Pink is on the bottom.
- 4 -

3 - 5

6 - 2

- 1 -
Take key 3, and use it under the keyboard panel.
A drawer opens and you can take a gold key.
Keyhole
Unlock the doorway at the top of the stairs. It's instant death!
Okay, not exactly instant. If you're fast enough, you can back out just after opening the door.
That's not enough to save you this time…
Pick up the spear? to the right of the snake.
Next time you open the door, click the snake in its mouth to stab it.
After surviving that, you can take the big key inside.
There's a sun symbol where the key was. Where have you seen that?
Bring the key to the middle of the building, and look at the floor.
Intermission
The key is definitely supposed to go into this sun mark on the floor, but it seems that there's just a closed trapdoor there. Other than its connection to the cannon, you can't make sense of any other clues, so you decide to watch Doctor Reoda's video again.
The doctor ends his dance with a circle over his head, then reaching out sideways, then grasping something in front.
Which means sunlight goes into… the cannon, and then you can turn the key. Or as your character puts it: it's not the gun, it's the sun.
Enough jokes! The sun is setting and you won't be able to open it at night.
(Click the button at the bottom to continue.)
Part-2
And you're back in the game at the same spot. But you can't look down.
Turn left towards the cannon, and you'll automatically do the necessary steps. Something happens on the roof.
The roof pieces form a shadow on the hill behind you, so enter that into the keyboard panel.
Click the letters
JGAHEPX (in any order)
There isn't much said in the ending, other than the next chapter is the finale!
Christmas 3
It's another Christmas time.
Exploration
You start facing an open doorway, but first turn around to face the exit door. The stocking on the left hides a screwdriver.
Head through the doorway into the corridor. There are six doors here. The left doors are locked and the right doors are unlocked. At the end is a wall box with four color buttons.
The nearest door is a toilet. You can pick up a towel on the left and look at the weird picture on the wall.
The second door is a bathroom. (Yes, a separate room.) There's a floor brush in the bathtub, as well as a locked box on the left and another weird picture on the right.
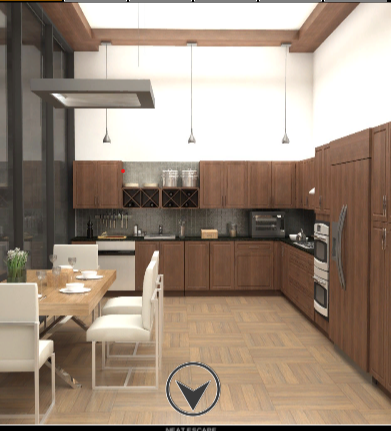
The last door is a dining room and kitchen. The dining table has a box with a grid of buttons that turn purple. The kitchen area (you can only see one side) has a wineglass spilled onto a stack of trays, as well as a six-digit box on the right.
Red / Black / Purple
Use the towel to clean up the spilled wine, revealing a clue.
Then use that clue to unlock the bathroom box.
Each letter-number pair represents an intersection of a row and column, giving you the code
Snowman-head Candles Bells Confetti
(5, 11, 4, 2 clicks)
Take a black light.
There are only two places the black light can be used:
The pictures in the toilet and bathroom.
Use that clue to unlock the box on the kitchen counter:
The diamond on the box is formed from a < sign and a > sign.
So combine the codes on the pictures to get
705814
Take a tablet, on which you can activate an app to find a grid of buttons that don't seem to do anything.
Use the clue from the tablet to unlock the box on the dining room table.
Each button flashes a different color when clicked / held down. We only want the purple ones to go on the box.
Rotating the clue so the red outline ends up on top gets you the code
P P -

P - P

- P P
Take a red key, and use it to unlock
the nearest door on the left.
Exploration 2 / 3 / 4
You're in a cozy-looking living room. The picture on the left seems to have screw hinges. The shelf in the middle has some pots and you find a part that looks like a guitar pick in the right one. The couch cushions don't hide anything.
Unscrew the picture and push the button behind it.
It's a bedroom! There's two armchairs facing the TV, but only the left one has a part under its cushion. The door to the right is locked.
Turn around to face a bed with nothing under its pillows. The left side table has an unusual slider lock, while the right side table has a heart-shaped space on its drawer.
Place the two parts into the right side table to complete its heart, then open it to get a yellow key.
Use that key to unlock the door near the TV.
This room has a long couch facing a small table. Both have locked boxes on them. The door in the back is locked too.
But you can zoom in on the lock to unlock it.
Also click the wall shelf to find a small hole there.
Turn around to find a laptop. The program on it suggests transferring something to the tablet.
Data / Orange
Use the tablet on the laptop, open the program and click GO.
The tablet now has more folders, one with a grid of squares and one with a black-and-white photo.
Use the clue from the tablet grid to unlock the box on the couch in this room:
The dot passes through each row once, in the
1st 3rd 2nd 4th 1st squares.
Take a blue dial.
Roll
Use the floor brush on the hole to make something move. After that, you can see a tiny bit of a TV screen through the hole.
Make your way back to the first living room, and check the couch to find a cooking pot with a yellow dial in it.
Detour
Since you've unlocked the 2nd door to the corridor, you no longer need the
plant pot shelf to be aside.
Push the red button again to move it back.
Enter through the corridor and make your way to the bedroom, where you now see more clues where the doorway was.
Use one of those clues to unlock the left bedside table:
Once again, the clue is rotated as you can tell from the lighter-colored slider.
Drag the right slider all the way to the right, the bottom slider all the way down, and the top slider to the middle position.
Take a red dial.
Dialed
Place all three dials into the white box in the laptop room, and use the other clue from the back of the shelf to unlock it:
The blue, red, yellow markings are at the
7, 10, 2 o'clock positions.
Pick up a blue key.
Save your game.
Normal End
Unlock the main door and leave. Santa gives you a choice of presents:
Chocolate and strawberry cakes!
Exploration 5
Load your game, and use the blue key on the last corridor door.
It's too dark here to do anything, but turn around and you see a side path with a cityscape view.
The path ends at a snowman who looks very plain.
Happy End
Comparing the snowman to your tablet, you find
that he's missing a hat and arm.
Give him the pot and floor brush.
A cover pops off to reveal a red button that lights up the tree.
Use the clue from the tree to unlock the corridor wall box:
Green Red Blue Red Yellow Red
⌝ ⌞⌟ ⌞⌜⌞
Now there's a four-digit lock. Look around for the code!
The TV in the bedroom now has moving dots.
The dots trace out 5062, but the arrows tell you that's upside-down, so it should be
2905
An exit opens in front of the snowman.
You enjoy a proper celebration with pizza.
Thanks again KK.
Update