
 Hi! The new Weekday Escape has arrived ! The first game by TomoLaSiDo isn't escape; it's just an attempt to open a can - and the journey matters more than the destination - no ambrosia inside, the can says water. After a long pause returned Minoto with lovely nonsense game. Then you get to a strange house with GetLostGames where physical laws work in a different ways than we are used to. Yonashi created beautiful escape with their favorite theme - the sea.
Have a good time and enjoy!
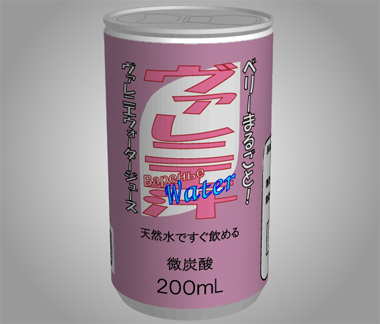
You aren't escaping anywhere here; you just get a can by TomoLaSiDo which can't be opened as it is. Look carefully on its sides and the bottom - there is something you can do and when the blue spot lights up, you've solved it. Three blue spots need to be activated before you can pull off the top of the can and drink.
The cursor is changing, no save button, one ending.
A new Minoto! Whimsy, strange, and very very short with one puzzle only...but fun!
The cursor is not changing, no save button, one ending.
GetLostGames' house is broken indeed - some pieces of furniture are fixed on walls, window isn't in the right position and the staircase apparently neither, what makes the gallery inaccesible - and you definitely need to get there as this cyan jigsaw puzzle piece propped against the banister may get handy later...
This game is a perfect relax. Pleasant music, no pixelhunt, clear instructions and a nice riddle. Also funny end.
The cursor is changing, no save button, one ending.
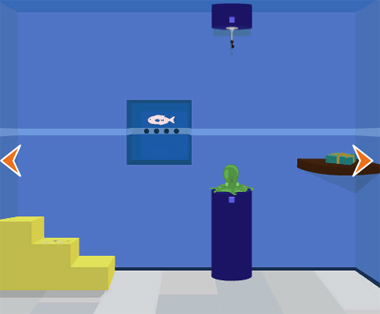
You materialize in the middle of Yonashi's bluish room which is quite empty apart from few sea life decorations and senseless steps. No doors, no windows - how to escape it? The only way how to find out is to start with exploration and soon you find that the objects around are not here to make the room cosier, they are clues - if you understand them correctly and input in the right places, maybe you get out!
The cursor is not changing, no save button, one ending.
P.S. Did you like the game's calming color? Four years old Sea Room is Blue too...
We love escape games, and our readers love talking about them and sharing hints! How about you? Let us know what you think, ask for clues, or help out other players in the comments below.


Motto Akeru (More Open) is the sequel to another can-opening series Akeru (Open). Between those two series and holiday specials, there's actually more than 160 cans to open! Some of the very early ones require knowledge of Japanese though.
Motto Akeru 54
Every can in the series contains some form of "juice", and this one is no exception: the Japanese in the middle reads "Varenye Juice" and the text running down the left reads "Varenye Water Juice".
Exploration
In addition to the combined Japanese/Russian/English logo, the label also reads "Whole Berries!" in the top right, "Drink natural water right away" under "Water", and "Lightly Carbonated" under that.
Click the top of the can to change the view. The pull tab doesn't work.
Go back (by clicking the front face which is now on the bottom), and click the right side to rotate the can and view the ingredient list (natural water, strawberry, cassis, blueberry, raspberry). There's a picture of a bowl of berries above, and two buttons at the bottom of this face next to the blue spot show a football/soccer ball and berries.
Go back and click the left side to rotate the can. The blue spot is blocked by an unusual disjointed frame in which a stickman kicks a ball. A progress bar underneath it (and above the barcode) begins to fill up if you click the frame, but resets with every wrong click.
Go back and click the bottom of the can. The expiry date (actually the game's publishing date) is listed here, and beside the blue spot is a big pink-and-yellow play button with a yellow pointer and rectangular buttons at the bottom. Clicking the play button makes digits descend from the top of the display.
Digits
On the bottom face, press the play button, and set the digit button beneath to match the falling digit, and then press GO before it reaches the bottom. (This is randomized, but there's no penalty for wrong answers, and the only digits I've seen are 1 to 4.)
After four correct digits, a lit button shows up on the display, so click the digit button seven times (so it goes from 6 to "button"), and hit GO. This lights up the real blue spot on the right, and stars appear on the corners of the display.
Corners
Use the clue from the bottom face to solve the puzzle on the left face.
The stars indicate where the frame pieces should be made to meet.
So for instance, the star in the top right indicates that the big middle piece should move up to meet the top one at the top-right corner, and then the star at the top left indicates that the top piece should move left to meet the middle piece again, and the next star indicates that the middle piece needs to move down.
After that, the middle piece can't immediately move up (or it would form a corner at the top left instead of top right), so the top piece must move first and then the middle one. Similarly, the bottom piece must then move right before the middle one comes down again, and then it can move left again to complete the sequence.
Putting this all together, you need to click the middle, top, middle, top, middle, bottom, middle, bottom pieces. Once the bar is completely filled, the blue spot lights up, and the stick figure does something slightly different.
Berries
Use the clue from the left face to solve the puzzle on the right one.
The stick figure now eats berries in addition to kicking balls, in a specific sequence: kick, kick, eat, eat, kick, eat, kick, eat.
So click the LLRRLRLR buttons, and then click the blue spot to light it up.
Fizz
Now that you've activated all three spots, you can click the can to open it up and end the game.
But the drink is carbonated, which means you can also shake it up.
Rapidly switch between the top of the can and the bottom (9 times worked for me), and you get a more berry-ful animation before the ending screen.
Boy, am I stuck in Ocean Room, though I was making progress at first. I have only
a remote light switch, and a note with two entwined fish (eels?) that says "8 times" (and I've used it already).
I've solved all three puzzles in the circular alcove, unscrewed and opened the octopus, and
have got the first two of the four lights under the pink fish to light up.
I have *not* unlocked the trap door in the staircase, done anything with the octagonal thing on the wall, or
done anything with the spot on the wall that the fish eye illuminates.
I seem to be missing something important, but can't figure out what. I can't brain, apparently. :-P
Sounds like you haven't solved the fish painting on the wall, which
moves up and down when you click the top/bottom half.
The clue for that one is
the note that you've used once already — you just have to read it a different way.
Thanks, kktkkr! Actually, a funny thing about that:
I'm not sure how I did this, but the painting now moves when I click the bottom half, but does nothing when I click the top half anymore. Maybe it's a game glitch?
I've heard about that particular bug from the no1game thread on the game, which was resolved by restarting. Too bad there's no save function at all.
"Broken House Escape" was enjoyable, but the JIG description mentioned a "nice riddle". Either I overlooked that somewhere, or I've already forgotten (both equal possibilities!). What was the riddle?
It's my mistake. I really liked the puzzle with five hints and I wasn't sure whether I should use "puzzle" or "riddle" so I googled a bit and it seemed that the words are often used interchangeably.
RISU Escape
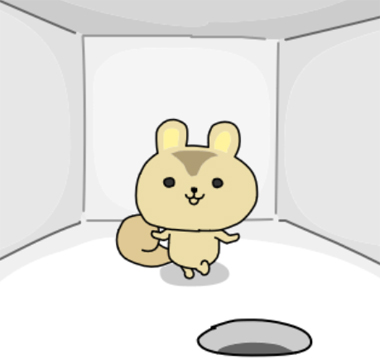
RISU the squirrel has been locked in the house, and its up to you to save it!
Exploration
The starting screen has RISU standing next to a hole in the ground.
Go right to find a pinkish fire.
Then go left twice to find a fridge with a fish in an ice block and a safe with a hole and a weird clue.
Go left once more to find a giant floating yellow block with a question mark and a large puddle in the ground.
Thaw
Melt the ice block on the fire, leaving the fish.
Release
Then place the fish in the puddle, which gets you a fishing rod.
Hook
Use the fishing rod in the hole on the first screen, which gets you a star piece.
Golden
Place the star piece in the safe, and use the clue from the safe to unlock it.
The arrow clue on the safe tells you (from left to right) which directions to turn the star knob, and the lines above each arrow tell you how many times each rotation should repeat.
So turn the star left once, right twice, left thrice, right four times, and then pull on the star to open the safe and get a wooden hammer.
Pound
Use the hammer on the floating block, which throws out a mushroom of similar size.
Feed
Give the mushroom to RISU, who grows to a giant size and escapes the confines of the house!
Broken House Escape
Fix your escape room!
Exploration
(Navigational arrows are always blue, which is helpful because some screens don't have them in the conventional positions.)
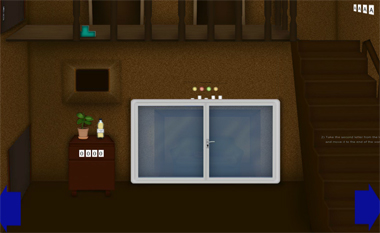
The first weird thing you see in this house is the window on the floor, which has a puzzle with buttons and bars above it. To the left, there's a hole in the wall with an empty square grid above a bottle of cooking oil on a cupboard whose drawer has a four-digit lock. There's also stuff upstairs, but the railing is open on the left and the stairs are placed awkwardly on the right. You can click the clue on the stairs, but it looks rather cryptic right now.
Turn right. There's a four-letter lock at the top of the stairs with another word clue above it, and there's a CD at the bottom of the stairs and a matchstick puzzle to the left. On the right, there's five unconnected pipes with a key stuck in the left one, a diagram of a white pentagon partitioned into four triangles, and three colored spots beside.
Turn right. Don't adjust your glasses: the table and chair are protruding out of the wall! Like them, the lever beside the chair is too high to reach. This screen also has a stove whose second knob turns on a heater.
Turn right. The TV set and stand for it are floating in the air, with the video player and key defying gravity. There's also a four-digit lock in the wall and some puzzle tiles on the floor. The upper floor is still inaccessible, and you can see that the upstairs door is only the upper half of a door, with the lower half stuck downstairs.
Flatten
On the first screen, solve the puzzle above the window.
The instructions tell you to flatten each bar, and the labels on the buttons tell you which bars they affect, making the solution easy to reason out:
The starting position has bars 1 and 5 up, and the only way to affect bar 5 is with the third button, so press that once.
The third button should not be pressed any more, which means that the only way to flatten bar 4 is with the fourth button. Press that once.
Following the same logic, you need to push the first button to flatten bar 3. Pressing it solves the puzzle.
Once done, the window slides up and a sofa slides out from behind. Take the rope from the sofa and notice the blue shape behind the window.
Grapple
Use the rope on the lever. You automatically toss the end over and pull it down, which makes the furniture disappear into the wall and reappear out of the floor.
You can now take a frying pan and a yellow puzzle piece, and click the tiny text at the far-right corner of the table to read another word clue.
Sizzle
Place the frying pan on the stove and (in either order) turn on the flame if you haven't already, and pour the oil on it.
Instead of doing whatever cooking oil does, it congeals into four transparent digits.
So enter the code (8862) from the cooking oil into the lock under the TV.
The TV and console snap back into place, so you can read another word clue, pick up a golden key, and open the tray on the CD player.
Unlock
Use the golden key to unlock the window. Now you can reach the blue puzzle piece.
Video
Place the CD in the player to play it, and another four-digit code appears on the TV.
Enter that code (3782) in the drawer on the first screen to open it and find a handle and folded paper with word clue.
Unscramble
Click the pieces under the TV, and solve the jumbled image puzzle.
Conveniently, the four corner pieces are already in place, so all you need to do is piece the suns together. Labelling the original pattern
1AB2

CDEF

3GH4
you need to swap the tiles into the positions
1EC2

BFHD

3AG4.
Do so, and the entire puzzle lifts off the floor to reveal a paper with a picture and a paint brush.
Paint
Use the picture and brush to color the pentagon in.
Colorblind help:
The colors of the spots are (top to bottom) red, blue, green.
The colors on the picture are (top) cyan, (bottom, left to right) yellow, green, magenta.
The colors blend additively, which means that you need to add red to the left and right triangles, blue to the top and right triangles, and green to all except the right triangle.
Once the correct colors are in, the triangles slide apart to reveal a pair of holes.
Hold it
Place the handle over the holes among the colored triangles, and then click it.
This makes the pipes line up so that the silver key can slide along them and onto the floor.
Matched
Solve the matchstick puzzle.
Notice that you can only move matches to the indicated positions, and the valid digits are shown above the puzzle.
These restrictions mean that the solution must either change only one digit by moving a match within it, or change two digits by taking a match from one and adding it to the other.
Since the original equation evaluates to 1=8, any solution which changes only one digit must change its value by exactly 7. There are no digits which differ from 4 or 5 by exactly 7, so the only available changes are 2→9 or 8→1, neither of which can be performed with a match move. So this type of solution won't work.
This means that the solution(s) must remove a match from one digit and add it to the other. Removing a match from 4, 2 or 5 leaves an invalid pattern, so the match must be removed from 8, leaving 6 or 9. By similar reasoning to above, it can't be 9 because no single-digit changes can make up for the difference. So 8→6, which means 4→9, 2→7 or 5→0. Only one of these can be performed with a single match move, the first one.
The final solution: Take the top-right match from 8 and move it to the top of 4, making the equation read 9+2−5=6. Doing so makes the entire puzzle slide up to reveal a purple puzzle piece.
Words
Solve the word puzzle.
The starting word as well as the first clue is on the folded note.
The second clue is on the stairs visible from the first screen.
The third clue is under the TV.
The fourth clue is on the table.
The fifth clue (and lock) is at the top of the stairs.
Following the instructions on the clues gives
ESCAPE→ESCEAP→ECEAPS→CEAEPS→COAOPS→COOP.
So enter COOP in the lock, and the entire staircase slides to the left!
You can now take a look at the upstairs "door" whose lock has 1 digit and 3 letters, and you can pick up the teal puzzle piece from the upper floor.
Jigsaw
Place all four puzzle pieces on the grid to the left of the window.
(In the order that they appear in the inventory, they are blue, purple, teal, yellow.)
(Note that when you have the blue or purple pieces selected, where you click will be where its top-left square goes. For the teal piece it's the left square, and for the yellow piece it's the top square.)
The areas of all four pieces are just enough to cover the grid, and the game won't let you overlap any pieces. This is probably trivial if you have loads of Tetris experience, but let's solve it the hard way using only logical deduction.
The yellow piece partially covers two adjacent columns. Those columns can't be the left two, or else one of the corners would be cut off. They can't be the middle two, or else the right corners of the grid would be unreachable. So they must be the right two. Similarly, the teal piece must lie within the bottom two rows. This teal piece leaves exactly one square free to its left on either the lowest or second-lowest row, which can only be filled by the purple piece.
Now that we've constrained all the other pieces, the top-left corner can only be covered by blue, which means the top-right can only be covered by yellow, which means the bottom-right can only be covered by teal, which means the bottom-left can only be covered by purple:
1 1 1 4

1 1 4 4

2 2 3 4

2 3 3 3
Place the pieces accordingly, and the grid slides into the wall and is replaced by an alphanumeric code.
Exit
Enter the final code (6TSK) in the lock above the upstairs half-door, which slides down to meet the other half.
Now you can use the silver key to unlock it and leave!
Ocean Room
So much to do, so much to sea.
Exploration
The lighter blue stripe that runs across the blue walls is disturbed by the octagonal protrusion in the middle which has the stripe running diagonally, and which you can click to find a hole in its lower right. A shelf on the wall holds a small box with a star-shaped hole, and the yellow stairs on the right lead to nowhere but have a locked compartment on the middle step.
Turn left to find a bunch of different-sized letter Ds on the ground. A panel above them has a grid of nine buttons, and the cabinet on the left has three doors that open downwards. The middle door has a lock with three colored buttons, but you can open the ones on the sides to find the head and tail of a large fish. For now, take the scissors on the cabinet.
Turn left. The painting on the wall shows some fish parts on a yellow background, and clicking the top/bottom of the painting makes it move up and down. (Don't click it too fast, as either side tends to get stuck and you'll have to restart.) The circular alcove on the right has three small shelves carrying a picture of a red fish, a safe with two buttons in slightly different shades of orange, and another safe with four shape buttons and a large PUSH button on the front. On the left side, a wall shelf holds a tightly tied box.
Turn left. There's a square hole in the wall with a fish button above four lights, currently all off. Beside it, a pillar rises from the ground and a matching pillar descends from the ceiling directly above. You can only reach the bottom pillar right now, and it has an octopus with a keyhole screwed onto it. Pushing the button on the pillar makes it descend to the ground, and the one attached to the ceiling also lowers to be within reach. It has a key chained to it, and a button that does the opposite of the other button.
Unwrap
Use the scissors to cut the box on the shelf free. It has a zigzag marking on the top and nine neatly arranged sea specimens inside.
Pick up the starfish in the bottom left corner of the box.
Zee
Use the clue from the shellfish box to unlock the nine-button wall panel.
The arrangement in the box has the swirly spiral shellfish at the top. Reorienting the clue on the top accordingly, the arrow draws out the shape of an N:
3-7

246

1-5
Click the buttons on the panel in that order, and you hear a sliding sound.
The letters on the ground are now taller! And they actually spell different letters!
And if you click them you'll find a rotatable fish in the bottom of the largest B and an orange hexagonal piece in the rightmost B.
Colors
Use the clue from the letters on the ground to unlock the middle cabinet door.
From left to right, the letters are the initials of the colors blue, red, pink, red, blue, pink, blue.
So click the CRLRCLC buttons. The middle door opens up to reveal the middle section of the fish, which has a hexagonal hole. There's also a folded note with some clues in it.
Intertwine
The folded note has a picture of eels that wriggle over and under each other, an arrow that runs from left to right and then turns around into the opposite direction from right to left, and the text "8times".
Where can you use those clues, and how?
Hint 1: 8 times means the code is a sequence of 8 clicks.
Hint 2: You don't need the whole eel image. Which parts should you focus on?
The eels cross/overlap in four spots: from left to right, the orange eel passes over/under/over/over the yellow eel, where "over" means that the orange eel covers the yellow one.
The arrow clue means you need to look at the crossings from left to right and then from right to left, for a sequence of 8 over/unders.
On the box with two orange buttons, notice that the left one is entirely visible; it covers the right. So you should press the left button for crossings where the orange eel covers the other one, and the right button for the other crossings.
Push the LRLLLLRL buttons, and the box opens to give you a red fish.
But you can also consider the crossings from the perspective of the yellow eel: in each crossing where the orange eel is over, the yellow one is under.
In the yellow painting, the head of the fish is at the top, and the tail of the fish is below in a darker color, suggesting that what you're actually seeing is the shadow of the tail.
However you interpret this, you need to move the painting up when the yellow eel passes over the orange one, and down otherwise.
Move the painting DUDDDDUD by clicking on the appropriate halves, and it comes off. Take the key hanging on the hook, and notice the rotatable fish on the bottom of the compartment.
Unlock
Use the key in your inventory to unlock the panel on the stairs, revealing another rotatable fish.
Shapes
Use clues from the room to unlock the box with shaped buttons in the circular alcove.
The shapes of the buttons match the square and circular alcoves, the rectangular cabinet and the octagonal box on the walls.
So push the first two buttons in and pop the last two buttons out.
Then push the PUSH button, which pops out a tray with a screwdriver.
Unscrew / Unlock 2
Use the screwdriver to remove the octopus from the lower pillar. Underneath, there's another one of those rotating fish, but the fish is missing.
Use the octopus on the key dangling from the upper pillar to unlock it.
Examining the octopus again and open it up to find a remote control that controls the lights.
Star
Place the starfish you picked up in the star box on the first screen, and it projects a compass upwards (onto the wall?).
Four fish
Place the fish from your inventory in the lower pillar, then rotate all four fish according to the photo frame clue.
The clue tells you that all four fish should point south.
Referring to the compass, you know that the first screen (with the octagon) is the south wall.
So click the fish on the stairs twice, the fish on the pillar thrice, the fish behind the painting thrice and the fish on the large letter twice.
What did that do?
The row of four lights is now completely lit up, so push the fish button and it dispenses a gold key.
Bright
Place the orange hexagon on the fish in the cabinet, and you should notice that the fish's eye is now lit up.
So use the remote to turn the lights off, and the eye shoots a light beam onto the wall behind…
…reflecting off the eye on the painting and the fish on the pillar (if you kept it lowered) onto the wall below the compass light.
In the bright spot, you find an octagonal panel that you can open up to get a lever handle.
Horizontal
(Turn the lights back on.)
Place the handle in the hole of the octagonal box, and use it to rotate the stripe into alignment.
That sliding sound you hear is a doorway opening behind the stairs, which ends in a locked door.
So use your golden key to unlock the door and escape!
Update