An adventure of epic proportions. Perfect for young readers.

Killer Escape 2: The Surgery


  • Currently 4.5/5
  • 1
  • 2
  • 3
  • 4
  • 5
Rating: 4.5/5 (651 votes)
Comments (9) | Views (48,064)

Killer Escape 2: The Surgery

DoraLook, real talk, pal. Get captured by one sicko serial killer with an elaborate kill dungeon set-up, okay. Run straight into the arms of another? I dunno... maybe you're giving off some sort of... pheromone? Psionic is back with another freaky escape game in Killer Escape 2: The Surgery. After the events of the first game, you stumble through the corridors of the ruined building looking for help, but you might have gone from the frying pan to strapped down into the dentist's chair with rusty dental implements coming straight at your face. That's a saying my Grandma used to use, you know. Click around to gather what you can and try to unravel the twisted secret of this place, but above all else solve the puzzles and escape before you're caught for good!
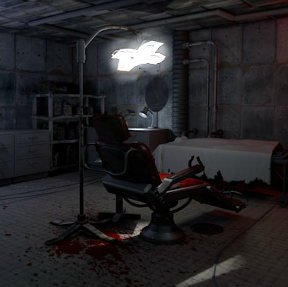
Killer Escape 2: The SurgeryClues hidden everywhere, jump scare, creepy backstory, thoroughly unsettling antagonist... The Surgery has everything you need to craft a good scary escape. A lot of the frustrating randomisation and awkward mouse puzzles are gone from the original, but at the same time, The Surgery has its own issues with a finicky text parser, small items bleeding into the background, and a relatively small amount of puzzles, few of which require any real brainwork. You can, incidentally, complete the story without finding all the little tidbits and opening the world's creepiest lock, so make sure you search every nook and cranny if you're into completion. And teeth. It's a more atmospheric experience with a focus on story... albeit one that ends with a cliffhanger. And, uh. Some therapy bills.

Play Killer Escape 2: The Surgery

Walkthrough Guide


(Please allow page to fully load for spoiler tags to be functional.)

Killer Escape 2 Walkthrough

A Brutal Appointment

  1. Click through the introduction until you are unstrapped from the dentist chair.

  2. Click to get out of the chair (the x-ray light should be on the right). Examine the venus flytrap under the x-ray light. Click the open venus flytrap to pick up a pin. Pick up the shark tooth that's resting on the pipe to the left. Pick up the x-ray on the right that's slightly hidden by the sand bags. (These X-rays can be held up to the X-ray light to examine them, though this is not strictly neccesary for finishing the game). Back away from the flytrap view.

  3. Click to take a closer look at the corner to the right of the X-ray light. Pick up the x-ray underneath the shelves. Pick up the photograph from the second shelf from the top. Examine the trash bin on the lower right. Pick up the pliers from the bin, and the x-ray from underneath the bin. Back away from the bin. Open your inventory and use the pliers to destroy the camera just above the shelves. Turn to the right so that you are facing the dentist chair.

  4. Pick up the photograph on the left that's resting on the covered cadaver. Click to take a closer look at the dentist chair. Pick up the surgical scalpel from the tray, as well as the tiny silver tooth from the tray's upper right corner. Click in the upper left of the screen to "Look Over Here".

  5. Pick up the fishing line from the back of the chair. You'll automatically combine it with the pin in the inventory to make a fishing line. Click the bottom of the dentist chair to look underneath it.

  6. Open your inventory and use the fishing line on the grate. Use the line to fish out the key. Also, take that newspaper clipping on the left. Back away from the grate, then move back again so that you're facing the corner with the X-ray light.

  7. Click to examine the lift lock to the right of the covered cadaver. To unlock the lift, you must quickly and correctly click the proper button indicated by the number on the left, four times in a row. Once the green meter on the right is filled, back away.

  8. Turn to the left. You should be facing the corner with a computer on a desk. Grab the newspaper clipping resting on the machine console to the left of the door. Use the pliers on the camera in the upper right. Click the empty gas canister on the lower left to move it. Pick up the photograph. Examine the lift lock that's to the left of the covered cadaver. Once again, click to examine the lift lock to the right of the covered cadaver. Once again, to unlock the lift, you must quickly and correctly click the proper button indicated by the number on the left, four times in a row. Once the green meter on the right is filled, back away.

  9. Examine the desk with the computer on it. Grab the X-ray that's behind the machine console on the left. Grab the photograph resting under the desk lamp. Click the computer to examine the screen.

  10. Open the inventory and view the four photographs you should have picked up by now. These are key to unlocking the computer. Type HELP in the computer to get information about how to proper unlock it, using the numbers from the photographs. Some may already be correct on the screen, but generally, type TOP 1, then RIGHT 3, then BOTTOM 2, then LEFT 0. This computer has a lot of interesting information on it, (check out DOC 13, DOC 100, DOC 768, DOC 666 and DOC 999) and the AI will respond to a fair number of questions. What we really need to do now, though, is type OPEN DOOR 1. The door to the right of the dentist chair will be open. Back away from the computer and the table, then turn to the left, facing the now-open door.

Through Door 1

  1. Go through the door. Use the pliers on the camera in the upper left. Click the sheet on the table examine the JUMP SCARE body underneath. Use the pliers on the gold tooth. Back away from the body. Click the corpses hand to examine it. Use the scalpel to cut off the corpse's finger. Back away. Examine the lift lock on the right side of the door, underneath the "living quarters" sign. Once again, to unlock the lift, you must quickly and correctly click the proper button indicated by the number on the left, four times in a row. Once the green meter on the right is filled, back away.

  2. Turn around to face toward the open door. Use the pliers on the camera in the upper left to disable it. Pick up the "old piece of paper" in the upper right. Click the lift lock on the right to examine it. Once again, to unlock the lift, you must quickly and correctly click the proper button indicated by the number on the left, four times in a row. Once the green meter on the right is filled, back away. Examine the lockers on the right. From left to right, each of the lockers has a number in it, making 7269. The second locker has a newspaper clipping in it as well. Back away from the lockers, then turn around to face the closed door.

  3. The closed door can be opened with the key in your inventory. Go through it into the padded cell.

Padded Cell

  1. Once in the padded cell, use the pliers to disable the camera on the upper left. Take the newspaper clipping underneath the fish tank. Click the fish tank to examine it.

  2. Use the finger in the tank to distract the piranha. Once the fish starts chomping on the finger, quickly grab the snaketooth that's in the tank. Back away from the tank. Examine the toilet on the left. Use the fishing line in the toilet to collect the wolf fang. Back away Turn around so that you are facing the couch.

  3. In the center of the padded wall above the couch, there is a secret panel denoted by the cursor turning into a question mark. Click several times, and you'll open the panel, finding the killer's secret notes. Click the corner of the rug on the lower right to roll it up, revealing the article underneath, and pick it up.

  4. Click on the keypad to examine it. Though the buttons aren't labeled, they stand for 123 across the top, 456 in the center and 789 at the bottom. Type in the 7269 code from the lockers. This opens the tooth plate.

  5. To open the final door, you'll need to place the five teeth you've collected throughout the game: the shark tooth, the snake tooth, the silver tooth, the gold tooth, and the wolf fang. Put them in their proper place and push the button. The holding cell door is now open. Back away, turn around and walk through the door.

Holding Please

  1. Looks like Carnodyne Industries is involved here too... Examine the lift doors. If you've been following this walkthrough, all the lift locks should be undone, and the panel on the right all green. Click the open button to open the doors, then enter the lift.

  2. Uh, oh! Looks like the killer doesn't want to let you go yet. Open your inventory and take out the scalpel. Every time she peaks her head through the elevator doors, slice her with the scalpel. Eventually, the lift doors will finish her off for you. Click through to complete the game!

Thanks to Tricky for the walkthrough!

9 Comments

Killer Escape 2 Walkthrough

A Brutal Appointment

  1. Click through the introduction until you are unstrapped from the dentist chair.

  2. Click to get out of the chair (the x-ray light should be on the right). Examine the venus flytrap under the x-ray light. Click the open venus flytrap to pick up a pin. Pick up the shark tooth that's resting on the pipe to the left. Pick up the x-ray on the right that's slightly hidden by the sand bags. (These X-rays can be held up to the X-ray light to examine them, though this is not strictly neccesary for finishing the game). Back away from the flytrap view.

  3. Click to take a closer look at the corner to the right of the X-ray light. Pick up the x-ray underneath the shelves. Pick up the photograph from the second shelf from the top. Examine the trash bin on the lower right. Pick up the pliers from the bin, and the x-ray from underneath the bin. Back away from the bin. Open your inventory and use the pliers to destroy the camera just above the shelves. Turn to the right so that you are facing the dentist chair.

  4. Pick up the photograph on the left that's resting on the covered cadaver. Click to take a closer look at the dentist chair. Pick up the surgical scalpel from the tray, as well as the tiny silver tooth from the tray's upper right corner. Click in the upper left of the screen to "Look Over Here".

  5. Pick up the fishing line from the back of the chair. You'll automatically combine it with the pin in the inventory to make a fishing line. Click the bottom of the dentist chair to look underneath it.

  6. Open your inventory and use the fishing line on the grate. Use the line to fish out the key. Also, take that newspaper clipping on the left. Back away from the grate, then move back again so that you're facing the corner with the X-ray light.

  7. Click to examine the lift lock to the right of the covered cadaver. To unlock the lift, you must quickly and correctly click the proper button indicated by the number on the left, four times in a row. Once the green meter on the right is filled, back away.

  8. Turn to the left. You should be facing the corner with a computer on a desk. Grab the newspaper clipping resting on the machine console to the left of the door. Use the pliers on the camera in the upper right. Click the empty gas canister on the lower left to move it. Pick up the photograph. Examine the lift lock that's to the left of the covered cadaver. Once again, click to examine the lift lock to the right of the covered cadaver. Once again, to unlock the lift, you must quickly and correctly click the proper button indicated by the number on the left, four times in a row. Once the green meter on the right is filled, back away.

  9. Examine the desk with the computer on it. Grab the X-ray that's behind the machine console on the left. Grab the photograph resting under the desk lamp. Click the computer to examine the screen.

  10. Open the inventory and view the four photographs you should have picked up by now. These are key to unlocking the computer. Type HELP in the computer to get information about how to proper unlock it, using the numbers from the photographs. Some may already be correct on the screen, but generally, type TOP 1, then RIGHT 3, then BOTTOM 2, then LEFT 0. This computer has a lot of interesting information on it, (check out DOC 13, DOC 100, DOC 768, DOC 666 and DOC 999) and the AI will respond to a fair number of questions. What we really need to do now, though, is type OPEN DOOR 1. The door to the right of the dentist chair will be open. Back away from the computer and the table, then turn to the left, facing the now-open door.

Through Door 1

  1. Go through the door. Use the pliers on the camera in the upper left. Click the sheet on the table examine the JUMP SCARE body underneath. Use the pliers on the gold tooth. Back away from the body. Click the corpses hand to examine it. Use the scalpel to cut off the corpse's finger. Back away. Examine the lift lock on the right side of the door, underneath the "living quarters" sign. Once again, to unlock the lift, you must quickly and correctly click the proper button indicated by the number on the left, four times in a row. Once the green meter on the right is filled, back away.

  2. Turn around to face toward the open door. Use the pliers on the camera in the upper left to disable it. Pick up the "old piece of paper" in the upper right. Click the lift lock on the right to examine it. Once again, to unlock the lift, you must quickly and correctly click the proper button indicated by the number on the left, four times in a row. Once the green meter on the right is filled, back away. Examine the lockers on the right. From left to right, each of the lockers has a number in it, making 7269. The second locker has a newspaper clipping in it as well. Back away from the lockers, then turn around to face the closed door.

  3. The closed door can be opened with the key in your inventory. Go through it into the padded cell.

Padded Cell

  1. Once in the padded cell, use the pliers to disable the camera on the upper left. Take the newspaper clipping underneath the fish tank. Click the fish tank to examine it.

  2. Use the finger in the tank to distract the piranha. Once the fish starts chomping on the finger, quickly grab the snaketooth that's in the tank. Back away from the tank. Examine the toilet on the left. Use the fishing line in the toilet to collect the wolf fang. Back away Turn around so that you are facing the couch.

  3. In the center of the padded wall above the couch, there is a secret panel denoted by the cursor turning into a question mark. Click several times, and you'll open the panel, finding the killer's secret notes. Click the corner of the rug on the lower right to roll it up, revealing the article underneath, and pick it up.

  4. Click on the keypad to examine it. Though the buttons aren't labeled, they stand for 123 across the top, 456 in the center and 789 at the bottom. Type in the 7269 code from the lockers. This opens the tooth plate.

  5. To open the final door, you'll need to place the five teeth you've collected throughout the game: the shark tooth, the snake tooth, the silver tooth, the gold tooth, and the wolf fang. Put them in their proper place and push the button. The holding cell door is now open. Back away, turn around and walk through the door.

Holding Please

  1. Looks like Carnodyne Industries is involved here too... Examine the lift doors. If you've been following this walkthrough, all the lift locks should be undone, and the panel on the right all green. Click the open button to open the doors, then enter the lift.

  2. Uh, oh! Looks like the killer doesn't want to let you go yet. Open your inventory and take out the scalpel. Every time she peaks her head through the elevator doors, slice her with the scalpel. Eventually, the lift doors will finish her off for you. Click through to complete the game!

Thanks to Tricky for the walkthrough!

Reply
Patreon VIP abfdrumz August 6, 2013 3:33 PM

Odd...did anyone else find that it wasn't necessary to complete most of the steps in the walkthroughs to escape?

I didn't need to disable the video cameras, or complete the "tooth puzzle" to open the final door, which was open from the moment I entered the living quarters (though the mouseover tip said it was locked).

At first I thought that there might be a "better" ending than the one I reached in this manner, but I got the same one as in the video walkthrough.

Reply
BubbaJoe August 6, 2013 5:05 PM

@abfdrumz

Same here.

Didn't need to do the tooth puzzle, or the keypad puzzle - the door to the hallway leading to the elevator was already unlocked.

Reply

Not quite as vile as Killer Escape 1, but still not exactly a pleasant experience to play.

Reply

The scariest thing about this game was the voice acting... and not in a good way. Other than that a fairly good game but I'd prefer it if they'd spent more time designing puzzles than adding awards for doing things arbitrary to completing the game. I like the SAW meets Cabin In The Woods vibe, unoriginal but enjoyable.

Reply
WolfgangDS August 8, 2013 10:34 AM

Has anyone gotten all of the awards yet? If so, what questions did you ask the computer? And where are the secret notes and the sixth note?

(Don't think this deserves spoilers since the Awards menu is right there at the main menu and it tells you how to get each one.)

Reply
WolfgangDS August 8, 2013 10:58 AM

Nevermind on the computer thing.

Just type in "joke" twenty times and you're good. Some of 'em are even kinda funny. Alternatively, you can type in the following.

Who are you
Who am I
Where am I
Why are you doing this (or just why)
How do I get out
Tell me a joke
Idiot
Stupid

And there are a few swears that will elicit reactions as well. They are single words and begin with F, B, S, and C. All four are very severe. The policy on profanity seems pretty harsh here, so that's as much as you're getting out of me.

Reply

Thank you for respecting our profanity restrictions, Wolfgang, that was very thoughtful. :) We appreciate the discretion so those people who might not like swearing, or the children who also frequent the site, can avoid running across it. While I personally have nothing against it in every day life, we leave content like that to the games and the ratings so people can decide what they want to expose themselves to.

Reply
gmdave449 August 25, 2013 10:55 PM

Easter egg in the computer:

If you type "doc 666" in the "1. RECENT ENTRIES" menu, you will get a secret victim file.

Reply

^ Scroll Up | Homepage >

Leave a comment [top of page]

Please consider creating a Casual Gameplay account if you're a regular visitor here, as it will allow us to create an even better experience for you. Sign-up here!
  • PLEASE UNDERSTAND SITE POLICIES BEFORE POSTING COMMENTS
  • You may use limited HTML tags for style:
    (a href, b, br/, strong, em, ul, ol, li, code, spoiler)
    HTML tags begin with a less-than sign: < and end with a greater-than sign: >. Always. No exceptions.
  • To post spoilers, please use spoiler tags: <spoiler> example </spoiler>
    If you need help understanding spoiler tags, read the spoiler help.
  • Please Preview your comment before posting, especially when using spoilers!
  • No link dropping, no domains as names; do not spam, and do not advertise! (rel="nofollow" in use)
jayisgames.com Lately, there has been a lot of buzz surrounding tennis video games. In 2020, Andy Murray, who is an ambassador for HEAD, achieved success in the virtual Madrid Open following the cancellation of the real tournament due to the...  ...
jayisgames.com Open-world environments have been going strong for almost two decades in the gaming industry. Sprawling maps filled with side quests and NPC interactions ushered in a new era of exploration galore for gamers all too eager to deviate from...  ...
jayisgames.com Technology is constantly updating and improving the way we live our lives. From how we get from place to place to how we entertain ourselves, technology is making everything better....  ...
jayisgames.com Are video games as harmful for young minds as many people believe them to be? Or maybe there are some positive effects of youngsters diving deep into the world of virtual reality? Will you fail all your classes if...  ...

HELP Jayisgames.com

Recent Comments


Display 5 more comments
Limit to the last 5 comments

Game of the week


Dark Romance: Vampire Origins Collector's Edition

Your Favorite Games edit

add
Save links to your favorite games here. Use the Favorites editor.

Monthly Archives