JayisGames.com is now available ad-free!
Jay is Games recommends Cheat Happens with 8,000+ games and 35,000+ trainers!

Weekday Escape N°27


Comments (69) | Views (18,449)

Weekday Escape

elleHere we are again, already another week's worth of escape games sorted through, the five best "not quite ready for primetime" selections all lined up for your amusement. Among them you can relish the whimsy of FunkyLand's eleventh candy-strewn room, prove your devotion by collecting little green men, play hide-and-seek with adorable baby chicks, enjoy puzzles and a view from Yomino Kagura, or escape from an avalanche in a most unconventional way...

Candy Rooms No.11: Sycamore Natural
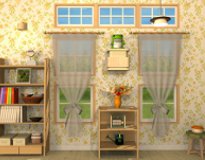
Candy Rooms No.11: Sycamore Natural - If FunkyLand made a tree-flavored candy—yeah, I would eat it. I'm thoroughly convinced that everything FunkyLand makes is fabulous! These settings are so scrumptious, they'll make your eyes salivate. This eleventh installment in the series is a bit trickier, thankfully. By being more sneaky about a needed item's hiding place and more clever in its clue delivery, it's quite logical but not so straight-forward you could skip your morning coffee. You'll need to pay attention to figure your way out.

Find the Escape-Men 104: Trial of the Love
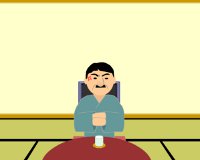
Find the Escape-Men 104: Trial of the Love - Seemingly, the hunt for little green guys is inherently prone to pixel hunting. Okay, that's a given I'm willing to accept in order to enjoy No1Game's quirky humor. But this time around the hunt has a new quirk: escape men popping up randomly in places I know I've already searched. Maybe they're playing a game of "It" with us? It takes a lot of clicking to catch all ten cagey greenies. But that's the price you pay to prove true love. At least it's easier than, say, bringing back a fallen star or facing down Doc Ock.

Escape from the Room with Windows
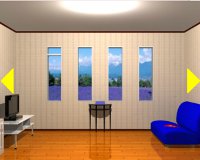
Escape from the Room with Windows - Yomino Kagura is getting more stylish—a prettier view with brighter, snazzier aesthetics is always appreciated when you're locked inside a room. Yet the real reason to play a Yomino Kagura creation is for the gameplay. The multi-layered clues and well-designed puzzles are what we crave in any good escape game. The drawback is Yomino Kagura's tendency to stick to the same tried and true methods, making the experience a bit predictable. It's probably even easier for those who can read the Japanese messaging, as there are a couple areas that aren't really clear. Inference and a little trial-and-error solves it readily enough.

Chicks Hide and Seek 18Chicks Hide and Seek 18 - You had me at "chicks!" Yuri's charming yellow brood is cute to begin with and they're even more adorable when they're playing a game of hide and seek. To play, search the rose garden for all ten chicks. When they're gathered together, they'll tell you how to escape. This episode is probably the easiest one of all; with no pixel hunts and no codes to break or riddles to solve, all the challenge is in spotting hidden objects. Collect a few items, use them in your explorations, click on the peeps as you find them and you'll be done before you can say "Awww!"

Avalanche Escape
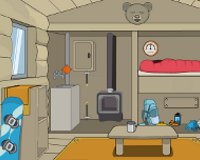
Avalanche Escape - from Aztec Games feels like an old school adventure game where you need to find creative uses for the items you gather. On first glance at the nice, clean style, I was excited. But then the unwieldy interface had me taking hatha breaths as I hadn't felt so much frustration since being trapped on a Silicon Valley freeway at 3 in the afternoon. Yet there is ample payout for patience, for diligently scrolling through inventory and experimenting with items in every way. The whole scenario pulls itself together and explains its crooked logic as the final scenes roll out, and any annoyance I had in getting to the end was replaced by charmed amusement.

We love escape games, and our readers love talking about them and sharing hints! How about you? Let us know what you think, ask for clues, or help out other players in the comments below.

Walkthrough Guide


(Please allow page to fully load for spoiler tags to be functional.)

Candy Rooms 11 Walkthrough

  • Hard candy

    1. Inspect the underside of the lid of the crock pot in the corner. Get the knob.

    2. Put the knob onto the device that's perched on the window ledge on the right.

    3. Turn the knob to determine the code.

    4. Input the code into the box with the flames on the low table under the big window.
      Code help:

      The box has four columns of 5 buttons that can be lit up in sequence. The device has five settings and four images. Thus, the images on the device must correspond to rows on the box: when the knob is at 1, the images show which buttons in row 1 need to be lit (the ones where the chef is holding a flaming pan - in the first row, it's all of them). When the knob is at 2, the image shows which buttons in row 2 need to be lit up, and so on.

      5: _ ■ _ _
      4: _ ■ _ ■
      3: _ ■ _ ■
      2: ■ ■ _ ■
      1: ■ ■ ■ ■

    5. Press the big button once you've set the small buttons correctly.

  • Gumball

    1. Get the thermometer from the basket in the middle of the bookshelf.

    2. Measure the temperature of the water in the coffee pot on the side table.

      67

    3. Measure the temperature of the water in the orange crock pot in the corner.

      42

    4. Put the code into the box under the vase of flowers. Get the pumpkin.

    5. Give the pumpkin to the frog. Get the coin.

    6. Use the coin in the gumball machine.

  • Round lollipop

    Inspect the pot of orchids in the corner.

  • Wrapped wafer

    Look in the watering can (bottom shelf under the vase of flowers).

  • Flat lollipop

    Check the top of the bookshelf on the left.

Escape-Men 104: Trial of Love Walkthrough

Nook view

  • Scroll

    Click the bottom of the scroll three times.

Door view

  • Door

    Open the door, then close it again. (Don't go out yet unless you want the bad end.)

  • Cup

    Click the table in the foreground. Move the cup, then the saucer.

  • Table

    Still viewing the table, click towards the bottom of the screen so you get a view under the table.

Wardrobe view

  • Tie

    In the door view, note the pattern on the door. Put that pattern into the buttons on the wardrobe. Click the green tie.

  • Album

    Open and close the wardrobe doors repeatedly until the red book falls off. Get the book. Click the green baby in the first picture.

  • Right

    Look at the right side of the wardrobe.

TV view

  • TV

    In the wardrobe view, get the remote from the drawer. Click the TV with the remote repeatedly until the image comes up, then click the ring.

  • Stool

    Click the table, then click the left edge of the stool.

Nook view again

  • Crackers

    Note the date on the first picture in the red memory album. Put that date into the sliding door. (No zeros, YYMD order.) Get the bag of rice crackers. Click the top of the bag to open it, then click each of the crackers to eat them.


Exiting

  • Bad end

    Go out the door before you have all 10 escape men.

  • Happy end

    Collect all 10 escape men (which then form an engagement ring) before going out the door.

Escape from the Room with Windows - Walkthrough

Looking Around
You start at the Door Wall
Door, shelves with 6 stars, box with note on it with input for three letters using some combination of "aenosu"

Couch Wall
blue couch
on couch a red diamond "+7"

and a key chained to leg;

box on table with three squares and an empty cross;
clock on wall;

with cross on it

also with a red, yellow, blue marks at the 1, 3, and 8 o'clock positions

Window Wall

left window has upper pane, yellow triangle

(this is a piece, not a zoom in button, silly me) on jamb you can't reach

Table has blue box with a slot for a circle, square, triangle

TV wall
poster on the wall: a left to right arrow, 6 black "8"s with red dots

the poster seems to be held in place by a screw in the upper left corner, seems dangerous to me

left cabinet: red, blue, yellow buttons; "Star 1323122";
middle cabinet: requires key;
right cabinet: three digit number; blue diamond, yellow diamond, red diamond

Lets get solvin!

Door Wall:

The light switch has up and down buttons-- some combination of up and down needs to be pushed?

Where have we seen an alternating pattern of up and down?

The TV Wall?

The poster?

up, down, down, up, down, up

Yay, you've turned the lights off? What next? back up, the only thing you can do.

The stars are lit up! In pretty colors!

Top row: blue, red, yellow; bottom row red, yellow, yellow

Turn the lights back on

TV wall
Left cabinet has stars and colored buttons and we now have some stars-related information. How to combine the three:
three colored buttons;
a 7 digit series of 1s, 3s, & 2s;
the information from the 6 stars on the door wall:

Lit up star colors:

top row: blue, red, yellow; bottom row red, yellow, yellow

This drove me crazy; its the hardest puzzle here and it ain't actually that hard

I always forget the Japanese tendency to treat numbers as characters before thinking about their numerical value

Maybe if we counted the number of each color of star? (Argh, I'm such an idiot I yelled when this finally dawned on me.)

1 blue star, 2 red stars, 3 yellow stars

blue, yellow, red, yellow, blue, red, red

GET RED CIRCLE, GET WIRE CUTTERS

The red circle

undoubtably goes in the circle slot on the box under the windows. Put it in now, or hold onto it for later, it doesn't matter.

Using the wire cutters
What did we see that needed the wire cutters?

The chain attaching the key to the couch! GET KEY

TV Wall Middle Cabinet

use key

GET SCREWDRIVER, GET ROD

Window Wall

Lets knock down that yellow triangle shall we?

with the rod of course

GET YELLOW TRIANGLE
Use it or keep it, like with the circle

TV Wall

The only screw in the room is located here

holding up the poster
Now what could that mean?
a note and "oun"?

Well, the box above the stars on the Door Wall needs three letters, lets give it a try.

Well damn, that didn't work.

dummy, the note is upside down

so the letters are actually "uno"

GET BLUE SQUARE

Window Wall
Box on table: insert circle, square, triangle

GET TV REMOTE

TV Wall
Turn on TV

Yellow Diamond X31

Right Cabinet is labelled with a blue, yellow, red diamond

Blue "=10" from middle cabinet

Yellow "X31" from TV

Red "+7" from couch

Solve

10*31+7=317

GET CROSS

Couch Wall
Put cross on box on table
three numbers are needed:

where else did we see a cross?

the clock

red 1, yellow 3, blue 8

enter code
GET KEY

Even though the second key looks exactly the same as the first, it turns out it opens the door and

YOU'RE OUT!

Avalanche Escape Walkthrough

As mentioned, this game has a really screwy inventory system. You can only see one item at a time, and whatever item is showing is what you're gonna use if you click anywhere. (Once you pick up your first inventory item, your hand cannot be empty anymore.) To use an item other than what's showing, use the arrows on the sides of the screen to scroll through your items. Yes, it's exactly as tedious as it sounds.

To back out of any view, click the bottom edge of the screen. (There are no navigation arrows in the game.)

  1. Top bunk

    Click the red sleeping bag in the top bunk. Click the head of the sleeping bag to lift it slightly and get the knife from underneath.

  2. Bottom bunk (or storage area, really)

    • Move the cup on the left, then move the hat. Get the headlamp.

    • Get the ice pick from the backpack's front pocket.

    • Use the knife on the panel on the back; get the rubber tubing.

  3. Bear poster (on the right wall)

    • Use the knife on the poor bear's nose; get the yellow stone.

    • Use the ice axe on the wiggly board on the right to expose the oxygen canister. Press the button on the canister (to turn it on or something? it's not really clear).

  4. Couch

    • Get the lighter from behind the pillow.

    • Put the headlamp on the small table.

    • Zoom out and use the ice axe where the headlamp indicates to expose a valve of some sort.

  5. Rug

    1. Move the coffee table to the right.

    2. Click the left side of the rug to fold it up.

    3. Click on the exposed floor and notice the wiggly floorboard. Use the ice axe to remove the board.

    4. Click the red thing to lift it up; it's an air compressor.

    5. Add the rubber tubing to the compressor. (Again, not sure what that does, besides producing some clouds of smoke? vapor? strangely-visible air?)

  6. Window

    • Use the knife to pry open the window.

    • Use the ice axe to expose the power cord and pick it up.

    • You can continue whacking away at the ice if you like, but there's nothing else to find.

  7. Bookshelf

    • Get the firewood from the right.

    • Use the lighter on the bear's nose. Get the blue stone. (What is it with the violence against bear's noses?)

  8. Stove

    • Get the trekking pole from the right.

    • Put the wood in the stove.

    • Use the lighter on the wood.

    • Use the power cord on the pole on the left.

  9. Grey bear (near the roof)

    • Use the trekking pole on, you guessed it, the bear's nose.

    • Look at the stove again and get the red stone.

  10. Skylight

    Use the trekking pole on the skylight. Look at the couch and collect the wrench that fell out of the skylight.

  11. Sink

    1. Use the wrench on the orange valve.

    2. Get the key from the sink.

  12. Locked cabinet

    Use the key on the locked cabinet (between the sink and the stove). Move the lever up.

  13. End game

    1. Look at the yellow & black valve below the sleeping bag (the one you used the headlamp to find). You should be able to turn it now.

    2. Go into the portal that opened.

    3. Put your stones in the indicated spots. (From left to right, the spaces are red, blue, and yellow.)

    4. When the hatch opens, click the blue sleeping bag. Watch the cut scene.

    5. When the hatch opens again, click near the bottom of the screen to go back to the room.

    6. Click the window twice.

69 Comments

About the ending to Avalanche Escape:

The person stays in the cryo chamber for a few days shy of 50 years. It would still be winter when they exited. I suppose we should chalk it up to global climate change.

Overall I enjoyed the game. It's nice to play some escape games from new developers every now and then.

Reply
Cyberjar88 June 11, 2014 1:31 AM

For those of you wondering why Aztec sounds familiar: They made the Jinja series.

Reply
Billy-o June 11, 2014 2:23 AM

I'm stuck near the very end (I think) of Avalanche Escape. I'm in the

room with the electronic stuff in it, and there are two computers at the back. Only the left one is on, though -- when I try to put a bear stone in the appropriate slot, the computer on the right beeps at me. I think I need to turn it on before I can finish the game, but I can't figure out how.

Reply
dmondelli June 11, 2014 3:28 AM replied to Billy-o

I just finished that one.

If I remember correctly, you need to go to the orange bear poster, and poke around on the wall next to the poster a bit. That might help you get unstuck.

Reply
Billy-o June 11, 2014 3:29 AM

Thanks, elle! That gave me the motivation to go back and explore some more -- the area I was missing was

on the wall just to the right of the yellow bear poster.

By the way, one area you can get a close-up of -- but which I never found a use for -- is the ceiling on the left side of the room. Did anyone else find a use for that area?

Reply
Billy-o June 11, 2014 3:31 AM

Ninja'd by dimondelli! ;-)

Reply
dmondelli June 11, 2014 3:35 AM replied to Billy-o

IRT: Billy's second question..

You don't need it at all.

Reply
Kniggit June 11, 2014 5:18 AM

Avalanche Escape -- did I miss something?
On the

window and inside of the fuse box thing

there were

some symbols, were those used for anything?

Reply

"Aztec games" are not a new developer, there are 5 games from them in JIG archive under tag "aztec". Very good adventure/escape games. Developers just had really long pauze (7 years or so) so they are not remembered...

Reply

Wow, Aztec! It's been a few years since they've made one. One of my favorite game designers.

Reply

my post seemed to have been deleted. I was asking for a walkthrough for all 5 games if possible :)

Reply
Itt June 11, 2014 11:43 AM replied to Kniggit

@kniggit

I wondered the same thing, since I didn't use them. I only figured out after the fact that...

They seem to be clues for where to use your ice axe.

The one in the electric box has an "X" to the right of a circle and a five pointed star. The bear poster has circles at the top and stars at the bottom. You use your axe to the right of these symbols to get the oxygen.

The skylight window has a 4 pointed star with an "X" above and to the left. The carpet has this symbol. Above and to the left is where you find the air compressor.

Also, the ones on the skylight don't appear until after you have lit the fire and the water on top of the stove boils and creates steam. (I assume the ones in the electric box are the same) which explains the purpose of building the fire.

Reply
Itt June 11, 2014 12:05 PM replied to elle

@ elle re: Avalanche Escape inventory

At first, I really didn't like it. But, I quickly adapted and didn't find that it distracted too much from the game play.

I still prefer a system that allows you to see the full inventory, but at least this is better than the ones that make you drag your items to where you want to use them instead of just selecting them. I hate drag and drop inventory and usually will knock a star off for that.

Reply
Cyberjar88 June 11, 2014 12:51 PM replied to chrpa

I believe I said that already.

Reply

I'm having a bit of trouble with Chick Hide and Seek 18: I can't find the last one.

I've got an apple, some rope and a stick in my inventory and no idea what to do with them

Reply
Patreon Crew SonicLover June 11, 2014 1:35 PM

Gabe:

What you have are two pieces of a trap and some bait. Now find the third piece. It won't be an inventory item.

Reply

If you mean

the basket,

I don't know if there's a glitch or I'm not clicking the right place or something because it's not working no matter what order I try it in

Reply
fuzzboxer June 11, 2014 1:45 PM

If anyone is looking for the last part on Candy Room to complete the chef puzzle:

It's under the lid of the orange pot.

Reply
mark0205 June 11, 2014 1:45 PM

Gabe

Have you tried combining any of your inventory items?

Reply
mark0205 June 11, 2014 1:46 PM

Gabe,

Have you tried combining any of your inventory items?

Reply

Yes, I have. Nothing happens

Reply
mark0205 June 11, 2014 1:50 PM

Sorry for the duplicate post above.

I'm stuck in the Avalanche Escape game. I have

blue stone, yellow stone, red stone, ice axe, wrench, lighter, headlamp, and a knife. I've uncovered the compressor, the O2 tank, cracked open the wall beneath the bunk, turned on the electricity, etc and I have no idea what to do next.

Help please!

Reply
mark0205 June 11, 2014 1:51 PM

Gabe

Open the stick in your inventory and combine it with the rope

Reply
mark0205 June 11, 2014 1:55 PM

Nevermind about the Avalanche tip, I finally got out!

Reply
prairiegal June 11, 2014 2:03 PM

Mark!

How did you get the electricity going? I've been looking for something to fix the wire with and have had no luck.

Reply

Candy Rooms 11 Walkthrough

  • Hard candy

    1. Inspect the underside of the lid of the crock pot in the corner. Get the knob.

    2. Put the knob onto the device that's perched on the window ledge on the right.

    3. Turn the knob to determine the code.

    4. Input the code into the box with the flames on the low table under the big window.
      Code help:

      The box has four columns of 5 buttons that can be lit up in sequence. The device has five settings and four images. Thus, the images on the device must correspond to rows on the box: when the knob is at 1, the images show which buttons in row 1 need to be lit (the ones where the chef is holding a flaming pan - in the first row, it's all of them). When the knob is at 2, the image shows which buttons in row 2 need to be lit up, and so on.

      5: _ ■ _ _
      4: _ ■ _ ■
      3: _ ■ _ ■
      2: ■ ■ _ ■
      1: ■ ■ ■ ■

    5. Press the big button once you've set the small buttons correctly.

  • Gumball

    1. Get the thermometer from the basket in the middle of the bookshelf.

    2. Measure the temperature of the water in the coffee pot on the side table.

      67

    3. Measure the temperature of the water in the orange crock pot in the corner.

      42

    4. Put the code into the box under the vase of flowers. Get the pumpkin.

    5. Give the pumpkin to the frog. Get the coin.

    6. Use the coin in the gumball machine.

  • Round lollipop

    Inspect the pot of orchids in the corner.

  • Wrapped wafer

    Look in the watering can (bottom shelf under the vase of flowers).

  • Flat lollipop

    Check the top of the bookshelf on the left.

Reply
merchantfan June 11, 2014 3:36 PM

OK, I have 6 of the escape men in Ordeal of Love

One under the cup and coaster
One under the table when you move the cushion
One behind the scroll when you roll it up
One on the side of the cabinet
One on the TV
and
One in the drawer

I'm stuck after that. Hint for the books, cabinet code or BIRTH code?

Reply

Escape-Men 104: Trial of Love Walkthrough

Nook view

  • Scroll

    Click the bottom of the scroll three times.

Door view

  • Door

    Open the door, then close it again. (Don't go out yet unless you want the bad end.)

  • Cup

    Click the table in the foreground. Move the cup, then the saucer.

  • Table

    Still viewing the table, click towards the bottom of the screen so you get a view under the table.

Wardrobe view

  • Tie

    In the door view, note the pattern on the door. Put that pattern into the buttons on the wardrobe. Click the green tie.

  • Album

    Open and close the wardrobe doors repeatedly until the red book falls off. Get the book. Click the green baby in the first picture.

  • Right

    Look at the right side of the wardrobe.

TV view

  • TV

    In the wardrobe view, get the remote from the drawer. Click the TV with the remote repeatedly until the image comes up, then click the ring.

  • Stool

    Click the table, then click the left edge of the stool.

Nook view again

  • Crackers

    Note the date on the first picture in the red memory album. Put that date into the sliding door. (No zeros, YYMD order.) Get the bag of rice crackers. Click the top of the bag to open it, then click each of the crackers to eat them.


Exiting

  • Bad end

    Go out the door before you have all 10 escape men.

  • Happy end

    Collect all 10 escape men (which then form an engagement ring) before going out the door.

Reply
Patreon Donator Reka June 11, 2014 4:18 PM replied to merchantfan

@merchantfan, if you don't want to read the walkthrough, you really only need one hint to get all of those things:

Look at the pattern on the door and use that to open the wardrobe. Pay attention to what happens when you open & shut the wardrobe doors.

Reply
hyperspeed100 June 11, 2014 6:01 PM

For Avalanche escape, I don't know what else is needed but for the electricity

Pry open the window with the knife, use the ice pick, then simply grab the power cord. Use that on the open ended wires next to the stove and the switch should flip. (If it doesn't then maybe those air tank things are key to have first).

Reply
mark0205 June 11, 2014 6:07 PM

prariegal,

There's a panel somewhere that you haven't opened...

Check out the window on the left side of the screen...

Maybe try the knife...

Use the knife on the window to open and use the ice axe to free the power cord inside

Reply

thanks for the walkthroughs of the first 2 games. can't wait to see the remaining 3 :)

Reply
shipoopie June 11, 2014 11:14 PM

@Reka

escape men

what stool?

also

there are two sides to the table

Reply
shipoopie June 11, 2014 11:20 PM replied to shipoopie

Oh, I see. You meant click on the

sitting pad thing. I clicked that a billion times but I guess I never clicked it left ways on the correct side of the table. :-(

Reply
shipoopie June 11, 2014 11:32 PM

@elle

Do you know why the escape men and the chicks game have the same ending music?

Reply

::writes down coloured book code in Candy Room::

::escapes without ever needing such a code::

::shakes fist at Funkyland::

Reply
Patreon Donator Reka June 12, 2014 1:09 AM replied to Tenzhi

@Tenzhi: I long ago learned not to bother looking at the books in Funkyland games. :)

Reply
Patreon Supporter SDRanger June 12, 2014 4:09 AM

Regarding Avalanche Escape
3 words: IT'S SO SHORT !!!!!!!!!!
I love ALL of the Aztec games VERY much, so when I saw that this one was just released, I got pretty excited...OK, VERY EXCITED!
What a mild letdown this one was for me...
I finished it the FIRST TIME in less than 10 minutes...without any hints from anyone!
It IS a good game, but the OTHER FIVE Aztec Games are TOTAL DYNAMITE! Their novelty is that they EACH keep you busy for a VERY LONG TIME...even if you already know the puzzle solutions.
Having finished Avalanche Escape in mere minutes, well,
I'm happy but SAD at the same time. :( :)

Reply
shipoopie June 12, 2014 4:32 AM

About the avalanche game

That arrow in the table isn't much of a hint. I thought it meant to push the pillow. The steamed window clues didn't show up until after I had already found those items so they were useless. I had to figure out that they weren't for things I hadn't found yet. I guess the sun on the arrow table says put the lamp there, but there should have been a sun logo on the headlamp. (Do mountaineers call headlamps sunlamps or something?) I only figured it out by trying everything on everything. I thought it was alright except for the lamp thing. I was wondering why it was only a weekday escape. Too short?

Reply
Patreon Supporter SDRanger June 12, 2014 5:28 AM replied to elle

elle,
In regards to Aztec Games' new inventory UI in Avalanche Escape:

I found the side-scrolling of the inventory to be slightly annoying for a couple of reasons. (Aside from the obvious - clicking the two arrows to navigate ME!)
First off, I no longer had all my items laid out in front of me, (although it wasn't THAT difficult to memorize them, considering that the sparse amount of inventory items was roughly 1/2 that of the previous, lengthier, game installments.) Secondly, there were seriously two different instances when I inadvertently used an item without realizing that the item was in the forefront. For example, I accidentally lit the polar bear without even THINKING about lighting the thing. I just happened to have had the lighter in hand! Just that alone knocked a huge chunk off of my (fun) exploration time. :(

A couple of other things that stuck out to me were:

The vague clues of the "X", the STAR, and the CIRCLE written into the window frost, and also the rug and tapestry, are things that I didn't really notice until AFTER I had solved those puzzles. (Unless they're all part of a more complex Easter egg puzzle that I have yet to see, haha.) As a whole, the puzzles in this installment were no where NEAR as challenging as in the previous 5 Aztec games.

THEN OF COURSE, the thing that bothered me the MOST about this Aztec installment was that, as you play the game...

you can't poke Joyce the cat and make her squeak!
(Whattt...? Admit it, you've ALL done it!)

THANKS for asking for our opinions and input, Elle!

Reply
Patreon Supporter SDRanger June 12, 2014 5:33 AM replied to shipoopie

shipoopie, the lamp on the table thing is another example of what I was referring to in my last comment! Can you believe that I

just HAPPENED to have been holding the lamp when I first walked by the table, and I set it there completely on accident?!?

Otherwise, I don't think I would have finished the game in less than ten minutes, THAT'S for sure! Bad inventory design...

Reply
Patreon Crew SonicLover June 12, 2014 9:54 AM

To answer shipoopie's question about the ending music, I believe the creators simply got their music from the same (royalty-free?) source.

Reply

anyone in the process?

Reply
Patreon Supporter Scaper June 12, 2014 6:18 PM replied to Reka

Thanks so much for the spoilers for the hard candy. I was completely stumped.

Having to go back and forth between the two factors to get the solution was not something I could have figured out.

Reply
CptnSuz June 12, 2014 9:02 PM

In Avalanche Escape did anyone notice that

the cryo pod

is shaped like a bear? I thought that was a nice touch :)

Reply
Canuckistan Bob June 13, 2014 1:35 AM

Escape from the Room with Windows - Walkthrough

Looking Around
You start at the Door Wall
Door, shelves with 6 stars, box with note on it with input for three letters using some combination of "aenosu"

Couch Wall
blue couch
on couch a red diamond "+7"

and a key chained to leg;

box on table with three squares and an empty cross;
clock on wall;

with cross on it

also with a red, yellow, blue marks at the 1, 3, and 8 o'clock positions

Window Wall

left window has upper pane, yellow triangle

(this is a piece, not a zoom in button, silly me) on jamb you can't reach

Table has blue box with a slot for a circle, square, triangle

TV wall
poster on the wall: a left to right arrow, 6 black "8"s with red dots

the poster seems to be held in place by a screw in the upper left corner, seems dangerous to me

left cabinet: red, blue, yellow buttons; "Star 1323122";
middle cabinet: requires key;
right cabinet: three digit number; blue diamond, yellow diamond, red diamond

Lets get solvin!

Door Wall:

The light switch has up and down buttons-- some combination of up and down needs to be pushed?

Where have we seen an alternating pattern of up and down?

The TV Wall?

The poster?

up, down, down, up, down, up

Yay, you've turned the lights off? What next? back up, the only thing you can do.

The stars are lit up! In pretty colors!

Top row: blue, red, yellow; bottom row red, yellow, yellow

Turn the lights back on

TV wall
Left cabinet has stars and colored buttons and we now have some stars-related information. How to combine the three:
three colored buttons;
a 7 digit series of 1s, 3s, & 2s;
the information from the 6 stars on the door wall:

Lit up star colors:

top row: blue, red, yellow; bottom row red, yellow, yellow

This drove me crazy; its the hardest puzzle here and it ain't actually that hard

I always forget the Japanese tendency to treat numbers as characters before thinking about their numerical value

Maybe if we counted the number of each color of star? (Argh, I'm such an idiot I yelled when this finally dawned on me.)

1 blue star, 2 red stars, 3 yellow stars

blue, yellow, red, yellow, blue, red, red

GET RED CIRCLE, GET WIRE CUTTERS

The red circle

undoubtably goes in the circle slot on the box under the windows. Put it in now, or hold onto it for later, it doesn't matter.

Using the wire cutters
What did we see that needed the wire cutters?

The chain attaching the key to the couch! GET KEY

TV Wall Middle Cabinet

use key

GET SCREWDRIVER, GET ROD

Window Wall

Lets knock down that yellow triangle shall we?

with the rod of course

GET YELLOW TRIANGLE
Use it or keep it, like with the circle

TV Wall

The only screw in the room is located here

holding up the poster
Now what could that mean?
a note and "oun"?

Well, the box above the stars on the Door Wall needs three letters, lets give it a try.

Well damn, that didn't work.

dummy, the note is upside down

so the letters are actually "uno"

GET BLUE SQUARE

Window Wall
Box on table: insert circle, square, triangle

GET TV REMOTE

TV Wall
Turn on TV

Yellow Diamond X31

Right Cabinet is labelled with a blue, yellow, red diamond

Blue "=10" from middle cabinet

Yellow "X31" from TV

Red "+7" from couch

Solve

10*31+7=317

GET CROSS

Couch Wall
Put cross on box on table
three numbers are needed:

where else did we see a cross?

the clock

red 1, yellow 3, blue 8

enter code
GET KEY

Even though the second key looks exactly the same as the first, it turns out it opens the door and

YOU'RE OUT!

Reply
JudyJetson June 13, 2014 1:50 AM


Window Room
The two trickiest spots for me were the star puzzle

I was confused because there were six stars, but the star-marked number sequence on the left cabinet door only used digits 1-3. Then I realized that there were only 3 different colors, and the first three stars were one of each color.

and the three-digit diamond code on the right cabinet.

I seriously overthought this one, because I was convinced that the clock-colors combined with the colored diamonds (it is the same three colors), and I seriously spent 10 minutes just trying to figure out how they combined to give me a three-digit code. Haha! Did I ever feel silly when I decided to leave the clock out of it, and the diamond code worked by itself!

Everything else was pretty straightforward. Actually, it was all straightforward, and I just got thrown off because of my tendency to over-think things. :)

I love these little packets of three and five (and sometimes 12) games at a time. They are wonderful for the all-night desk shift.

Reply
JudyJetson June 13, 2014 2:05 AM

Did anyone else notice that

the up-down code for the light switch in the window room game and the up-down code for the wardrobe in the escape-men game is the same 6-part sequence?

Talk about some serious deja-vu

Reply

Chicks Hide and Seek 18 Walkthrough

  • Table view

    • Get the apple from the table.

    • Get the chick from behind the apple.

    • Take a closer look at the yellow rosebush. Get the chick.

    • Get the rope on the right (near the pink rosebush).

  • Basket view

    • Look under the basket. Get the chick.

    • Look at the umbrella hanging from the railing. Get the chick.

    • While looking at the umbrella, get the water bottle.

    • Get the sunglasses from the foreground.

  • Fountain view

    • Get the chick from the left of the fountain.

    • Get the stick from the railing.

    • Use the magnifying glass on the water bottle; remove the cap. Look at the fountain. Put the cap on the reed sticking up on the right. Wait a bit, then get the chick.

  • Gate view

    • Use the sunglasses on the light on the left. Get the chick.

    • Look at the Rose Garden sign. Get two chicks: one from behind the sign, one from the yellow rosebush.

  • Basket view, take 2

    • Use the magnifying glass on the stick, then add the rope.

    • Use the stick to prop up the basket. Put the apple underneath.

    • Wait a bit, then get the chick.

  • Exiting

    • Click the flagstone the chicks are surrounding. Get the key.

    • Use the key on the gate.

Reply
shipoopie June 13, 2014 6:35 AM replied to Reka

@Reka

Haha. I didn't see that you created the chicks walkthrough and yours is exactly like mine! :-D

Reply

Is anyone working on the Avalanche walkthrough? thanks for the walkthroughs so far :)

Reply
Patreon Donator Reka June 13, 2014 1:06 PM replied to shipoopie

Well, there aren't that many ways to complete such a simple game. (I'm a bit confused, though: did you post a walkthrough and I'm not seeing it?)

Reply
Patreon Donator Reka June 13, 2014 2:12 PM replied to shipoopie

Avalanche Escape Walkthrough

As mentioned, this game has a really screwy inventory system. You can only see one item at a time, and whatever item is showing is what you're gonna use if you click anywhere. (Once you pick up your first inventory item, your hand cannot be empty anymore.) To use an item other than what's showing, use the arrows on the sides of the screen to scroll through your items. Yes, it's exactly as tedious as it sounds.

To back out of any view, click the bottom edge of the screen. (There are no navigation arrows in the game.)

  1. Top bunk

    Click the red sleeping bag in the top bunk. Click the head of the sleeping bag to lift it slightly and get the knife from underneath.

  2. Bottom bunk (or storage area, really)

    • Move the cup on the left, then move the hat. Get the headlamp.

    • Get the ice pick from the backpack's front pocket.

    • Use the knife on the panel on the back; get the rubber tubing.

  3. Bear poster (on the right wall)

    • Use the knife on the poor bear's nose; get the yellow stone.

    • Use the ice axe on the wiggly board on the right to expose the oxygen canister. Press the button on the canister (to turn it on or something? it's not really clear).

  4. Couch

    • Get the lighter from behind the pillow.

    • Put the headlamp on the small table.

    • Zoom out and use the ice axe where the headlamp indicates to expose a valve of some sort.

  5. Rug

    1. Move the coffee table to the right.

    2. Click the left side of the rug to fold it up.

    3. Click on the exposed floor and notice the wiggly floorboard. Use the ice axe to remove the board.

    4. Click the red thing to lift it up; it's an air compressor.

    5. Add the rubber tubing to the compressor. (Again, not sure what that does, besides producing some clouds of smoke? vapor? strangely-visible air?)

  6. Window

    • Use the knife to pry open the window.

    • Use the ice axe to expose the power cord and pick it up.

    • You can continue whacking away at the ice if you like, but there's nothing else to find.

  7. Bookshelf

    • Get the firewood from the right.

    • Use the lighter on the bear's nose. Get the blue stone. (What is it with the violence against bear's noses?)

  8. Stove

    • Get the trekking pole from the right.

    • Put the wood in the stove.

    • Use the lighter on the wood.

    • Use the power cord on the pole on the left.

  9. Grey bear (near the roof)

    • Use the trekking pole on, you guessed it, the bear's nose.

    • Look at the stove again and get the red stone.

  10. Skylight

    Use the trekking pole on the skylight. Look at the couch and collect the wrench that fell out of the skylight.

  11. Sink

    1. Use the wrench on the orange valve.

    2. Get the key from the sink.

  12. Locked cabinet

    Use the key on the locked cabinet (between the sink and the stove). Move the lever up.

  13. End game

    1. Look at the yellow & black valve below the sleeping bag (the one you used the headlamp to find). You should be able to turn it now.

    2. Go into the portal that opened.

    3. Put your stones in the indicated spots. (From left to right, the spaces are red, blue, and yellow.)

    4. When the hatch opens, click the blue sleeping bag. Watch the cut scene.

    5. When the hatch opens again, click near the bottom of the screen to go back to the room.

    6. Click the window twice.

Reply

I do think it's odd that a game doesn't get a feature pretty much because of the inventory system. The other Aztec games were so much less intuitive than this, and they got well-deserved features. It's not more complicated than, say, Six. The inventory format may be unwieldly, but it seems to serve a specific purpose of poking at that escape game habit of just trying everything with everything. The game wants you to focus and think about the different items and what they do. I doubt after all of Aztec's work, that it's simply there to annoy the player.

And I had no idea this was here till I saw it in comments.

And no, I would rather not break frozen stiff glass into a warm enclosed cabin, because I don't want to bleed to death in the cabin. ;) Nor would I want to smash the equipment underneath the wood with an ice axe -- those aren't built to be extracted from wood, either, so you'd get the first gouge in there and not get your axe back.

Reply
Shudog June 13, 2014 5:08 PM replied to shipoopie

The walkthrough's a bit incomplete. (And I'm stuck, after following it. Won't allow me to do the last insert, I think something's not turned on.)

The bear's noses are targeted because of the note next to the control box that says Bears have keen noses. So yes, we know why. The whole point of the air compressor is to raise the hygrometer in the sleeping area. I do fail at physics but I'm pretty sure raising heat and pressure and water vapor will do that.

Last but not least, what about the symbols on the windows (skylight and control panel)? Are we not supposed to do something with those?

Even the walkthrough is so negative! How many side comments about stuff that's just "not understandable" when it's really a clue that got overlooked? It makes it look like it's the developer's fault for making a poor game.

I really think this review just primed us for HORRIBLE UI OMG and that's become all we've talked about. Oh gosh we have to scroll! Over less than a dozen items! I think our hands will fall off forever because it's so *different*. Yeah. Don't think it gave this game a fair shake at all. And now, as usual, the audience will move on, and there's no going back from that first impression. Tsk.

Reply
JudyJetson June 13, 2014 6:22 PM replied to Shudog

@shudog, I agree that the 'scrolling' system doesn't deserve all the negative commentary. I thought that the system made up for loss of convenience in the benefits that you mentioned. So what if you have to click a few extra times to use something. Whoopdee doo. What frustrated me about the inventory system was that there was a huge circle blocking the bottom of every view. If it had been in a strip of space under the screen it would have been better.

Also, if you're stuck at the same spot where I got stuck:

in the hidden room behind the wall, where all the electrical equipment is, are you unable to insert the colored stones into the machine because the equipment on one side is not operational? I had to look at the walkthrough for that, and I found a spot I had overlooked. You have to turn on TWO machines, not just one. You use the pick axe to break a board for each of them, and because of that the walkthrough directions for both are so similar that you might mistake them for referring to the same machine.

one machine is under the floor and needs a hose, the other is behind a wall and just needs a click.

Reply
shipoopie June 13, 2014 6:26 PM replied to Shudog

I think the avalanche walkthrough just goes through the bare minimums. It doesn't tell you how to

steam up the windows for clues

and really, you don't need to because you'll discover those things on your own. When I played the game I spent a lot of time trying to solve problems that didn't make me prgress at all. If I had

tried the headlamp on the table

early on, I wouldn't have even bothered with half the puzzles because I'd have escaped by then.

I think maybe I might be on the verge of no longer wondering why this one wasn't featured by itself. Not because of the inventory system. That wasn't a big deal. But because of how half of the puzzles were useless. :-(

Reply
shipoopie June 13, 2014 7:00 PM replied to shipoopie

I don't think I would have ever figured out the chefs puzzle on the candy room game. Funkyland is really upping it's game lately. I probably wouldn't have figured out the pots puzzle either but

I just happened to be holding that weird orange lollipop device and it turned out to be a thermometer that I accidentally inserted into one of the pots.

Reply
Paul June 13, 2014 10:06 PM replied to shipoopie

thanks everyone :)

Reply
Patreon Donator Reka June 15, 2014 12:25 AM replied to Shudog

@Shudog, I didn't mention

the symbols that appear on the skylight/control panel

because I couldn't find any use for them. Trust me, I looked.

If the game isn't letting you put your three items in place in the last scene, it's because you missed something somewhere. Go back and make sure you actually turned on everything that can be turned on - merely finding them isn't sufficient.

Reply
Patreon Donator Reka June 15, 2014 12:28 AM replied to Shudog

@elle, any particular reason you didn't add a link to the chicks walkthrough? I posted it about a half day earlier than the avalanche one, and you did add a link to that...

Reply
Patreon Donator Reka June 15, 2014 12:34 AM replied to shipoopie

I think the difficulty of the chef puzzle was an accident. I just played the latest fruit kitchen, and it was incredibly easy.

Reply
shipoopie June 16, 2014 5:23 AM replied to Reka

@Reka

I'm afraid to push the flag button but maybe there should be an option when you push it to flag for walkthroughness. :-)

Reply

^ Scroll Up | Homepage >

Leave a comment [top of page]

Please consider creating a Casual Gameplay account if you're a regular visitor here, as it will allow us to create an even better experience for you. Sign-up here!
  • PLEASE UNDERSTAND SITE POLICIES BEFORE POSTING COMMENTS
  • You may use limited HTML tags for style:
    (a href, b, br/, strong, em, ul, ol, li, code, spoiler)
    HTML tags begin with a less-than sign: < and end with a greater-than sign: >. Always. No exceptions.
  • To post spoilers, please use spoiler tags: <spoiler> example </spoiler>
    If you need help understanding spoiler tags, read the spoiler help.
  • Please Preview your comment before posting, especially when using spoilers!
  • No link dropping, no domains as names; do not spam, and do not advertise! (rel="nofollow" in use)
chrpa Jayisgames needs your help to continue providing quality content. Click for details Hi! Weekday Escape and Weekday Puzzle are here! First we have two new cans from tomoLaSiDo and then two small rooms from isotronic. That's all for this...  ...
6,365 Views
0 Comments
chrpa Jayisgames needs your help to continue providing quality content. Click for details Welcome to Mobile Monday! We have another beautiful game from Nicolet and it's a winter game as it should be. Tasuku Yahiro have released another of their...  ...
6,161 Views
2 Comments
chrpa Jayisgames needs your help to continue providing quality content. Click for details We've got a new game from Rinnogogo's magical world and this time it really is magical.. Not only do you get to meet cute animals that express themselves...  ...
chrpa Jayisgames needs your help to continue providing quality content. Click for details After a few weeks of patient waiting, we have been rewarded - the new game from Ichima Coffeedo is here. We got a wonderful new game - it's...  ...

HELP Jayisgames.com

Recent Comments


Display 5 more comments
Limit to the last 5 comments

Game of the week


Dark Romance: Vampire Origins Collector's Edition

Your Favorite Games edit

add
Save links to your favorite games here. Use the Favorites editor.

Monthly Archives