
 Another week is over, another seven days behind us, we all are smarter and wiser and a new Weekday Escape is waiting. What a nice Wednesday!
Genuinely positive Denofthekamo lets us out of Ramen Shop only after we get a drink for big rooster (yes, poultry everywhere, again). Neat Escape lets us in to play after we solve some sophisticated puzzles. And Miyabure takes us to another awesome magic place!
Have a good time and enjoy!
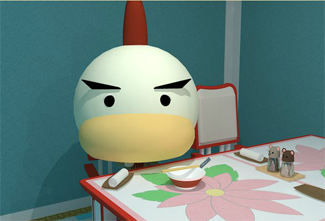
Charming game from denofthekamo (alias kamotokamotokamo alias kamokichi) is not long but overall enjoyable. You meet e̶v̶i̶l̶ panda and strict rooster (maybe it´s just their eyebrows) in small Ramen Shop and the rooster gives you the key from exit door only in exchange for a cup of green tea. The panda is just watching.
The cursor is changing, save button, one ending.
Neat Escape ´s friend, similarly to Tesshi-e´s friend Mr. Y, loves escape games. This time he made a huge effort and turned the entry to his new house into set of puzzles and clues, and even his dog takes its place in the game! First, switch Japanese to English. Notice, that items which doesn´t disapear from your inventory can be reused. The second ending brings much more content and definitely worth playing!
The cursor is not changing, save button, two endings.
Miyabure´s game introduces the rabbit and the little man from previous game (featured in Weekday Escape N°145). You are the rabbit in the game and the place you are locked in is very atmospheric, with beautiful watercolour art and soft ringing music around.
You don´t have to understand the little man´s monologues, just click through them. Side bars are for navigation, but notice that there are some views without them.
The cursor is not changing, save button, one ending.
We love escape games, and our readers love talking about them and sharing hints! How about you? Let us know what you think, ask for clues, or help out other players in the comments below.


This game also has an Android app version linked somewhere on the right side of its page, if that's how you prefer to play.
Escape from a Ramen Shop
Stay for ramen, or escape the shop? Why not both?
Exploration
You start off facing a rooster who just wants a cup of tea. He sits at a table with two towels, one for each of the left seats, as well as an empty ramen bowl. The other table is similar, but it has three towels set.
Turn left to find the main entrance, which is locked. Next to it, there's a painting of a cloudy mountain. Something seems suspicious about it, but perhaps you should leave it for later. Back out and look at a vase on a pedestal, which has a locked compartment.
Turn left again. The panda is waiting at a counter. Above him, six menu items are listed in different colors and prices. Beside him (zoom out first), a water kettle with cute ears sits on the counter.
Click on the corridor to walk into the kitchen behind the panda. There's a locked box under the counter with pink, green and yellow buttons. Each button has 100 written on it, and the numbers increase by 100 as you click the buttons.
Turn right past the shelves. From this screen, you can click on the pans to get a closer look; there're two light-colored saucepans among four black frying pans, hanging on an arrow-shaped rack. You can also open the cupboard doors under the stove to find one of each type of pan, the frying pan over a blue circle and the saucepan over a red circle. The cabinet on the side is locked, and has seven working buttons and one that doesn't change, decorated to form a familiar arrangement. Next to the cabinet on the lower-left, an object is hidden but you can't reach it.
Towels
Unlock the cabinet with the clue from the setting of the tables.
The diagram on the lock is upside-down compared to your view of the tables. (You can tell since the diagonal white rectangle represents the towel nearest to the rooster.)
So the white rectangles should light up as follows:
_ T _ \

T _ x _

_ x _ T

T _ x _
Click the 1st and 2nd buttons on the top row and the 1st and 4th on the bottom row.
Then click the big pink button to open the doors. Inside, there's more towels and a pair of chopsticks.
Reach
Use the chopsticks on the object hidden beside the cabinet to get it. It's a short key.
Unlock
Use the key on the pedestal to unlock its compartment. Take the tea cup from it.
Pricey
Use the prices on the menu to unlock the box under the counter.
The pink, green and yellow items cost 900, 700 and 600 yen, so click the buttons 8, 6 and 7 times.
Open the box to find a key body (missing the key tip) and a clue for the picture.
Corner
Following the clue in the box under the counter, click the upper-right corner of the mountain painting five times to slide it aside. Take the box of green tea.
Brew
Use the green tea on the cup, then use the cup on the kettle, then use the clue from the pans to make it dispense (the right temperature of) water.
The 3rd and 5th pans from the left are saucepans, so the corresponding button presses are red.
So press the BBRBRB (RRLRLR) buttons to dispense the water, then pick up the cup of tea.
Give the tea to the rooster, who gives you a ramen voucher in return.
Ramen
Use the voucher on the panda, who serves you a bowl of ramen. Click on it to eat, then click on the empty bowl to pick it up.
Return
Use the bowl on the panda, and he gives you the key tip.
Escape
Assemble the key by using its pieces together, then use it on the main door to escape.
I translated the little man's dialogue from the Doll's Mansion Escape as best I could:
Nice to meet you. My name is Sebastian.
Thank you very much for helping me.
It seems that my body stopped moving after waiting so long for an owner.
I am different from the other dolls...
The dolls are all gone? No way.
All the other dolls were picked out before me. Only I am left.
Me?
I... Maybe they felt bad because I'm an intelligent robot that looks like a doll. I don't know.
Thank you. My body is now moving.
Your name is Utsusa?
I don't need a master, do I?
Well, then....do you want me, Utsusa?
You chose something like me. Thank you so much.
Bonus: the chicken at the end says "I think that I'm pretty beautiful."
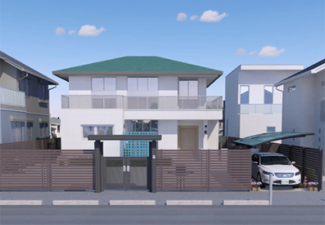
MyHome2 -Remake-
Neat Escape already had a My Home 2 in 2015, but this one is HTML5 (Unity WebGL?) instead of Flash and has completely different puzzles. The setup is the same: get into your friend's house by solving all his puzzles.
Don't forget to change the language on the title screen, which affects the intro and ending text. You will not be able to change the language in the middle of a playthrough.
Exploration 1
You start off with a bird's eye view of your friend's house and driveway. Clicking on the gate, you find that it's locked and needs a four-digit code on the security panel. So you look at the driveway for hints, and find only one: the license plate on your friend's car is just four geometric shapes (and a hyphen).
Four digits
Convert the license plate to four digits, then use that code to unlock the gate.
The shapes are: square, triangle, circle, hexagon.
These have 4, 3, 0, 6 sides, so enter 4306 by clicking the buttons 5, 6, 9, 3 times.
Then click the green button to unlock the gate.
Exploration 2
You're at the house, but not yet in the house. And of course, the main door is locked. Click on the blue grid to the left to find a bunch of items on shelves, as well as some plants and a skateboard. There are two different locked boxes here, one which takes four letters and has a silhouette of a dog followed by
-11as a hint. (Each button cycles through a different set of 10 letters.) The other locked box takes a code with four geometric shapes, or perhaps it's five and the first is a star. There's also a basketball and a beach ball and a dog's water bowl, as well as a locked cupboard.Back up to the view of the front door and click on the walkway to the right of the door. This takes you around the house, through some planters with a screwdriver in them, and shirts of different colors hanging out to dry, and on a nearby table, six nearly-identical shoes that aren't in pairs, with a white ball among them.
Back up to the front door again and turn right to find a locked gate to the back of the driveway, and a water tap without a handle.
Turn right again to find the main gate. To the left of it, there's a black box with a circled letter H on the top. On the right of the gate, there's a grate in the ground.
Turn right. On the left table, a locked box has four buttons with weather forecast symbols, arranged vertically. On the right side, a dog stands next to a doghouse. The nameplate on the doghouse reads Lucky (and you can click on it). In front of the doghouse, two white chalk circles mark positions for food and water bowls. The water bowl is missing (you have it) and you can lift the food bowl to find a clue. There also seems to be a walkway around the house on this side, but it doesn't seem like Lucky will let you walk through.
Names
Use the clues from the doghouse to unlock the box on the shelf with the dog picture.
If Z=26, then 11=K, the 11th letter of the alphabet.
Since the dog's name is Lucky, the clue
(Dog)-11refers to taking the letterKout ofLucky, leavingLucy.So enter LUCY by clicking the buttons 4, 7, 1, 9 times, then open the box to get the tap handle.
Fill
Use the tap handle on the tap, then turn it on and fill the water bowl, and place it in the circle next to the food bowl.
Something opened up!
Click the nameplate on the doghouse to slide it down. Take a pink key.
Unlock 1
Use the key to unlock the driveway gate.
There's nothing interesting except for a traffic cone, which lifts up when you click it to reveal a box of dog food.
Feed
Use the dog food on the food bowl, and then back up. Lucky is now happily engrossed in the food, allowing you to walk freely into the walkway by the side.
Exploration 3
This side of the house isn't as well lit. There's a locked briefcase on the table in the left corner.
Click the right corner to continue walking around. There's an air-conditioning unit on the right wall. It's turned off and the fan cover is screwed down. At the end of this walkway, there's a box with two footprint-shaped buttons on it.
Two right feet
Use the hint from the shoes to unlock the footprint box.
(They're on the same table, but you have to walk all the way around.)
The shoes on the table are the right, left, left, left, left, right shoes.
So click the RLLLLR buttons to open the box and get a toy helicopter body, missing the propellers.
Unscrew
Use the screwdriver to unscrew the air-con fan cover. Reach behind the fan blades to get the propellers for the toy helicopter.
(Don't try this at (your friend's) home.)
Unlock 2
Use the pink key to unlock the briefcase. Inside, there's a bunch of complicated machinery, and a big red button labeled PUSH.
Takeoff
Assemble the helicopter, then use it on the box beside the gate.
Then press the big red button in the briefcase to make it take off.
It flies quickly over the driveway, and you can see some black weather symbols on its roof.
Weather
Use the symbols on the roof of the driveway to unlock the box on the table beside the doghouse.
From top to bottom, the symbols are:
Crescent moon
Rainy cloud
Cloud partially covering sun
Rain on umbrella
So click the buttons 9, 4, 3, 7 times, then open the box and take a red key.
Unlock 3: This time in red
Use the red key to unlock the cupboard among the item shelves left of the door. Inside, there's a miniature crowbar and a blue key.
Ending 1
Save your game from the menu, then use the blue key on the main door to enter.
Your friend has prepared a great dessert with pancakes, fruit and cream. Enjoy!
Another way
Okay, maybe that was too easy and you want a bit more challenge. (Load your game and go back in through the main gate.)
This time, use the crowbar to remove the grate on the right of the gate. There's a ladder leading down to a corridor with a locked door.
Use the blue key on the locked door, consuming it. (This locks you out of the first ending.)
Exploration 4
The basement is surprisingly bright. You're facing a locked door with a card sensor next to it. A glass column to the left has a large hole cut in the bottom, with a square metal plate neatly set into the marble base.
Turn left to find a glass cabinet with pool cues, some pointing up and some down. The glass is shut so you can't reach the cues.
Turn left to find the door which you came from, with a screwed-down wooden panel on its left. On the right side, a weight exercise machine sits next to some dumbbells, and there's a pool cue in the corner. On the chair, there's a locked box with six buttons. Clicking the buttons makes either their top or bottom half glow yellow.
Turn left again to find a pool table, most of it covered under a sheet of glass. In one of the corners that you can reach, there's a white circle marked on the felt. Click the hole further from it to look under the glass and see a light-colored ball at the far corner of the table.
Long shot
Place the white (cue) ball on the circle on the pool table, then use the pool cue on it to make a shot that sinks the other ball.
It rolls out the bottom of the table. Take the striped yellow 9 ball. Examining the ball closely, you find a hole on the bottom.
Up and down
Use the hint from the pool cue cabinet to unlock the box on the exercise machine seat.
The pool cues point down, up, up, down, up, down, and the ends of the cues are light-colored.
So make the buttons light up on the DUUDUD sides by clicking them 2, 1, 1, 2, 1, 2 times, then open the box and take a bolt.
Unscrew, again
Unscrew the wooden panel next to the door to find another big red button, and push it.
The metal plate at the bottom of the glass column slides aside to reveal another helipad plate.
Takeoff, again
Take the helicopter from upstairs, bring it to the basement and place it on the new helipad.
Then climb back up and press the button on the briefcase again.
This time, the helicopter flies straight up over the roof of the house, allowing you to see some geometric shapes painted on the balcony.
Starry
Use the clue from the aerial view of the balcony to unlock the box with geometric shapes near the front door.
The code you see on the balcony is upside down, so invert it to get Star Triangle Circle Diamond Hexagon.
Press the buttons until they show a triangle, circle, diamond and hexagon (4,3,2,8 times).
Then open the box and take a wrench.
Secrets
Use the bolt on the 9 ball, then the wrench on the bolt. This separates the top white cap from the rest of the ball, so you can remove it.
Under the cap, there's a mini keycard.
Ending 2
Use the keycard on the scanner to unlock the door and enter the house.
Oh, just look at the time! You've taken so long that it's now time for dinner. I'm sure you're hungry after all that escaping. Enjoy a hearty dinner with your friend.
Shorter walkthrough
The game checks that you have launched the helicopter before it will let you unlock the weather box, but there's no such check for the star box.
These are the steps you need to get to the first ending:
Unlock front gate (4306)
Get screwdriver from planters on right
Get water bowl and tap handle (dog box: LUCY/4719)
Fill and place water bowl
Get pink key from name plate, unlock driveway, get and place dog food
Get helicopter parts from footprint box (RLLLLR) and AC unit
Place helicopter, unlock briefcase, press button
Unlock weather box (9437), get red key
Unlock shelf cupboard, get crowbar and blue key
Unlock main door
After the first 9 steps, you need the following for the second ending:
Unlock star box (4328), get wrench
Get cue ball from shoes
Pry open grate, go down, unlock door
Get pool cue, unlock box on gym machine (DUUDUD/211212), get bolt
Get 9 ball from pool table
Use bolt and wrench on 9 ball, get card
Unlock basement door
Thanks for the walkthrough, kktkkr. I had tried playing yesterday and couldn't even get the first gate open...
This game is a bit unconventional in how things are shown, so don't worry if some parts seem confusing - pay attention to the details, and it will become clear.
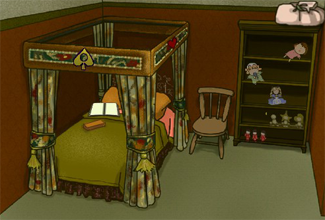
Escape from the Dolls' Mansion
For some people, dolls are charming. To others, they are creepy. In any case, you don't want to remain in this room of dolls forever, so start looking for clues to escape.
Exploration
You start off facing a four-poster bed with a golden spade mark and red heart mark on the canopy frame. The bed has a book on it with what looks like a purple flower and a petal on the left page and a doll, the same petal and a red heart on the right. There's also a music box, which has a key behind a pane of glass and five green buttons next to the glass. (There's the music! Click on the "BGM" text to adjust the volume or turn it off.)
Next to the bed, there's a wooden chair next to a shelf with a sack on top which you can't reach. On the shelves, there's a girl doll in a red dress, a baby doll in green clothes and a "French lady" doll in a blue dress.
The next shelf has a mobile with three wooden figures locked to the shelf by its bottom beam, with two of the figures wearing spade and heart-shaped hats, and there's something metallic hidden behind the mobile. The shelf also has a golden circle on it with the numbers 47 above. Further down, the bottom shelf has three small dolls wearing red kimonos.
Click on the right side of the screen to find a locked door with a (also locked) pet door at its bottom, and a transparent window at its top. You can look through the window at the next room, but let's leave that for later.
Back out, then turn right to find an flower vase on a small table with a locked drawer with three buttons that cycle through different symbols and colors as you click them. Some vines extend upward from the vase, and you can follow them across the ceiling to the top of the doorway, where a golden circle is painted with the digits 126 above/over/in front of it.
Higher
Place the chair in front of the bed, allowing you to reach the spade piece, which has a hole in it. Then pick the chair back up and place it beside the bed (next to where it came from), letting you reach the heart piece.
(You can try to reach the sack in this way, but it's tied tightly closed.)
Match
Use the spade piece on the left wooden figure. Now all three of them wear hats, and the rectangle above them lights up so that each hat appears a different color and part of the circle on the left fades into a letter V.
Colored symbols
Use the clue from the hats of the wooden figures to unlock the drawer on the other side of the room.
The hats are a purple spade, red star and green heart.
So click the buttons 10, 9 and 2 times, and unlock the drawer. (All the buttons should turn white when unlocked.)
Inside the drawer, you'll find a silver key. Also, the front of the drawer has changed: it now has a golden circle with 35 over it.
Unlock
Use the key on the pet door.
As a rabbit, you can get through easily. But the chair doesn't fit. (If you have it, put it down somewhere before going through.)
Exploration 2
The second room is exactly as you saw through the window: a fireplace with a flower painting above it with vines crawling along the wall to it, and a sunlit window where a small gentleman doll is sitting.
But there's more: the fireplace has a golden circle on it with the digit 8 over it, and the flower painting has a white petal somewhere in the middle but you can't even reach the painting anyway, and the gentleman is a little upset because there's a huge dark heart-shaped hole right in the middle of his chest.
Feels
Use the red heart on him, and he talks... but he doesn't move, because the many years of waiting around on the windowsill have paralyzed him in place.
Different
Just like that, the conversation ends and wait, something's changed in the room. Or rather, something's changing.
Click the glimmer under Sebastian (the gentleman), or just zoom in on his shoes. A golden key hangs from his left shoe.
Sebastian tells you that he's different from the other dolls.
Unlock 2
Use the golden key to unlock the lock on the shelf with the wooden figures, allowing you to take the whole mobile, and then the scissors behind it.
Snip
Pick up the chair again and place it against the shelves, then use the scissors on the sack, dropping its contents onto the floor.
Move the chair aside, then click on the spilled Russian nesting dolls to put them back on the shelves (as well as the mobile), then pick up the pen light that's left on the floor.
Three's a crowd
Use the clue from the dolls on the shelves to unlock the music box.
The shelves have 2, 4, 1, 3, 5 dolls in total, so click the 3rd, 1st, 4th, 2nd, 5th buttons from the top.
Take the ornate key from the box, then back out and oh no, the dolls are gone!
Unlock 3
Use the ornate key on the door to open it. The sunlight is almost blinding.
Sebastian has a tiny speech bubble, so zoom in on him to talk. He's the only doll left without an owner...
...because he's actually a miniature robot!
Now you can grab the chair and bring it to the next room, set it down and reach the flower painting. The painting moves when you click the four sides (not corners).
Glow
Use the penlight (or the mobile if you're doing this out of sequence) on each of the numbered circles to reveal some hidden clues.
Select the light and hover over each circle to reveal a letter:
Doorway top (126): N
Drawer (35):E
Shelf (47): W
Fireplace (8): S
The entire flower painting has the same background color, and it shows the letter W near the top when hovered in this way.
Numbers
Use the digit and letter clues to unlock the flower painting.
The combinations which appear together are 126=N, 35=E, 47=W, 8=S. So click the NNEWENWS edges.
Since West is up, those are the RRDUDRUL edges.
Once you enter the correct sequence, a fire poker falls out from the bottom-left corner of the painting.
Phoenix
Remove the chair and use the poker on the fireplace, retrieving a bottle of water marked with the word "flower".
Open the bottle and water the flowers in the vase, causing magical light to flow along the vines and into the painting, which is now colorful.
Replace the chair and take the white petal in the middle of the painting.
Transplant
Use the petal on Sebastian, who's able to move again. He thanks you and gives you a heart-gemmed key.
(My translation of this dialogue differs slightly from @lakhila's. I can't say I'm confident in my Japanese, but here it is:)
(polite tone throughout)
"Thank you very much.
I've returned to a mobile form.
Was your name Ussa-sama?
Can I drop the -sama?
Then, is Ussa-san okay?
Thank you for choosing something like me.
Here's the key to leave from here."
Escape
Back up into the first room, then use the heart key on the door to unlock it again. Now it opens into the blinding sunlight, and both of you run off into the distance.
(You get to enjoy an end screen with a very mesmerizing chicken.)
Quick correction for Ramen Shop: in "Pricey",
click the pink, green, yellow buttons 8, 6, 5 times (not 8, 6, 7).
Arduino Uno Price in Pakistan
That is awesome and fixing the issue which is made by Solar Inverter Pakistan
Update