
 Hello and welcome to the newest Weekday Escape!
This week we start with Selfdefiant's short and colorful game, and finish with their long and dark one. Between them you need to find your way out from tomoLaSiDo's living room with four hidden soybeans, and then solve several very cunning puzzles in kitposition's apartment. Then you find yourself in an abandoned asylum, dark, damp, slowly collapsing building...yay!
Have a good time and enjoy!
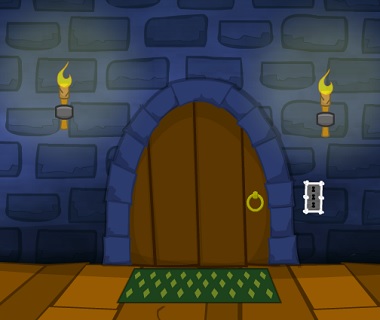
Seems that Selfdefiant trapped you inside an old castle with several friendly ghosts (on contrary to ghosts who often occupy asylums, those are purely evil as we can see later) and several locked doors. Your goal is to get three skeleton keys and escape!
The cursor is changing, autosave, one ending.
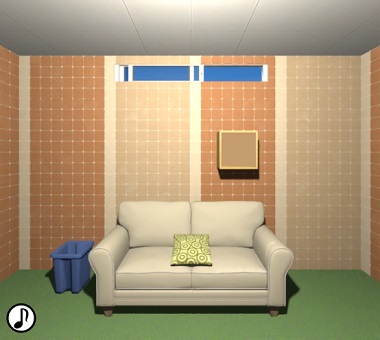
Edamame is a preparation of immature soybeans (Wiki says) so the small green balls you keep finding in tomoLaSiDo's room are apparently soybeans. Well "keep finding" isn't exactly accurate...you need to look for them and follow hints...and also find those hints. Apart from the first soybean laying in a plain sight there are four more well hidden ones. But this is a side quest only - your main target is to collect six key parts, as usual.
The cursor isn't changing, no save, one ending.
Escape from a Higher Room
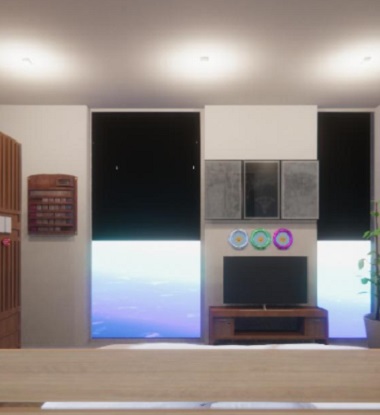
We had an opportunity to play the first kitposition's game few weeks ago (WE N°269) and their debut was well-done indeed! Now you find yourself locked in an apartment on a high floor (again) and need to solve several interesting puzzles to escape. Three notices: 1 - you need three clues to solve the calendar puzzle and thoroughful examination of the clues is crucial. 2 - you need to find five sets of tetra blocks to be able to solve the last puzzle. 3 - you don't need to understand any text in Japanese. That's all. Now you're on your own.
The cursor isn't changing, no save, one ending.
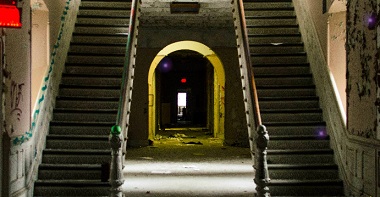
Once again and sadly, maybe for the last time (unless Selfdefiant starts doing asylums in Unity or another engine), you find yourself trapped in a cursed asylum. Your friend went missing and you decided to look for him what's not surprising since you're very experienced in supernatural business...do you remember how many ghosts you've exorcised in past months and years? Must be tens of them! You know that floating orbs can be collected in green bottles only, that you can pay with those in a special shop and buy sacred items there, and that after you find the last blood red gem (the seventh one), sockets for inserting them appear on walls and after you place the gems, the golden skull gives you a skeleton key. Can you escape?
The cursor is changing, autosave, one ending.
P.S. Here are two bonus games. Both quite good but with some technical issues. Magic Boy Room Escape by Flash 512, and Escape from Island by Dassyutu.
We love escape games, and our readers love talking about them and sharing hints! How about you? Let us know what you think, ask for clues, or help out other players in the comments below.


Interface help for Escape from a Higher Room:
The top button starts a new game, and the second continues a saved game.
Once you're in the game, there's a menu button. The top button of the menu that pops up saves the game, the second one exits to the main menu and the bottom one closes the menu.
Hmmm. I'm stuck near the end (I think) of Escape from a Higher Room. I can't figure out the 5-digit code for the cabinet. Has anyone cracked that one?
Oh, I also haven't figured out
what to do with the paper that has Japanese writing on it (I already dipped it in the water to reveal more writing). There's also a picture in the left side of the cabinet that has a hoto of the Earth with an area circled in red above it -- I haven't figured out what to do with that.
Nevermind! I figured it out -- man, that fifth puzzle piece was hard to find.
Warning Spooky Escape was bugged for me.
If you open the green box on the bookshelves before you have seen the ghost at the top of the tower then the green box is empty.
Working on a walkthrough for Edamame, but I can't find
the bonus edamame. I found the five fake ones, but I can't find anywhere else to click.
The Self Defient Spooky
Might have a bug?
For those sensitive to spoilers and just in case you clicked by accident.
When I solved the color code and George Washington's mouth drops open with the 2nd skeleton key, I found a hot spot on the left curtain. I tried to pick it up and it told me I had too many items. All I had was the key. So went to main door and placed the second key. I went back to the curtain scene and the item behind the left curtain was gone and it wasn't in my inventory.
Self Defiant another one?
For those sensitive to hints and spoilers and / or clicked by accident.
I found the clue for the arrows. Solved the arrow puzzle ...
and
the box is empty.
and
the message "You can't hold anymore items" is still displayed.
Escape from Island
Interface tips:
I think you can complete the game without it, but you can change the view by dragging with the right mouse button or using WASD or arrow keys. You can scroll in and out with the mouse wheel. The white boxes are items. Anything that lights up on mouseover when you're standing next to it either contains an item or can be used with an item. To use an item, you first need to select it. Click "Item" to open the menu, click on the item (there's a scrollbar if you have a bunch), and click OK. To interact with something in the item menu, double-click it, then click the picture of it on the left.
Walkthrough:
Password Boxes
Most of the islands have a password box, which you can't use until you've found the clue
in the bottle. You need to combine this clue with another one to get the password.
The password screen has a picture of a vertical rock. Find this rock nearby for a letter clue.
The password is only some of the letters, as indicated by the number clue.
Blue Island
Get the coins by the house and the boat frame and the shovel behind the ... smaller building of some sort.
Select the shovel and dig on the dirt pile. Then put the dirt between the shark and the bridge.
Shark Island
Grab the fishing rod, then use it to grab bottle #1 next to the capsized boat.
Blue Island again
Open the bottle for a clue. See above for help on what to do with it; the next spoiler is the password itself.
ABCDE + 123 = ABC
Open the box for a blue treasure key. Use that on the blue box to get a blue key, which opens the door to the next island.
Green Island
There's a coin in the bucket next to the tent, matches in the bush, dynamite from the barrel, and a saw next to the ... weird outbuilding.
Put the dynamite by the iceberg and light it with the matches to slide the iceberg and polar bear over. Good thing polar bears can't cross water. No, wait, that's vampires.
Polar Bear Island
Grab the net on the island and use it to get bottle #2. You know what to do with that.
Green Island again
Open the password box for a green treasure key.
FGHIJ + 135 = FHJ
Open the green treasure box for a green key and open the green door.
Fork Island
Get the coin behind the tent, the knife from the barrel, and the rock next to the palm tree. There are three more things you can do before moving on.
Use the saw on the dead tree to get a board. Throw the stone at the palm tree to get a coconut and open it with the knife for a red key, which opens the red door.
(Now there are two ways to go; you can do them in either order.)
Red Island
Get coins from the cow skull and next to the rock. Get a black key from the bucket. But where's the black door?
On the house on that island. Get birdseed, which you
put on the mysterious black spot.
Get the red treasure key, then bottle #4. Open the password box on this island for a bucket.
AASDF + 531 = FSA
Broken Bridge Island
Use the board to get there (click on the island itself with the board selected) and pick up bottle #3. Grab a coin from the bucket of fish.
Fork Island again (after going to both sides)
Open the password box for a yellow treasure key.
APPLE + 245 = PLE
Use that to get the yellow key from Broken Bridge Island and open the yellow door.
White Island
Get a coin from the bone the pickaxe from the barrel in the corner. Use that to get at the white rock in the center. Use the bucket from Red Island to catch the Portuguese man-of-war by clicking the white box next to it. (Kids, don't try this at home.) I'm not sure why, but you need to use it on
the dark door on the giant rock
to get bottle #5. Open the password box,
ORANGE + 433 = NAA
then the white treasure box to get the white key. When you open the white door, the game ends, so make sure you get the coins first if you want them.
Guide to my island names:
All directions assume the minimap has north up.
Blue Island (color names match the treasure boxes) is where you start, with a house and a boat under construction. Shark Island (small square) is to the south.
Green Island, which has a tent and a big rock, is the next island to the north. Polar Bear Island (small square) is to the east.
Fork Island is next, the only place where gameplay forks instead of being strictly linear, and the only island with four exits. To the west is Red Island. It has an outlying square island that you can't get to. To the east is Broken Bridge Island (small square).
White Island is the last, and the only big island to be square. There's a big rock to the west.
Locations of all the coins:
1. Blue Island, next to the house.
2. Blue Island, next to the boat frame.
3. Shark Island, in the bush.
4. Green Island, in the bucket by the tent.
5. Polar Bear Island, in the fire pit.
6. Fork Island, behind the tent.
7. Red Island, in the cow skull.
8. Red Island, by a rock.
9. Broken Bridge Island, in the bucket of fish.
10. White Island, in/on the bone.
@ceecee For the final part of edamame
The last page of the notes in the fake edamame will give you a hint where to put the fake ones. After you do that step back and look up high.
Put the fake ones in the bin.
can;t wait for these.
I escaped from a Higher Room, but there were several things I didn't use. Could there be two endings?
I didn't use:
It looked like a cake pan of solid ice that I got out of the freezer. I couldn't thaw it, either.
The sheet of paper.
The picture of the UFO over the planet with the circle on it.
I was stuck on the tetris puzzle for a while. I didn't know if I needed to
match colors, count the squares, make a pattern...
You need to
look at the patterns the pieces make.
They form numbers.
They open the cabinet on the right.
Click on the second piece first.
After that click on the fifth, first, fourth, and third.
The answer is
42036.
Once I entered the numbers on the cabinet my only move was to leave.
What you didn't use
the baking pan full of solid ice
goes right into the sink
after some time the ice melts
there is one set of tetra blocks in it
the sheet of paper
you can put it in the pan with melted ice
Japanese text appears
don't know what it says but it could be an info about the sets of tetra blocks
the picture of UFO
is a hint for placement of one set of tetra blocks
it's the one you find in a kitchen window
UFO stands for the green lamp imho
Thanks, midiphile.
Escape Challenge 121: Room with Edamame
Accessibility note: I provide colorblind help for the two puzzles that need it. (Note that the color sequences are different in those two spots.) There's another spot that I think should be doable without color but no guarantees. And there's one spot requiring
speed.
Walkthrough
In case you didn't read the description above, the edamame that go in your inventory (the left spot) are clues.
You can find five of these and one more, presumably real, edamame.
Three Windows
Zoom in on the table and chair. Get key part 1 (in a blue and white capsule) and edamame 1. You can also zoom in on the tree, but there doesn't seem to be anything there. Turn left.
Couch
There's a box that needs a 4-digit clue. The blue bin is empty, as usual. Zoom in on the couch and touch the pillow. A clue! Turn left.
Dresser
Obviously, the door is locked. The dresser has four drawers, which have four, three, and two buttons. The top two drawers need color clues; the bottom needs a sequence. There's also a clock with green hands. Turn left.
Table
On the table are an edamame pod that you can open for clues and a capsule machine. On the wall is a framed picture of edamame (that's not weird at all). The words don't matter, but pay attention to the frame. (But I looked them up anyway: On the thirteenth night... tastes exquisite with salt.) If you click on the recess on the right, you can go into the obligatory bathroom. You don't need to, but as usual you can click on the toilet and then follow the arrows to find a doodle.
Bottom Drawer
The pillow gives you the code for the bottom dresser drawer.
RLRLL
Get key part 2.
Middle Drawer
Where have we seen three circles in that arrangement?
The windows.
Blue (2 clicks) on top and green (1 click) on the bottom.
Get key part 3.
Top Drawer
Where are there four colored circles?
The edamame pod on the table. Open it, then open the two edamame.
Green (2 clicks) on the left. Blue (3 clicks) and yellow (1 click) on the right.
Get key part 4.
Weird Machine
You can push the brown button, but you'll probably get an X. Watch the pretty edamame-pod-shaped rainbow lights.
Push the button when they're all lit up. I'm hoping the last (red) light isn't too hard for colorblind people to see.
When you get it right, the machine dispenses key part 5. (The red text says edamame.)
Wall Cabinet
This one's the hardest. You need to combine two clues, but they're both near the capsule machine.
The numbers in the edamame pod and the operations on the bottom of the picture frame.
1 2 3 4
+ + - -
4 3 2 1
=5513
That gives you key part 6.
End
Now that you have the whole key, you can open the door. You can leave now or find the hidden edamame first.
Edamame Hunt
Starting out
Double-click on that edamame you found on the first screen. It's fake, but it contains a clue for the next one, which is much better hidden than this one was.
Second
It's a picture of the plant on the dresser. Zoom in on the dresser, then click about that spot on the plant to zoom in, and you should see edamame 2 where the picture showed. It goes into the same inventory slot; check that again. Click on the paper to scroll through all the clues you've found.
Third
The bottom of a circle with two arcs underneath. That looks like the windows. Collect edamame 3 from the bottom of the top window. Check the new clue, which is #4.
Fourth
This one's clearly a clock, with the star at 9. Zoom in on the clock and open up the hole in the 9 for edamame 4. The new clue is #3.
Fifth
This one's on the door, about where a peephole would be. You already have all four clues, but you get another note. What next?
Last
Throw out the edamame in the blue bin. Back out and click the top of the screen to get the bonus edamame off the ceiling.
Spooky Escape
Hey it's still 2020, so Halloween can be anytime.
Exploration
A locked door requires three bone keys, and it's surrounded by torches you can't take. To its right in a drawer is a slider box.
Go left to find bookshelves with loads of crystal balls, a candle and a box with arrow buttons. Also, a locked door.
Go right twice to find a kitchen with a cauldron over some wood. The cabinet on the left has a pentagonal lock.
Go right to find a key in a fire, a locked door, and a quest for ghost pepper.
Hot / Exploration 2
Light the candle in the fire and then use it to light a fire under the cauldron.
This gives you a black key you can use to unlock the right door.
In this laboratory, you notice a handle missing from the wall on the left, a book on the table, an empty bottle (flask) and an arrow under the test tubes.
Go right to find a closed gate. On the left, a clue is taped to the wall behind a ceiling leak.
Wet / Exploration 3
Fill the flask in the puddle, use it to put out the fire, and take the silver key.
Then use that to unlock the left door.
There's a ghost here who doesn't want anything, and in front of the statue is a pedestal with four colored buttons.
Puzzles
The clue for the buttons is
the test tubes in the lab.
Red Green Yellow Purple
(3 1 4 2)
The clue for the slider box is
the crystal balls on the bookshelf.
0 2 1 3 1 2 clicks.
Take the handle from it, and place that on the wall of the lab.
This opens the gate, and outside you see a ghost who wants perfume.
The clue for the cupboard beside the cauldron is the
book in the lab
Left, Right, Bottom-left, Top, Bottom-right
Take the pepper and give it to the ghost to get a bone key.
Use the clue from the
note beside the gate
to unlock the box on the bookshelf:
In the order of the arrow:
L, DR, DL, UL, D
Take the perfume and give it to the ghost to get another bone key.
Place all three bone keys in the door on the first screen, and leave!
Escape From a Higher Room
This room isn't much larger than the previous, but it certainly has more space.
Exploration
You start off facing a door with a three-symbol lock. The plant pot on the left has a key in it.
Turn right. There's some difficult books on the bed with a note hidden in them. On the left, you can pick up a robot cleaner from its stand, and on the right is a basket with some blocks in it and an arrow on the floor. Clicking the basket lifts it from the wooden frame to reveal a clue.
And of course there's something under the bed, but you can't reach it.
Turn right to face wooden doors. The left one has a keyhole while the right has a five-digit lock.
Turn right. From this awkward viewpoint behind the bed, you can see a calendar for December (seems wrong though) to the left of a television screen above a locked drawer and an unlocked drawer that contains a screwdriver. Above the TV, you can zoom in on the colored weather buttons.
What does the note say?
"In the end, they're not just left behind.
The last 5 digits are…"
On the back the translation is more difficult:
"Together with the brilliance of the pure waterside…"
Symbols / Exploration 2
Unlock the three-symbol door by entering the code
from the bin:
Star Heart Hexagon
This opens the way to the kitchen! The kitchen table has a weird arrangement of cubes, some of them lit up, some of them with levitating rings.
The sink doesn't work (why are all these rooms broken?) but you can open the fridge next to it to find an ice cube tray in the freezer. It's too heavy to carry, so you leave it in the sink.
Turn right. The windows here offer the best view of Earth, but now is not the time for that. Speaking of, the wall clock isn't set.
Turn right to face the doorway back.
Turn right again. Curiously, there's a lamp in the corner of the room.
Since you've looked around the room, check the sink again. The ice has melted and you can take some more blocks from it.
Disk
Use the vacuum under the bed. When you check it again, you find a key stuck in the right wheel.
Use the screwdriver to pry the key out.
Put the vacuum back on its stand, and use its clue to unlock the wall clock:
Push the red button once and green 7 times.
Take the block there. You can also use the screwdriver to remove the battery from it.
Unlock (twice)
Use the round key on the left wooden door. You find more blocks and a clue drawing.
Also use the square key on the drawer under the TV. It contains a remote.
Vision
Insert the batteries in the remote and use it to turn on the TV.
There's a 10 day forecast that uses the same icons as the buttons above!
You can also use the remote again to view a commercial for the first game. The fine print there tells you it has no relation to this game's puzzles.
The clues for the weather buttons are
the TV, the calendar and the kitchen table.
The layout of the table cubes matches that of the calendar.
Matching the colors on the buttons to those on the table, you find that they represent the days 11, 14, 16.
The forecast for those days is
Sunny, Cloudy, Rainy
This opens up a panel above the buttons, but before you can even read the wall of text that's there the game tells you that you're missing some items.
Well alright, let's keep looking. How about that drawing earlier? Surely there's no UFO floating around here?
I guess a lampshade will do. Click the horizon through the window under the kitchen lamp to find the last set of blocks.
Blocked
The last puzzle (above the TV) works exactly as you might expect. But the rules also say that a hint is hidden in the room.
As hinted by the note, the uncovered space should form 5 digits.
You can see based on the space that's already there that the first digit must be 4 and the third 0.
This determines the first and third pieces, which forces the second digit to be 2, which determines the second piece. The loop can only go in the last spot, which leaves only one choice for the fourth piece…
Click the
2nd 5th 1st 4th 3rd
pieces, and then JUDGE.
The code for the other wooden door is now clear:
42036
You've escaped! …into space?
Thanks again KK.
Asylum 2020
This may indeed be the last time you ever play this game, so I'll recommend you use their full screen link to play it at a more enjoyable size.
Jar
Let's keep it simple and go straight to the jar.
Up, Left, Up, Left.
The sacred jar is hiding at the bottom of the suitcase pile. With it, you can collect the 4 purple orbs on the screen.
Map
(Number of orbs in parentheses.)
Go east (4). There are unlit candles here.
Go south (4). Numbers are underlined on the wall.
Go west (4). You can now buy a map from Orb Shop! Using it, you can tell that you're now at F.
Going south
Go east twice to H(4), and pick up the book on the stairs.
Go south to C(4), where you started.
Go west to B(4), which has an evil spirit you must DESTROY.
Go west to A(3). On the bowling ball, you find a magnetic talisman necklace.
Go east thrice to D(4). A mysterious pattern of skulls hangs on the wall.
Go east to E(3). This may be straight out of a horror movie, but I'm sure there's something of worth in that bath.
Use the talisman to draw out a purple key.
Purple
Go west twice, then north, then east. You should end up at I(4), a corridor full of glass panes and mirrors. There's a panel next to the door full of complicated symbols.
Go east. There's a door with a purple keyhole, so use the purple key on it.
J(4) has another pattern of skulls, but don't let that distract you from
the batteries on the windowsill.
Go north to O(3), which has an X marked on the wall.
Break / Ball
That's a dead end, so let's back up a bit to I, and then go north to N(3) to pick up a hammer. The doorway to the north has a silver keyhole.
Use the hammer on the X mark at O, which reveals a blue key.
Walk to M(4), which also has
a flashlight on the left windowsill
and then cash in your orbs at the Orb Shop for a fancy crystal ball!
Blue
Now you can just open up the map and click M to teleport to it!
Go north, use the blue key, and you arrive at R(4), which features a treasure chest with a seven-letter lock.
Go west to Q(4), which has a shoe under the colored numbers. North of here is a gold keyhole door.
Go west to P(4), which is pitch dark.
No problem! Just put the batteries in your flashlight, and use that on the screen to find a silver key.
Silver
Use the key north from N to reach S(4). The floors aren't polished, they're sinking, but you can still check the shelf on the left to find a safe with a good old dial.
Go east to T(4), which features another evil spirit.
Go west and then north to X(3). The north door has a green keyhole.
Go east to Y(2), which has
a closed electrical box on the right wall.
Treasure / gold
The code for the treasure chest at R is
the instruction at B:
DESTROY
Take the screwdriver, and then use it to open the box at Y, which contains a gold key.
Go to Q and use the gold key on the north door to reach V(4). On the stretcher is a grid of tiles.
Go west to U(4) which has some lighter fluid on the table.
Go east twice to W(4), which has a game board in the lower left.
Go north to AA(2), featuring a skull on the wall.
Go south, west, north to Z(2), which has a slider box.
Slider / Green / Light
The clue for the slider box is
the numbers at Q.
from 1 to 5:
Yellow Black Blue Green White
(2 5 1 3 4 clicks)
Take the green key.
Use it north of X to reach AB(2), where you can take the lighter.
Use the fluid on the lighter, and then use that to light the candles at L:
The candles go out unless you light them in the correct order. This means you can use the candles that don't go out to deduce this order:
3, 1, 5 ,2, 4
You get a red gem.
Hunt
By the way, you've visited every room and should now have 44 orbs.
Buy up the sacred dagger and sacred cross.
Use them to defeat the spirits at T and B, getting 2 red gems.
(Your inventory should be filling up now. Remember that you can switch the inventory rows, as well as move items by using them on the empty slots.)
Memory
Play the memory game at V:
To make it easier to read, here are the six near pairs:
2 - 5 - 6 4

- 1 6 - - -

1 5 2 4 3 -

- - - 3 - -
and here are the six far ones:
_ 2 _ 1 _ _

5 _ _ 6 5 4

_ _ _ _ _ 3

6 4 3 _ 1 2
You get a red gem at the end of it.
Solitaire
Use the skull clues at D and J to place the pegs at W:
Click once for black, twice for white. (Unless you run out of black.)
_ _ w b _ _

_ _ b w _ _

b w w b b w

b b b w b b

_ _ w b _ _

_ _ b w _ _
You get another red gem.
Sliders
Use the book clues to solve the panel at I:
Click the top and bottom buttons 6 and 3 times.
Click the left and right buttons 7 and 5 times.
Click the top-left and bottom-right buttons twice.
Click the bottom-left and top-right buttons once.
A red gem appears in the middle.
Safe
Use the clue from G to unlock the safe at S:
Blue, Red, Green = 8, 23, 6
Click the left half of the dial 8 times.
Click the right half of the dial 25 times (until it lands on 23).
Click the left half of the dial 23 times (until it lands on 6).
Turn the lever.
Take the red gem.
Deadly
You should now have red gems from B, I, L, S, T, V, W.
Place them in the walls at
A, F, K, N, S, X, AB
Take the skull key from AA and use it on the door south of C. You've escaped!
Update