An adventure of epic proportions. Perfect for young readers.

The Room Two


  • Currently 4.6/5
  • 1
  • 2
  • 3
  • 4
  • 5
Rating: 4.6/5 (45 votes)
Comments (13) | Views (14,139)

The Room Two

JohnBThe Room is back! After Fireproof Game's wildly successful 2012 mobile point-and-click puzzle game, the team got to work on a sequel. The Room Two is now ready to impress, taking just about everything that made the original so perfect and making it even better. Dozens of layered puzzles to solve, multiple boxes in each room, a spyglass to give you a new perspective on locations, and the same dark, haunting atmosphere that make the games so irresistible.
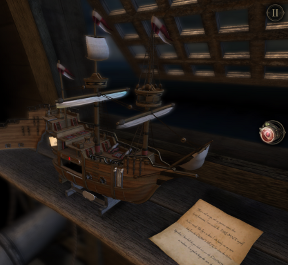
The Room TwoEach chapter in The Room Two features sets of boxes you must figure out how to unlock. It's more than just "find key, insert into keyhole, celebrate", as each of these containers is riddled with tiered puzzles to solve, often requiring pieces to be brought in from elsewhere. Even the word "box" is a bit of a misnomer, as you'll be pulling apart everything from model ships to treasure chests to entire table tops. Oh, and plenty of actual boxes, too.

Navigation is an elegant affair with The Room Two. To shift from one box to another, simply pinch to zoom out, just like you're browsing a web page on that fancy mobile device of yours. Tap and drag to look around each area. Double tap to zoom in on an item of interest, then slide your finger to take a look at the object from different angles. You can also interact with many objects, such as pulling out drawers, flipping levers, taking off lids, rotating inventory items, etc.

SEE ALSO ON JAYISGAMES: The Room

A handy spyglass quite literally adds a new layer to every puzzle. Certain clues can only be seen by swapping the lens, sort of like those old decoder puzzles you'd get in your cereal (if you ate the fun cereal as a kid). This not only forces you to look beyond the puzzle you're trying to solve, it also contributes to the tightly-knit spaces that give The Room Two such a brilliantly claustrophobic feeling. The walls aren't closing in on you, you just feel like it's those boxes and you, nothing else exists.
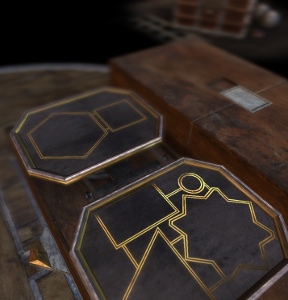
The Room TwoAnalysis: The Room Two is such a brilliantly crafted work of art, it's difficult to even draw comparisons to other games in the genre. The production values are extraordinarily high, featuring detailed models with lighting effects that make objects look eerily realistic. The atmosphere is unparalleled. Spotlights illuminate only the boxes you're working on, leaving everything else sitting just beyond the shadow line, teasing your mind with what secrets are behind the veil. Finish the chapter and you just might find out.

The touch interface works really well for The Room Two, although it does feel slightly sluggish from time to time. There's an integrated hint system that appears after several moments of inactivity, pointing you in the right direction without spoiling things right away. It's the perfect brand of nudging games like this need, allowing you to do things on your own but whispering secrets in your ear so you don't get frustrated.

If you've played through The Room, you'll immediately notice that The Room Two is a bit more straightforward than its predecessor, despite featuring multi-boxed chapters. Puzzles seem to fall into place with less effort and thought, and since your attention is divided between multiple areas, some of that razor focus is lost. Still, it's not a disappointing sequel by any means.

Quiet, mysterious, layered with intrigue, and delightfully cerebral. The Room Two knocks everything up a notch for the room escape genre.Unlocking boxes has never been this complex or provocative. And we never want it to end!

NOTE: This game was played and reviewed on the iPad 3. Game was available in the North American market at the time of publication, but may not be available in other territories. Please see individual app market pages for purchasing info.

Walkthrough Guide


(Please allow page to fully load for spoiler tags to be functional.)

The Room 2 Walkthrough

This walkthrough is still a work in progress. Please check back soon for more updates!
Chapter 1 - The Crypt

Part 1 (Tutorial)

  1. First, tap the screen to begin the game. Tap the folded paper on the table twice to examine it.

    • Swipe from right to left over the paper to unfold it. The EYEPIECE will be added to your inventory automatically.

      • Tap the EYEPIECE at the top of your inventory bar (on the left side of the screen) to find the lens is broken.

      • Press the arrow button on the right side of the screen to exit the inventory screen.

    • Use a pinching motion on the screen to zoom out from the note. Zoom out again to view the entire room.

  2. Double tap the table at the left side of the area to take a closer look. Double tap the round box on the table for a close-up view.

    • Drag the gold cover clockwise in a circular motion to lift it up.

    • Press the revealed button to unlock the round box lid.

    • Drag the lid of the box up to open it and view the puzzle inside.

      • Insert the three gold plate pieces into the matching spaces at the center of the broken disc.

      • To begin with, the correct section of the disc is already aligned with the lower left piece, so you can simply drag the piece up into the space to insert it.

      • Rotate the disc to the right so that the t-shaped space is adjacent to the t-shaped piece, then drag the piece into the space.

      • Turn the disc right one more time to align the final space with the final piece and complete the puzzle.

  3. After the puzzle is solved the camera angle will shift to the side drawer at the bottom of the box. Tap and drag the handle towards the right to slide the drawer open.

    • Take the LENS inside the opened drawer, which will automatically repair the EYEPIECE.

  4. The camera will shift again to the inside of the raised box lid. Tap the completed EYEPIECE at the right side of the screen to equip it.

    • A bright red fingerprint on the button in the lid will become visible. Tap it to open a hidden compartment and take the SHAPED METAL PIECE 1/2 inside.

  5. Tap the EYEPIECE again to remove it.

Part 2

  1. Pinch the screen to zoom out once.

  2. Turn the camera to the opposite end of the table where you'll find an envelope. Double tap it to zoom in

    • Tap the letter inside the envelope to read it.

    • At the edge of the table directly underneath the envelope is the other SHAPED METAL PIECE 2/2. Tap it to add it to your inventory

  3. Zoom out twice to return to the full view of the room, then double tap the table on the right to view it more closely. From there, turn the camera right to face the front of the table and double tap the two hexagonal spaces on the surface to zoom in.

    • Put both SHAPED METAL PIECES into the two spaces by dragging from your inventory and releasing them over each space.

    • Two gold discs with a small round hole in the center will appear beside the hexagonal pieces. You can see an object through the hole, but it's too small to pull out. You'll have to make the hole bigger!

    • Turn the discs so that the larger cut-out sections meet in the middle, allowing the golden orb underneath the discs to pass through the hole.

    • Tap the BRASS SPHERE to add it to add it to your inventory.

  4. Zoom out, then examine the letter you opened earlier beside the large compass at the center of the table.

    • Equip your EYEPIECE to view a hidden message at the bottom of the note.

      • Five red letters appear on the page: S E S W N.

  5. Back away from the letter, then double tap the compass to examine it next.

    • Place the BRASS SPHERE into the space in the middle of the compass to begin a puzzle.

      • Turn the dial of the compass to point the diamond at the cardinal directions, North (N), South(S), East (E), or West (W) in the correct order.

      • Each time the diamond passes one of the directions, its letter will appear in the buttons underneath the eye. If you release the dial too early, the puzzle will reset.

      • Input the letters in the order you saw from the hidden message on the note: S E S W N, or, South East South West and North.

        • First turn the dial clockwise to South.

        • Next, turn the dial counter-clockwise to East.

        • Thirdly, turn the dial lockwise again to return to South.

        • Continue moving clockwise to West.

        • Lastly, turn the dial clockwise further to North.

      • Release the dial to submit your solution.

    • Once the puzzle is complete, take the MEDALLION from the opened eye in the middle of the compass.

  6. Tap the MEDALLION in your inventory to take a closer look at it.

    • Using two fingers, simultaneously swipe the upper left and upper right sides of the medallion outward (in the directions indicated by the two arrows) to rearrange the shape of the medallion into a square.

  7. Zoom out twice to view the room again, then go back to the table on the left. Double tap the square box at the center of the table to inspect it.

    • Place the now square MEDALLION into the matching square space at the top of the box to reveal the spot light.

  8. Double tap the spot light to move behind it, then tap your EYEPIECE to equip it. Now you can drag the spot light to move it around

    • Sweep the light around the area until you locate a red rune. Aim the light at the rune to highlight it.

    • After each rune is found, the spot light will shift to the next location where you must find another rune.

  9. When you've highlighted all three red runes the camera will shift automatically to the angel statue.

    • Turn the top half of the box in the statue's hand so that the two halves of the red pattern on the front of the box are aligned.

  10. Next, the scene will transition to a group of floating red segments and your EYEPIECE will activate.

    • The goal is to recreate the pattern shown at the lower right corner that also flashes intermittently on the screen.

    • Turn the camera to face the stationary red lines on the wall. Now adjust the angle of your view so that the floating red segments are aligned with the red lines, creating the completed pattern and completing the chapter.

Chapter 2: The Ship

Part 1: Model Ship

  1. Double tap the small model ship on the windowsill by the open window to move towards it.

  2. Tap the note to the right of the ship twice to read the clue.

    • Note the capitalized words in the message that all describe three parts of the ship: The fore-mast, the crow's nest, and the cannons.

  3. Zoom out from the letter, then double tap the first area named in the letter, the fore-mast (the mast nearest the front of the ship), for a closer look.

    • At the bow of the ship directly underneath the slanted fore-mast, you'll see a peg that appears to be missing something. Note that information for later, then zoom back out.

  4. Next, take a look at the second area named in the letter: the crow's nest. Double tap the structure underneath the long nets at the middle of the second tallest mast to find the crow's nest.

    • At the side of the structure you'll see a misaligned diamond pattern. Rotate the two halves of the pattern until you find a split image of a knotted rope.

    • Adjust the top and bottom halves so that the rope image is connected to unlock a secret compartment in the crow's nest, then take the SMALL GOLD KEY inside.

  5. Back up from the crow's nest, then investigate the last area mentioned in the letter, the cannons, on the deck of the ship.

    • Here you'll see four cannons, two of which are set on a track in the deck.

    • Move the left cannon to the end of the track by dragging it first to the left, then rotating it 90 degrees clockwise, then dragging it down.

    • Now move the right cannon by dragging it down, pulling it left, and then dragging it down again.

  6. This will open three of the portholes at the side of the ship. The first two portholes contain a cannon, but the third porthole has a keyhole.

    • Use the SMALL GOLD KEY on the lock in the third porthole. Turn the key to open the lock, which pops out the back half on the starboard side of the ship.

  7. Drag the side of the ship outwards to look inside.

    • Take the STRANGE SHAPED KEY from the middle deck.

    • Between the middle and lower deck is a mechanism with a red gem half on the left side and an empty slot for another half on the right side. Drag the gem on the left all the way to the middle of the mechanism.

  8. This will unlock the treasure chest and cause the camera to shift to that area automatically.

13 Comments

Can't wait for this to come to android. I have the Original and the Epilogue.

Reply

These are soooooo pretty! I wish they made them for the iPhone.

Reply

I will happily buy this the second it becomes available for iPhone.

Reply
Patreon Donator Infant Tyrone December 15, 2013 1:39 PM

Oooh I'll be in line for the iPhone release too.

Reply

The Room 2 Walkthrough

This walkthrough is still a work in progress. Please check back soon for more updates!
Chapter 1 - The Crypt

Part 1 (Tutorial)

  1. First, tap the screen to begin the game. Tap the folded paper on the table twice to examine it.

    • Swipe from right to left over the paper to unfold it. The EYEPIECE will be added to your inventory automatically.

      • Tap the EYEPIECE at the top of your inventory bar (on the left side of the screen) to find the lens is broken.

      • Press the arrow button on the right side of the screen to exit the inventory screen.

    • Use a pinching motion on the screen to zoom out from the note. Zoom out again to view the entire room.

  2. Double tap the table at the left side of the area to take a closer look. Double tap the round box on the table for a close-up view.

    • Drag the gold cover clockwise in a circular motion to lift it up.

    • Press the revealed button to unlock the round box lid.

    • Drag the lid of the box up to open it and view the puzzle inside.

      • Insert the three gold plate pieces into the matching spaces at the center of the broken disc.

      • To begin with, the correct section of the disc is already aligned with the lower left piece, so you can simply drag the piece up into the space to insert it.

      • Rotate the disc to the right so that the t-shaped space is adjacent to the t-shaped piece, then drag the piece into the space.

      • Turn the disc right one more time to align the final space with the final piece and complete the puzzle.

  3. After the puzzle is solved the camera angle will shift to the side drawer at the bottom of the box. Tap and drag the handle towards the right to slide the drawer open.

    • Take the LENS inside the opened drawer, which will automatically repair the EYEPIECE.

  4. The camera will shift again to the inside of the raised box lid. Tap the completed EYEPIECE at the right side of the screen to equip it.

    • A bright red fingerprint on the button in the lid will become visible. Tap it to open a hidden compartment and take the SHAPED METAL PIECE 1/2 inside.

  5. Tap the EYEPIECE again to remove it.

Part 2

  1. Pinch the screen to zoom out once.

  2. Turn the camera to the opposite end of the table where you'll find an envelope. Double tap it to zoom in

    • Tap the letter inside the envelope to read it.

    • At the edge of the table directly underneath the envelope is the other SHAPED METAL PIECE 2/2. Tap it to add it to your inventory

  3. Zoom out twice to return to the full view of the room, then double tap the table on the right to view it more closely. From there, turn the camera right to face the front of the table and double tap the two hexagonal spaces on the surface to zoom in.

    • Put both SHAPED METAL PIECES into the two spaces by dragging from your inventory and releasing them over each space.

    • Two gold discs with a small round hole in the center will appear beside the hexagonal pieces. You can see an object through the hole, but it's too small to pull out. You'll have to make the hole bigger!

    • Turn the discs so that the larger cut-out sections meet in the middle, allowing the golden orb underneath the discs to pass through the hole.

    • Tap the BRASS SPHERE to add it to add it to your inventory.

  4. Zoom out, then examine the letter you opened earlier beside the large compass at the center of the table.

    • Equip your EYEPIECE to view a hidden message at the bottom of the note.

      • Five red letters appear on the page: S E S W N.

  5. Back away from the letter, then double tap the compass to examine it next.

    • Place the BRASS SPHERE into the space in the middle of the compass to begin a puzzle.

      • Turn the dial of the compass to point the diamond at the cardinal directions, North (N), South(S), East (E), or West (W) in the correct order.

      • Each time the diamond passes one of the directions, its letter will appear in the buttons underneath the eye. If you release the dial too early, the puzzle will reset.

      • Input the letters in the order you saw from the hidden message on the note: S E S W N, or, South East South West and North.

        • First turn the dial clockwise to South.

        • Next, turn the dial counter-clockwise to East.

        • Thirdly, turn the dial lockwise again to return to South.

        • Continue moving clockwise to West.

        • Lastly, turn the dial clockwise further to North.

      • Release the dial to submit your solution.

    • Once the puzzle is complete, take the MEDALLION from the opened eye in the middle of the compass.

  6. Tap the MEDALLION in your inventory to take a closer look at it.

    • Using two fingers, simultaneously swipe the upper left and upper right sides of the medallion outward (in the directions indicated by the two arrows) to rearrange the shape of the medallion into a square.

  7. Zoom out twice to view the room again, then go back to the table on the left. Double tap the square box at the center of the table to inspect it.

    • Place the now square MEDALLION into the matching square space at the top of the box to reveal the spot light.

  8. Double tap the spot light to move behind it, then tap your EYEPIECE to equip it. Now you can drag the spot light to move it around

    • Sweep the light around the area until you locate a red rune. Aim the light at the rune to highlight it.

    • After each rune is found, the spot light will shift to the next location where you must find another rune.

  9. When you've highlighted all three red runes the camera will shift automatically to the angel statue.

    • Turn the top half of the box in the statue's hand so that the two halves of the red pattern on the front of the box are aligned.

  10. Next, the scene will transition to a group of floating red segments and your EYEPIECE will activate.

    • The goal is to recreate the pattern shown at the lower right corner that also flashes intermittently on the screen.

    • Turn the camera to face the stationary red lines on the wall. Now adjust the angle of your view so that the floating red segments are aligned with the red lines, creating the completed pattern and completing the chapter.

Chapter 2: The Ship

Part 1: Model Ship

  1. Double tap the small model ship on the windowsill by the open window to move towards it.

  2. Tap the note to the right of the ship twice to read the clue.

    • Note the capitalized words in the message that all describe three parts of the ship: The fore-mast, the crow's nest, and the cannons.

  3. Zoom out from the letter, then double tap the first area named in the letter, the fore-mast (the mast nearest the front of the ship), for a closer look.

    • At the bow of the ship directly underneath the slanted fore-mast, you'll see a peg that appears to be missing something. Note that information for later, then zoom back out.

  4. Next, take a look at the second area named in the letter: the crow's nest. Double tap the structure underneath the long nets at the middle of the second tallest mast to find the crow's nest.

    • At the side of the structure you'll see a misaligned diamond pattern. Rotate the two halves of the pattern until you find a split image of a knotted rope.

    • Adjust the top and bottom halves so that the rope image is connected to unlock a secret compartment in the crow's nest, then take the SMALL GOLD KEY inside.

  5. Back up from the crow's nest, then investigate the last area mentioned in the letter, the cannons, on the deck of the ship.

    • Here you'll see four cannons, two of which are set on a track in the deck.

    • Move the left cannon to the end of the track by dragging it first to the left, then rotating it 90 degrees clockwise, then dragging it down.

    • Now move the right cannon by dragging it down, pulling it left, and then dragging it down again.

  6. This will open three of the portholes at the side of the ship. The first two portholes contain a cannon, but the third porthole has a keyhole.

    • Use the SMALL GOLD KEY on the lock in the third porthole. Turn the key to open the lock, which pops out the back half on the starboard side of the ship.

  7. Drag the side of the ship outwards to look inside.

    • Take the STRANGE SHAPED KEY from the middle deck.

    • Between the middle and lower deck is a mechanism with a red gem half on the left side and an empty slot for another half on the right side. Drag the gem on the left all the way to the middle of the mechanism.

  8. This will unlock the treasure chest and cause the camera to shift to that area automatically.

Reply
https://www.google.com/accounts/o8/id?id=AItOawn7OLIj_H72dXQOC-zM_JCUphdl3Mp-_b4 December 19, 2013 11:33 PM

The Room Two Walkthrough

Chapter 1: The Crypt

Following Instructions

Hey, this is the tutorial, you know...
-Zoom in on the square table.
-Zoom in on the note.
-Swipe in the direction of the arrow.
-Tap to continue.
-Open up the EYEPIECE in your inventory. Close it down.
-Zoom out twice, then zoom in on the table to the left.
-Zoom in on the round box.
-Spin the circle up.
-Push the revealed button, then swipe the lid up.
-For this puzzle, spin the circle in the middle until you can slide the pieces on the outside inwards to fill the gaps.
-Slide the revealed drawer open.
-Take the PECULIAR LOOKING LENS.
-Tap the eyepiece icon on the right.
-Press the revealed fingerprint.
-Collect the SMALL PIECE OF SHAPED METAL.
-Tap the eyepiece icon again to remove it.

First Steps

-Zoom out once, and zoom in on the small gold hexagon on the side of the table, near the envelope.
-Collect the SMALL PIECE OF SHAPED METAL (2).
-Zoom out twice, then zoom in on the square table.
-Zoom in on the two hexagon shaped holes, and place both SMALL PIECES OF SHAPED METAL into them. If done correctly, a panel will open.
-Spin each gold disc until their large holes are in the center.
-Collect the STRANGE BRASS SPHERE.
-Zoom out once, and don the eyepiece.
-Zoom in on the note, and remember the code at the bottom.
-Zoom out once, and remove the eyepiece.
-Zoom in on the strange plate in the center of the table.
-Place the STRANGE BRASS SPHERE into the gap in the center.
-See that little gold diamond to the bottom right? Drag that thing around the circle to see what happens.
-Enter the code from the note (SESWN). Drag the diamond to the S, then to the E, then the S again, the W then the N. Don't let go until you're finished.
-Collect the MEDALLION. Open it up in your inventory.
-Swipe the top-left quadrant and bottom-right quadrant in the direction of the arrows. You must do this with two fingers at the same time. If done correctly, the MEDALLION will change shape.
-Close your inventory, then zoom out twice.
-Zoom in on the octagonal table, then the box in the center of it.
-Place the MEDALLION on the top of the box.
-Zoom in on the light which pops up, then don the eyepiece.
-For this section, you need to move the light around until it is focused on a red rune. You will need to do this three times. The rune locations are: 1. Near the left. 2.Top-right. 3.Bottom-right.
-Spin the top of the device around until the red shapes match up.
-Spin the camera around until the red shapes match up. It's a little bit to the left of the angel. This will end the chapter.

Chapter 2: The Ship

The Model Ship

-Zoom in on the desk with the modek ship on it.
-Zoom in on, then read, the note to the right. It will provide some clues. Zoom out.
-Zoom in on the crow's nest (I think...) and spin each of the patterned rings until their vertical lines match up.
-Collect the SMALL GOLD KEY.
-Zoom out, then zoom in on the cannons on the ship's deck.
-Slide the cannon on the left to the left. Spin it clockwise, then slide it down.
-Slide the cannon on the right down, left, then down.
-Use the SMALL GOLD KEY on the keyhole.
-Swipe open the part of the ship which pops out.
-Collect the STRANGE SHAPED KEY. Note the pattern on it.
-Slide the ruby on the left to the center.

The Chest

-Zoom in on the gold pattern on the pole in the background.
-Spin each circle until their gaps match with the rectangle in the middle.
-Collect the SMALL KEY. Note the pattern behind it. Zoom out.
-Zoom in on the silver handle on the right side of the chest.
-Lift it, then slide it up.
-Collect the STRANGE CYLINDER. Open it up in your inventory.
-Lift both of the handles on the STRANGE CYLINDER. The bottom will change shape slightly.
-Close up your inventory, then zoom out once.
-Zoom in on the gold circle on the left side of the chest. Note the pattern. Zoom out.
-Zoom in on the bronze circle on the front of the chest.
-Slide each side of the circle down.
-Spin the wheels until the outlined patterns match with the ones found on the STRANGE SHAPED KEY, in the pole compartment, and on the side of the chest.
-If done correctly, you will be able to use your STRANGE SHAPED KEY on the keyhole.
-Swipe the lid open.

Inside the Chest

-There is a strange mechanism in the chest, requiring four puzzles to be solved. The puzzles look like grey squares.
-Zoom in on the first puzzle, which is on the underside of the lid of the chest. Use the eyepiece to reveal the puzzle.
-Slide the upper quadrant anticlockwise, and the lower quadrant clockwise. If done correctly, a short animation will happen.
-Zoom in on the second puzzle, which is to the left of the mechanism. Again use the eyepiece to reveal it.
-Spin the shape anticlockwise. If done correctly, a short animation will happen.
-Zoom in on the small gold rectangle at the upper-right of the chest.
-Slide the rectangle left, then reveal the puzzle with the eyepiece.
-Slide the bottom rectangle down, and the left one to the left.
-Spin the circle anticlockwise. If done correctly, a short animation will happen.
-Zoom in on the small gold square on the bottom-right gear. Slide it down.
-Zoom in on the last puzzle, bottom-right of the mechanism. Again, put on the eyepiece.
-Slide the upper triangle to the top-left, and the lower triangle to the bottom-right. If done correctly, a completely unexpected animation will happen.
-Zoom in on the revealed hole.
-Put the STRANGE CYLINDER into the hole. Spin it clockwise.
-Swipe the mechanism up.

Chasing the Santa Helena

-Zoom in on, and read the text on the right.
-Zoom out, then zoom in on the map.
-Replicate the path of the ship with the gold coin. (2 up, 2 left, 3 down)
-Press the gold square. If the path was correct, a short animation will happen.
-Zoom in on, and read the newly revealed text.
-Zoom in on the keyhole below the text.
-The triangles can spin around the two center points. The aim is to line up the circle and the rectangle with the keyhole. The easiest way to do this is to spin the triangles on the right until the rectangle is directly below the keyhole, and there are no triangles on the keyhole. Spin the circle up, then the rectangle.
-Use the SMALL KEY.
-Once again, replicate the path of the ship. (4 left, 4 up, 2 left)
-Press the gold square. If the path was correct, a short animation will happen.
-Zoom in on the new text, and don the eyepiece.
-Use the ship's wheel to align the red shapes. Remove the eyepiece.
-Follow the ship's path again. (6 down, 2 right, 1 up.)
-Press the gold square. If done correctly, a short animation will happen.
-Zoom in on the raised tile, and collect the PAINTED FIGUREHEAD. The chest will close up.

Pieces of the Ship

-Zoom out, then zoom in on the ship again.
-Zoom in on the very front tip of the ship, and place the PAINTED FIGUREHEAD on it.
-Collect the MODEL SHIP'S WHEEL. Zoom out once.
-Zoom in on the highest deck of the ship.
-Use the MODEL SHIP'S WHEEL.
-Spin it in either direction until a short animation happens.
-Slide the peg along the path.
-Spin the... uhh... wheely thing in either direction until it stops.
-We need a code. Zoom out once, then don the eyepiece.
-Look at the foremast (I think) to see the code.
-Take off the eyepiece, then zoom in on the code input.
-Enter the code (ROSE).
-Collect the GEM.
-Zoom out once, then zoom in on the gem slider on the side of the ship.
-Put the GEM into the empty spot, then slide it to the centre.

Weighing Things Up

-Zoom in on, and collect, the golden WEIGHT on the table.
-Zoom out once, then zoom in on the scales.
-Place the WEIGHT on the rectangle.
-Swipe both sides of the box up.
-Zoom in on the left side of the box, and collect the SMALL DISC.
-Zoom out once, then zoom in on the circular gap on the front of the box.
-Put the SMALL DISC into the gap.
-Spin the disc until its slot lines up with the rectangle. Slide the rectangle into the slot.
-Collect the WEIGHT, and the SMALL DISC on the underside of the lid.
-Zoom out once, then zoom in on the scales.
-Place the WEIGHT on the square.
-Zoom in on the newly revealed circular gap.
-Put the SMALL DISC into the gap.
-Line up the slots in the disc with each of the rectangles, and slide them into the slots. Do them one at a time.
-Collect the WEIGHT.
-Spin the golden squares around the compartment around until their 'bites' seem to make a square.
-Zoom out once, then zoom in on the drawer on the left side of the box.
-Open the drawer, and take the SMALL DISC.
-Zoom out once, then zoom in on the scales.
-Open up the WEIGHT in your inventory.
-Spin the knob at the top of the WEIGHT clockwise, and the WEIGHT will change shape.
-Close up your inventory, and place the WEIGHT on the triangle.
-Zoom in on the new slots puzzle, and insert the SMALL DISC.
-Rotate the disc until the deep slot is lined up with the bottom 'notched' rectangle, and slide it in. Rotate the disc again until the deep slot is lined up with the top 'pointed' rectangle, and slide it in. Slide the outer two rectangles into their slots.
-Collect the WEIGHT.
-Spin the outside of the compartment until the two arrows match up. A SMALL DISC will be revealed. Take it.
-Zoom out once, then zoom in on the scales.
-Open up the WEIGHT in your inventory.
-Slide each of the silver bars up until they fall back down in a different way.
-Close up your inventory, then put the WEIGHT on the star.
-Zoom in on the final slots puzzle, and insert the SMALL DISC.
-Rotate the disc until the long slot lines up with the 'notched' rectangle, and slide it in. Rotate the disc 180 degrees, and take the 'notched' rectangle out of the disc and back into its original position. Rotate the disc so that the 'notched' slot lines up with the 'notched' rectangle, and slide all the rectangles into their slots.
-Collect the WEIGHT.
-Zoom out, then zoom in on the scales.
-Open up the WEIGHT in your inventory.
-Spin the knob at the top of the WEIGHT until it comes off, and the weight changes shape. You will automatically get a SMALL WEIGHT.
-Close up your inventory, and put the WEIGHT on the hexagon and the SMALL WEIGHT on the circle.

Clockworks

-Collect the SMALL ANCHOR and the METAL CLOCK SPRING.
-Zoom out twice, then zoom in on the model ship.
-Zoom in on the vertical grey line on the side of the ship.
-Place the SMALL ANCHOR onto the two holders.
-Collect the METAL STAR.
-Zoom out twice.
-Zoom in on the round table, then the brown box, then the gap in the front of the box.
-Place the METAL STAR into the gap, and spin it 180 degrees.
-Swipe the box open.
-Zoom in on the slider on the front edge of the box. Slide it to the left.
-Collect the WINDING KEY. Zoom out.
-Zoom in on the metal knob at the bottom right of the box.
-Spin the knob clockwise.
-Zoom in on the small contraption on the left of the gold cylinder.
-Slide the big brown shape to the right.
-Swipe the cylinder open.
-Outside the box, there are silver lines. Two of these can be slid down. Zoom in on and slide the bottom-right and the top-right metal lines down.
-Collect the SMALL FLATHEADED SCREWDRIVER
-Zoom out, then zoom in on the small metal cylinder in the box.
-Use the screw with the screwdriver.
-Swipe the cylinder open.
-Place the METAL CLOCK SPRING into the cylinder.
-Place the WINDING KEY into the gears on the right.
-Spin the key clockwise.
-Zoom in on the left side of the box, and put on the eyepiece.
-Slide the peg to the right. Remember the time.
-Zoom out, then zoom in on the clock in the box.
-Spin the center wheel until the hands match the time you saw earlier (2:50).
-Press the square buttons when the gaps of their corresponding wheely things are facing up.
-Take the KEY.
-Zoom out, then zoom in on the very top of the lid of the box.
-Use the KEY on the keyhole.
-Zoom in on the circle, and don the eyepiece.
-Spin the circles until you make a picture of a ship.
-Zoom in on, and take the DIAMOND SHAPED METAL CASTING.
-Put the DIAMOND SHAPED METAL CASTING on top of the pyramid.
-Spin the cylinder until a very strange animation happens.
-Rotate the camera until the red shapes align. It is a little bit to the left of the chest. This will finish the chapter.

Chapters 3&4 coming soon.

Reply
https://www.google.com/accounts/o8/id?id=AItOawn7OLIj_H72dXQOC-zM_JCUphdl3Mp-_b4 December 21, 2013 5:40 AM

My Chapter 3 walkthrough didn't show up for some reason :(

Time to write it allllllll again...

Reply

Walkthrough for Chapter 3: The Temple

Confined Space

Use the EYEPIECE - there is an arrow shape pointing upwards. Follow it up to a METAL BAR, which you can remove by sliding it to the left. This will make the wall fall down, opening up the main room.

Exploration

Around the room, you can see:

  • a table with a model of a wooden house;

  • a crossbow in front of a hole in the wall;

  • a chest next to a strange stone thing and a sand tray;

  • and a blank panel on the wall.

Building and Firing the Crossbow

Start off by looking at the chest. Rotate the handle on the side, slide it out and collect the LENGTH OF STRING from inside.
Now move on to the sand tray. Slide your finger over the tray to reveal the shapes underneath.
Next up is the wooden house. Read the note behind the house for some background info if you like, then move around to the panel on the front with the shape in the middle. Slide it to the right, then the left, and then the right again to reveal a switch. Slide the switch to open a panel containing a SMALL TOKEN. Take the GOLD TOWER from the roof of the house as well.
Next, the crossbow. Pick up the SMALL WOODEN HANDLE, then put the METAL BAR and the LENGTH OF STRING onto the crossbow.
Back on the wooden house, find the side with the shapes and use the SMALL WOODEN HANDLE on the holes. Use the handle to move the panel up and down and slide the shapes into the holes with the same pattern. Pick up the TRIGGER MECHANISM from inside.
Put the TRIGGER MECHANISM onto the crossbow. Once it is complete, a drawer will open containing CROSSBOW BOLTS - take one. Attach it to the crossbow and pull it back, then zoom in on the trigger, aim for the hole in the wall and slide the lever to the right to fire. If you miss, just pick up another BOLT from the drawer and try again. When you get one into the hole, it will reveal a broken mirror, box and handle where the blank panel was.

Opening the Small Box and Chest

Read the note if you like, then put the SMALL TOKEN into the hole in the box. Slide it around, avoiding the skull token, and try to reach the bottom right. It's impossible, unless you...

Put the token in the middle, then slide the lever on the front to the right.

A panel will open on the side of the box. Collect the SMALL KEY from inside.
This KEY opens the chest. Use it on the left keyhole, then rotate both sides until they line up in the middle. Open the chest and collect the LARGE STONE BLOCK from inside.

Collecting Effigies and Rocks

Use the BLOCK on the handle under the table, turning the handle then releasing it with the lever. Repeat until the MIRROR SHARD is revealed.
You can guess where this goes! On the panel above the mirror, enter the code from the sand tray. This swaps the wooden house for the gold one.
Put the GOLD TOWER back on the house, collecting the revealed ORNATE, ANCIENT DAGGER. This goes on the roof of the wooden house, but how do we get there?
Slide the panel on the side of the house's roof to the right, opening the doors underneath. Use the EYEPIECE to see inside, then line up the lines to create a doorway. Do this twice, then use the symbols shown above the mirror to get the wooden house back. Use the DAGGER on the roof and collect the STRAW EFFIGY and the SMALL GEM from inside.
Look at the back panel of the house using the EYEPIECE. Record which circles have crosses in them, then switch to the gold house and look at the same panel. Use the SMALL GEM on the hole in the top left, then tap the gems that correspond to the crosses. Read the note if you like, then collect the PIECE OF FLINT from the compartment.

FIRE!

Put the STRAW EFFIGY into the circular hole in the strange stone thing by the chest and the FLINT on the strip of metal going down to it, then slide the flint down until the effigy catches fire. The flame will travel across the room and light two torches, revealing a window with two weights and a strange face.

Collecting the Skull

Reload the crossbow and fire at the bag in the window, lowering the face, and collect the METAL OBJECT from behind the face.
Put the METAL OBJECT into the chest, then close and reopen the lid and collect the METAL SHARD. Use this SHARD on the front of the house, wear the EYEPIECE, and then rotate the central piece to line up all of the pink bands. Now rotate the outer ring until the shapes line up and collect the HUMAN SKULL revealed.

Endgame

Return to the panel behind the face and put the SKULL on the panel. Pull the lever to open the skull and reveal the exit cylinder. Line up the symbol on the cylinder and with the red rods (just above the crossbow) and complete the chapter.

Reply

I'm going to find them and poke then with sticks until they release the android version.

Reply

Don't know if anybody will ever see this comment, but yesterday I discovered to my immense joy that the iphone version has been out for a couple of weeks.

Reply

It's out on Android now, btw. I just completed it. I found it to be a tad easier than it's predecessor, oddly enough.

Reply
jason9045 March 6, 2014 3:47 PM

It's in the Amazon store as well, though it seems to only be available for Kindle Fire HD. I have a second-gen Fire and it's not compatible.

Reply

^ Scroll Up | Homepage >

Leave a comment [top of page]

Please consider creating a Casual Gameplay account if you're a regular visitor here, as it will allow us to create an even better experience for you. Sign-up here!
  • PLEASE UNDERSTAND SITE POLICIES BEFORE POSTING COMMENTS
  • You may use limited HTML tags for style:
    (a href, b, br/, strong, em, ul, ol, li, code, spoiler)
    HTML tags begin with a less-than sign: < and end with a greater-than sign: >. Always. No exceptions.
  • To post spoilers, please use spoiler tags: <spoiler> example </spoiler>
    If you need help understanding spoiler tags, read the spoiler help.
  • Please Preview your comment before posting, especially when using spoilers!
  • No link dropping, no domains as names; do not spam, and do not advertise! (rel="nofollow" in use)
chrpa Jayisgames needs your help to continue providing quality content. Click for details Hi! Weekday Escape and Weekday Puzzle are here! First we have two new cans from tomoLaSiDo and then two small rooms from isotronic. That's all for this...  ...
6,365 Views
0 Comments
chrpa Jayisgames needs your help to continue providing quality content. Click for details Welcome to Mobile Monday! We have another beautiful game from Nicolet and it's a winter game as it should be. Tasuku Yahiro have released another of their...  ...
6,161 Views
2 Comments
chrpa Jayisgames needs your help to continue providing quality content. Click for details We've got a new game from Rinnogogo's magical world and this time it really is magical.. Not only do you get to meet cute animals that express themselves...  ...
chrpa Jayisgames needs your help to continue providing quality content. Click for details After a few weeks of patient waiting, we have been rewarded - the new game from Ichima Coffeedo is here. We got a wonderful new game - it's...  ...

HELP Jayisgames.com

Recent Comments


Display 5 more comments
Limit to the last 5 comments

Game of the week


Dark Romance: Vampire Origins Collector's Edition

Your Favorite Games edit

add
Save links to your favorite games here. Use the Favorites editor.

Monthly Archives