
 Hello, I have a riddle for you: what's orange, adorable, and comes every fortnight? Why, the brand-new biweekly feature known as Monkey Go Happy Roundup! In our debut installment we visit a junkyard dog, a cold cabin, a strange site with a robot looking for fuel, and a cold wintry landscape.
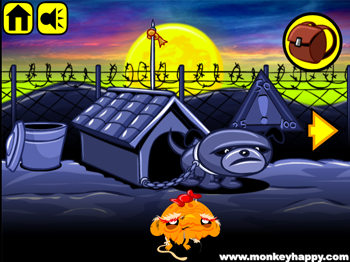
Our first stop is a dusk (or is it dawn?) scene in an abandoned, fenced in area. A dog painted in the somber colors of night sits sad and without a meal.
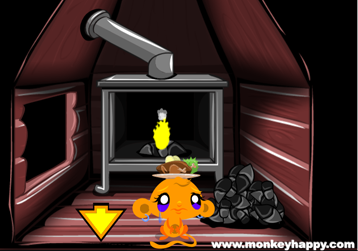
Continuing along the theme, the next stage brings our monkey to a deserted cabin. The little monkey only wants to be warm, but it turns out this will be a bitmore of a task than expected!
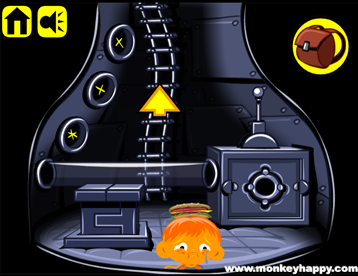
Third, you visit a site with a robot-creature who appears to be out of fuel. Help find a fuel cell for him to help him charge up!
Finally, visit a chilly snowscape where you'll have to crack codes to enter a cabin and make skis for a boy. Our primate friend looks especially cold here, so give these a try and make the monkey GO happy!


Monkey GO Happy Roundup 1 (Stage 125-128)
Don't get put off by the number of games: these are of a manageable length that you can finish them all in one lunch break. (But if you prefer, you might try spreading them out over two weeks.)
Stage 125: Dog Food
Exploration
Is it dawn or dusk? Either way, the dog chained to his house looks hungry, and he's growling and barking at you to fill his bowl. A rope dangles from a pole on the doghouse roof. There's also a warning sign on the right of the doghouse which you can click to turn upright, as well as a bin on the left which you can take a Mini Monkey from. Also take 2 Mini Monkeys from the ground.
Turn right to the shed whose door lock has three buttons that light up in different amounts when clicked. There's a bush next to it that hides a knife, and a grate in the ground that's stuck, and a bin that also contains a Mini Monkey, and 2 more Mini Monkeys on the ground.
(Current Mini Monkey total: 6)
Limit
Use the clue from the warning sign to unlock the shed door.
The (top, left, right) buttons should be lit in the proportions 50:25:100, which means they should be 50%, 25% and 100% lit.
Click those buttons 2, 1, 4 times, and then click the big button to open the shed, which is empty except for a large locked panel at the back and a magnet in the corner, as well as 2 Mini Monkeys on the wall and floor.
Length
Use the knife to cut the string off the doghouse.
Then combine the string with the magnet (in the inventory, click the Combine Items icon, then the string and magnet in either order).
Then use the magnet-on-a-string on the grate to pull a key through the bars.
Unlock
Use the key on the back of the shed to find a closed can of dog food inside, as well as a Mini Monkey.
Feed
Combine the knife with the can to open it, then the open can with the bowl to fill it, then use the full dog bowl on the dog to feed it.
The last Mini Monkey appears next to the dog.
Bonus clue from this stage: (slanted #) = 3.
Stage 126: Mountain Cabin
Exploration
You're on a rocky mountain path with heavy boulders on the side. One of the rocks is light enough to move, and it hides a Mini Monkey. Pick up the 2 Mini Monkeys on the tree and path, and also the 4 gems which are brown and pyramidal, 1 on the tree and 3 on the ground.
Move right to a screen with a bearded man in front of a cave who asks for 13 gems. One of the lower branches of the tree is shaky. Pick up the saw handle from the path. There's more boulders and a rock on the path which can be moved to reveal a Mini Monkey. Pick up the other 2 Mini Monkeys which are on the tree and among the boulders, as well as 3 gems, 2 on the left and right of the tree and 1 in the lower right.
Go back to the first screen, and enter the cabin. The fireplace is lit, but the room is still cold. Perhaps the pile of coal on the side might help, but you don't have a way to move it. The chimney pipe has a saw blade resting on it. In the left wall, there's a panel with four buttons that cycle through various decorated patterns when clicked. (The exact order of patterns is slightly different between the buttons.) Pick up the 2 Mini Monkeys from the fireplace, as well as 2 gems from the lower-left and upper-right corners of the room.
(Current totals: 8 Mini Monkeys, 9 gems.)
Burly
Match the patterns on the cabin wall so that they connect to form an image.
From top to bottom, the buttons should be clicked, 4, 1, 2, 3 times.
Open the wall panel to get a Mini Monkey and a gem.
Rod
Assemble the saw by combining its parts, then use the saw on the tree branch to get a stick.
Pry
Use the stick to move each boulder and find 3 gems: 2 on the first screen and 1 on the second.
Hoard
Use all 13 gems on the bearded man, who steps aside to let you get a shovel head.
Fuel
Combine the shovel head and stick to get a shovel, and use it on the coal in the cabin to toss it into the fire.
This warms the room and also lets you pick up the last Mini Monkey from beneath.
Bonus clue for this stage: (U with curved stroke) = 4.
Stage 127: Crash Site
Exploration
A large fireball-shaped rock in a shallow crater immediately presents a confusing puzzle surrounded by three buttons that display dark circles of different sizes when pushed. To the lower left of the rock is an empty fuel cell and a hollow device. Pick up the 2 Mini Monkeys from the rock.
Turn right to a screen where a metallic knight on a rocket platform needs a fuel cell that's shining with energy. The rock wall on the right has a grid clue with symbols for the grid safe below it, as well as a telescope-shaped staff bit above that. Also pick up the lever and button piece from the lower left, as well as the 2 Mini Monkeys from the ground and slope.
(Current Mini Monkey count: 4)
Doubled
Use the clue from the rock to unlock the grid safe.
The squares(symbols) on the grid each represent a number, in the order
123

456

789
The symbols on the rock represent 9 and 6. Twice 9 is 18, and twice 6 is 12.
So click the 1st, 8th, 1st, 2nd buttons on the safe, and it opens up to let you take a staff bit and a Mini Monkey.
Copy
Combine the staff bits to get a staff, and use it on the device next to the fireball rock.
It flashes three symbols, so use that to "unlock" the rock.
The symbols are the 2nd, 1st, 3rd in the grid.
So click the buttons on the rock 2, 1, 3 times from left to right.
Then push the staff down and the whole rock rises up to reveal a ladder down and a Mini Monkey, and the staff itself now flashes a single digit.
Exploration 2
Three circular buttons on the left wall lead to a circular pipe running into a device on the right which appears to have slots for a lever and fuel cell. On the floor, there's a square hole, a button piece and a Mini Monkey. Pick up the other Mini Monkey from the pipe.
Triple
Combine the button pieces and use the resulting button on the square hole. Also use the lever and fuel cell on the device on the right side.
Now that all three items are in place, you need to solve the remaining puzzle to charge the fuel cell.
Hint: The staff showing 3 blinks six times, so you should set six buttons to represent 3.
Look up the third symbol on the grid (which is an asterisk with three lines) and enter that into each of the three wall buttons by clicking them 2, 3, 1 times.
Also climb up and push each button on the fireball rock until their black circles are at the maximum size (3).
Once you're done, climb back down and push the square button which charges up the pipe.
Then pull the lever to charge the fuel cell.
Then pick up the charged fuel cell, which somehow now has a Mini Monkey behind it, and bring it to the rocket knight. He floats up so you can pick up the last Mini Monkey.
Bonus clue for this stage: (Sideways squarish euro) = 1.
Stage 128: Winter Scene
Exploration
You're perched on a rock in the middle of a flowing river. Along the bank, there's a three with a letter code etched into its leaves (how?), and a small cabin with a crate on the roof, whose door is locked with a four-color lock, and a lady on the path who wants a sled. Pick up the 2 Mini Monkeys on the bank and in the rock in the river.
Move left to a cave entrance with another letter code on top. There's a man here who wants fish. Pick up the 2 Mini Monkeys on the left side of the screen.
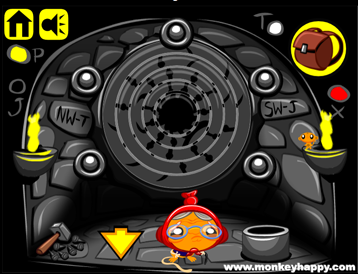
Enter the cave, which has a jumbled picture on the back wall surrounded by five buttons, as well as more letter clues on the paved walls, and letters next to colored circles around the outside of the screen. Pick up the hammer and nails from the lower left and notice the hole on the right, then pick up the 2 Mini Monkeys from the lights on the wall.
(Current Mini Monkey count: 6)
Colors
Use the letter clues to unlock the door of the cabin.
The clue NE-X indicates that the northeast quadrant should be colored X, which is red.
Reading the other clues similarly, the code for the door is
White(2) Red(4)

Black(1) Yellow(3)
So click the buttons that many times and open the door to the cabin.
The cabin is empty except for a locked panel on the back wall, a long stick on the left wall and a pair of skis on the right wall. And of course, 2 Mini Monkeys.
Assemble
Combine the skis and crate, and then the crate-on-skis with the hammer and nails.
Then give the sled to the lady, who slides down the path and leaves behind a line and hook and a Mini Monkey.
Feed
Combine the line and hook with the stick to form a fishing rod, and use that in the river to get a trout.
Give it to the man who walks away, leaving behind a lockpick.
Unlock
Use the lockpick on the back of the cabin to get a button and the last Mini Monkey.
Spin
Go back to the cave, use your button on the hole at the lower right, and use the small buttons around the wall picture to align the rings.
From the lower left in clockwise order, click the buttons 3, 5, 5, 2, 7 times.
Then push the big button. A spider drops from the ceiling, and the stage is complete.
Bonus clue for this stage: (broken triangle horseshoe) = 2.
Click the arrows at the top or the Next Stage button to proceed to the bonus stage.
Bonus Stage 32
The bonus clues from the four stages combine to form 3412.
Enter that and pull the lever to open the box!
Update