JayisGames.com is now available ad-free!
Jay is Games recommends Cheat Happens with 8,000+ games and 35,000+ trainers!

Miro Clue


  • Currently 4.3/5
  • 1
  • 2
  • 3
  • 4
  • 5
Rating: 4.3/5 (86 votes)
Comments (20) | Views (17,989)

Miro Clue

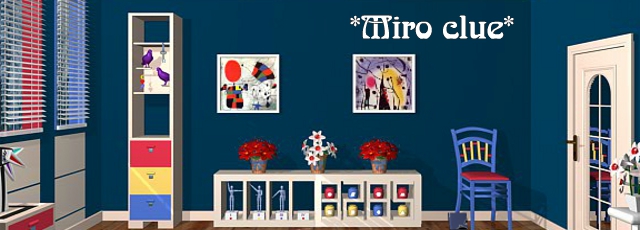
TomaTea's escape game Miro Clue isn't sad, but it sure is blue. To open the locked door and make your way to freedom, you'll need to solve your fair share of puzzles, and of course use the items you pick up and spot the clues hidden around you. If a puzzle informs you that you don't know how to solve it, that means there's something you haven't seen yet to crack it, and the tip of your in-game cursor will glow when it passes over something you can click on to interact with. Miro Clue has a very abstract art feel to it, apart from its stately soundtrack that makes you feel like the king is about to burst in and demand some hossenfeffer any moment, though the puzzles themselves are pure TomaTea through and through. There are puzzle pieces to assemble, a whole host of coded locked drawers to solve, and some clues to corresponding puzzles that are juuuuust a bit maddeningly vague when compounded with the silent judgement of wooden models. Just remember to pay close attention to your surroundings, examine items in your inventory by clicking the little "i" when you mouse over them, and if you get stuck, well, try looking at the bigger picture.

Play Miro Clue

Walkthrough Guide


(Please allow page to fully load for spoiler tags to be functional.)

Puzzle guide

  • Chair view

    • Tall shelf

      • Birds and stuff

        The birds are just a color clue.

        Birds are purple in this world.

        The moon, heart, and fish are a color clue...

        yellow moon, red heart, blue fish

        ...as well as a clue to another puzzle.

        Namely, the right picture.

        To get the key, solve the rainbow bird contraption.

        Examine the item you got.

        It opens to reveal a knife.

      • Big red drawer (left-right buttons)

        Part of the clue is in plain sight.

        Turn to the door and look at the shelves.

        But those figurines aren't arranged linearly, so we need another clue.

        Open the big yellow drawer below this one.

        Put the two together to get a left-right sequence.

        The yellow drawer tells you that the arm with the black squiggle is the one to look at (the figure in the clue has the squiggle on the right, and there's a big letter R next to it). It also tells you to "read" the shelves in the shape of an R.

        RLRLRLL

        Get: blue marker and a hand-signal alphabet.

      • Big yellow drawer (5 sliders)

        Check the chair.

        Specifically, look at the little red horizontal slats. If 1 is top and 3 is bottom, they're arranged 32123.

        Get: white marker (aka eraser) and a clue having to do with the yellow and red abstract statues.

      • Big blue drawer (4 digits)

        The clue is in plain sight, albeit kinda hard to see. (Does that make sense?)

        Look to the right.

        The cubbyholes with the jars are actually numbers: 3285.

        Get: a mannequin.

    • Left picture (hats and a balloon?)

      • Key

        It's the flower-shaped key from the small red drawer.

      • Puzzle

        It's a standard connect-the-shapes puzzle.

        From the top diamond, go down two squares to the other diamond. (So vertical, then top-right.)
        From the top spade, go right three squares, down four squares, and left two squares. (top-right, horizontal, left-bottom, vertical, vertical, top-left, horizontal)
        From the top heart, go right two squares and down four squares. (horizontal, left-bottom, vertical, vertical, vertical, vertical)
        This leaves three squares to connect the two clubs. (From left to right: bottom-right, horizontal, top-left)

        Get the puzzle piece, and note the red and black pattern.

    • Right picture (a forest?)

      • Key

        It's the knobby key you get from the mannequins.

      • Puzzle

        The clue is at the top of the tall cabinet: a moon, heart, and fish, hanging in that order. You need to trace a path that covers the entire grid, always following the moon-heart-fish-moon-heart-fish sequence, starting and finishing where indicated.

        Down, down, left; up, left, down; down, down, right; up, right, down; right, right, right; up, left, left; up, up, right; down, right, up

        Get the puzzle piece.

    • Mannequins

      (There's a clue, or rather part of a clue, on the pedestals the mannequins are standing on.)
      To solve the mannequin puzzle itself, first you need to acquire a fourth mannequin.

      Open the big blue drawer just to the left of the mannequins.

      Next, you need to arrange the mannequin's arms correctly.

      Solve, or at least bring into focus, the puzzle behind the picture in the door view.

      The arms should point down and to the sides at 45 degree angles.

      Then you just need to put the properly-arranged fourth mannequin on its pedestal.
      Get the knobby key (the fourth mannequin's head), and part of the clue for the 4-letter code on the small blue drawer.

    • Jars

      These are part of the clue for the small red drawer. The shelves/cubbyholes they're in are also a clue, for the big blue drawer.

  • Window view

    • Rainbow bird contraption

      This one's simple, if you're not colorblind: just click the colored parts of the feathers in rainbow order, which is conveniently even written at the base of the contraption.

      The feathers on the left side, top to bottom, are yellow, indigo, orange, and green. On the right, they're brown, blue, red, and violet. So if you number them from top to bottom, click R3, L3, L1, L4, R2, L2, R4.

      Get the brown feather.

    • Small red drawer (4 shapes)

      The mannequins and the jars tell you what to do.

      The pedestals for the mannequins are numbered 1 to 4 (although with Roman numerals), and they each have a picture of a jar.

      I = red, II = yellow, III = blue, IV = red

      Note the shapes on the appropriate-colored jars.

      I = circle, II = square, III = diamond, IV = trapezoid

      Get: red marker, flower-shaped key

    • Small yellow drawer (5x5 grid)

      To get the clue, solve the puzzle behind the left-hand picture in the chair view.

      RBRRR
      RBBBR
      RRBBR
      BBBBR
      BBBBR

      Get a puzzle piece.

    • Small blue drawer (4 letters)

      There are two parts to this clue: you get one from the mannequins, and one from the big red drawer.

      OK, so it's not from the mannequins so much as it is the mannequins, or rather their arms. Use the hand-signal alphabet clue from the big red drawer to figure out what letter each mannequin is signaling.

      north, east = J; northwest, west = O; southwest, south = A; southwest, southeast = N

      Get the yellow marker.

  • Easel view

    • Easel

      • Puzzle:
        Location of pieces

        1. Under the chair

        2. Chair view, solve the puzzle behind the left picture

        3. Chair view, solve the puzzle behind the right picture

        4. In the second window from the right (raise the blinds)

        5. Small yellow drawer

        6. Easel view, at the base of the lamp

        7. Easel view, on the table

        8. Door view, solve the puzzle behind the picture

        Solving

        It's a "click two squares to switch them" puzzle. The moon goes in the top left quadrant, the boat (with the bird sitting on it) goes in the top right quadrant, and the biggest fish goes in the bottom left quadrant. When you get it right, it'll briefly say "Prepared", and you won't be able to move the pieces anymore.

      • Markers

        (Colorblind: note that the markers say what color they are if you examine them.)

        • White/eraser: big yellow drawer

        • Red: small red drawer

        • Blue: big red drawer

        • Yellow: small blue drawer

      • Colors

        Bird, moon, heart, fish: top of the tall shelf

        Bird = purple, moon = yellow, heart = red, fish = blue

        Stars, triangles: plug in and turn on the lamp

        stars = yellow, triangles = green

        Boat: color mixing chart on the table

        orange

        Note that simple shapes override complex shapes; or, to put it another way, notice that the fish have heart-shaped fins and triangular tails, while the bird's wing is a heart shape.
        If you put the wrong color somewhere, use the white marker to erase it.

        With the yellow marker, click: the moon, the three stars, the sail of the boat, the boat itself, and the tail of each fish.
        With the red marker, click: the bird, the bird's wing, the boat (but not the sail), and the fins of the fish.
        With the blue marker, click: the bird, the sail, the bodies of the fish, and the tails of the fish.

        Get the ornate key and use it to go out the door.

    • Lamp

      Plug the lamp in, then click the round knob at the top to turn it on.

      It's a color clue to the last puzzle: yellow stars, green triangles.

    • Table

      There's a color mixing hint here, in case you need it. (It's that bit of white to the right of the flowers.)

      There's also a color hint on the paper: note the shape at the bottom.

      It's an orange trapezoid.

  • Door view

    • Picture (I can't even make a guess as to what this is trying to depict, sorry)

      • Key

        It's the oval key from the top of the tall shelf.

      • Puzzle

        Use the buttons to focus and align the picture appropriately.

        Click the top right button until the picture comes into focus. Next, click the top left button until the head of the mannequin is about the same size as the blue oval at the top of the frame. (5 clicks ought to do it; if you go too far, use the bottom left button to zoom back in.) Now use the arrows to move the picture up and to the left until the head of the mannequin lines up with the blue oval.

        Get the puzzle piece. Also, note the position of the mannequin's arms.

Walkthrough outline

  1. Big blue drawer

  2. Big yellow drawer

  3. Big red drawer

  4. Small red drawer

  5. Chair view left picture

  6. Small yellow drawer

  7. Rainbow bird

  8. Door view picture

  9. Mannequins

  10. Chair view right picture

  11. Small blue drawer

  12. Easel

20 Comments

CJTressler January 26, 2016 10:39 AM

Any help on the left-right buttons?

Reply

You need another clue.

Open the yellow door of the cupboard

Reply

Left-right

Have you opened the yellow door with the five-bar lock?

Check the chair.

After you open it, you'll see an image of a yellow-and-red statue and the letter R (and get a marker eraser). There's an arrow on the R. Look around and see if that rings any bells.

On the wall with the exit door are six more such statues, each one holding a blue ball in one of its hands.

Follow the "R" path indicated on the clue

R L R L R L L

Reply

One clue for the very last puzzle:

EVEN THOUGH the fish show up as complete fish shapes elsewhere, here they are actually 3 different shapes.

Otherwise, everything made perfect sense once you connected the dots.

Reply

I cannot come up with the clues to determine the shapes and their order for the four-button puzzle. Help, please.

Reply
PrinceLKlar January 26, 2016 12:35 PM replied to usmoo

This took me a while too, here's a hint...

there is a clue to the shapes very near to the pots

Reply
usmoo January 26, 2016 12:37 PM replied to PrinceLKlar

Thanks. I've tried using the numbers, the roman numerals, and the figures, but I may be overthinking it.

Reply
PrinceLKlar January 26, 2016 12:41 PM replied to usmoo

under the figures are colored pots in order 1-4, next to them are 4 stacks of 2 pots. Just go in order, there is only one color that matches the dolls in each stack

and there you have it

Reply
Daibhid C January 26, 2016 2:00 PM replied to ChairmanMUHC

Thanks for that!

I'd spotted the fins were hearts, but the tails threw me.

Reply

Could someone please explain the yellow drawer under the rainbow sculpture? I think it has something to do with

zpbo

.

Reply

The clue for that yellow drawer

Is behind the left-hand painting, which you open with the star key you get from the red drawer above the yellow one in question.

Join the symbols behind the painting.

Regarding your spoiler,

You might want to double-check your chart?

Reply

THANK YOU!!!

z is actually k.

Reply

For the last puzzle, can someone explain to me why

the boat is orange? The only thing in the room that's orange is that one "petal" of the rainbow contraption, which is not shaped like a boat, trapezoid, or stripe.

Reply
Patreon Donator Reka January 26, 2016 10:04 PM replied to Reka

Found it:

There's a color mixing chart behind the flowers on the table, which I had kind of glanced at and ignored because I know that yellow and blue make green, thankyouverymuch. As a result, I missed the orange stripey trapezoid shape at the bottom of the paper.

Reply
Patreon Donator Reka January 26, 2016 11:36 PM replied to Reka

Puzzle guide

  • Chair view

    • Tall shelf

      • Birds and stuff

        The birds are just a color clue.

        Birds are purple in this world.

        The moon, heart, and fish are a color clue...

        yellow moon, red heart, blue fish

        ...as well as a clue to another puzzle.

        Namely, the right picture.

        To get the key, solve the rainbow bird contraption.

        Examine the item you got.

        It opens to reveal a knife.

      • Big red drawer (left-right buttons)

        Part of the clue is in plain sight.

        Turn to the door and look at the shelves.

        But those figurines aren't arranged linearly, so we need another clue.

        Open the big yellow drawer below this one.

        Put the two together to get a left-right sequence.

        The yellow drawer tells you that the arm with the black squiggle is the one to look at (the figure in the clue has the squiggle on the right, and there's a big letter R next to it). It also tells you to "read" the shelves in the shape of an R.

        RLRLRLL

        Get: blue marker and a hand-signal alphabet.

      • Big yellow drawer (5 sliders)

        Check the chair.

        Specifically, look at the little red horizontal slats. If 1 is top and 3 is bottom, they're arranged 32123.

        Get: white marker (aka eraser) and a clue having to do with the yellow and red abstract statues.

      • Big blue drawer (4 digits)

        The clue is in plain sight, albeit kinda hard to see. (Does that make sense?)

        Look to the right.

        The cubbyholes with the jars are actually numbers: 3285.

        Get: a mannequin.

    • Left picture (hats and a balloon?)

      • Key

        It's the flower-shaped key from the small red drawer.

      • Puzzle

        It's a standard connect-the-shapes puzzle.

        From the top diamond, go down two squares to the other diamond. (So vertical, then top-right.)
        From the top spade, go right three squares, down four squares, and left two squares. (top-right, horizontal, left-bottom, vertical, vertical, top-left, horizontal)
        From the top heart, go right two squares and down four squares. (horizontal, left-bottom, vertical, vertical, vertical, vertical)
        This leaves three squares to connect the two clubs. (From left to right: bottom-right, horizontal, top-left)

        Get the puzzle piece, and note the red and black pattern.

    • Right picture (a forest?)

      • Key

        It's the knobby key you get from the mannequins.

      • Puzzle

        The clue is at the top of the tall cabinet: a moon, heart, and fish, hanging in that order. You need to trace a path that covers the entire grid, always following the moon-heart-fish-moon-heart-fish sequence, starting and finishing where indicated.

        Down, down, left; up, left, down; down, down, right; up, right, down; right, right, right; up, left, left; up, up, right; down, right, up

        Get the puzzle piece.

    • Mannequins

      (There's a clue, or rather part of a clue, on the pedestals the mannequins are standing on.)
      To solve the mannequin puzzle itself, first you need to acquire a fourth mannequin.

      Open the big blue drawer just to the left of the mannequins.

      Next, you need to arrange the mannequin's arms correctly.

      Solve, or at least bring into focus, the puzzle behind the picture in the door view.

      The arms should point down and to the sides at 45 degree angles.

      Then you just need to put the properly-arranged fourth mannequin on its pedestal.
      Get the knobby key (the fourth mannequin's head), and part of the clue for the 4-letter code on the small blue drawer.

    • Jars

      These are part of the clue for the small red drawer. The shelves/cubbyholes they're in are also a clue, for the big blue drawer.

  • Window view

    • Rainbow bird contraption

      This one's simple, if you're not colorblind: just click the colored parts of the feathers in rainbow order, which is conveniently even written at the base of the contraption.

      The feathers on the left side, top to bottom, are yellow, indigo, orange, and green. On the right, they're brown, blue, red, and violet. So if you number them from top to bottom, click R3, L3, L1, L4, R2, L2, R4.

      Get the brown feather.

    • Small red drawer (4 shapes)

      The mannequins and the jars tell you what to do.

      The pedestals for the mannequins are numbered 1 to 4 (although with Roman numerals), and they each have a picture of a jar.

      I = red, II = yellow, III = blue, IV = red

      Note the shapes on the appropriate-colored jars.

      I = circle, II = square, III = diamond, IV = trapezoid

      Get: red marker, flower-shaped key

    • Small yellow drawer (5x5 grid)

      To get the clue, solve the puzzle behind the left-hand picture in the chair view.

      RBRRR
      RBBBR
      RRBBR
      BBBBR
      BBBBR

      Get a puzzle piece.

    • Small blue drawer (4 letters)

      There are two parts to this clue: you get one from the mannequins, and one from the big red drawer.

      OK, so it's not from the mannequins so much as it is the mannequins, or rather their arms. Use the hand-signal alphabet clue from the big red drawer to figure out what letter each mannequin is signaling.

      north, east = J; northwest, west = O; southwest, south = A; southwest, southeast = N

      Get the yellow marker.

  • Easel view

    • Easel

      • Puzzle:
        Location of pieces

        1. Under the chair

        2. Chair view, solve the puzzle behind the left picture

        3. Chair view, solve the puzzle behind the right picture

        4. In the second window from the right (raise the blinds)

        5. Small yellow drawer

        6. Easel view, at the base of the lamp

        7. Easel view, on the table

        8. Door view, solve the puzzle behind the picture

        Solving

        It's a "click two squares to switch them" puzzle. The moon goes in the top left quadrant, the boat (with the bird sitting on it) goes in the top right quadrant, and the biggest fish goes in the bottom left quadrant. When you get it right, it'll briefly say "Prepared", and you won't be able to move the pieces anymore.

      • Markers

        (Colorblind: note that the markers say what color they are if you examine them.)

        • White/eraser: big yellow drawer

        • Red: small red drawer

        • Blue: big red drawer

        • Yellow: small blue drawer

      • Colors

        Bird, moon, heart, fish: top of the tall shelf

        Bird = purple, moon = yellow, heart = red, fish = blue

        Stars, triangles: plug in and turn on the lamp

        stars = yellow, triangles = green

        Boat: color mixing chart on the table

        orange

        Note that simple shapes override complex shapes; or, to put it another way, notice that the fish have heart-shaped fins and triangular tails, while the bird's wing is a heart shape.
        If you put the wrong color somewhere, use the white marker to erase it.

        With the yellow marker, click: the moon, the three stars, the sail of the boat, the boat itself, and the tail of each fish.
        With the red marker, click: the bird, the bird's wing, the boat (but not the sail), and the fins of the fish.
        With the blue marker, click: the bird, the sail, the bodies of the fish, and the tails of the fish.

        Get the ornate key and use it to go out the door.

    • Lamp

      Plug the lamp in, then click the round knob at the top to turn it on.

      It's a color clue to the last puzzle: yellow stars, green triangles.

    • Table

      There's a color mixing hint here, in case you need it. (It's that bit of white to the right of the flowers.)

      There's also a color hint on the paper: note the shape at the bottom.

      It's an orange trapezoid.

  • Door view

    • Picture (I can't even make a guess as to what this is trying to depict, sorry)

      • Key

        It's the oval key from the top of the tall shelf.

      • Puzzle

        Use the buttons to focus and align the picture appropriately.

        Click the top right button until the picture comes into focus. Next, click the top left button until the head of the mannequin is about the same size as the blue oval at the top of the frame. (5 clicks ought to do it; if you go too far, use the bottom left button to zoom back in.) Now use the arrows to move the picture up and to the left until the head of the mannequin lines up with the blue oval.

        Get the puzzle piece. Also, note the position of the mannequin's arms.

Walkthrough outline

  1. Big blue drawer

  2. Big yellow drawer

  3. Big red drawer

  4. Small red drawer

  5. Chair view left picture

  6. Small yellow drawer

  7. Rainbow bird

  8. Door view picture

  9. Mannequins

  10. Chair view right picture

  11. Small blue drawer

  12. Easel

Reply
diegocavalier January 27, 2016 11:24 AM

I think I may have encountered a bug with the left picture puzzle:

I'm 100% sure that I've connected the shapes properly, but nothing is happening. I believe I've solved everything else I can up to this point, so I'm not sure what's going on.

Reply

Are you sure you have the endpoints correct? The only other thing I can suggest is to "cycle through" all the possibilities for each square until it "takes". (I did not have any trouble with that puzzle, and TomaTea games are not generally buggy.)

Reply
Bobo The Bear January 27, 2016 2:22 PM replied to diegocavalier

I had the same issue

Connected the four suits correctly and got no response. Closed and reloaded the page, replayed the game, and the second time it worked fine. So it's the game, not you.

Reply

I also have a bug with the left picture (connect the card suit shapes). I connect the shapes, but nothing happens. When I leave the puzzle it resets. Tried cycling through each piece and refreshing.

Reply
diegocavalier January 27, 2016 5:26 PM

Glad it wasn't just me! :)

Reply

^ Scroll Up | Homepage >

Leave a comment [top of page]

Please consider creating a Casual Gameplay account if you're a regular visitor here, as it will allow us to create an even better experience for you. Sign-up here!
  • PLEASE UNDERSTAND SITE POLICIES BEFORE POSTING COMMENTS
  • You may use limited HTML tags for style:
    (a href, b, br/, strong, em, ul, ol, li, code, spoiler)
    HTML tags begin with a less-than sign: < and end with a greater-than sign: >. Always. No exceptions.
  • To post spoilers, please use spoiler tags: <spoiler> example </spoiler>
    If you need help understanding spoiler tags, read the spoiler help.
  • Please Preview your comment before posting, especially when using spoilers!
  • No link dropping, no domains as names; do not spam, and do not advertise! (rel="nofollow" in use)
chrpa Jayisgames needs your help to continue providing quality content. Click for details Hi! Weekday Escape and Weekday Puzzle are here! First we have two new cans from tomoLaSiDo and then two small rooms from isotronic. That's all for this...  ...
6,365 Views
0 Comments
chrpa Jayisgames needs your help to continue providing quality content. Click for details Welcome to Mobile Monday! We have another beautiful game from Nicolet and it's a winter game as it should be. Tasuku Yahiro have released another of their...  ...
6,161 Views
2 Comments
chrpa Jayisgames needs your help to continue providing quality content. Click for details We've got a new game from Rinnogogo's magical world and this time it really is magical.. Not only do you get to meet cute animals that express themselves...  ...
chrpa Jayisgames needs your help to continue providing quality content. Click for details After a few weeks of patient waiting, we have been rewarded - the new game from Ichima Coffeedo is here. We got a wonderful new game - it's...  ...

HELP Jayisgames.com

Recent Comments


Display 5 more comments
Limit to the last 5 comments

Game of the week


Dark Romance: Vampire Origins Collector's Edition

Your Favorite Games edit

add
Save links to your favorite games here. Use the Favorites editor.

Monthly Archives