JayisGames.com is now available ad-free!
Jay is Games recommends Cheat Happens with 8,000+ games and 35,000+ trainers!

Fancy Maze (Case 01)


  • Currently 2.9/5
  • 1
  • 2
  • 3
  • 4
  • 5
Rating: 2.9/5 (65 votes)
Comments (64) | Views (5,887)

Weekday Escape

GrinnypFor today's Weekday Escape we go back in time a bit to a year ago when HILG came out with a fun little room escape that got overlooked in the Halloween rush. Now, for your room escaping pleasure, we proudly present Fancy Maze (Case 01).

Fancy MazeFancy Maze (Case 01) is one of HILG's slighter efforts. Despite that, there are a lot of fun things to discover and puzzles to solve in what looks like a mini-movie theater, probably in an office or some rich person's house. Wander around, pick things up, see if you are up on the latest (and not so latest) technology, and see if you can find the two different endings in this amusing little game. Fortunately, for such an easy game, there is the usual save function so that finding the two ways out is much easier and doesn't require replaying the entire game.

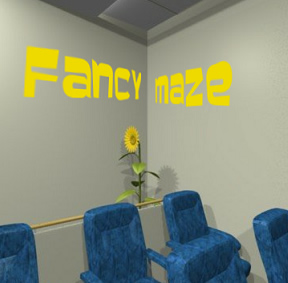
The mini-theater has a screen at one end and a door at the other. Very comfy seating and some nice decorative touches round out this mysterious space, which you appear to be trapped in. It all looks very luxurious, pretty standard with HILG games. Navigation can be tricky, though, partly due to the odd turning angles and partly due to the lack of navigation bars at the edges of the screens. There are little balls instead which show up when you hover your mouse near the edge. However, the balls can sometimes be hard to see against the backgrounds so be prepared for a bit of confusion. And the lack of a changing cursor means that yes, pixel hunting ahead.

Fortunately, as with all of HILG's games, you can use the friendly yellow button at the bottom left of the screen to change to the English version, as well as turn on a hint feature. Unfortunately, Fancy Maze is a throwback to HILG's earlier games, so you can't get into the system to change the language until after you wander through an all Japanese introduction, presumably telling you how you got locked into the mini-theater in the first place.

Despite the flaws, though, Fancy Maze is a fun little time waster. A classic escape the room puzzle wrapped up in a pretty bow, the perfect mid-week break. Sit back, relax, and enjoy some classic simple room escaping.

Play Fancy Maze (Case 01)

Walkthrough Guide


(Please allow page to fully load for spoiler tags to be functional.)

Fancy Maze Walkthrough

Note: you can change the language from Japanese to English (after the intro is done) by clicking the yellow SYS button at the bottom left of the screen.

Another note: I found that second ending, so the walkthrough is complete (at least to my knowledge).

You begin facing a lit-up projector screen.

  1. If you mouse over the projector screen, you'll see a message at the bottom of the game screen telling you the title of the movie is "ALONE in the Tom's tree house". You'll probably want to write this down, making sure to spell everything correctly.

  2. To the far right of the counter in front of you is a tiny switch. Click the switch to zoom in, then click "OFF" to turn off the projector and turn on the lights. Back up.

  3. Now that the lights are on, you can see that the box in the middle of the counter is a VCR, which you can open and close with a button on the bottom left of the front of the VCR. Take the little memo from inside the VCR. We'll deal with that later.

    Also notice that if you click just above the VCR there is a hook on the wall there.

  4. On the left side of the counter is a potted plant. Pick up the plant and take the red part from underneath it.

  5. Go right from the counter. You see a big potted plant and a rectangular box behind it. Zoom in on the box. It's a speaker, which you can open with a "thin thing". Zoom out.

  6. Go right. You're facing a corner, with a dark brown door to the right. There's a small panel on the wall in the corner, which you can open revealing a red keyhole. (You won't need this till much later.)

    If you click behind the back row of seats, you'll get a view of a toolbox on the ground. There's a padlock on it, but you don't have the clues to the combination yet.

  7. Turn right from the toolbox corner. You're facing a dark brown door, above which is a projector. Zoom in on the projector, then click underneath it to see a compass. Note the square around the N and the figure-eights under the directions.

  8. Turn right from the door. You should see a big sunflower. Click the sunflower to zoom in, then click the bottom of the sunflower pot to see the bottom halves of some numbers. (This again won't come in until much later.)

    Zoom out from the bottom of the sunflower, and to the right of the sunflower you see a little cabinet. If you zoom in and try to open it you see that it's locked.

  9. Go right from the sunflower corner. You should see a square clock on the wall. Note that if you hover over the 12 spot, you see a square, and also that there are little figure-eights where the numbers would be.

  10. Back up from the clock. Click on the area between the two chair backs you can see to zoom in on the seats. Take the pamphlet on the middle chair.

  11. Bring up the pamphlet in your inventory. Note that when you open up the pamphlet, the bottom of your screen says the title is "ALOHA in the Sam's true house". Write this down, remembering to spell everything correctly.

    Click the pamphlet to open it. Take the memo that was inside it. Click the pamphlet again to see a picture of the ocean. Take the paperclip from the top of the page.

  12. Turn right from the clock on the wall, and you'll see a corner with another speaker in it. Zoom in on the speaker and open it up. Take the green part (near the little navigation ball by the bottom of the screen).

  13. Go to the speaker to the right of the counter, next to the potted plant. Use the paperclip on it to open it up. Take the little iPod from the top hole in the speaker.

    If you click the very bottom of the iPod, you see a little slot for a memory card.

The clock/compass puzzle

  1. Go to the clock on the wall. Open up the memo you got from the pamphlet. You should see a bunch of numbers with their middles erased. But if you click the bottom-right corner of the memo, it turns around and you see another clue: "A movie does not tell a lie."

    This means:

    Remember the title of the movie from the projector screen? Compare that to the title you got from the pamphlet. They're similar, but there are some differences.

    ALONE in the Tom's tree house - projector
    ALOHA in the Sam's true house - pamphlet

    There are five letters different in the titles: N/H, E/A, T/S, O/A, E/U. But only one set of letters is correct. And since the movie can't lie, the letters from the projector screen are the correct set of letters you should be working with: N, E, T, O, E.

  2. There are two compass directions in that set of letters:

    NETOE = NE to E

    Compare this to the memo you got from the VCR, which says "S to L", S and L referring to the Small and Large hands of the clock. Luckily, you already have these parts in your inventory: the red part and green part are actually clock hands. (Why that L was blue and not green like the corresponding part I have no idea.)

  3. Look back at the clock. It greatly resembles the compass from the bottom of the projector, doesn't it? The 12 position is North, the 3 position is East, etc.

    Put the clock hands on the clock in the places indicated by the VCR memo:

    Put the Small red hand in the NE position. Put the Large green hand in the East position.

    Now push the button at the bottom of the clock. Take the key that pops out from the side.

The toolbox lock puzzle

  1. Go to the toolbox in the corner. If you have both memos, you should now be able to zoom in on the lock.

    Keep in mind the set of letters you used earlier: NETOE.

    Your first clue is the VCR memo. If you click the bottom-right corner of it, it turns around to show you a padlock outline with some shapes in it. What this means is that you're going to have four pairs of letters that are adjacent to each other:

    NETOE breaks up into NE, ET, TO, AND OE

    Second, take a look at the memo from the pamphlet, the one with the broken-up numbers in the padlock outline. Think about those numbers for a second: they're missing their MIDDLE parts. Meaning you can only see the FIRST and LAST parts of them.

    What this all means:

    Look at your pairs of letters: NE, ET, TO, OE. These are spelled-out numbers with their middles missing, so you only have their first and last letters. The numbers are

    NinE, EighT, TwO, and OnE.

  2. Put the four-digit number you figured out from the memos into the padlock on the toolbox. The numbers are

    9821

    Now click the gold part of the padlock to open it, then click again to remove it. Back up once and open the toolbox. Take the screwdriver and the hammer.

  3. Go to the VCR and zoom in on it. Click on the wall to the top-left of the VCR. If you click on the wall, you discover that it sounds kind of funny when you knock on it.

  4. Use the hammer on the wall. You open up a niche with a camera in it. Next to the camera is a remote. Notice that if you hit the ON button on the remote, the camera starts recording.

    There is also a little slot on the front of the camera where you can stick something.

  5. Go to the corner with the sunflower in it. Zoom in on the little cabinet behind the sunflower. Use the key you got from the clock to open the cabinet. Take the top-right video there. Click on the top shelf to zoom in and take the small box.

  6. Go to the VCR. Open up the VCR and put the tape in (make sure to take the tape out of its case before you put it in the VCR). Close the VCR's door again.

  7. Flip the ON/OFF switch on the wall on the right side of the counter. Back up and look at the projector screen. Notice the pattern that shows up. Keep that pattern in mind as you flip the switch again, turning the lights back on.

  8. Look around the room again, specifically at the arrangement of the seats. The chairs are in the same pattern that you just saw on the screen. Find the chair indicated by the pattern:

    if you're facing the sunflower corner, then it's the chair directly in front of the sunflower.

    Get the M-shaped hook from under that chair.

  9. Use the screwdriver to open the small box. Get the memory card.

  10. If you put that memory card in the slot on the bottom of the iPod, you see a broken animation, which is useless. What you need to do is make a useful animation. Remember that camera in the wall? What is the camera facing that you could make a video of?

    Go to the camera in the wall. Make sure the camera is off (using the remote in your inventory). Put the memory card in the slot on the bottom-front of the camera.

    Bring up the remote in your inventory and hit ON. Now go flip the switch on the wall to lower the projection screen. Hit that same switch again to raise the screen. Now go back to the camera and use the remote to turn it off. Take the memory card back.

  11. Put the memory card into the bottom of the iPod. Hit the button to watch a new animation, and take note of the numbers you see on the back of the projector screen.

  12. Go back to the clock on the wall. Take back the two clock hands.

    Remember those numbers you saw on the back of the projector screen? Yep, they were a time. Put the clock hands on the clock at the appropriate time:

    4:55

    Take the key that pops out.

  13. You can now use that key on the big brown door to escape.

Fancy End

  1. But wait! Don't go through that door just yet! (If you did, there's an option to return to the room, so no worries.) Notice that this key has a red, sun-shaped bit on it.

  2. Go to the panel in that corner to the left of the door and put the key in the red keyhole there. This rotates the sunflower's pot so you see whole numbers. Go inspect the pot and see what the numbers are.

  3. Go to the counter and flip the switch to pull down the projector screen. Back up from the switch and zoom in on the VCR, then use the M-shaped hook on the area above the VCR, attaching the projector screen to the hook behind the VCR. Now go back and flip the wall switch again.

  4. A secret door! Click the secret entrance and you see a door with a keypad on it. Enter the numbers from the sunflower pot into the keypad:

    6219

    Back up and open the door for the Fancy End. (And for a surprise, click the sunflower.)

Many, many, many thanks to SonicLover for his comment explaining the toolbox puzzle. I had no idea what was going on with that.

[Thank you for compiling this great walkthrough! I've added some list elements to improve its readability a bit, but you did a great job with it to start with. Please send an email to our contact address for a selection of prizes to choose from. :) -Jay]

64 Comments

Have found red and green strips. No idea what to do next

Reply

This isn't quite as easy as you're making it out to be in that review, I must say...so far I've found

A movie program, an iPod, 2 memos, 2 clock hands, and a metal clip that I can't use anymore

, and I apparently need to

figure out the combination on the toolbox

...and am having no luck with that. I imagine the

writing on the sunflower's pot

is a clue, but uhh....yeah, I got bupkis.

Reply

Something I just found:

There's a hook on the wall by the top/back of the VCR.

Reply
Stage name November 10, 2010 2:46 AM

I agree this one's not as easy as advertised. Enjoyed it, but got through a fair amount of it with good old trial-and-error . . .

Bimal:

It's "time" to take a look at that clock on the wall

Reply

Thanks Stage Name, that got that bit figured out for me. Granted, now I no longer have any clue in regards to

the combination to that lock...

I don't suppose the

movie and pamphlet

have anything to do with it?

Reply

An Onyx Mouse,

did you already turn the pieces of paper around? I think I'm stuck where you are...

Reply

Yeah...still not helping. :[

Reply

Would I be correct in assuming it has something to do with

the differences between the title on the screen and the title on the pamphlet cover? i.e. the

ALONE/ALOHA, Tom's/Sam's, and Tree/True?

Still, maybe I should save this for tomorrow and let my brain cool off....ugh. X_x This one's a doozy.

Reply

It's REALLY annoying how the game doesn't let you look at/manipulate certain things until you get certain clues/items that may not even relate. I try to do something, game doesn't let me, and figure I need a clue or item to do it.

Then I after however long I'll try again out of sheer frustration and it lets me because some unrelated item I got let me do the thing I tried to do in the first place with the items I already had.

Reply
infeliciter November 10, 2010 3:47 AM

i'm lost when it comes to the

lock on the tool box

I have taken care of the clock puzzle and gotten the

key, watched the video (not sure what to do with that)

i'm confused by the sunflower too.

Reply

On the toolbox lock,

does one line up the different letters (as pointed out above by An Onyx Mouse) with the number sequence?

And what does the square, circle, triangle have to do with any of this? D:

Reply

Hi,
I now have

Red Stick, Green Stick, Paper Clip, a number note and a pamphlet.
Stagename: I tried to put sticks on clock but wont work.

Help!

Reply

infeliciter, on the video

is there anything in the room that resembles the picture's layout?

Reply
infeliciter November 10, 2010 3:57 AM

haha, wow. cant believe i missed that
thought it was referring to the

sound on the wall.

Reply

I also got

Ipod and 2 memos. But still cant figure out what time should i place on clock and how

Reply
infeliciter November 10, 2010 4:09 AM

ok so i'm still lost on the lock and what i just picked up.

weird metal connector with m shape in the center

im not sure what the

different letters have to do with the numbers

i visually over lapped the 2 papers and got the answer for the clock, i imagine that the circle is what ever the sunflower is for but not sure what the triangle is referencing

Reply

What you just picked up is

a pair of hooks (you can switch the language to English by clicking the yellow SYS button). It seems you can

attach it to the hook on the back of the video player and the screen, but I suppose it's a later step.

Reply
infeliciter November 10, 2010 4:23 AM

ok so playing in japanese is making this much harder. thanks. i figured out that i could

attach the hook to the player and screen, but it doesnt let me pull it up. so i figure that i need something else before i can do anything with that

i'm still completely lost on the tool box though.

Reply

Assuming that

the parts of the numbers on the flower pot correspond to the memo with the sequence 0123456789 and can be used to figure out the code for the toolbox...

I can't seem to work out what the numbers on the pot are. I'm assuming the second number is 2, the third number is most likely 1 or 4 but the other two numbers could be anything with a curve at the bottom like 3, 5, 6, 8, 9 or 0.

Reply

I was also lost at the toolbox and by luck I found the combination.

The combination is

9821

Reply
infeliciter November 10, 2010 5:15 AM

finally out, i think that i got the "good" ending too
Mj5

dont worry about the sun flower, it is somewhat a red herring

comes into play much later

to figure out the tool box i had to turn on the hints. the hint is

"The first to the last" and "the search for a mistake is also required."

its much easier then you think, just look at the sequence of numbers

dont let the paper with the square circle and triangle get you confused

Reply

still understand the tool box code logic.

got the answer from another walkthrough, but even that didn't explain the clues to any real degree of satisfaction.

:-(

Reply

erm... don't understand the tool box code logic

;-)

Reply
Patreon Crew SonicLover November 10, 2010 8:24 AM

Would someone please explain the clock puzzle to me, with the red and green parts? I've seen the compass on the underside of the projector, and the "S to L / H : M" hint on the memo, but nothing else!

Reply

About the note with the letters:

I'm not sure about the first part, but the H:M is Hammer:Middle. Use the hammer from the toolbox on the middle of the hollow wall. I assume the S is screwdriver.

Reply

H:M clue

H:M is hours and minutes. The other bit of the clue is S to L.

If we compare the differences between the two movie titles the different letters in the on screen title spell out NE TO E

so if H is equivalent to NE and M is equivalent to E and we can put the clock hands in those positions on the clock.

Reply

I'll take RuDeF's pure dumb luck in this case, to be perfectly honest.

Reply

This is a good game, for Hilg standards. It is so much better than the Sensor series, but no where as good as the Camel Eye game. Typical of older Hilg games, there is some pixel hunting and some puzzles that stretch the limit of reason and logic. And as James pointed out above, the game structure is strictly linear; some clues or solutions can not be reached without completing a previous required step. I find playing this game requires more than the ingame hint system, even a walkthrough that explains the reasoning.

Here are some stronger hints on the two hardest puzzles in the game.

First off, think of the blue letters on the S to L / H : M note as green.

The Compass / Clock Puzzle

The Square on the wall is a compass first, then a clock later in the game.

The solution to the compass is the two direction headings given by the clues of the movie title and the book title.

The movie does not lie, the book is a misprint.

Which letters should the book title have to make it the same as the movie.

The Toolbox Puzzle

Both notes give clues to both the compass and the toolbox, thus both solutions are related.

The compass solution has to be translated to the toolbox solution; directions into numbers.

The Square, Circle, Triangle on the note are objects in the room. Imaginary lines drawn from the circle (doorknob) to the square and from the circle to the triangle (projection screen handle) are 3D directions; on x,y,z axis similar to the 2D directions of the compass puzzle.

Thus, the three shapes represent the directions from the compass puzzle, which are the five letters missing from the book title. The three shapes (five letters) must be converted to four shapes, in pairs. Notice the circle was duplicated, so some of the letters must also be duplicated, and in pairs.

Each of the resulting four shapes represents a number, and a pair of letters from the compass solution. The five letters have to be converted to eight letters (four pairs).
The first pair is the first two letters, the second pair is the second and third letters, the third pair is the third and fourth letters, the fourth pair is the fourth and fifth letters. (12, 23, 34,45)

Each pair of letters represents a number for each of the four shapes.

The beginning and the last.

The pairs of letters represent the beginning and last of numbers.

Don't fret, I couldn't escape solo on this one, and rarely do with Hilg games. But I did enjoy it, thanks grinnyp.

Reply

I would just like to say:
*ahem*
ARRRRRRGGGGHHHH! I can' figure out the 2nd speaker!

Reply

Okay, this is the best "logic" I've been able to come up with for the tool box combination:

1) Compare the title of the movie on the screen to the title on the pamphlet. Note the differing letters. N/H, E/A, T/S, O/A, E/U.

2) The back of one note says that the movie doesn't tell a lie. So, let's assume that the movie's version of those letters is "right."

3) That gives us N-E-T-O-E. If we just look at the first four, and assume that letters stand for numbers (hang in there), this could be 9-8-2-1. I'm inclined to believe that the last changed letter, E/U, is in fact a typo. I could be convinced otherwise.

4) So, why should we consider the letters to represent numbers? Well, take a look at the flower pot. The partial numbers there could be interpreted as 8, 2, 1, 9, with the aid of the front of the note mentioned above. So if we can guess that there's an 8, a 2, a 1, and a 9 floating around somewhere, maybe the movie is supposed to give us the order of those numbers.

5) Does it make sense? No. Does it work? Yes.

Not perfect, but it's the best I've been able to come up with.

Reply

Well, I made it out with both endings...but a lot of things made no sense. Biggest offender: How was I supposed to get

the lock combination from

the pictograph on the back of that memo?

Reply

Looking at Aroz's analysis, which I admit I haven't fully thought through,


I can believe that the last differing letter in the movie title is not a typo but part of an overlapping clue to the compass puzzle.

Reply

@ Fritware

I was wondering why you were concerned about the letter U, but now I see that you wanted just one letter to represent a number, hence N=9, and not two letters, NE=9 (first and last letter). NETOE is corrrect, not NETO. I suspect in the past I have come across some typo or translation errors in Japanese games, but not this one.

Reply

Here's the way the toolbox puzzle REALLY works, as far as I can see. I believe we're all overthinking it.

We can start with Fritware's observation of the differing letters. The "right" letters are N, E, T, O, and E.

Now, the memos. The images with the yellow padlock-shaped border are the ones relevant to the lock. One memo shows the ten digits with the middle wiped out, and only the top and bottom showing. The other shows square-circle-triangle going to square-circle and circle-triangle.

What does this all mean? Well, the first memo's hint indicates that numbers are represented by their beginning and ending, or their first and last letters. The second hint shows that the chain of letters should be split up into independent pairs of adjacent letters.

Thus, N...E, E...T, T...O, and O...E. NinE, EighT, TwO, OnE. Was that so hard?

Reply

the writing in the pamphlet is so small that it is almost impossible to read for me. i wouldnt get a clue from there in a million years. i solved the toolbox by trial and error and the clock half guess/half trial and error.

Reply
Billy Nitro November 10, 2010 12:15 PM

Aroz's logic is overly complicated and introduces assumptions it can't resolve with the theory of shapes and compass directions as they relate to the numbers. I will admit though, that I don't know what purpose the shapes served. It just seems unlikely they three shapes served to convert five letters into four numbers when the conclusion can be reached without using them at all.

And just for the record

no one should worry about the numbers on the sunflower pot until the very end.

Reply

SonicLover --

Hmm. I don't think I would have translated the top and bottom of the numbers on the first note as a hint regarding looking for first and last letters of the numbers in the combination in a million years.

So, I suppose the answer to your last question is "Yes." :)

-- F.

Reply

I'm stuck. I've got

a blurry pamphlet, an iPod, a red and green "part", and a memo with the middles of the numbers cut out.

I've seen

the compass clue beneath the projector and the spot on the wall that sounds different when tapped.

The in-game hint system is being spectacularly unhelpful, just telling me "No information,now.".

Reply

Stuck...

Have:

Remote Control
Ipod, playing broken animation
Hook
S to L note

Hint system is telling me the same thing as Avetre, and I have no clue what to do now. When I

attach the hook to the screen it won't go back up and I can't navigate away from that view

Reply

Well, I now have

a remote control, the VCR memo, a cassette tape, an iPod, and a screwdriver. I haven't gotten the iPod to do anything, and the hint I got by playing the tape made no sense to me.

Reply

Can anyone tell me where to find

the iPod?

Reply

@arachne, it's in the

right-hand speaker. You'll need to use the metal bookmark from the pamphlet to get it.

Reply

Thanks a lot, Avetre. I was really stuck there.

Reply

SonicLove....you are a genius. I feel like SUCH an idiot now.

Reply

I give up. Make with the walkthrough, pretty please, Grinny?

And Neutral fans, heads up - I just checked their site and they will have their next game ready SOON!!!

Reply

I think both main puzzles had too many clues, which was awful, because considering all clues at the same time made up a terrible mess. In my opinion that ruined what could have been a cute escape, turning it into a run-for-a-walkthrough one.

Reply

Could someone tell me whre the

remote control is?

I currently have

the screen hook, the hammer, the "S to L" note (which, unlike the other one, hasn't greyed out even though I've solved the clock and the combination, so I'm guessing it's still trying to tell me something) and the iPod. I found a memory card for the iPod, but it doesn't help much...

Reply

I agree with Laurakis; the pamphlet is unreadable. Also, I cannot find

the hook

Reply

If you switch the language to English via the SYS menu, the game tells you what the pamphlet says.

Reply

i didnt find the hook yet but I managed to

put the memory card in the videocamera behind the screen, atarted recording with the remote control, lowered the screen, then put it up again and removed the memory card. when i played it in the ipod i got the time 4:55, went to the clock and obtained the red key. this completed the number code in the sunflower

Reply

I think the figures clue

is only to show us that the letters have two functions, one as the beginning and the other as end of the names of the numbers for the combination lock, I cannot make head or tails of the objects/coordinates theory and it is my opinion that that poster is just messing around with us :-)

Anyway, there's no way I had figured that out by myself, mostly because

it is an English puzzle in a badly translated Japanese game

Reply

Seriously, can someone either post a walkthrough or point me in the direction of a text walkthrough somewhere else? I'm completely stuck and the spoilers here are not helping.

Reply
nerdypants November 11, 2010 2:21 PM

Out! I'm going to start working on a walkthrough now.

However, I feel like I'm missing a few things. It seems to me that there's a different ending from the one I got, since I can go back into the room after escaping. If anyone knows about any alternate endings, could you please let me know what they are?

Or at least let me know

what the heck that sunflower clue was for? Because I never found a use for it.

Or, for that matter, did anyone find a use for

the M-shaped hook? I attached the screen's handle to the hook behind the VCR, but beyond that I have no clue what I'm supposed to do with it.

Reply

I would have enjoyed this one much more if the game responses had been less vague. If something is important but I need another clue(s) before I can access it, I think the response given should be different than the one from clicking a totally useless item.

Reply

Nerdypants --

After you finish the second clock puzzle (using the video camera and the iPod to record the appropriate time) and use the sunflower key in the red keyhole, you can attach the hook to the screen and then retract the screen. The hook is useless before that point.


At the end of that passage is a door with a keypad. That's where the sunflower code comes in.

Reply

I have

solved the clock puzzle, opened the videotape case

and now I'm stuck.
How can you people

read all these letters on the magazine? I can barely read the first word, the one that is written in bold capitals. And where is the iPod?

Reply

Whew, out!

I'd write a walkthough, except I'm still not exactly clear on how a lot of it actually worked...

Oh, and I only found

the ending through the secret tunnel - there's another one?

Reply
nerdypants November 11, 2010 6:53 PM

Fancy Maze Walkthrough

Note: you can change the language from Japanese to English (after the intro is done) by clicking the yellow SYS button at the bottom left of the screen.

Another note: I found that second ending, so the walkthrough is complete (at least to my knowledge).

You begin facing a lit-up projector screen.

  1. If you mouse over the projector screen, you'll see a message at the bottom of the game screen telling you the title of the movie is "ALONE in the Tom's tree house". You'll probably want to write this down, making sure to spell everything correctly.

  2. To the far right of the counter in front of you is a tiny switch. Click the switch to zoom in, then click "OFF" to turn off the projector and turn on the lights. Back up.

  3. Now that the lights are on, you can see that the box in the middle of the counter is a VCR, which you can open and close with a button on the bottom left of the front of the VCR. Take the little memo from inside the VCR. We'll deal with that later.

    Also notice that if you click just above the VCR there is a hook on the wall there.

  4. On the left side of the counter is a potted plant. Pick up the plant and take the red part from underneath it.

  5. Go right from the counter. You see a big potted plant and a rectangular box behind it. Zoom in on the box. It's a speaker, which you can open with a "thin thing". Zoom out.

  6. Go right. You're facing a corner, with a dark brown door to the right. There's a small panel on the wall in the corner, which you can open revealing a red keyhole. (You won't need this till much later.)

    If you click behind the back row of seats, you'll get a view of a toolbox on the ground. There's a padlock on it, but you don't have the clues to the combination yet.

  7. Turn right from the toolbox corner. You're facing a dark brown door, above which is a projector. Zoom in on the projector, then click underneath it to see a compass. Note the square around the N and the figure-eights under the directions.

  8. Turn right from the door. You should see a big sunflower. Click the sunflower to zoom in, then click the bottom of the sunflower pot to see the bottom halves of some numbers. (This again won't come in until much later.)

    Zoom out from the bottom of the sunflower, and to the right of the sunflower you see a little cabinet. If you zoom in and try to open it you see that it's locked.

  9. Go right from the sunflower corner. You should see a square clock on the wall. Note that if you hover over the 12 spot, you see a square, and also that there are little figure-eights where the numbers would be.

  10. Back up from the clock. Click on the area between the two chair backs you can see to zoom in on the seats. Take the pamphlet on the middle chair.

  11. Bring up the pamphlet in your inventory. Note that when you open up the pamphlet, the bottom of your screen says the title is "ALOHA in the Sam's true house". Write this down, remembering to spell everything correctly.

    Click the pamphlet to open it. Take the memo that was inside it. Click the pamphlet again to see a picture of the ocean. Take the paperclip from the top of the page.

  12. Turn right from the clock on the wall, and you'll see a corner with another speaker in it. Zoom in on the speaker and open it up. Take the green part (near the little navigation ball by the bottom of the screen).

  13. Go to the speaker to the right of the counter, next to the potted plant. Use the paperclip on it to open it up. Take the little iPod from the top hole in the speaker.

    If you click the very bottom of the iPod, you see a little slot for a memory card.

The clock/compass puzzle

  1. Go to the clock on the wall. Open up the memo you got from the pamphlet. You should see a bunch of numbers with their middles erased. But if you click the bottom-right corner of the memo, it turns around and you see another clue: "A movie does not tell a lie."

    This means:

    Remember the title of the movie from the projector screen? Compare that to the title you got from the pamphlet. They're similar, but there are some differences.

    ALONE in the Tom's tree house - projector
    ALOHA in the Sam's true house - pamphlet

    There are five letters different in the titles: N/H, E/A, T/S, O/A, E/U. But only one set of letters is correct. And since the movie can't lie, the letters from the projector screen are the correct set of letters you should be working with: N, E, T, O, E.

  2. There are two compass directions in that set of letters:

    NETOE = NE to E

    Compare this to the memo you got from the VCR, which says "S to L", S and L referring to the Small and Large hands of the clock. Luckily, you already have these parts in your inventory: the red part and green part are actually clock hands. (Why that L was blue and not green like the corresponding part I have no idea.)

  3. Look back at the clock. It greatly resembles the compass from the bottom of the projector, doesn't it? The 12 position is North, the 3 position is East, etc.

    Put the clock hands on the clock in the places indicated by the VCR memo:

    Put the Small red hand in the NE position. Put the Large green hand in the East position.

    Now push the button at the bottom of the clock. Take the key that pops out from the side.

The toolbox lock puzzle

  1. Go to the toolbox in the corner. If you have both memos, you should now be able to zoom in on the lock.

    Keep in mind the set of letters you used earlier: NETOE.

    Your first clue is the VCR memo. If you click the bottom-right corner of it, it turns around to show you a padlock outline with some shapes in it. What this means is that you're going to have four pairs of letters that are adjacent to each other:

    NETOE breaks up into NE, ET, TO, AND OE

    Second, take a look at the memo from the pamphlet, the one with the broken-up numbers in the padlock outline. Think about those numbers for a second: they're missing their MIDDLE parts. Meaning you can only see the FIRST and LAST parts of them.

    What this all means:

    Look at your pairs of letters: NE, ET, TO, OE. These are spelled-out numbers with their middles missing, so you only have their first and last letters. The numbers are

    NinE, EighT, TwO, and OnE.

  2. Put the four-digit number you figured out from the memos into the padlock on the toolbox. The numbers are

    9821

    Now click the gold part of the padlock to open it, then click again to remove it. Back up once and open the toolbox. Take the screwdriver and the hammer.

  3. Go to the VCR and zoom in on it. Click on the wall to the top-left of the VCR. If you click on the wall, you discover that it sounds kind of funny when you knock on it.

  4. Use the hammer on the wall. You open up a niche with a camera in it. Next to the camera is a remote. Notice that if you hit the ON button on the remote, the camera starts recording.

    There is also a little slot on the front of the camera where you can stick something.

  5. Go to the corner with the sunflower in it. Zoom in on the little cabinet behind the sunflower. Use the key you got from the clock to open the cabinet. Take the top-right video there. Click on the top shelf to zoom in and take the small box.

  6. Go to the VCR. Open up the VCR and put the tape in (make sure to take the tape out of its case before you put it in the VCR). Close the VCR's door again.

  7. Flip the ON/OFF switch on the wall on the right side of the counter. Back up and look at the projector screen. Notice the pattern that shows up. Keep that pattern in mind as you flip the switch again, turning the lights back on.

  8. Look around the room again, specifically at the arrangement of the seats. The chairs are in the same pattern that you just saw on the screen. Find the chair indicated by the pattern:

    if you're facing the sunflower corner, then it's the chair directly in front of the sunflower.

    Get the M-shaped hook from under that chair.

  9. Use the screwdriver to open the small box. Get the memory card.

  10. If you put that memory card in the slot on the bottom of the iPod, you see a broken animation, which is useless. What you need to do is make a useful animation. Remember that camera in the wall? What is the camera facing that you could make a video of?

    Go to the camera in the wall. Make sure the camera is off (using the remote in your inventory). Put the memory card in the slot on the bottom-front of the camera.

    Bring up the remote in your inventory and hit ON. Now go flip the switch on the wall to lower the projection screen. Hit that same switch again to raise the screen. Now go back to the camera and use the remote to turn it off. Take the memory card back.

  11. Put the memory card into the bottom of the iPod. Hit the button to watch a new animation, and take note of the numbers you see on the back of the projector screen.

  12. Go back to the clock on the wall. Take back the two clock hands.

    Remember those numbers you saw on the back of the projector screen? Yep, they were a time. Put the clock hands on the clock at the appropriate time:

    4:55

    Take the key that pops out.

  13. You can now use that key on the big brown door to escape.

Fancy End

  1. But wait! Don't go through that door just yet! (If you did, there's an option to return to the room, so no worries.) Notice that this key has a red, sun-shaped bit on it.

  2. Go to the panel in that corner to the left of the door and put the key in the red keyhole there. This rotates the sunflower's pot so you see whole numbers. Go inspect the pot and see what the numbers are.

  3. Go to the counter and flip the switch to pull down the projector screen. Back up from the switch and zoom in on the VCR, then use the M-shaped hook on the area above the VCR, attaching the projector screen to the hook behind the VCR. Now go back and flip the wall switch again.

  4. A secret door! Click the secret entrance and you see a door with a keypad on it. Enter the numbers from the sunflower pot into the keypad:

    6219

    Back up and open the door for the Fancy End. (And for a surprise, click the sunflower.)

Many, many, many thanks to SonicLover for his comment explaining the toolbox puzzle. I had no idea what was going on with that.

[Thank you for compiling this great walkthrough! I've added some list elements to improve its readability a bit, but you did a great job with it to start with. Please send an email to our contact address for a selection of prizes to choose from. :) -Jay]

Reply

Was there walk-through writing contest or was that just a random prize?

:)

[We want to encourage our readers to post walkthroughs for games, and we will reward those who create walkthroughs for the site that are accurate, well-formatted, and easy to read and follow. But they must be in your own words. Plagiarizing (copy/pasting) from other sites is not allowed. If you feel you have posted a walkthrough that deserves a reward for your efforts, please email us at our contact address found in the site footer. We read every comment posted to the site, but it's possible that we may miss one. -Jay]

Reply

I can't believe no one's commented about the 2nd part of the clock puzzle where you have to put in the WRONG solution for it to work..

It's 4:55, which means the green hand should be ALMOST on the 5, not on the 4! We're just so used to digital clocks now...

Reply

Huh.... Is anyone else getting a "page not found" error??

[Thanks for the note. Apparently the site has moved. I've updated the links. -Jay]

Reply

ugh hammer is not working hit the whole front area below vcr nada :/

Reply

^ Scroll Up | Homepage >

Leave a comment [top of page]

Please consider creating a Casual Gameplay account if you're a regular visitor here, as it will allow us to create an even better experience for you. Sign-up here!
  • PLEASE UNDERSTAND SITE POLICIES BEFORE POSTING COMMENTS
  • You may use limited HTML tags for style:
    (a href, b, br/, strong, em, ul, ol, li, code, spoiler)
    HTML tags begin with a less-than sign: < and end with a greater-than sign: >. Always. No exceptions.
  • To post spoilers, please use spoiler tags: <spoiler> example </spoiler>
    If you need help understanding spoiler tags, read the spoiler help.
  • Please Preview your comment before posting, especially when using spoilers!
  • No link dropping, no domains as names; do not spam, and do not advertise! (rel="nofollow" in use)
chrpa Jayisgames needs your help to continue providing quality content. Click for details Welcome to the Roundup 66 - Retro with four games! After you find the ten monkeys in the chapter, look in the inventory. You will find a...  ...
chrpa Jayisgames needs your help to continue providing quality content. Click for details Welcome to the Roundup 65 with three games! As mentioned in the previous roundups, only odd-numbered episodes are featured since even-numbered are for Robin Vencel's patrons (the...  ...
chrpa Jayisgames needs your help to continue providing quality content. Click for details Hi! Weekday Escape and Weekday Puzzle are here! First we have two new cans from tomoLaSiDo and then two small rooms from isotronic. That's all for this...  ...
6,365 Views
0 Comments
chrpa Jayisgames needs your help to continue providing quality content. Click for details Welcome to Mobile Monday! We have another beautiful game from Nicolet and it's a winter game as it should be. Tasuku Yahiro have released another of their...  ...

HELP Jayisgames.com

Recent Comments


Display 5 more comments
Limit to the last 5 comments

Game of the week


Dark Romance: Vampire Origins Collector's Edition

Your Favorite Games edit

add
Save links to your favorite games here. Use the Favorites editor.

Monthly Archives