JayisGames.com is now available ad-free!
Jay is Games recommends Cheat Happens with 8,000+ games and 35,000+ trainers!

Escape from Mr. Y's Room 3


  • Currently 4.7/5
  • 1
  • 2
  • 3
  • 4
  • 5
Rating: 4.7/5 (139 votes)
Comments (44) | Views (11,611)

Weekday Escape

Grinnyp
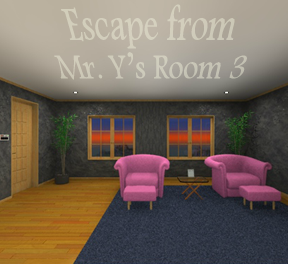
If you play through all of the Tesshi-e escape games sooner or later you will run up against the mysterious Mr. Y, a "friend" who has a predilection for inviting you over only to lock you into, and force you to solve your way out of, a room. Whether it be his children's bedroom, a random room in his house, or a strangely empty space, Mr. Y has the room escaping goods all ready to go. Isn't it nice to know that, even though having recently moved, Mr. Y is still ready to challenge you with Escape from Mr. Y's Room 3, the latest by Tesshi-e, just in time for Weekday Escape?

Escape from Mr. Y's Room 3Escape from Mr. Y's Room 3 is packed with a bunch of fun new puzzles as well as some old favorites. Navigation is smooth and easy and the room is so sparsely furnished that despite the lack of a changing cursor there is very little pixel hunting. An amazing new feature involves color-based puzzles that are color-blind friendly (simply click on a colored item and it helpfully announces its color to you) and even more surprisingly there are two endings that both feature a happy coin.

Escape from Mr. Y's Room 3 features all that is good about Tesshi-e room escape design from the beautiful backgrounds to the easy-to-handle inventory. With this, their 75th game, Tesshi-e (and Mr. Y) continue to amaze and delight room escape fanatics everywhere.

Play Escape from Mr. Y's Room

Walkthrough Guide


(Please allow page to fully load for spoiler tags to be functional.)

WALKTHROUGH

Exploration

Pink Chair Wall

The left chair has a piece of paper under it with 'River' and different coloured stars in the corners

The right chair has K24 under the cushion

Take the piece from the table and note the calender

Picture Wall

The picture of the RIVER has wobbly corners

TV Wall

There's a blue diamond, a locked box that needs a key, and an amp?

Window Wall

Cabinet

The top cubby has a screwdriver in a box with 5-9-20-25-31 under it and 7 buttons. The right cubby is locked with a 3x7 grid. The bottom cubby is locked and needs a key. The left cubby opens and has different coloured books that have stars on the top and numbers along the bottom

The window's blinds are closed. Under the window there is a hole. Between the window and the cabinet there is a panel that is screwed to the wall. Beside the door is a panel with a card slot and 'TYK'

Solving Puzzles

Getting the Screwdriver

The 5 numbers on the screwdriver's case correspond to the calender's columns which correspond to the buttons

e.g. 5 is in column 5, so you press button 5

The order of the buttons is 52643

Screwed Panel

unscrew with screwdriver and take orb with clover key. You cannot open it yet.

Wobbly Picture Puzzle

Use the 'River' clue and the clue from the left cubby

The numbers and colours of the books tell you the order to press the corners of the pictures, and the corners on the 'River' paper show you which colour corresponds to which corner

Upper left, upper right, upper right, lower left, lower right, lower right

Take the key card (note the YX) and trade the orb for the ball inside the tube

Use the screwdriver on the ball of ice to get a switch

The Right Cubby

Go back to the window wall and place the switch in the spot between the window and cabinet. Turn it so the light turns green

The room reveals a decorative Mr.Birdy and a spade key near a hole on the ledge

The decorative Mr.Birdy looks like that 3x7 grid in the right cubby

The solution for the cubby (going left to right) is top, middle, top, bottom, top, middle, top

Take the strong magnet (note the red heart) and place it on the ledge of the window

The key will fall to the hole under the window

Getting into the Second Room

Use the spade key on the bottom cubby

You will get a tin that says T343 but you can't open it

Go to the panel beside the door. It says TYK. Insert the key card

We know that T is 343, Y is X, and K is 24

343 x 24 = 8232

Exploration #2

Mr.Birdy Wall

Click on the decorative Mr.Birdy and then again on the top left of the drawers to see 4 buttons with a spade, diamond, heart, and club

Table Wall

Note the white spade on the window and click on the table. Open the drawer to reveal a box with 5 spaces

Looks like a piece can go in here. That means there's 4 more to find

Window Wall

The top left cubby has a happy coin, use your screwdriver to take it. The top right has a box that needs a 3 digit code. The middle cubby has a hippo munching on something with 4 buttons on its side. The bottom right has a green club

Bed Wall

Click on the table between the beds and take the remote. Note the yellow spade

Click to the right of the right bed to see a red ball. Take it

Solving Puzzles #2

Hippo

Go back into the first room and turn on the TV.

Click the buttons 1-6 and note the hippo's position. Go back to the second room

The solution for the hippo's buttons is upper right, lower right, upper left, lower right, lower left, upper left

Take the piece and go back to the first room

Buttons on Mr.Birdy

Turn on the TV again and go to channel 7-12

Note the colours blue, white, green, yellow, red. Where have we seen those before?

The spades, heart, diamond, and club were those colours

The solution to the Mr.Birdy buttons is diamond, spade, club, spade, heart

You should see numbers come up on the 5 boxes. We'll come back to that

Upper Right Cubby

Go back to the first room and close the blinds. Return to the second room

There's 3 numbers on the blinds. Just what you need for the locked box.

Enter 512, open the box and take the can opener and the piece

Open the can and take another piece (You should have 4 pieces)

The Locked Box on the TV Wall in the first room

Go back to the first room and look behind the river picture

Use the red ball to get back the orb with the clover key. How are you going to open it?

Use the happy coin to open the orb and take the key

Use the key on the locked box and take the final piece

Getting out

Go back to the second room. Now that you have all 5 pieces, how do you know what order to put them in?

Look at the boxes on the decorative Mr.Birdy

46385, what does that mean?

The sides of the shapes on the pieces match up with the numbers in the boxes

Place the pieces in the slots in the drawer

square, hexagon, triangle, octagon, pentagon

Take the heart key and escape!

Walkthrough of Mr. Y's Room 3

Starting Out: Gathering Clues

  1. From the start screen, select your language (Japanese or English) and press "Opening Start" then "Game Start."

  2. Zoom in on the two pink chairs:

    • Under the left pink chair's cushion you'll find a "River" CLUE. Take it.

    • Under the cushion of the right pink chair is another clue: "K24." Make a note.

  3. Then look at the glass table between the two chairs:

    • Take the SOME KIND OF PART (square).

    • Look at the calender on that same table. Notice the days, days and colors.

  4. Back up and turn left to see the door:

    • Notice there is a lock by the door: a card slot, "TYK" and 4 digits.

  5. Back up twice, then examine the panel next to the window:

    • a screwdriver is needed.

  6. Back up and look at the hole under the window.

    • That might be useful later.

  7. Back up and zoom in on The Cabinet on the left side of the room:

    • Look in the Top Door:

      • Here is the screwdriver.

      • The clue is "5-9-20-25-31" and 7 buttons to push.

    • Look at the Right Door:

      • A 3x7 grid with buttons you can press/change color.

    • The Bottom Door needs a key.

    • Look inside the Left Door:

      • Six books of varying colors—red, yellow, yellow, blue, green, green.

  8. Back up, turn left to face the TV and stereo:

    • Look on the side of the right speaker: a blue diamond.

    • The little box to the right of the "amp?" needs a key.

  9. Now you've gathered as many clues as possible; it's time to solve some puzzles.

The Screwdriver

  1. Turn back to the cabinets and open the top door.

  2. Use the clues from the calender and the numbers under the screwdriver to open the screwdriver's case:

  3. HINT:

    Number the buttons as you would the days of the week: 1 through 7.

    SOLUTION:

    The first number under the screwdriver is a "5". Checking the calender, it's also the 5th button. So push that button first.

    Coordinate the other numbers on the calender according to the which column they're in, matching that to a button, and you know to push the buttons in this order:

    5th - 2nd - 6th - 4th - 3rd

  4. When you've pressed the buttons in the correct order, the case opens and you can get the:

    • SCREWDRIVER

Panel by Window and Wobbly Picture

  1. Back up from the cabinet and examine the panel next to the window again.

  2. Use the SCREWDRIVER to take it off.

  3. Get the BALL WITH (clover) KEY INSIDE.

  4. Back up and turn left twice and zoom in on the picture of the river.

  5. Using the clues you gathered from the left pink chair and inside the left cupboard door, click on the corners of the wobbly picture frame in the correct order.

  6. SOLUTION:

    1-top left; 2-top right; 3-top right; 4-bottom left; 5-bottom right; 6-bottom right.

  7. From the niche behind the river picture, get the:

    • KEY CARD. (Notice the key card has "Y x" written on it.)

  8. There is also a PIPE:

    • Put the BALL WITH KEY into the top of the pipe.

      • A BALL OF ICE comes out. Take it.

    • Use the SCREWDRIVER to break the ice and get:

      • A SWITCH.

3x7 Grid Puzzle and Key to Bottom Cabinet Door

  1. Turn back around to face the window again.

  2. Examine the niche where you removed the screwed-on panel:

    • Put the SWITCH in the spot where you can "place something here".

    • Click on the switch and it will turn to the right, turning the light green.

  3. Back up and zoom in on the window:

    • You can see 7 Mr. Birdies, hanging in a pattern in the next room.

    • Look down at the windowsill and you can see a spade key next to the hole.

  4. Back out and go back to the right cabinet door:

    • Use the clue from the Mr. Birdies display to click on the correct buttons on the 3x7 grid.

    • HINT:

      Notice how each of the 7 Mr. Birdies hang at one of 3 different lengths.

      SOLUTION:

      Divide the buttons by 7 columns and 3 rows. For each column, only one button should be shaded. So, because the first Mr. Birdy on the left is in the top row, that's which button you should click. Do the same for the rest:

      X = click that button. o = do not click that button.

      X o X o X o X
      o X o o o X o
      o o o X o o o

    • When you've shaded the buttons on the 3x7 grid correctly, click the handle to open the door:

      • Get the STRONG MAGNET.

      • Also note the red heart.

  5. Back up twice and look at the windowsill again:

    • Place the STRONG MAGNET on the windowsill by the key so that it slides toward the hole and drops down.

  6. Back up twice then zoom in on the hole under the window to get the:

    • SPADE-SHAPED KEY.

  7. Back up and zoom in on the cabinet again.

  8. Use the SPADE-SHAPED KEY on Bottom Cabinet Door to open it:

    • Get the CAN.

    • Notice that it has "T343" written on it.

  9. Back up. Now you're ready to open the door to the next room.

Entering the Next Room

  1. To the right side of the window is the door to the next room. To get in, you'll need:

    • Key Card.

    • Can from inside the bottom cabinet door.

    • and a peek underneath the cushion of the right pink chair.

  2. Put that information together to get a code for the door lock panel.

  3. HINT:

    The door lock panel has "TYK" written on it. You have seen those letters on the items listed above.

    SOLUTION:

    T343
    Yx
    K24

    343x24 = 8232

    So, the code is 8232

  4. Insert the KEY CARD into the slot on the door lock panel.

  5. Input the code (see above spoiler).

    • the light will turn green indicating the door is unlocked now.

  6. Back up from the panel and click the door handle to open it. Go in.

Inside Room #2: Gathering Clues

  1. As you enter the second room, go forward to examine the Mr. Birdy display:

    • Notice the four buttons on the left side: spade, diamond, heard, and club.

  2. Turn right to see out the two windows (lovely view!):

    • Make a note of the: White Spade.

    • Zoom in on the small table and open its drawer:

      • There's a box inside. It looks like you need 5 parts to place on its top to open it.

  3. Turn right again and then zoom in on the five inset shelves on the right:

    • The Top Left shelf has a happy coin (yay!) on display.

      • Use your SCREWDRIVER to get it.

    • Back up.

  4. The Bottom Right shelf has a Green Clover on display.

  5. The Top Right shelf has a safe needing a 3-digit number code.

  6. The Middle has a Mr. Hippo that's holding something in its mouth.

  7. Back out from the shelves and turn right to face the beds.

    • Make a note of the Yellow Spade on the left headboard.

    • Take the TV REMOTE (complete with batteries inside!) from the nightstand.

    • Back up and click on the right side of the right bed:

      • Get the RED BALL.

  8. Go back through the door into the first room.

  9. Zoom in on the river picture again. Click it to open the panel again...:

    • Use the RED BALL to retrieve the BALL WITH KEY inside.

    • Use the HAPPY COIN to open the ball:

      • Get the CLOVER-SHAPED KEY.

  10. Back up and turn right to face the TV.

  11. Examine the Box under the TV:

    • Use the CLOVER-SHAPED KEY to unlock the box:

      • Get another PART (triangle).

  12. Click the RED BUTTON in the top corner of the remote to turn on the TV.

    • Select "1" from the remotes number pad.

    • Make a note of how channel 1's hippo is positioned on the screen.

    • Do the same for the other numbers (up to 6) and note where the hippo is each time.

  13. Now click any number, 7-12:

    • Make a note of the colors and the order they're in: Blue, White, Green, Yellow, Red.

  14. Turn right. Examine the switch next to the window again:

    • Click the switch to turn it, turning the light red, to close the blinds.

  15. Go back into the 2nd Room. Turn left twice and zoom in on the now closed blinds to read the number written there.

  16. Now you're ready to solve more puzzles.

The Safe, the Hippo and the Can

  1. Go back over to the shelves in the second room.

  2. Examine the Hippo in the middle shelf:

    • Use the clues from the TV to determine which buttons to push on the hippo.

      1. Top Right

      2. Bottom Right

      3. Top Left

      4. Bottom Right

      5. Bottom Left

      6. Top Left

    • Get the SOME KIND OF PART (hexagon).

  3. Examine the safe on the top right shelf:

    • Enter the code you found on the window blinds (see room#2 clues above).

    • SOLUTION:

      512

    • Click the handle to open it and get:

      • CAN OPENER.

      • SOME KIND OF PART (pentagon).

  4. Use the CAN OPENER to open the Can:

    • Get another PART (octogon).

Mr. Birdies Display and Box in Small Table

  1. Put together the clues from the colored shapes (found throughout the two rooms) with the colored bars on TV channels 7-12.

  2. Using that information, push the four buttons on the Mr. Birdies display in the correct order.

  3. SOLUTION:

    1. Diamond

    2. Spade

    3. Club

    4. Spade

    5. Heart

  4. Then, back up and look at the result:

  5. 4 6 3 8 5

  6. Turn right and examine the small table, opening the drawer:

    • The big numbers lit up on the Mr. Birdies display tell you where to put which SOME KIND OF PART into the box.

    SOLUTION:

    Count the sides of each shape on the parts. Insert them in that order into the box.

    From left to right:

    SQUARE--HEXAGON--TRIANGLE--OCTOGON--PENTAGON

  7. When the parts are correctly entered into the box, you'll get:

    • a HEART-SHAPED KEY.

Regular "happy" End

  1. If you want to do both endings, after you get the HEART-SHAPED KEY from drawer by the two windows in the 2nd room:

    • select "FUNCTION" from below the game screen.

    • Choose "SAVE" and "Yes".

    • Then click the red box in the bottom right corner to return to the main game screen.

  2. Go back into the first room and use the heart-shaped key on the door next to the TV.

  3. Click the handle and out you go!

Extra Happy End

Note: save your game before following these steps if you haven't seen the regular ending yet (see "Regular End" spoiler above).

  1. After getting the heart-shaped key, return to the first room.

  2. BEFORE using the key and going out the door, use the remote on the TV again:

    • Note how the hippos have changed.

  3. Go back into the 2nd Room and examine the hippo again:

    • Press the buttons again in the new order.

    SOLUTION:

    1. Top Left

    2. Top Right

    3. Bottom Left

    4. Bottom Right

    5. Bottom Left

    6. Top Right

  4. Get the extra special happy coin from the panel that opens in the hippo's side.

  5. Go back into the first room, use the key on the door, and exit.

Congratulations! Happiness to you!

44 Comments

STUCK. I have

a River clue card (used), screwdriver (used), magnet (used), some kind of part (not used), key with heart shape (used), key card (not used), and a can I can't open.

I have no idea what to do next. Am I missing a spot?

Reply
ThemePark July 4, 2012 1:47 AM

Sadly this is sub-par for Tesshi-e. Dead pixels aplenty, and too many illogical puzzles.

Reply

@rhed

Note the letter and symbol on the key card, the letter and numbers on the can, and the combination clue by the key card slot. If you're still missing one of the clues, try visiting the pink chairs.

Reply

rhed

You are not missing anything, you need to use the keycard.

The code is on the door TYK

T from the tin of paint, Y on the card itself, and K under the seat on the chair

24x343 = 8232

Reply

Themepark

I agree some dead pixels, but what illogical puzzles ?

Reply

Now I'm stuck. Help! All I have left to do is

unlock the safe next to the amp, most likely by using the key inside the ball which is now stuck behind the river picture on the wall. I'm guessing that safe holds the triangle piece, which is the only one of the five shapes that I'm missing. Help!

Reply

I'm stuck on the screwdriver puzzle.

I've tried everything I can think of with the numbers and buttons on the box, but I can't get it open. I have the blue keycard, the river paper, and a square part of some sort.

Reply

Bilson

Did you take anything out when you deposited the ball?

Thomas

look at the numbers in relation to the position of the days of the week on the calendar

Reply

Thomas

The screwdriver puzzle has the code 5-9-20-25-31 underneath seven buttons.

Look at the calendar.

5 is a Thursday, 9 is a Monday, 20 is a Friday, 25 is a Wednesday, and 31 is a Tuesday.

Thursday= column 5, Monday= column 2, Friday= column 6, Wednesday= column 4, Tuesday= column 3

Reply

I don't understand the "dead pixels" comment. Dead pixels are a hardware issue with a monitor. Perhaps it's supposed to be referring to some of the apparent visual artifacts?

And the puzzles all made sense to me.

The only thing that bothered me about this one, is that the Happy Coin wasn't a bonus item to find, but rather was a necessary tool.

Reply

Yaddab

Yes, I got the switch

which I put in the wall and turned on

which opened the blinds so that I could see

the Mr. Birdy clue

The items I still have are

the remote

I used the hippopotamus clue and the color clue and got

the happy coin and the 4-6-3-8-5 clue

the screwdriver (used), the river clue card (used), the happy coin, and the can opener.

Is something lying around still that I haven't found?

Reply

Yaddab, I forgot to include that I still have

the magnet (used)

Reply

Bilson

Did you find the ball beside the right hand bed?

Tenzhi

There is one you missed!

Reply

Any help on how to get

three digit code in the other room?

Reply

Power of the post. Figured it out!

Reply

Care to enlighten me on how you found it, Thomas? I'm stuck looking for that code.

Reply

I'm stuck on the grid puzzle on the right cabinet door. is there a hint for that somewhere that I missed?

Reply

Alex -

the code is on the other side of the door on the window, you can only see it with the switch turned off and the curtain closed

Reply

Annelise

You will kick yourself, look at the arrangement of the Mr Birdies

Reply

@Annelise:

Mr. Birdy says hi.

Reply

.... damnit. haha can't win 'em all!

Reply
nerdypants July 4, 2012 3:27 AM

I really enjoyed this one. The weird pixels were a bit disappointing, but otherwise it was a great game. I didn't think any of the puzzles were illogical at all. They flowed together beautifully. Also,

two Happy Coins!!

Happy Coins brought happinesses to me.

Reply

WALKTHROUGH

Exploration

Pink Chair Wall

The left chair has a piece of paper under it with 'River' and different coloured stars in the corners

The right chair has K24 under the cushion

Take the piece from the table and note the calender

Picture Wall

The picture of the RIVER has wobbly corners

TV Wall

There's a blue diamond, a locked box that needs a key, and an amp?

Window Wall

Cabinet

The top cubby has a screwdriver in a box with 5-9-20-25-31 under it and 7 buttons. The right cubby is locked with a 3x7 grid. The bottom cubby is locked and needs a key. The left cubby opens and has different coloured books that have stars on the top and numbers along the bottom

The window's blinds are closed. Under the window there is a hole. Between the window and the cabinet there is a panel that is screwed to the wall. Beside the door is a panel with a card slot and 'TYK'

Solving Puzzles

Getting the Screwdriver

The 5 numbers on the screwdriver's case correspond to the calender's columns which correspond to the buttons

e.g. 5 is in column 5, so you press button 5

The order of the buttons is 52643

Screwed Panel

unscrew with screwdriver and take orb with clover key. You cannot open it yet.

Wobbly Picture Puzzle

Use the 'River' clue and the clue from the left cubby

The numbers and colours of the books tell you the order to press the corners of the pictures, and the corners on the 'River' paper show you which colour corresponds to which corner

Upper left, upper right, upper right, lower left, lower right, lower right

Take the key card (note the YX) and trade the orb for the ball inside the tube

Use the screwdriver on the ball of ice to get a switch

The Right Cubby

Go back to the window wall and place the switch in the spot between the window and cabinet. Turn it so the light turns green

The room reveals a decorative Mr.Birdy and a spade key near a hole on the ledge

The decorative Mr.Birdy looks like that 3x7 grid in the right cubby

The solution for the cubby (going left to right) is top, middle, top, bottom, top, middle, top

Take the strong magnet (note the red heart) and place it on the ledge of the window

The key will fall to the hole under the window

Getting into the Second Room

Use the spade key on the bottom cubby

You will get a tin that says T343 but you can't open it

Go to the panel beside the door. It says TYK. Insert the key card

We know that T is 343, Y is X, and K is 24

343 x 24 = 8232

Exploration #2

Mr.Birdy Wall

Click on the decorative Mr.Birdy and then again on the top left of the drawers to see 4 buttons with a spade, diamond, heart, and club

Table Wall

Note the white spade on the window and click on the table. Open the drawer to reveal a box with 5 spaces

Looks like a piece can go in here. That means there's 4 more to find

Window Wall

The top left cubby has a happy coin, use your screwdriver to take it. The top right has a box that needs a 3 digit code. The middle cubby has a hippo munching on something with 4 buttons on its side. The bottom right has a green club

Bed Wall

Click on the table between the beds and take the remote. Note the yellow spade

Click to the right of the right bed to see a red ball. Take it

Solving Puzzles #2

Hippo

Go back into the first room and turn on the TV.

Click the buttons 1-6 and note the hippo's position. Go back to the second room

The solution for the hippo's buttons is upper right, lower right, upper left, lower right, lower left, upper left

Take the piece and go back to the first room

Buttons on Mr.Birdy

Turn on the TV again and go to channel 7-12

Note the colours blue, white, green, yellow, red. Where have we seen those before?

The spades, heart, diamond, and club were those colours

The solution to the Mr.Birdy buttons is diamond, spade, club, spade, heart

You should see numbers come up on the 5 boxes. We'll come back to that

Upper Right Cubby

Go back to the first room and close the blinds. Return to the second room

There's 3 numbers on the blinds. Just what you need for the locked box.

Enter 512, open the box and take the can opener and the piece

Open the can and take another piece (You should have 4 pieces)

The Locked Box on the TV Wall in the first room

Go back to the first room and look behind the river picture

Use the red ball to get back the orb with the clover key. How are you going to open it?

Use the happy coin to open the orb and take the key

Use the key on the locked box and take the final piece

Getting out

Go back to the second room. Now that you have all 5 pieces, how do you know what order to put them in?

Look at the boxes on the decorative Mr.Birdy

46385, what does that mean?

The sides of the shapes on the pieces match up with the numbers in the boxes

Place the pieces in the slots in the drawer

square, hexagon, triangle, octagon, pentagon

Take the heart key and escape!

Reply

Nerdypants, where did you find the other happy coin? :O

Reply

@Janet:

I wondered about the ease with which you got the happy coin. It isn't in Tesshi-e's normal style. I've unlocked the door, but I'm guessing there is another order in which you can press the buttons on the Mr. Birdy display, which will give you a different order for the cards to go, and out will pop a happy coin.

So far I'm not having much luck finding another colour clue, I've tried the order of the books (RYYGBB), and inputting them backwards etc. but no luck as of yet.....

Reply

@Tenzhi: Tesshi-e doesn't give the happy coin that easily, maybe you missed something???

@Janet: Found it.... disregard the above post.

One of the puzzle clues has changed after unlocking the door.

See if there's anything interesting on TV while you try and figure it out.

Look at the hippo order.

It's changed to 123432 (with 1 being top left, 2 top right, 3 bottom left, and four bottom right)

Press those buttons on the hippo, and grab the second happy coin.

Reply
MikuJess July 4, 2012 8:56 AM

I wonder if the design for the second Happy Coin is gonna be used for the Happy Coins in future escapes...

Reply

For the screwdriver an alternative approach that worked for me -

Numbers are 5 - 9 - 20 - 25 - 31
Count across the buttons and loop back when you get to the end. So 5th button first, count to 7th (last button), 8th is back to the first and so 9th is the second - keep going until 31.
Hope that makes some sense.

Reply

i'm stuck on

i used the magnet on in key and the walkthrough says it is to put the magnet on the hole and the key will push into the holem which it does, but the next part says i'm to use that key to open the bottom door ob that cabinet and i never collected it because it;s still in the hole. i'm confused.

Reply
inheritance.fan July 4, 2012 4:53 PM

The Walkthrough only shows one ending, but the game description says there are at least two...

Reply

Walkthrough of Mr. Y's Room 3

Starting Out: Gathering Clues

  1. From the start screen, select your language (Japanese or English) and press "Opening Start" then "Game Start."

  2. Zoom in on the two pink chairs:

    • Under the left pink chair's cushion you'll find a "River" CLUE. Take it.

    • Under the cushion of the right pink chair is another clue: "K24." Make a note.

  3. Then look at the glass table between the two chairs:

    • Take the SOME KIND OF PART (square).

    • Look at the calender on that same table. Notice the days, days and colors.

  4. Back up and turn left to see the door:

    • Notice there is a lock by the door: a card slot, "TYK" and 4 digits.

  5. Back up twice, then examine the panel next to the window:

    • a screwdriver is needed.

  6. Back up and look at the hole under the window.

    • That might be useful later.

  7. Back up and zoom in on The Cabinet on the left side of the room:

    • Look in the Top Door:

      • Here is the screwdriver.

      • The clue is "5-9-20-25-31" and 7 buttons to push.

    • Look at the Right Door:

      • A 3x7 grid with buttons you can press/change color.

    • The Bottom Door needs a key.

    • Look inside the Left Door:

      • Six books of varying colors—red, yellow, yellow, blue, green, green.

  8. Back up, turn left to face the TV and stereo:

    • Look on the side of the right speaker: a blue diamond.

    • The little box to the right of the "amp?" needs a key.

  9. Now you've gathered as many clues as possible; it's time to solve some puzzles.

The Screwdriver

  1. Turn back to the cabinets and open the top door.

  2. Use the clues from the calender and the numbers under the screwdriver to open the screwdriver's case:

  3. HINT:

    Number the buttons as you would the days of the week: 1 through 7.

    SOLUTION:

    The first number under the screwdriver is a "5". Checking the calender, it's also the 5th button. So push that button first.

    Coordinate the other numbers on the calender according to the which column they're in, matching that to a button, and you know to push the buttons in this order:

    5th - 2nd - 6th - 4th - 3rd

  4. When you've pressed the buttons in the correct order, the case opens and you can get the:

    • SCREWDRIVER

Panel by Window and Wobbly Picture

  1. Back up from the cabinet and examine the panel next to the window again.

  2. Use the SCREWDRIVER to take it off.

  3. Get the BALL WITH (clover) KEY INSIDE.

  4. Back up and turn left twice and zoom in on the picture of the river.

  5. Using the clues you gathered from the left pink chair and inside the left cupboard door, click on the corners of the wobbly picture frame in the correct order.

  6. SOLUTION:

    1-top left; 2-top right; 3-top right; 4-bottom left; 5-bottom right; 6-bottom right.

  7. From the niche behind the river picture, get the:

    • KEY CARD. (Notice the key card has "Y x" written on it.)

  8. There is also a PIPE:

    • Put the BALL WITH KEY into the top of the pipe.

      • A BALL OF ICE comes out. Take it.

    • Use the SCREWDRIVER to break the ice and get:

      • A SWITCH.

3x7 Grid Puzzle and Key to Bottom Cabinet Door

  1. Turn back around to face the window again.

  2. Examine the niche where you removed the screwed-on panel:

    • Put the SWITCH in the spot where you can "place something here".

    • Click on the switch and it will turn to the right, turning the light green.

  3. Back up and zoom in on the window:

    • You can see 7 Mr. Birdies, hanging in a pattern in the next room.

    • Look down at the windowsill and you can see a spade key next to the hole.

  4. Back out and go back to the right cabinet door:

    • Use the clue from the Mr. Birdies display to click on the correct buttons on the 3x7 grid.

    • HINT:

      Notice how each of the 7 Mr. Birdies hang at one of 3 different lengths.

      SOLUTION:

      Divide the buttons by 7 columns and 3 rows. For each column, only one button should be shaded. So, because the first Mr. Birdy on the left is in the top row, that's which button you should click. Do the same for the rest:

      X = click that button. o = do not click that button.

      X o X o X o X
      o X o o o X o
      o o o X o o o

    • When you've shaded the buttons on the 3x7 grid correctly, click the handle to open the door:

      • Get the STRONG MAGNET.

      • Also note the red heart.

  5. Back up twice and look at the windowsill again:

    • Place the STRONG MAGNET on the windowsill by the key so that it slides toward the hole and drops down.

  6. Back up twice then zoom in on the hole under the window to get the:

    • SPADE-SHAPED KEY.

  7. Back up and zoom in on the cabinet again.

  8. Use the SPADE-SHAPED KEY on Bottom Cabinet Door to open it:

    • Get the CAN.

    • Notice that it has "T343" written on it.

  9. Back up. Now you're ready to open the door to the next room.

Entering the Next Room

  1. To the right side of the window is the door to the next room. To get in, you'll need:

    • Key Card.

    • Can from inside the bottom cabinet door.

    • and a peek underneath the cushion of the right pink chair.

  2. Put that information together to get a code for the door lock panel.

  3. HINT:

    The door lock panel has "TYK" written on it. You have seen those letters on the items listed above.

    SOLUTION:

    T343
    Yx
    K24

    343x24 = 8232

    So, the code is 8232

  4. Insert the KEY CARD into the slot on the door lock panel.

  5. Input the code (see above spoiler).

    • the light will turn green indicating the door is unlocked now.

  6. Back up from the panel and click the door handle to open it. Go in.

Inside Room #2: Gathering Clues

  1. As you enter the second room, go forward to examine the Mr. Birdy display:

    • Notice the four buttons on the left side: spade, diamond, heard, and club.

  2. Turn right to see out the two windows (lovely view!):

    • Make a note of the: White Spade.

    • Zoom in on the small table and open its drawer:

      • There's a box inside. It looks like you need 5 parts to place on its top to open it.

  3. Turn right again and then zoom in on the five inset shelves on the right:

    • The Top Left shelf has a happy coin (yay!) on display.

      • Use your SCREWDRIVER to get it.

    • Back up.

  4. The Bottom Right shelf has a Green Clover on display.

  5. The Top Right shelf has a safe needing a 3-digit number code.

  6. The Middle has a Mr. Hippo that's holding something in its mouth.

  7. Back out from the shelves and turn right to face the beds.

    • Make a note of the Yellow Spade on the left headboard.

    • Take the TV REMOTE (complete with batteries inside!) from the nightstand.

    • Back up and click on the right side of the right bed:

      • Get the RED BALL.

  8. Go back through the door into the first room.

  9. Zoom in on the river picture again. Click it to open the panel again...:

    • Use the RED BALL to retrieve the BALL WITH KEY inside.

    • Use the HAPPY COIN to open the ball:

      • Get the CLOVER-SHAPED KEY.

  10. Back up and turn right to face the TV.

  11. Examine the Box under the TV:

    • Use the CLOVER-SHAPED KEY to unlock the box:

      • Get another PART (triangle).

  12. Click the RED BUTTON in the top corner of the remote to turn on the TV.

    • Select "1" from the remotes number pad.

    • Make a note of how channel 1's hippo is positioned on the screen.

    • Do the same for the other numbers (up to 6) and note where the hippo is each time.

  13. Now click any number, 7-12:

    • Make a note of the colors and the order they're in: Blue, White, Green, Yellow, Red.

  14. Turn right. Examine the switch next to the window again:

    • Click the switch to turn it, turning the light red, to close the blinds.

  15. Go back into the 2nd Room. Turn left twice and zoom in on the now closed blinds to read the number written there.

  16. Now you're ready to solve more puzzles.

The Safe, the Hippo and the Can

  1. Go back over to the shelves in the second room.

  2. Examine the Hippo in the middle shelf:

    • Use the clues from the TV to determine which buttons to push on the hippo.

      1. Top Right

      2. Bottom Right

      3. Top Left

      4. Bottom Right

      5. Bottom Left

      6. Top Left

    • Get the SOME KIND OF PART (hexagon).

  3. Examine the safe on the top right shelf:

    • Enter the code you found on the window blinds (see room#2 clues above).

    • SOLUTION:

      512

    • Click the handle to open it and get:

      • CAN OPENER.

      • SOME KIND OF PART (pentagon).

  4. Use the CAN OPENER to open the Can:

    • Get another PART (octogon).

Mr. Birdies Display and Box in Small Table

  1. Put together the clues from the colored shapes (found throughout the two rooms) with the colored bars on TV channels 7-12.

  2. Using that information, push the four buttons on the Mr. Birdies display in the correct order.

  3. SOLUTION:

    1. Diamond

    2. Spade

    3. Club

    4. Spade

    5. Heart

  4. Then, back up and look at the result:

  5. 4 6 3 8 5

  6. Turn right and examine the small table, opening the drawer:

    • The big numbers lit up on the Mr. Birdies display tell you where to put which SOME KIND OF PART into the box.

    SOLUTION:

    Count the sides of each shape on the parts. Insert them in that order into the box.

    From left to right:

    SQUARE--HEXAGON--TRIANGLE--OCTOGON--PENTAGON

  7. When the parts are correctly entered into the box, you'll get:

    • a HEART-SHAPED KEY.

Regular "happy" End

  1. If you want to do both endings, after you get the HEART-SHAPED KEY from drawer by the two windows in the 2nd room:

    • select "FUNCTION" from below the game screen.

    • Choose "SAVE" and "Yes".

    • Then click the red box in the bottom right corner to return to the main game screen.

  2. Go back into the first room and use the heart-shaped key on the door next to the TV.

  3. Click the handle and out you go!

Extra Happy End

Note: save your game before following these steps if you haven't seen the regular ending yet (see "Regular End" spoiler above).

  1. After getting the heart-shaped key, return to the first room.

  2. BEFORE using the key and going out the door, use the remote on the TV again:

    • Note how the hippos have changed.

  3. Go back into the 2nd Room and examine the hippo again:

    • Press the buttons again in the new order.

    SOLUTION:

    1. Top Left

    2. Top Right

    3. Bottom Left

    4. Bottom Right

    5. Bottom Left

    6. Top Right

  4. Get the extra special happy coin from the panel that opens in the hippo's side.

  5. Go back into the first room, use the key on the door, and exit.

Congratulations! Happiness to you!

Reply

@Paul:

When you put the magnet against the window the key will fall into the hole. That hole attaches to the hole under the window, the hole that you can access. If the key has fallen then you should be able to grab it by clicking the hole below the window

@inheritance.fan:

I hadn't read the description and didn't know there were two endings when I created the walkthrough. If you read MattOG's comment I believe you will get the other ending, although I haven't tried it myself

Hope that helps!

Reply
Lasse Laserman July 4, 2012 11:02 PM

@ThemePark: Dead pixels?
@nerdypants: Weird pixels?

I'm not sure if you're referring to the same thing but either way, I can't say any one pixel caught my attention. Care to elaborate?

Reply

@Lasse:

I believe they're referring to the visual artifacts. For instance, the pink chair on the right has a number of odd pale or white squares of varying size that appear to be graphical mishaps. Mind you, that's the only place I noticed such things.

Reply

I don't normally notice things like that and maybe it is supposed to be reflection but it is most visible on the chairs, the TV screen and the river painting.

Also I noticed that this time around not all the items that were no longer needed disappeared.

Tesshi-e did say this one was a bit rushed (if google translate can be trusted!)

That said I still gave it a 5/5 it was a very good game with decent puzzles, and I made it out without a walk through:)

Reply

Can ANYONE PLEASE tell me..What is the beautiful music that Tesshi-e always uses in his/her room escape games is? Please!

I've been trying to find out for a few months now! lol

Thank you!

Reply

Repost, though I haven't played this one:

Tesshi-e (and most other Japanese designers, I've noticed) make a point of crediting their music sources. In this particular game, go to Function > Thanks for the credits.

Reply

Thanks Shudog for that reply! That put me one step closer. Unfortunately (for me) - everything is in japanese - a very intricate and complex language I don't speak. lol So I see the credits/links - and clicked on them - but I can't make hide nor hair out of any of them. :(

Reply

Most browsers will translate for you. I already downloaded a few sound files from those sites.

Japanese sites tend to be incredibly easy to navigate. They're all so organized.

Reply

My bad, I meant most search engines, though I imagine some browser plug-ins have a go at it.

Reply

Ok Shudog - let me give it a shot!!

Reply
JetSetVegas July 7, 2012 1:04 PM

There are two rules for a Tesshi-E game. 1.Check everything
2.Check everything again.
With all due respect to ThemePark I found this game to be very fluid and the puzzles to be very logical. With the exception of

clicking the side of the bed in the second room to find the red ball

all clickable areas were front and center. From the first solved puzzle everything else fell into place as you navigate the room and found clues. And while there were two escape scenarios both with a happy coin, I didn't really count the first one because

the coin is used as a tool in the course of the game and I think is used to throw us off and get comfortable thinking we didn't have a second coin, the REAL happy coin, to find

. This, IMHO, was another stellar effort by Tesshi-E and the second room to make the game longer and larger was a nice touch. No hints, no help, two coins. I liked the two coin scenario. something different.

Reply

Hmm, maybe I'm getting spoiled by the recent bloom of escape games, but I found this one a little sub-par compared to Tesshi-E's usual lush and mysterious surroundings. For a moment I thought it was a remake of an early early Tesshi-E.

In any case, nobody combines austere, gorgeous, and clever quite the way he does...so while I'm sure this was a great puzzle in its own right, I toddled off after a few minutes to another of his new ones that I haven't played yet.

Reply
jadis eaux August 16, 2014 11:26 PM

@Tenzhi

Or maybe it's just sparkly...
* * *
^-^

Reply

^ Scroll Up | Homepage >

Leave a comment [top of page]

Please consider creating a Casual Gameplay account if you're a regular visitor here, as it will allow us to create an even better experience for you. Sign-up here!
  • PLEASE UNDERSTAND SITE POLICIES BEFORE POSTING COMMENTS
  • You may use limited HTML tags for style:
    (a href, b, br/, strong, em, ul, ol, li, code, spoiler)
    HTML tags begin with a less-than sign: < and end with a greater-than sign: >. Always. No exceptions.
  • To post spoilers, please use spoiler tags: <spoiler> example </spoiler>
    If you need help understanding spoiler tags, read the spoiler help.
  • Please Preview your comment before posting, especially when using spoilers!
  • No link dropping, no domains as names; do not spam, and do not advertise! (rel="nofollow" in use)
chrpa Jayisgames needs your help to continue providing quality content. Click for details Welcome to the Roundup 66 - Retro with four games! After you find the ten monkeys in the chapter, look in the inventory. You will find a...  ...
chrpa Jayisgames needs your help to continue providing quality content. Click for details Welcome to the Roundup 65 with three games! As mentioned in the previous roundups, only odd-numbered episodes are featured since even-numbered are for Robin Vencel's patrons (the...  ...
chrpa Jayisgames needs your help to continue providing quality content. Click for details Hi! Weekday Escape and Weekday Puzzle are here! First we have two new cans from tomoLaSiDo and then two small rooms from isotronic. That's all for this...  ...
6,365 Views
0 Comments
chrpa Jayisgames needs your help to continue providing quality content. Click for details Welcome to Mobile Monday! We have another beautiful game from Nicolet and it's a winter game as it should be. Tasuku Yahiro have released another of their...  ...

HELP Jayisgames.com

Recent Comments


Display 5 more comments
Limit to the last 5 comments

Game of the week


Dark Romance: Vampire Origins Collector's Edition

Your Favorite Games edit

add
Save links to your favorite games here. Use the Favorites editor.

Monthly Archives