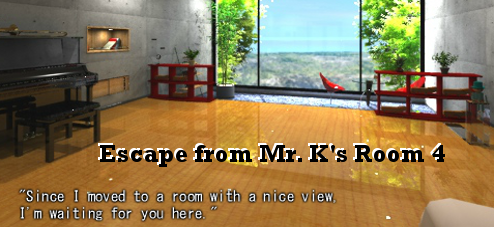
![]() It's been almost three years since we last heard from Mr. K, a friend of ours who probably never gets his security deposit back because he immediately renovates each and every place he moves to into an elaborate concoction of puzzles and mechanisms for his friends to escape from. Thanks to Tesshi-e, he's finally back, and now it's time to Escape from Mr. K's Room 4, featuring hippos, dapper birds (of course), piano music, a great view, and even a relaxing beverage. Awwwww yisssss folks, now we're gaming with style. Remember to click the language button to choose English before you start the game if you can't read Japanese!
It's been almost three years since we last heard from Mr. K, a friend of ours who probably never gets his security deposit back because he immediately renovates each and every place he moves to into an elaborate concoction of puzzles and mechanisms for his friends to escape from. Thanks to Tesshi-e, he's finally back, and now it's time to Escape from Mr. K's Room 4, featuring hippos, dapper birds (of course), piano music, a great view, and even a relaxing beverage. Awwwww yisssss folks, now we're gaming with style. Remember to click the language button to choose English before you start the game if you can't read Japanese!
 Like most Tesshi-e games, Escape from Mr. K's Room 4 lacks a changing cursor, so you'll have to click everywhere to find items and clues to escape. All items can be examined closely when you pick them up by highlighting them with a click and choosing "about item", and many of them need to be in order to discover even more clues and additional objects. Viewing objects up close is also the way you can combine things in your inventory, so if you want to try, examine an item, then click another one you're carrying and try to place it on the magnified view. You may also need to click and hold on certain things to reveal their hints! Tesshi-e's games have always married whimsy with logic in their design, and this latest is no exception as it packs a surprising amount of secrets, clues, and puzzles into a relatively small area. The angles can be a bit of an issue when it comes to manipulating your environment since there are so many sneakily hidden ways to approach things, but if you're a fan of Tesshi-e you already know to search every nook and cranny, sometimes more than once. Can you find the way out and the Happy Coin? This one might take a little arts and crafts to do so...
Play Escape from Mr. K's Room 4
Thanks to Cyberjar88 for sending this one in!


Walkthrough Guide
(Please allow page to fully load for spoiler tags to be functional.)
Escape from Mr. K's Room 4 Walkthrough
You'll start facing the window. There are two sections to this room; click the window to go down the little stairs to the other section. Look around.
Check the glass table and remove the two straws from the drink.
Turn left from the window. Take the tissue box from the shelf, and remove a single tissue from it.
Examine the tissue box again. Take Cork 1 from it.
Examine the tissue. Hold the mouse button on it. "Moon on one", eh? And a hippo with its mouth open?
Also on the shelves, note the box tied with string and the strange Mr. Birdy ornaments on sticks. You'll see the relevance of those later.
Turn to face the door. Towards the lower left you should see a little hatch locked with a keyhole. Keep it in mind for later.
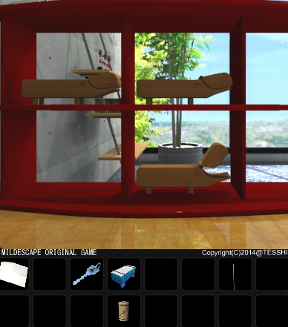
Before returning up the stairs, check out all those Mr. Hippo ornaments on shelves. Some of them open their mouths when clicked, some don't. Strange.
Alright, go up the stairs to explore the rest of the room. Check the strange picture to the right of the door. "A1Z26"? A reference to that classic cypher, I suppose.
Click and hold the picture to tilt it and reveal numbers behind the corners. 14, 5, 15, and 13... which, using the aforementioned classic cypher, translate to N, E, O, and M. I know what we can spell with those letters!
Back away and turn left. A picture of a hippo with its mouth open. Zoom in and click the corners; it's a wobbly picture.
We have all the clues we need to decipher the code. The A1Z26 picture showed us which corners represented which letters, and the tissue showed us what the sequence was. Lower right, lower left twice, upper left, and so on to spell M-O-O-N-O-N-O-N-E.
It worked! Take the sticky tape and note what else is here: a strange twelve-button keypad and three spotlights, not on.
You already have all the information you need to solve this puzzle. Remember the hippos on the shelves? The hippo in the painting is facing left, and has its mouth open, so look from the window side of the shelves (so the hippos face left) and note which ones open their mouths. There should be four; map their positions to the twelve buttons.
When you get it right, the spotlights will turn on. What are they illuminating? We'll investigate that later; there's more room to explore.
Turn around; you'll see some bookshelves and a piano. Check the left shelf and take the Mr. Birdy on a stick. Remove its stick.
Now examine the right bookshelf. Click and hold to see a sequence of musical notes. It's either E-B-G-F-G-D or G-D-B-A-B-F, depending on the clef. It's got to be a clue for SOMETHING, though.
Now, check out the cabinets below the shelves. Each one wants a sequence of five buttons clicked, one (on the left) horizontal, the other (the right) vertical.
You've already seen the code for the vertical buttons: the musical notes from the book! Read them from left to right and push the corresponding buttons to open the sliding door, revealing... nothing?!
Maybe there's something on the other side. Slide the doors to the right and grab the battery.
We haven't checked out that little nightstand between the door and the piano yet. The drawer needs a code with six A's in it, and the Mr. Birdy ornament needs a battery to function. Lucky thing we just picked one up. Put it in.
Press the button, and the Mr. Birdy glows several colors. Yellow-green-red-green-red-green? That's a code for something if I ever saw one, but we haven't seen the thing it goes to yet.
Examine the piano. Move the bench aside and check the pedals. Hey, those spotlights from earlier are shining up above the pedals! Green-red-yellow... if you map those colors to the pedals, you can enter the code from the Mr. Birdy ornament. Get it right and the piano pops open.
Look at the piano keyboard. "WAHAHA"? Don't laugh at us, piano! Take the other Mr. Birdy on a stick from the piano, and take the other stick from it, just like before.
The six-letter code goes to the drawer in the little nightstand we were just at, as you may have guessed. Take the clover key and Cork 2 from the drawer once it's open.
If you zoom in on the door, there's a locked panel just to the left of it. The clover key unlocks it. Press the button that's revealed, and the fan turns... dropping something.
Check behind the bed. The object that dropped is there; it's Cork 3.
Remember the ornament with three Mr. Birdys on the shelves by the window? Stick the two Mr. Birdys you found on the empty spokes. You'll get a cohesive code: 53142.
This goes to the row of horizontal buttons on the little door to the left of the piano. It doesn't mean "press the fifth button, then the third, and so on". That means "map the numbers to the buttons and press them from 1 to 5". You'll get a bottle of water that you can take Cork 4 from. Move the doors to the left like before to see... a locked box.
Check the left shelf of hippos from the door side; the bottom-center hippo has a spade key it wants to give you.
That key will open the locked box we just found, and you'll get a drill.
Have you seen the U-shaped tube on one of the Mr. Hippo shelves? Examine it and pour the water from the bottle into it. You'll get a plastic ball and, shortly after, a diamond key from inside it.
The diamond key unlocks the little hatch beneath one of the Mr. Hippo shelves on the window side. Open it and take the box cutter; also note the tunnel beyond it.
Use the box cutter to cut the string on the box on the shelves; you'll automatically take the string with you. You also want the screwdriver inside the box.
Did you notice the little doll with the hat sitting on the glass pedestal near the Mr. Hippo shelves? His seat is secured with screws; undo them with the screwdriver and lift him up. There's a key inside the glass, hanging by a string, but you shouldn't cut it without some means of retrieving it. Well, it'd probably land at the end of that tunnel where we found the box cutter...
Time for construction. Examine the tissue box and turn it over. Add the straws to it, and secure them with the tape. Then add the two sticks, then the four corks... er, the corks are too hard just to poke holes in. Use the drill on the four corks, and THEN add them. Finally, add the string and tape it in place.
Put the tissue car in the tunnel and push it all the way in, then go cut the string under the little doll. Finally, retrieve your car and the heart key within.
You can unlock the door with the heart key and leave now, but that'll get you the normal end. And what's a Tesshi-e escape without a Happy Coin? Stay just a little longer...
Examine the heart key. There's something on its tag: RG2Y3. R, G, Y... red, green, yellow? We used a code involving those colors on the piano's pedals.
Press the "red" pedal once, the "green" pedal twice, and the "yellow" pedal three times. A Happy Coin will drop. Pick it up, then use the heart key to unlock the door and depart. And that, as they say, is that.
Posted by: SonicLover |
January 28, 2014 1:55 PM