
![]()
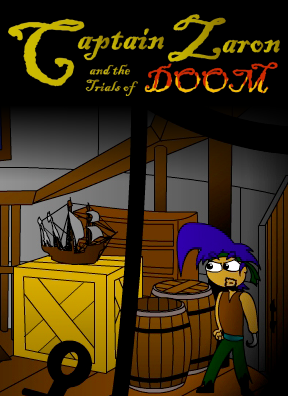 Life's not easy for the fearsome pirate mercenary antihero Captain Zaron, star of Studio Meristem's adventure game Captain Zaron and the Trials of Doom. His sister Elsa is to be sacrificed at the stroke of midnight as part of a doomsday prophecy that will wipe out the kingdom, and he'll be damned if he's going to let that happen unchallenged, even if it means tracking down a legendary skull in an ancient tomb, traveling to the afterlife and back, and blowing down a boarded-up door with a Molotov cocktail. (He probably cares more about his sister than the kingdom, but a motivator is a motivator.)
Controls are a fairly simple task of pointing and clicking. Click items of interest to examine them, handle them, talk to them, or use your equipped item with them, depending on which action is selected. Change that action by clicking the icon in the lower left or pressing [A]. The treasure chest icon in the lower right is where you can access your inventory screen; from there you can inspect your inventory items, switch your equipped item, or use things on each other or on yourself. You can also access the options menu from the inventory screen, from where you can adjust a variety of settings and save your game. Later you'll also get a spellbook from which you can cast a number of different spells, and even later than that you'll get involved in two or three swordfights for which you'll need to use the [arrow] keys and [D].
Analysis: Don't let the simple style graphics fool you, Captain Zaron is a game with meat. It's an compelling adventure game with logical puzzles and the perfect level of challenge. There's an in-game source of two kinds of hints when you need it, which is certainly a plus. It also has a very gripping plot, albeit slightly corny, and is filled with hilarious shoutouts to classic adventure games such as Zork and Space Quest.
Peter Lemiszki's Studio Meristem does a great job of ironing out the many frustrations that plague adventure games old and new. For example, one thing that was pretty controversial with older adventure games was how they handled actions that could get the protagonist killed. On the one hand it can be frustrating losing a lot of progress by forgetting to save before doing that risky thing; on the other, finding all the hilarious ways you can kill the protagonist off was one of the appeals of Sierra On-Line's games. Meristem has found the perfect middle ground: Captain Zaron can still die in amusing ways, but you won't lose any progress over it— you can undo your mistake and get right back to playing. There's no way to make the game unwinnable, either, so feel free to try anything.
There's no question about it, this is a game made by lovers of adventure games, for lovers of adventure games. A game doesn't need to look pretty to be a worthwhile experience, and Captain Zaron proves it.


Walkthrough Guide
(Please allow page to fully load for spoiler tags to be functional.)
Captain Zaron and the Walkthrough of Inspiration
Part One of a Six-Chapter Trilogy
General Advice
Talk to everyone, and choose every dialogue option when you do. Examine everything, in the world and in your inventory.
Once you've been to a location once, I'll assume you know how to get back there. I'm not going to explain the directions to you over and over.
North is assumed to be towards the background, and south towards the foreground. East is right, west is left.
There's a rough map of the world in the background of the options menu.
There are a total of 4 flasks to be found in-game, possibly as a nod to the Legend of Zelda. I refer to them by number, from left to right as they appear in your inventory.
Chapter 1: Mulduralm's Castle
You'll start off in Elsa's house. Look at the note on the bed, then search the pot in the foreground to get the flint kit. Then go outside (south exit) and take the worm in the dirt.
Go south, then west all the way until you reach a house. Enter it to meet Norman. He's a source for in-game help that helped me a lot during my first playthrough. You can also get hints regarding specific items by showing them to Pit, the dragontoad on the desk.
You got a pouch! You don't have firewood, though, so go east twice, then north until you reach a clearing. That's the Green Plains. You'll know them when you see them.
Once in the plains, head east. On the way, talk to the old man crying on the stump, and pop into the house to talk to the healer and nab Flask #2. When you reach the far right, you'll find a stack of firewood. Grab a log.
Not really much else to do here, so head back west and south into the forest, then keep going south until you reach the coast. Then head east. Pick up Flask #1 in the sand, and read the parchment that was inside it. Definitely a clue of some sort.
Now go back west along the coast. Ring the bell if you want, but it doesn't do anything yet. Enter the lighthouse. On the first floor, take the rope on the floor and the bottle of rum on the barrel, then look at the map. Take a screenshot; it'll come in handy later.
Now go up the ramp to the lighthouse's top. Grab the spyglass to the right, then talk to the old man and agree to hear his story. You'll get a horn for your troubles. Yes, it WILL come in handy later.
Go back down and take the west exit. Talk to the fisherman and give him your worm. …Well, that failed spectacularly. Backtrack to the forest and go back into Elsa's house. Pick up another worm outside on the way.
Once inside, stick the log in the fireplace, then light it with the flint kit. Finally, throw in the sack and listen to the exposition which culminates in you receiving an empty spellbook. Right. Real useful, Dad.
Go back to the Green Plains, and this time go straight north from the entrance. You'll reach Mulduralm's Castle. Talk to the guards; it seems you aren't getting in this way, but the well passage sounds promising. Well, you'll worry about that later.
From the path to the castle, go straight west and you'll reach the desert. Remember the map? There's something to be found in this desert, mark my words. First, go straight north from the entrance until you reach a traveler. Talk to him.
From the traveler, go straight east until you reach some animal bones, then straight south to some cacti, then straight west and you'll discover a treasure chest. Open it and you'll find some money and a compass.
To get out of the desert, head south as far as possible, then east until you see the exit. Then return to the Plains. From the "THIS WAY TO THE DESERT" sign, go south past a beehive to an archway guarded by a dragon statue.
You may remember the healer mentioning that thing. Don't approach it or you'll be turned to iron. Throw the worm on the ground in front of it and watch what happens, then snatch back the iron worm. It'll be useful.
Return to the forest. This time, go east at the four-way signpost and you'll enter Saint CrabFloss. First things first, you'll want to head straight east and enter the library. It's… very bare, but pick up that one book on the table. Page through it and you'll discover a lot of exposition and a recipe tucked between the pages. Huh.
Wait, is that a picture of a king on the wall? Remember the parchment inside that flask on the coast? "Under the gaze of a king once proud…" I think it was talking about this room. There are six candles… light them with the flint kit.
A secret passage! Into an awfully dark room. Pick up that gauntlet on the floor, then examine the heads on pedestals I, II, and VI. Use the hand icon to put them on the headless statue; I's eyes glow yellow, II blue, and VI orange. Maybe it's a clue for later.
Leave and head back west to the inn and mage's guild. There's nothing much to do in the inn besides talk to people, but if you've been watching the compass you picked up from the desert chest, you'll note it leads to one of the inn's back rooms. Not that you can get into them since they're locked.
The mage's guild is where you want to go. If you can't enter, it's because you never got the spellbook. But you did, so you can. Talk to the guildmaster; she's selling magic magnets at 60 gold each, so buy one. (Use your pouch of gold on her.)
Leave and return to the fisherman's dock behind the lighthouse. Give the fisherman the iron worm… see where I'm going with this? Use the magnet on the ocean and you'll catch the fish! …And immediately throw it back in exchange for teaching you your first spell, Fetch.
Know anything you might want to fetch? Go back to the coast and head all the way to the east into the cave. That lever's unreachable, but you'd have to pull it TOWARDS you… and that's exactly what Fetch does! Click your spellbook, then choose Fetch, then click the lever.
Pulled! You opened the dam. Now head back to that well in the Green Plains (you passed it on the way to the east during your first excursion). Tie the rope to it, then descend. If you hadn't Fetched that lever, the water level would prohibit your descent, but you did, so it doesn't.
At the bottom, head east and take the sword from the skeleton, then head east again and head into the largest sewer pipe. One rather disgusting trip later, you're in a storage room in Muldy's castle. Head east… OUCH!
While unconscious, you'll have an odd dream. Head up the stairs and hear what Elsa has to say. You'll then wake up in a dungeon cell, with an empty inventory and no spellbook… and a disturbing scream coming from somewhere.
Search the east wall to discover a secret passage. That gray book on the stool is your spellbook, so snatch it. Also, pick up those bellows on the floor, then return to your cell and head south. Not a very useful view.
Cast Fetch on that keyring, then use the key to open the door. Talk to the other door, to the left, and discover the identity of the prisoner called Rose. Agree to deliver her letter, and pick it up. Then go east.
A guard! Fetch the rug under his feet to trip him up, then head up the stairs and watch a series of cutscenes. You now have a new quest: retrieving the Head of the Black Warlock!
Chapter 2: Tower of Ithandor
First things first. Head south to the other Plains entrance, then east to the crying man. Give him the letter and he'll run off, leaving you with his handkerchief. Now head straight north; on the way, fill one of your flasks with water from the fountain.
One screen to the east, you'll see a boarded-up shack. This is what I mentioned in the review. Stick the handkerchief in the rum bottle, then stick the result on the door. Light it with the flint kit and the door will be blown open. Nothing inside to see but a shovel, so take it.
Now head to the eastern edge of the Plains, then north to see the entrance to the Labyrinth of Ithandor, guarded by three stone monkeys. Read their plaques to find clues on where their keys can be found. We'll go left, right, center.
Head straight west and you'll happen upon a beehive and a dirt patch. Pour the water from your flask on the patch, then suck up some of the resulting mud with the bellows. Also, use the gauntlet to snatch a honeycomb from the beehive.
Now go south. Remember that dragon statue that turned the worm to iron? Blind it by spraying the mud-filled bellows on it, then head through the arch and open the chest in the area beyond, revealing a red jeweled rose. Sweet haul.
Go to the screen just south of Elsa's house in the forest. Cut up the brambles with your sword, then go east, then north to find a sacrificial altar. Remember the second plaque? "Strengthen your chance with an offering sweet…" Sacrifice the honeycomb.
A blessing of luck? Nice. Head for town and reenter the inn. If you played Sylvin's game before, you'll know Zaron has a nasty streak of bad luck, but that blessing should change that. Offer your jeweled rose as a stake, then pick anything and you'll win.
One rose to go. Go to the desert entrance, the little circular plateau. "The last turn to infinity…" the desert's about as infinite as you can get. Dig up the plateau with your shovel to get the last jeweled rose.
Return to the labyrinth entrance. Give the red jeweled rose to the left monkey, the green to the right monkey, and the blue to the center. Now you can enter the labyrinth!
I can't give you much advice about navigating the Labyrinth of Ithandor, except that turning on Zip Mode will make it much less annoying. Note that plaque just inside; weird math, but it's actually referencing colors. Remember the statue and the switchable heads in the library? I is yellow, II is blue, and VI is orange.
Following the equations, that would mean III is green, IV is purple, and V is red. Now explore the whole labyrinth, checking the map as you go. You should find six crystal balls, each with a sign depicting a Roman numeral; touch the ball until it's the corresponding color.
At some point you should also find two guards looking to kill you (near I). Use Fetch to retrieve the magic mirror from the belt of one guard. Once you've gotten the mirror and set all six crystal balls, the exit door (middle north edge, approach from the west) will open.
Once you're finally out, you'll see another bell like the one on the coast. Don't bother with it yet. Head east to the Altar of Foolery. If you take the jade scorpion the exit will be closed until you put it back, but just keep this place in mind-- you'll be back later.
Approach the Tower of Ithandor. Three wheels… huh. If you peeked into the magic mirror you got from the guards, you'll see a series of locks that match up rather well with those wheels. Glance at the mirror after every turn of the wheels to see which to turn and which to leave alone.
Once the crack down the door's center is unblocked, you can enter the tower. Weird cyclops statue, that. If you look at the base, you'll see a series of drawings about removing its eye through its mouth…? Might be useful later. For now, try those doors.
I can't give you advice about this maze, either, but I can say that the same door will always lead to the same place, but reentering the door you just came through won't necessarily lead you back to where you were before. Just keep trying new doors until you get to where you want to go.
Eventually you'll reach a purple chest; the Coconut is inside. But you're not done here once you've got it. Backtrack one door, then take the door next to where you came out, to reach a platform near a pot spewing green water. That sign depicts wind, so blow the pot with the bellows.
Now fumble with the doors some more until you reach a platform where you can reach the water. Fill a flask with it for later, then get out of this damned tower and ring the bell, then ring the southwest bell to be teleported to the coast.
To be continued...
Posted by: SonicLover |
December 15, 2011 12:25 PM
|
December 15, 2011 12:25 PM
Captain Zaron and the Walkthrough of Inspiration
Part Two of a Six-Chapter Trilogy
Chapter 3: Dwarven Mines
From the coast, head to Norman's place (first west turn upon reentering the forest from the coast). He'll point you to the Dwarven City, but is at a loss regarding how you can get there. He'll also teach you the Fool spell, and make a remark on that green water you got.
Now that you know what to do with the green water, drink it (use it on yourself). You've got two new spells now; it's time to have some fun with them! Return to the Tower (ring the bell on the coast and choose the southeast bell this time).
Cast Open on the cyclops statue to open its mouth, then grab its eye. Now use the bell to return to the coast and head east upon entering the forest again (as if you're going back to the sacrificial altar). This time, go east all the way until you reach an ogre's house.
Don't go in! Drop the statue's eye into the window. After a long cutscene, you'll be inside the ogre's house and safe. Cast Open on the cage to free the dwarf and he'll give you a magic rod. Odd. For now, I want to take care of a few errands with our new spells.
Go to Saint CrabFloss again, the inn's back rooms to be more precise. The Open spell will crack them open. Take Flask #3 from the right end of the kitchen counter, and the slab of meat from the hook to the left in the same room.
In one of the other two rooms, the magic compass from the chest will flash wildly. Feel the bed and you'll get a comment about it feeling lumpy. Slash it with your sword to find a locked box… but you don't know the code. Ah well.
On the way out, fill a flask with ale from the big barrel. Trust me, you'll need it. Now go straight west out of town, past the signpost, and see the big spider. Cast Fool in the spider's presence to turn into a scorpion, which frightens the spider.
Keep moving. That meat-eating plant looks ferocious. Show it the slab of meat, then chop off its tongue with your sword (remember the recipe from the book?). There's nothing else you can do here yet.
Go down the well you first entered the castle from, and look at the stone door before the sewer pipes. Use the magic rod the dwarf gave you on it to get through it, then enter. Watch a rather foreboding cutscene on the way in.
"Dwarven Mines." Climb the ladder to see a puzzle that requires you to be heavier, which you can't do yet. So go back down and head west to see a tunnel to a rather hot area and a nook with a jade statue. Take the statue and continue left.
That's a rather hotheaded dwarf. Talk to him and learn about his hatred of seesaws. Stick your shovel on the rock in front of him, then talk to him again and provoke him into activating the smasher again. Now he's got one more reason to loathe seesaws.
Take the gear, and take the shovel back. Head east as far as you can and put the gear where it belongs on the wall. Now you're sort of stuck, so leave and head back to the coast, then ring the bell and return to the Altar of Foolery.
Nab the jade scorpion. Remember how the Fool spell turned you into a scorpion? If you cast it now nothing will happen… I think I know how this works. Stick the other jade statue, the one you picked up in the mine, into the altar, then return. Also, fill another flask with water; seawater from the coast will do.
Return to the mines and climb the ladder, then cast Fool while on the scale platform to knock the gear loose. Return to where the gears were and you'll see that things are now working as they should! Use your magnet to catch one of the pieces of metal being transported across the chasm.
Go south, then east to meet with the dwarf you rescued. Talk to him thoroughly, then head east, through the log, east, into the shack. Finally we can get this stupid coconut op… oh dear.
Chapter 4: Backstage
Well, that didn't really go too well. But he's deceased… perhaps we can get a hair from him as part of that Voice of Spirits recipe? First we'll need to get him down from that high perch of his.
Knock him down with the shovel and you'll end up setting him on fire. Douse it with the flask full of water and the frog will eat him. Give the frog the ale (they don't call it the Drunken Frog Inn for nothing!) and it'll spit Severalius up. Now you can finally snatch a hair from his body, so do exactly that.
Take the gold music box to the left, then leave and go back to the blacksmith. He'll tell you about the Land of the Dead and give you a mandrake root. Thanks, I think. Ring the Bell of Soaring (this is the northeast destination) and go to the coast.
Return to the forest signpost and head west from there, past where the spider was, until you reach the witch. Give her the mandrake root. You can now travel to Backstage! Talk to the soul just inside and it'll ask you to rescue his daughter from slavery… and tell you an odd four-digit number.
Remember the lockbox from the inn? It needed a four-digit combination. Use the number the soul tells you and you'll get a pouch of diamonds. Return to the mines and give them to the blacksmith (if you remember, he mentioned that he had a girl working off her father's debt).
You've done a good deed! Return backstage and talk to the soul again. You'll be taught the Freeze spell. It'll come in handy, but for now, go further in and talk to the one-eyed thing with the net.
You'll learn about Sum Li Kan. Go north, up the stairs, and talk to the Scribe. Agree to go into your future to search for the swordsman's spirit. Yep, that staircase again. Head all the way up. Remember the last part: "To strike the final blow, you must be open-minded."
You now have Sum Li Kan's spirit. Go give it to the net-wielder. Looks like we somehow helped things along in the healer's house. We'll be by there later. (You'll also get Flask #4; the soul was stored inside it.) Go west to find the Sea of Souls… hm… where's Severalius?
Let's play a familiar sound. Use the music box from his room on yourself to play it. But he's got no voice… time to make that Voice of Spirits potion, then. Leave backstage and go north at the carnivorous plant.
Cast your new Freeze spell on the water (there's something lurking in it that you don't want catching you), then go into the hut. Try to read the book and it'll shut itself, so cast Open on it and look at it again. You'll learn Dispel, which is actually less useful than it sounds.
Go back to the fountain in the Green Plains and look at the statue holding the vase. Have you guessed the statue is a real woman? Cast Dispel to cure her, and you'll get her vase of eternal water. Now go down the well and reenter the mines; there's something else to do here.
Go down the hot-looking path to the left just inside, and cast Freeze to cool it down. Then pass through to the sunken ship. Enter it and light the cannon aimed at the hull with your flint kit, which somehow causes a reaction on the model ship in the lighthouse.
Now climb the ladder, then the rigging to the surface and head right to meet the Dryad and learn the Bloom spell. Your spell collection is complete! Backtrack ALL the way back to the well, then go to the backside of the healer's house where you got the firewood.
Note the plant growing on the back of the house. Cast Bloom on it to make it grow, then pick one of the blue lanterns. Now go to the Inn's kitchen; it's time to cook up a potion. Put the tongue, the blue lantern, and Severalius's hair in the cauldron, then fill up a flask.
Take the potion backstage and give it to Severalius's spirit. You'll give him a slightly exaggerated account of what happened, and he'll crack the coconut for you. Cool. Now… how are you to get to the Temple of Zat?
To be continued...
Posted by: SonicLover |
December 15, 2011 1:03 PM
|
December 15, 2011 1:03 PM
Captain Zaron and the Walkthrough of Inspiration
Part Three of a Six-Chapter Trilogy
Chapter 5: Temple of Zat
First things first, go back to the lighthouse and reach into the newly made hole in the model ship to get a key. Now go to the healer's house in the Green Plains and use the key to open the cabinet on the wall. You'll get another jade statue, this one a jellyfish.
Go back to the desert and go straight north to the traveler. Give him the vase of eternal water and he'll lead you to Zat. Go inside and hang a right, then talk to the little kid sitting by the barrels. After that, ring the bell (northwest for Zat) and go to the Altar of Foolery.
Swap the fat statue for the scorpion statue. Not the jellyfish statue, the scorpion statue. You read right. Now go back to Zat and head west to a dead-end. See the scorpions climbing the wall? Why not join them? Cast Fool and you'll automatically enter the school of swordsmanship.
The trainer's a trash-talker, but take his lessons to heart. You'll have to do some swordsmanship later. Shift your sword up and down with the arrow keys and attack with the D key. It's fairly easy to get the hang of… I'm not so sure about attacking, though.
Once you've graduated, go east and into the building by the boy to see a familiar face. Talk to him and challenge him to a swordfight. Remember your lessons and take him down. Once he finally surrenders, you'll get an action figure… huh?
Give the action figure to the boy outside and he'll open for business. Give him the spyglass and he'll crack it open and give you the prism inside. Surprisingly that's the only use you'll have for his business. Ring the bell and return to the Altar.
Swap the scorpion statue for the jellyfish statue, then return to Zat. This time approach the Temple of Zat to the north. Cast Fool and you'll crack the door open, allowing you entry… but not exit, thanks to the interference of a certain someone.
Well, we're stuck here for now, so we might as well explore. Head east.and look at the carving beside the door, then stick the prism on the top of the pillar. Pull the lever to raise the pillar, which opens the door. Head in and explore the new room.
Hm, there's a pillar in this room just like in the other one… and one carving's missing an eye. Stick the magic eye in there, then backtrack one room and throw the lever again to lower both pillars. Now you have the information needed to solve the next puzzle.
You can see three symbols on the wall in the room where you used the eye, and if you look in your magic mirror you'll see three more down below. You want those six symbols to line up vertically on the dial on the wall.
Careful, turning some dials turns others. I can't give you a step-by-step solution because the solution changes every playthrough. My advice: line up symbols with one another without considering their final position, so when you turn multiple dials multiple symbols will snap into place at the same time.
Once you've figured it out, the next door will open. Head upstairs, then west to find a room full of traps. This one I can give you a step-by-step solution for: wait until you can safely take two steps left safely, then do that, then step north, wait, south, south, west, west, west, wait, east, north, west, west.
Open the door with the gold key and go inside, then yank the lever to shut off the traps. Open the coffin and nab the skull, then go south twice and cast Fetch on the statue on the right to make it fall. Who'd have thought Fetch would work on heavy things, too?
Backtrack to the entrance and go west to discover your newly made hole, then go down. Put the sea monster-calling horn in your equip slot (trust me on this one) before using the boat. You'll row out of the temple and discover a familiar face.
Quickly use the horn on yourself to call for backup; looks like we've taken down that interference. Zaron will automatically row to the lighthouse dock.
Chapter 6: Mulduralm's Castle Redux
Make your way all the way back to Mulduralm's Castle and show the head to the guards, then enter the castle. After a rather climactic cutscene, you'll be pitted against two guards at once. Thankfully only one ever attacks at your time, so keep your cool and attack carefully.
You should be able to take both guards down without issue. Once that's done, head east, then east again. The door here leads back down to the prison (remember it?). You don't need to go down there, but if you do note that Rose is now gone.
Head up the stairs and use the door on the right. Let the bird out of the cage. It doesn't look it, but that bird is a direct line to the Altar of Foolery. Give it the fat jade statue and it'll bring you the jellyfish statue. Presumably it swapped them.
Leave the room and go west, then enter the next door. Take the potted plant and leave. Further west is a foreboding but locked door, and further west from that is a bridge blocked by flames. Not much you can do here, so return to the throne room.
This time go west twice. You'll land in a room with lots of gears. A sign says "DO NOT PLANT A BOMB HERE!" Well, you don't have a bomb, but you do have something that might work just as well. Stick the plant in the center of the room and cast Bloom on it.
Gears stopped! The flames upstairs are now out, so backtrack and go through the door they were guarding. Take the parchment on the book. The west door leads to the storage room you first entered the castle through, but you don't need to go there.
Now, the big door. Look at the lock mechanism in the center. It needs a special combination, and the parchment contains a series of hints. But since it never changes, I'll tell you exactly what the combination is: IV-II-VI-I-III-V.
This staircase again! But this time it's for real. Head up the stairs and you'll be at the final battle. Orco will attack you with a variety of spells; you need to counter them with the right spells of your own.
When he summons wind, cast Fool. A bow and arrow, use Fetch to grab that shield above Elsa's head. Fireballs are rid of with Freeze, but you have to cast it on each one in turn, which is a little tricky and requires good reflexes.
"Enough of this!" Now what are you going to do? Remember Sum Li Kan's words? "To strike the final blow, you must be open-minded." He meant it literally. Cast Open on the shutter beside Orco to knock him down, then watch Zaron finish him off… and finish the game!
Posted by: SonicLover |
December 15, 2011 1:59 PM
|
December 15, 2011 1:59 PM