JayisGames.com is now available ad-free!
Jay is Games recommends Cheat Happens with 8,000+ games and 35,000+ trainers!

Bloons Tower Defense 5


  • Currently 4.5/5
  • 1
  • 2
  • 3
  • 4
  • 5
Rating: 4.5/5 (534 votes)
Comments (58) | Views (145,298)

GrinnypBloons Tower Defense 5
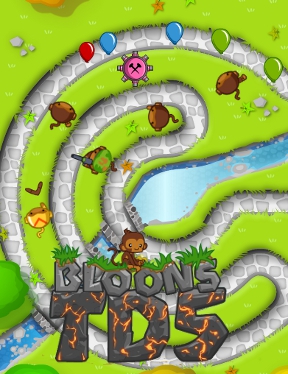
Ah, the life of a monkey is a fabulous one, isn't it? You get to chill all day, climbing trees, eating fruit, flinging...well, things that shouldn't be flung. Unfortunately there is a downside to all that leisure, and it involves the most chillingly lethal thing known to man, the deadly balloon, or bloon for short. The use of monkeys and bloons in the opening paragraph can only mean one thing, NinjaKiwi has finally hit with their latest tower defense gem, Bloons Tower Defense 5, in which nature's most mortal enemies (i.e. the monkeys and the bloons) are once again at war.

Each type of monkey tower is unique and kills bloons in its own way, and each is upgradable in a pretty deadly way. NinjaKiwi has added two new tower types and one new bloon type since Bloons Tower Defense 4, but they have also tweaked the gameplay in some interesting ways that changes the old strategies. Each tower, for instance, can now be upgraded in 8 different ways and camouflage bloons have become more deadly. The new heart bloon has a bad habit of regenerating if not hit fast enough, and is much harder to kill. Other new things include "secret agents" which are one-shot items that can only be deployed once per round and which can be purchased with monkey money, itself earned by completing a path without getting killed. There are also the usual modes, new paths, and new experience levels which are earned by smiting a lot of killer bloons. And, if you get that far, there's a new ultimate type of bloon, the ZOMG. Be warned.

Play all the Bloons games:
BloonsMore BloonsEven More BloonsBloons 2Bloons 2 Xmas ExpansionBloons 2: Spring Fling
Bloons Tower DefenseBloons Tower Defense 2Bloons Tower Defense 3Bloons Tower Defense 4Bloons Tower Defense 4 ExpansionBloons Tower Defense 5

The graphics this time around have been simplified a bit, presumably to alleviate lagging gameplay in later stages. While the towers, scenery, and bloons are less detailed this time around, they are also easier to differentiate. If you want to save your progress you do have to register with NinjaKiwi, which is free and can be done through Twitter or Facebook, and there are a few entirely optional microntransactions, but for the most part you can enjoy Bloons Tower Defense 5 without either registering or dropping any money if that's the way you roll. The major cost involved is not money but time. Nations need to brace themselves for a complete loss of productivity as folks all over the world once again become immersed in the major time-suckage that is a bloons tower defense game. Enough talk, I have another screen to conquer!

Play Bloons Tower Defense 5

Walkthrough Guide


(Please allow page to fully load for spoiler tags to be functional.)

Bloons Tower Defense 5
Basic Guide/Strategy:

The early game (1-25) is quite easy and you want to focus on cheap towers with small incremental upgrades. You want juuuust enough firepower to get you by, while working on Banana Farms to get the economy going.

Midgame (25-45) the bloons really ramp up and you need Area Effect weapons to keep up. In med/hard you want to efficiently be able to kill multiple bloons at once, while continuing to invest in Farms.
Furthermore you need to be able to deal with Camo and Lead bloons. The other types aren't really much of a special threat.

Endgame (46+) - This is when the huge bloons show up and they are VERY RESISTANT to all the area effect damage youve invested in midgame! Even when popped, they still manage to transport their 'payload' past much of your tower damage which is bad.
You have to prepare for them by building single-target/focused damage towers. This is where your Farms come in handy, using all that money for the endgame towers.

-----------------

For the easier maps, a TWO PASS system is your best bet. You want a big mass of towers all together (NOT spread out as regen bloons will hoze you and clusters benefit from the aura village effects), such that they are able to shoot at the bloons when they FIRST arrive...and right as they are LEAVING.
As long as the path is big enough this basically doubles your potential firepower since each tower gets to shoot at the entire line of bloons twice over.

For the harder maps, while they are doable, it is much easier to efficiently use your Monkey Bucks to assist you, particularly the special agents.
In these maps you will try to put your towers perpendicular to the bloons so they have straight shots right into them, instead of at an angle.
This helps your towers penetrate multiple bloons and prevent missing the faster ones and wasting attacks on high deflection angle shots.

Bloons Tower Defense 5
Tower Recommendations:

The Dart Tower is one of the most efficient in the game. With 2 range upgrades and the triple-dart upgrade, it kills 9 bloons at long range and shoots really fast. Its very cheap too.
I highly recommend using 2000 monkey bucks when you get them to max out the Dart Tower building and keep it active. Its drawback is meaningless since I dont like ninja towers and getting free towers at 1,10,20,30, means you effectively start with 200 free cash.

I tend to use multiple Darts with the triple upgrade. The catapults just aren't very good unless you have a long line of bloons and can position perpendicular to them for a long alley. This doesnt happen on the hard maps.

The Bloon Bush special agent is very strong as well. Putting 1 of these at the exit point means you can literally keep all 650 starting cash, use 1 dart tower and this agent and be able to rush a Banana Farm asap. This hugely kickstarts your economy. The bush is useful mid/endgame too since it provides a lot of 'virtual health' if you mess things up. After buying 50 of them, they spawn mini-bushes periodically making them twice as effective roughly.

The Tribal Turtle is also quite strong and gives you a decent tower for no cash, which lets you ramp up Farming ASAP. At pro level it gains double the firepower, tossing a piercing spear and coconut at the same time.

For the midgame, Apprentices are powerful and can take out ANY kind of bloon which is important. They are small and space efficient and highly upgradable. However, they are relatively weak lategame vs MOABs. With the Apprentice Building active they are much stronger and start with a bouncing zap effect that lets you spam them with minimal upgrades and be quite powerful.

Watch out for Glue Gunners. NEVER USE THEM EARLY. Midgame they are incredible once you have the 2/2 upgrades to make them fire area effect and pop bloons. Get the triple fire rate upgrade for sure! NOT the fast-pop one. 1 such Glue can almost literally win the entire midgame but they are useless vs MOABS, so you absolutely must have 1target towers.

Super Monkeys are very powerful and practically necessary endgame because they fire extremely fast at 1 target which makes them exceptional at killing the MOABs. Their extreme firepower makes them good at killing ALL bloons really. But DO NOT RUSH THEM because they require a ton of gold to really become effective. The basic Super cant take out Lead and doesnt have the area effect needed to survive midlevels.

Bloons Tower Defense 5 Strategy Guide

Tower Pairings and General Tips

  1. It's important to place short range towers with multi-shot functions in spots where they can hit multiple targets. Bridges and spots in between two sides of the track are great for the towers like the monkey ace (airplane), bomb tower, and tack shooter.

  2. Snipers are long range towers who get even better range with upgrades. You can place these towers farther back. Preferably place them in the middle of maps because of their excellent range. They can take out initial bloons or pick off stragglers towards the end.

  3. Ice Towers and the Glue Gunners are great for the start of the course and a little before the end of it to slow down any bloons that may have missed the initial destruction. This will allow your towers time to finish any remaining bloons.

  4. Make sure to have a decent amount of towers that can see camo bloons. Ninja monkeys can do this immediately, whereas other towers can purchase upgrades to enable this ability. Great placement for those able to see camo bloons would be towards the front and middle to destroy them as quickly as possible.

  5. Mortar Towers are also clutch when disposing of camo bloons because it will shoot off randomly and is not hindered by a lack of visibility. This is also great for area of effect damage.

  6. All towers will receive upgrades allowing multi-target attacks. Some, however, are better than others. Boomerang towers are great for disposing of bloons with multiple layers, or simply picking off multiple bloons at once. Ninjas and Dartling monkeys are also great for this and benefit by being stacked with each other for heavy area-of-effect damage.

  7. Banana Farms are instrumental in helping have more money flow in later levels. If you have these available when going through levels at the start, create these early to farm gold. Upgrades become more expensive the further you get, and the later towers are also more expensive.

  8. Monkey Villages are great for boosting abilities. Place these within range of as many towers as possible. Two to three on your map are great, but more isn't necessary because bonus effects do not stack.

  9. Apprentice Towers are very handy for bloons that are not harmed by physical attacks and even by bloons not harmed by explosions or freezing.

  10. Super Monkeys are the ultimate beneficial tower. They do heavy damage and are clutch when the MOAB and ZOMG bloons are on the scene. Focus on keeping these guys on the field. More is better when it comes to these towers; however, they are very expensive, as are their upgrades.

  11. Purchasing Special Agents can be great for extra defense but isn't always necessary and sometimes can be more entertaining than they are necessary. There are agents that have great benefits that will be helpful to towers already on the map, including the meerkat spy, bloonsday device, and super monkey storm. These are helpful for camo bloons or the more devestating MOAB-group.

Bloons

  1. White bloons are immune to freezing.

  2. Black bloons are immune to explosions.

  3. Zebra bloon is immune to both explosions and freezing.

  4. All three contain two pink bloons.

  5. Blue bloons contain one red.

  6. Green bloons contain one blue.

  7. Camo bloons are dangerous because most towers cannot hit them. Any bloon type can be camo and so will all the bloons that come out of that one. They can only be hit by towers that can detect camo bloons. In an emergency, use road spikes to pop them.

  8. Heart bloons have regenerative abilities and will create more bloons if not popped immediately.

  9. Lead bloons move slowly but are immune to anything sharp. They contain two black bloons.

  10. Ceramic bloons are made of clay and take ten hits to destroy. They have two rainbow bloons inside them.

  11. Rainbow bloons have yellow, green, blue, and red bloons inside them.

  12. MOAB-class bloons (MOABs, BFBs, and ZOMGs require hundreds of hits to pop. They move slowly, but if any get through it's game over.

  13. MOAB contains four ceramic bloons.

Towers

  1. Dart Monkey

    • Talent Tree One

      1. Long range darts: makes the dart monkey shoot further than normal.

      2. Enhanced Eyesight: Increases attack range even further and allows dart monkey to shoot camo bloons.

      3. Spike-O-Pult: Converts the dart monkey into a spike-o-pult, a powerful tower that hurls a large spiked ball instead of darts. Good range but slower attack speed. Each ball can pop 18 bloons.

      4. Juggernaut: Hurls a giant unstoppable killer spiked ball that can pop lead and excels at crushing ceramic bloons.

    • Talent Tree Two

      1. Sharp Shots: Can pop one extra bloon per shot.

      2. Razor Sharp Shots: Can pop two extra bloons per shot.

      3. Triple Darts: Throws three darts at a time instead of one.

      4. Super Monkey Fan Club: Converts up to ten different dart monkeys into super monkeys for fifteen seconds.

  2. Tack Shooter

    • Talent Tree One

      1. Faster Shooter: Shoots tacks faster.

      2. Even Faster Shooting: Shoots tacks even faster.

      3. Tack Sprayer: Sprays out sixteen tacks per volley instead of the usual eight.

      4. Ring of Fire: Upgrade to a fast firing burst tower that shoots a deadly ring of flame instead of tacks.

    • Talent Tree Two

      1. Extra Range Tacks: Tacks fly out further than normal.

      2. Super Range Tacks: Tacks go much further than normal.

      3. Blade Shooter: Converts tower into a blade shooter that shoots out razor sharp blades that are harder for bloons to avoid.

      4. Blade Maelstrom: Covers the area in an unstoppable storm of blades.

  3. Sniper Monkey

    • Talent Tree One

      1. Full Metal Jacket: Shots can pop through four layers of bloon and can pop lead and frozen bloons.

      2. Point Five Oh: Shots can pop through seven layers of bloon.

      3. Deadly Precision: Extreme accuracy and muzzle velocity cause up to eighteen layers of bloon to be popped per shot. Enough to destroy an entire ceramic bloon.

      4. Cripple MOAB: Bullets from this tower temporarily take out propulsion systems of MOAB-class bloons, immobilising them for a short time.

    • Talent Tree Two

      1. Faster Firing: Allows sniper to shoot faster.

      2. Night Vision Goggles: Allows sniper to shoot camo bloons.

      3. Semi Automatic Rifle: Allows sniper to take multiple shots and attack three times as fast.

      4. Supply Drop: Drops a crate full of cash.

  4. Boomerang Thrower

    • Talent Tree One

      1. Multi-Target: Boomerangs can now pop up to seven bloons.

      2. Glaive Thrower: Throw glaives instead of boomerangs; they're sharper, faster, and more poptastic.

      3. Glaive Ricochet: The glaives from this tower will automatically bounce from bloon to bloon as long as there is one close by.

      4. Glaive Lord: Creates two permanent glaives that orbit around the tower, shredding almost anything that touches them. Glaive lord can attack camo bloons.

    • Talent Tree Two

      1. Sonic Boom: Sonic boomerangs can smash through frozen bloons.

      2. Red Hot 'Rangs: Red hot boomerangs can melt through lead bloons.

      3. Bionic Boomer: This tower replaces its arm with a super strong bionic arm. The bionic boomer throws boomerangs twice as fast.

      4. Turbo Charge: Increase attack speed to hypersonic ability for ten seconds.

  5. Ninja Monkey

    • Talent Tree One

      1. Ninja Discipline: Increases attack range and attack speed.

      2. Sharp Shurikens: Shurikens can pop four bloons each.

      3. Double Shot: Extreme ninja skill allows Ninja to throw two shurikens at the same time.

      4. Bloonjitsu: The art of bloonjitsu allows ninjas to throw 5 shurikens at once.

    • Talent Tree Two

      1. Seeking Shuriken: Infuses bloon hatred into the weapons themselves—they will seek out and pop bloons automatically.

      2. Distraction: Some bloons struck by the ninja's weapons will become distracted and move the wrong way temporarily.

      3. Flash Bomb: Sometimes throws a flash bomb that stuns bloons in a large radius.

      4. Sabotage Supply Lines: Sabotage the bloons supply line for fifteen seconds. During the sabotage, all new bloons are crippled to half speed.

  6. Bomb Tower

    • Talent Tree One

      1. Extra range: Gives tower longer attack range.

      2. Frag Bombs: Each explosion throws out eight sharp fragments that pop even more bloons.

      3. Cluster Bombs: Throws out secondary bombs instead of frags, causing widespread explosive poppage.

      4. Bloon Impact: Impacts from this tower become so violent, bloons become stunned for a short time after being hit.

    • Talent Tree Two

      1. Bigger Bombs: Shoots much larger bombs than normal—they have a larger blast area and more popping power.

      2. Missile Launcher: Converts the tower into a missile launcher—the missiles have higher velocity, longer range, more popping power, and faster shooting.

      3. MOAB Mauler: MOAB maulers are special missiles that wreak havoc on MOAB-class bloons, inflicting ten times the damage of normal.

      4. MOAB Assasin: super deadly missile seeks the nearest MOAB-class bloon and destroys it instantly. Does 1000 damage to ZOMG bloons instead of destroying them.

  7. Ice Tower

    • Talent Tree One

      1. Enhanced Freeze: Has a larger freeze area and freezes bloons for longer.

      2. Snap Freeze: The tower freezes so fast the bloons pop first before freezing.

      3. Arctic Wind: Super cold aura that slows all bloons that come near the tower. Also has larger freeze area of effect.

      4. Viral Frost: Freezes bloons so cold that any bloons it touches freeze as well.

    • Talent Tree Two

      1. Permafrost: Makes bloons so cold that they go slowly even after thawing.

      2. Deep Freeze: Freezes two layers of bloon instead of one.

      3. Ice Shards: Creates razor sharp pieces of ice on frozen bloons that fly out and pop more bloons when popped.

      4. Absolute Zero: Freezes the entire screen worth of bloons for four seconds, but doesn't affect MOAB-class bloons.

  8. Glue Gunner

    • Talent Tree One

      1. Glue Soak: Glue soaks through all layers of bloons.

      2. Corrosive glue: Makes the glue become corrosive, popping bloons every few seconds while glued.

      3. Bloon Dissolver: Glue contains an extreme solvent that melts bloons. While glued, bloons will pop twice every second.

      4. Bloon Liquefier: Pops bloons once before gluing. Contains a super strong dissolving glue that pops bloons ten times every second.

    • Talent Tree Two

      1. Stickier Glue: Makes glue effect last much longer.

      2. Glue Splatter: Splatters six bloons at once with glue.

      3. Glue Hose: Shoots glue more than three times as fast.

      4. Glue Striker: Glues all bloons on screen.

  9. Monkey Buccaneer

    • Talent Tree One

      1. Faster Shooting: Shoots faster.

      2. Longer Cannons: Longer shooting range.

      3. Destroyer: Super duper fast attack speed.

      4. Aircraft Carrier: Rapidly launches monkey ace pilots that strafe the area with darts.

    • Talent Tree Two

      1. Grape Shot: Sprays out a blast of four grapes for additional poppage.

      2. Crow's Nest: Allows detection of camo bloons and ability to shoot them.

      3. Cannon Ship: Adds an independent firing cannon to the buccaneer.

      4. Monkey Pirates: Uses a grappling hook to take down a MOAB bloon. Does not work on ZOMG bloons.

  10. Monkey Ace

    • Talent Tree One

      1. Rapid fire: Shoots darts more often.

      2. Sharper Darts: Can pop eight bloons each.

      3. Neva-Miss Target: Darts seek out and pop bloons intelligently.

      4. Spectre: Flying fortress of bloon doom.

    • Talent Tree Two

      1. Pineapple Present: Drops an exploding pineapple every three seconds.

      2. Spy Plane: Allows detection of camo bloons and ability to hit them.

      3. Operation Dart Swarm: More darts.

      4. Ground Zero: Drops bomb that kills all bloons on screen except for MOAB-class bloons.

  11. Super Monkey

    • Talent Tree One

      1. Laser Blasts: Shoots powerful lasers instead of darts. Can pop frozen bloons.

      2. Plasma Blasts: Plasma vaporizes everything it touches.

      3. Sun God: Bloons touched by the sun get destroyed.

      4. Temple of the Monkey God: Sacrifice a power in order to kill more bloons. The power sacrificed will determine the form of death of bloons.

    • Talent Tree Two

      1. Super Range: Longer range.

      2. Epic Range: Even further range.

      3. Robo-Monkey: Arms become robotic and intelligent. Able to shoot independently and annihilate.

      4. Technological Terror: Destroys all bloons within range of tower. Does 1000 damage to MOAB class bloons.

  12. Monkey Apprentice

    • Talent Tree One

      1. Intense Magic: Shoots larger and more powerful magic bolts.

      2. Lightning Bolt: Unleashes lightning bolt that zaps multiple bloons at once.

      3. Summon Whirlwind: Blows bloons off of path but gets rid of glue and freeze effects.

      4. Tempest Tornado: Blows many bloons faster and further and pops bloons once before starting. Removes glue and freeze effects.

    • Talent Tree Two

      1. Fireball: Fireball attack.

      2. Monkey Sense: Allows Monkey apprentice to detect and attack camo bloons.

      3. Dragon's Breath: Short range attack that blows fire at bloons and pops multiple at once.

      4. Summon Phoenix: Summons a phoenix that flies around for twenty seconds releasing doom upon bloons.

  13. Monkey Village

    • Talent Tree One

      1. Monkey Beacon: Increases attack range of all towers within monkey village radius by fifteen percent.

      2. Jungle Drums: Inspires nearby towers to attack faster by fifteen percent.

      3. Monkey Town: All bloons popped by towers within radius of the monkey village earn fifty percent more money from pop.

      4. High Energy Beacon: All nearby towers with non-passive abilities have their cooldown reduced by twenty percent and get a powerful energy beam attack.

    • Talent Tree Two

      1. Monkey Fort: Increases popping power of all nearby towers by one bloon.

      2. Radar Scanner: Allows all towers within radius to detect and attack camo bloons.

      3. Monkey Intelligence Bureau: Allows towers within radius to pop any bloon type.

      4. M.I.B. Call to Arms: Doubles attack speed and popping power of all nearby towers for ten seconds.

  14. Banana Farm

    • Talent Tree One

      1. More Bananas: Grows 3 big bunches of bananas.

      2. Banana Plantation: Grows seven big bunches each round.

      3. Banana Republic: Genereates thirteen big bunches of bananas every round.

      4. Banana Research Facility: Produces 5 boxes of bananas every round.

    • Talent Tree Two

      1. Long Life Bananas: Bananas last twenty seconds instead of the usual ten.

      2. Valuable Bananas: Each bunch or box of bananas is worth fifty percent more cash.

      3. Monkey Bank: Generates stored cash that earns five percent each round and holds up to five thousand dollars.

      4. Banana Investments Advisory: Ten percent interest each round instead of five percent and storage for twenty thousand dollars.

  15. Mortar Tower

    • Talent Tree One

      1. Increased Accuracy: Makes your mortar shots more accurate.

      2. Bigger Blast: Heavy ordinance delivers a bigger explosion radius.

      3. Bloon Buster: Smash through two layers of bloons at once.

      4. The Big One: Devastating explosions each pop three layers of bloon.

    • Talent Tree Two

      1. Rapid Reload: Increase the attack speed of the mortar.

      2. Burny Stuff: Pops additional bloons two seconds after impact.

      3. Signal Flare: Camo bloons popped by flares permanently lose their camo.

      4. Artillery Battery: Immobilizes and bombards the entire screen for five seconds.

  16. Dartling Gun

    • Talent Tree One

      1. Focused Firing: Greatly reduces the spread of the gun.

      2. Faster Barrel Spin: Makes gun fire much faster.

      3. Laser Cannon: Rapid fire plasma also pops frozen and lead bloons.

      4. Ray of Doom: The Ray of Doom is a persistent solid beam of bloon destruction.

    • Talent Tree Two

      1. Powerful Darts: Darts move faster and can pop three bloons each.

      2. Depleted Blootonium: Shots can now hurt any bloon type.

      3. Hydra Rocket Pods: Shoots vicious little missiles instead of darts.

      4. Bloon Area Denial System: Shoots missiles toward the nearest 100 bloons on screen.

  17. Spike Factory

    • Talent Tree One

      1. Bigger Stacks: Generates larger piles of spikes per shot.

      2. White Hot Spikes: Cuts through lead.

      3. Spiked Ball Factory: Produces sharp spiked balls that do extra damage to ceramics.

      4. Spiked Mines: Spiked balls explode when they lose all their spikes.

    • Talent Tree Two

      1. Faster Production: Increases the rate of spike production.

      2. Even Faster Production: Rate of spike production increases even more.

      3. MOAB-SHREDR Spikes: Super hard rending engine driven razors shred MOAB class bloons.

      4. Spike Storm: Lays down a thick carpet of spikes over the whole track.

  18. Heli Pilot

    • Talent Tree One

      1. Quad Darts: Shoots four darts per volley instead of two.

      2. Pursuit: Superior targeting computers enable a powerful new targeting option to pursue bloons across the track.

      3. Razor Rotors: Rotor blades rip up bloons on contact, including frozen and lead.

      4. Apache Dartship: Adds a large missile array and a powerful machine gun.

    • Talent Tree Two

      1. Bigger Jets: More powerful jets enable the heli to move much faster.

      2. Enhanced IFR Instruments: Allows heli pilot to detect and shoot camo bloons.

      3. Downdraft: Blows bloons away from the heli.

      4. Support Chinook: Drops med and cash crates or can pick up and reposition most towers.

Special Agents

  1. Tribal Turtle:

    • Can be on land or water. Throws spears and coconuts. Coconuts do extra damage to ceramic bloons and can pop frozen and lead bloons.

    • Costs $85 monkey money.

  2. Bloonsday Device:

    • Provides a large beam that destroys all bloons and does extreme damage to MOAB-class bloons.

    • Costs $250 monkey money.

  3. Meerkat Spy

    • Does not have any attacks, but provides camo bloon detection to all towers within radius.

    • Costs $60 monkey money.

  4. Bloonberry Bush

    • Placed on the track, this fast growing plant will pop bloons with its thorns. A thorn will be lost for each individual bloon popped, but it regains five thorns between each round.

    • Costs $50 monkey money.

  5. Beekeeper

    • Has a swarm of bees that attack bloons and kill off layers. Does not work on frozen or lead bloons.

    • Costs $120 monkey money.

  6. Angry Squirrel

    • Can spot camo and pop lead bloons with acorns durng frenzied throws.

    • Costs $60 monkey money.

  7. Super Monkey Storm

    • Group of Super Monkeys that destroy all bloons on the screen and also deal big damage to MOAB-class bloons.

    • Costs $50 monkey money.

  8. Portable Lake

    • Water spot that can be placed on map to allow water units to help in battle.

    • Costs $40 monkey money.

  9. Pontoon

    • Can be placed on water so land towers can float even on the portable lake.

    • Costs $40 monkey money.

  10. Monkey Farmer

    • Picks up bananas off field automatically.

    • Costs $40 monkey money.

  11. Radadactyl

    • Will pop any bloons near the nest, but will eventually die off and a new one will have to hatch.

    • Costs $100 monkey money.

Special Buildings

  • Purchase Land

    1. Is required before building any other buildings.

    2. Costs $250 monkey money.

  • Dart Training Facility

    1. Reduces cost of Dart Monkeys and their upgrades by five percent.

    2. Increases attack speed of dart monkeys by ten percent.

    3. You get one free dart monkey to start and every ten rounds.

    4. Increases the cost of boomerang throwers and their upgrades by five percent.

    5. Costs $500.

  • Tack Research Center

    1. Reduces cost of tack towers and their upgrades by five percent.

    2. Increases attack speed of tack towers by ten percent.

    3. Every second shot from the tack tower has extra pierce.

    4. Increases cost of bomb towers and their upgrade by five percent.

    5. Costs $500

  • Boomerang Dojo

    1. Reduces cost of boomerang throwers and their upgrades by five percent.

    2. Increases attack speed of tack towers by ten percent.

    3. Boomerangs fly one more circuit if they haven't hit their piercing cap.

    4. Increases cost of dart monkeys and their upgrades by five percent.

    5. Costs $750

  • Bombing Range

    1. Reduces cost of bomb towers and their upgrades by five percent.

    2. Increases attack speed of bomb towers by ten percent.

    3. Bomb Towers can pop black and zebra bloons.

    4. Increases cost of spike factories and their upgrades by five percent.

    5. Costs $750.

  • Mage Spire

    1. Reduces cost of apprentices and their upgrades by five percent.

    2. Increases attack speed of apprentices by ten percent.

    3. Adds a new additional magic bolt attack that seeks out its target.

    4. Increases cost of super monkeys and their upgrades by five percent.

    5. Costs $750

  • Ice Fortress

    1. Reduces cost of ice towers and their upgrades by five percent.

    2. Increases freeze length of ice towers by ten percent.

    3. Ice towers can freeze white and zebra bloons.

    4. Increases cost of glue gunners and their upgrades by five percent.

    5. Costs $750

  • Ninja Academy

    1. Reduce cost of ninja monkeys and their upgrades by five percent.

    2. Increases attack speed of ninja monkeys by ten percent.

    3. Creates a shadow double of the ninja monkey for a short period of time.

    4. Increases cost of sniper monkey and upgrades by five percent.

    5. Costs $750

  • Spikes R Us

    1. Reduces the cost of spike factories and their upgrades by five percent.

    2. Increases the lifespan of spike factories by ten percent.

    3. Generates one free road spike pile every round.

    4. Increases the cost of tack towers and their upgrades by five percent.

    5. Costs $500

  • Mortar Emplacement

    1. Reduces the cost of mortar towers and their upgrades by five percent.

    2. Increases attack speed of mortar towers by ten percent.

    3. All bloons hit by mortar towers are stunned briefly.

    4. Increases cost of dartling guns and their upgrades by five percent.

    5. Costs $750

  • Ace Private Hangar

    1. Reduces the cost of monkey aces and their upgrades by five percent.

    2. Increases attack speed of monkey aces by ten percent.

    3. Aces get fast-firing forward gunners to add to their fire power.

    4. Increases the cost of monkey buccaneers and their upgrades by five percent.

    5. Costs $1,000

  • Pirate Cove

    1. Reduces the cost of monkey buccaneers and their upgrades by five percent.

    2. Increases attack speed of monkey buccaneers by ten percent.

    3. All ships detect camo; Crows nest grants camo detection to nearby towers.

    4. Costs $750

  • Glue Supply Depot

    1. Reduces the cost of glue gunners and their upgrades by five percent.

    2. Increases glue slow down by ten percent.

    3. Popped bloons leave glue on the track.

    4. Increases the cost of ice towers and their upgrades by five percent.

    5. Costs $750

  • Dartling Ammo Dump

    1. Reduces the cost of dartling guns and their upgrades by five percent.

    2. Increases the attack speed of the dartling guns by ten percent.

    3. Dartling gunners can lock their attacks to a fixed position.

    4. Increases the cost of mortar tower and their upgrades by five percent.

    5. Costs $1,000

  • Rifle Range

    1. Reduces the cost of sniper monkeys and their upgrades by five percent.

    2. Increases the attack speed of the sniper monkeys by ten percent.

    3. Every second shot does +1 damage.

    4. Increases the cost of ninja monkeys and their upgrades by five percent.

    5. Costs $750

  • Super Monkey Lair

    1. Reduces the cost of super monkeys and their upgrades by five percent.

    2. Increases the range of super monkeys by ten percent.

    3. Super Eyes can detect camo.

    4. Increases the cost of apprentices and upgrades by five percent.

    5. Costs $2,500

  • Heli Hangar

    1. Reduces tower and upgrade cost by five percent.

    2. Increases range by ten percent.

    3. Heli pilot buildings take up to twenty percent less room.

    4. In pursuit mode, heli pilot flies much faster.

    5. Increases the cost of monkey apprentice and upgrades by five percent.

Thanks to Meaghan for the strategy guide!

58 Comments

My word, how did this sneak up on me?! I had no idea it was even in the works!

Reply

I've been waiting for this game for a long time...Its the best yet!

Reply

I was getting bored with the TD genre long before the 4th entry, but the Bloons TD series has kept my interest. It's so cathartic, and it's got a great sense of humor. And this version is more cathartic than ever, with a gazillion different ways to annihilate balloons.

There's still that troublesome premium content... I maintain that it would be way better if they'd just let us buy ranks ahead of time rather than holding out specific upgrades. But oh well, at least there's no leaderboard this time, so I forgive them.

The only problem is, Ninja Kiwi's site isn't letting me log in (the secure server is throwing an exception), so I can't sign in to save my game. Let's hope they fix it soon.

Reply

My mistake, there is a leaderboard. Don't know why I didn't notice that. Maybe because it doesn't pop up automatically after each game (which is, in itself, an improvement)? Oh well.

And now I emptied my caché and the site is working again. That helps.

All righty then, so, BTD is out. Now all I need is for the next Submachine to be released before New Year's, and my year will be complete.

Reply

Awesome! BTD's are always a wonder to behold.

However, there is a most unfortunate issue. You are obliged to log in for some of the features, such as medals, saving progress within games et cetera. However, every time I log in (laborously, as the servers seem to be struggling), the game resets to the title screen a few seconds later and forces me to log in again, which causes the game to reset, and so on.

It's too bad, really. I don't want to miss out on anything and I hate losing my progress. Does anyone else have this problem, is it due to the undoubtedly strained servers, is it a bug or is my glorified potato of a computer the issue?

Reply

...or shortly after New Year's, as I would have found out if I'd checked the Submachine wiki more regularly. Silly me.

Also, word of warning about BTD5: If you're playing on a laptop (or any not-specifically-designed-for-power-gaming computer), you need to close EVERYTHING else. Either that, or spread out a towel on your lap and put some ice under the hot spots in your case on the later levels. Trust me.

Reply

hey, ive been playing balloon tower defense 5.... I always have a problem when it comes to the the metal/camo balloons.. i literally have no idea how to get past them and i was wondering if anyone else knows how to.. :/

Reply

FYI, The BTD 4 link in your article appears to be broken. I'm getting a 404 error.

[Thanks, and fixed. -Jay]

Reply

Hey guys, thanks for the review and the comments. We've had this new login system up and running a few days but as some have noticed we've had some teething problems with it. These will be worked out over time as we get to grips with the ins and outs of it and then it will hands down be the best option for any fan of our games from now on.

One commenter noted that its a pain to have to login to save progress and medals etc. I just want to be clear that we didn't take this decision lightly - adobe was forced to make a change to cookies so that flash data gets wiped if the user clears the cache or some other stuff happens (I'm not 100% sure under which conditions this happens) - this has made it a total nightmare for developers like us to save users progress. We have used mochis system for this in the past but it doesn't really give us enough control over the users experience or the ability to correct wrongs with lost saves/data/premium purchases. We HAD to make our own system for BTD5 there was simply no other way to make the game work without it. Although we do attempt to save data to the local cookie in the game, this is so unreliable we've pretty much had to say that you WILL lose your data if you choose not to login to the system.

Thanks

Stephen

Reply

Mr. Ninjakiwi:

I feel I must inform you that I didn't quite mean that the login system itself is so awful: it's actually really easy to login, and I think the 8-second wait is due to the servers being strained. Probably a lot of people playing this stuff.

I was informing you about the fact that the game resets when you log in, causing you to automatically log out. I literally can't play the game while logging in. I'm willing to use an account (I made one) if needed, but then you'll have to let me use it too. Saving progress is pretty important to me.

Reply

I haven't had problems logging in, but while loged in I have had problems with the save working. Sometimes it saves fine, others it can't save at all.

Reply

I, too, am getting the same problem as Yarrr. After logging in (takes a while, but no problems), after about 5 seconds I am returned to the "Play" screen, logged out. This occurs if I am logging in through the top bar, or through the game menu.

Yes, for now I am unable to save, apparently.

Reply

I don't know how to click the towers, it won't let me select them so I have no upgrades.

Reply

Why changing quality is disabled? My computer is rather bad and It can't handle some levels, especially later ones. I didnt notice any options menu in game and right-click menu doesnt have this option either?

Please tell me if I missed something or there is other way to change it?

Please dont forget about poor people with suckish comps. It could happen to you! :P

Reply

Working on walkthrough. Expect it to come within a day, an hour, or if I'm diligent, 30 minutes.

Reply

Blue-Hand-
There is. It's been updated.

Reply

CJ, thanks for info, but I still don't see quality change option (I cleared my cache, didnt notice any difference).

So, I just built Temple of the Monkey God and I was really surprised to see it destroyed all my towers! The description says its power is "modified by the types of TOWER sacrificed". I tought that means I will choose a tower, not ALL towers will be sacrificed. I don't know if it is a bug or intentional, but if it's supposed to be like that, tower description should be changed.
(On a side note, this one mega tower was worse than all my towers separately :(

Otherwise, great game! :D

Reply

We have managed to sort out most all of the teething issues we had with the brand new NK Login system so you should be able to log in and save your progress without issue now.

If you do encounter any problems, you can always email support *at* ninjakiwi *dot* com and we'll reply asap.

Enjoy the game!

Reply

Hey guys,

I just created a "Temple of the Monkey God" it upgrades and does its animation but then disappears..

I started a fresh game and it did it again..

Can someone tell me if this is happening to them or maybe I don't have enough towers? As a test I played on the easy level and only had 2x of the fire monkey wizards (If that's what you call them)and banana farms fully upgraded.. do I need more towers?

-Alex

Reply

Temple is fixed - we broke it in the previous update. Apologies!

Reply
Isu the Mule December 23, 2011 6:44 AM

I was expecting a bit more out of this to be honest. still a 5/5 game but there's little it offers that's better than btd4. I do think it's a bit more balanced which is a plus. I'll be playing this one for a while.

I don't like using the sniper. I can't tell what he's popping so it's very hard to tell if he' being useful. A visual aid would be nice.

For the most part, I like the changes in the tower upgrade system. But I don't like how I can't see tier 4 until I've bought tier 3. tier 4 is my goal but I can never remember which upgrade is on which side. I've resorted to writing them down which I really shouldn't have to do. Also, it's unclear whether or not some of the tier 4 upgrades improve the tower or just give it an activated ability. the change in skin suggests that the tower improves but their's nothing in the description of the upgrade so I'm unsure.

The Sun Temple sacrifice thing is an interesting concept, but I was completely let down by what you did with it. Many of the tower's seem to default to a ring of darts. I really expected something more. I know it says "use at your own peril" or whatever, but still. I wanted a flaming ring of golden fire when sacrificed my fully upgraded tack shooter, not some flying saws.

Reply

Oh NOES!
Walkthrough delayed. This thing is more expansive than I thought it would be!

[I appreciate you doing it, CJ. Take your time with it, do it up right, and there's a nice surprise waiting for you when you finish. :) -Jay]

Reply

You guys are probably busy with Christmas, but I'm busy with research. Since I'm not the proper rank, I need the costs (for easy, medium and hard) of all the upgrades of these towers:

Banana Farm
Super Monkey
Monkey Buccaneer
Monkey Ace
Glue Gunner
Mortar Tower
Ice Tower
Bomb Tower

It may be a lot, but I need YOU. (If I don't get all of these, the walkthrough will take a longer time)

Reply
Isu the Mule December 24, 2011 2:11 PM

@CJ I just beat level 1 on hard. I've been recording a lot of things so I can help you with this walkthrough. I'll post all the prices later today.

Reply

@CJ, Here are costs of these towers on medium (banana farm missing, sorry).

Super Monkey
Path1: 3500,5000,16500,100000
Path2: 1000,1500,9000,25000
Monkey Buccaneer
Path1: 400,180,2200,17500
Path2: 300,250,1200,4500
Monkey Ace
Path1: 700,500,2000,18000
Path2: 200,350,3000,14000
Glue Gunner
Path1: 200,300,2300,12500
Path2: 120,1800,3250,5500
Mortar Tower
Path1: 200,600,800,10000
Path2: 250,500,500,9000
Ice Tower
Path1: 230,400,6500,8000
Path2: 100,350,2000,2000
Bomb Tower
Path1: 200,300,800,3200
Path2: 400,400,900,3200

Hope that helps, and Isu the Mule will have some less work to do ;)
Good luck with walkthrough, I can't wait to read some tips from more experianced players.

Reply
Isu the Mule December 25, 2011 3:45 AM

@Blue-Hand, all of the medium prices can be found in sandbox mode, so I hope you found them there and didn't work to hard to get them.

Here are the all the prices, even the ones you didn't ask for:

Dart Monkey

E:$170 M:$200 H:$220
  Path 1
 Long Range Darts E:$80 M:$90 H:$100
 Enhanced Eyesight E:$100 M:$120 H:$130
 Spike-o-pult E:$430 M:$500 H:$540
 Juggernaut E:$1280 M:$1500 H:$1620
  Path 2
 Sharp Shots E:$120 M:$140 H:$150
 Razor Sharp Shots E:$140 M:$170 H:$180
 Triple Darts E:$280 M:$330 H:$360
 Super Monkey Fan Club E:$6800 M:$8000 H:$8640

Tack Shooter

E:$310 M:$360 H:$390
  Path 1
 Faster Shooting E:$180 M:$210 H:$230
 Even Faster Shooting E:$260 M:$300 H:$320
 Tack Sprayer E:$430 M:$500 H:$540
 Ring of Fire E:$2130 M:$2500 H:$2700
  Path 2
 Extra Range Tacks E:$90 M:$100 H:$110
 Super Range Tacks E:$190 M:$230 H:$240
 Blade Shooter E:$580 M:$680 H:$730
 Blade Maelstrom E:$2300 M:$2700 H:$2920

Sniper Monkey

E:$340 M:$400 H:$430
  Path 1
 Full Metal Jacket E:$300 M:$350 H:$380
 Point Five Oh E:$1870 M:$2200 H:$2380
 Deadly Precision E:$6380 M:$7500 H:$8100
 Cripple MOAB E:$10630 M:$12500 H:$13500
  Path 2
 Faster Firing E:$340 M:$400 H:$430
 Night Vision Goggles E:$260 M:$300 H:$320
 Semi Automatic Rifle E:$2980 M:$3500 H:$3780
 Supply Drop E:$10200 M:$12000 H:$12960

Boomerang Thrower

E:$340 M:$400 H:$430
  Path 1
 Multi-Target E:$210 M:$250 H:$270
 Glaive Thrower E:$240 M:$280 H:$300
 Glaive Riccochet E:$940 M:$1100 H:$1190
 Glaive Lord E:$2130 M:$2500 H:$2700
  Path 2
 Sonic Boom E:$90 M:$100 H:$110
 Red Hot 'Rangs E:$130 M:$150 H:$160
 Bionic Boomer E:$850 M:$1000 H:$1080
 Turbo Charge E:$2550 M:$3000 H:$3240

Ninja Monkey

E:$510 M:$600 H:$650
  Path 1
 Ninja Discipline E:$260 M:$300 H:$320
 Sharp Shurikens E:$300 M:$350 H:$380
 Double Shot E:$720 M:$850 H:$920
 Bloonjitsu E:$2340 M:$2750 H:$2970
  Path 2
 Seeking Shuriken E:$210 M:$250 H:$270
 Distraction E:$300 M:$350 H:$380
 Flash Bomb E:$2340 M:$2750 H:$2970
 Sabotage Supply Lines E:1530 M:$1800 H:$1940

Bomb Tower

E:$600 M:$700 H:$760
  Path 1
 Extra Range E:$170 M:$200 H:$220
 Frag Bombs E:$260 M:$300 H:$320
 Cluster Bombs E:$680 M:$800 H:$860
 Bloon Impact E:$2720 M:$3200 H:$3460
  Path 2
 Bigger Bombs E:$340 M:$400 H:$430
 Missile Launcher E:$340 M:$400 H:$430
 MOAB Mauler E:$770 M:$900 H:$970
 MOAB Assassin E:$2720 M:$3200 H:$3460

Ice Tower

E:$320 M:$380 H:$410
  Path 1
 Enhanced Freeze E:$190 M:$230 H:$240
 Snap Freeze E:$340 M:$400 H:$430
 Arctic Wind E:$5530 M:$6500 H:$7020
 Viral Frost E:$6800 M:$8000 H:$8640
  Path 2
 Permafrost E:$90 M:$100 H:$110
 Deep Freeze E:$300 M:$350 H:$380
 Ice Shards E:$1700 M:$2000 H:$2160
 Absolute Zero E:$1700 M:$2000 H:$2160

Glue Gunner

E:$260 M:$300 H:$320
  Path 1
 Glue Soak E:$170 M:$200 H:$220    
 Corrosive Glue E:$260 M:$300 H:$320
 Bloon Dissolver E:$1960 M:$2300 H:$2480
 Bloon Liquefier E:$10630 M:$12500 H:$13500
  Path 2
 Stickier Glue E:$100 M:$120 H:$130
 Glue Splatter E:$1530 M:$1800 H:$1940
 Glue Hose E:$2760 M:$3250 H:$3510
 Glue Striker E:$4680 M:$5500 H:$5940

Monkey Buccaneer

E:$510 M:$600 H:$650
  Path 1
 Faster Shooting E:$340 M:$400 H:$430
 Longer Cannons E:$150 M:$180 H:$190
 Destroyer E:$1870 M:$2200 H:$2380
 Aircraft Carrier E:$14880 M:$17500 H:$18900
  Path 2
 Grape Shot E:$260 M:$300 H:$320
 Crow's Nest E:$210 M:$250 H:$270
 Cannon Ship E:$1020 M:$1200 H:$1300
 Monkey Pirates E:$3830 M:$4500 H:$4860

Monkey Ace

E:$810 M:$950 H:$1030
  Path 1
 Rapid Fire E:$600 M:$700 H:$760
 Sharper Darts E:$430 M:$500 H:$540
 Neva-Miss Targeting E:$1700 M:$ H:$2160
 Spectre E:$18000 M:$18000 H:$19440
  Path 2
 Pineapple Present E:$170 M:$200 H:$220
 Spy Plane E:$300 M:$350 H:$380
 Operation: Dart Storm E:$2550 M:$3000 H:$3240
 Ground Zero E:$14000 M:$14000 H:$15120

Super Monkey

E:$3400 M:$4000 H:$4320
  Path 1
 Laser Blasts E:$2980 M:$3500 H:$3780
 Plasma Blasts E:$4250 M:$5000 H:$5400
 Sun God E:$14030 M:$16500 H:$17820
 Temple of the Monkey God E:$85000 M:$100000 H:$108000
  Path 2
 Super Range E:$850 M:$1000 H:$1080
 Epic Range E:$1280 M:$1500 H:$1620
 Robo-Monkey E:$7650 M:$9000 H:$9720
 Technological Terror E:$21250 M:$25000 H:$27000

Monkey Apprentice

E:$470 M:$550 H:$590
  Path 1
 Intense Magic E:$260 M:$300 H:$320
 Lightning Bolt E:$680 M:$800 H:$860
 Summon Whirlwind E:$1700 M:$2000 H:$2160
 Tempest Tornado E:$6800 M:$8000 H:$8640
  Path 2
 Fireball E:$170 M:$200 H:$220
 Monkey Sense E:$260 M:$300 H:$320
 Dragon's Breath E:$2980 M:$3500 H:$3780
 Summon Phoenix E:$6800 M:$8000 H:$8640

Monkey Village

E:$1360 M:$1600 H:$1730
  Path 1
 Monkey Beacon E:$430 M:$500 H:$540
 Jungle Drums E:$1280 M:$1500 H:$1620
 Energy Beacon E:$1020 M:$1200 H:$1300
 Monkey Town E:$25500 M:$30000 H:$32400
  Path 2
 Monkey Fort E:$770 M:$810 H:$970
 Radar Scanner E:$ M:$1700 H:$2160
 Monkey Intelligence Bureau E:$3660 M:$3870 H:$4640
 M.I.B Call to Arms E:$20400 M:$21600 H:$25920

Banana Farm

E:$850 M:$1000 H:$1080
  Path 1
 More Bananas E:$260 M:$300 H:$320
 Banana Plantation E:$1190 M:$1400 H:$1510
 Banana Republic E:$2720 M:$3200 H:$3460
 Banana Research Facility E:$11900 M:$14000 H:$15120
  Path 2
 Long Life Bananas E:$430 M:$500 H:$540
 Valuable Bananas E:$3400 M:$4000 H:$4320
 Monkey Bank E:$3570 M:$4200 H:$4540
 Banana Investments Advisory E:$4680 M:$5500 H:$5940

Mortar Tower

E:$680 M:$800 H:$860
  Path 1
 Increased Accuracy E:$170 M:$200 H:$220
 Bigger Blast E:$510 M:$600 H:$650
 Bloon Buster E:$680 M:$800 H:$860
 The Big One E:$8500 M:$10000 H:$10800
  Path 2
 Rapid Reload E:$210 M:$250 H:$270
 Burny Stuff E:$430 M:$500 H:$540
 Signal Flare E:$430 M:$500 H:$540
 Artillery Battery E:$7650 M:$9000 H:$9720

Dartling Gun

E:$810 M:$950 H:$1030
  Path 1
 Focused Firing E:$210 M:$250 H:$270
 Faster Barrel Spin E:$1020 M:$1200 H:$1300
 Laser Cannon E:$5100 M:$6000 H:$6480
 Ray of Doom E:$55000 M:$55000 H:$59400
  Path 2
 Powerful Darts E:$510 M:$600 H:$650
 Depleted Bloontonium Darts E:$850 M:$1000 H:$1080
 Hydra Rocket Pods E:$5950 M:$7000 H:$7560
 Bloon Area Denial System E:$20000 M:$20000 H:$21600

That's a lot of information so I'm going to calculate the totals for each tower and post those as well (tower cost + 6 upgrades)

I was able to complete the first two maps on hard with no lives lost and no special agents used. I'll write up my strategy and post it here later.

Reply

@Isu, I used deflation mode actually, because I had to level up some towers ;) It wasn't very hard work, still some text to write, but nothing, compared to what you did! Wow, that was lot of work!

I think I finally understand how Temple of the Monkey God works. It destroys all towers within its attack range and pilfers their powers (some).
When I build it few days ago it wasn't worth it (though I lost all of my towers), but today it was really powerfull, able to destroy waves of ZOMG Moabs. Don't know if they buffed it or combination of sacrificed towers made the difference.

Reply

I still dont understand everytime i buy a temple of the tower god, it takes my money and just dissapears, what is the problem with that?

Reply

@Mike, They said they fixed this bug already, so try shift + refresh page to clear cache, maybe you're still playing on previous version.

I just completed first two tracks on hard, so will write few small tips for all waiting for CJ's full walkthrough.

For first few waves several basic towers seems better than one upgraded. After making few dart monkeys and boomerang (ninja or apprentice may work too), you can start upgrading darts into triple darts. They are really efficient towers.

Before camo appears you need to get enhanced eyesight, and then red hot 'rangs (or apprentice or bomb tower if not using boomerang) for lead bloons.

Eventually you can build monkey village, and start buying more expensive upgrades for your bomb, apprentice and boomerang, and village of course. Though keep your bomb on lvl 2, so you can build MOAB assassin when needed.

After some time you will build your first super monkey. Focus on damage, not range, uprage it to plasma, and build second one and even third one if all is going good (you may need at least laser upgrade on them).

If you have trouble with camo, upgrade village to radar so your super monkeys can hit them.

At level 46, if I remember correctly, first red MOAB appears. Build MOAB assassin before it and use its ability.

At this stage you can start collecting cash for Sun God. If you have trouble with some waves upgrade your super monkeys (if you haven't already) and build some juggernauts (dart monkeys 1st path), because you will need them anyway before huge cermic wave appears (don't remember which wave it is). Also you can build some bomb towers and upgrade them into MOAB killers - they will be very handy for last level - ZOMG MOAB. Also, if in dire situation you can sell your dart monkeys to upgrade more important towers faster.

If you have some other tactics, please share! I would love to read it and see if some of the towers I didn't use can be more efficient.

Reply

@Blue-Hand
Thank you! The walkthrough is advancing quickly! If I may, it can be done as soon as later!

Reply

My Tips / Thoughts

Not particularly thought through ideas but the following might be useful to somebody..

I generally start with a ninja and upgrade to L3 / L2

Next I field a bomb tower and upgrade to L3 / L2

I then go for apprentice and upgrade to L0 / L3. This is expensive early on but works very well.

Super monkeys are next to L3 / L2.

A monkey village is useful too..

I might then install a snipper to L4 / L2 to slow down the MOABs

Bomb towers taken to to L4 / L2 are also useful for slowing down bloons.

Reply

great game,but my touchpad always refreshes by itself at some point and makes me lose my progress,once on 56 and once on 88

Reply

This game is very fun, with all the upgrades added on from the fourth version, but their are a few downsides. Sometimes my activation abilities for example the Blade Maelstorm Ability it doesn't cool down completely so I have to wait until the next round. Also, the game runs smoothly, but all of a sudden lags a bit. But otherwise, one of the best games!

Reply

i do not know what the tokens are for i get them by beating all 50 waves and the monkey money please help

Reply

I don't understand the paths. How can you get all of the upgrades?

Reply

@person, you can upgrade one path 2 times and another one 4 times. Once you build third upgrade on specific path you can upgrade other path only to level 2.

Reply

at first I thought the logging in was messed up because I could not log in. But then I used my eyes, and brain, and realized that for BTD 4 (or any other game on the Ninja Kiwi website) had always used a Mochi Games account, so just simply create a Ninja Kiwi account

Reply

Problem with BTD 5 ist that it is much too easy for an average player like me if you buy the whole upgrade bundle - and much too difficult for an average player like me if you play the free version. I was not able to do the hardest versions of the difficult tracks.

So why spend money if all you get is bordedom because the game is not challenging in any way? I would prefer to get more tracks, more difficulty levels or things like that.

I often support developers by buying the full version of their games, because I would like to see more. But when it comes to BTD, I will not spend money in the future.

Reply

Eyes twitching...
Local time... 3:08 AM
No... Can't get enough BTD5...
Why can't I finish the walkthrough...

Reply

Finally I finished advanced tracks on hard difficulty (though I used some agents). I found that dartling guns can be really good on some tracks.

Still have problems with expert tracks, especially last one (I barely finished it on easy and had to use lot of agents), so CJ, there is still at least one person patiently waiting for some tips from pro player :)

Reply
Landshark767 February 20, 2012 1:54 PM

In my opinion, as good as BTD5 is, it seems more like an update to 4 than a whole new game. So much changed between 3 and 4, and not so much between 4 and 5. Sure, there were the few things like ZOMG, Ninja/Sniper monkeys and heart bloons, but it really felt like it had so much more potential. I will look foward to 6, but I hope this doesn't become another Call of Duty that has millions playing yet little improvement year to year.
Pros: Less lag, new monkeys, a login system to keep your data, new maps, Two way upgrades (Probably the best update)
Cons: Worse graphics, slow login, not enough change.
I know other people have their own opinions, and that I may not have the deepest insight, but thats really what I thought about the game.

Reply

A tactic I tend to use now:


Always start your levels with easy mode to get the in game cash. First find a choke point on the map where you can hit multiple bloons with the tack/ice tower. Then nearby, place a ninja tower where it can still hit the choke point.
For easy mode you will still have enough cash to place a glue gunner at the beginning area of the level. As you progress, spend all of your money on getting corrosive glue for the gunner. Once you have got this, buy the path 2 upgrades for it. GET THE GLUE SPLATTER ASAP, THIS TOWER WILL GO ON FROM A HELP TO A GODSEND IF YOU GET THIS UPGRADE. Your Glue Gunner with corrosive will let you get rid of lead and your ninja will take out any camo for now. You are relatively safe.
Once you have enough money, upgrade the ninja tower so you have 2 upgrades on each path.
Then get a Dart Monkey and place it near to the choke point somewhere where it may hit a bunch of bloons in a line. Get it up to the Spike O' Pult.
Next concentrate on AoE towers, tack is what I often go for first. Place it on the choke point and level it up at your pleasure, aiming for path 1 upgrade primarily.
Then spend money on an ice tower and Boomerang Thrower at the choke point. For these two you MUST level up for path one as the Glave lord, Ring of Fire and Arctic Wind/Viral Frost will eliminate any and all bloons in the area. Don't level these up too far for now though.
Next make sure to get a Spike factory right at the end of your map, just as insurance.
From now it is really up to you as to what towers you place, you want all of your towers to be able to hit that choke point where the bloons will be glued, iced, boomeranged constantly, being set on fire, exploded and generally destroyed.
TIPS: A good investment first will be a MOAB Mauler as this set up isn't very good against MOABS to start with (Although once your choke is properly set up, you should have no problem.) If you are going for the Wizard, go straight for Firebreath and have him very close to the choke. I am a huge fan of Artillery too, and either path should be ok. Do not waste money on snipers as they are expensive as hell and really aren't that useful once hundreds of bloons are pouring out.
FOR MEDIUM MODE: You should have some cash by now so I advise getting the beekeeper. He may not be great later on but he will save your life at the beginning. Keep him close to the front and set him to target the strongest bloon to work well with the Glue gunner. Do the same as the easy mode but your path will be slower, get a Village early on to save a lot of money to all of your choke towers. Banana Farms are advised once you have hit a point where you can go a round without any close mishaps and enough money to buy one. I prefer having Path 1 but path 2 is just as good. Just take the same steps as Easy and hope for the best
Took me a few tries to get the whole choke tactic down, along with 10 minutes on Sandbox.
Good Luck Monkey
I'm counting on you

Reply

Everyone, I have an awesome thing here in this spoiler


Round 1 RBE: 20 (20 Red Bloons)
Round 2 RBE: 30 (30 Red Bloons)
Round 3 RBE: 30 (20 Red Bloons, 5 Blues)
Round 4 RBE: 60 (30 Red Bloons, 15 Blues)
Round 5 RBE: 55 (5 Red Bloons, 25 Blues)
Round 6 RBE: 57 (15 Red Bloons,15 Blue Bloons,4 Green Bloons)
Round 7 RBE: 85 (20 Red Bloons,25 Blue Bloons,5 Green Bloons)
Round 8 RBE: 92 (10 Red Bloons,20 Blue Bloons,14 Green Bloons)
Round 9 RBE: 90 (30 Green Bloons)
Round 10 RBE: 204 (102 Blue Bloons)
Round 11 RBE: 74 (10 Red Bloons,10 Blue Bloons,12 Green Bloons, 2 Yellow Bloons)
Round 12 RBE: 80 (15 Blue Bloons, 10 Green, 5 Yellow)
Round 13 RBE: 185 (106 Red Bloons, 21 Green Bloons, 4 Yellow Bloons)
Round 14 RBE: 145 (45 Red Bloons, 15 Blue Bloons, 10 Green Bloons, 10 Yellow Bloons)
Round 15 RBE: 91 (32 Red Bloons, 12 Green Bloons, 5 Yellow Bloons, 3 Pink Bloons)
Round 16 RBE: 112 (20 Green Bloons, 8 Yellow Bloons, 4 Pink Bloons)
Round 17 RBE: 32 (8 Yellow Regrowth Bloons)
Round 18 RBE: 240 (80 Green Bloons)
Round 19 RBE: 101 (10 Green Bloons, 4 Yellow, 5 Yellow Regrowth, 7 Pink)
Round 20 RBE: 66 (6 Black Bloons)
Round 21 RBE: 70 (14 Pink Bloons)
Round 22 RBE: 88 (8 White Bloons)
Round 23 RBE: 99 (5 Black Bloons, 4 Whites)
Round 24 RBE: 3 (1 Green Camo Bloon)
Round 25 RBE: 124 (31 Yellow Regrowth Bloons)
Round 26 RBE: 207 (23 Pink Bloons, 5 Zebras)
Round 27 RBE: 545
Round 28 RBE: 92 (4 Lead Bloons)
Round 29 RBE: 160 (25 Yellow Bloons, 12 Pink Regrowth)
Round 30 RBE: 207 (9 Lead Bloons)
Round 31 RBE: 230 (8 Zebra Bloons, 2 Zebra Regrowth)
Round 32 RBE: 767 (25 Black Bloons, 28 Whites, 8 Leads)
Round 33 RBE: 80 (20 Yellow Camo Bloons)
Round 34 RBE: 675 (140 Yellow Bloons, 5 Zebras)
Round 35 RBE: 685 (35 Pinks Bloons, 25 White, 5 Rainbow)
Round 36 RBE: 405 (81 Pink Bloons)
Round 37 RBE: 1092
Round 38 RBE: 1137
Round 39 RBE: 1986 (10 Black Bloons, 10 White, 20 Lead, 20 Zebra, 18 Rainbow)
Round 40 RBE: 886 (10 Rainbow Bloons, 4 Ceramic)
Round 41 RBE: 2040 (60 Black Bloons, 60 Zebra)
Round 42 RBE: 564 (6 Rainbow Camo Bloons, 6 Rainbow Regrowth)
Round 43 RBE: 1198 (10 Rainbow Bloons, 6 Ceramic)
Round 44 RBE: 1150 (50 Zebra Bloons)
Round 45 RBE: 2359 (200 Pink Bloons, 8 Lead, 25 Rainbows)
Round 46 RBE: 616 (1 M.O.A.B.)
Round 47 RBE: 1598 (70 Pink Camo Bloons, 12 Ceramic)
Round 48 RBE: 2950 (150 Pink Regrowth Bloons, 50 Rainbows)
Round 49 RBE: 4771
Round 50 RBE: 3516 (20 Red Bloons, 8 Lead, 20 Ceramic, 2 M.O.A.B)
Round 51 RBE: 3382 (10 Rainbow Regrowth Bloons, 28 Ceramic)
Round 52 RBE: 3447 (25 Rainbow Bloon, 10 Ceramic, 2 M.O.A.B)
Round 53 RBE: 2248 (80 Pink Camo Bloons, 3 M.O.A.B)
Round 54 RBE: 4872 (35 Ceramic Bloons, 2 M.O.A.B)
Round 55 RBE: 5296 (45 Ceramic Bloons, 1 M.O.A.B)
Round 56 RBE: 2496 (40 Rainbow Regrowth Bloons, 1 M.O.A.B)
Round 57 RBE: 4344 (40 Rainbow Bloons, 4 M.O.A.B)
Round 58 RBE: 6096 (29 Ceramic Bloons, 5 M.O.A.B)
Round 59 RBE: 5844 (28 Lead Camo Bloons, 50 Ceramic)
Round 60 RBE: 3164 (1 B.F.B.)
Round 61 RBE: 6530 (150 Zebra Regrowth Bloons, 5 M.O.A.B)
Round 62 RBE: 5901 (300 Pink Camo Bloons, 15 Rainbow Camo Regrowth, 6 M.O.A.B)
Round 63 RBE: 14413
Round 64 RBE: 5544 (9 M.O.A.B)
Round 65 RBE: 12638
Round 66 RBE: 7392 (12 M.O.A.B)
Round 67 RBE: 7720 (15 Ceramic Bloons, 10 M.O.A.B)
Round 68 RBE: 5628 (4 M.O.A.B, 1 B.F.B)
Round 69 RBE: 8660 (60 Lead Bloons, 70 Ceramic Regrowth)
Round 70 RBE: 11864 (200 Rainbow Camo Bloons, 4 M.O.A.B)
Round 71 RBE: 9280 (30 Ceramic Bloons, 10 M.O.A.B)
Round 72 RBE: 10280 (38 Ceramic Regrowth Bloons, 2 B.F.B)
Round 73 RBE: 11872 (9 M.O.A.B, 2 B.F.B)
Round 74 RBE: 23964 (200 Ceramic Bloons, 1 B.F.B)
Round 75 RBE: 12600 (28 Lead Bloons, 4 M.O.A.B, 3 B.F.B)
Round 76 RBE: 6240 (60 Ceramic Regrowth Bloons)
Round 77 RBE: 24444 (14 M.O.A.B, 5 B.F.B)
Round 78 RBE: 25502 (254 Rainbow Bloons, 50 Ceramic, 50 Ceramic Camo, 1 B.F.B)
Round 79 RBE: 45648 (500 Rainbow Regrowth Bloons, 7 B.F.B)
Round 80 RBE: 19096 (31 M.O.A.B)
Round 81 RBE: 28476 (9 B.F.B)
Round 82 RBE: 50440 (400 Rainbow Camo Regrowth Bloons, 10 B.F.B)
Round 83 RBE: 34080 (150 Ceramic Bloons, 30 M.O.A.B)
Round 84 RBE: 62440 (50 M.O.A.B, 10 B.F.B)
Round 85 RBE: 16656 (1 Z.O.M.G.)

Reply

I have the lab track on btd5, and it is too hard!!

Reply

Blue hand, i am a pro player at rank 60 that can help. I could send emails or something or just simply ask questions here.

Reply

I started reading this, and what sylocat says is right. I played on a new power gaming computer, and got to 111, but it became as slow as my computer on round 67.

Reply

Bloons Tower Defense 5
Basic Guide/Strategy:

The early game (1-25) is quite easy and you want to focus on cheap towers with small incremental upgrades. You want juuuust enough firepower to get you by, while working on Banana Farms to get the economy going.

Midgame (25-45) the bloons really ramp up and you need Area Effect weapons to keep up. In med/hard you want to efficiently be able to kill multiple bloons at once, while continuing to invest in Farms.
Furthermore you need to be able to deal with Camo and Lead bloons. The other types aren't really much of a special threat.

Endgame (46+) - This is when the huge bloons show up and they are VERY RESISTANT to all the area effect damage youve invested in midgame! Even when popped, they still manage to transport their 'payload' past much of your tower damage which is bad.
You have to prepare for them by building single-target/focused damage towers. This is where your Farms come in handy, using all that money for the endgame towers.

-----------------

For the easier maps, a TWO PASS system is your best bet. You want a big mass of towers all together (NOT spread out as regen bloons will hoze you and clusters benefit from the aura village effects), such that they are able to shoot at the bloons when they FIRST arrive...and right as they are LEAVING.
As long as the path is big enough this basically doubles your potential firepower since each tower gets to shoot at the entire line of bloons twice over.

For the harder maps, while they are doable, it is much easier to efficiently use your Monkey Bucks to assist you, particularly the special agents.
In these maps you will try to put your towers perpendicular to the bloons so they have straight shots right into them, instead of at an angle.
This helps your towers penetrate multiple bloons and prevent missing the faster ones and wasting attacks on high deflection angle shots.

Reply

Bloons Tower Defense 5
Tower Recommendations:

The Dart Tower is one of the most efficient in the game. With 2 range upgrades and the triple-dart upgrade, it kills 9 bloons at long range and shoots really fast. Its very cheap too.
I highly recommend using 2000 monkey bucks when you get them to max out the Dart Tower building and keep it active. Its drawback is meaningless since I dont like ninja towers and getting free towers at 1,10,20,30, means you effectively start with 200 free cash.

I tend to use multiple Darts with the triple upgrade. The catapults just aren't very good unless you have a long line of bloons and can position perpendicular to them for a long alley. This doesnt happen on the hard maps.

The Bloon Bush special agent is very strong as well. Putting 1 of these at the exit point means you can literally keep all 650 starting cash, use 1 dart tower and this agent and be able to rush a Banana Farm asap. This hugely kickstarts your economy. The bush is useful mid/endgame too since it provides a lot of 'virtual health' if you mess things up. After buying 50 of them, they spawn mini-bushes periodically making them twice as effective roughly.

The Tribal Turtle is also quite strong and gives you a decent tower for no cash, which lets you ramp up Farming ASAP. At pro level it gains double the firepower, tossing a piercing spear and coconut at the same time.

For the midgame, Apprentices are powerful and can take out ANY kind of bloon which is important. They are small and space efficient and highly upgradable. However, they are relatively weak lategame vs MOABs. With the Apprentice Building active they are much stronger and start with a bouncing zap effect that lets you spam them with minimal upgrades and be quite powerful.

Watch out for Glue Gunners. NEVER USE THEM EARLY. Midgame they are incredible once you have the 2/2 upgrades to make them fire area effect and pop bloons. Get the triple fire rate upgrade for sure! NOT the fast-pop one. 1 such Glue can almost literally win the entire midgame but they are useless vs MOABS, so you absolutely must have 1target towers.

Super Monkeys are very powerful and practically necessary endgame because they fire extremely fast at 1 target which makes them exceptional at killing the MOABs. Their extreme firepower makes them good at killing ALL bloons really. But DO NOT RUSH THEM because they require a ton of gold to really become effective. The basic Super cant take out Lead and doesnt have the area effect needed to survive midlevels.

Reply

Bloons Tower Defense 5 Strategy Guide

Tower Pairings and General Tips

  1. It's important to place short range towers with multi-shot functions in spots where they can hit multiple targets. Bridges and spots in between two sides of the track are great for the towers like the monkey ace (airplane), bomb tower, and tack shooter.

  2. Snipers are long range towers who get even better range with upgrades. You can place these towers farther back. Preferably place them in the middle of maps because of their excellent range. They can take out initial bloons or pick off stragglers towards the end.

  3. Ice Towers and the Glue Gunners are great for the start of the course and a little before the end of it to slow down any bloons that may have missed the initial destruction. This will allow your towers time to finish any remaining bloons.

  4. Make sure to have a decent amount of towers that can see camo bloons. Ninja monkeys can do this immediately, whereas other towers can purchase upgrades to enable this ability. Great placement for those able to see camo bloons would be towards the front and middle to destroy them as quickly as possible.

  5. Mortar Towers are also clutch when disposing of camo bloons because it will shoot off randomly and is not hindered by a lack of visibility. This is also great for area of effect damage.

  6. All towers will receive upgrades allowing multi-target attacks. Some, however, are better than others. Boomerang towers are great for disposing of bloons with multiple layers, or simply picking off multiple bloons at once. Ninjas and Dartling monkeys are also great for this and benefit by being stacked with each other for heavy area-of-effect damage.

  7. Banana Farms are instrumental in helping have more money flow in later levels. If you have these available when going through levels at the start, create these early to farm gold. Upgrades become more expensive the further you get, and the later towers are also more expensive.

  8. Monkey Villages are great for boosting abilities. Place these within range of as many towers as possible. Two to three on your map are great, but more isn't necessary because bonus effects do not stack.

  9. Apprentice Towers are very handy for bloons that are not harmed by physical attacks and even by bloons not harmed by explosions or freezing.

  10. Super Monkeys are the ultimate beneficial tower. They do heavy damage and are clutch when the MOAB and ZOMG bloons are on the scene. Focus on keeping these guys on the field. More is better when it comes to these towers; however, they are very expensive, as are their upgrades.

  11. Purchasing Special Agents can be great for extra defense but isn't always necessary and sometimes can be more entertaining than they are necessary. There are agents that have great benefits that will be helpful to towers already on the map, including the meerkat spy, bloonsday device, and super monkey storm. These are helpful for camo bloons or the more devestating MOAB-group.

Bloons

  1. White bloons are immune to freezing.

  2. Black bloons are immune to explosions.

  3. Zebra bloon is immune to both explosions and freezing.

  4. All three contain two pink bloons.

  5. Blue bloons contain one red.

  6. Green bloons contain one blue.

  7. Camo bloons are dangerous because most towers cannot hit them. Any bloon type can be camo and so will all the bloons that come out of that one. They can only be hit by towers that can detect camo bloons. In an emergency, use road spikes to pop them.

  8. Heart bloons have regenerative abilities and will create more bloons if not popped immediately.

  9. Lead bloons move slowly but are immune to anything sharp. They contain two black bloons.

  10. Ceramic bloons are made of clay and take ten hits to destroy. They have two rainbow bloons inside them.

  11. Rainbow bloons have yellow, green, blue, and red bloons inside them.

  12. MOAB-class bloons (MOABs, BFBs, and ZOMGs require hundreds of hits to pop. They move slowly, but if any get through it's game over.

  13. MOAB contains four ceramic bloons.

Towers

  1. Dart Monkey

    • Talent Tree One

      1. Long range darts: makes the dart monkey shoot further than normal.

      2. Enhanced Eyesight: Increases attack range even further and allows dart monkey to shoot camo bloons.

      3. Spike-O-Pult: Converts the dart monkey into a spike-o-pult, a powerful tower that hurls a large spiked ball instead of darts. Good range but slower attack speed. Each ball can pop 18 bloons.

      4. Juggernaut: Hurls a giant unstoppable killer spiked ball that can pop lead and excels at crushing ceramic bloons.

    • Talent Tree Two

      1. Sharp Shots: Can pop one extra bloon per shot.

      2. Razor Sharp Shots: Can pop two extra bloons per shot.

      3. Triple Darts: Throws three darts at a time instead of one.

      4. Super Monkey Fan Club: Converts up to ten different dart monkeys into super monkeys for fifteen seconds.

  2. Tack Shooter

    • Talent Tree One

      1. Faster Shooter: Shoots tacks faster.

      2. Even Faster Shooting: Shoots tacks even faster.

      3. Tack Sprayer: Sprays out sixteen tacks per volley instead of the usual eight.

      4. Ring of Fire: Upgrade to a fast firing burst tower that shoots a deadly ring of flame instead of tacks.

    • Talent Tree Two

      1. Extra Range Tacks: Tacks fly out further than normal.

      2. Super Range Tacks: Tacks go much further than normal.

      3. Blade Shooter: Converts tower into a blade shooter that shoots out razor sharp blades that are harder for bloons to avoid.

      4. Blade Maelstrom: Covers the area in an unstoppable storm of blades.

  3. Sniper Monkey

    • Talent Tree One

      1. Full Metal Jacket: Shots can pop through four layers of bloon and can pop lead and frozen bloons.

      2. Point Five Oh: Shots can pop through seven layers of bloon.

      3. Deadly Precision: Extreme accuracy and muzzle velocity cause up to eighteen layers of bloon to be popped per shot. Enough to destroy an entire ceramic bloon.

      4. Cripple MOAB: Bullets from this tower temporarily take out propulsion systems of MOAB-class bloons, immobilising them for a short time.

    • Talent Tree Two

      1. Faster Firing: Allows sniper to shoot faster.

      2. Night Vision Goggles: Allows sniper to shoot camo bloons.

      3. Semi Automatic Rifle: Allows sniper to take multiple shots and attack three times as fast.

      4. Supply Drop: Drops a crate full of cash.

  4. Boomerang Thrower

    • Talent Tree One

      1. Multi-Target: Boomerangs can now pop up to seven bloons.

      2. Glaive Thrower: Throw glaives instead of boomerangs; they're sharper, faster, and more poptastic.

      3. Glaive Ricochet: The glaives from this tower will automatically bounce from bloon to bloon as long as there is one close by.

      4. Glaive Lord: Creates two permanent glaives that orbit around the tower, shredding almost anything that touches them. Glaive lord can attack camo bloons.

    • Talent Tree Two

      1. Sonic Boom: Sonic boomerangs can smash through frozen bloons.

      2. Red Hot 'Rangs: Red hot boomerangs can melt through lead bloons.

      3. Bionic Boomer: This tower replaces its arm with a super strong bionic arm. The bionic boomer throws boomerangs twice as fast.

      4. Turbo Charge: Increase attack speed to hypersonic ability for ten seconds.

  5. Ninja Monkey

    • Talent Tree One

      1. Ninja Discipline: Increases attack range and attack speed.

      2. Sharp Shurikens: Shurikens can pop four bloons each.

      3. Double Shot: Extreme ninja skill allows Ninja to throw two shurikens at the same time.

      4. Bloonjitsu: The art of bloonjitsu allows ninjas to throw 5 shurikens at once.

    • Talent Tree Two

      1. Seeking Shuriken: Infuses bloon hatred into the weapons themselves—they will seek out and pop bloons automatically.

      2. Distraction: Some bloons struck by the ninja's weapons will become distracted and move the wrong way temporarily.

      3. Flash Bomb: Sometimes throws a flash bomb that stuns bloons in a large radius.

      4. Sabotage Supply Lines: Sabotage the bloons supply line for fifteen seconds. During the sabotage, all new bloons are crippled to half speed.

  6. Bomb Tower

    • Talent Tree One

      1. Extra range: Gives tower longer attack range.

      2. Frag Bombs: Each explosion throws out eight sharp fragments that pop even more bloons.

      3. Cluster Bombs: Throws out secondary bombs instead of frags, causing widespread explosive poppage.

      4. Bloon Impact: Impacts from this tower become so violent, bloons become stunned for a short time after being hit.

    • Talent Tree Two

      1. Bigger Bombs: Shoots much larger bombs than normal—they have a larger blast area and more popping power.

      2. Missile Launcher: Converts the tower into a missile launcher—the missiles have higher velocity, longer range, more popping power, and faster shooting.

      3. MOAB Mauler: MOAB maulers are special missiles that wreak havoc on MOAB-class bloons, inflicting ten times the damage of normal.

      4. MOAB Assasin: super deadly missile seeks the nearest MOAB-class bloon and destroys it instantly. Does 1000 damage to ZOMG bloons instead of destroying them.

  7. Ice Tower

    • Talent Tree One

      1. Enhanced Freeze: Has a larger freeze area and freezes bloons for longer.

      2. Snap Freeze: The tower freezes so fast the bloons pop first before freezing.

      3. Arctic Wind: Super cold aura that slows all bloons that come near the tower. Also has larger freeze area of effect.

      4. Viral Frost: Freezes bloons so cold that any bloons it touches freeze as well.

    • Talent Tree Two

      1. Permafrost: Makes bloons so cold that they go slowly even after thawing.

      2. Deep Freeze: Freezes two layers of bloon instead of one.

      3. Ice Shards: Creates razor sharp pieces of ice on frozen bloons that fly out and pop more bloons when popped.

      4. Absolute Zero: Freezes the entire screen worth of bloons for four seconds, but doesn't affect MOAB-class bloons.

  8. Glue Gunner

    • Talent Tree One

      1. Glue Soak: Glue soaks through all layers of bloons.

      2. Corrosive glue: Makes the glue become corrosive, popping bloons every few seconds while glued.

      3. Bloon Dissolver: Glue contains an extreme solvent that melts bloons. While glued, bloons will pop twice every second.

      4. Bloon Liquefier: Pops bloons once before gluing. Contains a super strong dissolving glue that pops bloons ten times every second.

    • Talent Tree Two

      1. Stickier Glue: Makes glue effect last much longer.

      2. Glue Splatter: Splatters six bloons at once with glue.

      3. Glue Hose: Shoots glue more than three times as fast.

      4. Glue Striker: Glues all bloons on screen.

  9. Monkey Buccaneer

    • Talent Tree One

      1. Faster Shooting: Shoots faster.

      2. Longer Cannons: Longer shooting range.

      3. Destroyer: Super duper fast attack speed.

      4. Aircraft Carrier: Rapidly launches monkey ace pilots that strafe the area with darts.

    • Talent Tree Two

      1. Grape Shot: Sprays out a blast of four grapes for additional poppage.

      2. Crow's Nest: Allows detection of camo bloons and ability to shoot them.

      3. Cannon Ship: Adds an independent firing cannon to the buccaneer.

      4. Monkey Pirates: Uses a grappling hook to take down a MOAB bloon. Does not work on ZOMG bloons.

  10. Monkey Ace

    • Talent Tree One

      1. Rapid fire: Shoots darts more often.

      2. Sharper Darts: Can pop eight bloons each.

      3. Neva-Miss Target: Darts seek out and pop bloons intelligently.

      4. Spectre: Flying fortress of bloon doom.

    • Talent Tree Two

      1. Pineapple Present: Drops an exploding pineapple every three seconds.

      2. Spy Plane: Allows detection of camo bloons and ability to hit them.

      3. Operation Dart Swarm: More darts.

      4. Ground Zero: Drops bomb that kills all bloons on screen except for MOAB-class bloons.

  11. Super Monkey

    • Talent Tree One

      1. Laser Blasts: Shoots powerful lasers instead of darts. Can pop frozen bloons.

      2. Plasma Blasts: Plasma vaporizes everything it touches.

      3. Sun God: Bloons touched by the sun get destroyed.

      4. Temple of the Monkey God: Sacrifice a power in order to kill more bloons. The power sacrificed will determine the form of death of bloons.

    • Talent Tree Two

      1. Super Range: Longer range.

      2. Epic Range: Even further range.

      3. Robo-Monkey: Arms become robotic and intelligent. Able to shoot independently and annihilate.

      4. Technological Terror: Destroys all bloons within range of tower. Does 1000 damage to MOAB class bloons.

  12. Monkey Apprentice

    • Talent Tree One

      1. Intense Magic: Shoots larger and more powerful magic bolts.

      2. Lightning Bolt: Unleashes lightning bolt that zaps multiple bloons at once.

      3. Summon Whirlwind: Blows bloons off of path but gets rid of glue and freeze effects.

      4. Tempest Tornado: Blows many bloons faster and further and pops bloons once before starting. Removes glue and freeze effects.

    • Talent Tree Two

      1. Fireball: Fireball attack.

      2. Monkey Sense: Allows Monkey apprentice to detect and attack camo bloons.

      3. Dragon's Breath: Short range attack that blows fire at bloons and pops multiple at once.

      4. Summon Phoenix: Summons a phoenix that flies around for twenty seconds releasing doom upon bloons.

  13. Monkey Village

    • Talent Tree One

      1. Monkey Beacon: Increases attack range of all towers within monkey village radius by fifteen percent.

      2. Jungle Drums: Inspires nearby towers to attack faster by fifteen percent.

      3. Monkey Town: All bloons popped by towers within radius of the monkey village earn fifty percent more money from pop.

      4. High Energy Beacon: All nearby towers with non-passive abilities have their cooldown reduced by twenty percent and get a powerful energy beam attack.

    • Talent Tree Two

      1. Monkey Fort: Increases popping power of all nearby towers by one bloon.

      2. Radar Scanner: Allows all towers within radius to detect and attack camo bloons.

      3. Monkey Intelligence Bureau: Allows towers within radius to pop any bloon type.

      4. M.I.B. Call to Arms: Doubles attack speed and popping power of all nearby towers for ten seconds.

  14. Banana Farm

    • Talent Tree One

      1. More Bananas: Grows 3 big bunches of bananas.

      2. Banana Plantation: Grows seven big bunches each round.

      3. Banana Republic: Genereates thirteen big bunches of bananas every round.

      4. Banana Research Facility: Produces 5 boxes of bananas every round.

    • Talent Tree Two

      1. Long Life Bananas: Bananas last twenty seconds instead of the usual ten.

      2. Valuable Bananas: Each bunch or box of bananas is worth fifty percent more cash.

      3. Monkey Bank: Generates stored cash that earns five percent each round and holds up to five thousand dollars.

      4. Banana Investments Advisory: Ten percent interest each round instead of five percent and storage for twenty thousand dollars.

  15. Mortar Tower

    • Talent Tree One

      1. Increased Accuracy: Makes your mortar shots more accurate.

      2. Bigger Blast: Heavy ordinance delivers a bigger explosion radius.

      3. Bloon Buster: Smash through two layers of bloons at once.

      4. The Big One: Devastating explosions each pop three layers of bloon.

    • Talent Tree Two

      1. Rapid Reload: Increase the attack speed of the mortar.

      2. Burny Stuff: Pops additional bloons two seconds after impact.

      3. Signal Flare: Camo bloons popped by flares permanently lose their camo.

      4. Artillery Battery: Immobilizes and bombards the entire screen for five seconds.

  16. Dartling Gun

    • Talent Tree One

      1. Focused Firing: Greatly reduces the spread of the gun.

      2. Faster Barrel Spin: Makes gun fire much faster.

      3. Laser Cannon: Rapid fire plasma also pops frozen and lead bloons.

      4. Ray of Doom: The Ray of Doom is a persistent solid beam of bloon destruction.

    • Talent Tree Two

      1. Powerful Darts: Darts move faster and can pop three bloons each.

      2. Depleted Blootonium: Shots can now hurt any bloon type.

      3. Hydra Rocket Pods: Shoots vicious little missiles instead of darts.

      4. Bloon Area Denial System: Shoots missiles toward the nearest 100 bloons on screen.

  17. Spike Factory

    • Talent Tree One

      1. Bigger Stacks: Generates larger piles of spikes per shot.

      2. White Hot Spikes: Cuts through lead.

      3. Spiked Ball Factory: Produces sharp spiked balls that do extra damage to ceramics.

      4. Spiked Mines: Spiked balls explode when they lose all their spikes.

    • Talent Tree Two

      1. Faster Production: Increases the rate of spike production.

      2. Even Faster Production: Rate of spike production increases even more.

      3. MOAB-SHREDR Spikes: Super hard rending engine driven razors shred MOAB class bloons.

      4. Spike Storm: Lays down a thick carpet of spikes over the whole track.

  18. Heli Pilot

    • Talent Tree One

      1. Quad Darts: Shoots four darts per volley instead of two.

      2. Pursuit: Superior targeting computers enable a powerful new targeting option to pursue bloons across the track.

      3. Razor Rotors: Rotor blades rip up bloons on contact, including frozen and lead.

      4. Apache Dartship: Adds a large missile array and a powerful machine gun.

    • Talent Tree Two

      1. Bigger Jets: More powerful jets enable the heli to move much faster.

      2. Enhanced IFR Instruments: Allows heli pilot to detect and shoot camo bloons.

      3. Downdraft: Blows bloons away from the heli.

      4. Support Chinook: Drops med and cash crates or can pick up and reposition most towers.

Special Agents

  1. Tribal Turtle:

    • Can be on land or water. Throws spears and coconuts. Coconuts do extra damage to ceramic bloons and can pop frozen and lead bloons.

    • Costs $85 monkey money.

  2. Bloonsday Device:

    • Provides a large beam that destroys all bloons and does extreme damage to MOAB-class bloons.

    • Costs $250 monkey money.

  3. Meerkat Spy

    • Does not have any attacks, but provides camo bloon detection to all towers within radius.

    • Costs $60 monkey money.

  4. Bloonberry Bush

    • Placed on the track, this fast growing plant will pop bloons with its thorns. A thorn will be lost for each individual bloon popped, but it regains five thorns between each round.

    • Costs $50 monkey money.

  5. Beekeeper

    • Has a swarm of bees that attack bloons and kill off layers. Does not work on frozen or lead bloons.

    • Costs $120 monkey money.

  6. Angry Squirrel

    • Can spot camo and pop lead bloons with acorns durng frenzied throws.

    • Costs $60 monkey money.

  7. Super Monkey Storm

    • Group of Super Monkeys that destroy all bloons on the screen and also deal big damage to MOAB-class bloons.

    • Costs $50 monkey money.

  8. Portable Lake

    • Water spot that can be placed on map to allow water units to help in battle.

    • Costs $40 monkey money.

  9. Pontoon

    • Can be placed on water so land towers can float even on the portable lake.

    • Costs $40 monkey money.

  10. Monkey Farmer

    • Picks up bananas off field automatically.

    • Costs $40 monkey money.

  11. Radadactyl

    • Will pop any bloons near the nest, but will eventually die off and a new one will have to hatch.

    • Costs $100 monkey money.

Special Buildings

  • Purchase Land

    1. Is required before building any other buildings.

    2. Costs $250 monkey money.

  • Dart Training Facility

    1. Reduces cost of Dart Monkeys and their upgrades by five percent.

    2. Increases attack speed of dart monkeys by ten percent.

    3. You get one free dart monkey to start and every ten rounds.

    4. Increases the cost of boomerang throwers and their upgrades by five percent.

    5. Costs $500.

  • Tack Research Center

    1. Reduces cost of tack towers and their upgrades by five percent.

    2. Increases attack speed of tack towers by ten percent.

    3. Every second shot from the tack tower has extra pierce.

    4. Increases cost of bomb towers and their upgrade by five percent.

    5. Costs $500

  • Boomerang Dojo

    1. Reduces cost of boomerang throwers and their upgrades by five percent.

    2. Increases attack speed of tack towers by ten percent.

    3. Boomerangs fly one more circuit if they haven't hit their piercing cap.

    4. Increases cost of dart monkeys and their upgrades by five percent.

    5. Costs $750

  • Bombing Range

    1. Reduces cost of bomb towers and their upgrades by five percent.

    2. Increases attack speed of bomb towers by ten percent.

    3. Bomb Towers can pop black and zebra bloons.

    4. Increases cost of spike factories and their upgrades by five percent.

    5. Costs $750.

  • Mage Spire

    1. Reduces cost of apprentices and their upgrades by five percent.

    2. Increases attack speed of apprentices by ten percent.

    3. Adds a new additional magic bolt attack that seeks out its target.

    4. Increases cost of super monkeys and their upgrades by five percent.

    5. Costs $750

  • Ice Fortress

    1. Reduces cost of ice towers and their upgrades by five percent.

    2. Increases freeze length of ice towers by ten percent.

    3. Ice towers can freeze white and zebra bloons.

    4. Increases cost of glue gunners and their upgrades by five percent.

    5. Costs $750

  • Ninja Academy

    1. Reduce cost of ninja monkeys and their upgrades by five percent.

    2. Increases attack speed of ninja monkeys by ten percent.

    3. Creates a shadow double of the ninja monkey for a short period of time.

    4. Increases cost of sniper monkey and upgrades by five percent.

    5. Costs $750

  • Spikes R Us

    1. Reduces the cost of spike factories and their upgrades by five percent.

    2. Increases the lifespan of spike factories by ten percent.

    3. Generates one free road spike pile every round.

    4. Increases the cost of tack towers and their upgrades by five percent.

    5. Costs $500

  • Mortar Emplacement

    1. Reduces the cost of mortar towers and their upgrades by five percent.

    2. Increases attack speed of mortar towers by ten percent.

    3. All bloons hit by mortar towers are stunned briefly.

    4. Increases cost of dartling guns and their upgrades by five percent.

    5. Costs $750

  • Ace Private Hangar

    1. Reduces the cost of monkey aces and their upgrades by five percent.

    2. Increases attack speed of monkey aces by ten percent.

    3. Aces get fast-firing forward gunners to add to their fire power.

    4. Increases the cost of monkey buccaneers and their upgrades by five percent.

    5. Costs $1,000

  • Pirate Cove

    1. Reduces the cost of monkey buccaneers and their upgrades by five percent.

    2. Increases attack speed of monkey buccaneers by ten percent.

    3. All ships detect camo; Crows nest grants camo detection to nearby towers.

    4. Costs $750

  • Glue Supply Depot

    1. Reduces the cost of glue gunners and their upgrades by five percent.

    2. Increases glue slow down by ten percent.

    3. Popped bloons leave glue on the track.

    4. Increases the cost of ice towers and their upgrades by five percent.

    5. Costs $750

  • Dartling Ammo Dump

    1. Reduces the cost of dartling guns and their upgrades by five percent.

    2. Increases the attack speed of the dartling guns by ten percent.

    3. Dartling gunners can lock their attacks to a fixed position.

    4. Increases the cost of mortar tower and their upgrades by five percent.

    5. Costs $1,000

  • Rifle Range

    1. Reduces the cost of sniper monkeys and their upgrades by five percent.

    2. Increases the attack speed of the sniper monkeys by ten percent.

    3. Every second shot does +1 damage.

    4. Increases the cost of ninja monkeys and their upgrades by five percent.

    5. Costs $750

  • Super Monkey Lair

    1. Reduces the cost of super monkeys and their upgrades by five percent.

    2. Increases the range of super monkeys by ten percent.

    3. Super Eyes can detect camo.

    4. Increases the cost of apprentices and upgrades by five percent.

    5. Costs $2,500

  • Heli Hangar

    1. Reduces tower and upgrade cost by five percent.

    2. Increases range by ten percent.

    3. Heli pilot buildings take up to twenty percent less room.

    4. In pursuit mode, heli pilot flies much faster.

    5. Increases the cost of monkey apprentice and upgrades by five percent.

Thanks to Meaghan for the strategy guide!

Reply
Gameplay Critic November 29, 2012 12:20 PM

This game series is actually among my favorites though i am very picky when it comes to games (been a gamer since i was 2 years old). BTD5 seems ok, although some changes need to be completed before the game can be considered good.

1. i dont know whos idea it was to remake the banana farms so that you have to collect the banans but it sucks! it is a total dealbreaker for me and if its not removed the entire game will suffer
2. airplanes landingstrip shold be turnable 90 degrees, and should have a smaller template.

I have only been playing the game for some houres but i had to quit because of theese horrible "misshaps." but i bet there are other quality-lowering factors as well.

Reply

DID YOU KNOWS?

1. you can actually clear levels 1-7 using a ninja, a buccaneer, a mage, or a spike factory.
2. always get a spike factory and seldom upgrade it. it's like a regeneration for your health. if you're going to upgrade it, always go for the 2/4 so it becomes long-ranged type of tower.
3. the dartling gun can be the most powerful monkey you have.
4. using the 2/4 skills of the super monkey, ace, buccaneer, dartling gun, cannon, and mortar don't award you coin kills.
5. the 2/4 skills of the super monkey and ace can be the most powerful skills you had.
6. always make your moab destroyers near the entrance, the bloon poppers in the middle, and the spike towers and post destruction towers near the end. this will make the balanced setting of the terrain and can dominate every level.
7. quality over quantity. a sun god is more powerful than 3 totmg's without sacrifices.
8. farm your banana farms before round 24. better if you have 2 2/0 banana farms already.
9. if you're going for the totmg, go for the town first no upgrades, put your monkey, 3/0. never upgrade the range until it's a temple. then sacrifice a techno-terror, moab assassin, bloon liquefier, tempest tornado, viral frost, 3 big ones. this is the most powerful temple with all abilities. but not the cheapest.
10. spam the ability of your sniper 2/4. but it's not helpful if you have 2 of these. always go for the 4/2 sniper for more survivality
11. 3 4/2 ninja monkeys can destroy a moab
12. the pause effect of the absolute zero and the pop and awe is always helpful for a moab near the exit because your dartling gun and other tower can still damage it.
13. super monkey operating a catapult. to do this, upgrade a monkey into 2/4 and another one to 2/0. activate the ability first and fast upgrade the 2/0 monkey into a juggernaut. it will shoot fast catapult balls.
14. put the bads in the middle near the entrance. it's missile spread shall not go to waste.
15. the best buildings i choose? ninja, dartling, mage, dart, ace and pirate.

Reply

Can someone put up a strategy on how to win the special challenges. I have tried the one with the 4/4 monkey apprentice with no luck and beaten the one where you have to defend the monkey village from both sides ( barely ). I am also a pro player at rank 45 but these are just too hard. I would appreciate it if you guys could help me to understand what I can do to win these. I am also a big fan of this website and appreciate what you guys do here. Thanks. Sincerely, ME. :P.

Reply

When will you get to Bloons Monkey City?

Reply
h.e.skrzypiec April 11, 2015 8:51 PM

Hey, what do we do with the coins/tokens after you upgrade everything in the Monkey Lab? I have 88 and still gaining more. Need to use them!!! I wish we could buy special agents or cash with them... Let me know what can be done!

Reply

i think that instead of showing a blank pop count for banana farms it should show a money count that tells how much money they have produced in total. rate this up so the developer can see it!

Reply

^ Scroll Up | Homepage >

Leave a comment [top of page]

Please consider creating a Casual Gameplay account if you're a regular visitor here, as it will allow us to create an even better experience for you. Sign-up here!
  • PLEASE UNDERSTAND SITE POLICIES BEFORE POSTING COMMENTS
  • You may use limited HTML tags for style:
    (a href, b, br/, strong, em, ul, ol, li, code, spoiler)
    HTML tags begin with a less-than sign: < and end with a greater-than sign: >. Always. No exceptions.
  • To post spoilers, please use spoiler tags: <spoiler> example </spoiler>
    If you need help understanding spoiler tags, read the spoiler help.
  • Please Preview your comment before posting, especially when using spoilers!
  • No link dropping, no domains as names; do not spam, and do not advertise! (rel="nofollow" in use)
chrpa Jayisgames needs your help to continue providing quality content. Click for details Welcome to the Roundup 66 - Retro with four games! After you find the ten monkeys in the chapter, look in the inventory. You will find a...  ...
chrpa Jayisgames needs your help to continue providing quality content. Click for details Welcome to the Roundup 65 with three games! As mentioned in the previous roundups, only odd-numbered episodes are featured since even-numbered are for Robin Vencel's patrons (the...  ...
chrpa Jayisgames needs your help to continue providing quality content. Click for details Hi! Weekday Escape and Weekday Puzzle are here! First we have two new cans from tomoLaSiDo and then two small rooms from isotronic. That's all for this...  ...
6,365 Views
0 Comments
chrpa Jayisgames needs your help to continue providing quality content. Click for details Welcome to Mobile Monday! We have another beautiful game from Nicolet and it's a winter game as it should be. Tasuku Yahiro have released another of their...  ...

HELP Jayisgames.com

Recent Comments


Display 5 more comments
Limit to the last 5 comments

Game of the week


Dark Romance: Vampire Origins Collector's Edition

Your Favorite Games edit

add
Save links to your favorite games here. Use the Favorites editor.

Monthly Archives