JayisGames.com is now available ad-free!
Jay is Games recommends Cheat Happens with 8,000+ games and 35,000+ trainers!

Playroom


  • Currently 3.7/5
  • 1
  • 2
  • 3
  • 4
  • 5
Rating: 3.7/5 (170 votes)
Comments (22) | Views (9,892)

JohnBplayroom.jpg
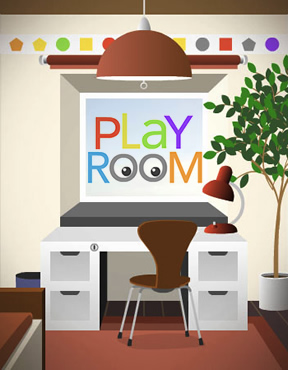
Kids get the weirdest toys. Dinosaurs with wheels. Monster trucks that roar and eat cavemen. Toy robot bears with color-coded buttons that correspond to wallpaper trim with arms that can be positioned to write encoded messages to other playmates. You know, the usual stuff. Playroom, a brand new room escape game from Imagia creator Kayzerfish, takes place in just such a location, and in order to escape from this abode, you'll need to do some serious code breaking, map drawing, and item hunting in this colorful and challenging title.

Use the mouse to do everything in this game, nudging it to the edge of the screen to move around and clicking on items to pick them up or take a closer look. There are a number of areas you'll need to step in and scrutinize, such as the posters and the travel chest, and their appearance in both views can be important. Keep a lookout for items hidden in plain sight, stuffed behind corners or sitting almost-hidden right in front of your nose. The little details can matter quite a bit!

Items automatically slide into your inventory, and in many cases you can examine them by clicking on them. Some can even be manipulated while in a close-up view, and you'll have to use this to solve a few of the game's many perplexing puzzles. Again, watch for small details, even on items, and think logically.

Analysis: The room escape formula is quite established at this point in time, and Playroom doesn't really deviate from those set standards. It does, however, take a bit more of a cryptic path to many of its puzzles, preferring to lay most of them out in tangled, often confusing codes. Bears with their arms raised representing letters? O...k... How about cities on a map that need to be connected? Or colored shapes that must be deciphered? Yikes!

Relatively difficult puzzles aside, the rest of Playroom is very well-constructed, featuring an easy navigation system, an inventory that works without too much hassle, and hotspots that are generous enough to allow you to do what you need to do without fussing with individual pixels. A few of the items are difficult to spot, but if everything was splayed out on the table for you, this wouldn't be much of a game, would it?

Another room escape game from Kayzerfish is never a bad thing, and Playroom looks to be a great start to a new series of games.

Play Playroom

Walkthrough Guide


(Please allow page to fully load for spoiler tags to be functional.)

Playroom 1 Walkthrough

General Information

  • Some items may be examined by clicking on them in your inventory.

  • Your cursor will change to a hand to indicate a hotspot.

  • To put an item back in your inventory, click the spot it used to occupy.

Exploration:

Bed Wall:

  • You begin by looking at a wall with a bed.

  • Click under the bed to take a peak. Take the battery. Click the plug twice to turn on the light board. Back up.

  • Click the pillow to lift it and look underneath. Grab the alloy key.

  • Click the alphabet chart for a closer look. The shapes and arm positions will come in handy later. Back up.

  • Turn right.

Desk Wall:

  • This wall has a desk and window on it.

  • Click the lamp head. It turns to face you, and you'll notice the socket is empty. There are also shapes on the top and bottom.

  • Look carefully at the tree. On the right side of it, about three branches up, you'll find a snippet of paper. If you click on it to examine it, you'll see that it has colored circles. You are still missing several pieces of the paper.

  • Click on the chair to pull it out.

  • Click under the desk to take a look. Grab the blacklight bulb and back up.

  • There's a lock on the desk. Use the alloy key on it to unlock it.

  • Open the top drawer and take out the bear box. The bottom drawer is empty.

  • Examine the bear box. We need a five letter code to open it.

  • Check the righthand drawers. The top drawer is empty. Take the robotoy out of the bottom one.

  • Examine the robotoy.

    • Clicking the hands move the corresponding arms up and down in set positions.

    • None of the buttons work yet.

    • Click to the side of the toy to look at the back side. Remove the panel to reveal that it needs two batteries.

  • Back up to the room view.

  • Now check out the trash can to the left.

  • Click the bottom to grab the cardboard disk and then the silver key. Notice the cardboard disk has notches at the top and bottom. Back up.

  • Turn right.

Chest Wall:

  • This wall just has a travel chest on it.

  • Click the chest to examine the front. There are stickers for several European cities.

  • Use the silver key on the chest. It works! Click the lid to open it.

  • Grab the piece of paper for the second snippet.

  • Click the map for a closer look. All the cities from the front of the chest are listed, but what to do with the information? Back up.

  • Click the exposed corner of the rug. Grab the college block (notebook).

  • Examine the notebook.

    • The first page has a series of x's. Click the lower right corner to turn the page.

    • Taped to the back of the first page is the third snippet.

    • The second page has a half circle on top and a triangle on bottom. Back up to the room view.

  • Turn right.

Door Wall:

  • This wall has the (locked) exit door, a padlocked closet to the left and a set of pictures to the right.

  • On the lower left corner of the closet you can see a bit of red sticking out. Click it for a closer look.

  • Grab the screwdriver and Back up.

  • You'll notice that on the exit door, the middle panel has something on the top and bottom. Click either for a closer look. There are two screws on each end.

  • Use your screwdriver on all four screws. Back up and grab the middle panel for a plank.

  • There's something on top of the closet. Click it for a close up.

  • Looks like a battery, but it's too high to reach. Maybe you have something useful?

  • Use the plank to knock the battery down.

  • Back up and grab the battery off the floor.

  • Click the pictures to the right of the door for a closer look.

  • Notice the eight pictures. They're held up with push pins, but one of them is loose. Grab the push pin from the grey picture. Back up.

  • Look at the fallen picture. Take the fourth snippet and back up.

  • Time to start solving puzzles!

Map Puzzle

  • The clue for the map puzzle is hidden around the room, literally.

  • Make note of the symbols on the wallpaper border along the top of each wall. The order doesn't matter; each wall is its own code.

  • Where have we seen these sets of shapes and colors?

    • On the alphabet chart.

    • Each shape/color combo represents a letter.

    • The ceiling light is blocking the middle two letters; they will have to be inferred.

    • The walls should translate to:

      • Bed Wall:

      • munic(hv)ienna

      • Desk Wall:

      • romai(st)anbul

      • Chest Wall:

      • osloh(el)sinki

      • Door Wall:

      • oslo****roma

  • Turn to the Chest Wall and click the map for a close up.

  • Click each of the city pairs. A black line will appear to show a correct pairing. Back up.

  • The markings we've created look like something familiar. Make note of it.

  • The letter E.

Bear Box

  • Turn to face the Desk Wall.

  • Use the blacklight bulb on the lamp and turn it on. It works!

  • We've seen the shapes on the lamp several times. Do you have something that might fit? Use the cardboard disk on the lamp. Unfortunately, it completely covers the light and does nothing useful.

  • But wait, there's something else in our inventory with those shapes!

  • On the second page of the notebook (college block).

  • Use the cardboard disk and replace the first page.

  • What do you have that can utilize the x's and make the disk useful on the lamp?

  • Use the push pin on each 'x'.

  • Put the disk back on the lamp and move it to face leftward.

  • Turn around to face the Door Wall. The five holes correspond to five of the bear pictures. Now it's time to use the robotoy.

RoboToy

  • Examine the robotoy and place your two batteries in the back.

  • Turn to the front and push the top botton to power the toy on. The screen will say 'H'. This matches with the arm position from the alphabet chart.

  • This corresponds to the first picture, but what about the colored button?

  • If you push the yellow button for the yellow background of the picture, you get a 1.

  • Continue repositioning the robot's arms and pushing the colored buttons to get a series of letters and numbers

    • The toy's arms should match when it is facing the away from you, as if it were mirroring the pictures.

    • You should end up with:

    • H1,E4, O2, N3, Y5

  • Where have you seen five letters before?

  • Use the five letters on the bear box.

    The order is determined by the number: HONEY.

  • Take the small key. Lift the red cushion for your fifth and final snippet.

Light Board

  • Examine the snippets of paper. It seems to be some kind of code.

  • Where have you seen colored circles before?

    • On the robotoy.

    • Put the robot's arms back down.

    • Push each color as instructed on the snippets and make note of the numbers

    • Half circles mean to add the numbers together.

      Two circles side-by-side represent two digit numbers.

  • Turn to face the Bed Wall.

  • Treating the light board as a number grid (the upper left square being 1 and the lower right 25), input the numbers decoded from the snippets.

  • 1, 5, 7, 9, 13,17, 19, 21, 25

  • The light board will flash, and the colors will invert to let you know it's been inputted correctly.

  • Can you see a symbol on the light board?

  • The letter 'X'.

Getting Out:

  • Turn right toward the Desk Wall

  • Turn the lamp head back down toward the desk.

  • Click the garbage can to get a look at the edge of the desk.

  • Make note of the symbols on the desk and the 'S' to the right. The symbols look like something.

  • A compass rose,indicating that you're currently facing east.

  • Back up.

  • Click the paper on the desk. Make note of what's written.

  • It says 'NEWS', with the numbers '2341' indicating N2, E3, W4, S1.

  • Given the other desk clue, would could this code mean?

  • 1st-south, 2nd-north, 3rd-east, 4th-west

  • Pull the cord for the window blinds.

  • They didn't come all the way down. Pull them again.

  • Now we can see something is on the blinds, but it's still obscured. You need to pull them down even further.

  • Look under the desk to pull the final length.

  • What does that look like? Make note of it.

  • The letter 'i'.

  • Now you've seen symbols on almost all the walls. Turn around to face the Door Wall.

  • Hmm, maybe there's something here to make note of after all?

  • The letter 'T' on the door.

  • Use the small key to unlock the closet and open it

  • There's nothing of interest in here, but it looks like there's a lot of room in the bottom. Click the closet to get inside.

  • Close the doors.

  • A four letter word, where have we seen this combo before?

  • S1,N2, E3, W4.

    The Chest Wall is south, as indicated on the compass rose.

    EXIT

  • Take the golden key and click the face to leave the closet.

  • Use the key on the door, open it and you're done!

22 Comments

Playroom 1 Walkthrough

General Information

  • Some items may be examined by clicking on them in your inventory.

  • Your cursor will change to a hand to indicate a hotspot.

  • To put an item back in your inventory, click the spot it used to occupy.

Exploration:

Bed Wall:

  • You begin by looking at a wall with a bed.

  • Click under the bed to take a peak. Take the battery. Click the plug twice to turn on the light board. Back up.

  • Click the pillow to lift it and look underneath. Grab the alloy key.

  • Click the alphabet chart for a closer look. The shapes and arm positions will come in handy later. Back up.

  • Turn right.

Desk Wall:

  • This wall has a desk and window on it.

  • Click the lamp head. It turns to face you, and you'll notice the socket is empty. There are also shapes on the top and bottom.

  • Look carefully at the tree. On the right side of it, about three branches up, you'll find a snippet of paper. If you click on it to examine it, you'll see that it has colored circles. You are still missing several pieces of the paper.

  • Click on the chair to pull it out.

  • Click under the desk to take a look. Grab the blacklight bulb and back up.

  • There's a lock on the desk. Use the alloy key on it to unlock it.

  • Open the top drawer and take out the bear box. The bottom drawer is empty.

  • Examine the bear box. We need a five letter code to open it.

  • Check the righthand drawers. The top drawer is empty. Take the robotoy out of the bottom one.

  • Examine the robotoy.

    • Clicking the hands move the corresponding arms up and down in set positions.

    • None of the buttons work yet.

    • Click to the side of the toy to look at the back side. Remove the panel to reveal that it needs two batteries.

  • Back up to the room view.

  • Now check out the trash can to the left.

  • Click the bottom to grab the cardboard disk and then the silver key. Notice the cardboard disk has notches at the top and bottom. Back up.

  • Turn right.

Chest Wall:

  • This wall just has a travel chest on it.

  • Click the chest to examine the front. There are stickers for several European cities.

  • Use the silver key on the chest. It works! Click the lid to open it.

  • Grab the piece of paper for the second snippet.

  • Click the map for a closer look. All the cities from the front of the chest are listed, but what to do with the information? Back up.

  • Click the exposed corner of the rug. Grab the college block (notebook).

  • Examine the notebook.

    • The first page has a series of x's. Click the lower right corner to turn the page.

    • Taped to the back of the first page is the third snippet.

    • The second page has a half circle on top and a triangle on bottom. Back up to the room view.

  • Turn right.

Door Wall:

  • This wall has the (locked) exit door, a padlocked closet to the left and a set of pictures to the right.

  • On the lower left corner of the closet you can see a bit of red sticking out. Click it for a closer look.

  • Grab the screwdriver and Back up.

  • You'll notice that on the exit door, the middle panel has something on the top and bottom. Click either for a closer look. There are two screws on each end.

  • Use your screwdriver on all four screws. Back up and grab the middle panel for a plank.

  • There's something on top of the closet. Click it for a close up.

  • Looks like a battery, but it's too high to reach. Maybe you have something useful?

  • Use the plank to knock the battery down.

  • Back up and grab the battery off the floor.

  • Click the pictures to the right of the door for a closer look.

  • Notice the eight pictures. They're held up with push pins, but one of them is loose. Grab the push pin from the grey picture. Back up.

  • Look at the fallen picture. Take the fourth snippet and back up.

  • Time to start solving puzzles!

Map Puzzle

  • The clue for the map puzzle is hidden around the room, literally.

  • Make note of the symbols on the wallpaper border along the top of each wall. The order doesn't matter; each wall is its own code.

  • Where have we seen these sets of shapes and colors?

    • On the alphabet chart.

    • Each shape/color combo represents a letter.

    • The ceiling light is blocking the middle two letters; they will have to be inferred.

    • The walls should translate to:

      • Bed Wall:

      • munic(hv)ienna

      • Desk Wall:

      • romai(st)anbul

      • Chest Wall:

      • osloh(el)sinki

      • Door Wall:

      • oslo****roma

  • Turn to the Chest Wall and click the map for a close up.

  • Click each of the city pairs. A black line will appear to show a correct pairing. Back up.

  • The markings we've created look like something familiar. Make note of it.

  • The letter E.

Bear Box

  • Turn to face the Desk Wall.

  • Use the blacklight bulb on the lamp and turn it on. It works!

  • We've seen the shapes on the lamp several times. Do you have something that might fit? Use the cardboard disk on the lamp. Unfortunately, it completely covers the light and does nothing useful.

  • But wait, there's something else in our inventory with those shapes!

  • On the second page of the notebook (college block).

  • Use the cardboard disk and replace the first page.

  • What do you have that can utilize the x's and make the disk useful on the lamp?

  • Use the push pin on each 'x'.

  • Put the disk back on the lamp and move it to face leftward.

  • Turn around to face the Door Wall. The five holes correspond to five of the bear pictures. Now it's time to use the robotoy.

RoboToy

  • Examine the robotoy and place your two batteries in the back.

  • Turn to the front and push the top botton to power the toy on. The screen will say 'H'. This matches with the arm position from the alphabet chart.

  • This corresponds to the first picture, but what about the colored button?

  • If you push the yellow button for the yellow background of the picture, you get a 1.

  • Continue repositioning the robot's arms and pushing the colored buttons to get a series of letters and numbers

    • The toy's arms should match when it is facing the away from you, as if it were mirroring the pictures.

    • You should end up with:

    • H1,E4, O2, N3, Y5

  • Where have you seen five letters before?

  • Use the five letters on the bear box.

    The order is determined by the number: HONEY.

  • Take the small key. Lift the red cushion for your fifth and final snippet.

Light Board

  • Examine the snippets of paper. It seems to be some kind of code.

  • Where have you seen colored circles before?

    • On the robotoy.

    • Put the robot's arms back down.

    • Push each color as instructed on the snippets and make note of the numbers

    • Half circles mean to add the numbers together.

      Two circles side-by-side represent two digit numbers.

  • Turn to face the Bed Wall.

  • Treating the light board as a number grid (the upper left square being 1 and the lower right 25), input the numbers decoded from the snippets.

  • 1, 5, 7, 9, 13,17, 19, 21, 25

  • The light board will flash, and the colors will invert to let you know it's been inputted correctly.

  • Can you see a symbol on the light board?

  • The letter 'X'.

Getting Out:

  • Turn right toward the Desk Wall

  • Turn the lamp head back down toward the desk.

  • Click the garbage can to get a look at the edge of the desk.

  • Make note of the symbols on the desk and the 'S' to the right. The symbols look like something.

  • A compass rose,indicating that you're currently facing east.

  • Back up.

  • Click the paper on the desk. Make note of what's written.

  • It says 'NEWS', with the numbers '2341' indicating N2, E3, W4, S1.

  • Given the other desk clue, would could this code mean?

  • 1st-south, 2nd-north, 3rd-east, 4th-west

  • Pull the cord for the window blinds.

  • They didn't come all the way down. Pull them again.

  • Now we can see something is on the blinds, but it's still obscured. You need to pull them down even further.

  • Look under the desk to pull the final length.

  • What does that look like? Make note of it.

  • The letter 'i'.

  • Now you've seen symbols on almost all the walls. Turn around to face the Door Wall.

  • Hmm, maybe there's something here to make note of after all?

  • The letter 'T' on the door.

  • Use the small key to unlock the closet and open it

  • There's nothing of interest in here, but it looks like there's a lot of room in the bottom. Click the closet to get inside.

  • Close the doors.

  • A four letter word, where have we seen this combo before?

  • S1,N2, E3, W4.

    The Chest Wall is south, as indicated on the compass rose.

    EXIT

  • Take the golden key and click the face to leave the closet.

  • Use the key on the door, open it and you're done!

Reply

Cute game, although

that face inside the closet asking you what the word is

startled the bojangles out of me. O_o;

Reply
nerdypants August 8, 2011 8:17 PM

That was... confusing.

I actually managed to solve the bear box before getting the clues from the blacklight and the robot. I was pretty confused as to what to do with either of them after having opened the box without them.

And actually, after reading the walkthrough, I still do not understand what the heck was going on with that robot clue. If someone could explain that, I'd be really grateful.

Reply

Just when you think you're playing a normal escape game...

there's a disembodied face waiting in your closet.

I may have lost it at that point.

Reply

Waaaaay to labor intensive for me. Once I saw that robot and figured I was going to have to spell something out, clicking each arm a bunch of times... ugh.

Reply

I can

climb into the closet but it doesn't give me any kind of word.

Also,

I don't see a T on the door wall.

Help?

Reply

Oh geez, you just have to

wait a moment for the face to appear.

Forehead slap!

Reply

Don't open those spoilers, or you will be spoiled, haha. I can't see the last

T on the door either.

The map was a little weird in terms of mouse-use, too. I still don't know if that was a click or drag.

Reply
ThemePark August 8, 2011 11:05 PM

The missing letter:

i.e. the T is shaped by the door itself and the two planks on it. Once you've removed the middle plank, there's a T right there. Took me a while to see it too.

Reply

Not feeling this one. Also, that face was disturbing.

Reply

I didn't find the face disturbing at all. The way you guys were talking about it I thought it was some dismembered head, but no, it's just a friendly smiling face. It kind of reminded me of Nick Jr.'s old mascot, Face. Is this why he disappeared, 'cause people got scared of him? He was my favorite, and the face was the best part of the game in my opinion.

Reply

Just a bit of useless knowledge: the floaty guy's name is…

"Enzo".

Reply
Anonymous August 9, 2011 7:21 AM

the face is wrong!!!
everybody knows that the bird is the word

Reply

Tedious...

Reply

I'm a bit shocked that this was "tedious" to so many. It was a cool bunch of puzzles, though there was some unevenness in terms of re-using the same code key. (Developers, please don't ever put red herrings in your code keys themselves, unless you have an extra ending.

The faces on the robot were irrelevant, right? And there was no indication that the compass rose wasn't one of the solution letters, other than the sound cue and font.

I guess I just like ye olde codebreaker puzzles more than most.

Reply
shadowmax August 9, 2011 3:17 PM

interesting game. i like the emphasis on finding and deciphering codes. wish the final answer had not been so 'intuitive' as i didn't even use the clue for the light box.

Reply

An escape game? On Tuesday? It's not even my birthday! :-D

Reply
Jennifer August 9, 2011 6:35 PM

To @ray9na's point, I just went through all of today thinking it was Wednesday because I saw the JayisGames tweet about this game and thought it was the Weekday Escape! Ah, JayisGames, you have me trained too well.

Reply
Anonymous August 9, 2011 11:30 PM

That was really fun. Although the

Tree Hidden pixel snippet was horrible

Other than that, the puzzles were engaging, the graphics were very nice and clean.

Reply
Anonymous August 9, 2011 11:35 PM

Anyone else notice the letter selector in the face puzzle has no "W" selection?

Reply
nerdypants August 10, 2011 2:24 AM

JIGuest:

There's also no W on the semaphore chart. I think this was probably

to give us a 5x5 grid above the bed.

Reply

You know, I love escape games. Love 'em. And along with the best, I've also played the cheesiest of them without really caring about the overall quality just to get my fix.

No doubt, this one has some good things going for it. But in the end, I have to agree with some others: It was TEDIOUS. Just too much monotonous work for the payoff.

Reply

^ Scroll Up | Homepage >

Leave a comment [top of page]

Please consider creating a Casual Gameplay account if you're a regular visitor here, as it will allow us to create an even better experience for you. Sign-up here!
  • PLEASE UNDERSTAND SITE POLICIES BEFORE POSTING COMMENTS
  • You may use limited HTML tags for style:
    (a href, b, br/, strong, em, ul, ol, li, code, spoiler)
    HTML tags begin with a less-than sign: < and end with a greater-than sign: >. Always. No exceptions.
  • To post spoilers, please use spoiler tags: <spoiler> example </spoiler>
    If you need help understanding spoiler tags, read the spoiler help.
  • Please Preview your comment before posting, especially when using spoilers!
  • No link dropping, no domains as names; do not spam, and do not advertise! (rel="nofollow" in use)
chrpa Jayisgames needs your help to continue providing quality content. Click for details Welcome to the Roundup 66 - Retro with four games! After you find the ten monkeys in the chapter, look in the inventory. You will find a...  ...
chrpa Jayisgames needs your help to continue providing quality content. Click for details Welcome to the Roundup 65 with three games! As mentioned in the previous roundups, only odd-numbered episodes are featured since even-numbered are for Robin Vencel's patrons (the...  ...
chrpa Jayisgames needs your help to continue providing quality content. Click for details Hi! Weekday Escape and Weekday Puzzle are here! First we have two new cans from tomoLaSiDo and then two small rooms from isotronic. That's all for this...  ...
6,365 Views
0 Comments
chrpa Jayisgames needs your help to continue providing quality content. Click for details Welcome to Mobile Monday! We have another beautiful game from Nicolet and it's a winter game as it should be. Tasuku Yahiro have released another of their...  ...

HELP Jayisgames.com

Recent Comments


Display 5 more comments
Limit to the last 5 comments

Game of the week


Dark Romance: Vampire Origins Collector's Edition

Your Favorite Games edit

add
Save links to your favorite games here. Use the Favorites editor.

Monthly Archives