

Monkey GO Happy Roundup 21
By Arceus
|
September 28, 2018
Comments (3) | Views (9,597)
 Have you missed the monkey roundups? Well, if so you'll be happy to see another round of them coming right up!
Shiver me timbers..or maybe monkeys in this case. We know some pirates have a hook for a hand, but what could they need with thirty of them?

In the next stage, there are carrots everywhere...along with some weird markings? What's going on?
I predict you're going to have a berry good time in this one, exploring through a huge tree an more!
Last but not least, it's time to help a little guy dressed in blue go home for the night. But before he can, he needs your help getting through a maze and operating some controls to let him through!


can't wait for the walkthrough to this :)
I will be quite busy this week and later this month, so walkthroughs will definitely take longer. I'll still try my best to have a walkthrough for everything, but I wouldn't mind if anybody wants to step in for now.
Here it is!
Monkey GO Happy Roundup (Stage 205–208)
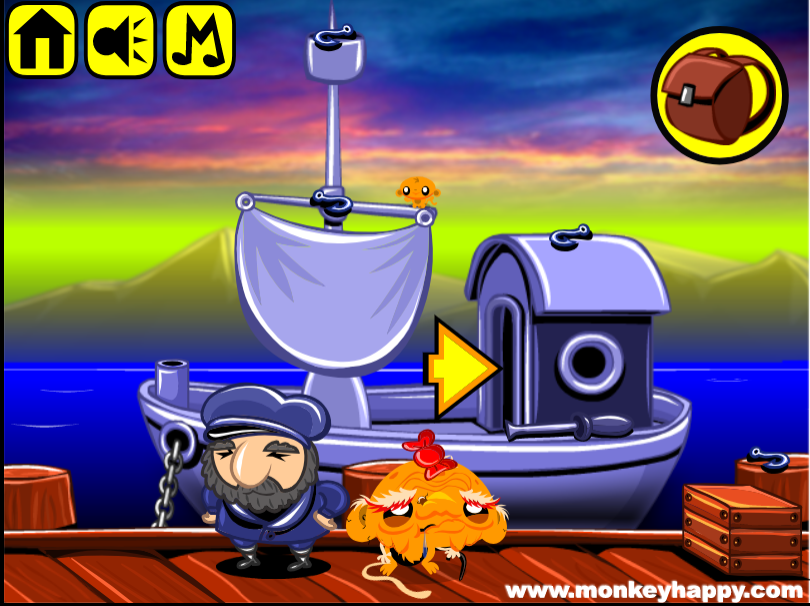
Stage 205: Hooked Sailor
Exploration
You start off on a dock next to a boat and its captain who asks for 30 hooks. After you move the crate, and raise the sail, you find 8 hooks, a screwdriver and a Mini Monkey. There are some other areas to click on this screen, but they aren't helpful right now.
Click the arrow to enter the boat. Let's tidy the place up by taking the fuse, 5 hooks and 2 Mini Monkeys. Now you can look at the labeled doorway on the left, the locked panel with round hole underneath, the five rectangular displays which show up to four dots, and the right wall panel fastened by a screw.
Go down. Another messy room! This one only has a fuse, a circle button, 4 hooks and 2 Mini Monkeys. However, it has clues on the walls and around the edges of the screen, as well as a locked round porthole(?) door with a cross, what looks like a pipe leading into it, and another rectangular panel that you can't do anything with.
(Check that you have 17 hooks and 5 Mini Monkeys.)
Cross
Figure out how to unlock the door with the cross by reading the clues nearby.
The X mark at the top of the screen is in the same font as the roman numerals I and II on the sides.
So match those clues by clicking the displays until they show (from top to bottom) 1, 2, 1, 2, 1 dots, then just click on the door to open it.
Exploration 2
The pipe extends through the door into a locked box with an electrical spark symbol. Move the crate in the corner, pick up the wheel, 6 hooks and Mini Monkey, and read the clues on the walls.
Vessel
Place the circle button beside the BOATS door, and use the letter clues to unlock the panel above it.
The roman numerals beside B, O, A, T, S represent the numbers 2, 4, 2, 3, 4.
So click the displays to show that many dots, then click the button to turn it. The panel opens and you can take a boat hook and then 2 hooks and a Mini Monkey.
Pole
Use the boat hook in the water on each side of the boat to get 2 hooks.
Driver
Use the screwdriver to remove the screwed panel, and take the hook from behind it.
You still have the screwdriver, which is the game hinting to you that there's something else to use it on.
Use the screwdriver again to open the electrical box. Inside, there's a hook and Mini Monkey.
Use the screwdriver again to remove a plank beside the captain, and take a hook beneath.
Collection
Give all 30 hooks to the captain, who leaves behind a fuse as he leaves.
Powered
Place all three fuses in the electrical box and the wheel in the slot connected to it.
The wheel still won't work until you use the clue beside it.
The clue beside the ladder is a stack of five 3s, so set each display to show 3 dots, then turn the wheel to open the panel. Take a box and Mini Monkey.
Unbox
Use the screwdriver to open the box (which means combining them from your inventory). You get the light bulb that was inside the box.
Torch
Attach the bulb to the boat hook, and then use the hook on its stand on the left of the boat. This ends the stage, and you can pick up the last Mini Monkey.
Collecting all Mini Monkeys gives you a clue in your inventory: (2 horizontal lines crossed by 3 verticals) = 1.
Stage 206: Carrot Town
Exploration
You stand in a town square surrounded by unusual brick houses, each with a different door lock. After picking up 7 carrots, a lever and 2 Mini Monkeys, you find that you can open the windows on the two left houses to find another carrot and a T-shaped key. The second and third houses have clues on the roof with symbols and numbers. Also, the fountain in the middle has something missing from it, and the two semicircular devices in the front can be set to display different symbols.
Unlock 1 / Exploration 2
Use the T-shaped key to open the door of the second house.
Inside, a goblin asks for 20 carrots. There are 2 carrots right next to him! Also, another lever and Mini Monkey. In addition to reading the clues on the ceiling and left wall, you can open the red curtain to find a ball and a carrot hidden behind, and shift the table to find another carrot.
Some of the bricks on the back wall (above the table) seem connected to each other and brighter than the others, so click them to remove the fake bricks and find a carrot and normal-looking key.
Unlock 2 / Exploration 3
Use this key to open the door of the left house.
Inside, you find another symbol device, as well as round ones on the wall which display a dot and concentric circles around it. There's also locked wall panels marked with clues, a lever slot beside one of them and a clue on the ceiling. Pick up the ball, Mini Monkey and notched key.
Unlock 3 / Exploration 4
Use this key to open the door of the right house.
This one is pretty much the same as the previous, with the wall panels, lever slot, ceiling clue, and floor and wall devices. The main difference is the items in the room: 3 carrots and a Mini Monkey.
(Check that you now have 16 carrots and 5 Mini Monkeys.)
Counting on walls
Place the balls in the wall panels in the left and right houses, then use the roof clues to unlock them.
The triangular clue has a symbol that also appears in its left house, and the columns of numbers beneath have the digit 1 on top and 2 below.
So click the wall displays in each room, each of the top ones once (so they show 1 dot) and each of the bottom ones twice (so they show a dot and a circle).
Pushing the ball in the left room opens the panel so you can take a carrot and Mini Monkey.
Similarly, the oval clue tells you to click each of the top displays to level 3 (one dot and two circles) and each of the bottom displays to level 1 (just one dot).
Push the ball in the right room, then take another carrot and Mini Monkey.
From the floor
Place the levers in the slots in the left and right houses, then use the ceiling clues to unlock them.
As the clue above the goblin shows, a single line indicates a circle symbol, two lines indicate a triangle, and three indicate a semicircle.
So for the fork-shaped clue, click the semicircular floor device in the left room until it shows a semicircle, those in the town square until they show a circle and triangle, and the one in the right room until it shows a triangle.
Then pull the lever in the right room to open the panel, and take another carrot and Mini Monkey.
Similarly for the other clue, click the devices until they show (from left to right) a circle, triangle, semicircle, circle, then pull the lever in the left room to open the panel. Take another carrot and Mini Monkey.
Fulfill
Give all 20 carrots to the goblin, who leaves behind a blue gem as he walks off-screen.
Place the gem in the fountain, and use the last clue in the game to activate it.
The cross pattern on the gem matches the clue in the goblin room, which tells you make each of the four floor devices show a circle and each of the wall devices show a dot.
Push the gem, and an eagle statue rises from the hole with a Mini Monkey on top!
Bonus clue from this stage: (two crosses 卄) = 5.
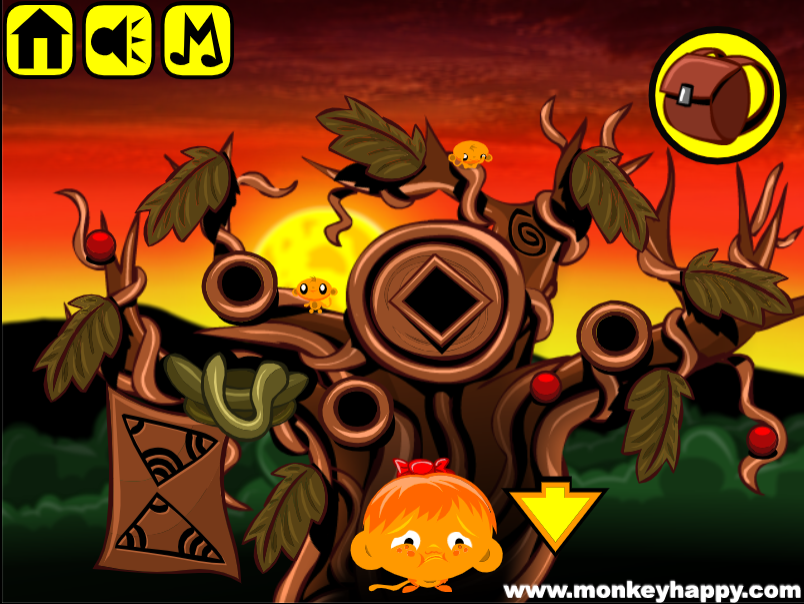
Stage 207: Berry Tree
Exploration
This magnificently grown tree appears to have a door in its base (and a horizontal slot in the door), surrounded by three circular displays which show up to three lines. There's also a small puddle with a wooden peg beside it. After clicking the leaves, rocks and bush to shift them, you can pick up 10 berries and 2 Mini Monkeys.
Climb the tree to find a circular door with a diamond-shaped hole, surrounded by three more circular line displays. There's also a spiral marking and a clue hanging on the left with a nest(?) next to it. As before, you can click all the leaves and pick up 10 berries and 2 Mini Monkeys.
(Check that you have 21 berries and 4 Mini Monkeys.)
Entry
Place the peg in the door and use the hanging clue to unlock it.
The triangles on the clue match the positions of the circular displays, and their angles are drawn with different numbers of arcs. Accordingly, set the displays at the top of the tree to (left, right, bottom) 1, 2, 3 lines and those at the bottom to (top, left, right) 1, 2, 3 lines.
Then click the peg to slide it across the slot, opening the door and revealing a Mini Monkey.
Exploration 2
A green creature warms himself by the fire as he asks you for 30 berries. There's a numbered wall panel with a round hole, as well as another spiral marking and triangle clue next to it. Pick up a cup, red diamond, 4 berries and 2 Mini Monkeys, and look closer at the ceiling and right wall to find two nests hidden there.
Diamond
Place the diamond in the panel at the treetop, and use the new triangle clue to unlock it.
Following the same logic and order as before, set the displays to show 2, 1, 2, 3, 1, 2 lines.
Pushing the diamond opens the panel to reveal a berry, a sharpening stone and a Mini Monkey.
Scoop
Fill the cup in the puddle, then pour it on the fire to extinguish it and find a rounder red diamond.
Single
Place the red diamond in the remaining wall panel and use the clue there to unlock it.
Set each display to show one line, then click the diamond to twist it and open the panel. Inside, there's a berry, blunt knife and Mini Monkey.
Dull
Sharpen the knife with the stone, then use it on each of the nests to find the last 3 berries.
Fruit
Give all 30 berries to the creature to end the stage, and take the Mini Monkey which appears beside him.
Bonus clue from this stage: (vertical line with 4 horizontals) = 2.
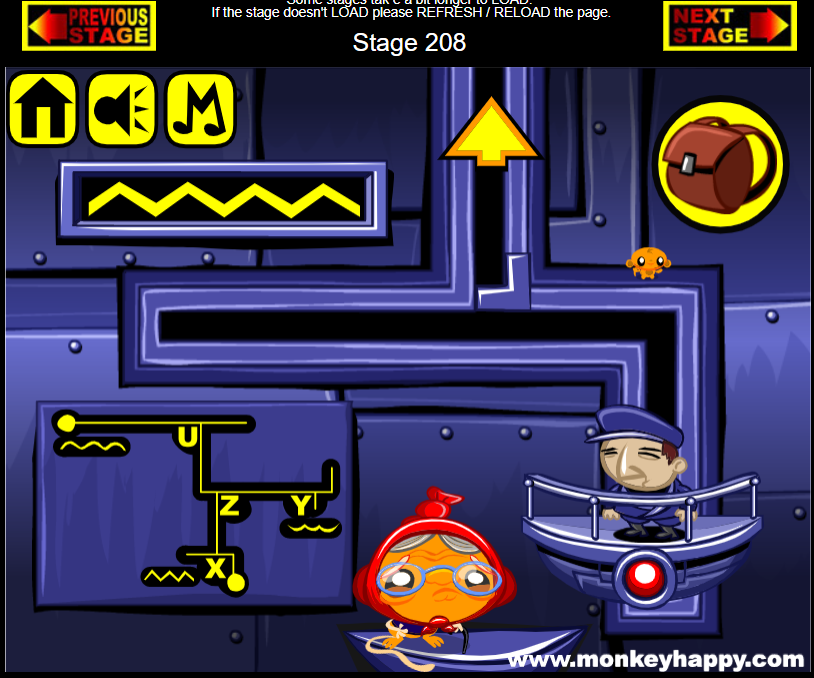
Stage 208: Secure Maze
Exploration
The man dressed in blue stands on a platform activated by a red button, mounted on a track that splits to a dead end on the left and a path leading up. He can't go in those directions right now, because of an L-shaped piece on the track blocking his way. There's a rectangular display and a clue diagram, and there's a Mini Monkey in the top right.
Go up. The track splits in two again with another L piece at the juncture. There's also a locked panel with a round hole and a Mini Monkey on this screen.
Go right. The track splits (with another L piece) into two dead ends. There's another rectangle display and a small hole in the wall, as well as 2 Mini Monkeys.
Go back left and then up. The track splits into two (with another L piece), and the dead end on the right seems to be connected to a locked rectangular wall panel. Pick up another Mini Monkey.
Go left. The track finally ends, but is guarded by a bright laser. There's another rectangular display, as well as two round buttons below that. The left one cycles through different letters, and the right one spins an entire round when clicked. Pick up 2 Mini Monkeys, for a total of 7.
Connect
Get the man to the dead end to the right of the junction marked U.
(A faster but more challenging solution is listed at the end of this stage walkthrough.)
In order to move the L piece at X, you need to set the letter device to X before pushing the rotating button. Try it and see!
The L piece now blocks the way up (and it only has two orientations, so you don't have to keep trying), but this means you can move the man to the left dead end by pushing the red button on his platform.
Next up, you'll need to clear the path at both X and Z (if you don't clear it at Z, he'll just bounce back).
So leave the letter set to X, push the button to rotate, and then change the letter to Z and rotate again. Checking the track, you now find that it's blocked at Y. So change the letter to Y and rotate again.
Finally, you can push the platform to move him to the bottom dead end at Y.
Rotate the pieces at U and Z, and the man should now be able to reach the dead end!
When he does, take the wheel and Mini Monkey from the panel.
Combination
Place the wheel in the panel at Z, and use clues from the diagram to unlock it.
Make the displays at X, Y and the top left screen match the patterns on the diagram by clicking them 2, 3, 1 times.
Turn the wheel to open the panel, and take 2 arm bits and a Mini Monkey from inside.
Equipped
Combine the arm bits into a robotic arm, and attach it to the hole at Y. If you click it, you'll find that the arm extends off screen, pulls down a clear shield in the path of the track, and then puts it back up.
So move the man until he can get the shield at Y.
You should be able to activate the platform without turning any pieces to get the man to Y.
Now rotate the L piece at Y once, and move the man to the top dead end there, then click the arm to attach the shield to his platform.
Reverse the steps above to get the man back to U.
Then rotate the piece at U. The man can now pass through the laser to end the stage! When the capsule opens on the other side of the laser, you can pick up the last Mini Monkey.
Bonus clue from this stage: (3 across 2 down) = 3.
Efficiency route
Rotate U and X, move, rotate X and Z.
Move (meanwhile, set the X device), and rotate Z and then Y after you hear him bounce twice.
Move the man back to Y. Meanwhile, take the wheel and use it to get the arm.
Rotate Y, move man, attach the arm and activate it, then move the man back.
Rotate Y, move man, wait for him to reach U, then rotate U and move him to the end!
Bonus Stage 52
As usual, there's some math to do. Work out the equations on the left (1+2=3, 5×3=15) and right (15−3=12, 12÷3=4) columns to get the final code (4124). Enter that in the box to open it!
Update