

Monkey GO Happy Roundup 11
By Arceus
|
March 23, 2018
Comments (4) | Views (8,188)
 Time for another dose of monkey puzzle hunting! Enjoy four more stages in this edition.
Time for another dose of monkey puzzle hunting! Enjoy four more stages in this edition.
In a sunny scene this time, the monkey is hunting shells (perhaps from snails?) and trying to help a boat prepare for its departure.
A castle lies on a hill, and a gardener seeks out mushrooms...help him out with his collection!
At last, help a camel find a prickly treat, which might also involve recovery of a knife.


I'm currently writing up the walkthroughs, but Arceus, you really need to update the descriptions.
I'm not sure what happened with it, but the descriptions there are not what I sent over in the file...I'll let Jeff know. Thanks.
Monkey GO Happy Roundup 11 (Stage 165–168)
Stage 165: Shell Treasures
Exploration
The ship and the house in the distance catch your eye, but let's focus on what's in the foreground, like the branch on the right that you can't get yet, or the hole in the slope on the left. Pick up the 3 shells and 2 Mini Monkeys, then click the tufts of grass to find another 3 shells. You can also see two shells submerged in the sea, but have no way to get to them.
Go up to the top of the slope. Outside the house, there's another hole and tufts of grass that you can click. Also click the two unusual spots on the roof, as well as the largest stone block on the right wall. You should find 10 shells and 2 Mini Monkeys on this screen.
Enter the house. A tall cupboard on the left side is locked, and its handles are actually buttons. On the back wall, there's a diagram of a ship with several areas labeled, four buttons below the diagram that cycle through different letters, and a mysterious clue with a twisty path with loops along it, starting and ending in arrows at the top. On the right, there's a box with a round socket, and a sailor asks for 20 shells. Pick up the knife and 2 Mini Monkeys.
Course
Use the line clue from the back wall to unlock the cupboard.
As the curved path winds around (from the left end to the right), the loop symbols on it appear on the RLLRLRRRLL sides.
So push those buttons to open the cupboard up. Inside, there's some bed sheets and a Mini Monkey.
Impale
Use the knife to cut loose the stick from the first screen.
Then use the knife on it again (with the Combine Items button in the inventory) to sharpen it.
Use the sharp stick to pick up 2 shells from the sea.
Also use the sharp stick to retrieve another 2 shells from the holes in the hill.
Collection
Give all 20 shells to the sailor, who walks away and leaves a coin and a Mini Monkey.
Compartment
Place the coin in the box in the right wall, then use the clue from the ship diagram to unlock it.
The word which appears in gray is the one which doesn't match its label. It's also the only word which can be spelt with the letters available.
Enter HOLD into the letter buttons, then push the coin to open the box. Inside, there's a needle and thread and a Mini Monkey.
Sew
Use the needle and thread to sew the bed sheets together into sails, then use them on the boat (on the first screen) to end the game.
As it sails to the left and right, pick up the last Mini Monkey from it.
Your bonus clue from this stage is (C with a dot) = 5.
Stage 166: Forest Castle
This stage (and the next two) has background music throughout instead of just ambience. Give it a listen!
Exploration
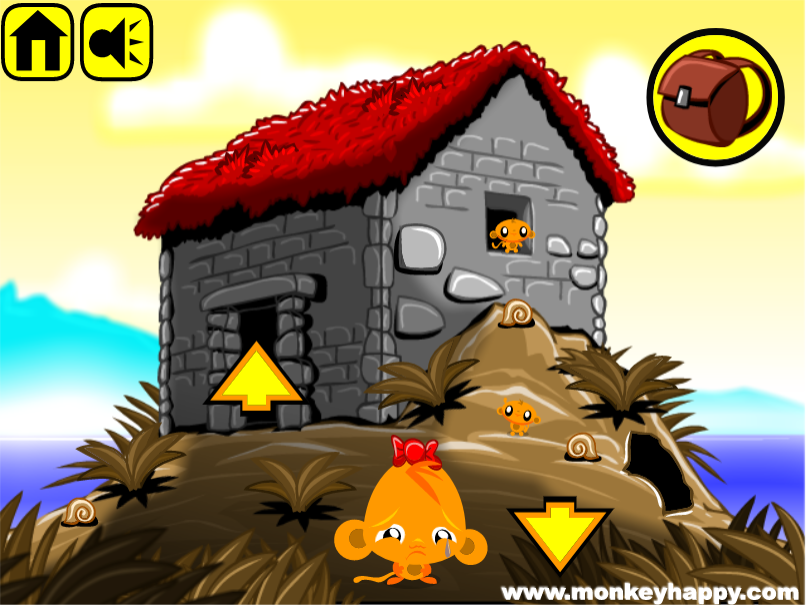
You're in a forest with mushrooms, and a castle is visible in the distance. Pick up the cup on the left tree stump, then click the three bushes and the large trees in the middle and right to reveal more mushrooms. Pick all 14 mushrooms up, as well as 2 Mini Monkeys.
Head left further into the forest and do more of the same, clicking two threes and three bushes and then picking up 14 mushrooms and 2 Mini Monkeys. Notice the branch still firmly attached to the tree stump.
Go back right and up to the castle, where an old man asks for 30 mushrooms. Click on the shrub and rock to move them, then pick up 2 mushrooms, a sealed bottle and 3 Mini Monkeys. Also notice the puzzle on the back wall, the hole on the right wall, and the note pinned to the left wall.
Climb up the stairs, where a balding guy in robes asks for a mug of beer. There are several digit devices behind him and a lever slot on the wall, and also a saw and Mini Monkey you can take.
Gatherer
Give all 30 mushrooms to the man who wants them, who walks away and leaves a bottle opener behind.
Drink
Use the bottle opener to unseal the bottle, and then pour the beer into the cup.
Give the full cup to the man who wants it, and he reveals another digit device and a Mini Monkey as he walks away.
Length
Use the saw to saw off the stick in the forest, and then place that in the lever slot on top of the castle.
Then use the clue from the note to set the digit devices.
Following the numeric scale on the note with B being 3 and D 7, A would be 9 and C 13.
Putting this in order, A-B-C-D would be 9-3-13-7.
Enter 93137 in the devices and pull the stick down. A trapdoor opens and you can take a peg that covers a colorful clue.
Fast Forward
Place the peg on the wall downstairs, then use the newly discovered clue to unlock it.
The number clue is the easiest: set the digits upstairs to 12345.
Downstairs, the triangular lights need to be
Red(4) Yellow(1)

White(3) Purple(2)
so click them that many times.
Clicking the diamond-shaped center once matches the colors to the outside, but the triangles on it face the wrong direction. So click it twice more to put white in the upper-right instead.
Push the peg to uncover a Mini Monkey and gold stash!
Bonus clue from this stage: (S with dot) = 1.
Stage 167: Purple Rooms
Exploration 1
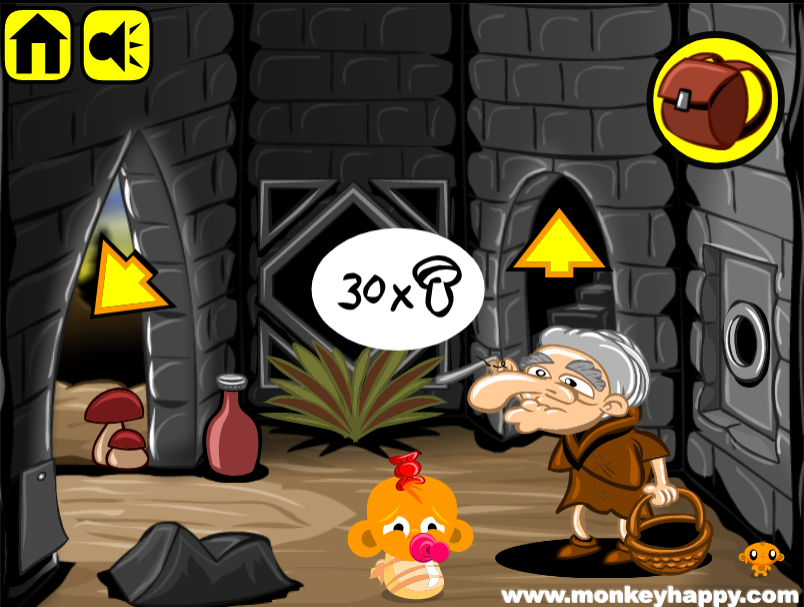
This room has several occurrences of the letter D: there's one on the ceiling above some numeric clues, one above the left door which has a lever slot, and one on the button lying on the ground. The back wall has a panel with a pause button- no, just two rectangular slots, and four round buttons that glow brightly while displaying dark lines and crosses. Open up the compartment in the middle of the right wall, then pick up a Mini Monkey there and another Mini Monkey on the floor.
Figures
Place the button on the door, and use the clue from the ceiling to unlock it.
The operators that make the equations hold are +, ×, −, ×.
So click the buttons (1, 2, 3, 2 times) to show those symbols, and push the button to open the door. Go to the next room.
Exploration 2
The panel on the wall is labeled A, but there's a B button on the floor. There's another round button on the wall, but it only shows vertical and diagonal lines. Pick up a dead fish from the bucket and the Mini Monkey on the ladder.
Climb up to a room with a B panel on the left and a C door on the right. There's also a clue on the back wall next to a round button similar to the previous. Pick up 2 buttons labeled A and C, and the Mini Monkey on the floor.
Blank
If you read the new clue closely, you'll know which key to use next.
The lines on the left side of the clue (beside the letters A, B and C) match the buttons in the first room, and the grids on the right side have short lines that match the round buttons in the other rooms.
Each of the first two grids references a line in the top-right. Since you only have access to two round buttons, the only part of the clue you can do is the line marked C.
So set the buttons in the first room to
×+−−, the round buttons to/(upstairs) and|(downstairs), then place the C button on its door upstairs and push it to open the door.Exploration 3
This room has no letter-labeled things, but it has a panel divided into ten rectangles by a grid of lines. The room also has a round button as you might expect. On the left is a monster standing under a hook, asking for fish. Pick up 2 Mini Monkeys.
Access
Now you can use the clue to open the panels marked A and B.
For A, set the buttons in the first room to
×++×and those in the other rooms to|/
\
then place the button, open the panel, and take the rope and Mini Monkey from inside.
For B, set the buttons in the first room to
+××+and those in the other rooms to\|
/
then place the button, open the panel, and take the unmarked button and Mini Monkey from inside.
Feed
If you just give the fish to the monster, he instantly gobbles it up, with nothing in return. (And then you'll have to get another fish from the bucket.)
Find something else to do with the fish.
Tie the rope to the fish and hang it from the hook above the monster. As it strains to reach the fish, remove the fuse from its mouth.
Grate
Place the last button in the panel in the last room, and use the clue there to unlock it.
The lines that divide the panel into a grid also form four perpendicular intersections, that is to say, four plus signs.
Set the buttons in the first room to
++++, and take the other fuse and Mini Monkey from inside.Fill
Place both fuses in the panel in the first room to unlock it. It opens to a view of the seafloor with the last Mini Monkey hidden behind the Stage Complete text.
Bonus clue from this stage: (S with two dots) = 2.
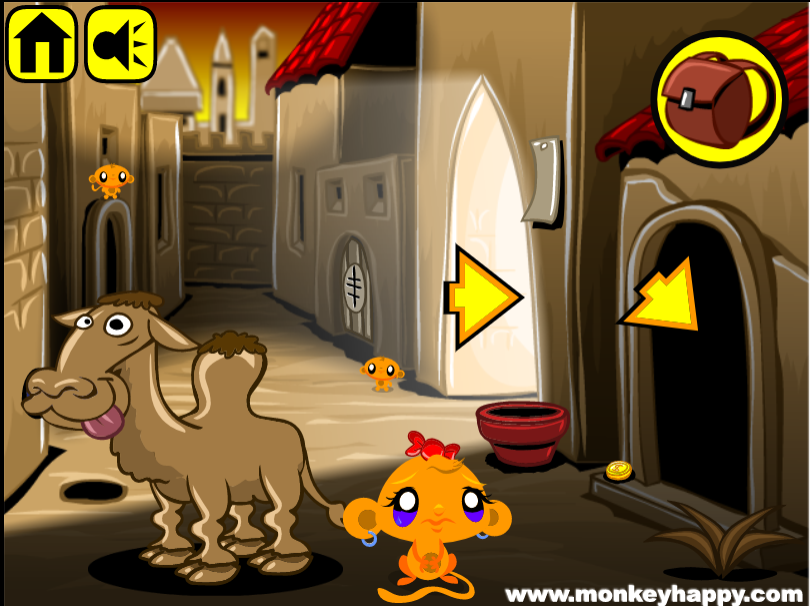
Stage 168: Parched Coins
Exploration
Several things are happening in this sandy setting. The camel next to you asks for a cactus, the locked door in the back is marked with a symbol, the note on the wall show complicated clues, and you can click the pot and shrub in the lower right to move them and find coins. Pick up a total of 3 coins and 2 Mini Monkeys from this screen.
Go down the darkened doorway to the right, where a woman asks for a cup of hot tea. Notice the tall rectangular displays in the back which cycle through a variety of vertical friezes. Pick up the tap handle, kettle, small key, coin and 2 Mini Monkeys, then slide the left rug aside to find another coin.
Then click the brick at the top left beside the door to remove it and find a coin and Mini Monkey.
Go back up and right through the lit doorway. Here, you find a man who sells a knife for 10 coins. There's also a panel beside him marked with a panel, as well as twisty branches and a potted cactus, all of which you can't do anything with yet. On the left of the screen there's an unusual wall with a hole and buttons that display complicated symbols, and there's a small pit covered by a wire frame through which bright flames emanate. Click the shrub here too, then pick up 2 coins and 2 Mini Monkeys.
Triplets
Unlock the door and small panel by using the clue with matching symbols from the note.
The headings reading 123 and 321 mirror each other, so the right three friezes should match the left three but in reverse order.
Click the tall displays 2, 3, 1, 1, 3, 2 times to match the first row of clues, then open up the locked door and take the coin from inside.
Then click them 2, 2, 1, 1, 2, 2 times more (4, 5, 2, 2, 5, 4 total) to match the second row, and open the locked panel to find another coin.
Cutting a deal
Now that you have 10 coins, you can buy the machete from the merchant.
He instantly changes the sign and puts out a locked chest instead. You just need 5 more coins to buy it.
Now that you have the machete, you can cut the branches, the cactus and even the fabric on the merchant's stall. Pick up 3 coins and a piece of cactus.
Succulent
Give the cactus to the camel, who trots off, leaving a Mini Monkey, 2 coins and a tap without a handle.
Valuable
Now that you have 5 more coins, buy the locked box from him too.
Then use the small key to unlock it. Inside, there's a bag of tea.
Brew
Place the handle on the tap, and use it to fill the kettle.
Then boil the kettle of water on the fire.
Then add the teabag to the kettle, and use it to fill up the cup in the basement.
Now you can pick up the lady's wrapped item and Mini Monkey.
Unwrap
Use the machete to free the item from its wrapping. It turns out to be a gem.
Letters
Place the gem in the wall puzzle, and use the remaining clues from the note to solve it.
The note lists several letters next to symbols, and the only meaningul word you can spell with them is
tea.So click the round buttons on the wall puzzle 2, 3, 1 times.
The other clue on the note includes one of the frieze patterns next to the digits 123321. So set all the displays to that same pattern.
Push the gem to open up its panel. The last Mini Monkey is inside, along with a hoard of gold treasure.
Bonus clue from this stage: (S with a line) = 4.
Bonus Stage 42
As you might have expected, this bonus stage involves math.
Work through the equations on the left side (4×2=8, 1+5=6, 8×6=48) and then those on the right side (48÷2=24, 1+1+1=3) to find that the code is 2433. Enter that into the box to open it!
My bad. It's fixed.
Update