

![]() Something freaky is happening in the town of Vortex Point again, and that means it's time for our favourite motley crew of investigators to solve the case with their usual, er, finesse in the latest point-and-click adventure from Carmel Games, Vortex Point 2: Nensha. There's something fishy going on with a photo booth, to the tune of a mysterious masked figure showing up in photos and people going missing. The police think it's just a prank to get attention, but nobody's laughing, and it's up to you to get to the bottom of things before anyone else comes down with a bad case of the phantom strangles.
Something freaky is happening in the town of Vortex Point again, and that means it's time for our favourite motley crew of investigators to solve the case with their usual, er, finesse in the latest point-and-click adventure from Carmel Games, Vortex Point 2: Nensha. There's something fishy going on with a photo booth, to the tune of a mysterious masked figure showing up in photos and people going missing. The police think it's just a prank to get attention, but nobody's laughing, and it's up to you to get to the bottom of things before anyone else comes down with a bad case of the phantom strangles.
 When your cursor changes when you mouse over an object, that means you can click to interact and pick it up, and items appear in your inventory at the bottom of the screen. You can click on items and then somewhere on the screen to use them, or click on one item and then another to try to combine them. Your investigations are going to take you all over town, so make sure you follow every lead, no matter how weird or unlikely, and especially if it involves property damage. While Vortex Point 2 has what is actually a pretty intriguing storyline apart from some awkward dialogue, its biggest flaw is that it typically tends to offer little to no direction, and progression tends to come down to being a jerk, breaking things, and experimentation... Sherlock you ain't. But though it's short, it's got a clever story premise I would have liked to have seen expanded on, and hopefully this isn't the last visit we make to Vortex Point.


Walkthrough Guide
(Please allow page to fully load for spoiler tags to be functional.)
Vortex Point 2 Walkthrough
After the introduction, you'll be in the office. Check the top drawer of the file cabinet (just to the left of Kevin) for a magnifying glass.
Go through the door to the left of the file cabinet to go to the map.
Go to the crime scene. Speak with the police officer to get the photos.
You can go into the restroom, but there's nothing to see in there. Instead, go into the alley to the left.
Click the recycling bin to speak with the homeless man lurking in there and get a new photo and a potential lead.
Take the board with the nail in it towards the right, by the door.
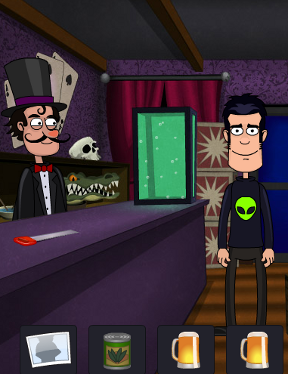
Go through the door to enter the pub.
Speak to the barman to get a beer.
Get two more beers the same way. After the third, the barman will leave.
Take the axe on the counter, then leave the pub.
Click the arrow on the left to return to the photo booth, then again to return to the map.
Go to Main St. Enter the building on the left.
Give the photo the homeless man gave you to the man behind the counter. Take the can of beans while he's gone.
Leave. Don't return to the map yet; instead, enter the building on the right.
Be a jerk and use the board with the nail in it to smash the water tank. Take the saw once the magician leaves.
Leave and return to the map (left edge of screen). Now go to the crime scene again.
Combine the saw with the can of beans to open the latter.
Go into the alley again and give the open can of beans to the homeless man for a better lead.
Return to the office via the map and talk to Caroline and Craig; they'll direct you to the museum.
Go to the museum via the map.
Talk to the security guard. He won't let you in, but he'll mention something about cold beer.
Give him all three beers, one at a time. After the last he'll leave.
Go inside the museum. There's a set of pictures on the back wall, and the upper left one is clickable.
Without zooming in on that picture, use the magnifying glass on it. Aha!
Backtrack to the office and report your findings to Caroline and Craig. Things are making sense now!
Go to Marshall Square via the map.
Enter the door on the left to visit Hailee, the girl whose friend went missing. There's not much you can do here but pick up the hairclip on the floor towards the right.
Now, the locked fence. Use the axe on it to get rid of the lock, then go inside.
Use the hairclip to pick the lock on the door to Koko's booth.
Watch the ending and hope for Kevin's sake that the Vortex Point penitentiary is as secure as advertised.
Thanks to Sonic Lover for the walkthrough!
Posted by: Dora Breckinridge |
June 29, 2013 11:35 AM
|
June 29, 2013 11:35 AM