
Sandra Fleming Chronicles: Crystal Skulls
Platform: Windows

![]() From Intenium, the makers of the equally awesome Insider Tales: The Stolen Venus 2 and Tulula: Legend of a Volcano, comes Sandra Fleming Chronicles: Crystal Skulls, a hidden object adventure with heavy emphasis on the latter. Sandra Fleming cuts out most of the casual stuff we see in modern games, leaving you alone with a strange world with nothing but your wits to get you out. It's a challenging and intriguing game that goes to greater lengths to satisfy your puzzle solving itch than most other games of its species!
From Intenium, the makers of the equally awesome Insider Tales: The Stolen Venus 2 and Tulula: Legend of a Volcano, comes Sandra Fleming Chronicles: Crystal Skulls, a hidden object adventure with heavy emphasis on the latter. Sandra Fleming cuts out most of the casual stuff we see in modern games, leaving you alone with a strange world with nothing but your wits to get you out. It's a challenging and intriguing game that goes to greater lengths to satisfy your puzzle solving itch than most other games of its species!
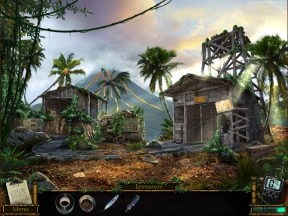 Summoned to the museum by a curator friend, you learn of the legend of the Crystal Skulls, relics of the old world hidden away by the natives of South America and sought after by conquistadors. The museum has one of the skulls, but now, information has surfaced leading to the remainder of them, sparking your pal Tom to head out on an adventure. You quickly follow, landing on the beach ready to scour the landscape for clues.
Sandra Fleming Chronicles: Crystal Skulls is much more adventure-oriented than most hidden object hybrids out these days, and for that reason alone, you should try it. You'll spend most of your time searching scenes for the odd item or two, poking your cursor around sparkling areas and investigating small mini-scenes within the larger areas. Often times you'll come up with a useful item or two, stashing it in your inventory for later use. Only when you collect the right things can you start solving puzzles, and even then you'll find you have to go exploring to pick out more necessary objects.
Puzzles take the form of multi-part riddles that require a number of items as well as some sleuthing on your part. For example, early on you'll be confronted with a locked safe with a three digit combination. Normally, a casual adventure game would throw the numbers on a piece of paper and place it right in front of your head. In Sandra Fleming Chronicles, however, you'll learn these numbers one at a time, but only if you're paying attention to your surroundings. They're never thrown right in your face, forcing you to actually get involved in the game!
 Analysis: Sandra Fleming Chronicles: Crystal Skulls isn't quite your ordinary hidden object adventure hybrid game. In fact, in a number of areas it goes out of its way to be just the opposite, preferring not to hold the player's hand and opting instead to throw you in head first to see if you can survive. Fortunately, even for non-adventure game buffs, it's easy enough to stay afloat, as the difficulty level won't drown you as long as you keep an eye peeled for random clues hidden right in front of your face!
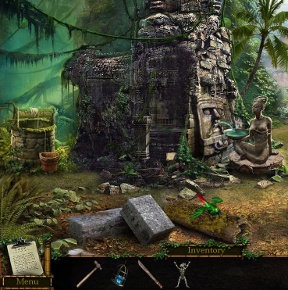
Sandra Fleming Chronicles: Crystal Skulls has a lot of nice animations that are both fun to play with but also serve to liven up the hidden object scenes. Some of them add a bit of depth to a scene, like doors that open to conceal items hidden on shelves, or things you have to repeatedly click to swing them out of the way. Try clicking on everything, see what moves!
Sandra Fleming Chronicles dares to do what every other popular hidden object game does: provide a challenge, and draw the player in to the game's world. If the same old formula is what you're looking for, this game probably won't please you. If you want something different enough to be satisfying, Sandra Fleming Chronicles: Crystal Skulls should be the very next game on your "to buy" list!
![]() Windows:
Windows:
Download the demo
Get the full version
![]() Mac OS X:
Mac OS X:
Not available.
Try Boot Camp or Parallels or CrossOver Games.


Walkthrough Guide
(Please allow page to fully load for spoiler tags to be functional.)
Sandra Fleming Chronicles: Crystal Skulls
The First Skull
Finding Tom
Look at the boat. There is a nasty crab in there.
Look near the water on the beach. Take the fish.
Place the fish near to the grab (not on top of it).
Once the crab moves over, take the screwdriver.
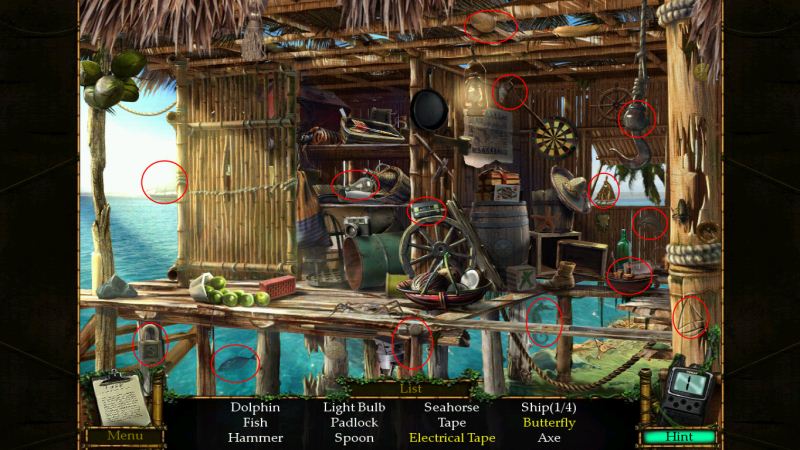
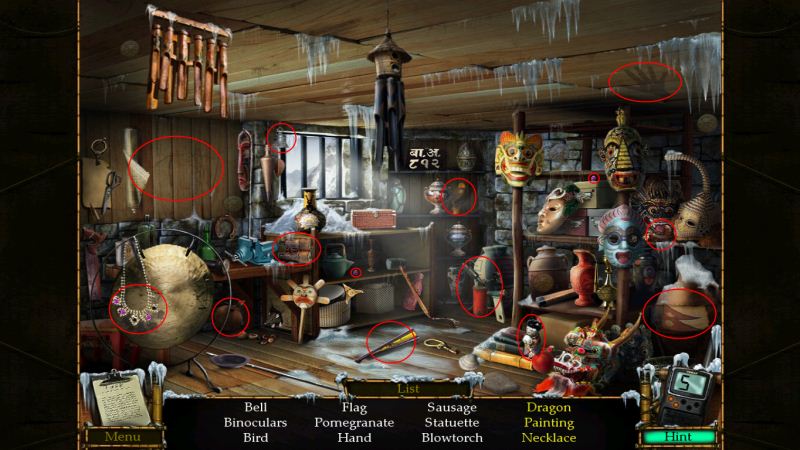
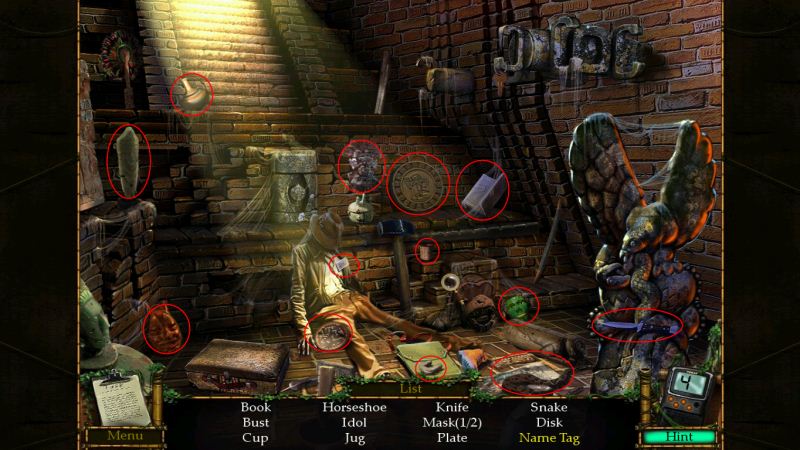
Go to the hut behind the air plane. It's a HOG scene:
Screenshot
Find the tape by moving the brick in front of the door.
Find the butterfly by tapping on the hook.
Fixing The Generator
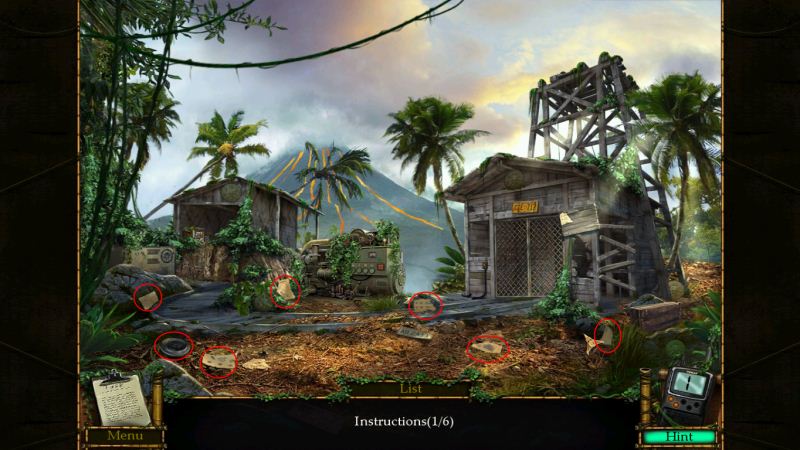
After meeting Tom, you will be by the mine entrance.
Find all of the paper pieces. Pick up the wheel on the ground. Screenshot
Assemble the pieces on notice next to the mind shaft. Screenshot
At the far right is a chest. Click on the two locks at the top, then remove all the stuff inside to find a shovel.
Look at the generator. Use the screwdriver to remove the cover at the lower right.
You need a fuse. Click on the hut in the back of the scene. It will be a safe. Take the gas container sitting next to it. Then open the safe (732). Take the fuse.
Leave the scene at the top left. You should now be near a stricken tanker and railroad tracks.
Use the gas container on the tanker.
Use the shovel on the mound of dirt to the left. Get the handle. Return to the mine entrance.
Use the fuse, handle and gas on the generator. Move the handle to start it up.
Return to the mains scene and take a look at the panel setting to the left. Use the screwdriver to remove the panel.
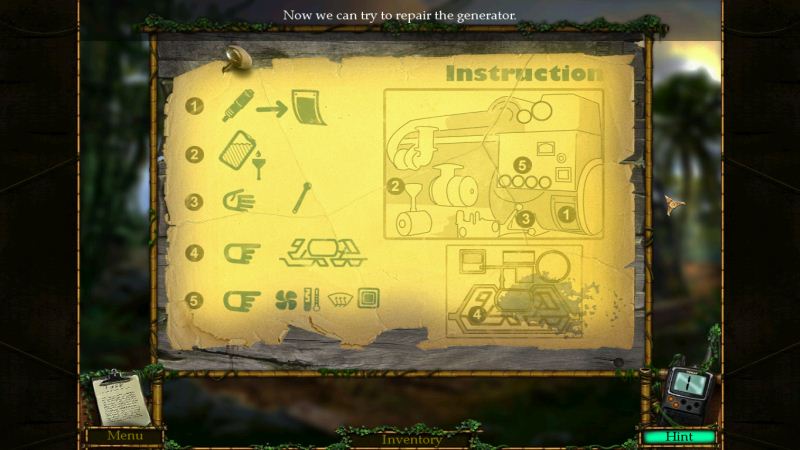
Solve the puzzle by replicating the patterns on the instructions (next to the shaft entrance). Screenshot
Go to the generator and press the big buttons in the order of the instructions. (3,1,2,4)
Click on the electric cable near the shaft. Connect the matching color cables by clicking on each, then use the electric tape on it.
Press the button to call the elevator.
The Mine
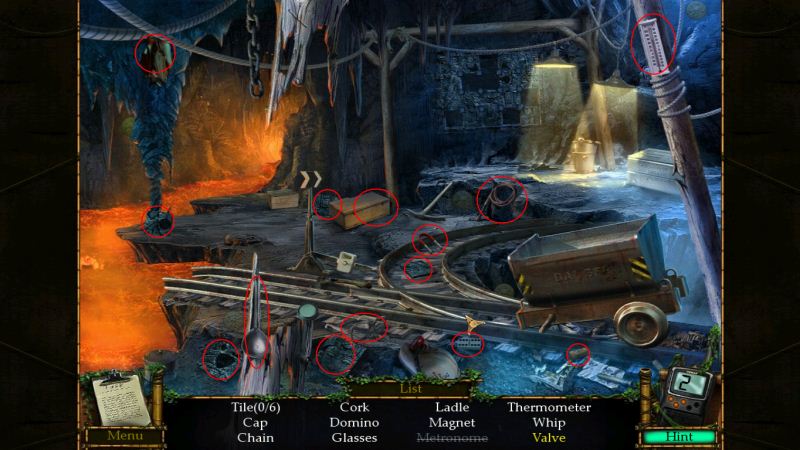
Complete the HOG scene:
Screenshot
Find the tile by clicking on the miner helmet.
Find the valve by using the pickaxe on the rock above the box in the center.
Place the six tiles into the puzzle at the back. Rotate the pieces until the picture is complete. Screenshot
Head towards the lava and pick up the cable on the left.
Head back to the beach, where the airplane is, and click on the hut.
It's a HOG scene:
Screenshot
Get the hook by cutting it down with a knife (found below the hook, near the edge of the screen).
Find the ring by tapping on the coconuts hanging from the roof.
Get the dart set by throwing the dart into the dart board, then taking it.
Use the valve on the pipeline on the beach. Get the reel.
Head to the stranded tanker and use the reel, cable and hook on the crane.
Lift the mine cart. (blue, red, yellow, blue).
Get the wrench. Use it on the railroad switch. Take the handle.
Attach the handle to the railroad switch in the mine. Place the wheel on the mine cart. Flip the switch and push the cart.
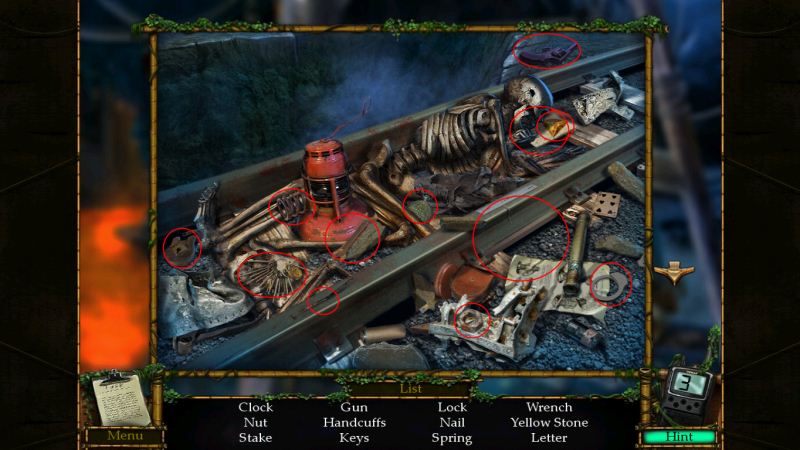
The area under the cart is now a HOG scene. Screenshot
Use the three maps to find the three gems. Use the shovel to dig them out. Screenshot
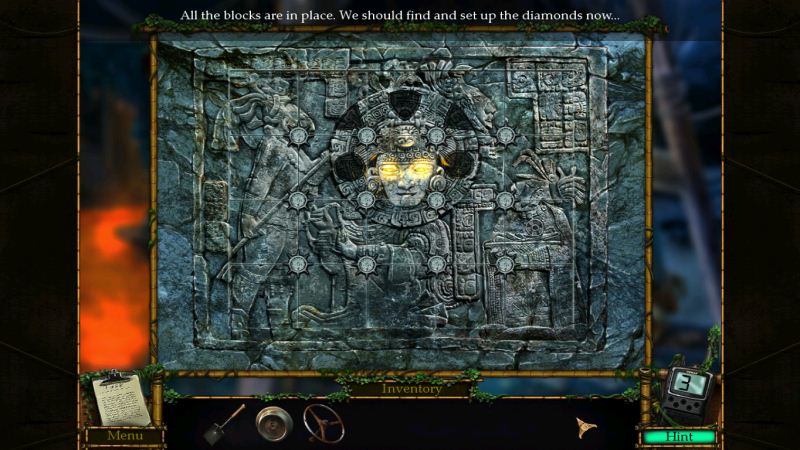
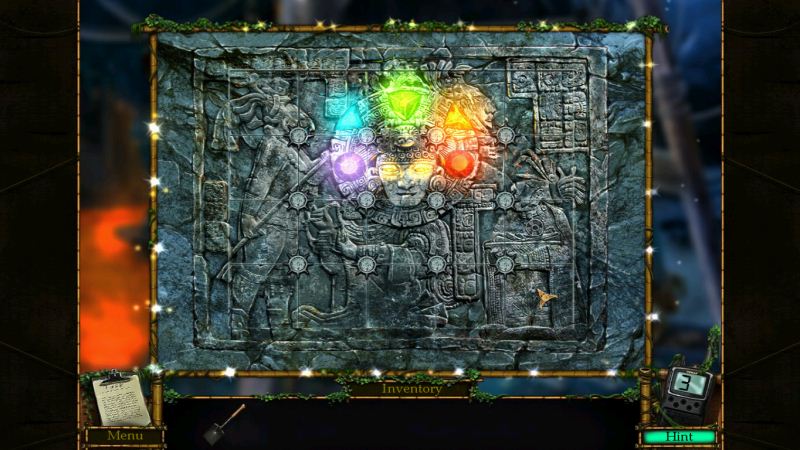
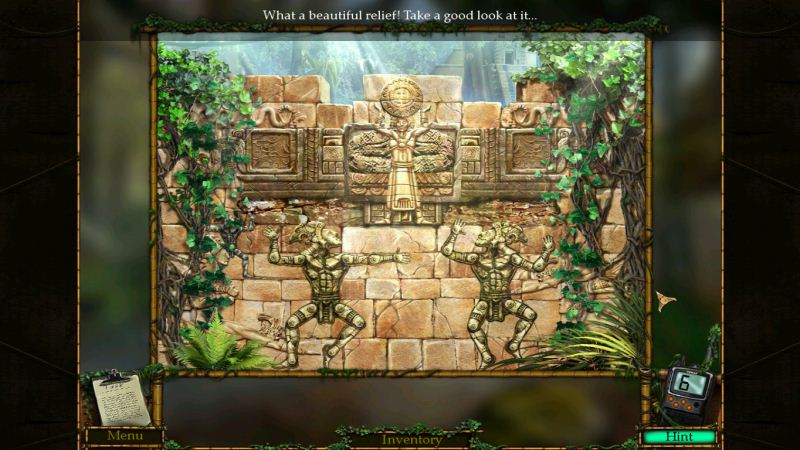
Place the five gems on the mural. Screenshot
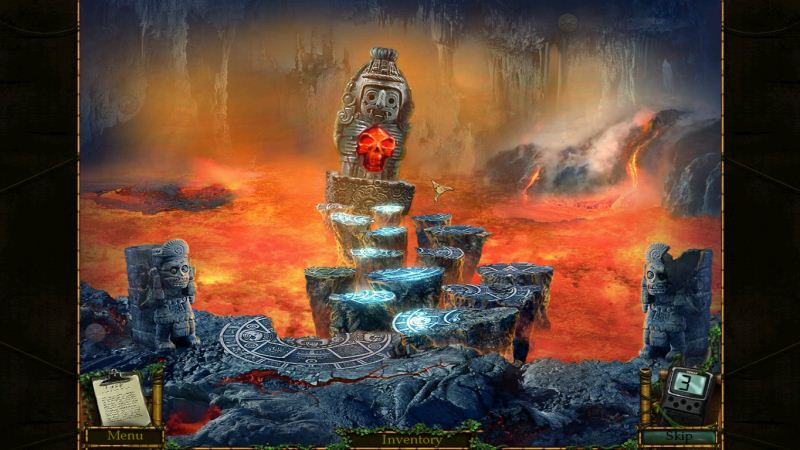
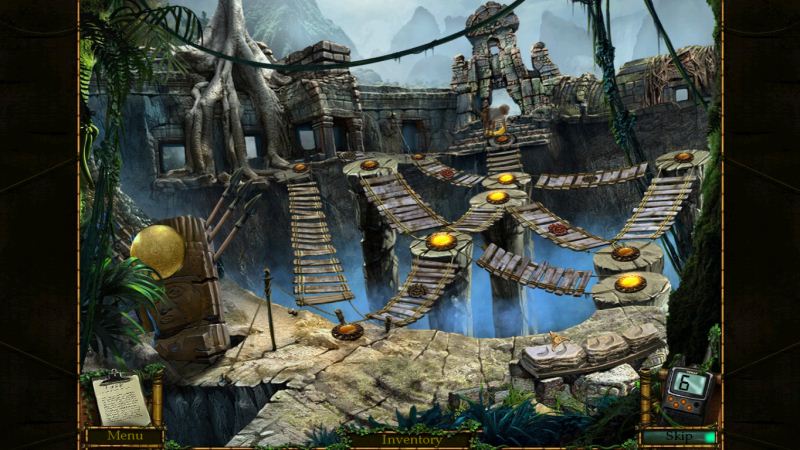
Head to the lava and step on the stones in sequence. Screenshot
The Second Skull
Crossing the Chasm
Collect all the pieces for the crossbow. Screenshot
Assemble the crossbow, then use it to fire across the gap.
Cross the gap and head towards the monastery.
Finding The Chalk
Look at the letter near the lion statue. Pick up the blue chalk.
Look at the puzzle on the door. Take the wooden crank.
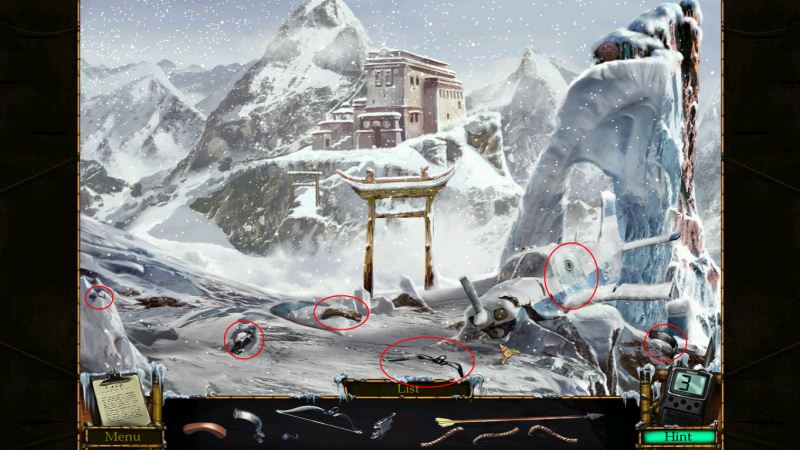
Go to the monastery entrance. Get the yellow chalk and reel.
Head to the far right of the monastery, where there is a snow-covered statue.
Use the crank on the rope. Use the trumpet and remember the sequence.
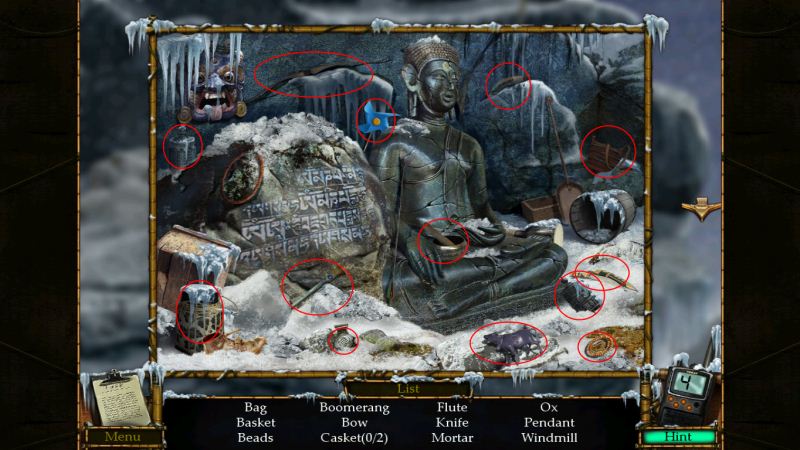
Click on the statue. It is a HOG scene. Screenshot
Head to the monastery and repeat the tune from the trumpet on the ice. (E,A,G,D,G)
Enter the monastery. Open the cabinet door on the far left and get the white chalk. Take the Lion's head.
Go to the broken lion statue and repair it with the head. Get the gold disc.
Look at the door near the lion statue. Use the windmill on the door, then keep clicking on the rotating blocks to make them spin. The door bars will retract.
Enter the building. It is a HOG scene:
Screenshot
Find the dragon by opening the fan on the floor.
Find the necklace by putting the two purple jewels in it.
Find the painting by hitting the gong with the hammer (at the work bench).
Go to the airplane and use the blowtorch. Enter the airplane.
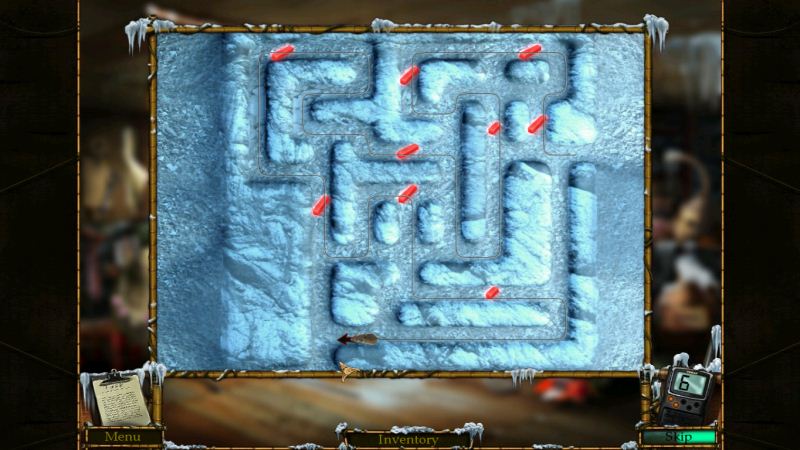
Go back to the storage building. Use the biscuits on the bowl near the mouse. Use the reel on the mouse. This will start a puzzle. Connect the red chalk pieces without cross the line. Screenshot
Go outside and click on the ice near the door. Take the red chalk.
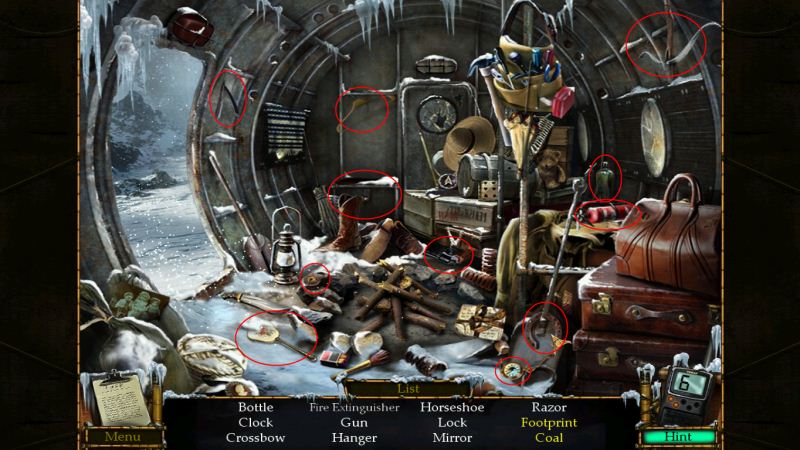
Head to the airplane and complete the HOG scene:
Screenshot
Use the matches on the dead fire to get the coal.
Use the boot on the snow by the entrance to get the footprint.
Go to the statue/trumpet area. Fill in the colors on the mural with the chalk, using the painting as a reference. Screenshot Take the gold disc from the mural.
Lighting the Lanterns
Head to the storage building. click on the small wooden chest at the back.
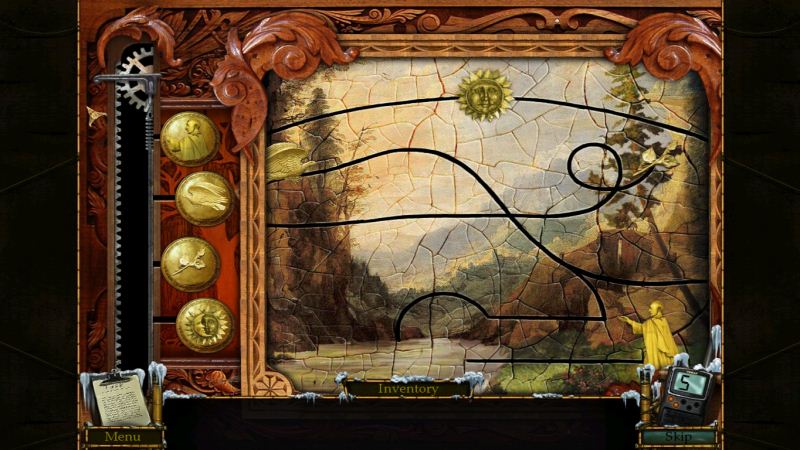
Place the gold discs you have found in it, then complete the puzzle. Arrange the discs so that the man carries the flower. Screenshot
Take the lotus from the puzzle and place it on the statue near the trumpet. Take the mirror.
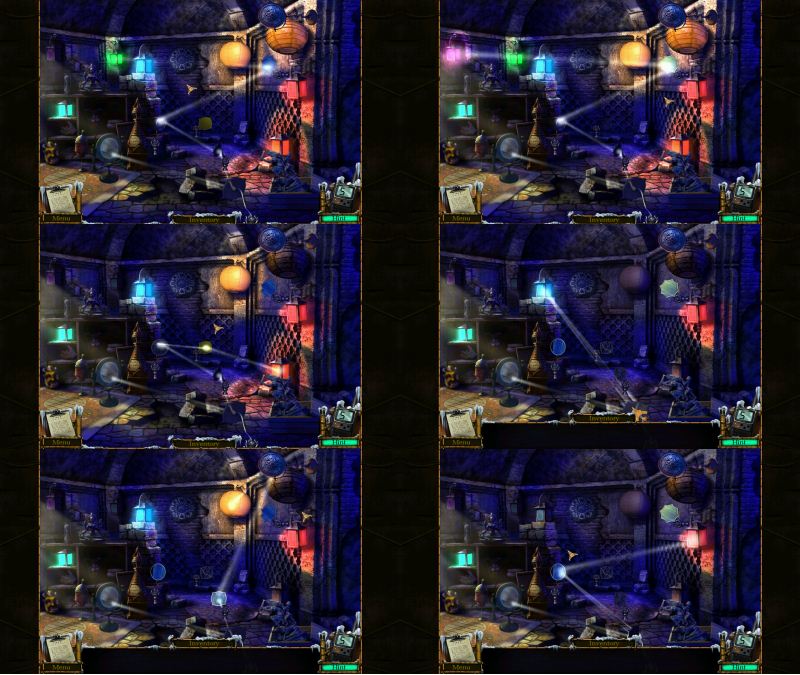
Return to the Monastery and place the mirror on the bottom stand. Manipulate the mirrors to light up all of the lanterns. Screenshot
Click on the mural at the back to get the second skull.
The Third Skull
Reaching The Temple
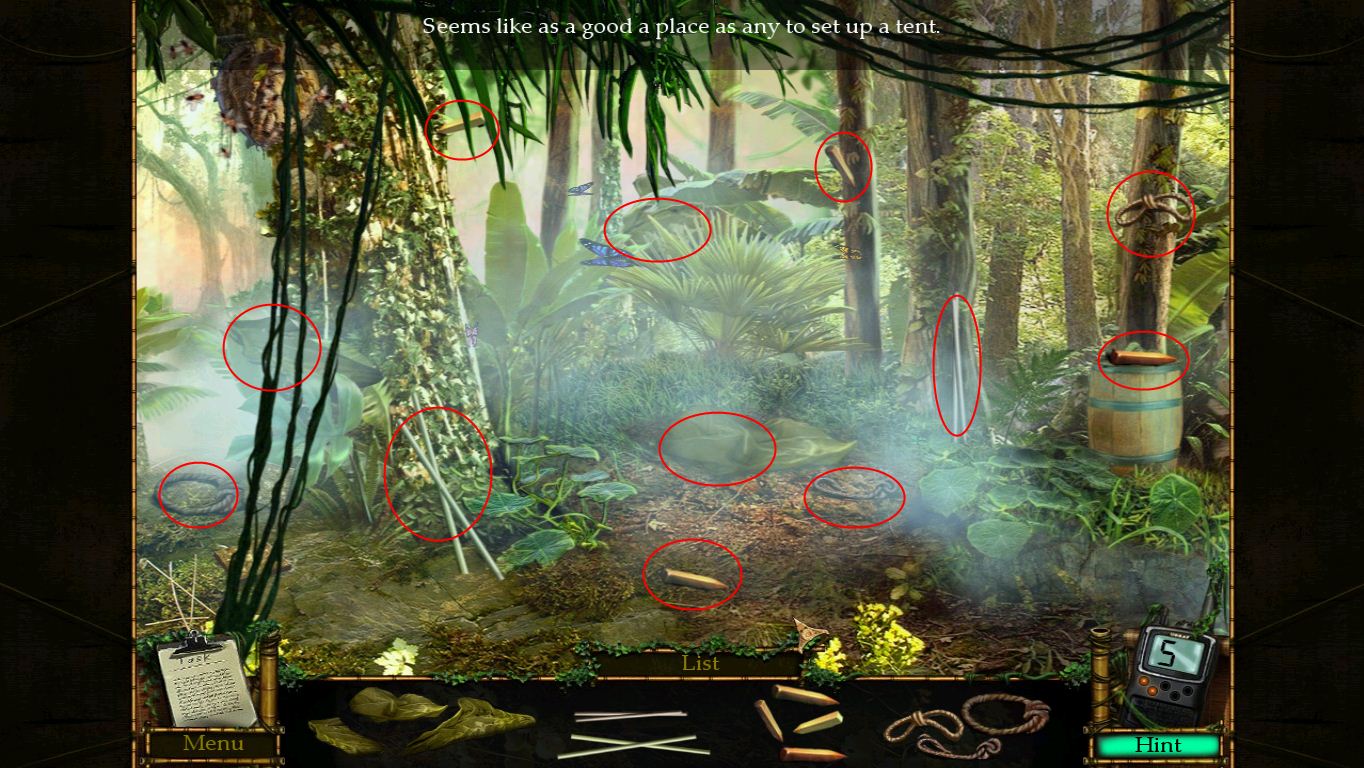
You have to build the tent. Click on the patch of leaves on the ground at the back, then find the objects. Screenshot
Build the tent. (leaves, tent, poles, stakes, ropes)
Click on the wall with the missing tiles. Now find the tiles in the scene.
Place the tiles in the wall. Complete the picture match puzzle.
Slide the blocks to move the two bars over. At the end a rock will block the final bar. Screenshot
Click on the tent. It is a HOG scene:
Screenshot
Find the butterfly by turning on the sound.
Find the monkey by opening the tent window.
Find the magnifier in the bag.
Head to the far left and enter the river scene.
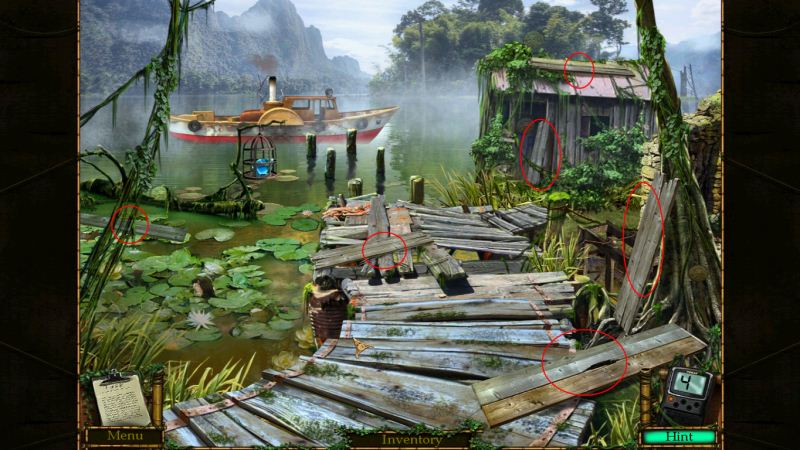
Find all the planks and place them on the broken pier. Screenshot
Click on the hut at the back. It is a HOG scene:
Screenshot
Find the bone by lifting the rock with the jack.
Go back to the camp site. Click on the bee hive (top left) and use the paper on the ground. Use the magnifying glass on the paper to smoke the bees out. Get the tool.
Use the tool on the cork in the barrel (near the wall). Get the hammer.
Smash the rock in the tile puzzle with the hammer. Unlock the door. Head through.
Finding The Statues
You are near the temple. Click on the well. Get the crutch.
Click on the podium near the large stone pillar. Assemble the statue and get the small statue. Screenshot
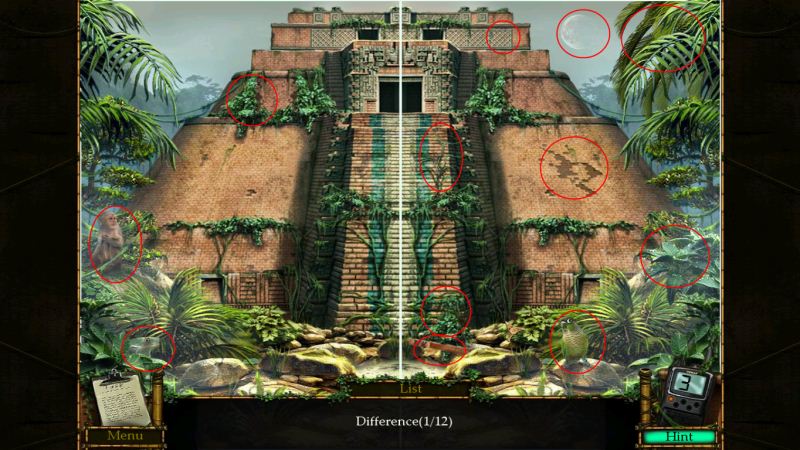
Head to the temple and complete the Spot The Difference puzzle. Screenshot
Head to the temple entrance and get the iron hook.
Go to the river. Use the crutch on the crocodile mouth.
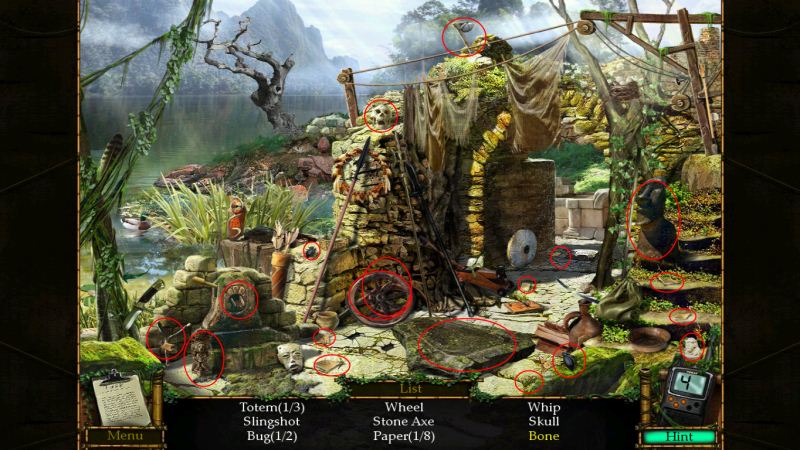
Head to the back and complete the HOG scene:
Screenshot
Find the horns by moving the hanging cloths.
Find the duck by cutting the river reeds down with the scythe.
Use the wetstone on the frame near the crocodile and sharpen the machete on it.
Go to the camp site and click on the overgrown mural.
Use the machete on the fines. Complete the gestures.
Click on the mural. Pick up the small statue to the left.
Down the River
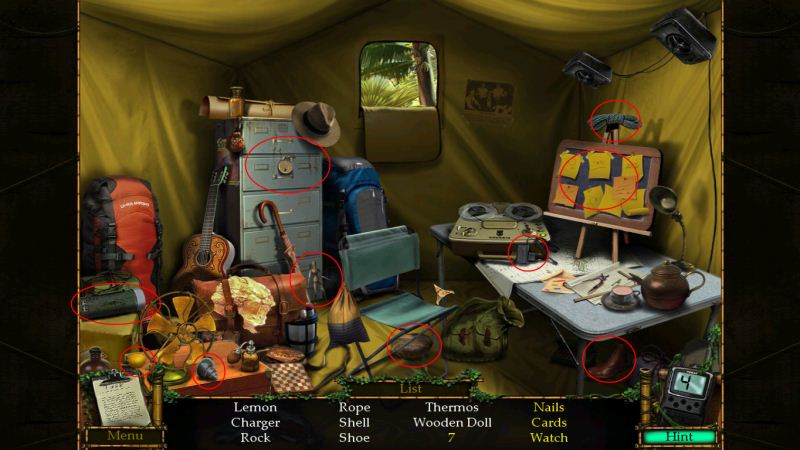
Go to your tent. It is a HOG scene:
Screenshot
Find the nails, cards and watch by taping on the hat to expose the key, then use the key to unlock the drawer.
Go to the river and use the nails on the pier. Hammer them in.
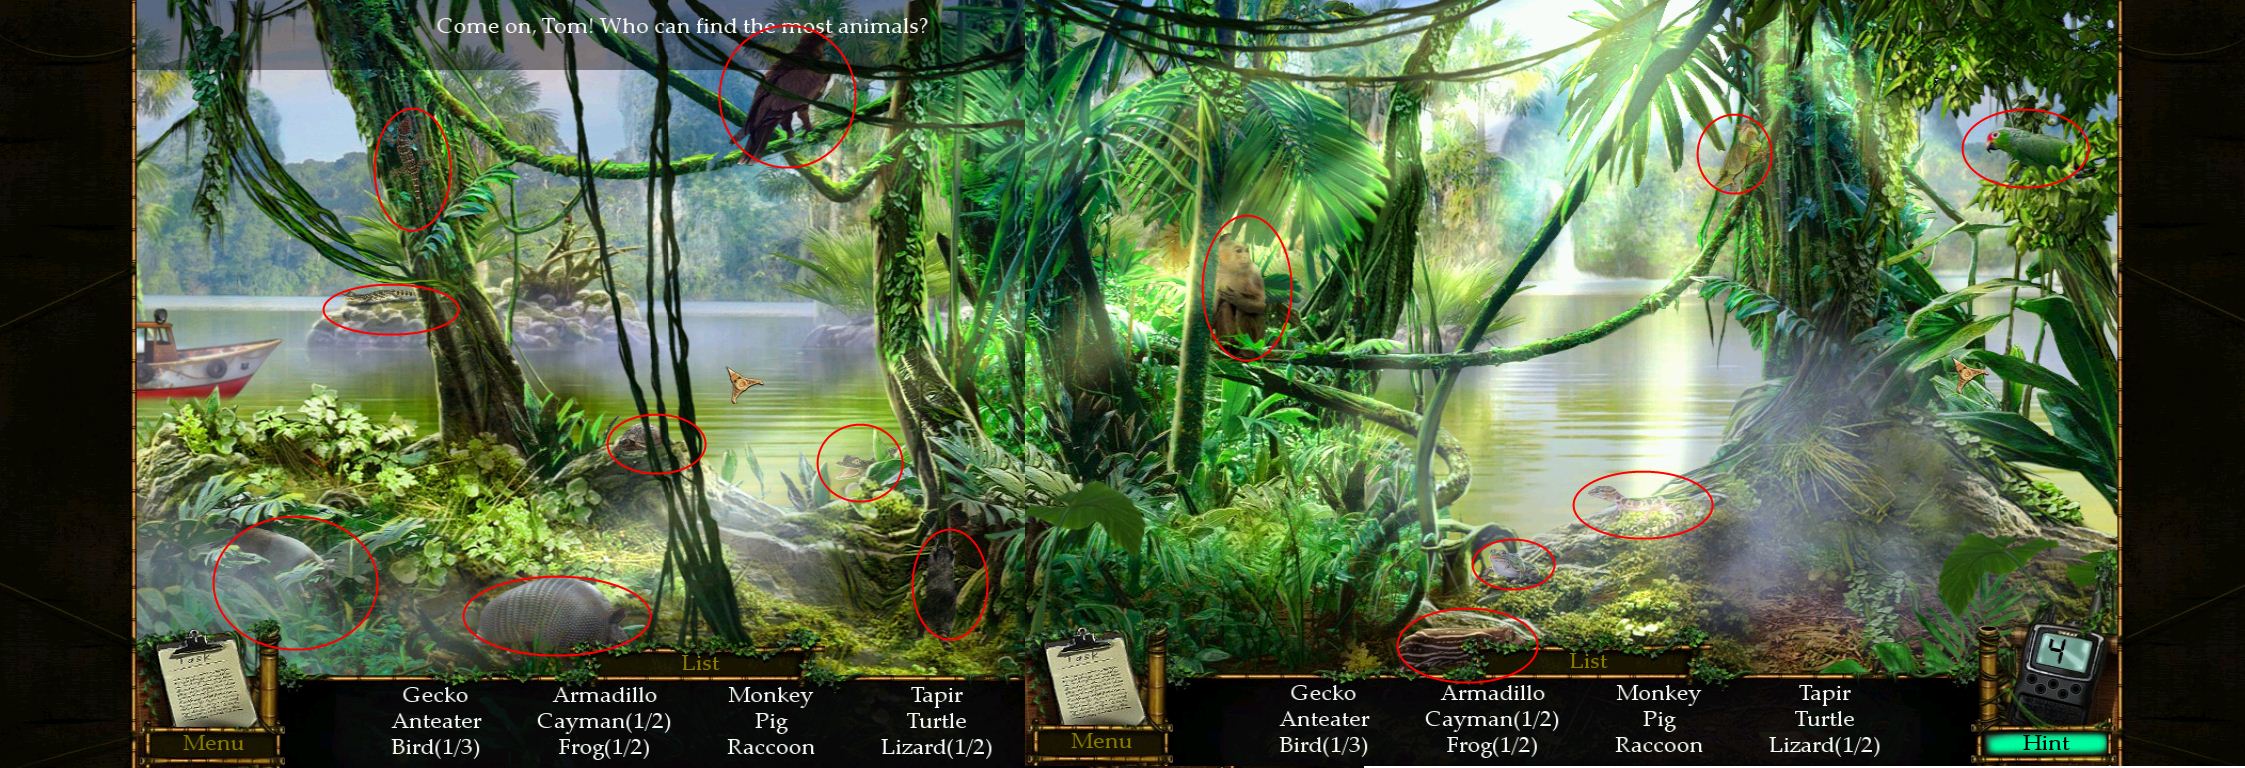
Head down the river. Find all the animals. Screenshot
At the area down river, pick up all the garbage. Screenshot
Head down the path to the temple. Pick up the ladder to the right.
Go back to where the garbage was and use the ladder to reach the bananas.
Solve the vine puzzle and get the bananas.
Take the bananas to the temple and place them to lure the monkey across. Get the gold disc. Screenshot
Getting The Jewels
Head back upriver. At the river use the iron hook to get the cage. Remove the crutch from the crocodile and use the cage on his mouth. Place the crutch back and get the jewel.
Go to the area before the temple and use the machete on the log until the termite appear. Take the crank from the bird's nest.
Use the crank on the well. Get the jewel.
Head to the temple and place the two jewels each on a pillar. Place the two small statues in the gaps that open.
Manipulate the two statues to look the same as on the mural. Screenshot
Enter the temple. It is a HOG scene. Screenshot
Use the sledgehammer on the bricks to the far left. Take the whip and use it on the key (top right). Unlock the suitcase with the key and place the monkey eyes on the monkey head.
The Museum
Take the note and ice-breaker from the door on the right.
Take the wand from the suit of armor.
Take the eye and wand from the dog statue.
Place the two wands on the sarcophagus. Take the sword and place it on the suit of armor. Take the nose.
Go to the left door. slide the paper underneath the door, then push the eye out with the icepick. Recover the eye from under the door.
Use the two eyes and nose on the face (far left). Get the key.
Unlock the professor's office with the key. Enter.
Pick up the two books from the floor and chair.
Look at the desk. click on the globe's countries in the order as they appear in the desk calendar. Take the handle and return to the museum.
Use the handle on the left door and enter. It is a HOG scene:
Screenshot
Find the ballerina in the Faberge egg.
Find the book by swatting the fly on the mask with the flyswatter.
Find the newspaper by calling the number under the telephone, using the phone in the professor's office. Collect the coin and use it on the newspaper box.
Return to the professor's office and place the books on the bookshelf. Arrange them to create a pattern. Screenshot
Posted by: James Francis |
July 12, 2011 10:38 AM
|
July 12, 2011 10:38 AM