


![]() Girls around the world have looked up to Nancy Drew for generations. Her intellect and courage are timeless, and she's been depicted in novels, comic books, movies and TV shows. It would be a mistake to dismiss her as belonging to the realm of tween girls, because without her, we might never have met Buffy Summers, Dana Scully, or Veronica Mars, just to name a few.
Girls around the world have looked up to Nancy Drew for generations. Her intellect and courage are timeless, and she's been depicted in novels, comic books, movies and TV shows. It would be a mistake to dismiss her as belonging to the realm of tween girls, because without her, we might never have met Buffy Summers, Dana Scully, or Veronica Mars, just to name a few.
Her Interactive has been cranking out Nancy Drew games since 1996, and Ransom of the Seven Ships is their 20th point-and-click adventure. We've featured Lights, Camera, Curses! from their Nancy Drew Dossier series, but their hallmark is, and continues to be, the complex large file mysteries.
 A bit of background may be in order for those who may be unfamiliar with this girl detective. Nancy Drew has been solving cases and nabbing criminals in book form since 1930. She started out as a plucky blonde running errands for her father, lawyer Carson Drew, in her blue roadster. During her exploration of River Heights, she'd usually stumble upon a band of smugglers or counterfeiters and save the day with her quick thinking and seemingly inexhaustible personal talents. She could scuba dive, tap dance (in Morse Code!), ride horses and sail boats, just for starters.
Along the way, Nancy's tresses changed from blonde to titian, she aged from 16 to 18, went to college, fell in and out of love with Ned Nickerson, focused less on her social life and fashion, and developed into a modern young woman. Still as plucky as ever, today's books feature a Nancy that drives a hybrid, owns a cell phone, and solves cases at music festivals and on reality show sets.
The Her Interactive games portray Nancy as resourceful and intelligent as she ever was. She's in great demand all over the world as a teenage sleuth, having closed cases in France, Italy, Canada and Ireland, as well as across the United States. Her circle of friends includes cousins Bess Marvin and George Fayne (a girl, despite the masculine name).
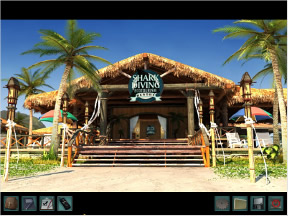
In Ransom of the Seven Ships, Nancy, George and Bess have won a free vacation at a tropical resort on Dread Isle, a small island east of the Bahamas. Nancy arrives a day after her friends and is shocked to find that Bess has been kidnapped, the resort owners are nowhere to be found, and she and George are cut off from communication to the outside world. A ransom note demands that, in order to save Bess, Nancy must find the treasure of El Toro, a Spanish captain whose fleet of seven galleons went down near the island almost 300 years ago.
Dread Isle is much too large to explore on foot, so one of Nancy's first tasks is to fix the resort's golf cart. Of course, before playing mechanic, she needs to find the key to open the shed where the cart's battery is kept. After replacing the battery, she puts her math skills to good use by determining how to fill each of the battery's cells with an equal amount of water. This mix of logic and object collecting is the backbone of the game's increasingly complex and intelligent puzzles.
 Analysis: Ransom of the Seven Ships is a puzzler's dream come true. Cryptograms, slider puzzles, matchstick manipulation, a Blokus variant, and the hardest game of underwater Sudoku you'll ever encounter are just a few of the many challenges you and Nancy must overcome. Even better? Every single one of these obstacles is seamlessly integrated into the intricate plot. With each solution you're one step closer to outwitting both the kidnappers and El Toro.
The mouse interface is incredibly intuitive, and gameplay is a piece of cake. The cursor changes from an arrow to a magnifying glass to a hand, depending on the options within the scene, and will glow red when you mouse over an object that can be examined more closely. An optional in-game tutorial will have you up and running in no time.
Dread Isle is a tropical paradise, and the graphics and soundtrack reflect the Caribbean influence perfectly. Steel drums abound, native birds sing in the trees, and even Nancy's footsteps in the sand sound authentic. The voice acting is fabulous, although there's no option to skip the sometimes longwinded discussions. And can we just talk about the exquisite graphics for a minute? The colors pop, the sea sparkles, and each location is lovingly rendered with a careful eye for texture and detail.
Unfortunately, the game's weakest point is the animation. The static first person scenes are absolutely perfect, but when you need to control Nancy from the third person perspective, the quality takes a step down. Speaking of that third person perspective, driving the golf cart, exploring in a sailboat and rock climbing are a treat the first few times, but grow tiresome fairly early on. Some sort of warp feature would be greatly appreciated.
 A staple of this series is the incorporation of historical facts and educational puzzles. Players will need to decipher a code using maritime signal flags, identify different types of bats, and learn how to plot longitude and latitude. Every single bit of information needed is in the game itself, so there's no need to consult external sources.
For an educational title aimed at young adults, this is a surprisingly difficult game. Make no mistake about it, these puzzles are hard. Thankfully, you can choose to play as a Junior or Senior Detective. The Junior level is highly recommended if you're unfamiliar with the series. Junior Detectives get the "task list" feature, a helpful tool when determining what to do next, and the overall difficulty level is lowered as well.
With hours and hours of casual gameplay, a solid plot, tons of educational content, gorgeous graphics, and a bevy of challenging puzzles, Nancy Drew: Ransom of the Seven Ships is no mere child's game.
![]() Windows:
Windows:
Large file, no demo available
Get the full version
![]() Mac OS X:
Mac OS X:
Not available.
Try Boot Camp or Parallels or CrossOver Games.
Note: Nancy Drew: Ransom of the Seven Seas is a large-file adventure game and, as such, no demo is available.


Nancy Drew: Ransom of the Seven Ships Walkthrough
General Strategies and Tips
You can play in either Junior or Senior Detective mode. The primary difference is that you will have access to a hint system (CouCou the parrot) in Junior mode. In addition, the puzzles in Junior mode are a bit easier.
Save your game often! You can die in this game and will have to restart from a save point.
You can refer to any of the informational displays in the resort lobby by using the walkie talkie to talk to George.
Sometimes talking to a character in the game will trigger the next series of events - if you feel stuck, revisit a character.
You can refill your oxygen tank at any time while on land by taking it to the diving closet at the resort. You should always have a full tank when diving to minimize the risk of running out of air.
Note: The puzzle solutions may vary from game to game, thus the solutions in this walkthrough may not be the same for your game.
Arriving at Resort
Click the Case File for your current assignment. Then click the plane ticket to leave for the Bahamas.
Bess has been kidnapped! After cut scene, talk to George to get the Kidnapper's Note with a set of directions.
Go left and notice the diving supplies closet. Click the panel to the right of the door for a puzzle. Your objective is to turn off all the lights.
Solution:
Number buttons 1 - 25 from the top left to the bottom right. Click in the following order: 21, 22, 25, 15, 10, 7 (for Junior) or 9, 8, 4, 14, 5, 20 (for Senior)
In diving closet, pick up the walkie talkie in the top left corner. You can use this to talk to George and access the informational displays in the lobby at any time. Also pick up scuba gear.
Notice the monkey display on the table and listen to the monkey noises. Pick up the monkey research notes on the table.
Look at the Bat Seeker display. Open the glass case to the right and take the Bat Device. Open to assemble the device. Your objective is to fit all parts on the device without overlap. Solution:
Screenshot
In the middle of the room is a wood table with a placard - examine the Book Exchange basket. Contains book called "In Search of the 7 Virtues Fleet". Notice it specifies that an explorer would require scuba gear, a metal detector, and a shovel.
Notice you can talk to Coucou the parrot in the corner. It wants fruit.
Take the exit with curtains to the dock. It leads to a sailboat that needs a sail.
Return to the resort and take the other exit. Outside is a locked shed. Return to the lobby and talk to George until you can talk about the key and get it from her.
Return to shed and use the key from the inventory to open. Read the note in the center describing the instructions for the golf cart battery.
Take the water dispenser and the shovel, located on the inside of the right door. Also notice the Sail Bin.
Now turn around to the golf cart. Open the seat to access the batteries. Use the water dispenser on the batteries. Your objective is to fill each tank to 100 units by evenly distributing a 60 unit dispenser 5 times. Solution:
Junior:
X    X


O    O


O    O


X    X


O    O


X    O


X    X


O    O


X    O


X    X


X    O


X    O


X    X


O    X


X    X
Senior:
X    O


O    O


O    O


O    X


O    X


X    O


O    X


X    O


O    O


X    X


X    X


X    X


X    O


O    X


X    X
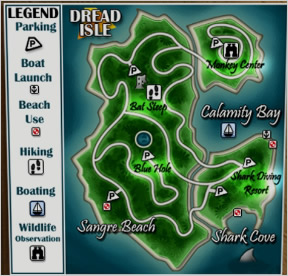
Explore the Island
Click the steering wheel to drive. Follow the southern path to Sangre Beach. You'll see the other golf cart there. Take the left path into the jungle.
Pick up the sandal. This will trigger a cutscene with Johnny Rolle, who tells you his story, mentions the monkeys on the island, and tells you that he has heard other men around.
Return to the resort and talk to George. There is now fruit on the table; click on the fruit and take a guava for the parrot.
Follow the map to Blue Hole. Examine the rock and notice there is a pulley missing. A footprint reveals that an extra-toed creature was there.
Follow the map to Dread Isle. There are monkeys there, but you cannot talk to them.
Follow the map to Bat Steep. Be careful scaling the cliff, as there are monkeys throwing rocks at you from the top. Notice that there is more than one cave on the side of the cliff.
At the top of the cliff you will encounter monkeys, but you cannot communicate with them and they are blocking your path.
The First Treasure
Go back to Shark Cove. Follow the directions on the Kidnapper's Note to find where the "other" treasure is buried. Start under the trees that make a W, and take three steps south. From that point, look at the object you are standing next to, and plan to take paces in the opposite direction. You will determine the number of paces by multiplying the number indicated on the kidnapper's note for that step times the number indicated by the object you are standing next to. For example, a tree with 4 palms will be four paces times the number on the map. When you finish the instructions, dig directly in front of you. You must right-click to use the shovel. Screenshot Right click to dig.
You will uncover El Toro's journal, which needs to be decoded.
Solutions: Screenshot 1 Screenshot 2 Screenshot 3 The missing letter in these images is "v".
Go back to Sangre Beach and talk to Johnny again. Discover that he has a metal detector and talk about what he has found. He has the battery you need, which he will give you if you find the beacon that he has lost. He describes the beacon as being between two rocks NW of the island.
Go back to the resort and open the shed, where there is a locked box that contains a sail. Find the correct combination for the lock by referring to the display case inside that shows the numbers corresponding to the flags on the lock. The correct combination is:
7 9 2 0 4
Walk to the dock and use the sail from your inventory to repair the boat. Then get in the boat and sail NW until you find two gray rocks near each other with a red flag between them. Take the flag, sail back to the dock, then take the flag to Johnny. When you tell him you retrieved his beacon, he will give you the battery. Place the battery in the Bat Seeker to repair it.
Find the Caridad
Talk to Johnny about the metal detector. He is willing to lend you his metal detector if you retrieve his compass, which the monkeys at Dread Isle have taken from him.
Go to Dread Isle and click on the left monkey by the coconuts. Tell him you want to play a game. Make sure that you refer to the research notes about the monkeys so that you know the values corresponding to the images (aim for the highest value items, especially coconuts). Play this game until you are offered the compass as a prize for winning.
Also play the games with the other monkeys and select the colored dial as your prize.
Go back to Sangre Beach and give the compass to Johnny, who will now lend you his metal detector.
Now that you have the metal detector, the scuba suit, and the shovel, you can explore the area where the ship sunk.
Pick up any bottle pieces you find along the way - if you complete the message from the bottles you will get a trophy at the end of the game.
El Toro's journal indicates that a ship sank a little SE of the island. When you get to the ring of rocks there, save the game and dive in.
Now you can use the metal detector to find the sunken treasure a little to the right of the ship. Screenshot
To open the treasure, you'll be presented with a colors sudoku puzzle. Solution: Screenshot (Senior)
Junior solution:
1= Yellow, 2 = light green... etc.
1 2 3      9 4 7     6 8 5


4 5 6      8 2 1     7 9 3


7 8 9      5 3 6     4 1 2


9 6 2      4 7 5     8 3 1


8 1 4      3 9 2     5 6 7


3 7 5      1 6 8     9 2 4


2 9 1      6 5 4     3 7 8


6 4 8      7 1 3     2 5 9


5 3 7      2 8 9     1 4 6
Inside the chest is as colored dial and an astrolabe.
Also try to grab a piece of coral while diving before returning to the ship.
Return to the monkey research facility and play the game again with the middle monkey to receive a pulley.
Go to the Blue Hole and use your new pulley on the bottom screw where the pulleys are located. You will now have access to this pulley puzzle.
Solution:
If the pulleys are lettered:
A D
C B
Then use the pulleys in the following order: B C D B A D.
You will receive another colored dial upon completion of the pulley puzzle.
Get Astrolabe Stand
Go up the cliff at the Blue Hole and give the monkeys the coral to get past them. You will find a small hole in the ground.
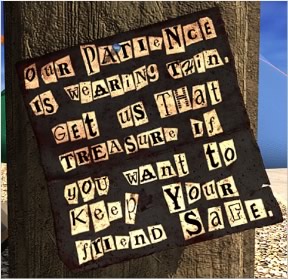
Return to the resort and check in with George. Go to the dock entrance to find the threatening note on the Post.
With the astrolabe, you can decode the rest of the journal. For these pages, a symbol can represent multiple letter combinations.
Solutions:
Screenshot 1
Screenshot 2
Screenshot 3
Screenshot 4
Screenshot 5
Once you have decoded the final pages, turn to the page with the round object on a stand and Nancy will observe that it looks like the parrot's perch at the resort.
Talk to the parrot, and make sure you have some fruit. (You can win fruit by playing games with the monkeys if you need it.) The parrot wants a driftwood perch if you are taking his.
The parrot has very particular requirements for his perch. Driftwood pieces are at the two beaches and the Blue Hole. Bring him one at a time until he likes one. Solution:
Senior: 4 branches, 2 leaves, and no bark
Junior: 3 branches, 2 leaves, bark
After you bring him the correct piece, watch the cutscene.
Exploring Bat Steep
Return to the Bat Steep. El Toro's journal describes a species of bat they befriended. Compare his description to the information on the bat display in the lobby.
Waterhouse's Leaf Notes
It will also tell you the frequency of their sounds.
16 KmHz
Now on the bat cliffs you can use the Bat Device to determine which cave contains the bats El Toro befriended by comparing the frequencies.
Once you find the correct cave, there will be a jade engraving. Push it to fall into a trap.
Use the elaborate mirror setup to escape. Solution (senior): Screenshot
You will receive a colored dial and a slate with a series of symbols translating scary words.
Now call George on the walkie talkie - she will come rescue you, and you will now control her character.
George must go back to the cliffs and find the cave with a skull and crossbones on the outside. Examine to start the camel puzzle.
Use permanent pieces to solve camel puzzle - it is in nine sections and is actually a slider puzzle. When you have correctly placed the pieces, Nancy and George will have a dialog about the puzzle and you can do the slider puzzle. Screenshot
After completing slider puzzle, cave will open and trigger cutscene with Nancy and George.
At the right side of the entrance is a pile of objects - examine to get the driver's license.
Return to Sangre Beach to confront Johnny about his identity.
Return to top of Bat Steep to the hole you found before.
Use rod from perch on hole in ground, then astrolabe on stand. Click on astrolabe to see someone moving in the jungle.
Look at the journal's image of the astrolabe - it gives set of instructions for Dove Isle and Moon Reef. (The arrows with degrees). These may be different every time.
Halfmoon Reef
Sail to Halfmoon Reef to the NE and look at the sundials. They spell ATOCHA.
Leave area - Nancy will automatically call George. George agrees to look at placard in shed that says Atocha to see date on it. You will now be in control of George's character.
Go to shed - monkeys have broken in. Turns out they have stolen the Atocha commemorative coin. Call Nancy on walkie talkie - she will instruct you to go play a game with the monkeys to win it back. Play the center game and win back the coin - you now know the date. 9/6/1622
You need the dials to match the date: a =9, t =6, o=1, c=6, h=2, a=2. However moving any dial effects other dials. To set the dials,
Senior: Set c to 6, h to 2, o to 1, a(first one) to 6, a(second one) to 2, and t to 9.
Junior: Set o to 1, a to 6, c to 6, h to 2, a to 2, t to 9.
You will hear a click. Click the structure to slide sundials plate off and reveal a sheet of rules, and a coin with an owl shape. Notice this owl is the same shape as one in the journal.
Now go to Halfmoon Reef at 40 NE.
Dive down and avoid the jellyfish. You'll notice the symbols along the cliffs that match those you found on the item in the bat cave. When you reach the bottom, go left and pick up a shell near the helmet on the ground. Swim back to the right to find a cave (with the "death" symbol - it is referenced in the journal) containing an octopus. When you try to enter, the octopus blocks you. Notice the shells around the cave - now place your shell on the rock furthest from the octopus. It will take the bait and leave you access to the cave.
This will open a puzzle. Use the notes from the journal to help solve. It says: two makes 3 squares, 3 makes 4, 4 makes 5. This refers to how many lines you move to create the indicated number of squares.
Solution:
Two to three - Take the loose one on the bottom and complete the square right above. Take the dangling one on the left and place between the two to the right.
Three to four - Take the dangling one on the left and use it to complete the square right next to it on the bottom row. The other two you need to move are on the very right. Take one and complete the top right square and the other to complete the bottom right square.
Four to five - Your final shape will be like a plus sign. Take two from the bottom left and two from the top right to complete the five squares in the center.
Take the colored dial and resurface. While resurfacing, watch the pressure meter under your air supply and care not to resurface too quickly.
Revisit Shark Cove & Favor for Johnny
Return to Shark Cove. With your metal detector, you can explore the area that contained El Toro's journal.
Explore area until you find Bess's bracelet, 3 animal coins, and a device with room for 6 animal coins. The you should have all the animal coins once you have thoroughly swept the beach. Then return and do the animal sliding puzzle. Your objective is to slide the animals over the center shape such that the shapes match.
Solution:
Move upper left coin to center. Move the cat on the bottom left until the head is upward, and move to center. Finally rotate bird in lower right clockwise three times and move to center.
Device opens giving you a colored dial!
Head to Blue Hole and try to scuba dive in the pool. Nancy says it is too dark to see.
Return to Johnny Rolle. Talk to him about an undercover glowstick. He will give you one if you program his GPS with waypoints.
Enter the waypoints using the map he gives you. One should be given to you: just enter it in the GPS. The others must be deduced using the map. Each line is three minutes.
Solution:
The waypoints are:
Half Moon Bay N23"57', W74"30'
Danger Reef N24"09', W74"18'
Kraken Whirlpool N23"54', W74"12'
Dread Isle: N24"00', W73"24'
Shipwreck Shoals N24"06', W74"00'
Gull Rock N23"51', W73"48'
USS Cyclops N24"09', W73"42'
Bermuda Triangle N24"18', W73"27'
Dread Isle N24"0', W73"24'
Return to Johnny and trade programmed GPS for lightstick.
Diving the Blue Hole
Make sure to refill your air tank at the resort if it's not full. Then go back to Blue Hole for another attempt at diving. You should have all six colored dials at this point in the game.
To navigate the system of doorways in the tunnels you'll need to refer to the part of the journal regarding the caves which reads: Danger! Heed this warning: Death awaits all who enter these caves unprepared. Poisonous guardians of the deep strike with no warning. Notice that many of these words are on the symbol translation sheet from bat cave.
You need to follow the symbols on the doors in the order they appear in the warning.
Solution:
Bottom right tunnel, bottom right tunnel, upper right tunnel, upper right tunnel. In the room that splits into three paths here, you can take the upper left tunnel to refill your air in an abandoned air tank. Otherwise (or afterwards) to right until the tunnel ends.
Here you must place the six colored dials you've found throughout the game. Notice each dial has an animal on it. Now examine the Code of Conduct document you found at Dove Cove. The names of all six animals appear in the document. Screenshot The order they appear is the order the dials must be placed.
Solution:
The order is bee, ant, donkey, owl, panther, camel.
Once they are in the proper positions, you must match the colors. Solution:
Red matches on the bee and ant, yellow on ant and owl, green on owl and panther, blue on panther and camel, green/white on camel and donkey.
Completing the puzzle will open a passageway to an hourglass puzzle. The journal refers to hourglasses once at the end, saying What a blessing it would be for the sands of time to run out for all at the exact same time.
Also notice the seven letters written in black in the journal: H G C P T C D. These letters correspond with the names on the hourglasses. This is the order they must be turned.
First grab the key on Humilidad. Then begin turning them in the following order so that they run out at approximately the same time: Humilidad, wait 2 seconds, Generosidad, wait 5 seconds, Castidad, wait 5 seconds, Paciencia, wait four seconds, Templanza, wait 5 seconds, Caridad, wait 4 seconds, Diligencia. The timing is tricky to get them to stop at the same time but play with them until you get a feel for their speed.
Once you've solved the puzzle and have the key, you can open the doors to receive the treasure map! Now head back out the tunnels the way you came. (Lower left, upper left, left, left). If you need air, go to the tunnel to the upper left in the room that is split three ways to access the air tank.
Go back to the resort and talk to George. Receive note instructing Nancy to deliver map to Johnny alone. Return to Johnny.
Finding Bess
After cutscene, meet Bess and find way out of hole. Use the key in your inventory from the hourglass puzzle on the small hole to the right of the door next to Bess.
In the next room, collect the key in the skeleton's hand.
There is an optional puzzle here to get El Toro's treasure. On the last page of the journal is an image of a key in front of a symbol. That symbol matches one of the ones in the box with the dozens of keyholes. Using the hourglass key in that keyhole will reveal a hidden safe behind the bull painting. Now notice that there are several images around the room: the bull, the sword, the shield, and the images in the two paintings. Each of these images appeared in the journal. The safe is locked with nine symbols: five are ON the these images in the room. You must hit the symbols in the order they were written about in the journal to open the safe.
Solution:
5 x x 4 1
x 2 3 x
Now that you have the briefcase, you must open it. Use both keys in the two keyholes. Hitting the buttons affects the other buttons.
Solution:
I, II, IV, V
Yay you got El Toro's treasure! Now to escape the room.
Return to the panel with all the keyholes. Their placement will change every time. Recall the clues on the last page of El Toro's notebook regarding this. This is a logic puzzle where you use those clues to determine which keyhole is correct.
Once you get the correct keyhole, you can escape. Congratulations!
Wow. Awesome walkthrough! But, are the solutions you have for the puzzles only for senior detective mode? Because, your solution for the water in the golf cart did not work for junior mode.
There is a demo available here - you won't be able to continue from your saved game and will need to redownload the full game, but if you haven't played a Nancy Drew game before, this will give you a good taste of what it's like: http://www.herinteractive.com/games/ran/RAN_demo.zip (248Mb)
Allie - The walkthrough has been updated to include junior solutions as well, thanks for the reminder!
Easter egg:
Take the trail on the south of the island, where there is no road, but tire marks in the pink sand. Along the trail there will be a hidden "path" of shrubs and pebbles you can drive on. Keep going until you reach a clearing.
I don't understand where the walk thru is.
Is the "seven ships" game a brand new one?
[Edit: Do you see the blue rectangle above the comments? The walkthrough is there. Click on the spoiler tag to view it (requires Javascript). Yes, this is a new Nancy Drew adventure. -Jay]
I've played over 100 game with the notch eared monkey but still no compass. What am I doing wrong?
Boopbug - You've been winning the coconut game and it hasn't given you the compass as a prize option? It's possible that you have to read the monkey pamphlet in the lobby about notch-eared monkeys first, or have to glance at the monkey research notes. And you've talked to Johnny about acquiring the compass for him?
I've done all of that and still no compass.
Guess I'll start again.
I don't understand the golf cart battery solution... help?
MaryEllen - The golf cart battery solution indicates which battery valves to leave open (O) and which to close (X).
For example,
XO
OO
OO
means to close just the top left battery, then click one of the blue water dispensers at the bottom.
Does that help?
There's another easter egg underwater by the ship. Dig dig until you find it!
I have not received the pulley from the game with the middle monkey. Do I need to have the coral to get the pulley as a prize? I have already given the coral to the monkeys on the cliff. Is there a way for me to get another piece of coral because I have gone back and it doesn't let me stop at the coral to get more.
I received the pulley from the monkey on the right when I won the color puzzle game.
That was it! Thanks very much!
I must be stupid, I don't get the shark cove directions at all, where do I need to go to dig up the "other" treasure?
Laurie - Shark Cove is the other beach South of the resort. When you get to the beach, go to the area where the view changes to a birds-eye view. Then walk around until you find the two trees that look like a W. At this point, refer to the map that you received at the beginning of the game from George (the Kidnapper's note). Does this help?
i cannot figure out how to do the batteries in the bat thing. can you help me?
JIGuest - Do you mean repairing the inside of the bat device?
https://jayisgames.com/images/ransom-of-the-seven-ships/bat1.jpg
I'm having problems digging. I get the red shovel & the detector is beeping, but I can't seem to dig. What am I missing?
Just to clarify, this is with the underwater search for the 2nd treasure. Can't seem to get the shovel to dig. I'm in the right spot.
NDrew - You dig by right-clicking.
I don't get how to resurface to the boat. Help, I keep dying.
Annette - Are you looking for the sunken treasure? If so, to resurface you need to swim back to the boat. It is to the left of the treasure.
How do you scuba dive? Do I need something other than the scuba suit to dive and what do I press to dive once I'm over the dive site? Do I need to anchor my boat? If so, how? HELP Eileen! :) Thank you!
I'm australian, I spent about half an hour trying to input the date on the atocha as 6/9/1622 as we would in Aussieland! thanks Jay.
Laurie - :) In order to scuba dive...
..you need at least the scuba suit, a shovel, and a metal detector. Then you'll probably need the treasure that is found using the Kidnapper's Map (the one with all the numbers of paces). Do you have those things? Once you do, you can go to the correct location and the view will change so that you are on the boat and can click an arrow to dive off.
How do you get a piece of coral. I can dive and all and have found the chest, but just can't seem to find a piece of coral.
Tee - A little to the east of the boat there should be a screen with a sea urchin and some brain coral. Try both digging and just clicking the coral.
How to get the brain coral? i tried to click several times on it but still can't see it through my goggle just like in the demo on youtube.
Help! I only found 5 colored dials??? what did I do wrong? The walkthrough (as far as I can tell) only includes the location of 5 of them??
I am stuck at the part where i am meant to do the gps. i can't find half moon bay. can anyone help
I've completed the underwater sudoku several times and each time I end up short one #7 turquoise block. All my other nos. are correct except I'm always short by one...what's up ??
Beth - If you are following the solution on this site,
the image leaves out the last turquoise block so I could get the screenshot. It goes in the top right set of squares.
Rach - Half Moon Bay is at..
Half Moon Bay N23"57', W74"30'
Amantisda - Try clicking on the sea urchin on that screen as well.
Marc - Dial locations:
Inside Caridad sunken treasure chest.
Win monkey game.
Completing pulley puzzle at Blue Hole.
Completing mirror puzzle in Bat cave.
Inside chest at Half Moon Reef.
Strange animal device at Shark Cove.
The only thing I can think of is not getting the one from the monkey games; Do I need to play coconut toss? I've played it many times and no dial.
Marc - Just play both of the other ones until you get it. I think it can be a prize for either of the other two games.
I am stuck on where you have to put in the coordinates for the gps...HELP?!
There is no way I can do the hourglass puzzle. I'm completely stuck. Help!!
Just sail south east and you will find a small horseshoe shaped island.
I have the bat seeker and have found the correct cave. However, I see no jade carving to press. All I see is darkness.
Meredith - If you are in the right cave, the jade carving should be on the wall on the left. Perhaps it isn't the right cave? It should be 16 KmHz frequency.
Thanks, Eileen. I figured out the problem. I didn't realize you had to do things in a certain order. Even though I used common sense to figure out what to do with the bat seeked, the game wouldn't let me go far enough into the cave to see the jade until after I had finished translating the book.
I've run out of air on my scuba tank. I still need to get the treasure. How do I get more air? HELP!!
You can get more air by returning to the resort lobby and using the air tank in the scuba closet (where you first found the suit). In fact you should be sure to refill your tank to the max before you ever go scuba diving.
I can't end the game I have tried several times. Many times I have it narrowed down to one and of course its the wrong one. Do I need to use a certain key for this.
JIGuest - use the key from the skeleton's hand. For the correct keyhole, it helped me to draw out a chart of circles to represent the keyholes and then cross them out as I went through the list of clues and eliminated them. Good luck!
where do i dive down to find the egg and ho w do i dive down
To dive...
You have to have gotten into the dive closet to the left of the desk. Get the wet suit and make sure the air bottle is full. You need to get the metal detector from the beach bum. You will have to get his compass from the notch eared monkey first. Take the sail boat to the south west to find the dive site. Click on the ladder and dive. Watch the levels for air and the metal detector.
Good Luck!
Where do you find the coordinates to program into the GPS system? The only ones I know are Half Moon Bay and Dread Isle!
Use the chart in your inventory to program the GPS
how do i solve the note that given by the kidnapper?
I can't get out of the cave. I tried every key possible and nothing.
I have the tressure but i cant get out.
Please Heeeeeeelp!!!!!!!
By the way, excellent Walkthrough
Great walkthrough!
JIGuest - Did you look at the walkthrough's instructions about the kidnapper's note?
The note describes the number of paces you have to walk in relation to a series of landmarks that correspond with the numbers. You do this at Shark's Cove. Please check the walkthrough for more detailed instructions.
criollita - The final puzzle with the key changes every time, so you'll have to start over if you get it wrong. All I can really suggest is that you draw a diagram and cross off the possible keys when you go through the list of clues. Good luck!
I can't figure out the Astolabe on top of the rock to find the locations. Please help.
Austin!!! - Once you have the astrolabe set up, you just have to look in all the locations to find the different areas. Their coordinates are given in the walkthrough above as well.
I have tried to figure out the whole skeleton key puzzle at the end so many times! i can't figure it out!!! i tried the chart idea and it didnt work!! what do i do?
count me with those that cannot figure out that last key puzzle. I am following the guide but I am stuck on if the plate does not have 2 screws its bronze...I have lots of plates left how do i know which to eliminate?
I am having a hard time saving the game. I have to keep starting over. Help!!!!
[Edit: With technical problems as this, the best solution is always to contact the customer support of the website, you purchased the game from ~ Kayleigh]
How do you get to Halfmoon Reef at 40 NE? Where is it?
When you leave the dock, sail south and east. You should find it.
I cannot seem to find the right cave at the Bat Mountain. I found one with 12, 22, and 24. Is there a fourth cave?
Look in the upper left corner of the cliff.
I have 5 of the 6 colorful dials. I know that my next move is to dive at Half-moon reef, but when I dive the only danger that faces me is sharks. How do I get rid of them?
Gamegirl24/7 - I don't remember any sharks at Half Moon Reef.. There should just be jellyfish on the way down, and the octopus blocking the cave. Are you sure you're in the right place?
Hi, how can I get to the dove shaped reef? I found the horseshoe one and the half moon one, and also how do I put directions on the gps? I don't even have a gps. Please help. Thank you.
Flori - The dove-shaped island is SW of the main island. Programming Johnny's GPS is a specific task you get later in the game, its not actually for helping you navigate.
I have tried to refill my scuba tank only it isn't letting me. Is there something specific I should be doing? I'm thinking there may be a glitch! There is no tank option in my backpack to place in the refill machine, is that normal?
Jenny - Open the scuba closet in the resort, there should be an air tank in one of the top corners. Click it, and it will place your suit automatically. Then you can click again to fill the tank.
I decided to buy this game because it was so highly praised, and because it seemed to literally flow over with puzzles.
That was a mistake.
Everything about this game is well done, except for the most important thing. The puzzles.
There are puzzles where the instructions are too vague:
Like the treasure hunt at the beginning, where the whole opposite direction makes absolutely no sense, as it's in no way clear whether it's the opposite direction of which you came from, or the opposite direction of what the object is pointing towards (which is always north for the palms, and indeterminable for some of the other objects)
There are puzzles that are harder to complete than they rightfully should be:
Like the sudoku puzzle, where some of the colours look too much like each other, especially so when overgrown with rust or moss or whatever the green stuff is.
And then there are points in the game where you give up, go look at the walkthrough, only to find out that you're actually working on something that you shouldn't do until much later when you've done a billion other things, and then get some of the game and the solutions spoiled, greatly reducing the joy of it.
This is the first time I play a Nancy Drew game, and yes I know it's a big series, but they have yet a lot to learn regarding implementation of puzzles, if they want to make a great game. Make it clearer how to solve a puzzle, make items more distinguishable, and please, pretty please invoke some kind of task line, so that you don't spend lots of time on a task, only to find out that it requires a lot of other tasks done first:
Like diving into the underwater maze at Blue Hole, only to find out from the walkthrough that you need all 6 dials.
Btw, there's a problem with the walkthrough put up. It's not accurate since many of the puzzles are made at random whenever you start a new game. So many of the puzzle solutions given won't work for anybody.
somebody help! i have all six dials, but can't get figure out how to get nancy to try to dive into the pool at the blue hole.
Help! I am stuck! I have set up the astrolabe but I don't know how to set the journal's coordinates as there is no 110 or 150 degrees to click on. What do I do?
I also can't find the sundials that spell ATOCHA. Do I need to finish the astrolabe before I can find them?
Now that I have the metal detector, I am supposed to go to shark cove only it won't let me go where I dug up the journal! What has to be done before it will let me enter?
Okay, what is this "rules of conduct" that is the only thing I have not figured out that I can see, and I cannot get the glowlight or the gps. Please help
I cannot find the shipwreck. I have been around in my sailboat everywhere. Please help!!!!!
Lori - Have you received the glowsticks yet?
jennykat - You might need to have three animal coins before you can reach the Shark Cove area, but I'm not certain. You can wait until pretty late in the game to do the treasure hunt there.
Joy - The Rules of Conduct are found..
..on Dove Isle when you solve the Atocha puzzle.
The glowstick and GPS..
..are both given to you by Johnny Rolle.
Sarah - The shipwreck is in a ring of rocks in the southeast corner of the map. It's possible that you have to obtain and read El Toro's journal before you can reach it - have you done that?
no, i haven't received the glowsticks yet. when i go to talk with him it doesn't hace the option for that. The walk through says that nancy tries to dive in the pool but says it's too dark, then goes for the glow stick. I can't get that to happen.
i cant get nancy to ask johnny about the metal detector. ive already gotten the battery from him and been to the monkey cliff. what else do i need to do?
HELP HELP HELP
ive read the advice given on how to scuba...but i cant get my view to change so i can jump in the water. i have everything i need - the shovel, the metal detector, the scuba suit, and the journal....im in the half moon shaped island SE of the docks...am i missing something???
If you've done everything and can't get Nancy to ask for the metal detector, then you need to go back and talk to George one more time. George will actually have a conversation with you this time. After this conversation, go back to the beach and talk to the guy. Now Nancy will ask for the metal detector.
Help!!! Im at the part where you have to get the pulley from the monkey on the right but every time ive won, it just gives me useless prizes and not the pulley itself. Have i missed anything??
To find the pulley.... Go up and read in the walk through about finding the Caridad.
Good Luck!
thanx for your quick reply Ive found the rope puzzle but nancy never mentions about it missing the pulley or the footprints, i have all the other discs but that one
And ive played the monkeys games loads of times but they just offer me fruit or useless stuff Once again thank you for your help
I cannot get back into Shark Cove to look for the bracelet and #6. That seems to be the last thing I need to do. I've checked w/ George, Poole, and the bird...no more clues. Please help, if you can.
Im completely stuck on the sudoko puzzle. Its really giving me a headache. is there a spoiler for the junior version?
I'm trying to get the first treasure at Shark Cove. I start at the W and go south 3 steps, then west 3 steps, then north 3 steps, then east 9 steps which puts me near nothing. I don't know where to go from there. Have I missed something?
sharks cove,
i'm following the directions and its not working!! jsut to clarify where about at the W palm tree do you start from and are the direction north = up south = down etc? (as in up = top of the screen)
please, i cant figure out how to resurface from looking for the treasure by the sunken ship i havent found the treasure but i only have about 5 seconds just to get out of the water , i cant figure out how to get out of the water at all/.
Lea and Feebs - For the shark cove treasure, start directly under the W. South is down, north is up, east is right, and west is left. Then,
..go south 3 from the W, west 3 from the coconuts, north 9 from the plant, west 9 from the palm trees, north 2 from the coconuts, etc. I hope this helps. You can also check the walkthrough for a screenshot of the location of the treasure.
Kelly - The walkthrough above contains a solution for the junior sudoku.
pam - To get out of the water you just have to keep going left. If you don't have enough air, you may have to restart from a save point.
I CANT DIVE!!!! I Have it all. I went to the half circle place, but there is no ladder on the side of my boat that i can see.
When I found the treasure chest open it and got the items, I can not find the Easter egg and I can not get back to the boat. Help
I have started the game for a third time and I cant ever get johnny to talk to me about the metal detector! What can I do?
dayle - Have you already followed the Kidnapper's map and found the journal? If you have done everything you can, this sounds like a bug. You should try contacting the developer or publisher with your issue.
frankie - Do you mean you can't get back to the shipwreck, or the sailboat? I think you only get one chance with the shipwreck scene, the easter egg isn't necessary to finish the game. The sailboat you can always access by the dock.
I found the treasure chest took the goodies but the game want let me go back to the surface. I keep drowning and ask me to try again. I can get back the surface on other saved stops but I want have the items from the treasure chest.help
Frankie - If you are running out of air, I'm afraid you may have to backtrack to a saved point and start the dive over, doing it more quickly. That happened to me as well.
Eileen, yes I have found the journal, given him the battery, have done everything in the walkthrough three times. I agree, I think it is a bug. I have looked for patches, but have found none. Maybe I will remove from my computer then reload. I am at my wits end.
Thanks anyway,
Dayle- I had the same issue. All I did was sail around out by the wreak site and also try going and talking to george. see if that works.
Help Me
I am trying to get into shark cove to get the last dial. I can't get into where i found the journal. And the metal detector wont work on the beach so I can't find the braclet or the coins to get the last dial.
Nevermind I finally got it figured out. I forgot to pick up a coin back at dove island.
Help! I have just finished the metal disk wheel. I talked to Johnny but it does't give me any options except goodbye. How do I get glow sticks or gps from him?
I CANT SCUBA DIVE FOR ANYTHING... im tryin in the ring of rocks but it wont work at all. what do i do?
I can't find El toro's journal in my inventory or anywhere.... where is it?
Sylvia - Once you have found it, it should appear as a dark brown book in your inventory.
help me please! I feel so stupid. I can't get out of the water. I'm running out of air and I can't get out!
[Edit by Kayleigh]
I can't find the sundials have been all around the island am I being stupid, please help.
sandra - Are you at Halfmoon Reef? The sundials aren't on the main island. If you sail to Halfmoon Reef, as soon as you leave the boat you'll be taken to the scene with the sundials.
I think I found the missing pulley. does it look like a stapler laying on it's side?? if so and it is the pulley, I cannot put it on the pulley system. either it won't let me or I'm missing something, or did not do something before putting it on. I read the walkthrough, and does make sense. but is this the monkey with the six toes who holds the pulley part hostage??? if not, where is the six-toed little rascal found!?!?
im stuck in the shark cove directions can u please just tell me the the location??ive been trying for days..i feel soo stupid...and wheres the scuba diving area??
I think I know what I did wrong. I had to find another walkthrough to know I was getting ahead of the game.
Sherry - There is a screenshot in the walkthrough above showing the location of the treasure at Shark's Cove.
To scuba dive, once you have the scuba gear, sail to the ring of rocks a little southeast of the island.
Hi I am stuck in this game. I have played the monkeys 245 times and I still haven't got the compass, so can you tell me what i am doing wrong? I could use your help, thank you.
kathy
Kathleen - There may be another step you have to take before you have access to the compass. Is there anything else you can do in the game?
I figured it out!!! To get the pulley:
it's the monkey in the tree you have to play with, the colouring game. As long as you have more points than the monkey, you still win even if you can't fill in all the spaces.
I still cannot get the glow sticks or gps from Johnny. Have been trying since Sept. can anyone help me. What have I missed? double checked with walk through and can't find anything. Johnny just won't talk to me.
how do you get out of the cave. I have read and re-read the journal followed the instructions which sometime contridict themselves and cannot seem to hit the right keyhole......whats up with that
I can not get off the boat I keep going around in circls. Where is the location for the wreackage.
I'm trying to figure out how to do the whole picking up the rock thing the pulley thing please help!!! it doesnt pick it up the rope keeps busting!!
dre - Did you look at the walkthrough? Pulley puzzle solution:
If the pulleys are lettered:
A D
C B
Then use the pulleys in the following order: B C D B A D.
I gave the monkeys the sea urchin but im still getting rocks thrown at me, why?
I cannot beat that stupid monkey for the compass. Any ideas?
I can't get the gear from the coconut monkey. I'd played serve times and won a lot in a role but he still won't reveal the gear i need. Can you help me
Where is the sundial found?
Instead of a gear it was the compass. Any idea how to get it?
I feel that there is a glitch in the software when it comes to the hourglasses. I turn over the "H" hourglass and 2 seconds later, I turn over the "G" hourglass and I crash everytime. I've tried turning the 2nd hourglass anywhere between 1 and 5 seconds and each time, I crash. There is no key everytime I restart the hourglasses again. I think that is the problem! Please help me get past this stage!!! Otherwise, I will have to start somewhere at an earlier point again...
Does anyone have problems with windows crashing when I am sailing? Updated video driver, but it still crashes. Help!
How do you open the scuba gear closet?!
i need help with the hourglasses i tried and tried but it wouldnt work what do i do
where is the extra-toed monkey i get the missing pully from at?
I am trying to do the pulleys. Checked the walkthrough but mine doesnt have letters. It has dots. Help please.
I have tried the hourglasses too many times and it always says I made a boo boo at the 5th hourglass. I have tried many different times that I have been given in the hints but nothing works at all. I am at a standstill. I have the right order but the times just will not work. I have tried everything.
I have everything i need to go diving
the scuba gear, metal detector, and el toros book which i've decoded most of the way
but it won't let me dive. I go to the dive site
inside the circle of rocks at the bottom of the island
but all it does is keep in the same view. is there something i'm missing? The game won't let me go on until i dive, but i can't. HELP!!!
I am stuck on the hour glasses. I have the order and I have tried counting - and even using the lines mentioned at another walkthrough site - When I get to Paciencia I get the boo boo message. I checked the order and I do have it correct. Please any suggestions?? It's driving me crazy. I have been working with this for at least a week.
How do you get the driftwood, and how do you get the parrot to give you the stand? Having pretty good time with the game, and your spoilers have helped!
I'm usually a big fan of Nancy drew games, but I didn't like this one. The puzzles are always hard, but some of them were ridiculously tricky this time. And usually at least there are some interesting characters around to talk to, which makes for something to do when you get stuck.
One of the things I usually love about Nancy Drew is that you get a lot of story in the dialogues. It allows you to spin out your own theories on what's going on. 7 ships only has George, who doesn't know any more then you do. The hostile jerk who doesn't want to talk to you and the annoying parrot. That just leaves Nancy running around the island, again and again and again....
Try Castle Malloy if you haven't played Nancy Drew yet. I found it far more enjoyable.
Anne - Do you have the shovel?
nkc40 - The driftwood is located at the two beaches and the Blue Hole. Bring pieces to the parrot one by one until he likes one.
Can somebody post a screen shot of the "ring of rocks" for the Caridad diving site? I have everything needed, and have solved the puzzles needed, and am in what appears to be the only ring of rocks, a circle with an opening that results in a sort of pool. Nothing happens? I can't find any other place with a ring of rocks?
I have the scuba suit! But how do I dive into the Blue Hole?! I can't get that to happen!
I have done everything that I think there is to do to get johnny to talk about the metal detector, to get the compass, but he never does... What do I do?
I can't match the colors of dials according to the spoiler. is the yellow como wrong?
I got the brass dial i'm up on bat steep, i decoded the journal it says i need something a fathom tall which is coucuo's perch but when i go to coucou there is nothing about a perch i can click on all i can do is ask for a hint (which dose not help) or do a trick so what do i do?
help im stuck where you need to find the treasure but my air tank keeps running out please help
so i see people have trouble obtaining the compass and i have the same problem. the bum never mentions it and he won't talk to me. i have nothing else i can do on the island without obtaining the compass first. the monkey won't give it to me if it hasn't been mentioned and hmmm, guess who won't mention it?
For those of you who can't get the guy to talk about his metal detector: the littlest thing can keep you from triggering that conversation. For me, it was that I hadn't looked at the last page of El Toro's journal! Make sure you look at EVERYTHING.
Now I'm stuck at Half Moon Reef. How do you dive here? I did the sundial stuff, but I can't figure out how/where to dive.
Is there anyway to get more air? I'm working on the puzzle in the cave with the octopus and I'm running out of air. Is there something else I need to do so I don't run out of air?
i cant get the owl dial. i have gone back and tried to dig up the metal thing again but i cant find it all can you help me?
Having problems with the Junior color sudoku puzzle. The walk through doesn't help. IT states 1=yellow 2=light green and then gives you 3 sets of 3 rows of numbers, but if the colors are listed 1-9 it doesn't work because of the blocks in the puzzle you can't change. IS there a screen shot you can post like in the senior solution?? I can't figure it out and now I'm stuck!! Can someone help me!!
Thanks Joan!!
Hi I need help i'm stuck at a point? i don't know what to do once i have the pulley and where is the guy? i need to give him some battery for my bat locater?? pleez help me!!
Umm.. im stuck at the pulleys part on the junior level??? it has dots not colors and i have no idea what to do... can somebody please help me???
Hi everyone, I am so stuck already lol. I'm wondering if I am missing a step or something. I am trying to get the first treasure at Shark Cove. I have followed the steps,(did the x thing), and even looked at the screenshot of where to dig..."nothing". Any ideas?
I got it, I was starting at the wrong spot of the first trees. :)
I dont know what to do with the Astrolabe. i cant find the place to set it up, even though i swear ive climbed across the whole top of the cliff. if i stand in the cave where you get stuck, what do i do from there? Very specific instructions would be nice :) help please!!
I am so confused by the first part of the Sharks Cove??? I have read walkthough/spoiler and Kiddnap notes, I have dug over 50 Holes and I still can't find any Teasure/book????
I go to the palms , stand in the middle under the 'W' and take 3 paces downwards....then what? this were the confusion starts. what exactly am I timesing what by???? the 4 palms by what? or the 3 round things on sticks I am standing next to? there is no times no. on the kiddnap sheet for this? What direction should I go....Please help!!!!!!!
To get El Toro's Journal, you need to follow the kidnapper's notes. You can use your keyboard to count if your mouse isn't doing it for you.
Start at palm tree and go the following directions and paces: S3, W3, N9, W9, N2, W3, S15, W4, S6, E12, N5, E6, S4, E8, N2.
Look at the screenshot in the walkthrough to see where you should dig.
I am having problems trying too find the right keyhole in El Troso"s room too finish game please help me.
JiGuest -
According to the walkthrough above the comments, the placement of the keyholes changes. Look for clues on the last page of El Toro's notebook.
I do that but just can't seem too get the right keyhole. I have been tryimg too do this for ages. but just can't get it right.
JiGuest -
Which column is the heart-shaped plate located?
Ok... I can't seem to win the coconut game. One time I actually managed to win (not sure how) and was NOT offered the compass as a prize) Personally I think the monkey cheats :P
If I play it often enough will the game eventually just give up and make the Monkey less good at throwing, or should I just give up now and move on and never finish this thing?
Valuable discussion , I learned a lot from the specifics , Does someone know where I might get access to a template 2014 IRS W-9 form to complete ?
Update