
![]() NEW VERSION UPLOADED 2014-04-05
NEW VERSION UPLOADED 2014-04-05
Disclosure: I was asked by the game's sponsor to help improve the game's English translation. I have not been paid for it in any way, nor did I change anything about the story or the text's structure.
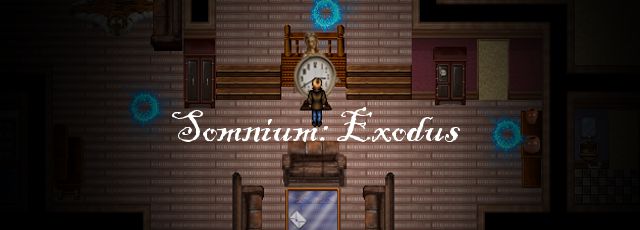
Azure Games' action adventure Somnium: Exodus is a horror game. Or maybe it's a science fiction story. Existential crisis? All three? Man, this is where the written medium really lets me down. Pretend I'm sauntering from streetlight to streetlight down a menacing dark street, looking mysterious and thoughtful with a bubble pipe as I speak, okay? As the game opens, you awaken, disoriented and in pain, in an abandoned hospital unable to remember your own name or why you're there. Strange things, dangerous things, seem to flit in and out of reality as you explore the city and empty streets, trying to find out what's going on... but the truth is stranger than fiction, and our world will never be the same once you discover it. Quick! Now find and play the spooky mystery sound effect from Earthbound! Doo-doo-doo-DOO-doo!
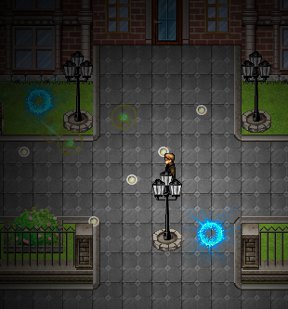 For the most part, Somnium: Exodus is a very straight-forward play. You move with [WASD] and the [arrow] keys, and interact with the [spacebar]. Clicking the star in the upper-right corner will open your skill tree, which you can put points in as you level up, both to grow stronger and activate/deactivate passive abilities such as being able to spot crucial items or skipping puzzles every ten minutes. Enemies, when you encounter them, will most often spawn periodically from the glowing blue circles, and attack by emitting bursts of orbs you'll want to dodge, and avoid touching the enemies themselves to boot. To fight back, you'll need to click them multiple times to destroy them. Your health is represented by a green bar, and your mental fortitude by a blue one, which depletes whenever you attack an enemy, and slowly regenerates over time. Health regenerates as well, though significantly more slowly, so be careful with baddies, since once you die, it's game over. The game autosaves for you each time you solve a puzzle or otherwise make story progress, but the only way you can manually save is by interacting with coffee machines.
 Analysis: Somnium: Exodus is an extremely ambitious game. It's not really scary so much as it is intriguing despite its excellent ominous atmosphere. The plot takes a lot of twists and turns in ways that can be hard to follow, which can make you wish the game kept all the text you found on hand for you to refer to whenever you wish, but darned if it isn't clever in a way that makes you want to keep following the trail of clues. It's sort of a shame that the profanity is so heavy and unnecessary at times, since players who don't care for it will be missing out on a clever science-fiction storyline, albeit one that ends on a big cliffhanger right as things start picking up. I want to call it Sliders meets a certain classic RPG I can't name because it would basically spoil everything. Somnium as a series has big plans for itself, and stands to be even bigger, badder, and more epic in the future considering the ways its storyline could lend itself to taking you some truly fascinating places... it just might be a ride that's less smooth than others.
The problem lies in the fact that the gameplay feels a little rough around the edges. The clicky combat is clunky, and since there's no way to destroy the enemy spawners, you're stuck dealing with swarms of foes all the time, many who can easily kill you in two hits early in the game. Health regenerates painfully slowly, and combined with the fact that most enemies are the same throughout the game, it sort of winds up feeling as if Somnium: Exodus would have been stronger without them at all. Some puzzles can also feel a little obstinate, with clues that are potentially too obscure or rely on scouring places that don't stand out to see if something has been hidden there. There are no optimisation options, which means some players might find it too laggy, while others will simply find themselves dealing with bugs. It's the sort of thing that will only improve with time as its talented development team becomes more experienced, but at the moment turns the experience rockier than it should be. It makes for the sort of game that could have been absolutely fantastic, instead of just good, if it had had a lot more player feedback early on to smooth out the rougher edges along the way.
As a result, Somnium: Exodus is a game that needs patience on your part, and perhaps polishing from the team down the line when it comes to future installments. It's a fairly massive game for a browser adventure, and gorgeously rendered to boot with its detailed areas and artwork, to say nothing of its soundtrack. Stripped of its action sequences, brave though it was to include them, and packed with more puzzles, Somnium: Exodus might have been on much firmer footing, but as it stands, it's still an extremely creative game that stands as a clear labour of love from its team, who is one we hope we see a lot more of.
Walkthrough video:


Walkthrough Guide
(Please allow page to fully load for spoiler tags to be functional.)
Somnium: Exodus Walkthrough
Chapter 1: Hospital
Goal: Find the painkillers
You'll start the game in Marylen Moneroy's hospital room. Exit through the door at the bottom of the room.
After you take a few steps, your character will stop moving for a moment and declare he needs some medicine. Fortunately, there's some nearby!
Go to the next room on your left (Curt Cobein's room).
Examine the red medkit on top of the table in this room to find the painkillers.
Goal: Get out of the hospital (part 1)
Exit Curt Cobein's room and walk right until you see the sign for Jorn Lemmon's room.
Walk straight down through the large open door to enter the lobby area.
Approach the two closed doors at the bottom of the room and press [spacebar] to try to open them.
The doors are locked with a passcode, so let's find it and come back later.
Goal: Find the password
While you're still in the lobby, walk to the table in front of the bottom sofa and examine the magazines.
Note the information in the article on "that popular old horror game" (Silent Hill for the curious).
The article describes a man searching through a foggy town filled with monsters for his daughter Cheryl. Got that? Okay, let's continue!
Exit the lobby and walk to the next room on your left, which is a lab room full of "sophisticated equipment."
Inspect the pile of papers on the floor to the left of the computer desk to collect NOTE 1.
This first note says: "He tries to find..." The message is incomplete; looks like we'll have to find a second note to make sense of this riddle.
Exit the lab room and walk all the way to the right until you reach a reception desk in the hallway.
From here, walk through the upper hallway on the right to the open door that leads to the large patient ward area.
Once you enter the patient ward, take a look at the pile of papers on the floor beside Seed Wishes' bed (it's the middle bed in this room). You'll find NOTE 2 here.
This note says: "...but only the fog and horror surrounds." This must be the the second half of note one! And the message should sound pretty familiar... but we'll get to that later!
Leave the patient ward through the door you came in and walk back to the reception desk in the hallway. Now head down into the lower hallway and enter the first door on your left to find the staff room.
Go to the flashing computer screen and press [spacebar] to interact with it.
You'll need a password to unlock the computer. The icon above the password box is a picture of an infamous character known as Pyramid Head. Whether or not you recognize him, you've already got the clues you need to log in.
Take another look at NOTE 1 and NOTE 2. They describe a man trying to find something, surrounded in horror and fog. This is the same story you read about in the magazine at the reception area. What was the man trying to find?
The article said he was looking for his daughter Cheryl. Enter CHERYL into the computer to log in.
Examine the pile of papers on the floor by the lower computer desk.
This mysterious message contains a clue to opening the closet in this room: "Find a patient. He is not like the others."
If you've been keeping a sharp eye on your surroundings up to this point, you may already know which patient is the odd one out...
Search for the patient signs in the hospital and read their files. All of them are named after celebrities with dark or violent causes of death such as murder, suicide, and overdose with the exception of one patient.
Take a look at the sign on the blue privacy screen by the far right bed in the patient ward.
Unlike the other patients, Steve Works is the only one diagnosed with a disease (cancer).
Go back to the staff room and take a look at the closet between the two steel bookshelves. The password is Steve's last name: WORKS.
After you open the closet, the DOOR CODE will be added to your inventory.
Goal: Get out of the hospital (part 2)
Exit the staff room and return to the lobby area.
Re-examine the locked doors at the bottom of the room.
Enter the numbers in the DOOR CODE: 4108.
After you open the doors you will be automatically transported to the next area, your home.
Chapter 2: Home
Goal: Find your diary
Read the letter on top of the coffee table.
Your character may have amnesia, but at least we know his name now! The letter's addressed to "Cameron" at the top of the page.
After you read the note, a series of blue portals will appear around your apartment.
Enemies will sporadically spawn out of these portals, so be careful!
Dodge the orbs it shoots from its sides and don't let it touch you to avoid taking damage. Find a safe place to stand and click the enemy until it explodes.
Each click attack costs CP which only regenerates will standing still or by using the Sacrifice ability which loses 10 HP in exchange for 10 CP.
Quickly move to the left side of the apartment and examine the lower left bookcase.
You can a book to select it, click the left or right arrows to move the book along the shelf, then click the book again to set it in place. So it's safe to assume these books need to be organized in a certain order.
Take a look at the titles of the books, specifically the capital letters.
From left to right, the first letters of the books' titles (except for The Europeans, ignore "The" because it's just an article) are: R, E, A, O, N, C, and M. Seem familiar?
It's an acronym of the main character's name: CAMERON.
Arrange the books from left to right to spell out Cameron's name to solve the puzzle.
Book Puzzle Solution.
Once you solve the puzzle, you'll hear a clicking sound "from the other side of the house."
Move right to the bedroom, being careful to either avoid or kill the enemies that will respawn at the blue portals.
Examine the open cupboard between the broken television and the computer to find your diary.
The room will shake after you close the last page, and your character will state that he should go to the laboratory next.
Goal: Find the key
Walk back to the middle of the living room, then go out the door at the back to leave the apartment.
While you're out here, use the coffee machine to save your game.
Go down the stairs to head outside.
Move all the way down and to the right to find your car in the parking lot.
Try to open the front left car door to find out it's locked and the keys are missing.
Go back into the building, up the stairs, and re-enter the apartment through the door at the bottom of the scene.
Search the apartment for the key's hiding place.
Walk left from the entrance of the apartment to the fireplace by the bookshelves.
Pick up the CAR KEY that's poking out of the left side of the tiger skin rug, near the tiger's head.
After you find the key, go back to your car in the parking lot and unlock the door. Select the location "Laboratory" to travel there. Before you arrive, however, you'll run into some car troubles...
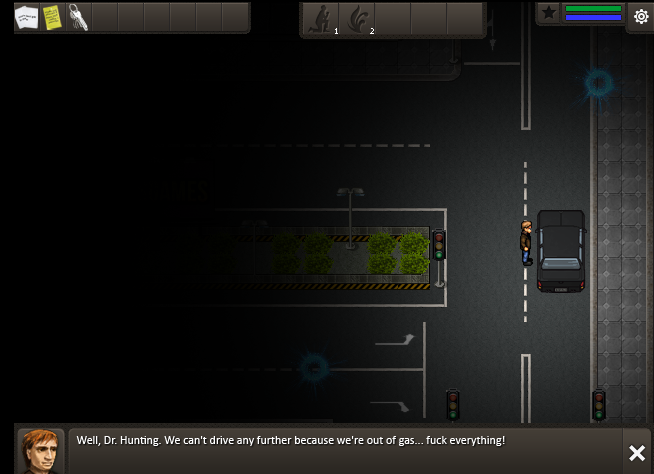
Goal: Fix the car
Try to open the front left door to the car. Your character will tell you that the car's out of gas.
Search the trunk at the back of the car to find a JERRY CAN.
Interact with the lower right side of the car to pour the gas from the can into the fuel tank.
Open the front left car door again to get back in the car and make it to the Laboratory parking lot.
Chapter 3: Laboratory
Goal: Find Component 13
Walk up and to the right (past the blue door) and then open the wooden double doors to enter the Lab.
Go up to the hallway past the reception area. Turn and walk right until you go past an office room and reach a row of vending machines.
Use the coffee machine here to save your game.
Enter the closest door to your left that leads to a small room behind a closed glass door.
Interact with the small blue screen between the glass door and the window to open the door.
Continue forward into the room full of scientific equipment.
Examine the large monitor on the wall at the upper right corner of the room to view the Somnium Interfact.
You'll notice that three components are inactive on the list: Component 3, Component 13, and Component 14.
Note that Cameron mentions Component 14 is produced at the center and that he should look for it in the hospital.
He also mentions searching the computers in this building for more information.
Walk back down to the coffee machines in the hallway, then continue right and go through the upper open door at the end of the hall.
Inspect the computer on the lower left desk to find the instruction manual Cameron mentioned earlier.
Now you'll be able to collect the three components, starting with Component 13 in this building.
Cameron also says that the last component, Component 3, should be found in the basement.
Go back out to the hall, then through the open door to the lab room at the bottom of the screen.
Pick up the dark object on the table at the lower left side of the room, found between the two groups of beakers, to collect COMPONENT 13. One down, two to go!
Goal: Repair the elevator, power supply, and water pump
Walk all the way left towards the reception desk of the lab building. Go through the upper left doorway to the room full of scientific equipment.
Head up to the attached room, being careful to avoid the enemies that are likely moving around the top of the glass tubes, and then use the ladder to climb down to the lower level.
Go through the open door into the small room above the entrance.
Examine the large green monitor on the wall at the top right corner of the room.
Click the two green buttons on the screen to turn off the power supply in the basement and to turn on the elevator.
The button next to "Power Supply Basement" should now say "ACTIVATE" (indicating that the power there is currently off) and the other beside "Central Elevator" should say "DEACTIVATE" (indicating that the power there is currently on).
Use the ladder to go back upstairs.
Go back to the coffee machine and save your game, then head straight down into the elevator.
Push the button beside the elevator door to go down into the basement.
After you exit the elevator, head straight up the hallway and turn right to reach a room full of pipes.
Navigate through the pipes to the other side of the room where you'll find the power supply equipment and a few barrels.
Since you turned off the power supply earlier, it's now safe to examine the wires on the floor. Cameron will fix the wires and put the grate back over to cover them.
Gi back through the pipes to the hallway and walk down.
When you reach the open doorway, turn left. You'll find a semi-hidden hallway that leads to a glass door. Be careful of a concealed enemy that can patrol this hall!
Activate the console beside the glass door to open it, then go through the door to find yourself back at the power supply room. Now that the door is open, you can use this convenient shortcut to move around the basement without using the elevator.
Interact with the large green monitor and click the "ACTIVATE" button next to "Power Supply Basement" to turn the power back on in the basement.
Walk back to the room full of pipes and navigate to the small room at the bottom right corner where you fixed the wires earlier.
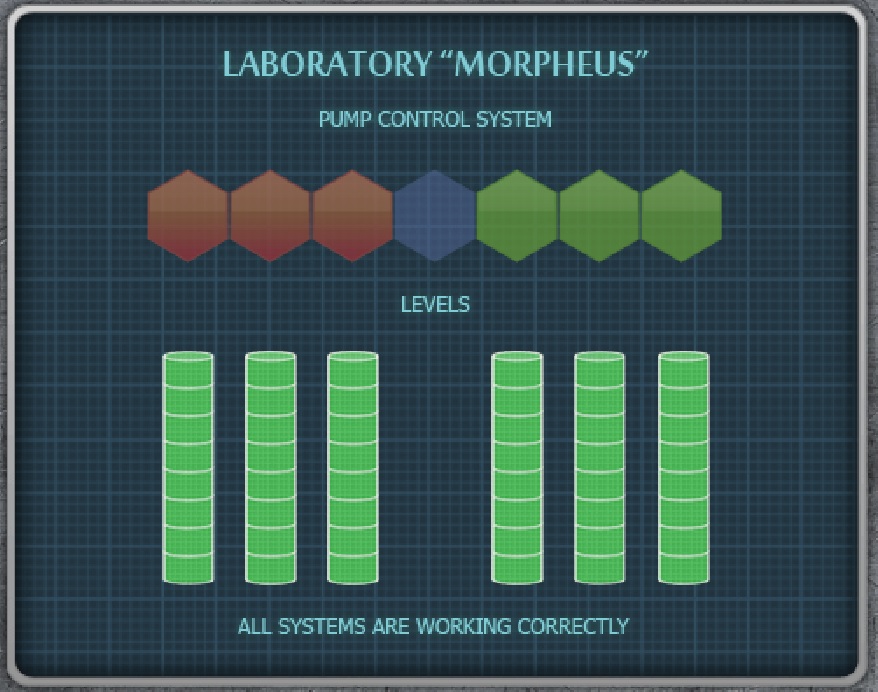
Use the pump mechanism at the right side of the room to begin a puzzle mini-game.
Organize the hexagons at the top of the screen so that all three red hexagons are on the left side, all three green hexagons are on the right side, and the blue hexagon is in the center.
To solve the puzzle, move the blue hexagon in the directions listed below:
Move the blue hexagon two spaces to the right.
Move one space right.
Move two spaces left.
Move two spaces left again.
Move one space left.
At this point, the blue hexagon should now be at the farthest left space.
Move two spaces right.
Move two spaces right again.
Move two spaces right one more time.
Now the blue hexagon should be at the farthest right space.
Move one space left.
Move two spaces left.
Move two spaces left again.
Move one space right.
Move two spaces right.
Move one space left to complete the puzzle.
Pump Control System Solution.
After you complete the puzzle, the repaired pump system will drain all of the water out of the basement tunnels.
Goal: Find Component 3
Walk back to the hallway and enter the office room opposite the elevator.
Examine the computer on the desk at the corner of the room to read the emails from Nicholas.
Exit the room and walk all the way right and then through the open doorway to enter the break room area.
You can use the coffee vending machine here to save your progress.
Inspect the paper on the table to find April's clue.
At the bottom of the note you'll see five symbols, a star inside a rectangle that is composed of 16 line segments.
Each symbol is missing some of the segments. If you fill in the missing lines, you'll find they make the shape of a letter of the alphabet.
The five letters found in the five symbols are: P U S S Y (stay classy, developer).
Go back to the main hallway, then go through the first door on your left and up the hall to the locked glass door.
Activate the console beside the glass door then enter the 5-letter password from April's note to open the lock.
Search the open safe between the lockers and the desk to find COMPONENT 3.
Return to the hallway. Walk left and up towards the doorway that leads to the room full of pipes. Enter the door on the left and go down the stairs to reach the Basement.
Chapter 4: Basement & Hospital
Goal: Find the Hospital Key
Go down the stairs and walk left until you reach an open doorway above you.
Walk up to the coffee vending machine and use it to save your game.
Go back down to the corridor and walk all the way right. Enter the doorway above you, then continue to walk all the way right pass the pipes and to the next doorway.
Walk up to the next room, through the archway, and across the bridge that goes over the water.
Move left, following alongside the outer wall, until you reach the second doorway (you'll pass an open doorway and another bridge, but you can ignore them both).
Walk up through the door and continue left to the top left corner wall. Walk down and turn left, then immediately go up through the doorway into the small room.
You should see G-9 written on the back wall of this room. Go up the ladder to enter the warehouse.
Examine the computer on top of the upper left boxes to read Richard's notes.
Move to the bottom right corner of the room and pick up the KEY (that was mentioned in the notes) on top of the bed.
Climb back down the ladder to return to the basement sewers.
Retrace your steps and return to the entrance stairway. Go up the stairs and walk to the elevator to go back to the lab.
Go left to the reception area and walk down to exit the lab building.
Quickly walk down to your car before enemies spawn and travel to the Hospital.
Goal: Find Component 14
Walk down and left from the parking lot to reach the hospital gates, then continue up to the front door and enter the hospital.
Go out the door of the reception area and walk up the end of the hallway to the left.
Unlock the double doors with the KEY from the G-9 room in the Basement.
Walk all the way to the end of the corridor to find a lab room.
If you inspect the middle sarcophagus in the back area, Cameron will mention that he thinks the component might be inside, but to open it you'll need to run the machine first.
Go back into the main room and examine the middle computer console to begin another minigame.
To solve this puzzle you must select the correct sequence on the grid by following the navigational clues.
The points on the grid have a number (ranging from 1-3) and a letter (N, S, E, and W).
The letter refers to the cardinal directions north (up), south (down), east (right), and west (left) while the numbers indicate the amount of spaces to the next correct point on the grid.
Every time you select the correct grid point, one of the lights at the top right corner of the puzzle will change from red to green. If you choose a point incorrectly, the puzzle and lights will reset.
The starting point is 1E near the top left side of the board. Follow these directions to complete the puzzle:
Start at 1E. Move one space to the right.
Click 2E. Move two spaces to the right.
Click 3S. Move three spaces down.
Click 2W. Move two spaces left.
Click 1E to complete the puzzle.
After the puzzle is completed, return to the back area of the room and search the middle sarcophagus to find COMPONENT 14.
Exit the Hospital and return to your car in the parking lot. Travel back to the Laboratory.
Chapter 5: Laboratory & Somnium
Goal: Repair Somnium
Walk up to the wooden double doors to enter the Laboratory building.
Go through the upper door to leave the reception room and move to the second open doorway on the right to reach the Somnium room.
Examine the monitor at the top right corner of the room to place the three COMPONENTS from your inventory.
Interact with the left side of the bed at the center of the room to travel to Somnium.
Goal: Explore Somnium
Walk up through the two open doorways and into the hallway.
Continue left until you find Cameron.
After you've finished speaking to him, walk down to the lower room and use the Somnium machine.
The End.
Posted by: Trinn |
April 17, 2014 11:10 AM
|
April 17, 2014 11:10 AM