
![]()
 Some games fit into nice, easy categories, others are just...bizarre. Case in point: Peter Javidpour's surreal puzzle game, Rambo: Last Blood. Cryptic much? That's because the less you know of the story behind Last Blood, the more fun you'll have.
To move Rambo use the left and right [arrow] keys, and [spacebar] to interact with characters and objects. Oh, and it wouldn't hurt to brush up on your 80's pop culture knowledge. Rambo: Last Blood is another in a series of games based on tweets by Peter Molydeux, and, like many of the others, is funny and even a little poignant. Let's hope this is a trend.


Walkthrough Guide
(Please allow page to fully load for spoiler tags to be functional.)
Rambo: Last Blood
Controls
Use the arrow keys to move your character.
Press the spacebar to shoot, to progress through a conversation, or to interact with the environment.
Level 1 - The Woods
Continually move right to reach the end of the scene.
Level 2 - In the Clouds
Move right into the beam of light.
Speak with Colonel Krenna.
Continue right to travel to the next scene.
Level 3 - Buddhist Bridge
Go right to approach the ninja.
Press spacebar to give him a big ol' bearhug.
The ninja will move back and forth towards you.
When he's close enough, press spacebar again to catch him in a hug.
Continue right to travel to the next scene.
Level 4 - Crying Baby Statues
Walk to the right until you see a ninja descending from the sky.
Keep facing right until he's lowered down within reach, or he will pause mid-air.
When he's even with the ground, quickly turn left and approach him.
Press spacebar to start the hug sequence.
The ninja will move back and forth towards you.
When he's close enough, press spacebar again to catch him in a hug.
Continue right to travel to the next scene.
Level 5 - Empty Bridge
Move towards the center of the bridge until the ninja appears in the sky.
The ninja will start in the middle and make two copies of itself on the left and right.
Keep your eye on the original ninja as they repeatedly swap positions.
After they're done switching and move lower towards the bridge, approach the real ninja to give him a hug.
If you pick the right ninja, it will begin the hug sequence.
The ninja will move back and forth towards you.
When he's close enough, press spacebar again to catch him in a hug.
Continue right to travel to the next scene.
Level 6 - Poseidon Lake
Move right until you're under the right statue arm that's touching the ground.
If you look in the water, you'll see your reflection has changed into a ninja.
Press spacebar to start the hug sequence.
The ninja will move back and forth towards you.
When he's close enough, press spacebar again to catch him in a hug.
Continue right to travel to the next scene.
Level 7 - The Gallery
Search each of the paintings for the hiding ninja.
The ninja is behind the painting of the man wearing a black mask.
Press spacebar under the correct painting to start the hug sequence.
The ninja will move back and forth towards you.
When he's close enough, press spacebar again to catch him in a hug.
Continue right to travel to the next scene.
Scene 8 - The Patrick Swayze Room
Move towards the radio on the right side of the room.
Press the spacebar three times so that the third button is lit red.
The song "Unchained Love" should be playing on the radio.
Go left to the pottery wheel, then press the spacebar repeatedly to get the wheel spinning.
When the ghostly ninja appears beside you, approach him and press the spacebar to start the hug sequence.
The ninja will move back and forth towards you.
When he's close enough, press spacebar again to catch him in a hug.
Continue right to travel to the next scene.
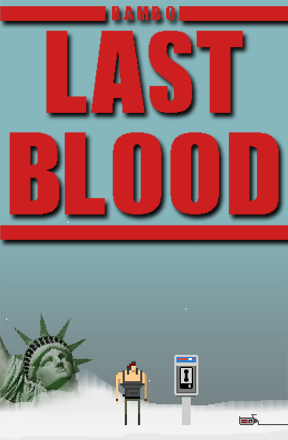
Scene 9 - Statue of Liberty
Walk up to the telephone and press the spacebar to look at the dial.
Who you gonna call? (the trap on the ground is your clue)
Ghostbusters!
Press the numbers on your keyboard to dial the telephone number 555-2368
If you entered the correct telephone number, you can catch the ninja in a hug sequence.
The ninja will move back and forth towards you.
When he's close enough, press spacebar again to catch him in a hug.
Continue right to travel to the next scene.
Scene 10 - Pacman
Use the arrow keys to navigate through the maze and catch the blue ghost.
If you can eat the ghost, it will start the hug sequence.
The ninja will move back and forth towards you.
When he's close enough, press spacebar again to catch him in a hug.
Scene 11 - The Pearly Gates
Move right to enter the gates of Valhalla.
If you hugged all the ninjas, each letter on the sign will light up.
Posted by: Trinn |
May 29, 2012 6:54 PM
|
May 29, 2012 6:54 PM