
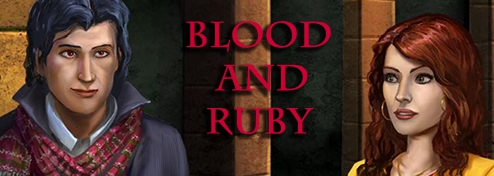
Blood and Ruby
Platform: Mac, Windows
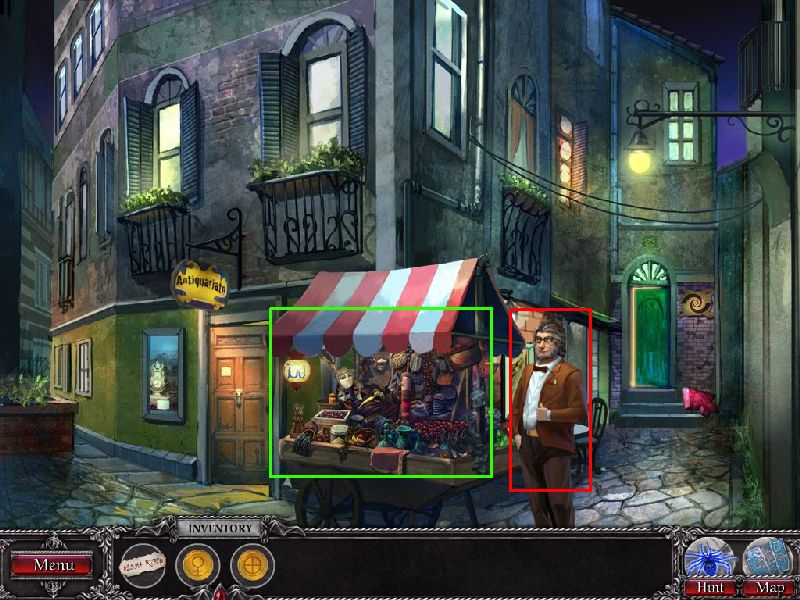
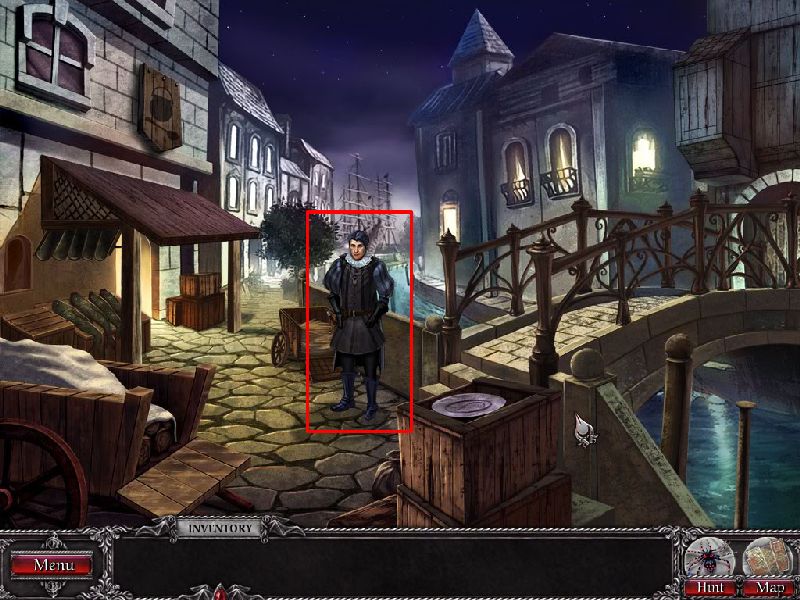
![]() Vampires. So many different kinds of vampires, aren't there? On one hand are truly frightening vampires who will shank you with their fangs in the middle of the night unless Van Helsing gives them the what's what with a wooden stake. On the other, we have the kinder, gentler modern vampire, who sparkles and just needs a hug and a hair gel refill. Both tend to take themselves seriously. Blood and Ruby, from Hitpoint Studios (creator of another fine adventure game, Guardians of Magic: Amanda's Awakening), features both the traditional bloodsucking villains and the new heartthrob type (he even has a cuddly scarf!) in its new adventure, but thankfully it doesn't take itself too seriously. Melodrama is the order of the day, from the histrionic organ chord which occurs when you finish a hidden object scene to the opening cut scene take-down which looks more like some people slipping during flag football. It all makes for an entertaining campy ride, with some clever touches along the way.
Vampires. So many different kinds of vampires, aren't there? On one hand are truly frightening vampires who will shank you with their fangs in the middle of the night unless Van Helsing gives them the what's what with a wooden stake. On the other, we have the kinder, gentler modern vampire, who sparkles and just needs a hug and a hair gel refill. Both tend to take themselves seriously. Blood and Ruby, from Hitpoint Studios (creator of another fine adventure game, Guardians of Magic: Amanda's Awakening), features both the traditional bloodsucking villains and the new heartthrob type (he even has a cuddly scarf!) in its new adventure, but thankfully it doesn't take itself too seriously. Melodrama is the order of the day, from the histrionic organ chord which occurs when you finish a hidden object scene to the opening cut scene take-down which looks more like some people slipping during flag football. It all makes for an entertaining campy ride, with some clever touches along the way.
 After her brother Marcus gets tagged out in a graveyard game of flag football—sorry, I mean, kidnapped by evil vampires—the titular Ruby comes to Venice in search of him. To assist her in rescuing him, you'll need to use your trusty cursor to pick up useful objects and employ them to solve so-called inventory puzzles. Of course, that flask of holy water isn't always just going to be lying around, as that would be too easy. Sometimes you'll need to search for it, and with the same mania that grips other hidden object heroes, you'll compulsively find other objects you're not going to use as well. A generous serving of puzzles, some of which are more like mini-games, and the merest sprinkle of spot the difference, tops off this recipe for adventure game enjoyment. Just don't forget the garlic.
Analysis: Blood and Ruby does not immediately give you instructions for puzzles, although you can click on a question mark button to get them. Unfortunately, sometimes these instructions are a little vague, telling you your ultimate goal, for example, but not the rules for how to get there. The skip takes a fairly significant time to charge, as well, so this is a recipe for running to the walkthrough. On the other hand, the hidden object scenes are extremely player-friendly. Too many games with dark themes think that means dark, monochromatic scenes that have your straining your retinas to tell which of the jumble of gray shapes is your desired knife or necklace. The art is excellent, and the item text is concise and descriptive. The hint button charges pretty fast to boot.
 As I've already said, the plot is on the hokey side, so your individual taste for hokeyness is important. The demo hams it up right from the opening cutscene, so you'll be able to tell right away if it's something you enjoy. That said, the writing truly isn't bad. There are even some genuinely creepy moments like the murderous marionettes. If the phrase "murderous marionette" in itself doesn't creep you out just a little, you're too jaded by far for this game.
Sometimes there's a little bit of gameplay/story incongruity. There are several times when, plot-wise, you are in deadly peril and need to act fast by quickly using objects to conquer various threats in turn, but since gameplay-wise, there's no timer, it saps the urgency out of it. There may be a vampire ready to spring at you, but you as the player can leave the game running and have a shower if you like; the vampire will still be crouched there when you get back. The ending cutscene is quite brief and abruptly fades to credits, which is particularly disappointing given the many fine cutscenes up to that point.
The last major thing I want to single out for praise is the map system, which is not only easy to use, but even gives gentle hints about where to go next, with an exclamation point indicating an area of interest and a number indicating hidden objects to find. At about three and a half hours for my first play through, the length is a fair value as well.
![]() Windows:
Windows:
Download the demo
Get the full version
![]() Mac OS X:
Mac OS X:
Download the demo
Get the full version


Walkthrough Guide
(Please allow page to fully load for spoiler tags to be functional.)
Blood and Ruby walkthrough
Chapter One
At the Station
Chat to the police constable to find out that there has been a murder.
You can't pass until you give the policeman a reason to go away.
At the bottom left there lies a bloody knife. Maybe that will interest him? Screen
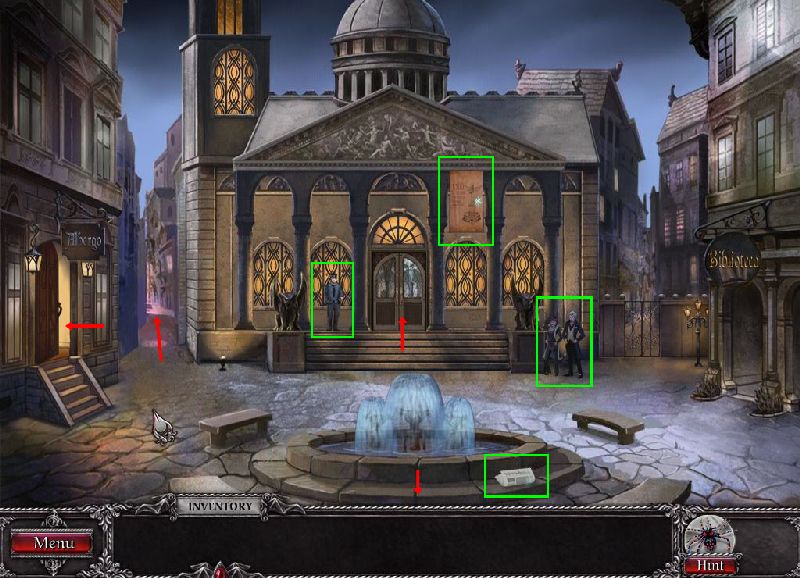
The Courtyard
Who are those two spooky people in the background? Screen
Take a read of the day's news. There's a newspaper by the fountain.
There are four places you can go to from here: back to the station, into the hotel, towards the museum and down the path on the left of the museum.
Your brother was checked into the local hotel. Maybe you should go there first.
If you want, you can look at the banner above the museum. You can also go to the museum and talk to the guard.
The Hotel
Be sure to grab the map on the counter. Screen
You need to find your brother's room. Click on the pigeon holes behind the counter.
Hotel Foyer Puzzle
Match the twin objects to find your brother's room number.
Your Brother's Room
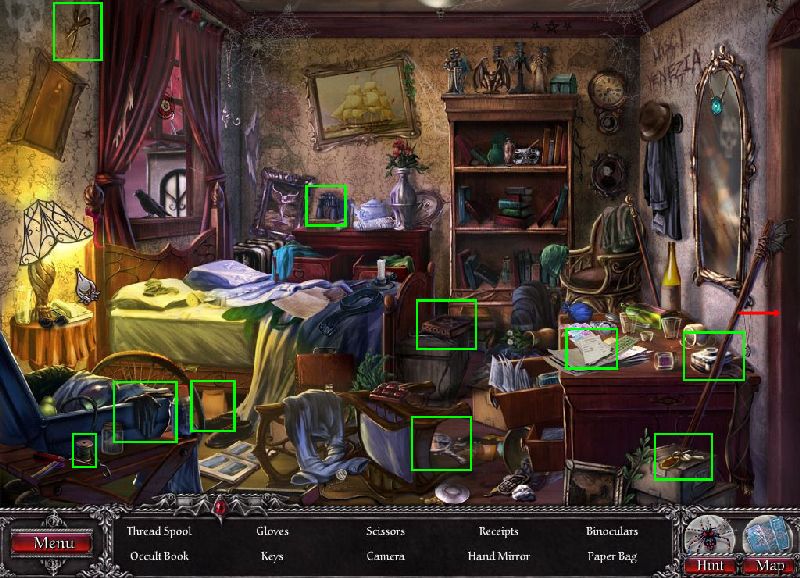
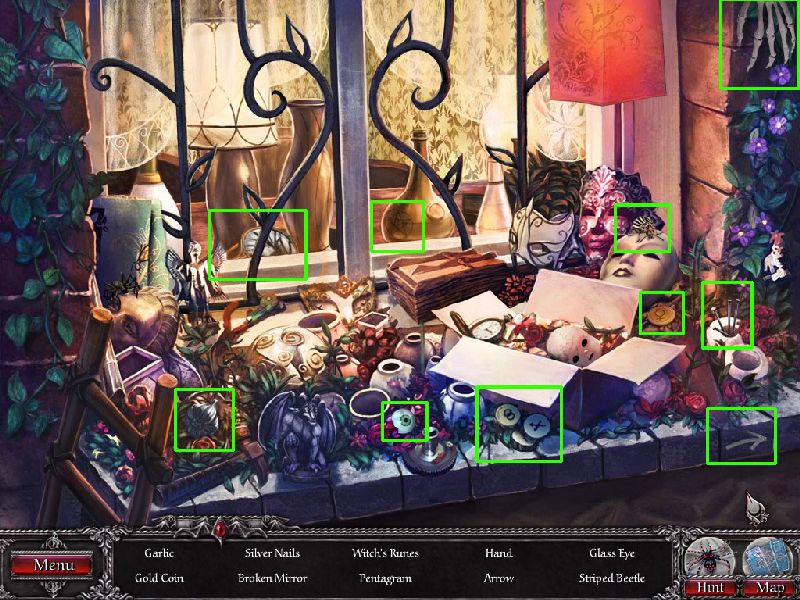
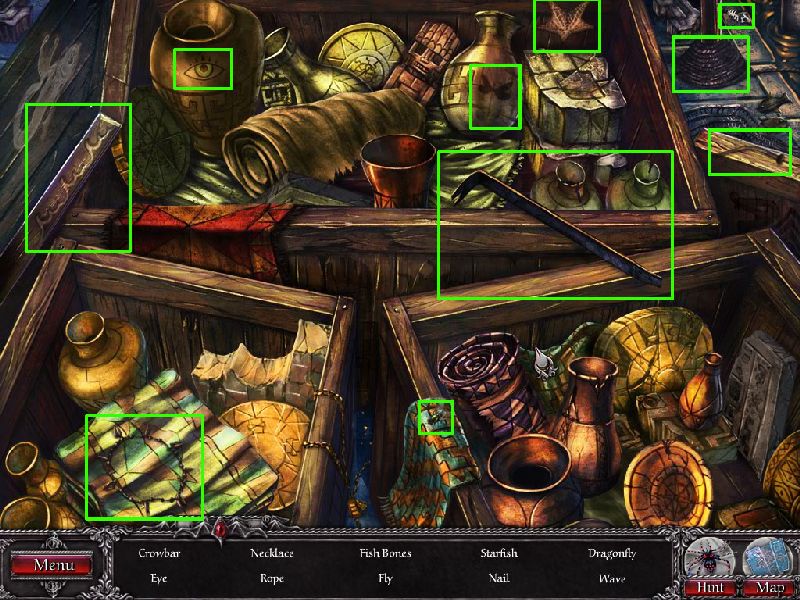
What a mess! Obviously a great place for finding objects...
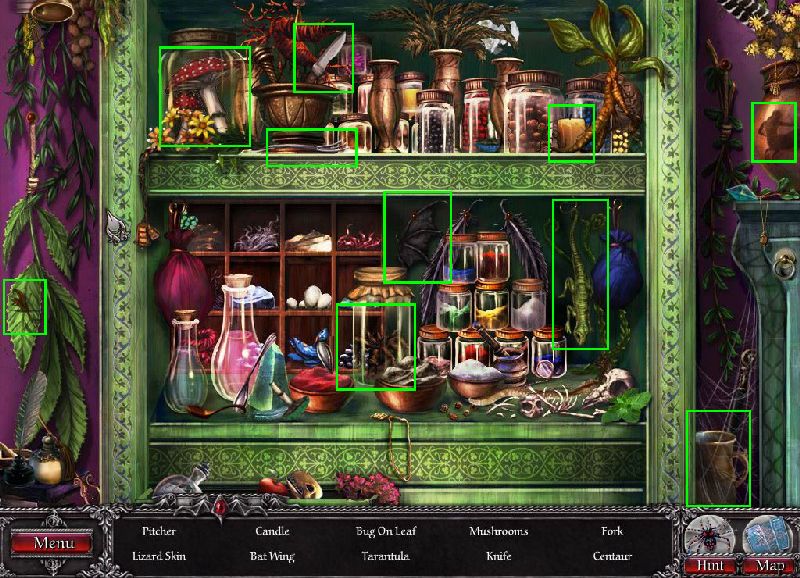
Hotel Room Hidden Object Game: Screen
After the game you will have a wrought iron key and a pile of receipts.
The receipts suggest you go towards the antiques store.
You can find the antiques store by heading down the path on the left side of the museum.
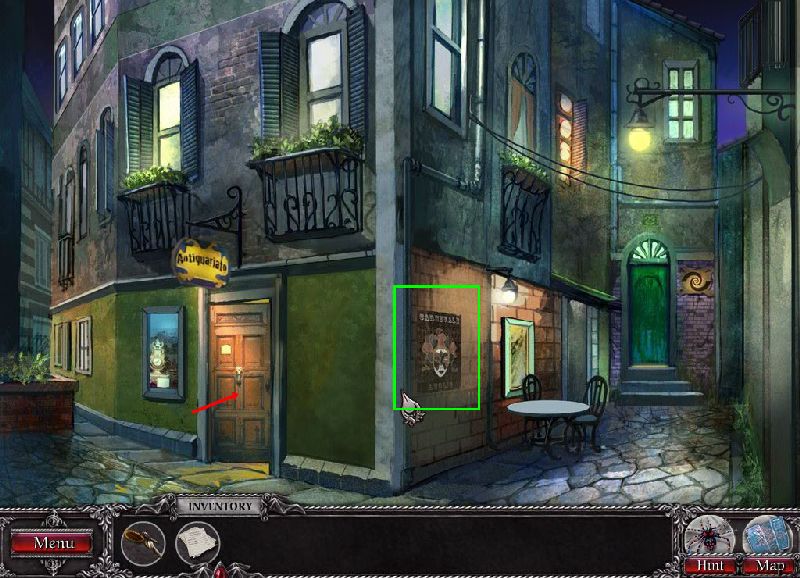
The Alley
You can do two things here. Screen
You can go to the antiques store. You can also take a look at the poster on the wall.
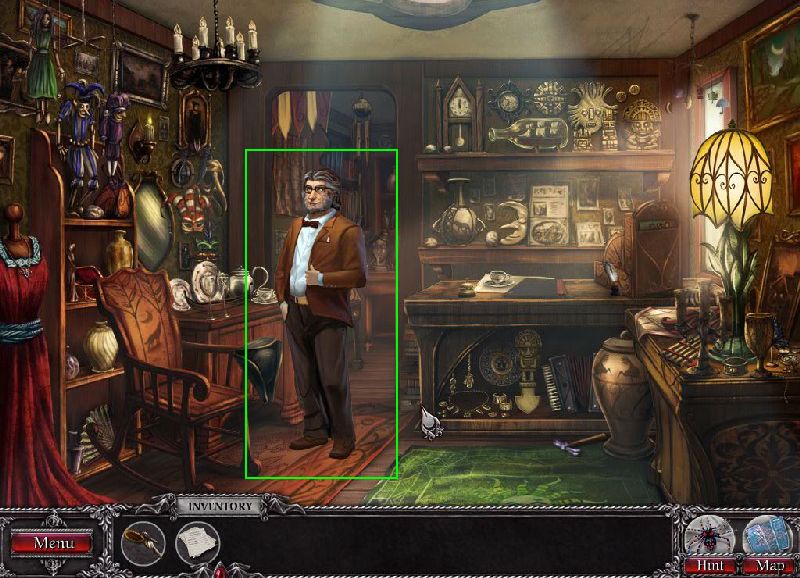
The Antiques Store
The antiques dealer isn't talking unless it has to do with business. Screen
Show him the receipts you found in your brother's room.
The antiques dealer needs you to find something. It's a hidden object game.
Antique Shop Hidden Object Game: Screen.
You will get your brother's journal. It has some strange code in it.
There is nothing left to do at the store. But maybe something else in your inventory can be used somewhere else.
You can use the wrought iron key to unlock the gate on the right side of the museum, in the Courtyard.
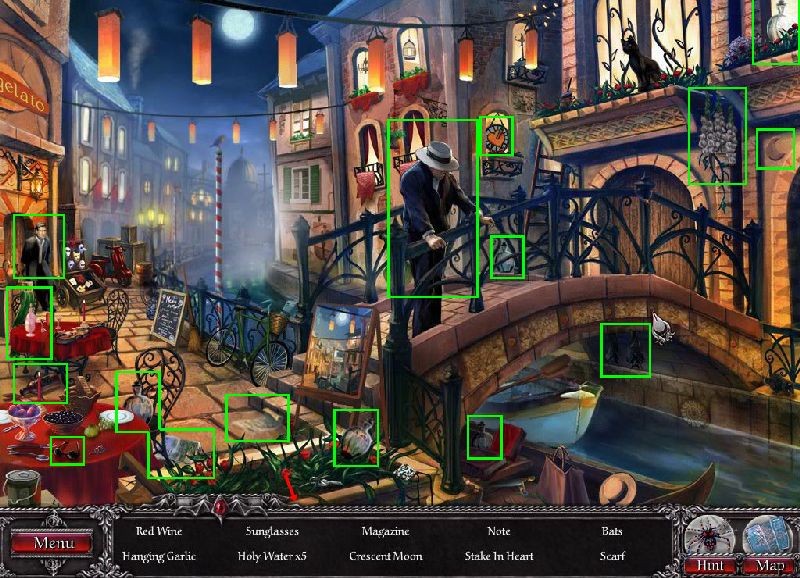
Canal
You can chat to the man on the bridge and the man in the background.
There is a path leading down the canal, but it is blocked.
Canal Hidden Object Game: Screen. Play the hidden object game to find your brother's scarf.
Maybe someone in the scene recognises the scarf?
Show the scarf to the guy standing at the back. His name is Stratton and he'll give you a recipe.
Where to now? You need to find the shop with the same symbol as the recipe.
The shop is located next to the antiques store.
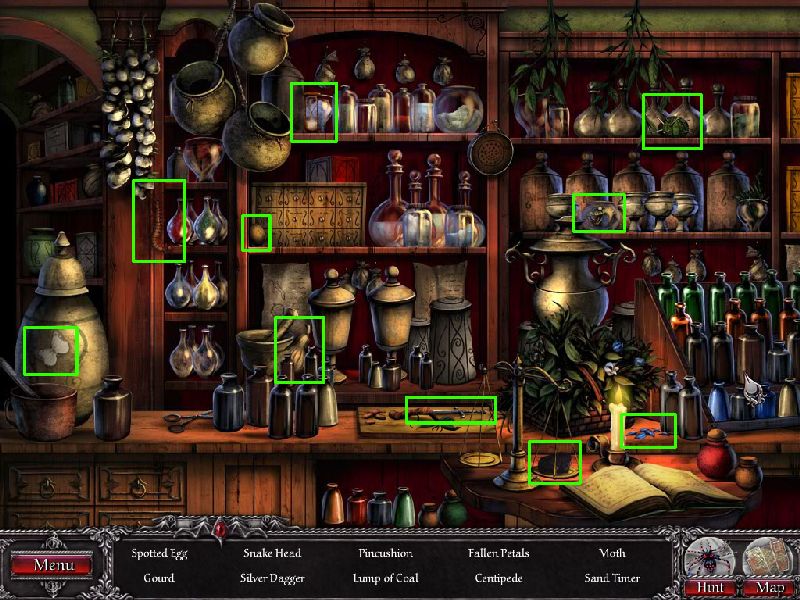
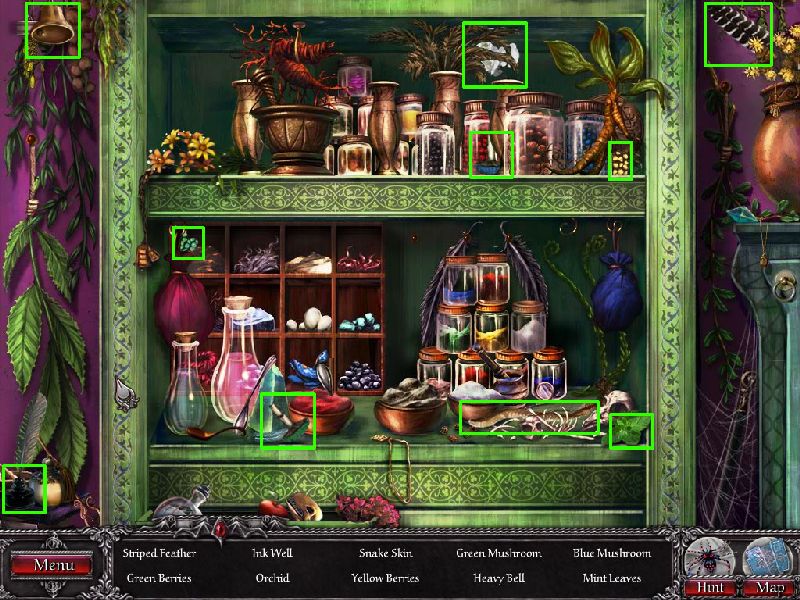
The Herbalist
Talk to the herbalist. Show her the recipe. Screen
She'll point you to get the ingredients from a shelf.
Play the hidden object game to find the ingredients. Screen
The herbalist kindly lets you mix the potion there.
Potion Mixing Puzzle
Find the right order to add the ingredients. Don't worry about making a mistake - it will not erase what you have done before. After the puzzle, you will have the Garlic Potion. Screen
Stratton gave you the recipe. Maybe he knows more...
Head back to the Canal.
Looking For Stratton
At the canal, Stratton is nowhere to be seen. Maybe the gondolier knows something?
Maybe Stratton left a note.
Find the note on the table. The ticket is under a mask.
Click on the pile of masks at the back.
Mask Spot The Difference Puzzle. There are six differences to find. Screen
Give the ticket to the gondolier.
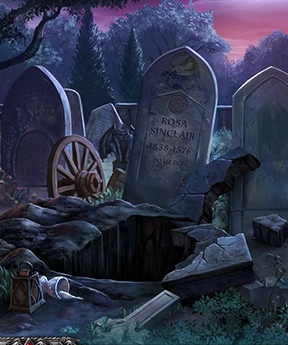
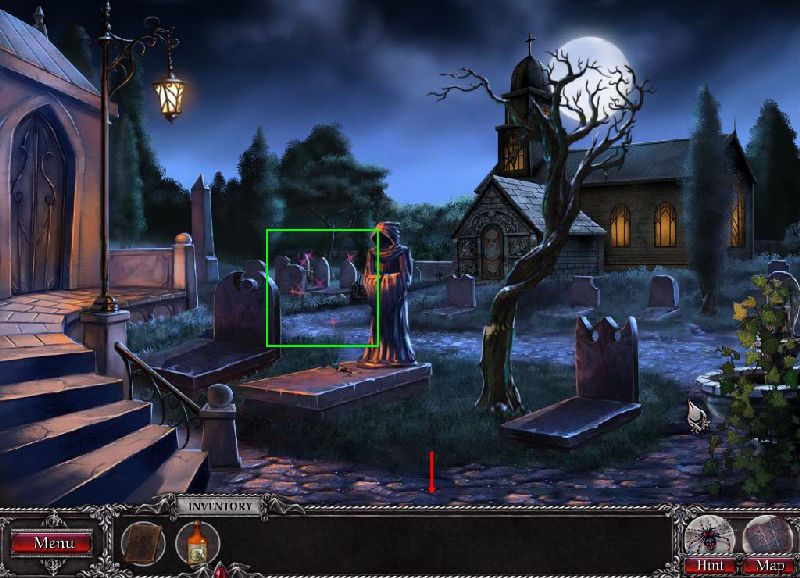
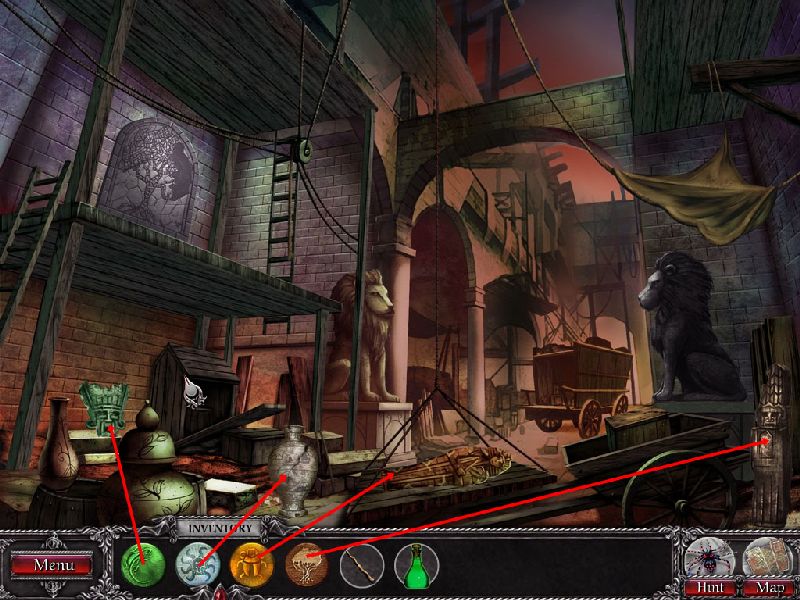
Graveyard Island
This doesn't look like a friendly place. Screen
Take a look at the graves in the back. It will start a hidden object scene.
Graveside Hidden Object Puzzle: Screen. Complete this to find the photo of the crate.
Someone is coming! Grab some weapons...
Weapons Hidden Object Game: Screen
It's a fight! Try to discover the order of attack.
Graveyard Fight
Use the garlic potion on the vampires.
Use the axe on the tree.
Use the shears on the fountain.
Use the hammer on the fountain.
Use the shovel on the cracked grave.
Use the brick on the lantern.
Chapter Two
Stratton, who just sent you into the clutches of the vampires, is here! Talk to him. Screen
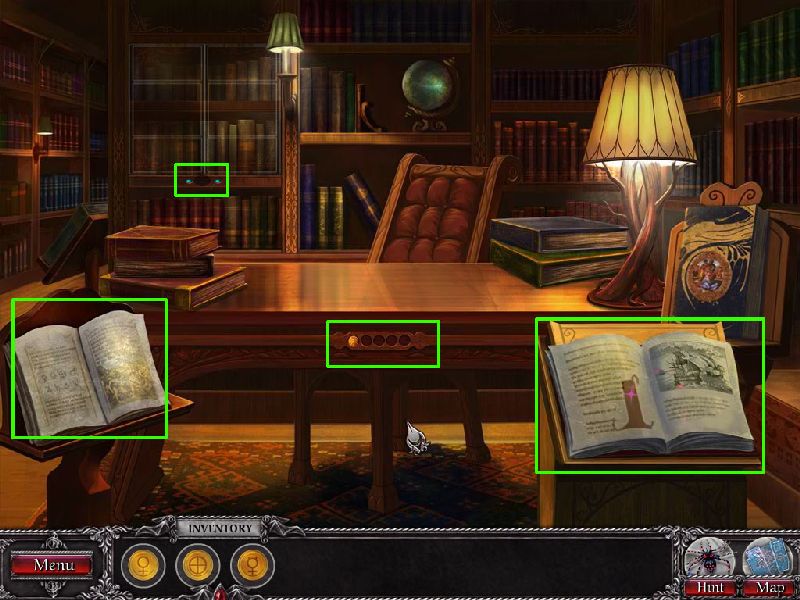
The library is now open. Head to it (on the right).
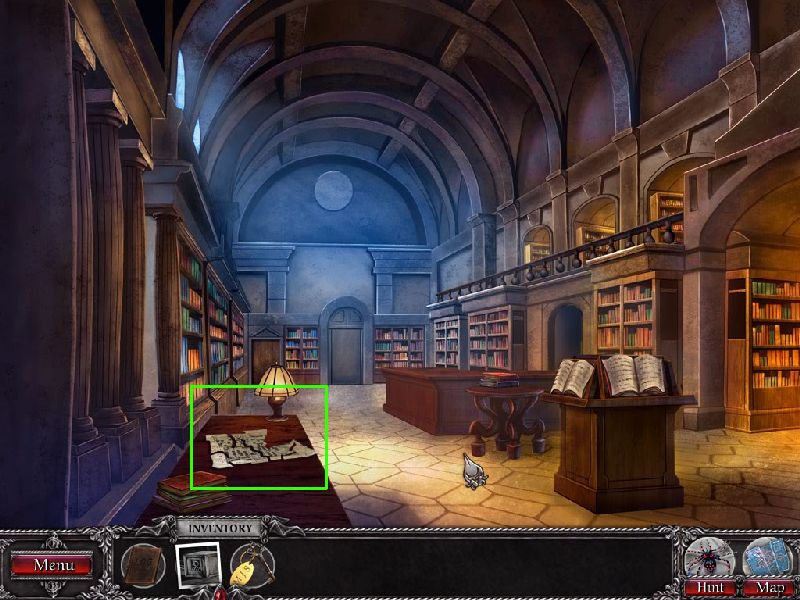
The Library Map & Gold Coins
Ruby has no idea where to go! You need a map. Screen
Click on the pile of papers on the nearby desk.
The map is missing a piece. Where would it be?
Head to the hotel room.
Your brother's chest is at the foot of the bed. It's locked.
Use the key in your inventory to unlock the chest. Screen
Chest Puzzle
Line the three blocks so that the same color lines link up.
The first block is, clockwise starting at 11, light brown, dark brown, orange, brown, white. Screen
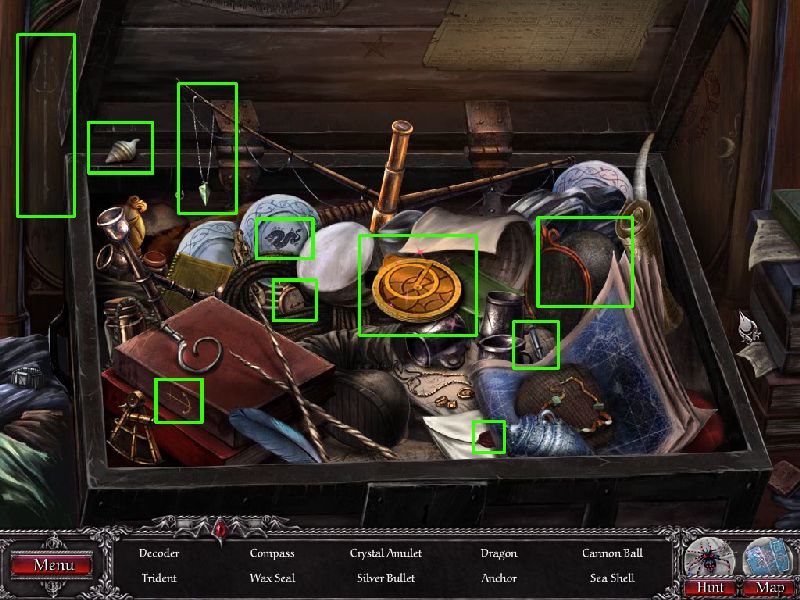
Inside the chest is a HOG scene. Screen
Decoder Puzzle
The decoder has three things you can move - two rings and an arm. Rotate them until you see a legible message.
The first four words in the message is "Ruby". Screen
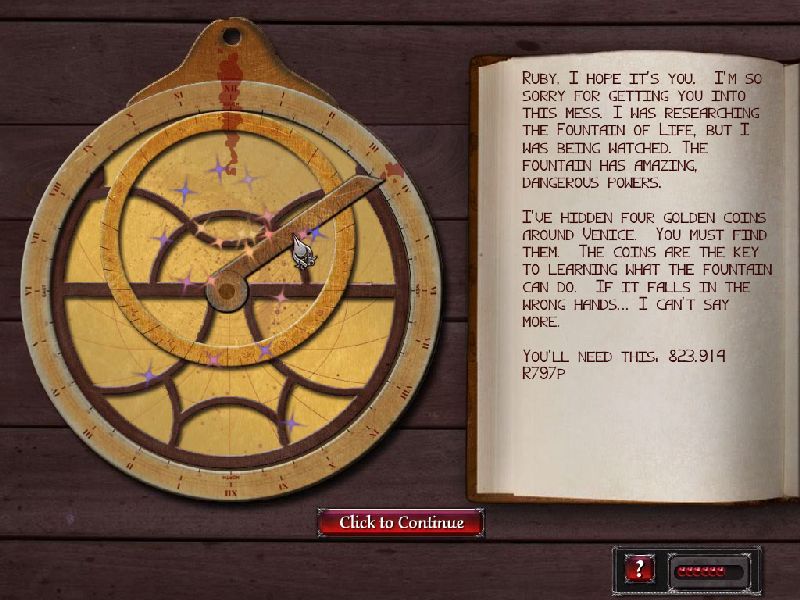
You will learn that Ruby's brother left gold coins for her to find. It also gives her a code - 823.914 R797p
The First Gold Coin
You need to find your brother's gold coins. Where can they be?
Try a location where he was last seen.
Head to the canal (down the right side of the museum).
At the top left, by the black cat, is a HOG scene. Screen
Finish the scene to get a gold coin.
Ruby mentioned earlier that the docks are now open. Head there (north from the Canal).
The Second Gold Coin
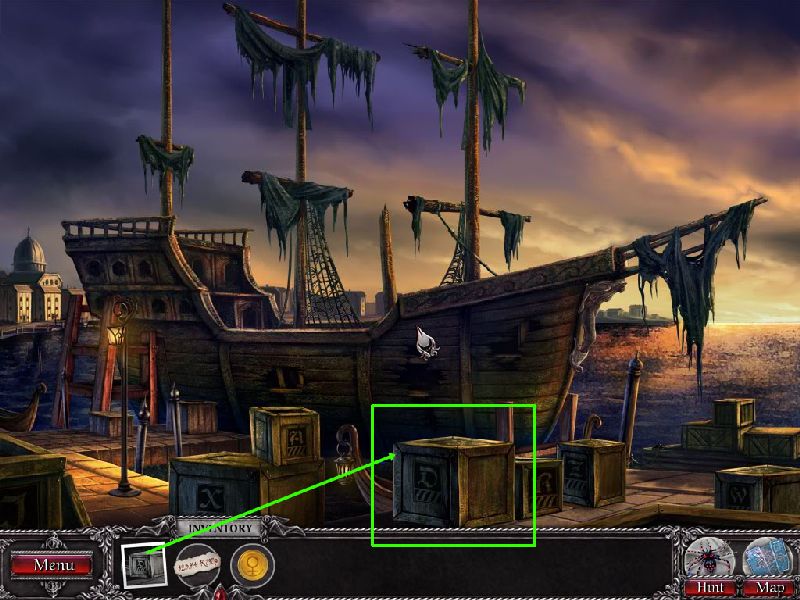
At the docks you'll meet Stratton. He and Ruby will discuss the old ship, then he'll leave.
Maybe something you need is in a crate. But which one?
Don't you have a photo of a crate?
Drag the photo of the D crate from your inventory and onto the D create in the scene. Screen
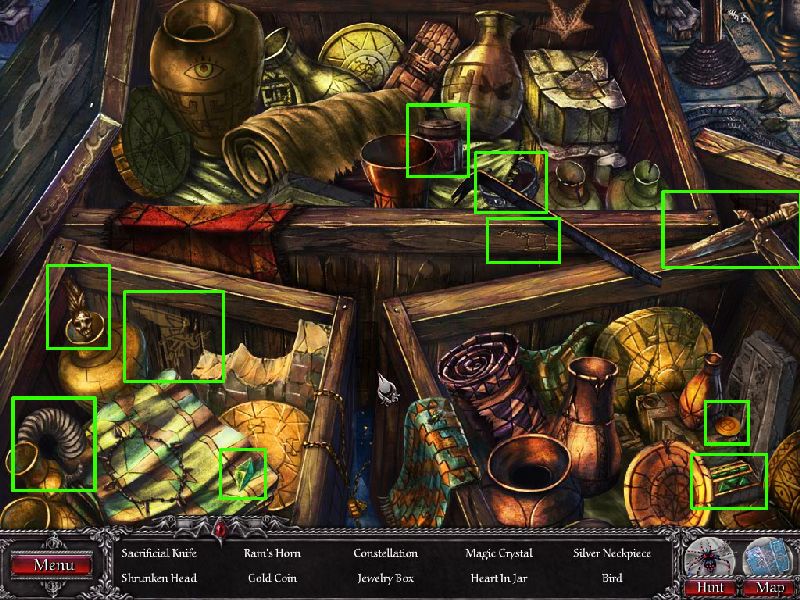
Click on the crate. It's a HOG scene. Screen
Complete the scene to get another gold coin.
Two down, two coins to go! Where haven't you looked yet?
Head to the Alley (down the left of the museum).
The Third Gold Coin
The store owner is outside with a cart. Chat to him. Screen
His cart is now activated. Click on it for a HOG scene. Screen
Complete the HOG scene to get the third gold coin as well as the missing library map fragment.
Where to now? You have the missing library map piece...
The Fourth Gold Coin
Head to the library (in the courtyard, the right-most doorway).
Use the piece of map on the pieces on the desk.
The Library Map Puzzle
Assemble the pieces of the map. Clicking on a piece rotates it.
The top left corner is set. Use that as a guide.
If a piece is in the right place, it will turn blue. Screen
You have the library map! But where must you go?
Library books can be found with a code. Do you have one?
Drag the code in your inventory to the completed map.
A new area is open. Head over!
Ah, that's where we have to use the coins! But there is still one missing. Maybe it is here? Screen
Try looking at the books in the front.
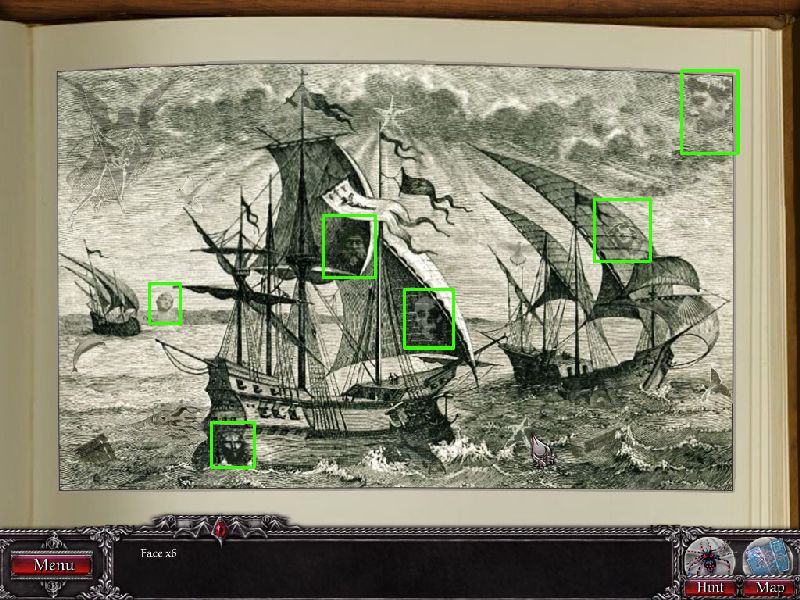
Click on the large book on the right.
Find the six faces in the scene. Screen
You have the last coin! Now what?
Using The Coins
You have to arrange the coins in a certain order on the desk.
The coins need to be aranged in the order of the planets.
Look at the book on the left for the coin meanings. Screen
You will find an ancient scroll and your brother's museum pass.
Maybe it's time to visit the museum?
The Museum and Fountain of Life
Head for the Museum.
The guard won't let you in without a pass.
Show your brother's pass to the guard.
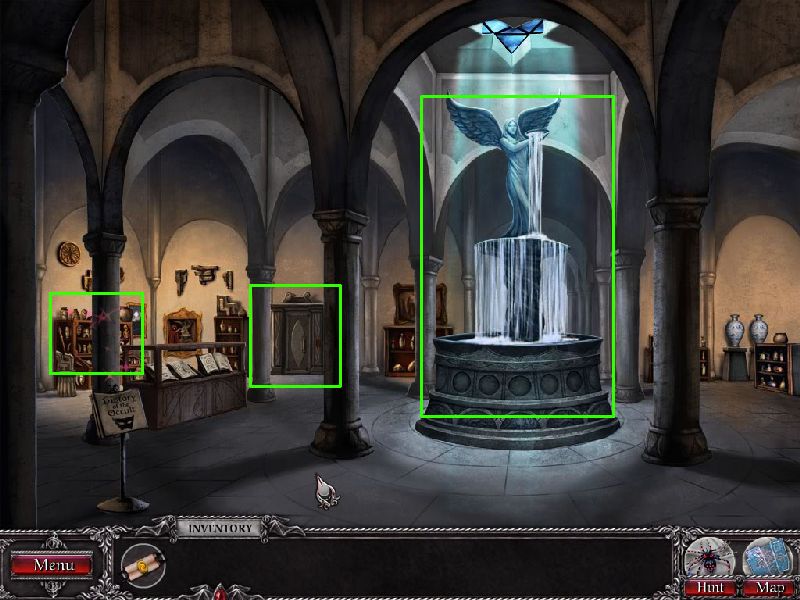
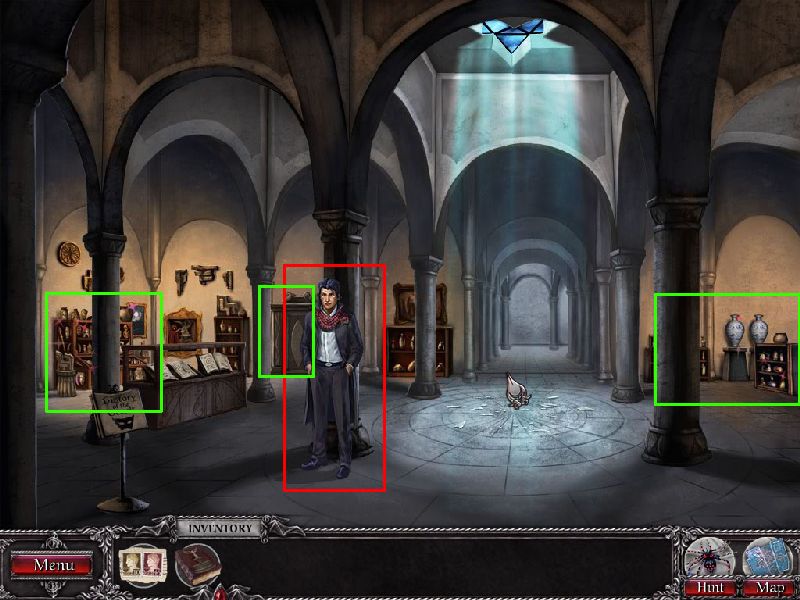
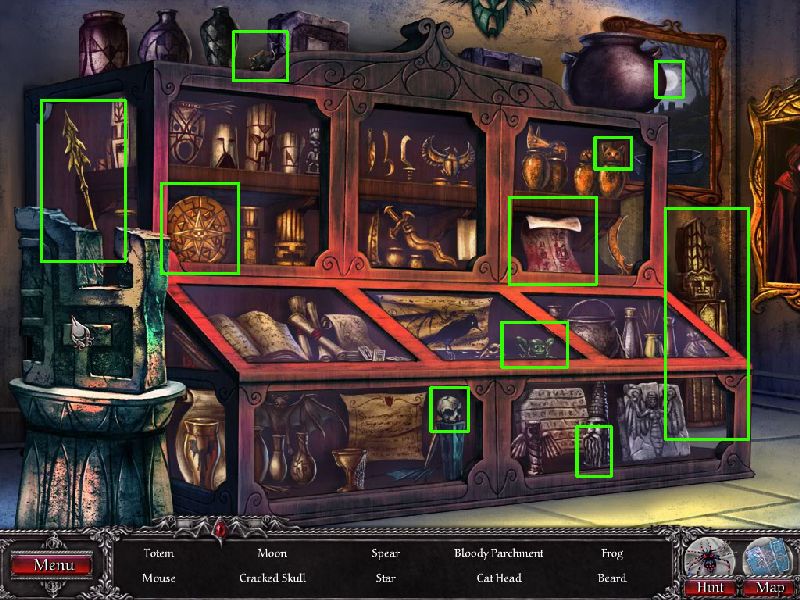
Inside the museum you can take a look at the statue, at the cabinet near the back (you need a code) and the cabinet to the left. Screen
Click on the cabinet to the left. It's a HOG scene. Screen
Complete the HOG scene to find the Marble emblem.
The emblem looks a lot like an indentation on the fountain.
Use the emblem on the fountain.
Spooky... Ruby's right - let's get out of here.
The whole courtyard is spooky! And you can't go anywhere! There must be something in the scene to interact with. Screen
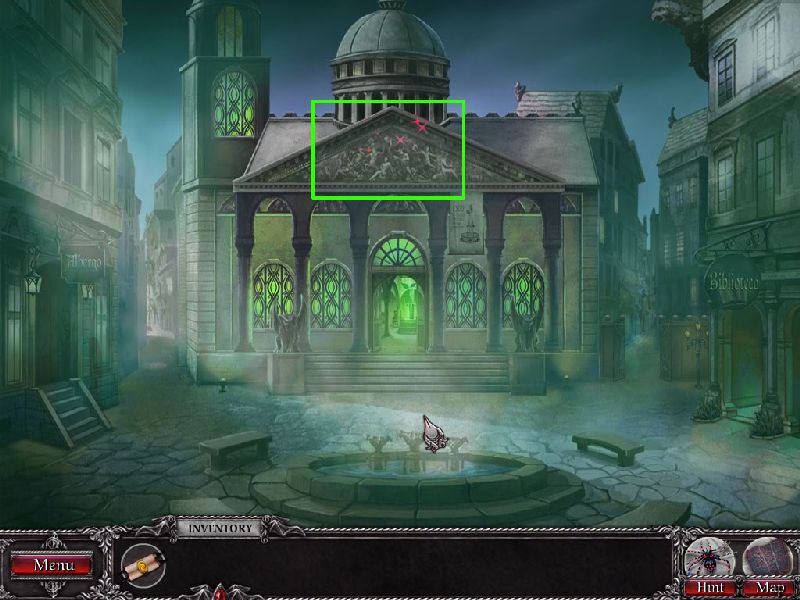
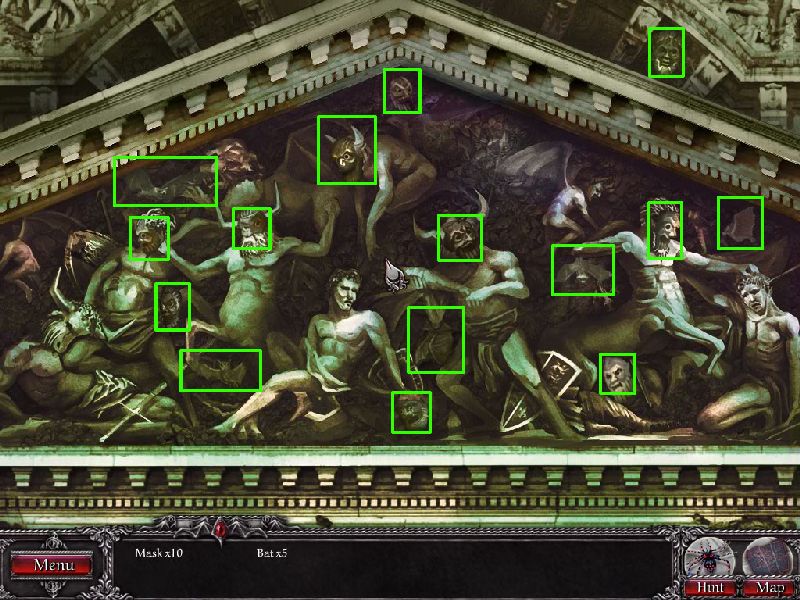
Click on the mural above the museum pillars.
Find the ten masks and five bats in the mural. Screen
Solving the puzzle with dispel the mist.
Stratton is back. He'll say something is wrong at the antiques store. Best go there.
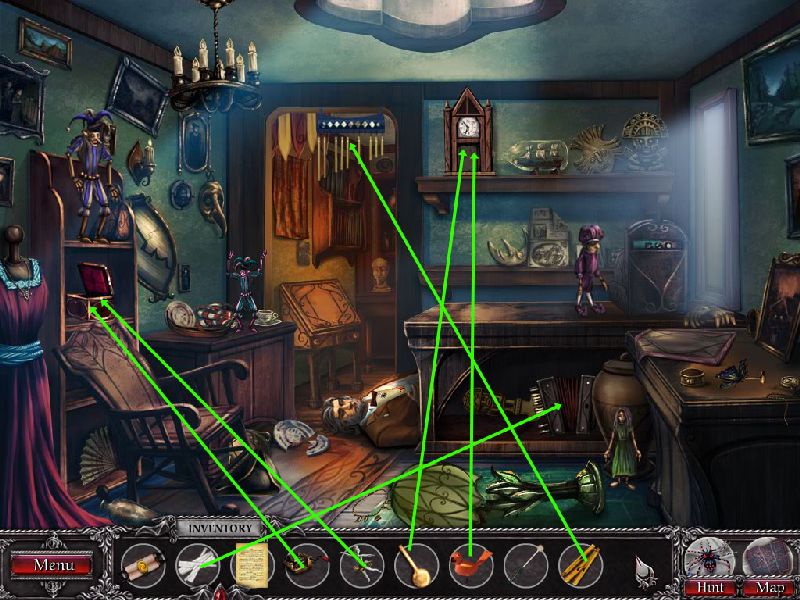
Defeating the dolls
Complete the HOG scene to get all the parts. Screen
Beating the dolls:
Use the Pendulum, then the bird, on the clock mounted behind the counter.
Use the chimes, then the mallet, on the chimes hanging from the door.
Use the music crank box, then the ballerina on the music box in the cabinet to the left.
Use the accordian keys, then the sheet music, on the accordian under the counter. Screen
It seems the shopkeeper is holding something. Take it.
It's a jewel and a letter. Ruby is told to visit the Herbalist.
Chapter Three
Talk to the herbalist.
Seems you need to give her something.
Show her the jewel.
Click on the jewel in front of here. It's a pattern matching puzzle - mimic the flashing patterns. There are five patterns
Ruby is then transported back to 16th century Venice.
16th Century Venice
Talk to Stratton. Screen
You need to stop the vampires form sailing away with the fountain.
Head for the docks.
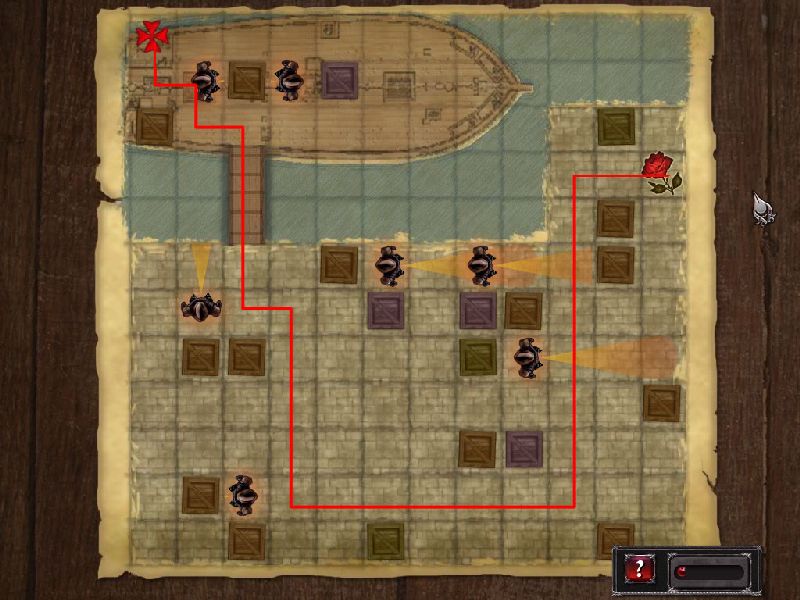
Sneaking Onto The Ship
Sneaking Puzzle
You have to find the route where guards don't see you.
You can wait on a block by click on the rose.
The directions are:
Left, Left, Down, Wait, Down, Down, Wait, Wait, Wait, Wait, Wait, Wait, Wait, Down, Down, Down, Wait, Wait, Down, Left, Left, Left, Left, Left, Up, Up, Up, Let, Up, Left, Up, Up, Up, Wait, Wait, Wait, Up, Left, Up, Left, Up.
Screen
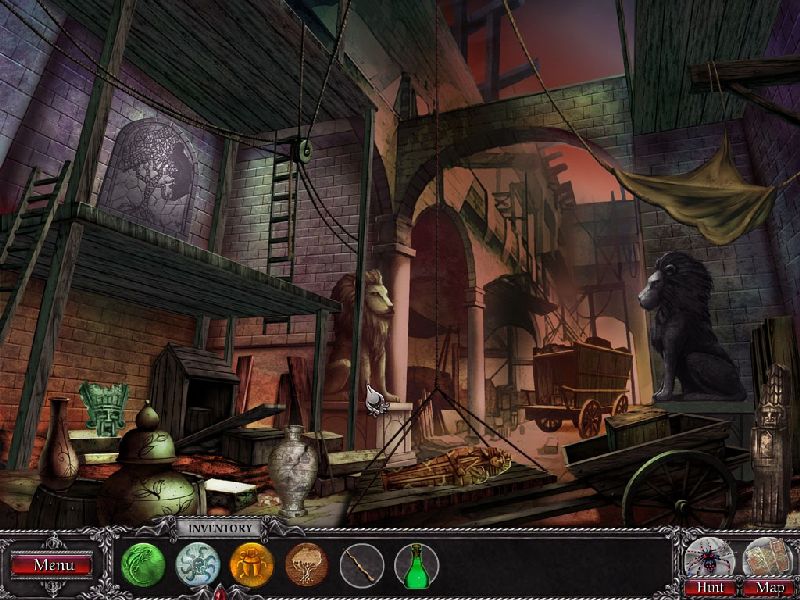
Once you sneak onto the ship, you'll be in the main cabin. It is a HOG scene. Screen
You'll find a lizard emblem, a stone hammer and some rope.
There is a chart on the back wall. Maybe we can see where they sailed from?
Chart puzzle
Screen
The puzzle will give you a message.
Once outside, give the message to Stratton. He will give you a recipe and tell you to talk to the Witch.
Head over to the courtyard and talk to the witch. She wil tell you to get a special wand as well as the remaining symbols. Screen
The Symbols & Wand
The Octopus Emblem
The Octopus emblem is in the courtyard, right in front of you.
Where would you find an octopus?
What about water. There is a well in the courtyard.
The well doesn't work - it needs something.
Use the rope on the well.
The Scarab Emblem
Head to the alley (left of the museum).
There is a crate to investigate, but you need to open it.
Where is a tool to open the crate?
Use the Stone Hammer on the crate.
Get the Scarab emblem. Screen
The Tree Emblem
Look in the library.
There is a puzzle on the floor.
There is no specific way to bea the puzzle. Simply move the pieces until the tree symbol is exposed.
The Wand Of Transformation
Inside the witch's wagon is a puzzle box.
Connect the line to let the spider reach the star. Screen
Hiding the Emblems
After you have the emblems, head over to the museum. Screen
You need to hide the emblems using the wand of transformation.
There is a corresponding object for each emblem type.
The Tree with the wooden idol in the front right.
The scarab with the golden coffin (use the cleaver found in the kitchen to cut the rope in the museum).
The Lixard emblem with the jade mask in the back left.
The Octopus emblem with the ceramic vase at the middle front. Screen
The Potion ingredients
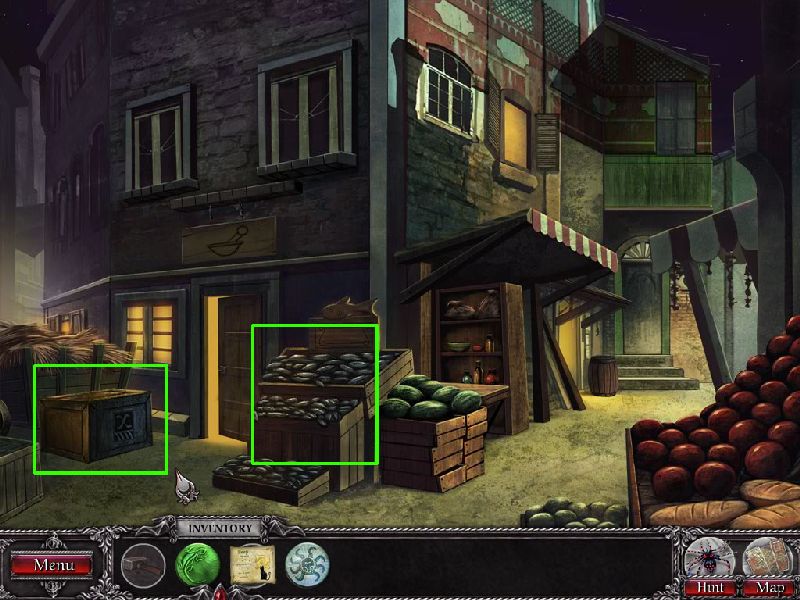
Blue Flower Petals
Check the shop. It's a HOG scene. Screen
Complete the scene to get blue flower petals.
Black Cat Fur
Head to the Witch's wagon.
Complete the HOG scene. Screen
Vial of Oil
Go to the kitchen - it's located in the Canal screen.
Complete the HOG screen to get the oil and a cleaver. Screen
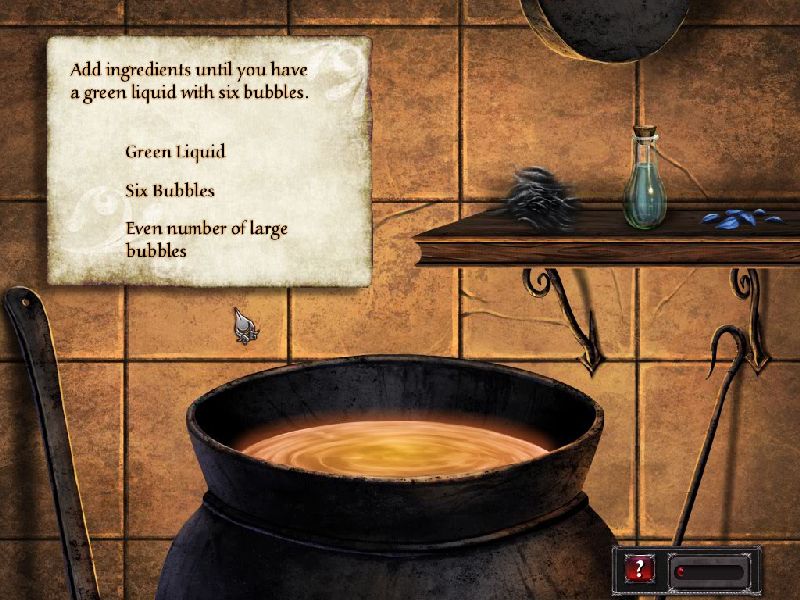
Preparing The Potion
After collecting the ingredients, go to the witch's wagon and click on the cauldren. Screen
You have to mix the potion so it becomes green with six bubbles, with an even number of large bubbles.
Oil changes the colour and adds color.
Cat hair removes bubbles.
Blue petals make the bubbles larger.
Getting Onto The Ship
Once you have the potion and have hidden the emblems, there is only one place to go...
Head back to the docks.
Show Stratton the potion. Then click on the coffin behind him.
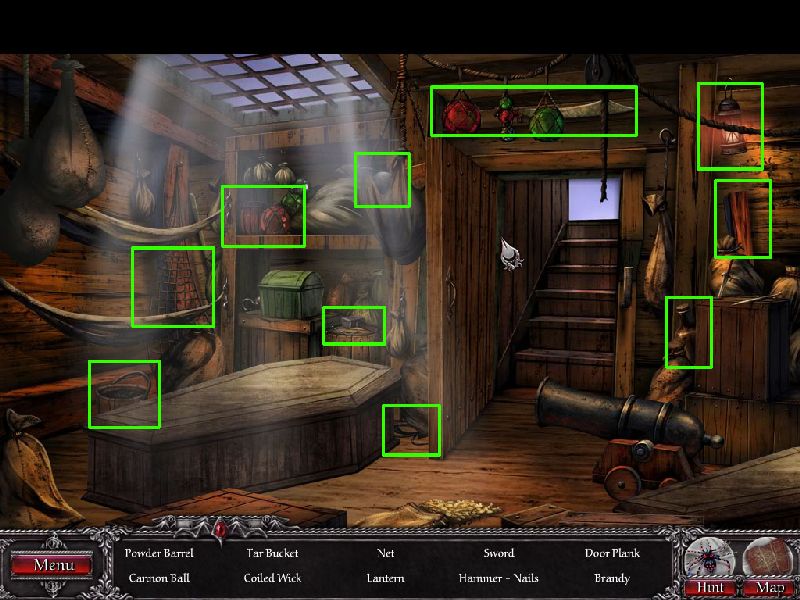
The Ship Fight
The Vampires are waking on the ship! You need weapons!
It's a HOG scene - find all the items. Screen
With the items in your possession, fight the vampires!
Close the door, then use the door plank on it.
Use the hammer and nails on the coffin.
Use the net on the hand waving the gun.
Use the sword on the hand wielding the other sword.
You have repelled the attack, but they are breaking down the door. What to do?
Maybe you can make the door very unattractive?
How about a fire?
Throw the brandy at the door, then use the lantern.
Now what? How about sinking the ship?
That cannon is useful and you have the items to make it work...
Use the items to arm and fire the cannon.
Use the gunpowder barrel on the cannon.
Use the cannon ball on the cannon.
Use the coiled wick on the cannon.
Chapter Four
You are back in the present time. The herbalist explains that you need the emblems to destroy the fountain.
Where are the symbols? Maybe your brother left a clue?
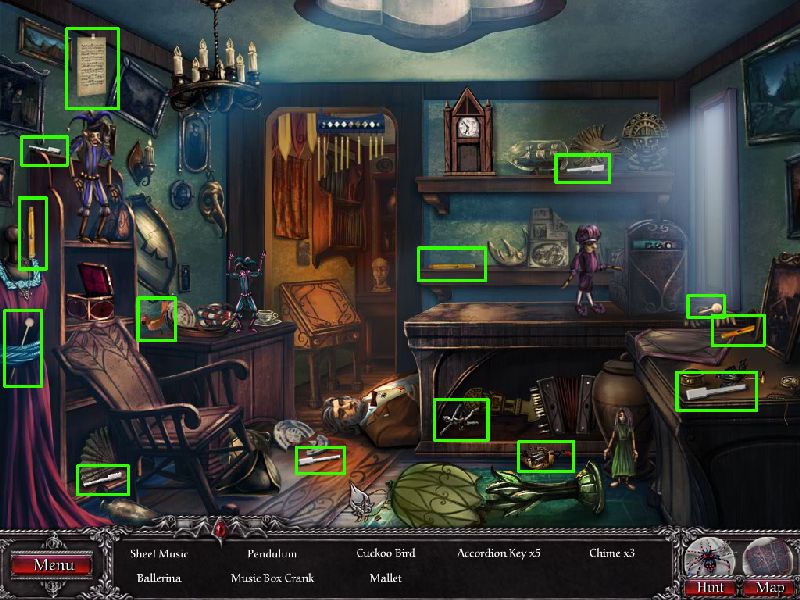
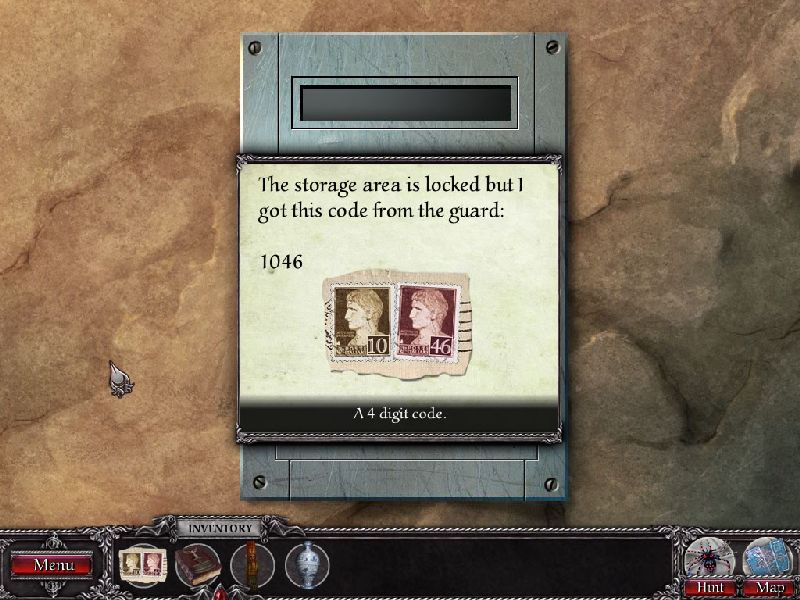
Head to his hotel room. It's a HOG scene. Screen
Finish it to get stamps that made a code (1046) and a blue gemstone.
You can also take the note from the mirror. It's a threat from the vampires.
How To Destroy The Fountain
You need to know how to destroy the fountain. Maybe a book can help?
The guide to destroying the fountain is in the library, but it is hidden.
What in your inventory can be used in the library?
Use the blue gem in the shelf inside the study room.
Find all the symbols on the books. Screen
Finding The Emblems
The emblems were last hidden in the museum. Maybe they are still there.
At the museum you discover the fountain is missing. Talk to Stratton.
Where are the objects? There are three active spots. Screen
Complete the HOG scene on the left to find the totem. Screen
Complete the Spot The Difference Puzzle on the right to get the vase. Screen
Use the code from the stamps to open the secure cabinet at the back. Screen
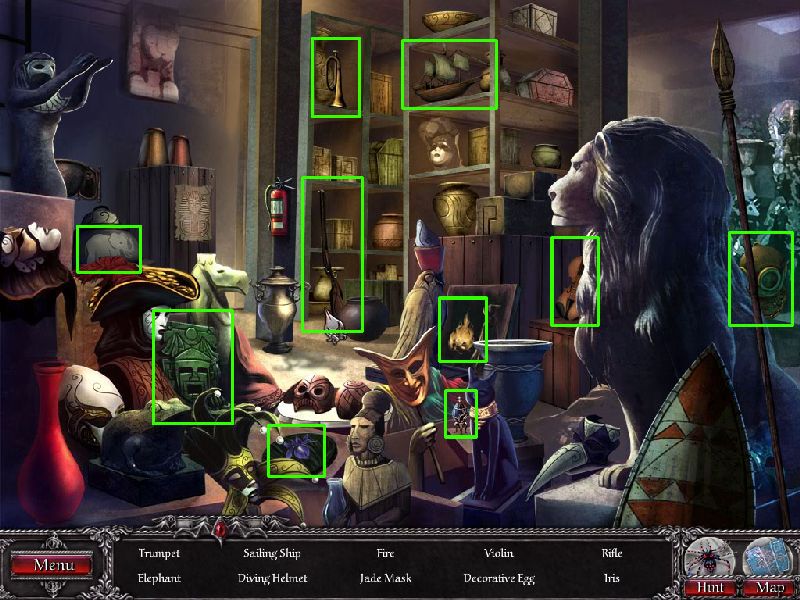
This will lead to a new HOG scene. Screen
The last emblem is hidden in a crate inside the storage area. How to open the crate?
Didn't you see a crowbar at the docks?
Head to the docks and click on the D crate. It's a HOG scene. Screen
After clearing the scene, you will have a crowbar.
The old ship's cabin is also now active. Click on it for a HOG scene. Screen
Now you have an empty bottle too!
Let's go use that crowbar. Head back to the storage section of the museum and use the crowbar on the crate at the back.
Transforming the emblems
Go to the courtyard and talk to Stratton.
Head back inside the museum and talk to the herbalist. She'll give you a recipe and say the ingredients are in her shop.
Head to the herbalist's shop in the alley.
Complete the HOG scene to find the heavy bell. Screen
Complete the matching puzzle to get the pearl, shells and gold. Screen
Head to the back and weigh up the ingredients to be equal to that of the bell.
You have the elixir! Head back to the museum.
Place the vase, mask, sarcophogus and totem in the circle, then apply the potion.
You have the emblems! Talk to the herbalist again to get a ticket to Graveyard Island.
Head to the Canal and give the ticket to the gondelier.
Graveyard Island
Time to prepare for battle! What can you use?
There is an axe - get it.
The broken fountain to the right worked earlier on the vampires. Maybe you should get some water?
Get holy water from the fountain using the bottle.
Look at the graves on the left to find a HOG scene that awards a lighter. Screen
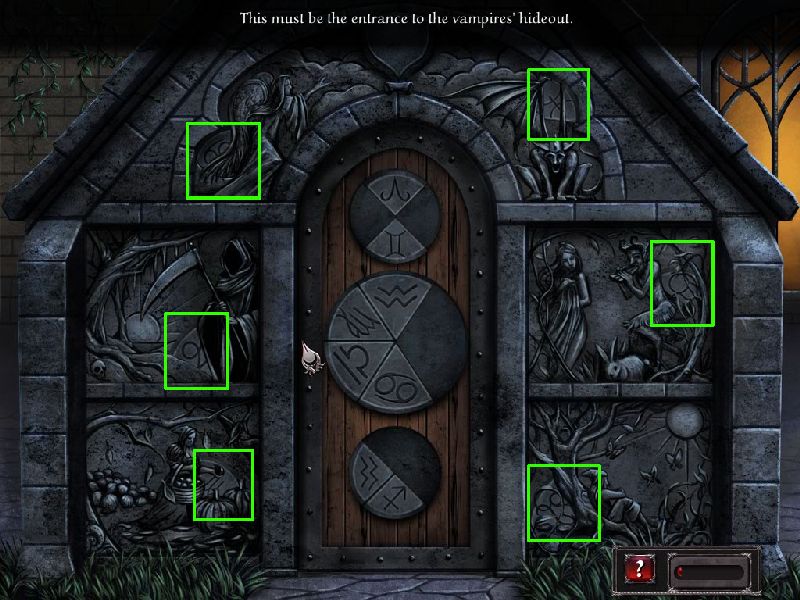
Now we're ready! Head to the crypt.
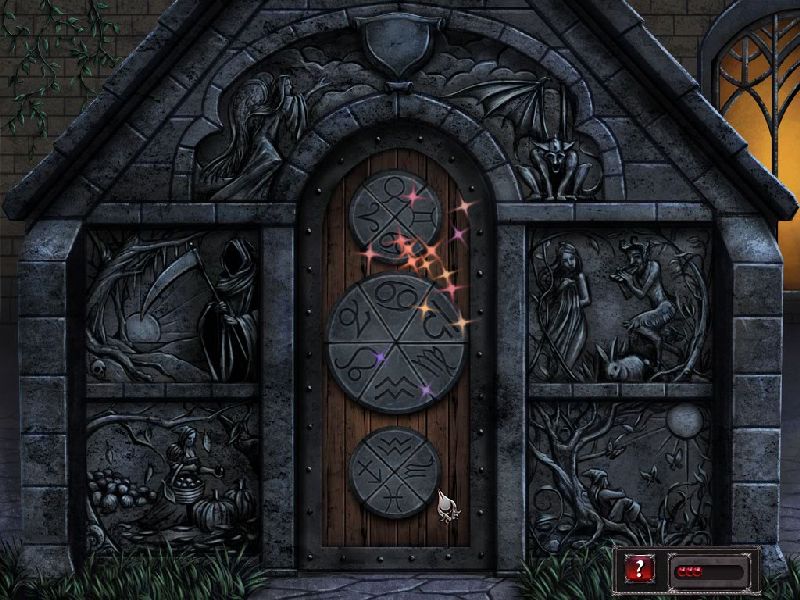
To enter the crypt you need to solve the puzzle. But first find the pieces hidden in the mural around it. Screen
Once the puzzle is assembled, look for symbols that appear on two of the three wheels and line them up. Screen
It's dark inside the crypt! Use the lighter...
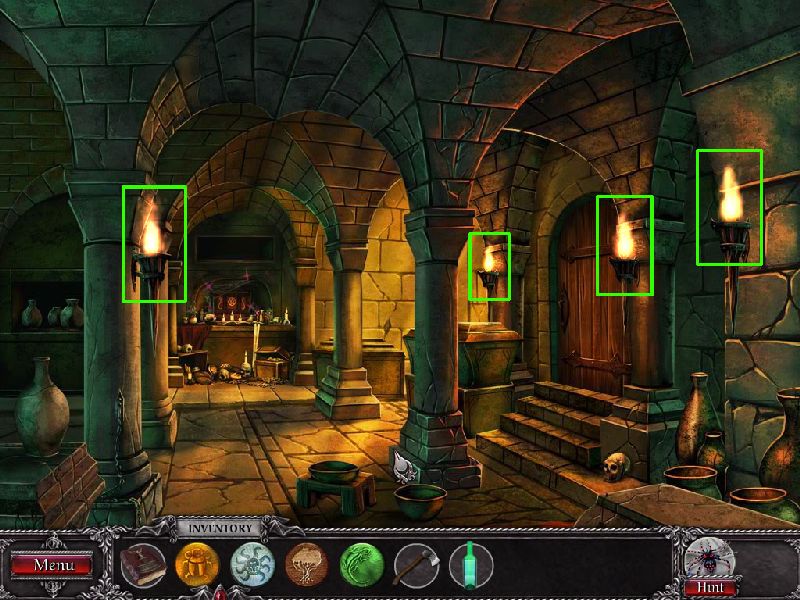
Light the four torches. Screen
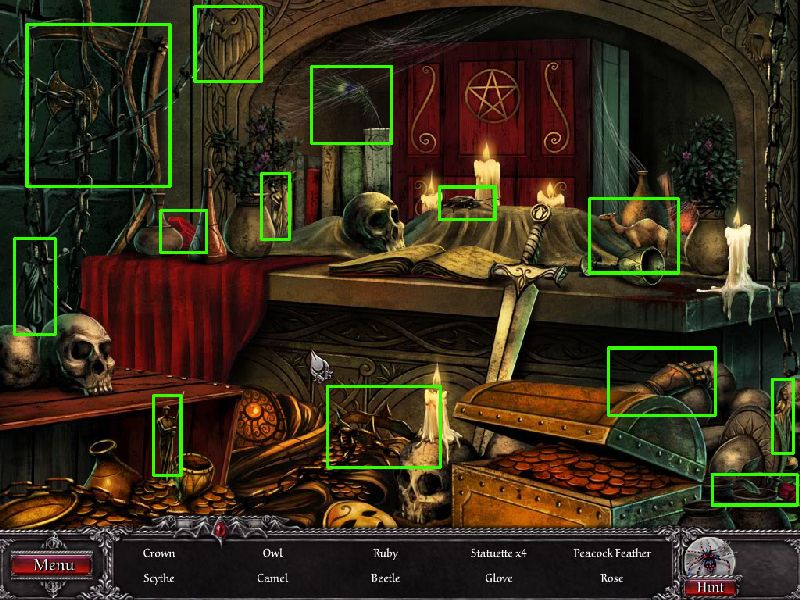
Take a look at the back. It's a HOG scene that will give you a chalice and a ruby. Screen
We're ready! Head through the door.
The door is locked! Nothing an axe can't fix...
The Final Fight
You've found your brother! Talk to him! Screen
Drat, another vampire. You need a weapon.
There is a stake-shaped piece of wood on the floor. Get it.
Use the stake on the vampire.
Your brother is thirsty. How can you help him?
The fountain can help him, but it needs to be activated.
Use the emblems on the fountain.
It works! Get some water with the chalice and give it to your brother.
Another vampire shows up, but Stratton intervenes!
You have to destroy the fountain.
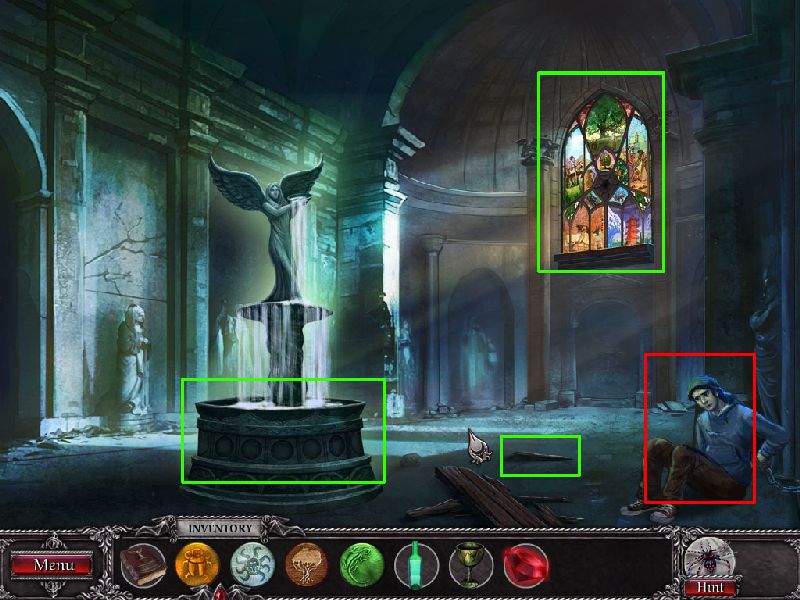
Look at the window and use the ruby.
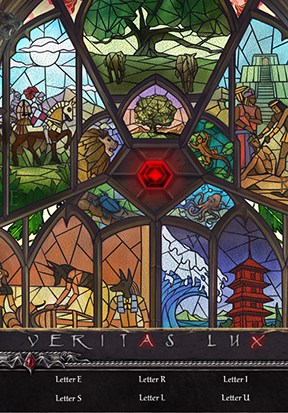
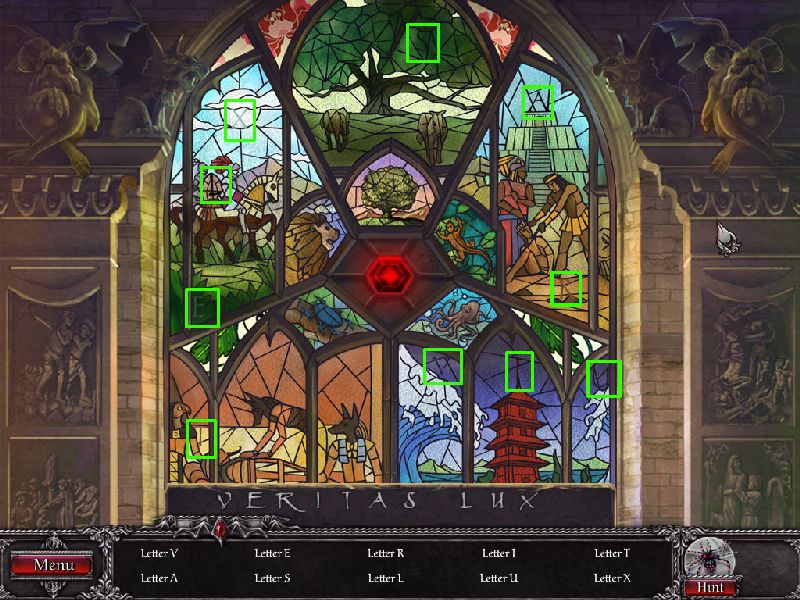
Find the ten letters of the incantation. Screen
Time to get out! Use the key on the ground to unlock your brother's shackles.
Congratulations! You have completed Blood and Ruby!
Posted by: James Francis |
May 5, 2011 1:22 PM
|
May 5, 2011 1:22 PM