
![]() [Mac user? Try freeware tool RPG Hub]
[Mac user? Try freeware tool RPG Hub]
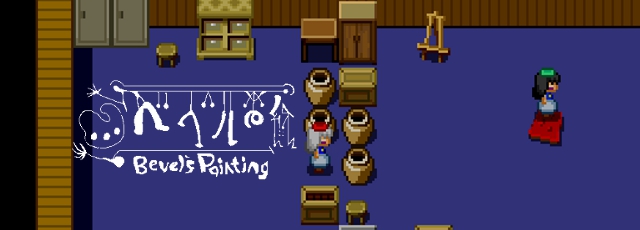
In Bevel's Painting, a free indie horror adventure by Maninu and translated by vgperson, you play an artistic young girl who winds up inside one of her own paintings one day when she discovers the canvas aglow. You know. As you do. Inside, things look magical, with fairy servants and teddy bear chefs, but there's something strange going on. ... well, stranger than getting sucked into a painting where everyone speaks gibberish. There's danger hidden around every corner, and this world doesn't exactly seem to follow logic our heroine would understand, though making the wrong choice could have... unfortunate consequences. Use the [arrow] keys to move and the [spacebar] to interact, while [ESC] opens the menu. You can only save at the little paint boxes you find, and most items will need to be used manually, so open the main menu and select an object from your inventory when you want to try to use it. Additionally, as you explore you'll find paint colours that can be used to change the world around you, though using a brush makes it dirty, and you'll need to find clean water to wash it before you can use it again. There are nine different endings to find, and the way to unlock all of them isn't necessarily obvious. Save frequently, and in different slots. Though on the short side compared to some freeware horror adventures and possessed of some chase sequences that may annoy more than anything else, Bevel's Painting crafts an unsettling and intriguing atmosphere with a story more implied than implicitly told. Note that while most of the text is in "Bevelese", it can be translated manually once you've worked out the alphabet... there's a clue as to how to do so in one of the "worlds".
 Initially almost entirely devoid of dialogue or readable text, Bevel's Painting is a seriously weird and disorienting game, and largely that works in its favour. So much of its storytelling is done organically, through implication and the things you see happening even if you don't understand them, which gives the game a great sense of mystery and unease. Most of your time is spent exploring each new environment and having to figure out on your own how to proceed, and the game is strongest when its focusing on that rather than the frankly annoying "action" sequences where it's possible to die. It's not the death that's frustrating, it's the fact that these sequences, like having to time your runs across a floor filled with spikes, just don't feel like they fit alongside the purposeful imagery that makes up the rest of the game. Figuring out what to read into the sudden change in a room you just passed through, or what a character might represent... that's intriguing and rewarding. Having to reload a save because you accidentally zigged when you should have zagged? Eh. The latter half of the game incorporates being chased and hiding very heavily into the gameplay... on the one hand, this ups the tension considerably, and gives everything an air of malice that constantly keeps you on edge. On the other, well, they're just sort of clunky, and they're jarring against the rest of the gameplay in a way that more puzzles wouldn't be.
 While Bevel's Painting does have jumpscares, some of them more effective than others, most of its horror comes not from its gorier aspects, but the sense of wrongness that pervades nearly every single scene. Sound is used sparingly, so when one area's "soundtrack" consists of low, even breathing, it raises the hairs on the back of your neck the entire time. It's not a particularly difficult game, with most of your time is spent trying to find Paint to proceed to the next area, and using items to overcome obstacles like crossing gaps or unlocking doors. The hardest part about Bevel's Painting is largely going to be unlocking anything other than the most unsatisfying ending, which leaves you with no answers at all. It's short enough that if you know what you're doing a playthrough will likely last less than half an hour, but all the hoops you need to jump through in order to get the conditions right for achieving some of the endings means a lot of replaying and experimentation unless you're following a walkthrough. The end result is a game that might wear out its welcome with players who don't have the patience for the trial-and-error. Which is a shame, because Bevel's Painting is compelling and creative, and knows how to be creepy rather than relying purely on gross-out horror. If you don't mind a lot of planning, there's even a special, extra difficult stage with its own unique ending as well. It's weird, to be sure, but despite its flaws, Bevel's Painting is definitely worth at least a try by any horror fan looking for something different.
![]() Windows:
Windows:
Get the free full version
![]() Mac OS X:
Mac OS X:
Not available.
Try Boot Camp or Parallels or CrossOver Games.


Walkthrough Guide
(Please allow page to fully load for spoiler tags to be functional.)
Bevel's Painting Walkthrough
There are 9 possible endings to this game and 1 bonus ending. The following walkthrough currently has the complete guide to reaching the final ending (which is the ending that grants the code to the bonus scenario). All other endings are included in the section labeled "Alternate Endings".
Refer to the Bevelese Messages Translation Guide to find the translation for code-language messages found in the game.
Bevel's Painting (Final) Ending
Normal World
Exit the art room through the doorway on the lower right.
Walk right until you see the red door to the girl's bathroom.
Press [Z] to use the restroom.
Return to the art room at the left end of the hall.
Approach the glowing blue canvas (second from the left) and press [Z] again to travel to a new area.
Fantasy World
Exit the red room through the doorway on the lower right, then walk all the way right to the rabbit at the end of the hallway.
Once Bevel travels through the portal in the theater, you'll arrive in a yellow hallway. Walk up the hall and follow the rabbit to the large door.
Go through the door to enter the central hall.
Here you'll find a save computer; simply activate it and select a file to save your game.
Enter the door at the top of the room, the one between the striped pillars, to reach the dining room.
Walk to the upper right corner of the room and read the instructions on how to reach the Blue World.
Next, read the note beside the center of the table. It says to "Clean your plate," so let's do just that.
Select the plate, then choose to "Eat it all."
Exit the dining room to return to the central hall, then go through the door on the left side of the room.
Take the door on the right to enter the toy room.
Inside the toy room you'll see several blocks and 3 holes in the floor. Push each movable block into the hole that matches its shape.
Round Block:
Move the Round Block up 3 spaces.
Left 2 spaces.
Down 1 space.
Right 1 space.
Star Block
Push the Star Block up 3 spaces.
Left 4 spaces.
Down 2 spaces.
Right 1 space.
Square Block:
Push the Square Block right 1 space.
Up 4 spaces.
Right 3 spaces.
Down 2 spaces.
Once all three blocks are inside their matching three spaces, the toy room will flash and change to a starry night room.
Pick up the BRUSH in the middle of the floor. The toy room will then flash back to normal.
Exit the toy room and enter the door on the left to find the cake room.
Read the warning note on the floor in the middle of the room. Watch your step! Going too far down the hall in this room means certain death.
Take a few steps forward to the glinting object on the floor. Pick it up to receive the BLUE PAINT.
Leave the cake room and walk all the way back to the central hall. From there, continue through the doorway on the right to find a plain wooden door in the corner.
If you try to open the door, it just loops infinitely back to itself.
Instead, press [X] to open the menu and select the Paint tab.
While facing the door, use the BLUE PAINT then choose [Yes] to paint the door blue.
Go through the blue door. Walk to the end of the linear path until you enter the main room of a blue carpeted house. Welcome to the Blue World!
Blue World
Once you reach the main room, use the jar on the table at the right side of the room to clean your BRUSH (it was made dirty when you used the blue paint).
You can also use the computer at this location to save your game.
Walk up and to the right to go to a different corridor.
The left door only leads to the blocked off side of the storage room. To open the door on the right, press [Z] seven times to shake the doorknob repeatedly until the door unlocks.
When you enter the storage room, the little girl beside the canvas will disappear. Examine the blank canvas to read a note about the Red World.
Exit the room and walk right until you're a few steps past the mirror.
After the mirror shatters, examine the broken glass to find a MIRROR SHARD.
Return to the main room. Go to the door in the upper left corner of the room, then climb down the ladder in the middle of the floor.
Walk left and through the glowing yellow doorway to enter the library, where an invisible person is playing the piano.
Pick up the glinting object on the table here to receive the SCISSORS.
Exit the library to return to the dark hall and walk right to the next doorway, which leads to the flooded room.
Approach the curtain hanging near the upper right corner of the room.
Open the menu and select the Items tab. Choose the SCISSORS to cut away the curtain, which will reveal a hidden passage and bend the scissor blades.
Enter the revealed secret passage. See the broken mirror hanging on the wall?
Take a look at the section of the wall that is opposite to the mirror (if you can't find it, just stand in front of the mirror and walk straight down until you hit the wall).
Press the [Z] key and then select [Yes] to activate the hidden switch.
DO NOT use the MIRROR SHARD in this room. If you do, you could see the reflection in the mirror which shows a hidden switch on the wall, but we are skipping that step because we need the SHARD for later!
Go down the ladder that appears in the center of the room to enter the underwater cellar.
Examine the glinting object between the two pillars to find the GREEN PAINT.
Walk all the way back to the main room where you first entered the blue world.
Go to the painting of the tree beside the locked door at the lower left corner.
Inspect the tree to find a message written in a strange language
It says: "It's cold with no leaves."
Make sure your brush is clean. If not, go ahead and use the jar to clean it now.
Next, open your Paint list in the menu and use the Green Paint on the tree painting to give the poor tree some leaves.
Go through the door on the left, which is now unlocked, to enter the toolbox room.
Read the sign in the middle of the room.
Stand in front of the toolbox, then open the menu and select the SCISSORS from your list of Items to put them in the box.
Exit the room then walk all the way back to the library. When you arrive, you'll see all the books have disappeared and only the piano remains, surrounded by skulls.
Don't touch the skulls! Just walk straight ahead and pick up the glinting object at the foot of the piano to receive the RED PAINT.
Quickly run to the door you came in from, making sure to avoid the skulls, to return to the dark hallway. Walk to the doorway on the right to return to the flooded room.
Wash your DIRTY BRUSH in the jar on the table so it's clean once again.
Leave the basement area and return to the main room of the Blue World.
Approach the door in the center of the room. If you try to walk through it, you'll find it loops indefinitely.
While facing the door, open the Paint menu and use the RED PAINT to color the door red.
Follow the train of blood to the lit doorway to reach the Red World.
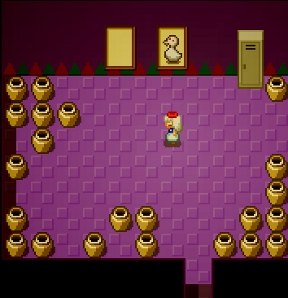
Red World
Once you reach the center room of the Red World, you can use the computer beside the table to save your game.
DO NOT touch the jar of water. Leave it alone!! We want to keep the red paint on the DIRTY BRUSH.
Walk left to find the jail cells, then continue left to the end of the hall where you'll see bloodstains on the ground leading to a large door.
Follow the bloodstains all the way through the winding torture chambers until you reach a dark room full of skulls and a giant heart.
Move to the right side of the room and examine the skull with glowing red eyes (it's the one closest to the right pathway) to receive the DESK KEY.
If you use the switch in the middle of this room, you can turn the lights here on or off.
Go all the way back to the center room. Enter the storeroom through the dark doorway at the upper right corner.
Approach the locked desk in the top right corner of the room, beside the empty closet.
Open the items menu and use the DESK KEY to open the lock and find the RED KEY.
Return to the giant heart room. Walk to the end of the small passage on the right to automatically use the RED KEY.
Inside this side room you'll find a glinting object. Pick up the object to receive the CANDLE.
Read the journal on the table and the note on the wall. Each of these items have more information written in the strange language.
The book has the whole Bevelese alphabet written from A-Z and two sentences that include each letter of the alphabet. Nifty!
The note on the wall has something equally useful; there's a clue that says "The red book is hidden behind a bookshelf."
Walk back through the torture chambers until you reach the giant blazing fire with a girl hanging above it.
Open the Items menu and select the CANDLE to light it with the fire.
Go through the lower doorway into the corridor and head right.
As you pass the picture frame, a girl will hop out and start to chase you. Quickly run to the right end of the hall to escape her.
Once you've made it out to the jail cells safely, turn back around return to the previous room. Take the BIG CANVAS on the wall that she jumped out of a moment ago (it's the only one not stained with blood).
Go back to the storeroom where you unlocked the desk.
Remember the Bevelese clue from the dark room where you found the CANDLE?
Examine the back of the left bookshelf to find a RED BOOK.
Exit the storeroom and go back through the torture chambers until you reach the area with the metal platform that has a gap in the middle.
Stand in front of the gap, then open the Items menu. Select the BIG CANVAS to make a bridge over the gap.
Look inside the right jar (with a red stain in front of it) to find the LIPSTICK.
Go down the lower right hallway to return to the giant heart room, then take the bottom passage to enter the dark red room.
Read the sign in the top right corner of the room. It's another message in Bevelese.
It says "Make it all red."
You can start by cleaning that DIRTY BRUSH we were holding on to with the jar in the center of the room.
Next, examine the mirror in the top left corner until it's totally covered red with blood.
Stand in front of the blank canvas. Open the Items menu and select the LIPSTICK to paint the canvas red.
Lastly, stand beside the book on the floor. Re-open the items menu and this time choose the RED BOOK.
Once all the items are properly red, you'll hear a loud heartbeat coming from the other room.
Step back out to the giant heart room. Pick up the shining object on the floor in front of the heart to receive the CLOTH.
Careful! Once you have this cloth, all the skulls will spring to life. Avoid them as you make your way back out through the top door.
Return to the center room. Walk to the end of the narrow hallway on the right to find a room filled with rows of doors.
Approach the middle door in the top row. Open your Items menu and use the LIT CANDLE to burn the door black.
Walk through the black door and follow the path to the black and white room. Continue all the way right, then go up across the bridge and through the large door to enter the Black World.
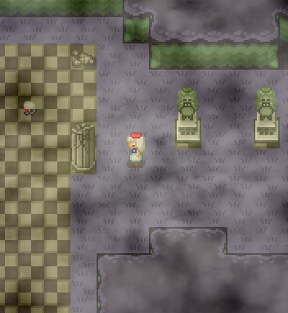
Black World
Once you enter the center room of the Black World, you can use the computer here to save your game.
Also make sure to pick up the EMPTY BOTTLE on the table beside the save point.
Walk left and up the staircase to reach the 2nd floor. Here you'll find another save point.
Go to the back of the room and enter the middle door to the dressing room.
Push the closet to the left to find a hidden note.
Remember the arrow pattern: UP, DOWN, LEFT, RIGHT, LEFT.
If you use the curtain from the right side, you can hide behind it. That's an ominous sign...
Exit the dressing room and go back down to the 1st floor via the stairway at the end of the lower right hallway.
Walk left, up, and then left again until you find the large door that leads to the backyard.
As soon as you walk out the door, turn right and examine the shining object on top of the purple flowery plant to take a PLANT SEED.
Follow the path up to the statues. If you approach the statues from the side and use the [Z] key, the statue will turn towards you.
Arrange the statues to match the pattern in the arrow clue from the dressing room: UP, DOWN, LEFT, RIGHT, LEFT.
But there are five arrows and only four statues, with a missing space in the center...
Starting with the far left statue, turn the first statue to face UP, the second statue to face DOWN, the third statue to face RIGHT, and the fourth statue to face LEFT.
Now stand on the blank tile in the middle of the statues and make sure your character is facing LEFT. Bingo!
Pick up the shining object that appears below you to collect the EYE JEWEL.
If you try to leave now, a mysterious voice speaking Bevelese will call out to you. Try to leave again and it will create a spike wall blocking the exit.
The skull is saying "Give me my eye."
Approach the one-eyed skull in the center of the crumbled columns. Open the Items menu and use the EYE JEWEL to put it inside the skull.
Once you've used the item, try to leave again. A voice will call out to you once more, but this time it belongs to The Reaper!
The Reaper is a deadly monster that will chase you endlessly until you are able to find a safe hiding place.
Immediately start running back inside the house. Any room with a hiding place will do, and there's one not too far from your current position.
As soon as you re-enter the house, move right and then down, then go through the door to the right of the flower pot. Quickly get inside the locker at the top left corner of the room.
If you are able to make it inside the locker before The Reaper enters the room, you will get away safely.
You'll know your hiding place was successful if the reaper looks side to side and then exits the room. If he starts slowly floating towards your hiding spot, you need to keep running!
After The Reaper leaves the room, it's safe for you to continue exploring.
Return to the main room, then go up the stairs on the left to the second floor. Enter the top left door, which should be slightly ajar, to find the telephone room.
Examine the telephone. Take a few steps away and it will start to ring. Walk back and answer the phone.
When the phone hangs up, walk down to the middle of the hall and inspect the glinting object to pick up the STUDY KEY.
Go back to the lower right corridor on the first floor, and then face the door to the left of the flower pot. Open the Items menu and use the STUDY KEY to unlock the door and enter the study.
Take a look at the right side of the lower right bookcase to read a note: "...I liked to sit behind the bookcase when I was little.
Pick up the DUCKETTE between the two upper bookcases.
As you leave the room, The Reaper will break through the crack in the floor and give chase again!
Run out of the room and go through the very next door on the right. Make The Reaper follow you around the table, then run out the door.
Quickly go back into the study, then stand behind the bookcase where you just found the note. It's a hiding place! The Reaper should leave shortly after entering the room. (If for some reason this spot doesn't work, you can still hide behind the curtain in the dressing room or the lockers in the other rooms.)
Walk right and head up the stairs to return to the 2nd floor. Go through the upper-right door to find a room full of jars.
Find the jar near the top left side of the room that is full of water.
Open the Items menu and select the EMPTY BOTTLE to fill it.
Next, inspect the blank canvas on the wall beside a portrait of Ducky.
Open the Items menu again and use Duckette to put her on the canvas. You'll also hear a door unlock somewhere else.
As soon as you exit the room, The Reaper will start to chase you once again.
This time, escaping him can be very easy. Simply run straight back to Ducky/Duckette's room and hide in the locker.
Exit the duck room and take a few steps to the left. You should see some bloody footprins have appeared in front of the nearest door. Enter the room.
Aside from two notes, this room is empty. The lower note shows a picture of a candle and a door (it's a clue to use the lit candle in the Red World).
The upper note is new. Read it, then select [Yes] to rip it off the wall. Press the switch to activate something on the 1st floor.
For now, leave the room and go to the lower-right doorway. This room should now be unlocked; continue through the door to enter the child's bedroom.
Pick up the SUN PAINTING on the floor beside the crayons.
Talk to the giraffe toy. It says something to you in Bevelese...
"That blue book looks pretty heavy."
There's one place in particular that needs a heavy object in order to continue.
Go downstairs and walk to the large door that leads to the back yard. Instead of going outside, however, continue left to the end of the hall.
In this hallways you'll see a locked door and a green button. If you step on the button, the door opens, but moving off the button closes it just as quickly. Let's use the clue from the giraffe toy.
Stand in front of the green button. Open your Items menu and select the BLUE BOOK to place it on the button.
Go through the opened door to enter the room.
Take a look at the gleaming object on the floor to pick up the BATTERY.
Examine the picture at the rear left corner of the room. It seems to show a black heart and a droplet of water.
Leave the room and walk right once so that you're back in the large hall with the door to the backyard. Continue through either of the two doors on the right to enter the lounge.
Inside this room you'll see a torn piece of paper on the table. Ignore it for now and take a look at the right bookcase.
Note the three steps for growing a plant: Water, Sunlight, and Time.
Exit the room and walk down once and then left once. Go through the first door to the right of the flower pot.
You might remember this as the room we used to escape The Reaper the first time it chased us.
Stand in front of the bare patch of ground and open the Items menu. Select the PLANT SEED to sow it into the earth.
Follow the instructions from the book in the study to grow the seed.
First, use the BOTTLE OF WATER.
Next, place the SUN PAINTING on the easel.
Thirdly, insert the BATTERY into the broken clock.
After the vines spring out of the ground, climb up them by pressing [Z] and take the TORN PICTURE from behind the vent.
Go back to the 2nd floor. Enter the Ducky/Duckette room through the top and farthest right door.
Refill the EMPTY BOTTLE with the water jug at the upper left side of the room.
Return to the 1st floor, and then go to the lounge.
Approach the paper scrap at the center of the large table. Add the TORN PICTURE from your own Items list to combine the two.
The reaper returns for another surprise appearance!
Quickly run out of the room and flee The Reaper.
The only way to escape this time is to go back to the study (the same room where The Reaper broke through the hole in the floor) by running down the hall and then through the left door.
Run behind the bookcase before The Reaper enters the room, then hide there until it leaves.
As you walk out the study, The Reaper will break through the wall and start the chase again!
This time, you need to run out the door then IMMEDIATELY run back in. If you take too long to do this, you'll run straight into death, so be quick!
As soon as you re-enter the study, go through the hole that The Reaper made Kool-aid Man style in the wall. The stones on the floor indicate where the gap in the wall is; quickly run through there to escape.
Now you'll find yourself on the back side of the 1st floor main room. Take a look in the mirror on the left side of the room to find the SHED KEY.
Take a few steps to the right to have a final encounter with The Reaper.
Select [Yes] when prompted to throw the MIRROR SHARD.
Walk back through the broken wall that leads to the study, then exit and return to the lounge where you reconnected the torn picture.
Look inside the fireplace and you'll find a hidden ladder (if there's no ladder here, then you either didn't activate the switch on the 2nd floor or you killed "evil Bevel" in the Red World). Climb down to reach the dining hall.
Take a look at the plate of meat on the table. Bevel's not so hungry this time.
Now would be a really good time to save - hint, hint!
Try to exit through the door at the bottom of the room. You'll be interrupted by a giant Teddy Chef who is not happy you've refused his meal.
The killer Teddy Chef will give chase! To escape the dining room, lure the bear around the table then run out the door before it can reach you.
In this next room, quickly move to the table at the lower right corner and pick up the CLEANING FLUID. Watch out for the skull that busts out of the wall!
Walk up and around the bear then run to the right to enter the hallway.
Quickly move to the door. It's jammed! Use the [Z] key repeatedly to open it before evil Bevel or the Teddy Chef can reach you.
If you manage to open the door in time, you'll find yourself in another giant heart room.
IMPORTANT NOTE: If you are interested in seeing some of the other endings, create a save point at this location. Multiple alternate endings can be accessed based on your choices from this point onwards.
Don't go through any of the doors in this room! Instead...
Do you remember the painting in the room we unlocked with the weighed down green button? That picture had the clue on what to do in this room.
Approach the black heart. Open the Items menu and select the BOTTLE OF WATER.
Bevel will be transported to the school hallway. If you have closely followed all of the steps in this walkthrough, there should be four black doors as well as the red and blue bathroom doors.
The first door will only turn black if you put the SCISSORS into the toolbox in the Blue World.
The second turns black if you acquired the CLOTH from making the whole room red in the Red World.
The third door turns black if you put the TORN PICTURE back together in the Black World.
The fourth door turns black if you threw the MIRROR SHARD at The Reaper in the Black World.
Go through the first black door on the right.
Approach the piano player and press the [Z] key. After she disappears, leave the room.
Go through the next black door.
Take a look at the red canvas in the middle of the room.
Enter the third black door.
Look at the piece of paper on the floor at the back of the room.
Open the last black door.
Wait for 10 seconds
After you leave the fourth room, move towards the other Bevel but DO NOT talk to her!
Instead, stand next to her then open the Items menu. Give her the BRUSH.
Now you are in control of the other Bevel. Walk right to find a blank wooden door.
Open the Paint menu and select the WHITE PAINT to color the door white.
Go through the door, then follow the sign to the left. Enter the doorway in the middle of the rainbow.
Pay attention after the credits to find the secret code to the Bonus Ending!
Bonus Ending
If you earn the ending "Bevel's Painting" you will be shown a command after the credits:
Up - Up - Up - Up - Down - Down - Down - Down - Left - Right - Left - Right - Down - Up.
Return to the Title Screen menu and enter this code with the [arrow keys] to automatically access the Bonus Level.
Normal World
The Bonus Level starts just like the real game.
You must exit the art room, go to the bathroom through the red door, then return to the art room.
Activate the blue painting to travel to the Fantasy World.
Fantasy World
Once you arrive in the first room, read the note on the floor.
Just like before, you must walk right to find the bunny and butterfly.
Follow the bunny to the large door that leads to the central room of the Fantasy World.
Go through the middle door to enter the dining room.
Take a look at the meat, which Bevel won't eat, then try to leave back out the door you entered from.
Return to the main room, then go through the left narrow hallway to reach the side corridor. From there, take the door on the right to enter the play room.
This puzzle has the same solution as the original game:
Round Block:
Move the Round Block up 3 spaces.
Left 2 spaces.
Down 1 space.
Right 1 space.
Star Block
Push the Star Block up 3 spaces.
Left 4 spaces.
Down 2 spaces.
Right 1 space.
Square Block:
Push the Square Block right 1 space.
Up 4 spaces.
Right 3 spaces.
Down 2 spaces.
This time when the room changes to night, instead of a brush, you can pick up the crate of dynamite to receive a BOMB.
After the room flashes back to normal, go out the door to return to the corridor.
Note: If you haven't yet, this would be a very good time to save your game!
Now enter the door on the left to find the cake room.
Be careful walking down this hallway! The floor will crumble under your feet if you take one wrong step.
It's only safe on the left side of the hall (the side that's partially covered in shadow).
Start standing beside the note. Take EXACTLY 14 steps forward so that you see the glinting object on the floor in the distance.
Turn and take 1 step to the Right.
Now take 5 steps Up, then pick up the sparkling item to receive the BLUE PAINT.
Remember to take the safe path on your way back! 5 steps Down, 1 step Left, then all the way down to the cake room.
Return to the main room and go through the narrow hallway on the right.
Stand in front of the cracked section of the wall. Use the BOMB in your inventory to blow it up.
Enter the secret room through the hole in the wall, then take the DIRTY BRUSH lying on the floor.
Go back to the main room.
Look behind the top of the upper-left pink pillar in this room to find a bottle of clear water.
Use the water to "Clean the Dirty Brush."
Walk through the narrow hallway on the right to return to the side room.
Stand in front of the blank door. Select the BLUE PAINT from your Paints menu to color the door blue.
Enter the blue door and follow the linear path until you reach the main room of the Blue World.
Blue World
Stay away from the save point and the jar! If you step past the crumbling floor, you will fall straight to your death.
Go through the upper left door and then climb down the ladder. From there, walk to the bright doorway on the right to enter the frozen room.
Look in the mirror to find a MIRROR SHARD. Look again to take the YELLOW PAINT.
Return to the main room. Stand in front of the center door and select the YELLOW PAINT from your Paints menu.
The yellow will combine with the blue paint on your DIRTY BRUSH to color the door green.
Go through the door to travel to the Green World.
Green World
Follow the path. When you reach the dress, press [Z] to put it on, then continue walking ahead.
Go out the door to enter the field. There's a save point here, so you should use it.
Walk straight up until you see vines sprouting out of the ground.
Look for a group of 4 vines. Stand in the space between the two upper vines to teleport to the next location.
Move forward and then drop down into the hole in the floor.
Go down the stairs and walk right to the upper-right corner of the room.
Stand in front of the broken mirror. Open your Items list and select the MIRROR SHARD.
Look inside the mirror, then select [Yes] to escape the Green World.
Follow the linear path to the doors of the mansion to reach the Black World.
Black World
Once you enter the main room, you can use the save point beside the table to save your progress.
Walk left to the next corridor. Move left until the flower pot shatters. From there, go up once and enter the first door on the left to reach the lounge. Did you notice the layout of the mansion has been reversed?
Examine the left side of the left bookshelf to read an important clue in Bevelese:
"'Duck on a walk.'"
"When I hid in the room, he went away. Maybe he's looking around the mansion for something."
Exit the room through either door. Take the left path back down to the corridor with the broken flower pot. This time, go left and walk up the stairs to reach the 2nd floor.
In the middle of the bottom section of the second floor you can find another save point.
Find the top door that is furthest left to enter the Ducky room full of jars.
Don't touch that sparkling object!! Instead, think of the clue we just read in the lounge:
Hide inside the locker for about 10 seconds. When you step outside, Ducky should have disappeared from his painting.
It's now safe to pick up the shining STUDY KEY at the bottom of the room.
Go back down to the 1st floor. Return to the corridor with the broken flower pot.
Stand in front of the door to the right of the table, then use the STUDY KEY from your inventory to unlock the study.
Pick up the BLUE BOOK between the two bookshelves at the top of the room.
Look inside the desk to find the CANVAS SCRAPER.
Exit the room then walk straight down to the section of the wall exactly opposite the study door. Press [Z] to open the door to a hidden room.
Pick up the glinting object on the ground to find the ORANGE CRAYON (1/7).
Leave the secret room to return to the corridor. Take a look at the broken flower pot beside the table to find the GREEN CRAYON (2/7).
Go through the door to the left of the flower pot.
Examine the object glinting on the floor - it's another crayon! But it's stuck.
Open the Items menu and use the CANVAS SCRAPER to receive the BLUE CRAYON (3/7).
Exit the area and move right to return to the main room of the 1st floor.
Look behind the right pillar (the one that's cracked and destroyed) to find the RED CRAYON (4/7).
Walk left, up, and then right until you reach the end of the hallway where you should see a locked door and a green button on the ground.
Stand next to the green button, then put the BLUE BOOK from your inventory on top of it to weigh the button down.
Go through the now open door into the small room.
Push the lightswitch on the back wall to turn the lights off and on repeatedly until the room changes.
Pick up the glinting object on the floor to collect the VIOLET CRAYON (5/7).
Leave the room and go upstairs to the 2nd floor. Go to the upper left door to enter the gallery (it's the door between Ducky's room on the left and The Reaper in the dressing room on the right).
Look behind the paint of a night sky and stars, the middle painting in the top row, to find the INDIGO CRAYON (6/7).
Exit the room and go to the door at the bottom left side of the 2nd floor to find the child's bedroom.
Inspect the far right star on the wall, it's a slightly lighter color than the other stars, to find the YELLOW CRAYON (7/7).
Once you have the 7th crayon, you will receive a notification that "A door was unlocked somewhere."
Go downstairs to he 1st floor then walk to the back hallway. You should now see the large doors leading to the backyard are slightly open.
If you haven't already, I strongly recommend you save your game at this point!
Walk outside to reach the theater. Take a few steps forward and you'll be interrupted by the pink rabbit.
Get ready to run as soon as he stops talking! Move forward to the portal before the rabbit can catch you, or you'll be teleported all the way back to the beginning (in that case, you'll have to reload a save).
Crayon Locations
Orange Crayon (1/7) - Hidden in the secret room located directly opposite the study.
Green Crayon (2/7) - Inside the broken flower pot in the lower left 1st floor corridor.
Blue Crayon (3/7) - Glued to the floor in the 1st floor room located to the left of the broken flower pot. Removed with the CANVAS SCRAPER from the study.
Red Crayon (4/7) - Located behind the right pillar beside the save point in the main room on the 1st floor.
Violet Crayon (5/7) - Found in the room unlocked by the green button by flipping the light switch on and off multiple times until the room fills with body parts.
Indigo Crayon (6/7) - Behind the painting of stars in the gallery on the 2nd floor.
Yellow Crayon (7/7) - White star on the wall in the child's bedroom, to the right of the toy giraffe.
Alternate Endings
Alternate Ending #1 - Long Dream
Follow all of the instructions in the main walkthrough until you reach the point in the Red World where you acquire the CLOTH from the giant heart room. You should still have the LIT CANDLE in your inventory at this point (Red World, step 11).
At that point, return to the central room and go through the dark doorway to enter the storeroom.
Stand in front of the vines and select the LIT CANDLE from your inventory to burn them away.
Continue up the unblocked passage to enter the spike trap room.
Carefully navigate along the path, and look out for the spike traps! Walk over them only when the spikes are detracted. Also stay away from the cracked section on the floor.
Patience is key here. Remember it's faster to wait for the spikes to go away than to start all over when you die!
At the end of the path, pick up the glinting object to receive the BLACK PAINT.
Once you have the paint, the lights in the room will turn off. Bevel will only be able to see about 2 squares around her, so you need to be very careful when walking back, because the spikes are still active!
Backtrace your steps to the storeroom, making sure to also avoid the crumbled section on the floor.
Once you're safely out, walk down to the center area, then go through the narrow hallway on the right to find a room full of doors.
Stand in front of the middle door on the top row. Other-Bevel will appear and steal your BLACK PAINT.
Follow the other Bevel through the torture chambers until you reach the area where you used the BIG CANVAS to create a bridge. Walk over the canvas and then go to the left.
Stand on the big red button on the floor to activate the spike trap and kill Other-Bevel.
Step off the button and pick up the BLACK PAINT in the middle of the spike trap.
Return to the room full of rows of identical doors.
Stand in front of the middle door in the top row once again. Open the Paints menu and select the BLACK PAINT to color the door black.
Follow the linear path until you reach the front doors to the mansion. Go inside to enter the Black World.
Refer back to the main walkthrough and follow all of the instructions in the Black World up to the point where you defeat The Reaper with the MIRROR SHARD (Black World, step 25).
After The Reaper disappears, go through the large double doors that lead to the back hallway on the 1st floor. Continue through the second set of double doors to enter the backyard.
Walk up and right until you reach the shed. Enter the building and follow the linear path all the way to the glowing blue easel.
Alternate Ending #2 - Meaningless Illusion
Refer to the main walkthrough until you reach the giant heart in the Black World after escaping the Teddy Chef and the Other Bevel (Black World, step 29).
This area is the hub of several different endings. If you haven't already, create a save point here so that you can reload it if you want to reach those other endings and save a lot of time!
Walk up to the top of the room and enter the door that's stained with splotches of paint.
Go up the hall and enter the locker at the end of the room.
Alternate Ending #3 - A Rousing Success
Refer to the main walkthrough until you reach the giant heart in the Black World after escaping the Teddy Chef and the Other Bevel (Black World, step 29).
This area is the hub of several different endings. If you haven't already, create a save point here so that you can reload it if you want to reach those other endings and save a lot of time!
Walk to the top of the room and stand in front of the paint-splotched door, but do not go through it!
Open your inventory and select either the CLOTH or the CLEANING FLUID (both items are required but you only have to choose one) to remove the stains from the door.
Go through the door and walk upwards. Bevel will start to run on her own as she's being chased until you reach an area that is completely blank.
Walk in any direction until The Reaper and Other Bevel appear.
Alternate Ending #4 - And I'm Gone
Follow the directions in the main walkthrough until you reach the toolbox room after using the GREEN PAINT in the Blue World (Blue World, step 14).
Do NOT put the SCISSORS in the toybox. Instead, drop the MIRROR SHARD into the box. We'll need the SCISSORS for later!
Refer back to the Blue World section of the main walkthrough and follow the instructions until you reach the entrance to the Red World.
Once inside, read the instructions in the Red World section of the main walkthrough and follow the steps until you reach the point where you have acquired the LIT CANDLE (Red World, step 6).
After you get the LIT CANDLE, return to the central room and go through the upper right doorway to enter the storeroom.
Stand in front of the vines blocking the path ahead. Open your inventory and use the SCISSORS to cut the vines away.
Continue forward into the spike trap room.
Carefully navigate along the path, and look out for the spike traps! Walk over them only when the spikes are detracted. Also stay away from the cracked section on the floor.
Patience is key here. Remember it's faster to wait for the spikes to go away than to start all over when you die!
At the end of the path, pick up the glinting object to receive the BLACK PAINT.
Once you have the paint, the lights in the room will turn off. Bevel will only be able to see about 2 squares around her, so you need to be very careful when walking back, because the spikes are still active!
Backtrace your steps to the storeroom, making sure to also avoid the crumbled section on the floor.
Once you're safely out, walk down to the center area, then go through the narrow hallway on the right to find a room full of doors.
Stand in front of the middle door on the top row. Other-Bevel will appear and steal your BLACK PAINT.
Go back to the central room, then walk left to the jail cells. Follow the Other-Bevel through the left doorway into the hall of bloody paintings.
Pick up the BIG CANVAS on the wall at the left end of the hall.
Continue left, up, and then right to navigate through the torture chambers. You should now be standing beside a metal bridge with a gap in the middle.
Open your inventory and select the BIG CANVAS to place it over the gap.
Walk across the bridge and go left to find Other-Bevel.
Step on the red button on the floor to kill her, then pick up the BLACK PAINT left behind at the center of the large spike trap.
Go back to the central room. Use the jar of water beside the save point to clean your DIRTY BRUSH.
Move right to return to the room full of identical doors.
Stand in front of the center door in the top row. Open the Paints menu and select the BLACK PAINT to color the door black.
Follow the instructions in the Black World section of the main walkthrough until you reach the child's bedroom where you find the SUN PAINTING (Black World, step 16).
Talk to the giraffe toy, who has a new and important clue for you in Bevelese:
It says, "The broken pillar hides a secret."
Go back down to the central room on the first floor.
Use the clue from the toy giraffe to find the object hidden in this area.
Look behind the broken pillar to the left of the save point to discover the BATTERY.
Walk to the hallway to your right and go through the door to the right of the broken flower pot.
Stand in front of the bare patch of ground and open the Items menu. Select the PLANT SEED to sow it into the earth.
Follow the instructions from the book in the study to grow the seed.
First, use the BOTTLE OF WATER.
Next, place the SUN PAINTING on the easel.
Thirdly, insert the BATTERY into the broken clock.
After the vines spring out of the ground, climb up them by pressing [Z] and take the TORN PICTURE from behind the vent.
Exit the room and walk up to the back hallway. Open the first door to the left to enter the lounge.
Approach the paper scrap at the center of the large table. Add the TORN PICTURE from your own Items list to combine the two.
The reaper returns for another surprise appearance!
Quickly run out of the room and flee The Reaper.
The only way to escape this time is to go back to the study (the same room where The Reaper broke through the hole in the floor) by running down the hall and then through the left door.
Run behind the bookcase before The Reaper enters the room, then hide there until it leaves.
As you walk out the study, The Reaper will break through the wall and start the chase again!
This time, you need to run out the door then IMMEDIATELY run back in. If you take too long to do this, you'll run straight into death, so be quick!
As soon as you re-enter the study, go through the hole that The Reaper made Kool-aid Man style in the wall. The stones on the floor indicate where the gap in the wall is; quickly run through there to escape.
Now you'll find yourself on the back side of the 1st floor main room. Take a look in the mirror on the left side of the room to find the SHED KEY.
Take a few steps to the right to have a final encounter with The Reaper.
Before he can catch you, run through the large double doors to reach the back hall, then go through the next set of double doors to the backyard.
From there, run up and to the right and enter the shed.
Once you're safely inside the shed, follow the linear path to the red canvas.
Stand in front of the canvas and use the LIT CANDLE from your inventory to light it on fire.
Alternate Ending #5 - Dead Inside
Follow the directions in the main walkthrough until you reach the toolbox room after using the GREEN PAINT in the Blue World (Blue World, step 14).
Do NOT put the SCISSORS in the toybox. Instead, drop the MIRROR SHARD into the box. We'll need the SCISSORS for later!
At this point, refer back to the instructions in the main walkthrough (starting at Blue World, step 15) and continue to follow them until you have acquired the LIT CANDLE in the Black World (Black World, step 6).
When you leave the torture chambers and return to the hallway full of bloody picture frames, Other-Bevel will jump out and start to chase you.
Quickly run right to the jail cells to escape.
Return to the central room and continue through the right hallway to enter the room full of identical doors.
Stand in front of the middle door in the top row. Open your inventory and select the LIT CANDLE to burn the door black.
Go through the door and follow the path into the Black World mansion.
Follow the instructions in the Black World section of the main walkthrough until you reach the point where enter the door in front of the bloody footprints (Black World, step 15.)
Go to the note on the back wall and tear it off to reveal a switch. Flip the switch to unlock the secret passageway in the lounge.
Exit the room and go downstairs. Go to the back hallway and enter the lounge through either of the two lounge doors.
Inspect the fireplace in the rear left corner of the room. Use the ladder to climb down
The secret ladder takes you to the dining room from the Fantasy World. Once you reach the dining room, it would be a good idea to use the save point here to store your progress.
Take a look at the plate of meat on the table. Bevel's not so hungry this time.
Try to exit through the door at the bottom of the room. You'll be interrupted by a giant Teddy Chef who is not happy you've refused his meal.
The killer Teddy Chef will give chase! To escape the dining room, lure the bear around the table then run out the door before it can reach you.
Once outside the dining room, run to the right to enter the hallway.
Quickly move to the door. It's jammed! Use the [Z] key repeatedly to open it before Other-Bevel or the Teddy Chef can reach you.
If you manage to open the door in time, you'll find yourself in another giant heart room.
Stand in front of the giant heart. Open your inventory and select the SCISSORS to kill the heart.
Go through the paint-stained door at the top of the room.
Alternate Ending #6 - Revenge
Refer to the main walkthrough until you reach the Other-Bevel after turning the 4 black doors white (Black World, step 35).
DO NOT talk to Other-Bevel. Instead, walk left to return to the giant heart room.
Go through the paint-stained door at the top of the room.
Walk up the hall to the glinting object on the floor. Pick up the CANVAS SCRAPER.
Continue walking upwards and go into the locker at the end of the hallway.
Alternate Ending #7 - First and Last Friend
Refer to the main walkthrough until you reach the Other-Bevel after turning the 4 black doors white (Black World, step 35).
Talk to the Other-Bevel. When she asks if you're friends, say "Right."
Alternate Ending #8 - The Real Me
Refer to the main walkthrough until you reach the Other-Bevel after turning the 4 black doors white (Black World, step 35).
Talk to the Other-Bevel. When she asks if you're friends, say "Wrong."
Walk left to go back to the giant heart room.
Approach the paint-stained door at the top of the room, but don't go through it!.
Select the CLOTH/CLEANING FLUID from your Items menu to clean the paint off the door.
Open the cleaned door and run to the end of the hallway to reach the blank room.
Walk straight ahead until you find the glowing blue canvas. Inspect the canvas to escape.
Bevelese Messages Translation Guide
Bevelese is a simple code that substitutes letters in the English language. You can find the cypher in the Red World, in the same room where you find the Candle.
There should also be an img file in your game folder titled bevelese.png which has a picture of the complete Bevelese alphabet.
Fantasy World
Sign in the painting portal room:
"Welcome to Bevel's Painting. We invite you to this wonderful world you painted.
Teddy Chef:
"Your meal has been prepared."
Blue World
The tree painting in the main room:
"It's cold with no leaves."
Three books in the library:
"I can't find my precious brush. It was hidden from me again."
"I was so close to completion, yet it was scribbled over."
"I'm still alone now. An odd one out."
Red World
The sign in the jail cell:
"No escape."
Blue book in the red room:
"You are me."
Sign in the dark red room:
"Make it all red."
Bookshelf in the storeroom:
"I don't want to be hurt anymore, yet thorny words come hurtling at me. I want to kill my own heart, and go to a world where I feel nothing."
Journal in the Candle room:
A-Z alphabet, followed by "The quick brown fox jumped over the lazy dog. Pack my box with five dozen liquor jugs."
Note on the wall in the Candle room:
"The red book is hidden behind a bookshelf."
Red Book description:
"Clean dead hearts with a cloth."
Black World
One-eyed skull:
"Give me... my eye..."
"Give it back..."
The Reaper:
"Why are you here..."
"You have no reason to live..."
"Disappear..."
"What a stubborn one... You can't run or hide anymore. Just go quietly...Bevel!"
Bookcase in the room with Duckette:
"Everything I can see scares me. So I burned it. Burnt it black to erase it all. I don't care if I'm alone. This is the world I wanted."
Description of Duckette:
"Take me to Ducky."
Giraffe toy:
"The broken pillar hides a secret."
OR "That blue book looks pretty heavy."
"That beret looks really cute on you."
Teddy chef:
"Why won't you eat?"
Black door bookcases:
"Mom always played the piano for me. I wanted to hear it closer. I went to the world outside. Mom wasn't there."
"I had nowhere to run. I immediately threw the broken mirror on the wall at him. Dad didn't move.
Bonus World
The red tree painting:
"I'm a maple... Am I pretty?"
Paper in the storage room:
"An amusing world, isn't it? Enjoy it more."
Pink rabbit:
"Stay here with me forever! I've been so lonely..."
"Stay here and play forever!"
"Wait! Don't go that way!"
Lounge bookcase:
"Duck on a walk. When I hid in the room, he went away. Maybe he's looking around the mansion for something.
Giraffe toy:
"Nice to meet you."
Posted by: Trinn |
March 11, 2015 4:27 PM
|
March 11, 2015 4:27 PM