
The Happy Escape 4

![]() Most room escapes by the prolific designer Tesshi-e feature two endings, one in which you merely escape, and one in which you escape holding the most fabulous token in the world, the Happy Coin. The Happy Coin is so sought after that folks will play Tesshi-e's escapes as many times as it takes to find those fantastically lucky coins. Once in a blue moon, however, Tesshi-e gets mischevious and builds an escape around finding not one, not two, but a grand total of ten lucky coins in a room. These escapes make Tesshi-e fans very happy, thus the title, The Happy Escape 4.
Most room escapes by the prolific designer Tesshi-e feature two endings, one in which you merely escape, and one in which you escape holding the most fabulous token in the world, the Happy Coin. The Happy Coin is so sought after that folks will play Tesshi-e's escapes as many times as it takes to find those fantastically lucky coins. Once in a blue moon, however, Tesshi-e gets mischevious and builds an escape around finding not one, not two, but a grand total of ten lucky coins in a room. These escapes make Tesshi-e fans very happy, thus the title, The Happy Escape 4.
 Have you ever wondered what happened to Santa when he left the Southern Islands the last time we visited the strange world of Tesshi-e? Well, he arrived back home to find not only his magic sack of presents missing but also those amazing things without which anything would be possible, the magical Happy Coins also not to be found. It is the job of the room escape fantatic to find not only the presents but all of those Happy Coins scattered about the place, probably hidden by those same naughty elves who locked Santa into his vacation cabin. Perhaps it is also time for Santa to think about some personnel changes...
The Happy Escape 4 features everything there is to love about Tesshi-e: well-designed, logical puzzles, gorgeous three dimensional space, jaunty music, Mr. Birdy, Mr. Hippo, the wobbly picture puzzle, and enough Happy Coins to choke a horse. Tesshi-e's beautifully designed games continue to amaze and delight, putting them at the top of the room escape heap in every conceivable way. Tight designs, easy controls, textual displays of color, grammatically correct English translation...basically everything you want in an escape is here to behold. As a special treat Tesshi-e has included a choice of three presents at the end, perhaps to make up for there being only one way to escape. Time to find out what special happiness Happy Coins will bring to you!!
Thanks to Cyberjar88, Tao, and Itt for sending this one in! :)


Walkthrough Guide
(Please allow page to fully load for spoiler tags to be functional.)
The Happy Escape 4 Walkthrough
General Information
The object is to find 10 happy coins and Santa�s bag-o-toys.
Don't forget to examine everything you pick up, items may be hiding other items.
Try using an object, even if it says that it is broken. Miracles can happen on Christmas.
There is only one ending, but a choice of three presents when the game is over.
Good luck and Happy Holidays!
Exploration
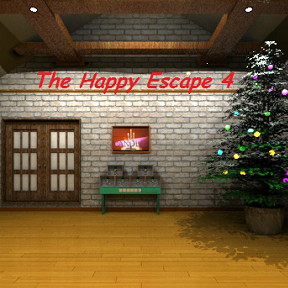
You begin facing the wall with the doors that go out. The doors are not locked, but you shouldn't go out until you find the happy coins and Santa's sack.
To the left of the door is a pink panel that is locked with a four digit code.
To the right of the door is a table and a picture. The table has six Mr. Birdy figurines in six alcoves, and features six buttons that turn each Mr. Birdy different colors.
Above the table is a picture of a candelabra with three candles and the word "Candle" on the picture. Yes, this is the wobbly picture puzzle.
To the right of the table in the right corner of the room is a Christmas tree. Click on the tree for a close up.
The tree is beautiful, isn't it? In close up, you will see a Happy Coin on the wall to the left of the tree, near the beams at the ceiling. It is too high up the wall to reach.
Back up and turn right.
You are now facing a wall with a double window. There is a low coffee table to the left and a panel of wood on the wall to the right.
Click on the coffee table for a close up.
Underneath are three brightly colored boxes. Click the right box to move it over, then click on the middle box. This should reveal a Happy Coin (Happy Coin #1).
Click the far left box to move it and you will see a diamond and the number 8. Back up.
There is some sort of device on top of the coffee table. Click on the device for a close up.
The device holds what appears to be a frozen snowman inside. The front of the device has six levers that can either be in the up, middle, or down position. Back up.
If you click on the wood panel for a close up you will see that it is held with screws. Looks like we need a screwdriver.
While in close up on the wood panel, notice the dark notch in the floor. Click on the notch for a close up, but it is too dark to see inside.
Back up twice and turn right.
You are now facing a lovely fireplace with a cozy fire burning. You can click on the fire for a close up and yes, it is warm.
Click on the mantel above the fireplace for a close up.
There are several items of interest here. First, there are two candelabras, each with three candles and letters on them that spell out "CANDLE".
There is a Plexiglas frame that holds a happy coin, but it is sealed with screws. We need a screwdriver!
There is a Mr. Hippo here as well. Click on his mouth to open it and take the Happy Coin (Happy Coin #2).
To the right of Mr. Hippo is a lovely plate of fruit. Hiding behind the fruit is a small present box, take the box.
Back up.
To the right of the fireplace is a bed, click on it for a close up.
Once the bed is in close up, click underneath it to look below the bed. There is some sort of metal plate below the bed, take it and back up twice.
To the left of the fireplace is a brick wood box with locked doors. Above the wood box is a picture. Click on the picture twice for a close up.
Note that the picture says "Xmas cake" in a circular, then back up once.
Just below the picture is a small brick formation, click on it for a close up.
This brick formation says "Merry Christmas" and has 2 nails sticking out of it. Back up.
To the left of wood box is a smaller box on the floor, click on it for a close up.
This box also needs a key. Back up twice and turn right.
You are now facing two sets of windows with a table between them.
The left set of windows looks normal, but the right set has something on the panes. Click on the right windows for a close up.
Okay, we have little snowman decals in the panes. That might be important. Back up.
Click on the table between the windows for a close up.
We have a really nice looking Christmas cake under glass. There appears to be a Happy Coin on the cake.
Above the cake are three wreaths which rotate when clicked. That might be helpful. Back up.
To the right of the window with the snowmen is a small panel, click on it for a close up.
Looks like we need yet another key to open this panel. Back up and turn right.
You should be back facing the door out. Time to solve some puzzles!
The Snowman
Turn right to face the wall with one window and the wooden plank.
Click on that device on the coffee table for a close up.
That looks like a frozen snowman inside the device.
Where have we seen snowmen in the room?
On those windows where the Christmas cake is!
But how do the snowmen on the windows relate to this device?
Look closely at the windows with the snowmen, they for two 3 x 3 grids.
In each column the snowman is either in the top, middle, or bottom cell.
Look at the levers on the front of this machine. There are six of them, and they can be set either at the top, middle, or bottom.
The position of the snowmen in the window dictate the position of the levers on the machine.
The snowmen are top, top, bottom, middle, bottom, top in the windows.
Set the levers on the machine in the pattern suggested by the clue.
If you set them correctly, the machine will open. There's a key in the snowman!
Too bad it's frozen, though.
The room is pretty warm because of the fire, maybe it will melt?
Back up and do a full circuit of the room (turn right or left four times until you are back at the machine.
Click on the machine for a close up. The snowman has melted some and you can now take the club key.
Back up.
The Small Gift Box
Turn right to face the fireplace.
There are two things here needing a key, the wood box and the smaller box to the left of it.
Click on the smaller box to the left for a close up, then use the club key on it.
Inside the box is a sharp knife, take it.
Hey, remember that gift box you picked up from the mantel?
Pull up the gift box from your inventory.
Use the knife to open it.
Inside are a box of matches, take them.
Pull up the gift box again, then open the top. Now you will find a Happy Coin (Happy Coin #3).
Pull up the box a third time. Open it again and this time you will find a clue consisting of a spade and the number 6.
Close down the box and back up twice.
Christmas Cake (Part 1)
I'm hungry, let's try for that delicious looking cake!
You should still be facing the fireplace.
Click on the wood box to the left of the fireplace for a close up, then click on that brick thing between the wood box and the painting for a close up.
Notice the two nails there above the "Merry Christmas"?
Have you seen anything that might go on those?
Perhaps that metal plate that you found underneath the bed?
Place the plate on the nails and only three letters are now visible, esm.
That must be a clue, but to what?
Back up once, then click on the picture for a close up.
Yes, the words "xmas cake" on the picture must be a clue, especially since they are arranged in a circular order.
And maybe the letters esm also have something to do with it?
Look at the letters in the picture.
E is in the upper left, at the NW position of the circle.
S is in the lower right, in the SE position of the circle.
M is in the upper right, in the NE position of the circle.
These positions are important, as they will tell you how to set the wreaths above the Christmas Cake display.
Back up twice, then turn right to face the windows and the Christmas Cake machine.
Click on the Christmas Cake machine for a close up.
Remember those wreaths above that move when you click them?
They coincidentally move so that the bells are in the same positions as the letters in the picture.
Click on the left wreath once to place the bells in the NW position.
Click on the middle wreath five times to place the bells in the SE position.
Click on the right wreath seven times to place the bells in the NE position.
Once the wreaths are in the correct positions, click on the top of the display to open it.
Click again to get the Happy Coin (Happy Coin #4).
Wait, we can't get the cake? Bummer!
Back up.
The Candles
Turn left to face the fireplace.
Click on the fireplace mantel for a close up.
Use the matches on one of the candles in the candelabras, it will light all six candles.
Back up and move around the room one circuit, either 4 times to the left or 4 times to the right.
Click on the mantel for a close up again. Note that the candles are now glowing with colors.
The candelabra on the left has the letter A with a red flame on the left, the letter C with a green flame in the middle, and the letter D with a yellow flame on the right. The candelabra on the right has the letter E with a yellow flame on the left, the letter L with a blue flame in the middle, and the letter N with a green flame on the right.
This must be a clue!
Back up and turn left (or right) twice to face the door.
Click on the table with the Mr. Birdy mechanism for a close up.
Let's turn the Mr. Birdys the same colors as the candles.
Use the buttons below the Mr. Birdys from left to right.
To turn the first Mr. Birdy red click the first button twice.
To turn the second Mr. Birdy green click the second button four times.
To turn the third and fourth Mr. Birdys yellow click the third and fourth buttons once.
To turn the fifth Mr. Birdy blue click the fifth button three times.
To turn the sixth and last Mr. Birdy Green click the last button four times.
A panel will pop open with a Happy Coin (Happy Coin #5) and a screwdriver. Take both and back up.
The Screwdriver
Turn right (or left) twice to face the fireplace.
Notice that the flame is going down in the fireplace.
Click on the mantel for a close up.
Pick up the Plexiglas picture frame and use the screwdriver on it to get a Happy Coin (Happy Coin #6).
Note the clue revealed after the Happy Coin is gone, the club symbol and the number 7.
Put down the picture and back up.
Turn left to face the wall with one window and the wood panel.
Click on the panel for a close up.
Use the screwdriver to open the panel and get a long stick. Note that if you click on the end of the stick you can maybe attach something to it.
Click on the wood panel leaning against the wall to turn it over and find a spade shaped key.
Back up.
The Dying Fire
Turn right to face the fireplace.
The fire should now be dead.
Click on the wood box to the left of the fireplace for a close up.
Use the spade key to open the wood box.
Yay, we found Santa's sack! Take the sack.
Behind the sack is a small fireplace spade, take it as well and back up.
Click on the fireplace for a close up.
The fire should be completely out at this point. If it is not, stir the fire with the spade, back up, and make a circuit of the room.
Now use the spade on the dead fire to move the charcoal.
Inside you will find a clue (ksm) and another Happy Coin (Happy Coin #7). Unfortunately the Happy Coin is too hot to handle.
Take the Happy Coin with the spade and back up.
Turn left to find the coffee table with the snowman mechanism.
Click on the mechanism for a close up. Hey, the snowman has completely melted!
Click on the mechanism 2 more times to open it up and reveal the water inside as well as the clue of a heart and the number 3.
Use the spade/coin combination on the water to finally get the Happy Coin.
Back up twice and turn left to face the door.
Click on the Christmas tree for a close up.
Use the long stick to get the Happy Coin off of the wall near the ceiling (Happy Coin #8).
Back up.
Christmas Cake (Part 2)
You know what, now I'm really hungry, this escape is going on forever.
Let's try for the cake again.
We got a second clue for the cake from the fireplace, the letters ksc.
What positions are they on the painting?
The K is in the W position, the S is in the SE position, and the C is in the S position.
Turn left to face the Christmas Cake.
Click on the cake for a close up.
Click on the first wreath twice to move the bells to the W position.
Click on the second wreath five times to the SE position.
Click on the last wreath four times for the S position.
Click on the cake! Wait, we still don't get the cake? This time the whole cake box lifts up revealing a round key. Take the key and back up.
The Wobbly Picture Puzzle
You should still be facing the wall with the Christmas Cake.
Click on that small panel to the right of the windows for a close up.
Use the round key to open the panel.
Inside you will find the word "candle" and four buttons. If you push the buttons they turn the upper left yellow, the upper right red, the lower left blue, and the lower right green.
Back up and turn right.
Click on the picture above the table with the Mr. Birdys for a close up.
Note that this picture has the word "Candle" on it.
Where else have we seen the word?
Yes, on the candles on the fireplace mantel.
But how does it all tie together?
Remember, each candle had a letter and a color.
C=green, A=red, N=green, D=yellow, L=blue, and E=yellow.
Now translate that to the corners, and you get a pattern of: lower right, upper right, lower right, upper left, lower left, upper left.
Click the corners of the painting in the correct order and it will move up to reveal a Happy Coin (Happy Coin #9) and a flashlight. Take both and back up.
The Last Happy Coin and the Endings
Turn right to face the wall with the wood panel.
Click on the panel for a close up, then click on that notch in the floor for a close up.
Despite the fact that the flashlight is "broken", you will now be able to see into the notch.
Inside you will see a math problem with symbols: diamond-spade X heart-club.
You will also see the tenth and last Happy Coin, but you can't reach it.
Back up twice and turn left to face the door.
Click on that pink panel to the left of the door for a close up.
Here we need a four digit code, and we just got the clue for a four digit code.
The clue is in the various card suit symbols found around the room, diamond=8, spade=6, heart=3, and club=7.
The math problem from the floor is diamond-spade X heart-club, or 86 X 37, which is 3182.
Enter the four digit code into the lock and click on the knob on the top of the panel to open it.
Take what is inside (hook) and back up twice.
We could attach the hook to the stick, but we're still missing something else that would make something we could use to get that last Happy Coin from the notch in the floor.
Search all of your items, you will find that if you pull up the knife and click on the very bottom, it will open up to reveal a magnet.
Turn right to face the wall with the wood panel.
Pull up the stick from your inventory.
Click on the end for a close up then attach the hook.
Once the hook is on use the magnet on the hook and you have a device ready to go.
Close down the device, then click on the panel, then click on the notch in the floor.
Use the stick device to get the Happy Coin (Happy Coin #10).
Back up twice and turn left.
Click on the door for a close up, then click again to leave.
Congratulations! Now you get to choose a present.
The left present is a Santa Happy Coin.
The middle present is a beautiful key necklace.
The right present is a yummy meal prepared by Tesshi-e!
Merry Christmas!
Posted by: grinnyp |
December 26, 2012 1:35 AM
|
December 26, 2012 1:35 AM