

![]() Kairo is a first-person puzzle adventure game from Richard Perrin, creator of The White Chamber. Set in a minimalist, somewhat abstract world of temples and stones, floating pathways and mysterious mechanisms, you'll be given no clues as to what you need to do to complete the game. Instead, you'll wander through room after room, using your keen powers of observation to figure out where the puzzles are and how to solve them. It's a game design choice rarely seen since the days of Myst, and it brings with it a satisfying gaming experience that has become increasingly rare in the age of tutorials and online cheat codes.
Kairo is a first-person puzzle adventure game from Richard Perrin, creator of The White Chamber. Set in a minimalist, somewhat abstract world of temples and stones, floating pathways and mysterious mechanisms, you'll be given no clues as to what you need to do to complete the game. Instead, you'll wander through room after room, using your keen powers of observation to figure out where the puzzles are and how to solve them. It's a game design choice rarely seen since the days of Myst, and it brings with it a satisfying gaming experience that has become increasingly rare in the age of tutorials and online cheat codes.
 The controls in Kairo are pretty standard for a first person game. Use [WASD] to move in the four main directions, hold [shift] to run, and press [spacebar] to jump. Use the mouse to look around, and you can also use the mouse buttons to walk or jump, just in case you want your other hand free for jotting down notes or drawing copies of the symbols you encounter (which isn't a bad idea). If you need to interact with anything, simply bumping into it will suffice. You'll be notified with visual or audio cues to confirm something happened.
Once you step into the world of Kairo, you'll feel completely lost in a world that seems to follow only the most basic rules. There are a series of unmarked temples, often constructed in mid-air, and some pathways that connect them to other structures. Doors seem like they're everywhere, and they lead to areas filled with puzzles that barely make sense. In order to get a handle on the game, your first task is to just start playing around with things. Step on tiles, push switches, and walk to new areas, all the while paying attention to see what changes when you activate something. Eventually some patterns will form, and before you know it, you'll have figured out something important!
 Analysis: Kairo represents the ever-shrinking minority of games that choose to present themselves without lengthy tutorials or hand-holding hint boxes that guide you through the entire experience. For anybody who grew up with extra challenging old school games, this will probably be a welcome change of pace. For everyone else, it might be a bit disorienting, but take it from us: this method is better! Kairo manages to walk the line well, forcing itself to adhere to the minimalist side of design but not being so obtuse that you can't figure out what to do after a little observation.
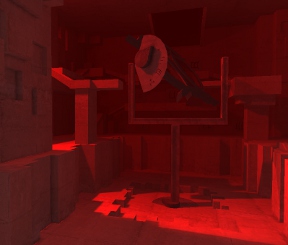
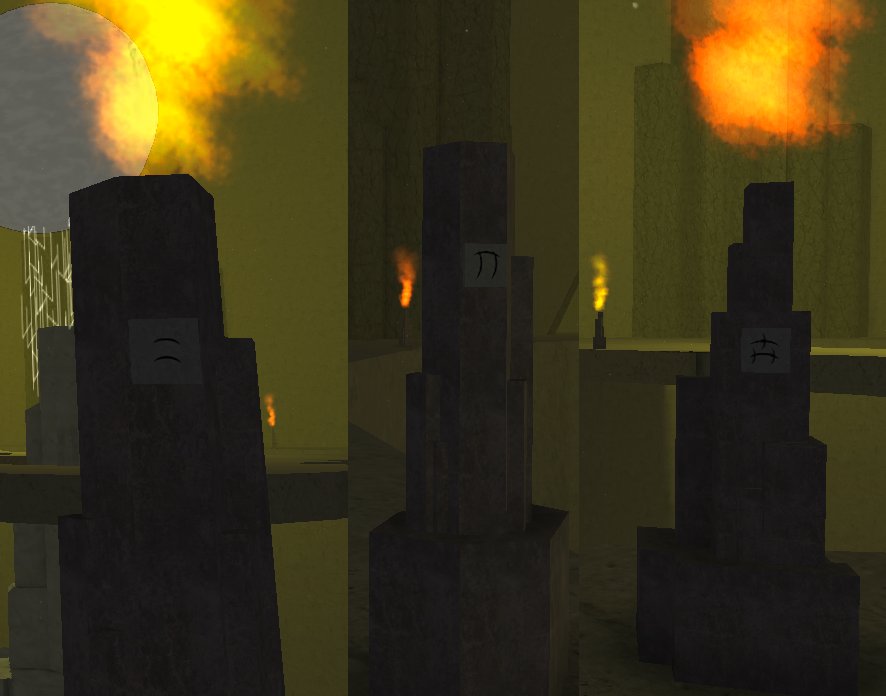
The environment is as much a character in Kairo as anything, and it's amazing how much personality is communicated without text or speech. You get the sense that each of these disparate sections are connected by some unseen force, and when you start activating ancient circuits and power sources, that sense of wonder only grows. If you've ever wanted to explore an ancient temple the likes of which are only seen in movies, this is your chance.
Kairo is a carefully designed puzzle masterpiece. What it lacks in a loud visual presentation it makes up for with a dense world filled with secrets and hidden nuances. It's an experience that's quite different from most games out there, one that will become intensely personal thanks to the quiet, thoughtful creation. Your brain will thank you for playing Kairo!
![]() Windows:
Windows:
Download the demo
Get the full version
![]() Mac OS X:
Mac OS X:
Download the demo
Get the full version


Walkthrough Guide
(Please allow page to fully load for spoiler tags to be functional.)
Kairo walkthrough
General Tips and Instructions
PC/Mac controls: Like many modern first-person games, you can move with the [wasd] or [arrow] keys and turn around or look around with the mouse. Press [space] to jump, and hold [shift] while moving to run.
Don't worry about walking off ledges; if you fall off, you'll be restored to safety on the ledge. There may be a few buggy areas where you can get stuck before the "net" catches you, but if you go to the main menu and restart the game, you'll return to the safe part of the level.
There are no items you have to collect in Kairo. There are objects to interact with, but there is no special interaction key. Instead, you activate objects by either walking over or into them.
Many items that are interactive have cuneiform-like symbols on them. Look for these when trying to solve puzzles.
Pressing [escape] pauses the game and lets you set various game options or quit the game.
This screen has a minimap in the upper-right of all the rooms in a given area you've visited. The cross shows you what room you're in.
You can also access the hint feature from this screen. Choose hints one at a time to help you figure out what to do next, if you need it. No hints means there are no puzzles to solve in a particular room.
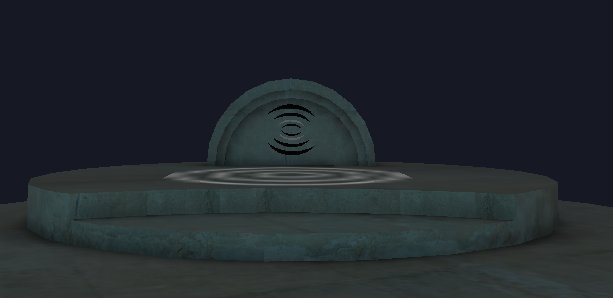
Many transitional rooms have no puzzles, but do have lots of interesting things to discover. Look closely, and you may get some idea of what Kairo is about.
There are several small collectible glyphs to be found throughout. These are not necessary to win the game, but are a reward for thorough exploration.
Main Walkthrough
NB: There are no level names in Kairo. I named these rooms based on color and a general impression of what the room is supposed to represent. I hope it's helpful!
Also note that since the game is somewhat open-ended, I do not explain how to get to every room in the game. Instead, consult the map for each larger section to help you navigate through these areas.
Beginning
Walk down the steps into the glowing void, towards the far building.
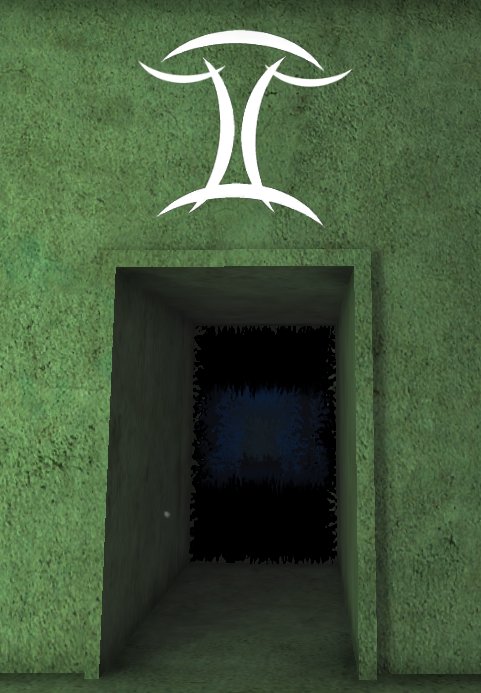
There is a door on the right wall of the building: enter it (if you call the direction you first moved north, the door would be on the east wall).
Go forward through the hallway. At the end of the hall, turn right and enter the door.
Climb both flights of stairs until you see the throne-looking object and the glowing symbol on the wall.
Walk towards the throne so it is pushed towards the symbol on the wall.
Follow the glowing nimbus to the new symbol on the ground (you can take the stairs back down, or just jump down to the lower level).
When you step on the symbol, the door at the end of the hall opens (if you jumped down, the open door is directly behind you). Enter the door, follow the hall, and enter the door at the end.
Go down the stairs and continue down the long causeway. A bridge appears before you, but it moves away as you approach it.
To make the bridge accessible, go up one of the ramps on either side of you and follow it until you are standing over the path you just traversed. Face the bridge, walk off the ledge, and proceed over the bridge into the doorway.
Green Park/The Lobby
Explore the park if you like, or just move straight forward from the entrance and climb the stairs that appear on the left.
The goal here is to power the device in the middle of the room. There are four steps you need to complete to do this.
You can check your progress by looking at the octagon-symbol above the door to the park. Each quarter represents one step you've completed.
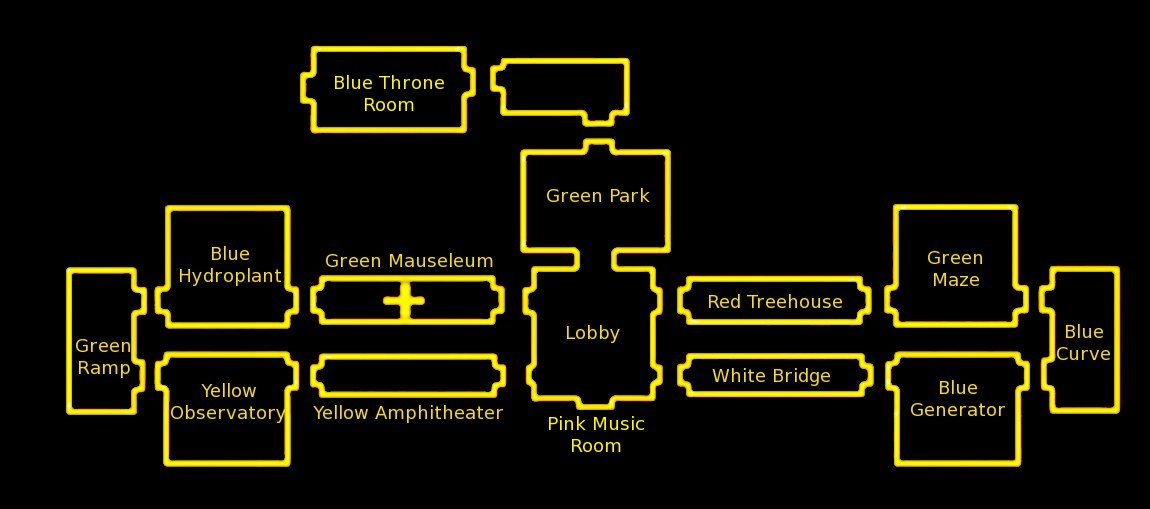
Map
White Bridge
Head to the irregular-looking bridge (to the left if you start on the lower level) and cross it to get to the next door.
If you go under the bridge and keep going forward, there is a strange sight.
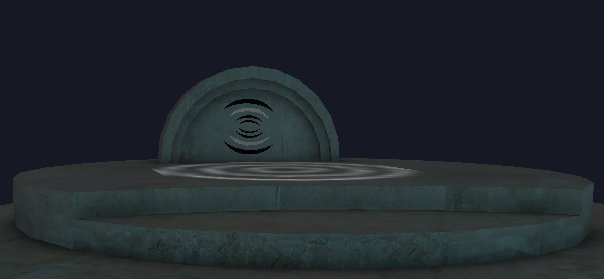
Blue Generator (Four Buttons)
Climb the tall dais with the floating symbol. Touch the symbol to get power in the center of the device.
There are four floor buttons surrounding the device, each one with a symbol above it. These symbols refer to the rings of the device.
You need to step on the buttons in order from the innermost ring to the outermost. Do this quickly, or the rings will stop spinning.
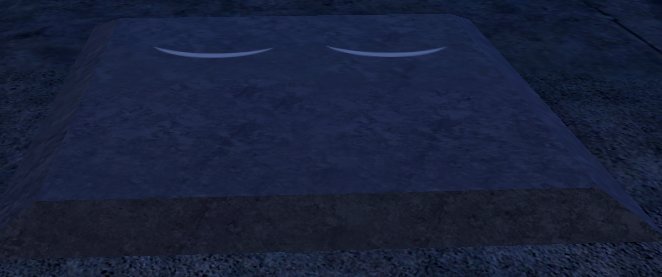
Find the button for the innermost ring and step on it. Screenshot
Step on the button for the second innermost ring: it is the furthest away from the first button, so the quickest way to it is by walking across the device. Screenshot
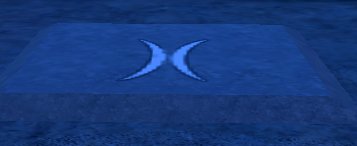
Step on the button for the next ring: it is closest to the second button. Screenshot
Step on the button for the last, outermost ring: it is the furthest away from the third button, so again the fastest way is to walk across the device. Screenshot
The quickest path for pushing all the buttons in orders is a sort of bow tie pattern, with the device at the center.
You've completed one step toward powering the device in the Lobby.
Green Maze
Head for the symbol in the middle of the room. When a wall appears, just remember the old trick for getting out of a hedge maze:
Walk along the walls as they appear so they are always on your right side (The same works if the walls are always on your left).
When you get close enough, head for the symbol on the dais. You've completed one step toward powering the device in the Lobby.
Head for the door on the other side of the room, using the same trick to navigate the maze walls as they appear.
Red Treehouse
Follow the ramps to each platform, until you get to the next door.
If you navigate to the highest platform, there's a strange surprise.
Yellow Amphitheater
Climb down the stairs.
Go down to the bottom of the pit. Opposite the stairs is a door: enter it.
Yellow Solarium
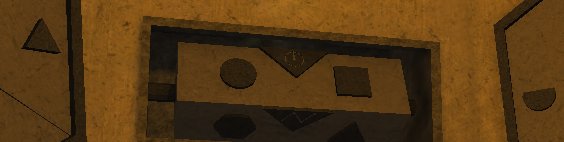
The room contains four square-shaped prisms above, operated by four orange triangular floor buttons.
Step on a button to rotate the prism. Look at the pyramid on the tall dais in the middle of the room. Step off the button when the light beam hits the pyramid (you'll hear a helpful gong sound when it connects). Note that some prisms are slower than others.
One prism won't stop spinning once it's operating. You can see the gears operating below it. Push the nearby chunk of debris into the gears to stop the prism.
You've completed one step toward powering the device in the Lobby.
Blue Hydroplant
There are nine floating platforms, each with a floor button with a different symbol. Note that if you fall off the platform, there are stairs and ramps that let you get back to the level you need to be.
The goal is to hit four buttons whose symbols combine to create a certain larger symbol. It's a symbol you've seen throughout the game already, and which you can find above either entrance to the current room.
Symbol
You can see which symbols you've lit up by looking above the main entrance, opposite the waterfall.
Face the waterfall and picture each platform as a button on a telephone keypad:
The buttons you need to press are 7426.
First symbol
Second symbol
Third symbol
Fourth symbol
You've completed one step toward powering the device in the Lobby.
Green Mausoleum
Follow the heavily inclined ramp to the door on the other end of the hall.
If you look at the marker on one of the "sarcophagi", you'll find that it's not quite what you might expect.
Back in the lobby, step on the floor symbol (where the glowing will o' wisp is floating).
The device opens up invitingly. Step inside.
Red Lens Room
Behind the elevator platform is a very large switch. Push it, and a beam of light should emerge from below the platform you are standing on (turn around to see it).
Look closely at the big lens-like device in the middle of the room.
At the base, there are five symbols (Screenshot). There are also five symbols on one side of the lens itself (Screenshot).
Each large button along the wall corresponds to one of these ten symbols. The first set rotate the lens horizontally, and the second rotate it vertically.
The goal is to adjust the lens so that the beam of light hits the mirrored surface on top of the wall with all the buttons.
Press the middle button in the middle row, and the middle button in the top row. Screenshot
Step into the large, shimmering symbol that appears on the nearby platform (it's radiant and hard to miss).
To the second building
Back out in the void. Head to the edifice the beam illuminates. Use the "people mover" to move faster. Follow the trilithons into the doorway on the side of the building.
Inside, step on each spotlight as it appears. Enter the large doorway.
Walk forward to the floating stone room. The door opens as you approach.
Walk into the column of light in the middle of the first room to open the door to the second room.
Blue Throne Room
Enter the room on the left as you face the throne. Look at the fragmented column and note how the pieces move as you do. While looking at the column, move until you hit the spot where the pieces reassemble themselves. Wait a few seconds, and the column becomes solid.
Do the same in the other room.
The spot happens to be in the upper-left corner as you face the wall with the column.
There should be two blue flames on either side of the throne. Climb the steps of the throne and wait for the walls to move. The exit is at the end of a path behind the throne to the left.
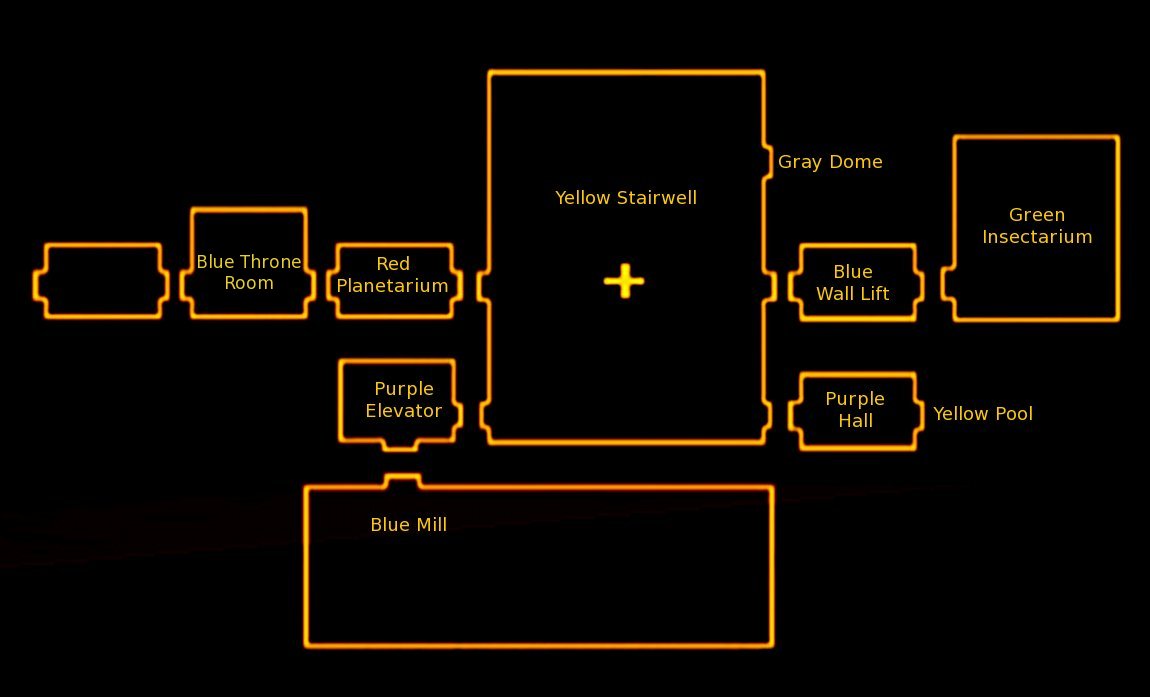
Red Planetarium/Yellow Stairwell
If you walk into the small pedestals, it lights up the corresponding white star and connects it to the previous star you lit like a constellation. There aren't any puzzles in here, however.
Go through the red door at the other end of the room.
This stairwell-like area has several rooms attached, one of which is a Gray Dome area accessible at the top of the stairs. Power the three devices found in the other rooms, and you can proceed through the Gray Dome.
The clear floating symbol at the bottom of the stairwell shows how many devices you've powered.
Map
Purple Elevator
Move to the back of the room, then walk into the console on the right. Exit the way you came in.
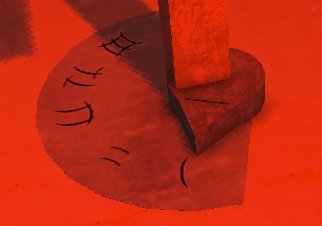
Blue Mill
Stand in the correct spot to assemble the column. It turns into an energy ball.
Follow the ball to the lower level. Push it into the turncrank apparatus in the middle of the floor.
Rotate the crank by walking into one of its arms. Rotating counter-clockwise raises the ball, while clockwise lowers it.
Position the ball so it is inside the transparent pyramid above you. You'll know it's in place when you can see bands of energy emitted from it.
Go to the second level and press the appropriate floor button.
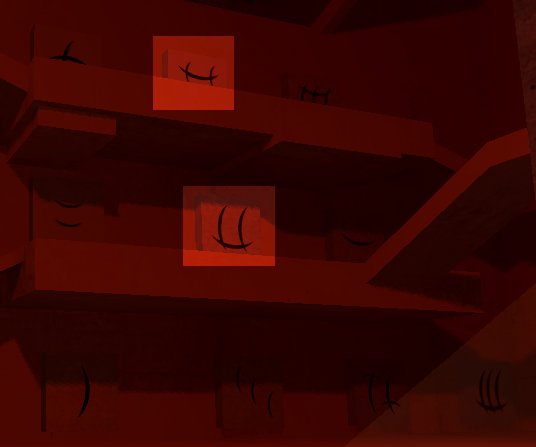
If you look at the symbols on the three stones with energy flowing through them, you'll know which one to press. Screenshot
Go back down to the lowest floor and continue to raise the ball until it is inside the transparent sphere on the top level.
Return to the second level and press the appropriate floor button.
Again, if you look at the symbols on the three stones on the top floor with energy flowing through them, you'll know which one to press. Screenshot
Green Insectarium
Stand in the correct spot to assemble the column. It turns into a large globe.
Go to the higher level with the column and floor buttons. Push on the buttons in the correct order to activate the device.
The goal is to darken the sphere from bottom to top. Use trial and error to test the four buttons, then test your sequence by stepping on the middle button with the symbol.
Facing the sphere, start with the bottom-right button, then bottom-left, then top-left, then top-right. Then hit the middle button.
Yellow Swimming Pool
Move toward the fractured column on the left. Stand in the correct spot to assemble it. It turns into a ball.
Stand on the platform where the column was. The goal is to get the ball into the chute on the opposite side of the room.
Launch the ball by walking over the button with the symbol. Note how the ball bounces off the stone blocks.
The ball always turns 90 degrees to the right when it hits a block.
Arrange the blocks so the ball bounces where it should go. Here is one possible arrangement (The rear blocks are along the back row):
Solution
Gray Dome
Approach the dome. If you've completed the previous three puzzles, it will retract.
Walk to the device in the center. Wait until the lift ride ends, then follow the path to the exit.
Take the stairs up and enter the door.
Pink Colonnade
Again, you need to power four devices in adjoining rooms to proceed to the next area.
Map
Yellow Midway
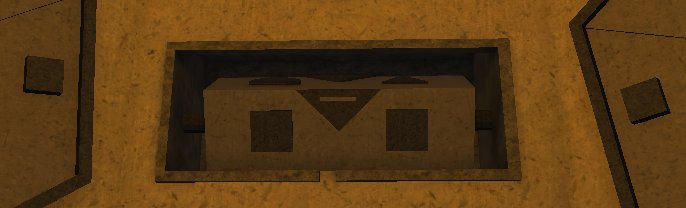
Go to the back of the room. Push the stone block with the symbol all the way into the back wall.
Return to the front of the room and notice the four devices in the recesses in the walls. They are treadmills attached to gages, which you have just turned on by pushing the block into the wall.
Step on one of the treadmills and walk forward until the gage is fully lit up. Be sure to look up to see the top of the gage.
Repeat this step for the other devices.
Head toward the back of the room and step in the ball of energy.
Green Accelerator Tunnel
Walk down the tunnel to the exit.
There's a crack in the wall to the right that's interesting to look at.
Red Arboretum
Note the hexagon tiles on the lower level. Step on the tile that is the brighter color than the others.
Step on the bright red tiles as they appear. When the black tiles appear, take care not to step on or jump over them, as they reset the puzzle.
When you've completed the task, an energy ball appears in the hexagonal recess in the wall, and a conduit lights up in the floor leading to the wall behind the stairs.
Green Spiral
Climb the spiral tower and step on the button. Watch the pattern light up on the far wall.
This is basically a game of Pachinko. Just keep stepping off and on the button until the pattern hits the bottom light until you "win".
Yellow Clocktower
Take one of the elevating pads to the raised dais.
Think of the large tile with the symbol as a trackpad. As you face the hexagonal gears, moving left or right rotates the right gear, and moving forward or backward rotates the left gear.
Use this motion to arrange the shapes to complete the pattern indicated in the center panel. The left gear is the first step of the pattern, while the right gear is the fourth. The two shapes in the center panel are the second and third step.
Think of the shapes as numbers. The number of sides the shape has is the number it represents. A circle has one side, the half-circle has two, a triangle three, and so on.
In the center panel, the middle shape represents the pattern you are trying to create. It might take some abstract thinking to figure out what it means.
The horizontal line means that the sequence is just the same symbol repeated.
Solution 1
The ascending line means that the sequence is ascending.
Solution 2
The jagged line means that the sequence alternates between two symbols.
Solution 3
The symbol showing the radius and circumference of a circle means that the sequence is the first four digits of pi rounded up.
Solution 4
After you've activated all the devices, a transparent stair leading to an elevator appears in the middle of the Pink Colonnade. Climb the stairs and step into it.
Check out all the interesting things that are in the green room, then go through the exit on the right. Walking off the ledge will take you to the next area.
Gray Amphitheater
Position yourself so that the fractured column reassembles itself. You'll have to climb the stairs behind you to find the right position.
The four symbols that light up are portals to the next puzzle areas. Let's call them Portals 1 through 4, from left to right.
Portal 1 leads to the behind the small building at the start of the game.
Portal 2 leads to the throne-like object in the first room you enter at the beginning of the game.
Portal 3 leads to the Blue Throne Room, the first room in the second building of the game.
Portal 4 leads to a new area, a very large gray complex.
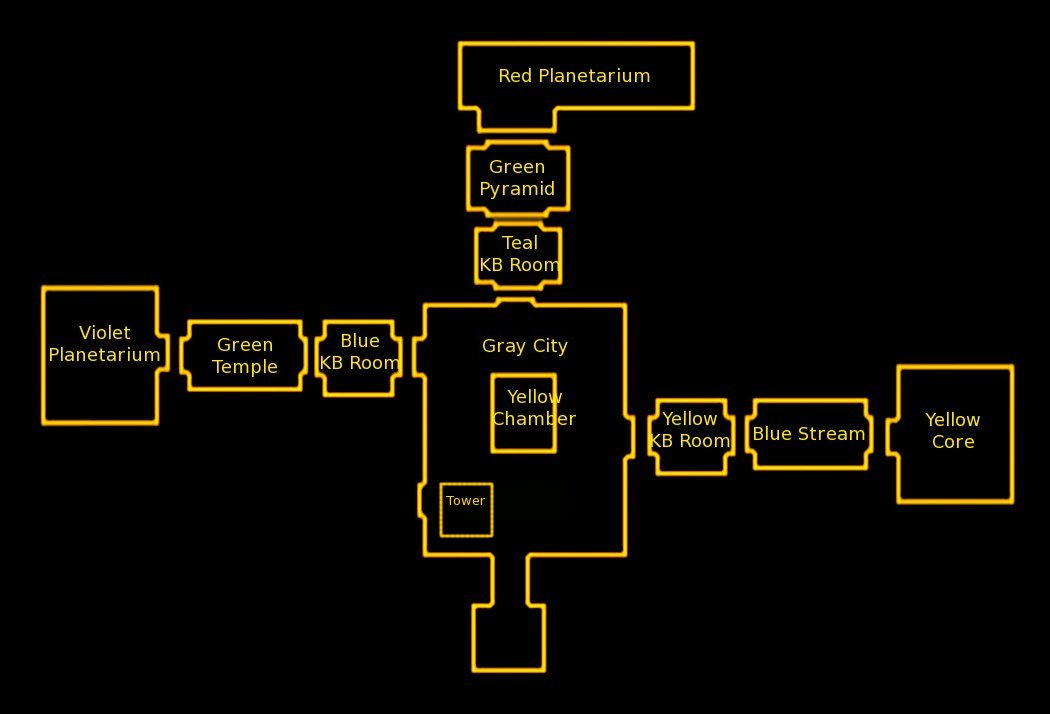
Gray City/Ending
Go up the stairs and boldly walk across the gap to the large complex.
If you keep climbing up, you'll eventually find a door to a yellow room at the top of the complex, but you won't be able to do anything there until (once again) you find three devices to power up. Instead, walk through any of the trilithons (i.e. the Stonehenge-looking gateways) that you see about the complex. Each one leads to a different, though similar-looking, large room.
Map
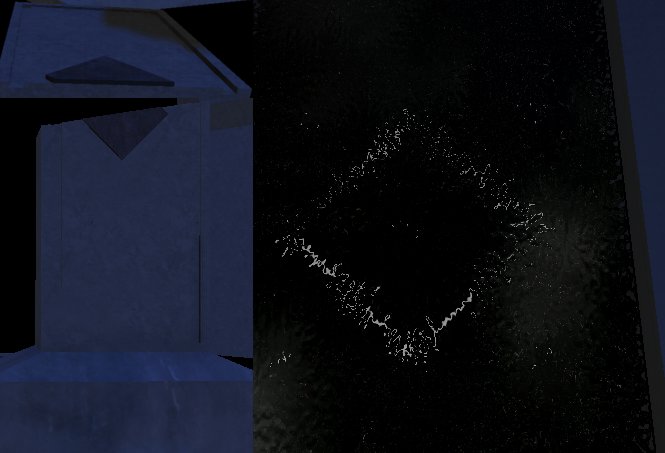
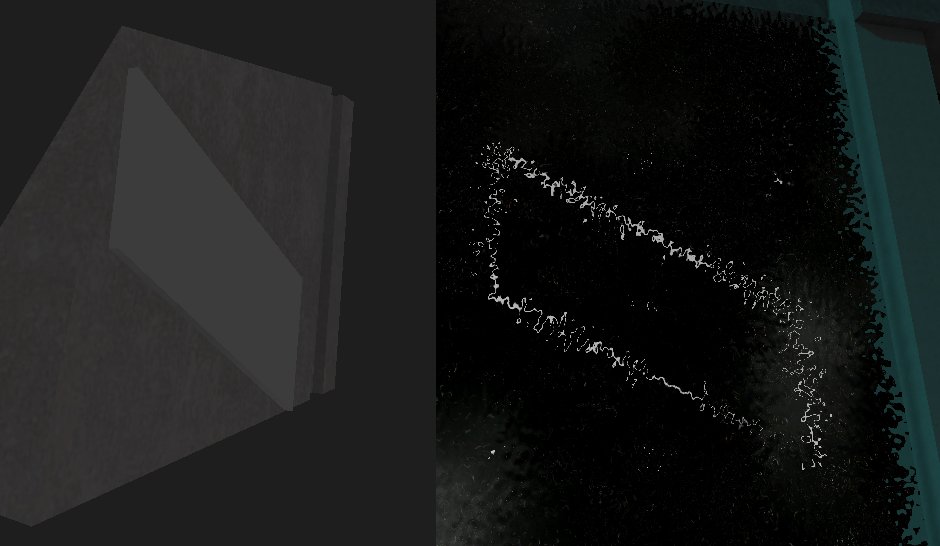
Think of the floor in these rooms as a large keypad, with each of the pink-orange prisms as a key. Note that as you walk through each prism, the large black gateway maps where you've been with white lines. In this way you can draw shapes.
The precise shape you need to open the large black door varies depending on what room you're in. Look around to find the piece or pieces of stone that show the shape you need. Some stones are in very dark or obscure areas, so look carefully.
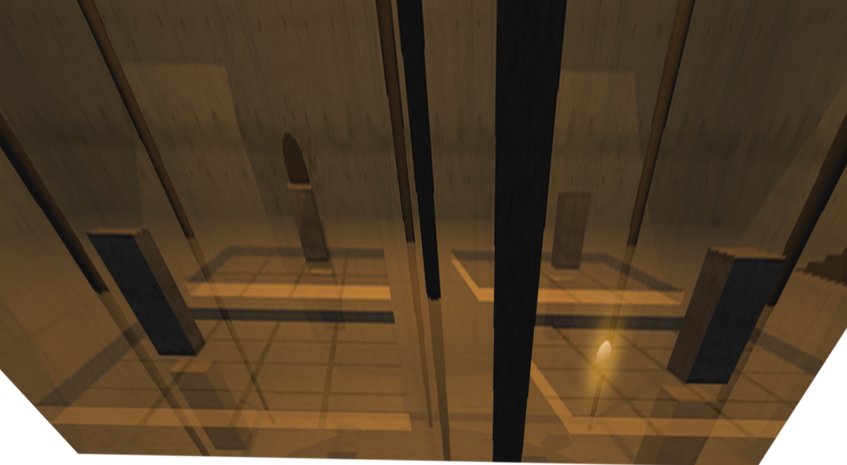
Blue Keypad Room/Violet Planetarium
Screenshot
When the door is open, go through it. Continue across the green courtyard into the next area.
Climb the rock in the middle of the room and step on the pad with the symbol. A large globe appears.
Note the design on the back wall. The goal is to align the smaller orbiting spheres around the large globe.
Step near the three rectangular columns to move one of the three orbits. Step off when it is where you think it should be; you'll hear the higher "happy" bell if you're right, and the lower bell if you're wrong.
Just get each orbit close enough to the large center globe so it looks like the orbit goes around the globe. You don't need to be very precise.
Teal Keypad Room/Red Planetarium
Screenshot
When the door is open, go through it. Continue across the green courtyard into the next area.
If you simply walk forward onto the intricate tile causeway, it will eventually fall out from under you. You need to know the proper way to walk across.
As you approach the tile causeway, look behind you; the rightmost column seems to have some sort of pattern on it.
Look at the corner, and you'll see a series of Tetris-style shapes, which indicate the steps you must take.
Screenshot
Cross the causeway by stepping on the proper sequence of tiles.
Screenshot
Keep climbing the stairs, then step on the large symbol on the floor at the top of the tower.
Climb back down to exit. The causeway will be safe to cross now.
Yellow Keypad Room/Yellow Core
Screenshot
When the door is open, go through it. Continue across the blue pathway into the next area.
Walk to the middle of the room and step on the symbol near the central tower to power the device.
Go through one of the triangular doorways to enter a side room. Note the symbols on the wall.
Screenshot
In this room, opposite the symbols, is a ramp leading down. Go down the ramp, then down the transparent ramp to the left.
Walk into the small column with the symbol to open the hatch.
Climb up the invisible ramp and walk into the small column with the symbol to turn on the fan.
Climb up and leave the side room. There are now six flaming columns surrounding the device. If you walk into one, you can turn the flame off (do it again to turn the flame back on).
The symbols in the side room told you which columns to turn off.
Turn off the symbols corresponding to the second, third, and fifth columns. Screenshot
Now that you've turned on the three devices, climb up to the top of the complex until you find the door to the next area. Enter the door.
Go to the back of the yellow room, where the teleport area is now active.
Step close to the central prism in this white area until it lowers and you can see the black circle on the floor. Walk here to go to the next area.
Just keep walking forward until you walk on the symbol on the ground, then watch the ending. Congratulations!
Posted by: Mike |
December 28, 2012 10:25 PM
|
December 28, 2012 10:25 PM
Kairo Secrets
Glyphs
Throughout the game, one can find 18 glyphs, small symbols on the walls. Walk into them to collect them.
Lighthouse Glyphs
Map
In the Blue Throne Room, on the back of the last pillar on the left hand side (from the entrance).
Turn sharp left when you enter the Lobby. The glyph is on the back of the second pillar.
In the Green Mauseleum, on the short side of the fifth coffin on the right, if you enter from the hub.
In the Green Maze. If you enter from the Red Treehouse, turn right and make your way to the corner. The glyph is on the wall of the last recess.
In the Blue Hydroplant. If you enter from the Green Ramp, cross to the other side, drop down and turn right. The glyph is in the last recess on the left hand side.
In the Yellow Amphitheater, on the back of the pillar that emits a radio transmission.
Tower Glyphs
Map 1
Map 2
After raising the throne in Blue Throne Room, move forwards from the throne in the direction you came from. The glyph is on a wall of the building, on the left hand side. It'll require some jumping to get there.
In the Blue Mill, on the back of the stairwell wall on the top floor.
In the Green Insectarium, on the back of the pedestal that carries the ball.
In the Green Stairs. When you enter, turn right. The glyph is on the side of the portal that surrounds the entrance.
In the Green Edifice. When you enter from the Yellow Clocktower, continue along the top level to the end, then go round the far end of the building. This will require one or two jumps.
In the Red Arboretum, on the back of a pillar at the far end, near the window.
Garden (City) Glyphs
Map
In the Gray City. Go all the way to the far end on the right hand side. The glyph is on the wall.
In the Yellow Keyboard Room, on the back of the furthest rounded pedestal on the right hand side.
In the Green Temple. Climb the stairs, then turn left and again left. The glyph is on the far wall of the last small pagoda.
In the Green Monument. Follow the inner wall to the left, it's at the back.
In the Tower, on the back of the entrance building. Turn left when you enter the room and follow the wall.
In the Yellow Core, on the wall of the room at the back.
Secret Seals
Map 1
Map 2
Map 3
Map 4
Remember to use the four teleporters in the Gray Amphitheater to get to the different map areas.
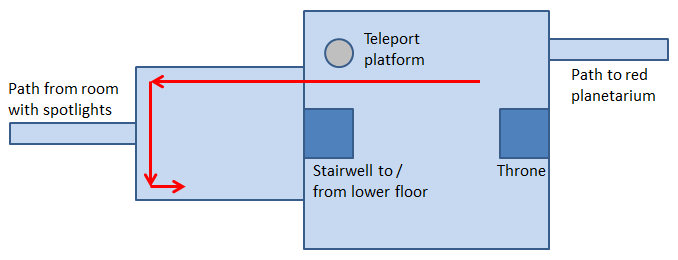
Touching the pedestal with a hexagonal cylinder on top in the Tower Throne Room (Map 2) unlocks a door with a hexagon on it in the Red Lens Room (Map 1): when you enter this room, face the wall, turn left, drop down and turn around. This leads to Secret Seal 1.
Touching the pedestal with a square cylinder on top in the upper level of the Pink Colonnade (Map 3) unlocks a door with a square on it in the Yellow Pool (Map 2). When you enter this room, turn right; the door is at the end. This leads to Secret Seal 2.
After teleporting out of the Yellow Control Room in the Gray City (Map 4), touching the pedestal with a triangular cylinder on top in the black-and-white room unlocks a door with a triangle on it in the Gray City. Teleport back to the Control Room, turn left, then turn left again. The door leads to Secret Seal 3.
If you have touched the monoliths in all three seal rooms (they explode), you'll get a monolith in the Gray Amphitheater, near the big cube. This leads to Secret Final Seal, with another monolith that explodes when you touch it.
Secret Rooms
Map 1
Map 2
Map 3
Map 4
There are three extra puzzles that lead to a room where you can only look around:
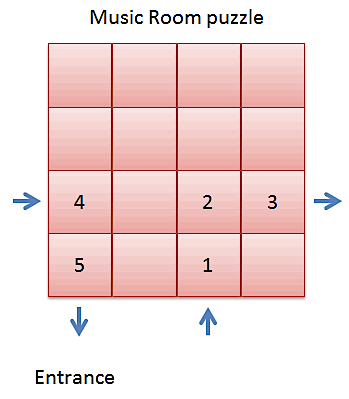
Solving the Pink Music Room puzzle in the Lighthouse (Map 1) creates a monolith through which you get a view of a deserted city.
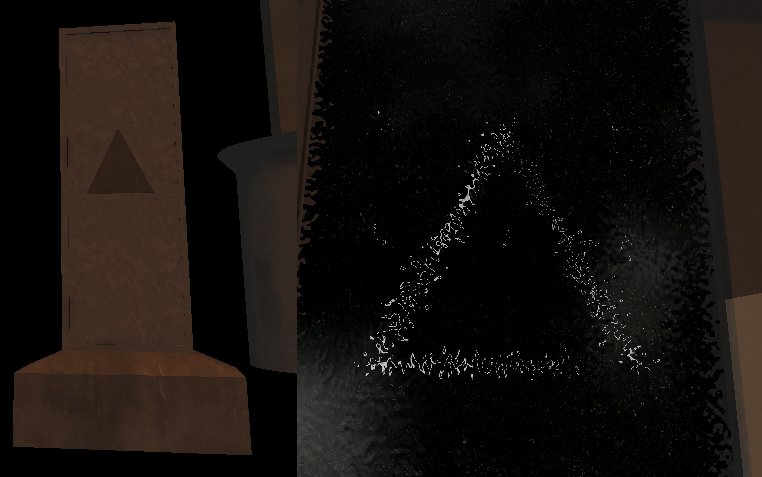
In the Gray City (Map 4), there's an obelisk on one of the upper levels that plays tones. Match the tones to the tiles in the Music Room. Solution
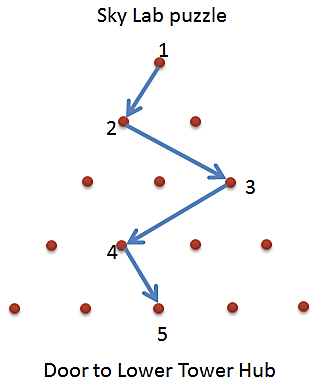
Solving the Red Planetarium puzzle in the Tower (Map 3) creates a monolith through which you get a view of planet Earth ravaged by pollution.
There is a partial clue on the back of the black cube in the Gray Amphitheater (the room with the four teleporters), but each player gets only part of the clue, so this puzzle could only be solved when several players shared their partial clues. Check out the solution: the entrance to the Yellow Stairwell (Map 2) is at the bottom: Solution
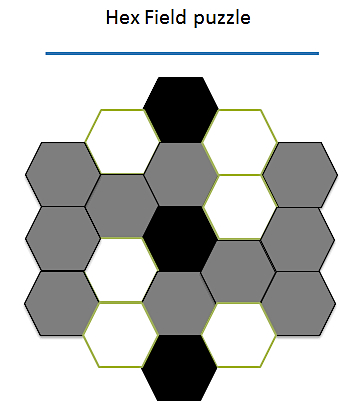
Solving the Hex Play Field puzzle in the Garden Tower (Map 4) creates a monolith through which you get a view of a desolate landscape.
The clue is on a Japanese print in a side room of the upper gallery of the Pink Colonnade, on the way to the Green Spiral (Map 3). Stepping on any hexagon (except the three black ones) toggles its color between dark gray and light gray. Make the pattern look like this (the screen displaying the pattern is at the top of the picture): Solution
If you have gathered all 18 glyphs, exploded all the seals and solved the three extra puzzles, a monolith will appear in the maze near the far end of Gray City (Map 4). This takes you to the Garden Secret Room, where you can admire some models of the game world, and some design sketches. A door leads to the Secret Ending, where the game freezes.
Thanks to the JiG community for your help in finding all the secrets for Kairo. Special thanks to Hans Vogelaar for his help writing this section!
Posted by: Mike |
January 2, 2013 6:45 PM
|
January 2, 2013 6:45 PM