
![]()
 The story you're about to hear is a fib, but it's short. The names are made up, but the problems are real. Stickville is like many other towns. It has churches, two car washes, three movie theaters, bike paths, sparkling beaches, a synagogue, fishing spots, and the best darn doughnut shop in the tri-state area. However, scratch off a little of the MS Paint, and you'll discover its seedy underbelly: murders, drownings, corpses, arson, manslaughter. When a crime happens, the town's innocents may rest assured that the Stickville Police Department will stop at nothing to bring the perpetrators to justice. You're a homicide detective, working the day watch at the SPD. Right now, the inbox has five open cases to solve in Stickman Murder Mysteries, a series of point-and-click mystery adventures by Norm and Company.
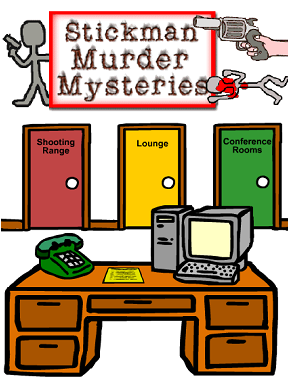
Apart from the first chapter, which has been remade into flash, the Stickman Murder Mysteries are done entirely in HTML, though they run fine on modern machines. Use the mouse to click on objects to examine them, doors to travel to them and, when on the map screen, buildings to travel to that location. There will be times where you will be prompted to enter addresses or other information to continue your investigation, so be sure to take notes. If you're stuck, taking a nap or checking around the precinct might help you head in the right direction. Once you have collected all the evidence, go to Da Chief's office, and he'll ask you a series of question to make certain that you have the correct culprit. Good luck, detective!
Analysis: By the standards of the internet, the five Stickman Murder Mysteries are old. Like, more than ten years old, and from a time when people thought the ability to display a .gif of a dancing rodent was the height of web design. It's certain that its relative primitiveness will turn some away. Those who stick with it, however, will be glad they did, because this is a fun little collection that every lover of mystery games (and Scene of the Crime in particular) should appreciate.
 The graphics may be crude, and the programming kludgey by modern standards, but where Stickman Murder Mysteries shine is in its plotting. Chapter 1 starts with a relatively straightforward case of murder, but as the series goes on, the crimes get ever more devious, and the investigations ever more complex. Don't let those smiley stick-people fool you! These are some serious crimes being investigated, with criminals that mean business. The content may not be to the level of Law and Order: SVU, but it definitely reaches Law and Order classic (CHUNG CHUNG). That said, a sense of old-school internet wackiness is present throughout, which keeps the tone light. There are a ton of little touches, easter eggs, and red herrings to find, for no other reason than to be goofy, and will keep a pleasant half-smile on your face as you play.
Besides the overall MS Paint-iness, some downsides are worth mentioning. The few times that you must type an answer in are generally forgiving, but there are quite a few things to keep track of. Clever investigators might want to open up Notepad before heading on in. Likewise, the medical examiner sections where you use the CDX machine is a little unintuitive to work with, which is a shame since it is often necessary to discover a vital clue. Finally, it's worth noting the site from which we have hosted the games had some ads and links to questionable content, so, in the words of Sergeant Esterhaus, let's be careful out there.
The five chapters of Stickman Murder Mysteries will keep you puzzled and entertained for quite a bit, and saddened that the promised sixth chapter never quite materialized. Still, while they are oldies, they are definite goodies. So play through them, and earn your place in the Stickville PD hall of fame!
Play Stickman Murder Mysteries Chapter 1 - Murder in Stickville
Play Stickman Murder Mysteries Chapter 2 - Drowning at Stickville
Play Stickman Murder Mysteries Chapter 3 - Cadaver at Stickville Dump
Play Stickman Murder Mysteries Chapter 4 - Arson in Stickville
Play Stickman Murder Mysteries Chapter 5 - Manslaughter in Stickville


Walkthrough Guide
(Please allow page to fully load for spoiler tags to be functional.)
Stickman Murder Mysteries 1 Walkthrough
Intro Scene
Click the figure's ear at the first scene to start the game.
Talk to the chief, clicking the red button to move through the conversation.
Exit the room to travel to Your Desk.
Your Desk
Click the yellow paper on the desk to read the list of objectives:
Examine crime scene.
Visit Morgue and examine dead body.
Take a nap (click on yellow pillow in lounge).
Try the new shooting range.
Interview witness (in Conference Room).
Interview both suspects (in Conference Room).
Check Email.
Avoid being brutally killed.
Report to Chief after solving the case.
Go through the yellow door in the middle to enter the Lounge.
Lounge
Click the yellow pillow on the couch and select "Yes" to take a nap.
After the dream sequence, you will see a large white Egg next to four rotating numbers.
Click the egg 10 times to crack it to release the Creepy Man.
Type in anything (or nothing) into the space at the lower right corner, then press Enter to speak with the Creepy Man.
He will tell you to look inside the purple paint can for a clue.
Go through the right door to return to Your Desk.
Your Desk
Speak with the Officer to learn a few clues from the victim's autopsy report.
The victim was stabbed to death.
A small green object is stuck inside the victim's mouth.
The victim has numbers written upside down on his hands that appear to be a telephone number.
A yellow key was found among the victim's possessions that could belong to a safety deposit box at the bank.
An officer at the crime scene noticed a small brown object in a purple paint can inside a trash can.
Exit through the blue door on the left labeled "Parking Lot" to view a map of the town.
Travel to the Crime Scene.
Crime Scene
Open the trash can lid to look inside.
Click and drag the garbage out of the can until you find the purple paint can.
Remove the brown handle sticking out of the paint can to find the murder weapon: a bloody steak knife.
Exit through the alley to view the map, then travel to the County Morgue & Hospital.
County Morgue & Hospital
Take the Elevator to the Basement to reach the Morgue.
Look inside the brown box on the table to view the victim's personal effects.
Note the gold key inscribed with the numbers "7465".
Remove the shroud to look at the corpse.
Inspect the victim's head to zoom in.
Click the small green corner of an object inside the victim's mouth labeled "?".
You will discover a Z-shaped chunk of green cloth between the victim's teeth.
Inspect the victim's right hand to zoom in.
Take note of the telephone number written upside down along the victims hand (618)555-7493.
Inspect the victim's right shoulder to zoom in.
Note the victim has a tattoo of a snake along his arm.
You can also inspect the two wounds on his body: one slash across his chest and the killing blow on his neck.
Take the elevator back to the 1st floor, then exit the building and return to the Police Station to travel to Your Desk.
Your Desk
Click the computer on the desk to view the screen.
Read the Email inbox to check the task off your to-do list.
Click the green telephone on the desk to view the dial.
Type in the telephone number found on the victim in the morgue, then press Enter.
The number is (618)555-7493.
Note the address at the end of the message: 405 Wall Rd.
Go through the red door on the left to enter the Shooting Range.
Shooting Range
Press the red button at the top of the screen to start the target practice.
Move the cursor to aim the reticle and click to shoot.
Shoot targets armed with a knife or gun, but do not shoot targets that are unarmed.
If you can hit all of the armed targets without attacking unarmed targets, you will earn the 100% accuracy score.
Exit the room to return to Your Desk, then go through the green door on the right to reach the Conference Rooms.
Conference Rooms
The officer beside the doors will give you a briefing on the witness and two suspects.
Enter the left grey door to speak with the Witness.
The witness did not see the crime committed, but she did see a man with yellow hair and a green shirt fleeing the scene.
Enter the middle grey door to speak with Suspect #1.
Suspect #1 matches the description given by the witness and was found walking away from the scene and came in quietly when detained.
He claims he was taking a short cut through the alley on his way to an interview.
Enter the right grey door to speak with Suspect #2.
Suspect #2 was found washing his hands in a public drinking fountain not far from the crime scene, and acted defensively towards the officer.
Bob refuses to speak, but he does have a bruise on the side of his face and a Z-shaped tear in the side of his green shirt.
Exit the room and go out through the blue door on the left to the Parking Lot.
Type the address found from calling the number on the telephone, 405 Wall Rd. then press Enter to travel to the Bank.
Bank
Talk to the bank teller about any criminal or suspicious activity to learn of the bank robbery in Normalville.
Ask the teller about a savings account, then ask her to open a safety deposit box.
Enter in the safety deposit box number found on the key from the victim's possessions in the Morgue: 7465.
If you entered the correct number, you will discover a bag of stolen bank money.
Leave the Bank and return to Your Desk, then go through the orange door on the right to enter the Chief's Office.
Chief's Office
Select "Yes." when the Chief asks if you have enough evidence to prove who the killer is to present your case.
Murderer Solution:
Select Suspect #2, aka Bob, as the killer - the man with pink skin, yellow hair, blue eyes, a gold tooth, and a plain green shirt.
Murder Weapon Solution:
Select the bloody steak knife as the murder weapon.
Aside from the clue in the wacky dream, the steak knife was found in the purple paint can inside the garbage at the Crime Scene and matches with the slash and stab wounds seen on the corpse at the Morgue.
Evidence Solution:
Select the Z-shaped piece of green cloth as evidence.
The green cloth that was found in the victim's mouth at the Morgue proves that there was an altercation, and the victim managed to tear out a piece of the cloth with his teeth.
Connection to the Murderer Solution:
Select the red circle over the Z-shaped hole in the murderer's shirt.
The tear in Suspect #2's shirt matches the shape of the torn piece of green cloth in the victim's mouth, whereas the jagged rip in the other suspect's shirt is only a thin line.
Motive Solution:
Select the bag money from the Normalville Bank.
The loot is evidence of a prior crime committed by the murder victim; he had the bank's telephone number written on his arm and owned the numbered key that belonged to the safety deposit box containing the stolen money.
If all of the correct proof is selected, the case will be solved!
Looks like these criminals... bit off more than they could chew. YEEEEEAHHHHH!!!
Stickman Murder Mysteries 2 Walkthrough
Intro Scene
At the first scene, click the grey cloud of smoke above the man's cigar to start the game.
Talk to the Chief, then exit to travel to Your Office and continue out the blue door on the left labeled "Squad Car Garage".
You can see a map of the town from here; click the Crash Site to travel to the location.
Crash Site
Open the car door to look inside.
Click the edge of the paper sticking out of the back of the seat to read the glasses prescription serial number.
Note the unique serial number indicated at the bottom of the letter: "ROCD79-234082555".
Open the glove box and read the folded paper inside the compartment.
Note that the victim had a meeting planned at 10:00 PM with a married woman named Barba.
The letter also contains an important address: 944 Pavilion St.
Leave the crash site to go back to the town map, then travel to the County Morgue.
County Morgue
Read the lab reports the coroner is holding in his hand.
Scroll down the report to view the fluid contents in the victim's blood, lungs, and stomach.
Note that the victim had an extremely large amount of brandy in his stomach, but there was 0% alcohol absorbed into his blood.
Also, his lungs were filled with water of a different composition (99% water, %.02 chlorine) than the water on his clothes (a mixture of water, mud, runoff, etc).
Look inside the box on the table to view the victim's possessions.
Click the wrist watch to inspect it.
The watch is broken and waterlogged, and it has stopped at exactly 11:05.
Remove the shroud to uncover the corpse.
Study the victim's head for a closer look.
Note that the body has a moldy water and alcohol smell, particularly the mouth.
Next, inspect the victim's right hand.
There are scrapes on the knuckles of his right hand
Exit the Morgue to view the town map, then enter in the address found on Barbra's note at the Crash Site.
Type in 944 Pavilion St. and hit enter to travel to Barbra's Place.
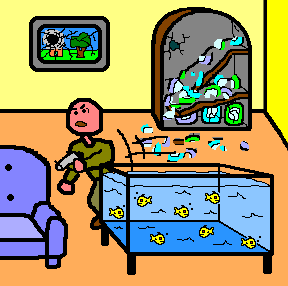
Barbra's Place
Press the red buzzer at the side of the door to speak with Barbra.
Ask Barbra each of the questions in the dialog options to learn that:
Barbra was carrying on an affair with Lance for the past 6 months.
Barbra is married to an antique dealer named Frank Shefer who has been gone on a business trip for the last few days.
Lance was expected to meet at the Shefer home at 302 Lucinda Ave., but was not there when Barbra arrived late that night.
Lance was not a good driver and required glasses because of a serious eye condition.
Lance was not a drinker and may possibly have had an allergy to alcohol.
End the interview and return to the town map, then enter in the address given by Barbra to travel to the Shefer Home: 302 Lucinda Ave.
Shefer Home
Go through the front door on the right side of the building to enter the living room.
Click the glasses sticking out of the right side of the couch.
Note that the serial number on the side of the glasses is identical to the number on the prescription in the victim's car: "ROCD79-234082555".
Go through the left door into the den.
Inspect the telephone on top of the desk.
The message on the telephone indicates that Frank Shefer's business trip was cancelled the day he was supposed to leave.
View the painting on the wall to see Frank Shefer's face.
Look inside the trash can to the right of the desk.
The trash can contains three pieces of important evidence. The first is the yellow paper from a Private Eye with a confirmation to trail Frank's wife, Barbra.
The second is an empty bottle of brandy.
The third is a funnel and hose that's covered in Brandy and vomit.
Exit the house and return to the Police Station, then go through the orange door on the right to enter the Chief's Office.
Chief's Office
First tell the chief "Yes... I believe this is a case of murder!"
Next, say "Yes... I do" have enough evidence to prove it.
Murderer Solution:
The murderer is Frank Shefer, the bald man in the red framed picture on the bottom row.
Time of Murder Solution
The murder was committed at 11:05, indicated by the time found on the victim's wet and broken watch from his personal effects box in the Morgue.
Suspect's Alibi Solution
Select the image of the telephone and recorder identical to the ones seen in the Shefer Home to disprove the suspect's alibi.
We know that Frank Shefer had received a message left on the phone in his home on the night of the murder that said his business trip was cancelled, leaving him with no alibi.
Motive Solution
Select "Jealous Rage" for the motive of the crime.
The victim, Lance, was having a 6 month long affair with the murderer's wife, Barbra, which was discovered by her husband.
The scrapes on the victim's knuckles seen at the Morgue also support the theory that the victim attempted to defend themselves from a physical attack.
Evidence Solution
There are 4 pieces of evidence that the chief will accept as proof to support your case.
The first is the yellow paper at the upper right corner of the items that contains the message from Mr. Smith, the private eye, to Mr. Shefer, the murderer.
The letter indicates that Frank Shefer was aware of his wife's infidelity, and hired the man to follow her.
The second piece of evidence is the pair of red glasses.
Because of the unique serial number found on both the glasses and the prescription note in the victim's car, the glasses found in the Shefer Home definitely belonged to the victim.
Since the victim would be completely unable to drive without his glasses, especially if he were supposedly very intoxicated, you can deduce it would be nearly impossible for him to leave the Shefer Home and drive all the way to the Crash Site.
The third and fourth pieces of evidence are the empty bottle of brandy and the connected funnel hose, and both point to the same facts.
These two items, when considered along with the lab reports from the morgue and the testimony from Barbra Shefer, prove that the victim did not actually drink the brandy, but had it funneled into his stomach postmortem.
The empty bottle of brandy found inside the trashcan in the den shows that the alcohol was used and discarded in the Shefer home.
The funnel and hose covered in brandy and vomit prove that they were used to force the alcohol into the victim's stomach.
Because the lab report from the morgue indicates that the stomach was full of alcohol, but the victim had a 0% blood alcohol level, you can logically infer that the victim was not alive when the alcohol was ingested.
Barbra's testimony also supports this theory, as she points out Lance was a teetotaler with a possible allergy to alcohol, so he would never willingly drink the brandy.
If you have presented enough correct evidence to the Chief, he will send you out to arrest Frank Shefer at the Shefer Home for the murder of Lance Monroe.
Shefer Home
Click the red door at the left side of the building to view the pool, then click it again to enter the den.
Click the green door on the back wall of the room.
You will be warned that a gun is missing from the gun rack. Click the green door again to enter the living room.
Frank Shefer will be waiting for you in the room with a gun.
He will not respond positively to any of the conversation options, so simply click his body to shoot at him as he dodges around the room.
When you run out of bullets, Frank will hide behind the couch.
Choose any of the dialogue options to stall for time to reload.
Click the couch to shoot through it and wound Mr. Shefer, then make the arrest.
Looks like this case was... a hole in one. YEEEEEAHHHHH!!!
Posted by: Trinn |
May 31, 2012 10:15 AM
|
May 31, 2012 10:15 AM
Stickman Murder Mysteries 3 Walkthrough
Starting Out
Click the cigar smoke to start, click the link to go to your desk, then visit the Conference room.
Interview the two boys to learn where the body was found.
Talk to the victim's parents to learn some important information:
There is a key under the mat to get into their house.
Billy was last seen on July 4th, 1994.
There is a note on the desk in Billy's room saying he ran away - but it isn't written in his usual style and they don't believe Billy wrote it.
Billy's House
Take a squad car and go to Billy's home. As his parents told us, the key is
under the mat.
Go to Billy's room and check the note on his desk. The phone next to it has a PIN code you need to find.
Look at the baseball bat or the poster for the pin, which is
VONE
From his messages, you can infer that Billy was killed by
a red headed 14 year old girl.
Check under the teddy's left foot to find some evidence:
a tooth shaped like an L
Before you leave, take note of the other objects in the room. One of them might be relevant later.
The Dump
Go to the dump where Billy was found and talk with the owner, in the building on the left. He will suggest that the police records might contain some information about illegal dumping on the night Billy was killed.
In the building on the right, you can see the case the body was found in. There's not much of any use to your investigation here.
Hospital
Head to the morgue and examine the body. Set the MCX scanner to
M: Hi
C: Lo
X: Hi
to see an image of the murder weapon, which was a
golf club. Where have we seen one of those?
Police Station
Head back to the police station and load the police files on your computer. Enter the date Billy disappeared
July 4th 1994
and check through the incident reports. Note the report about Stickville dump, and the address of the man who was questioned about it.
Suspect Address
Go back to your car and drive to the address you just found in the police report.
227 Everquest Rd
At the address is a man and his 20 year old redheaded daughter, but they refuse to talk to you. Her name is
Jane Greystoke.
You now know the following:
Billy disappeared on July 4th, 6 years ago.
His killer was a redheaded 14 year old girl, who would now be 20.
He was killed by being attacked with a golf club.
His body was dumped the same night at the local tip without the knowledge of the tip's owner.
Ted Greystoke, who has a 20 year old redheaded daughter, was arrested for illegal dumping on the night Billy disappeared.
Police Station
You have all the evidence you need. Visit the police chief and tell him 'yes', you do know who killed Billy. The answers to the evidence questions are
Jane Greystoke - the redheaded girl in the lineup.
The tooth chip was Jane's, after Billy punched her in the mouth.
The murder weapon was the golf club.
Jane was abetted by her father, Ted Greystoke.
They dumped the body at the dump.
Billy was killed in his room.
The supporting evidence for this is the record of the call Ted made to Billy's phone, which was answered by Jane confessing to the killing.
Congrats, you solved the case.
Stickman Murder Mysteries 4 Walkthrough
Starting Out
Start by clicking the cigar smoke, then the link to your desk.
There is a note on your desk telling you to go to the Conference Room. Speak to the brother of the victim to learn that
The victim called him to say she'd mailed him a letter.
She was in trouble with a man named 'Baldy'.
Baldy was a 'customer' rather than her handler.
Victim's Apartment
Head to the victim's apartment and talk to her former room-mate to learn that Dolly's likely killer was:
Bald
Pink skinned
In his twenties
The room-mate will also tell you Dolly's stuff is now in the trash in a box. Go to the back of the apartments and search through it.
The green jacket has something in its pocket. Have a closer look to find
The letter from Dolly to her brother, which was returned because postage wasn't paid on it.
From this you can learn that:
Baldy has a purple birth-mark on his chest.
Baldy was a thief and had robbed a house recently.
Dolly stole a valuable coin from Baldy, which she enclosed with the letter.
Burned-Out Building
Go back to the map and drive to the burned out building. There is some evidence to find here
A kerosene can, that the fireman already has.
A flare gun, on the right of the building.
Hospital
Head to the Morgue. It's in the Hospital; take the elevator once you get inside the building.
The mortician has found some evidence
A human ear that Dolly had eaten(!).
Use the MCX to examine the body. The correct settings
M: Low
C: High
X: Medium
You can see from the scan that Dolly was killed by
a bullet
from a Killya 85mm gun.
Go to the E.R and talk to the doctor. Although he isn't allowed to tell you anything, he will anyway, if you have something specific to ask him about. Query him about a man with an injury to his
ear
to be told that the man
Was admitted at 4am on the 15th.
Signed his name with an X.
Was 5'8" tall.
Weighed 150lbs.
Had a big scar on the back of his neck.
Gun Store
Visit the Gun Store and inquire about the
Killya 87mm
After the shopkeeper tells you he only sold one of that model of gun, ask who he sold it to, to learn the customer
is named Allen Ferguson.
lives at 101 Pheasant Dr.
bought the gun one month ago.
Follow up the lead by visiting that address. It turns out that:
Allen Ferguson is the man Baldy robbed originally.
The Killya gun was stolen in the robbery along with the coin.
Baldy has a tattoo of a skull and cross bones.
Police Station
Go back to the Police Station and logon to your computer. Access the search files, and give the following information:
Male
Pink skin
Bald
Big scar on the back of his neck
Skull and cross bones tattoo
Purple birth-mark
Note that even though the suspect had his ear bitten off, this happened too recently for the police files to have updated.
The search will return one result:
James Brink
Which gives you all the evidence you need to take the case to the police chief.
Answer the chief's questions:
James Brink
In the warehouse (bottom left)
She was killed with a gun shot The fire was started using a flare gun (the green one).
The motivation was the gold coin.
The Chase
All that remains is to capture Baldy. Go back to the victim's house and kick the door down. Aim your kick just below the door handle.
Run back to the trash pickup, then jump in your car.
Start the chase! If you call for backup you'll be told that
no backup is available
So just catch up with his vehicle.
If you radio for a road block, you'll be ordered to end the chase immediately, by any means necessary. Catch right up to his car and
shoot the tires and back window out.
Baldy makes a run for it, and you'll need to give chase in your car again. This time
run him over
at which point he'll surrender and you can make the arrest.
Congratulations - you solved the case.
Stickman Murder Mysteries 5 Walkthrough
Starting Out
Click the cigar smoke, then the link to your desk.
Start by talking to Officer Lunk, in the first door inside the Conference Room. He will tell you that:
The truck driver smelled of whiskey.
The breathalyzer test came back negative, at 0.02%.
A second breathalyzer test from a different officer also came back negative.
The driver claimed to have had one beer.
In the second room is the truck driver.
He, or something in the room, smells of whiskey.
Talking to the driver, you find out that
He had one beer before driving.
A lady spilled whiskey on his shirt before he left.
The victim was lying in the road on his back.
The trucker was driving below the speed limit but was unable to stop in time.
Crime Scene
Go to the crime scene and talk to the policeman on duty.
You now have two conflicting theories about what happened. The trucker maintains that
He was sober, within the speed limit, and the officer was lying in the road.
while the police officers believe that
The trucker was drunk, over the speed limit, and hit the victim when he was stretching his legs at the side of the road.
Take the
video cassette
from the victim's car and remember the label on it:
6463
Look under the wheels of the truck for the victim's left arm. It is holding
a name tag for Pam, payroll department.
Head up and left along the hiking trail. Stuck on some barbed wire is
a jacket
which has
150 Flamingo Rd
written on it.
Hospital
Go to the Morgue. It is in the hospital, reached via the elevator.
Search the officers pockets to find
a gun, which has not been fired recently.
Scan the victim with the MCX machine, using the settings
M: Low
C: High
X: Med
and investigate the
CYT1 bullet.
This almost certainly
clears the trucker.
Jacket Address
Time to pay a visit to the address you found on the jacket.
150 Flamingo Rd.
It turns out that it was a company jacket. Give the company secretary the details of the nametag you found earlier
PAM, Payroll Department
to find out that the employee
Was late to work today, and left again after 10 minutes.
Is usually a very reliable worker.
Has a verbally abusive boyfriend with brown hair.
Follow the secretary to the employee's cubicle.
Hitting the 'redial' button on her phone will call the last number the employee phoned, which is
the airport.
It turns out that at the airport,
both Pam and her boyfriend are under arrest for trying to smuggle drugs onto a plane.
Airport
Head to
001 Airport Dr
and talk to the security officer.
Talk to Pam and threaten her with immediate arrest.
Tell her you know she didn't do it, but you need her cooperation.
Tell her Tim doesn't love her.
Finally, tell her Tim can't hurt her if he's in prison. She will tell you that
Tim shot the officer for asking about a shoebox that contained
stolen credit cards.
Pam ran away after the shooting.
She does not know where the gun was hidden.
Tim intended for them to move to Mexico.
The crystal meth belonged to Tim.
Pam will co-operate against Tim in a trial.
Police Station
Go back to the station. Before talking to the chief, you can check out the video you picked up earlier. It confirms what you already know, but gives you a license number:
BADASS
A fellow officer tells you that a call came in from
240 Lincoin St
earlier about a car with that plate. Head there now.
Sewers
The man in the house tells you that the driver dropped something in the manhole. There's only one thing to do: climb in and look for it.
Go North twice and look in the puddle on the left to find a brown paper bag. Inside is
the gun which fired the bullet you found earlier.
Climb up the emergency sewage outlet to get back to the police station. Time to take the evidence to the chief.
Presenting The Evidence
Tell the chief that
It was murder.
You have a strong case.
It was Tim. He is the angry face on the top right.
The weapon was the Costa 20mm - the brown pistol.
The bullet connects the shooting to the gun.
The motive was stolen creditcards.
Congratulations! You solved the case!
Posted by: Ben |
May 31, 2012 10:27 AM
|
May 31, 2012 10:27 AM