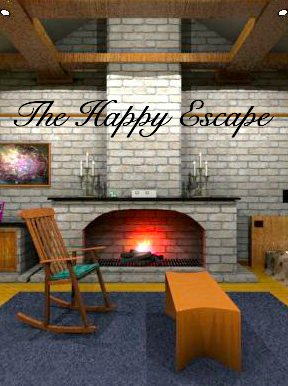
JayisGames.com is now available ad-free!
Jay is Games recommends Cheat Happens with 8,000+ games and 35,000+ trainers!

The Happy Escape


  • Currently 4.6/5
  • 1
  • 2
  • 3
  • 4
  • 5
Rating: 4.6/5 (102 votes)
Comments (37) | Views (12,994)

Weekday Escape

SonicLoverIf there's anything Christmas specials have told us, it's that the big man at the North Pole is notoriously bad at managing his assets. In Tesshi-e's holiday escape this year, Santa has lost ten of the Happy Coins he's supposed to give the children, and in The Happy Escape it's up to you to find them and save Christmas once again.

The Happy EscapeThere's nothing particularly unusual about the setup. Just point and click around the room to navigate, pick things up, and interact with other things. When you have something in your inventory, and there'll be a lot of somethings to have, click it to highlight it, then use it on the environment or click "About Item" to view a close-up. Solve puzzles, look everywhere, collect all ten Happy Coins, and get out the door! (There's no special Happy Coin ending this time, but since the whole game is about collecting them, well...)

Once again, Tesshi-e has come through with a spectacular escape; the puzzles flow perfectly and logically, the sounds and graphics are charming, and although there's still no changing cursor, you never really have to do any pixel-hunting. There's also a save feature for when you get stuck. It's a few days late in the year to be playing a Christmas-themed game, but the holiday season always ends too soon anyways.

Play The Happy Escape

Walkthrough Guide


(Please allow page to fully load for spoiler tags to be functional.)

THE HAPPY ESCAPE

PRE-GAME NOTES

  • You won't be looking for a single Happy Coin in this game..instead, Santa's tasked you with finding TEN of them! Best. Christmas. Ever.

  • There are a total of THREE endings to this game.

  • There is one color-dependent puzzle in this game, but the directions I gave for it will allow anyone who is colorblind to solve it.

WALKTHROUGH

NORTH WALL

  1. The door (locked, of course) has a keycard slot by it. Nothing we can do about that yet. Nothing in the flower pot either.

  2. Check the picture in the center of the wall. It's a puzzle with 3 wreaths that can be rotated. The bells on top can be positioned to the same spots as the numbers on a clock. Hmm...gonna have to come back to this one later.

  3. Check the table under the picture. Mr. Hippo's sitting on it; may as well check his mouth for anyth--

    SCORE!! Happy Coin (1/10).

  4. Hm. The cabinet under Mr. Hippo is locked. Nothing else around the table...we'll come back later.

  5. Whoa, hold up. What's that in the rafters over the picture?

    Some sort of gold ball, but...Bah, can't reach it. Guess we'll need a ladder, a slingshot, or some stuff to build a plane out of to get that.

  6. That's about all we can do here. Let's check the east wall next. To the right!

EAST WALL

  1. Nothing on the windows, but below them there's a table with 3 bells. Nothing we can do with those yet, though.

  2. Let's check that big cabinet out for now.

  3. Let's start with the upper-left cabinets.

    The cups in the middle are rather pretty. Wonder if there's anything in them?

    AHA! Happy Coin (2/10) is ours!

    Nothing else in here.

  4. Now, let's check those presents on the upper-right shelf.

    Can't open 'em since they aren't ours, but we can move them to check behind them.

    And sure enough, the Round Key is behind the last one!

  5. Below the presents is a device to put the Happy Coins into...let's hold off on that for now, shall we? I kinda like having more than 1 Happy Coin on me. ^_^

  6. Now to check the drawers in the middle.

    The far left one is locked. Will the Round Key open it?

    Yep! Happy Coin (3/10) is retrieved!

    The middle-left cabinet has a push-button box inside. Let's come back when we have a hint to open it.

    The middle-right one has a little bronze hammer. How cute! Let's take it.

    And in the far-right drawer...a Tetris block? O_o? Well, may as well take it too.

  7. Right, now for the bottom cabinets.

    The left one's locked, and the Round Key won't open it. Drat.

    The right one's unlocked....and empty. Double drat!

  8. Well, that seems to be everything of importance here for now. Rightward, to the south wall!

SOUTH WALL

  1. The little rack in the left corner has nothing on it, and neither does the picture. Let's check the cabinet below the picture for now.

  2. The little purple block atop it has some shaped cut-outs in it...looks like our Tetris piece will fit in one of them.

    Oh! Letters appeared inside it! Hmm, gonna have to find those other two pieces to make any sense of this.

  3. In the cabinet below, there's some firewood. Let's take a few pieces, shall we?

  4. That rocking chair looks inviting. I could sit in it and rock back and forth all day. Back and forth...back and forth...back and forth...

    Huh. Apparently all my rocking dislodged something underneath...OH! Another Happy Coin (4/10)! Sweet!

  5. Let's check the mantle over the fireplace next. There's some kind of stand here we can set something on...oh, and what's that to the left? Another Tetris piece! Let's go attach it to the device on the firewood cabinet.

    Yep, more letters. Guess we'll need that last one to make any sense of this thing...

  6. Well, nothing under or around the table. Time to check the bed for clues and Happy Coins.

    There's a panel on the left of the headboard that's screwed shut. Just our luck, no screwdriver yet.

    I can't see anything behind the headboard, but the lamp looks adjustable. If we tilt it down maybe--OH!! Another Happy Coin! ...But I can't reach it. D: ...Well, guess we'll have to come back for it later.

  7. Looks like we're done with the south wall for now. Time to check the west wall.

WEST WALL

  1. That's a very lovely painting there. I don't see anything resembling a hint on it, but...what's that sitting on the easel?

    Ah, a pencil. Could be handy later, let's take it.

  2. Next, let's check the top of that blue cabinet.

    Atop it is a chest with a green heart and a green spade on a latch. We can pull that down to reveal a combo lock...no clue what the combination is, though.

  3. Doesn't seem to be anything below or beside the cabinet, so let's have a look in those blue doors. For simplicity's sake, let's number the 1-5 from left to right.

    Door #1: A glowing green 6.

    Door #2: ...Looks empty.

    Door #3: A glowing yellow 9.

    Door #4: A Santa figurine! I bet I know where this goes.

    Door #5: A glowing red 2.

  4. Well, that seems to be all we can do here for now. Let's go back to the south wall for a sec.

SOUTH WALL

  1. Remember that stand atop the fireplace mantle? I bet our new Santa figurine goes on it.

    Yep! The blank letter blocks light up with a familiar heart and spade glow. But that's not how you spell "Santa!" Hmm...I bet those buttons below it change them.

    Ha, I was right. And once we get it to spell Santa...AHA! A screwdriver!

  2. Well, since we've got a screwdriver, let's open that panel on the bed, shall we?

    Ahh, and there's our last Tetris piece....and another Happy Coin (5/10)! Awesome!

  3. Before we get too carried away, let's check that panel sitting on the bedspread real quick. Could be another Happy Coin taped to it...well, there isn't, but let's take the screws anyway.

    Right then! Let's put that last Tetris piece in place in that purple box.

    "TAE PWL INK?" That doesn't make any sense, but hey, the box is open now. And look, a Triangle Key!

    Right, let's try something back on the east wall real quick.

EAST WALL

  1. Let's see if our new Triangle Key opens that locked door on the bottom of the cabinet, shall we?

    Yep, it sure does!

  2. Hm, another puzzle box. The button below the weird alien words change the shapes above them. Maybe this gibberish is a clue?

    Wait. I've seen these letters somewhere.

    The letter display on the purple box! Remember?

    TAE
    PWL
    INK

    The letters on this puzzle box are all there. Maybe they're a clue to the shapes.
    SOLUTION:

    Up triangle, Plus sign, Down triangle ^+v

    We put the right shapes in, hit the button...BINGO! Another Happy Coin (6/10) is ours!

  3. Well, that takes care of that, but...now what?

    Say...that little hammer we got matches the color of those bells. Maybe we can use it to make them ring!

  4. Well, they don't make any sound, but they let off a nice glow when they're hit. The left one glows red, the middle glows green, and the right glows yellow.

    We saw some numbers in that cabinet earlier that glowed those same colors, right? Maybe that's a hint...

    The green 6 was on the left, the yellow 9 in the middle, and the red 2 on the right. Let's try hitting them in the order of those colors, and hit each one that many times.

    Nope, nothing...doesn't look like there's any ind of panel here to pop open anyway....

  5. Wait, I think I know what these are a hint to! Let's go back to the north wall for a second.

NORTH WALL

  1. Check that wreath puzzle out again. There's 3 of them, and they can be positioned to have the bells point to where the numbers on a clock would be, right?

    Well, the numbers in that cabinet can be found on a clock! Maybe if we rotate them to match those numbers in the order the bells indicated...
    SOLUTION:

    Click the left wreath twice, the middle wreath six times, and the right wreath nine.

    ...and then hit that button on the bottom right--AH! It opened! Another Happy Coin (7/10) and...a metal bracket of some kind? Well, this could be useful.

  2. I think I just realized something. Let's go back to the south wall.

SOUTH WALL

  1. Remember how the S and T in that Santa figurine were originally lit up as the same heart and spade on the cover of that treasure chest? Let's have a look at them again.

    Look at the letters each one cycles through. They seem to spell something out...a pair of numbers. I bet that's a hint for the treasure chest on the west wall!

WEST WALL

  1. Let's check the chest again. Still has the same green heart/spade as the Santa figurine does. Let's try putting those numbers in to open it. What were they again?
    SOLUTION:

    7015

    Put them in, press the button...open sesame seeds! And inside we find...WOOHOO! Yet another Happy Coin (8/10)!

  • Well, I'm feeling limbered up now, let's try getting that Happy Coin behind the bed again!

  • SOUTH WALL

    1. Looking behind the bed again, tilt the light, REEEEAAAAACH.....gugh, no good. I could grab it if I had a long enough stick, but we've only got these two dinky pieces of firewood...

      ...and a bracket that we could connect them with...and screws to secure it...*facepalm*
      SOLUTION:

      Open the "About Item" view for the firewood. Use the bracket on them, then the screws, then the screwdriver to make a long stick. ...Huh. A sensible construct for once.

      Okay, let's grab that Happy Coin with our New And Improved Longer (or NAIL for short!) Stick!

      YES! Got it! (9/10)

    2. Y'know, I can think of something else we could use this thing for. Back to the north wall!

    NORTH WALL

    1. Remember that gold ball in the rafters? I bet our NAIL Stick could reach it!

    2. Sure did! ...Oh, and it's not a ball at all. It's a golden egg. Sounds like there's something inside it...definitely not yolk. But how to open it?

      Well, we've still got that hammer!

    3. Alright, now we've got a Clover Key. Probably goes to the cabinet below Mr. Hippo.

      Sure does. Now we've got a piece of paper with a blotch of pencil lead over a diagram.

      Good thing that pencil we found has an eraser on it!

    4. The diagram shows 6 squares with an arrow in a corner of each one...I bet I know what this goes to.

    EAST WALL

    1. I bet it's a clue to that puzzle box in the middle-left drawer. Just hit the buttons as indicated by the arrows...

      It's open! And there's the last Happy Coin (10/10)!!

    2. ... ... ...*sigh* Well, as much as I enjoy having 10 Happy Coins in my possession, we did promise to get these back to Santa, didn't we...let's go ahead and drop them off in the red box on the right side of the shelf.

      A key card fell out...oh, and the Happy Coins came back out as well! Guess we can hold onto them after all! JOY!!

    3. I bet I know just what that's a reference to. Right then, time to get out of here!

    NORTH WALL

    1. Put the card in the keypad and a red light'll come on. Now we just need to punch in the combo. Remember the letters on the purple box we used the Tetris pieces on? There were 9 of them in a 3x3 grid just like this, and the letters on the card were on there as well.
      SOLUTION:

      Press 4, 1, 2, 3, and Enter on the keypad.

      Alright, I think we can get out now!

    SAVE AT THIS POINT

    ENDGAME (All 3 endings)

    1. Well, what are we waiting for! Open the front door and let's go!

    2. Oh, Santa's here! And he's got a present for us for helping him get the Happy Coins back! ...But I can't decide which one to get. You pick first.

      Don't like what you get? Reload and pick a different box for a different ending!

      LEFT BOX

      Wow, that's a beautiful key necklace. Looks very nice on you!

      CENTER BOX

      Oooo, a Mr. Birdy figure! Lucky you! I want one next year, Santa, okay?

      RIGHT BOX

      Oh wow...a brand new kind of Happy Coin! I'm so jealous of you now!

    HAPPY HOLIDAYS!

    The Happy Escape Happy Coin Walkthrough

    Coin #1 (hidden in room)

    Walk forwards to the hippo and open it!

    Coin #2 (hidden in room)

    turn until you see a big set of shelves with glass doors on the left. Open the glass doors, and the happy coin is in a blue coffee mug.

    Coin #3 (hidden in room)

    Rock the rocking chair 3 times)

    Coin #4 (leftmost drawer)

    Go to the big set of shelves with the red box in it. Zoom in on the boxes on the top right. Move them to the left, and find a key. This unlocks the leftmost drawer in the big shelves, which has a coin.

    Coin #5 (Santa)

    Open the fourth cupboard in the low cabinet... the one with the chest on top. Take the Santa figure. Turn to the fireplace, put the Santa on the white box.

    Scroll through the letters, you'll see the heart spells "Seventy" and the spade spells "Fifteen". Go to the low cabinet, open the front of the chest, and enter 7015. Press the button, and take the coin.

    Coin #6 (bed)

    Go back to the santa. Make the stand actually spell "SANTA", and take the screwdriver. Go to the bed, zoom in on the headboard, unscrew the plate, and the coin is behind the green panel.

    Coin #7 (panels)

    The first panel is behind the plate on the bed. The second is in the right-hand drawer in the big shelf with the red box. The third is on the fireplace. Place all of them in the purple box on the wood cabinet, and get the triangle key. The triangle key opens the bottom left cupboard on the big shelves, and shows a strange device.

    Those letters are a clue... find what shapes they make on the purple box, and enter those shapes above. (regular triangle, plus sign, upside down triangle). Push the button, and take your coin.

    Coin #8 (bells & wreaths)

    Opening all the low cabinet cupboards reveals a green six, yellow nine, and red two. Go to the big shelves, and open the 3rd drawer to find a hammer.

    Take this to the bells, and see that using it to hit them reveals red, green, yellow.

    So the code is 269, but where do we use this?

    Go to the wreaths, and click them in that order, then push the button, and take your coin.

    Coin #9 (behind the bed)

    See coin #6 for taking the plate off the bed. Assuming it's off, go to the bed. See the plate lying on the bed? Zoom back in and get those screws. Go to the open cabinet by the fireplace and get two boards. Lastly, go to the wreaths and get a connector. (See coin #7).

    Connect the wood with the connector, use the screws on it, then use the screwdriver to secure them. Zoom behind the bed, it might take a few clicks. Move the light so you can see, then get the coin.

    Coin #10 (four corner device)

    Use the stick from coin #8 to get the ornament on the ceiling beam, then use the hammer from coin #7 to break it and get the clover key.

    Use the clover key on the hippo table, and get a smudged drawing. Go to the painting and get the pencil, use the pencil on the paper.

    Go to the second drawer in the big shelves. Click the corners shown (UR, UL, LL, UL, LR, UL) to get the coin.

    Ending

    Put all your coins into the red box on the big shelf, and you get your coins back, and a card to escape. But you need a code! There's a hint, though... "PINK".

    Use the letter position of the letters PINK on the purple box above the firewood to get your escape code.

    (4123).

    You're out! No spoilers on your present, though. *Grin*

    37 Comments

    Up to 8 coins. Have a smudged note I can't seem to un-smudge, and no clue about a numeric combination to a chest, 3 keys, a manufactured poking device, a hammer, and a screwdriver.

    Reply

    Ah, pixel hunting.

    Reply

    I feel silly, I thought I was gonna have magical progress but the note is pretty meaningless. It seems like it should be a clue to a tilty picture but there doesn't seem to be one of those about.

    Reply

    You need to find the pencil.
    it's

    on the easel

    -anne

    Reply

    Yay!...I'm free.

    Reply

    I'm stumped on that note.
    -anne

    Reply

    Hmm. I'm wondering what coin you got that I missed, then...

    The lit ornaments in the cabinets, the bells, and the wreaths are connected.

    The smudged note can be fixed by a pixel hunt at a painting. And it applies to an item in a locked drawer.

    Hope this helps...

    Reply
    nerdypants December 28, 2011 1:00 AM

    Tenzhi:

    Have you looked in all the drawers?

    Reply

    Hey, Tenzhi, there's a four-button device in one of the unlocked drawers. Maybe it goes to that?

    In the meantime, wanna post some of the progress you made? I can't even find the smudged note. And I have no idea what the glowy numbers mean.

    Reply

    I have 9 coins and I am stuck there but...

    search around the painting for help with the smudged message.

    Reply

    I did, but I had forgotten about the thing I couldn't take with me. :P

    Reply

    @nerdypants, you beat me to that hint for Tenzhi! But alas, although I knew where he should use the note, I have yet to find the note myself :-( Help plz?

    Reply

    Hah! Got the chest!

    Old Saint Nick reveals more than you think. Start at the symbols, see what your options are, and pay attention to them. ;-)

    Just one more puzzle to go...and I think I might have just figured it out. I'll be amazed to get this on my own, as I usually don't. :-)

    Reply

    And now I'm stuck at 9 coins as well. No clue for that chest which is irritating me.

    And unfortunately I don't recall where I got the note. Teach me to try an escape game before I've even finished a cup of coffee.

    Reply

    I'm stuck with 9 coins and have no idea where to go from here.

    Reply

    Note is

    In desk drawer.

    Reply

    Woot! Figured it out, and I'm out! Hooray!

    Reply

    Woot! Figured it out, and I'm out! Hooray!

    Reply

    Made it out - off to deliver presents.

    Reply

    Hah, got it...interesting to see puzzles that have their own solution *and* are part of the solution for another puzzle.

    The number pad at the door, the frame that you put the tetris-like pieces in, and the device in the cabinet are related. :-)

    Hah! And the frame and the number pad are also part of the final puzzle to get out of the door.

    Annnd...out! Wow. Never managed to finish one of these things on my own before. And definitely not this fast.

    Reply

    Made it out - off to deliver presents.

    Reply

    The chest with the heart and spade on it?

    cycle through the letters under the Santa, you'll see it.

    Reply

    Ah, I didn't see the pattern in the letters.

    This escape needed a Naughty Coin ending.

    Reply

    THE HAPPY ESCAPE

    PRE-GAME NOTES

    • You won't be looking for a single Happy Coin in this game..instead, Santa's tasked you with finding TEN of them! Best. Christmas. Ever.

    • There are a total of THREE endings to this game.

    • There is one color-dependent puzzle in this game, but the directions I gave for it will allow anyone who is colorblind to solve it.

    WALKTHROUGH

    NORTH WALL

    1. The door (locked, of course) has a keycard slot by it. Nothing we can do about that yet. Nothing in the flower pot either.

    2. Check the picture in the center of the wall. It's a puzzle with 3 wreaths that can be rotated. The bells on top can be positioned to the same spots as the numbers on a clock. Hmm...gonna have to come back to this one later.

    3. Check the table under the picture. Mr. Hippo's sitting on it; may as well check his mouth for anyth--

      SCORE!! Happy Coin (1/10).

    4. Hm. The cabinet under Mr. Hippo is locked. Nothing else around the table...we'll come back later.

    5. Whoa, hold up. What's that in the rafters over the picture?

      Some sort of gold ball, but...Bah, can't reach it. Guess we'll need a ladder, a slingshot, or some stuff to build a plane out of to get that.

    6. That's about all we can do here. Let's check the east wall next. To the right!

    EAST WALL

    1. Nothing on the windows, but below them there's a table with 3 bells. Nothing we can do with those yet, though.

    2. Let's check that big cabinet out for now.

    3. Let's start with the upper-left cabinets.

      The cups in the middle are rather pretty. Wonder if there's anything in them?

      AHA! Happy Coin (2/10) is ours!

      Nothing else in here.

    4. Now, let's check those presents on the upper-right shelf.

      Can't open 'em since they aren't ours, but we can move them to check behind them.

      And sure enough, the Round Key is behind the last one!

    5. Below the presents is a device to put the Happy Coins into...let's hold off on that for now, shall we? I kinda like having more than 1 Happy Coin on me. ^_^

    6. Now to check the drawers in the middle.

      The far left one is locked. Will the Round Key open it?

      Yep! Happy Coin (3/10) is retrieved!

      The middle-left cabinet has a push-button box inside. Let's come back when we have a hint to open it.

      The middle-right one has a little bronze hammer. How cute! Let's take it.

      And in the far-right drawer...a Tetris block? O_o? Well, may as well take it too.

    7. Right, now for the bottom cabinets.

      The left one's locked, and the Round Key won't open it. Drat.

      The right one's unlocked....and empty. Double drat!

    8. Well, that seems to be everything of importance here for now. Rightward, to the south wall!

    SOUTH WALL

    1. The little rack in the left corner has nothing on it, and neither does the picture. Let's check the cabinet below the picture for now.

    2. The little purple block atop it has some shaped cut-outs in it...looks like our Tetris piece will fit in one of them.

      Oh! Letters appeared inside it! Hmm, gonna have to find those other two pieces to make any sense of this.

    3. In the cabinet below, there's some firewood. Let's take a few pieces, shall we?

    4. That rocking chair looks inviting. I could sit in it and rock back and forth all day. Back and forth...back and forth...back and forth...

      Huh. Apparently all my rocking dislodged something underneath...OH! Another Happy Coin (4/10)! Sweet!

    5. Let's check the mantle over the fireplace next. There's some kind of stand here we can set something on...oh, and what's that to the left? Another Tetris piece! Let's go attach it to the device on the firewood cabinet.

      Yep, more letters. Guess we'll need that last one to make any sense of this thing...

    6. Well, nothing under or around the table. Time to check the bed for clues and Happy Coins.

      There's a panel on the left of the headboard that's screwed shut. Just our luck, no screwdriver yet.

      I can't see anything behind the headboard, but the lamp looks adjustable. If we tilt it down maybe--OH!! Another Happy Coin! ...But I can't reach it. D: ...Well, guess we'll have to come back for it later.

    7. Looks like we're done with the south wall for now. Time to check the west wall.

    WEST WALL

    1. That's a very lovely painting there. I don't see anything resembling a hint on it, but...what's that sitting on the easel?

      Ah, a pencil. Could be handy later, let's take it.

    2. Next, let's check the top of that blue cabinet.

      Atop it is a chest with a green heart and a green spade on a latch. We can pull that down to reveal a combo lock...no clue what the combination is, though.

    3. Doesn't seem to be anything below or beside the cabinet, so let's have a look in those blue doors. For simplicity's sake, let's number the 1-5 from left to right.

      Door #1: A glowing green 6.

      Door #2: ...Looks empty.

      Door #3: A glowing yellow 9.

      Door #4: A Santa figurine! I bet I know where this goes.

      Door #5: A glowing red 2.

    4. Well, that seems to be all we can do here for now. Let's go back to the south wall for a sec.

    SOUTH WALL

    1. Remember that stand atop the fireplace mantle? I bet our new Santa figurine goes on it.

      Yep! The blank letter blocks light up with a familiar heart and spade glow. But that's not how you spell "Santa!" Hmm...I bet those buttons below it change them.

      Ha, I was right. And once we get it to spell Santa...AHA! A screwdriver!

    2. Well, since we've got a screwdriver, let's open that panel on the bed, shall we?

      Ahh, and there's our last Tetris piece....and another Happy Coin (5/10)! Awesome!

    3. Before we get too carried away, let's check that panel sitting on the bedspread real quick. Could be another Happy Coin taped to it...well, there isn't, but let's take the screws anyway.

      Right then! Let's put that last Tetris piece in place in that purple box.

      "TAE PWL INK?" That doesn't make any sense, but hey, the box is open now. And look, a Triangle Key!

      Right, let's try something back on the east wall real quick.

    EAST WALL

    1. Let's see if our new Triangle Key opens that locked door on the bottom of the cabinet, shall we?

      Yep, it sure does!

    2. Hm, another puzzle box. The button below the weird alien words change the shapes above them. Maybe this gibberish is a clue?

      Wait. I've seen these letters somewhere.

      The letter display on the purple box! Remember?

      TAE
      PWL
      INK

      The letters on this puzzle box are all there. Maybe they're a clue to the shapes.
      SOLUTION:

      Up triangle, Plus sign, Down triangle ^+v

      We put the right shapes in, hit the button...BINGO! Another Happy Coin (6/10) is ours!

    3. Well, that takes care of that, but...now what?

      Say...that little hammer we got matches the color of those bells. Maybe we can use it to make them ring!

    4. Well, they don't make any sound, but they let off a nice glow when they're hit. The left one glows red, the middle glows green, and the right glows yellow.

      We saw some numbers in that cabinet earlier that glowed those same colors, right? Maybe that's a hint...

      The green 6 was on the left, the yellow 9 in the middle, and the red 2 on the right. Let's try hitting them in the order of those colors, and hit each one that many times.

      Nope, nothing...doesn't look like there's any ind of panel here to pop open anyway....

    5. Wait, I think I know what these are a hint to! Let's go back to the north wall for a second.

    NORTH WALL

    1. Check that wreath puzzle out again. There's 3 of them, and they can be positioned to have the bells point to where the numbers on a clock would be, right?

      Well, the numbers in that cabinet can be found on a clock! Maybe if we rotate them to match those numbers in the order the bells indicated...
      SOLUTION:

      Click the left wreath twice, the middle wreath six times, and the right wreath nine.

      ...and then hit that button on the bottom right--AH! It opened! Another Happy Coin (7/10) and...a metal bracket of some kind? Well, this could be useful.

    2. I think I just realized something. Let's go back to the south wall.

    SOUTH WALL

    1. Remember how the S and T in that Santa figurine were originally lit up as the same heart and spade on the cover of that treasure chest? Let's have a look at them again.

      Look at the letters each one cycles through. They seem to spell something out...a pair of numbers. I bet that's a hint for the treasure chest on the west wall!

    WEST WALL

    1. Let's check the chest again. Still has the same green heart/spade as the Santa figurine does. Let's try putting those numbers in to open it. What were they again?
      SOLUTION:

      7015

      Put them in, press the button...open sesame seeds! And inside we find...WOOHOO! Yet another Happy Coin (8/10)!

  • Well, I'm feeling limbered up now, let's try getting that Happy Coin behind the bed again!

  • SOUTH WALL

    1. Looking behind the bed again, tilt the light, REEEEAAAAACH.....gugh, no good. I could grab it if I had a long enough stick, but we've only got these two dinky pieces of firewood...

      ...and a bracket that we could connect them with...and screws to secure it...*facepalm*
      SOLUTION:

      Open the "About Item" view for the firewood. Use the bracket on them, then the screws, then the screwdriver to make a long stick. ...Huh. A sensible construct for once.

      Okay, let's grab that Happy Coin with our New And Improved Longer (or NAIL for short!) Stick!

      YES! Got it! (9/10)

    2. Y'know, I can think of something else we could use this thing for. Back to the north wall!

    NORTH WALL

    1. Remember that gold ball in the rafters? I bet our NAIL Stick could reach it!

    2. Sure did! ...Oh, and it's not a ball at all. It's a golden egg. Sounds like there's something inside it...definitely not yolk. But how to open it?

      Well, we've still got that hammer!

    3. Alright, now we've got a Clover Key. Probably goes to the cabinet below Mr. Hippo.

      Sure does. Now we've got a piece of paper with a blotch of pencil lead over a diagram.

      Good thing that pencil we found has an eraser on it!

    4. The diagram shows 6 squares with an arrow in a corner of each one...I bet I know what this goes to.

    EAST WALL

    1. I bet it's a clue to that puzzle box in the middle-left drawer. Just hit the buttons as indicated by the arrows...

      It's open! And there's the last Happy Coin (10/10)!!

    2. ... ... ...*sigh* Well, as much as I enjoy having 10 Happy Coins in my possession, we did promise to get these back to Santa, didn't we...let's go ahead and drop them off in the red box on the right side of the shelf.

      A key card fell out...oh, and the Happy Coins came back out as well! Guess we can hold onto them after all! JOY!!

    3. I bet I know just what that's a reference to. Right then, time to get out of here!

    NORTH WALL

    1. Put the card in the keypad and a red light'll come on. Now we just need to punch in the combo. Remember the letters on the purple box we used the Tetris pieces on? There were 9 of them in a 3x3 grid just like this, and the letters on the card were on there as well.
      SOLUTION:

      Press 4, 1, 2, 3, and Enter on the keypad.

      Alright, I think we can get out now!

    SAVE AT THIS POINT

    ENDGAME (All 3 endings)

    1. Well, what are we waiting for! Open the front door and let's go!

    2. Oh, Santa's here! And he's got a present for us for helping him get the Happy Coins back! ...But I can't decide which one to get. You pick first.

      Don't like what you get? Reload and pick a different box for a different ending!

      LEFT BOX

      Wow, that's a beautiful key necklace. Looks very nice on you!

      CENTER BOX

      Oooo, a Mr. Birdy figure! Lucky you! I want one next year, Santa, okay?

      RIGHT BOX

      Oh wow...a brand new kind of Happy Coin! I'm so jealous of you now!

    HAPPY HOLIDAYS!

    Reply

    The Happy Escape Happy Coin Walkthrough

    Coin #1 (hidden in room)

    Walk forwards to the hippo and open it!

    Coin #2 (hidden in room)

    turn until you see a big set of shelves with glass doors on the left. Open the glass doors, and the happy coin is in a blue coffee mug.

    Coin #3 (hidden in room)

    Rock the rocking chair 3 times)

    Coin #4 (leftmost drawer)

    Go to the big set of shelves with the red box in it. Zoom in on the boxes on the top right. Move them to the left, and find a key. This unlocks the leftmost drawer in the big shelves, which has a coin.

    Coin #5 (Santa)

    Open the fourth cupboard in the low cabinet... the one with the chest on top. Take the Santa figure. Turn to the fireplace, put the Santa on the white box.

    Scroll through the letters, you'll see the heart spells "Seventy" and the spade spells "Fifteen". Go to the low cabinet, open the front of the chest, and enter 7015. Press the button, and take the coin.

    Coin #6 (bed)

    Go back to the santa. Make the stand actually spell "SANTA", and take the screwdriver. Go to the bed, zoom in on the headboard, unscrew the plate, and the coin is behind the green panel.

    Coin #7 (panels)

    The first panel is behind the plate on the bed. The second is in the right-hand drawer in the big shelf with the red box. The third is on the fireplace. Place all of them in the purple box on the wood cabinet, and get the triangle key. The triangle key opens the bottom left cupboard on the big shelves, and shows a strange device.

    Those letters are a clue... find what shapes they make on the purple box, and enter those shapes above. (regular triangle, plus sign, upside down triangle). Push the button, and take your coin.

    Coin #8 (bells & wreaths)

    Opening all the low cabinet cupboards reveals a green six, yellow nine, and red two. Go to the big shelves, and open the 3rd drawer to find a hammer.

    Take this to the bells, and see that using it to hit them reveals red, green, yellow.

    So the code is 269, but where do we use this?

    Go to the wreaths, and click them in that order, then push the button, and take your coin.

    Coin #9 (behind the bed)

    See coin #6 for taking the plate off the bed. Assuming it's off, go to the bed. See the plate lying on the bed? Zoom back in and get those screws. Go to the open cabinet by the fireplace and get two boards. Lastly, go to the wreaths and get a connector. (See coin #7).

    Connect the wood with the connector, use the screws on it, then use the screwdriver to secure them. Zoom behind the bed, it might take a few clicks. Move the light so you can see, then get the coin.

    Coin #10 (four corner device)

    Use the stick from coin #8 to get the ornament on the ceiling beam, then use the hammer from coin #7 to break it and get the clover key.

    Use the clover key on the hippo table, and get a smudged drawing. Go to the painting and get the pencil, use the pencil on the paper.

    Go to the second drawer in the big shelves. Click the corners shown (UR, UL, LL, UL, LR, UL) to get the coin.

    Ending

    Put all your coins into the red box on the big shelf, and you get your coins back, and a card to escape. But you need a code! There's a hint, though... "PINK".

    Use the letter position of the letters PINK on the purple box above the firewood to get your escape code.

    (4123).

    You're out! No spoilers on your present, though. *Grin*

    Reply

    Greetings,

    I've been coming to this site for years but this will be my first time posting a comment.

    One of my favorite games to play on this site are those from Tesshi-e with their beautiful graphics and logical gameplay, lately however, I'm having difficulty loading their games.
    Example: The window will load fine but the black square in which the game actually loads in only says "SWF Loaded!!" and then nothing. I've even left it open on my computer to make dinner thinking that I was being too impatient but the game never changed.
    I apologize if this post seems a bit long-winded, but I wanted to make my example as clear as possible. I currently play on a Toshiba Satellite laptop, I don't know if that'll help any but in the past I was on a Dell Inspiron and would only occasionally encounter this problem. I thank you all so much for any help in this matter. :D Antara77

    [I've seen this happen from time to time. My guess is that the new Tesshi-e games are so popular that their site is overwhelmed and never finishes sending you the file. My best recommendation is to wait a few minutes, then reload the page. Keep trying until it loads completely. :) I hope that helps. -Jay]

    Reply
    awfulperson December 28, 2011 11:02 AM

    You know, before I even tackle this game (and find that it is a pixel hunting nightmare), I must confess, I don't know why people are continually peeved at the lack of a changing cursor.

    If we WERE indeed locked in a room by tesshi-E's evil genius in real life, would we know PRECISELY where to look? There's no changing cursor in life, people.

    One of my biggest complaints in these games is not the lack of more guidance, it's when I wish to explore more and cannot. Ooh, there's a neat doodad in the corner that, if this were real, I would DEFINITELY explore. What's that? Can't zoom in on it? Curses! :(

    I am also not fond of Tomatea's telling me, "I don't know how to solve this yet." Again, if this were real, I wouldn't know that.

    Just my two cents, sans happy coin. :)

    Reply

    @An Onyx Mouse, re: Your Walkthrough

    I have absolutely no idea how

    the TAE/PWL/INK gets us the code to the device accessed via the triangle key. (You say all the letters are there, but I did not see a W.) Either way, I don't see the connection.

    Could you please explain that for me?

    Reply

    Late for a Christmas-themed game? Nah! We've only got four partridges, six turtledovesj, six French hens and four calling birds so far. Plenty of time yet!

    Reply

    @ray9na

    Notice how all the letters on the puzzle box (device) are present in the grid?

    If you took the letters found on the puzzle box and traced the pattern on the grid, you will start seeing some shapes.

    i.e. If you went from A -> I -> K -> A, it will make a triangle shape

    Reply
    eine tolle etui December 28, 2011 11:39 PM

    I love reading Onyx Mouse's walkthroughs almost as much as I love puzzling my way through the latest Tesshi-e room escape!

    Reply

    ray9na:

    You know the purple pad above the firewood where you placed those tiles? If you take each set of letters as a path, the paths given would form 3 shapes... the shapes you'd enter in that machine. :)

    Reply

    Jay,

    Thank you so much for your response and I will definitely try that in the future.

    A.

    Reply

    @Ali and Werebear

    Thanks! The lightbulb flickers, sputters, and is on. :)

    Reply

    @eine tolle etui:

    Heh, thanks! I figure that it's a little more helpful if it's more interesting to read than a checklist, y'know?

    Reply
    VoxPopuli42 December 30, 2011 7:02 PM

    If Tesshi-e were ever to make Happy Coin pendants for necklaces, there would be a huge gamer population buying it. I would wear it proudly.

    Reply

    I hardly ever do these things without looking at a walk through, but I did it!!!

    Loved this one, the puzzles where logical and unique.

    My only problem is that there is pixel hunting near

    The Bed

    Reply

    ^ Scroll Up | Homepage >

    Leave a comment [top of page]

    Please consider creating a Casual Gameplay account if you're a regular visitor here, as it will allow us to create an even better experience for you. Sign-up here!
    • PLEASE UNDERSTAND SITE POLICIES BEFORE POSTING COMMENTS
    • You may use limited HTML tags for style:
      (a href, b, br/, strong, em, ul, ol, li, code, spoiler)
      HTML tags begin with a less-than sign: < and end with a greater-than sign: >. Always. No exceptions.
    • To post spoilers, please use spoiler tags: <spoiler> example </spoiler>
      If you need help understanding spoiler tags, read the spoiler help.
    • Please Preview your comment before posting, especially when using spoilers!
    • No link dropping, no domains as names; do not spam, and do not advertise! (rel="nofollow" in use)
    chrpa Jayisgames needs your help to continue providing quality content. Click for details Welcome to the Roundup 66 - Retro with four games! After you find the ten monkeys in the chapter, look in the inventory. You will find a...  ...
    chrpa Jayisgames needs your help to continue providing quality content. Click for details Welcome to the Roundup 65 with three games! As mentioned in the previous roundups, only odd-numbered episodes are featured since even-numbered are for Robin Vencel's patrons (the...  ...
    chrpa Jayisgames needs your help to continue providing quality content. Click for details Hi! Weekday Escape and Weekday Puzzle are here! First we have two new cans from tomoLaSiDo and then two small rooms from isotronic. That's all for this...  ...
    6,365 Views
    0 Comments
    chrpa Jayisgames needs your help to continue providing quality content. Click for details Welcome to Mobile Monday! We have another beautiful game from Nicolet and it's a winter game as it should be. Tasuku Yahiro have released another of their...  ...

    HELP Jayisgames.com

    Recent Comments


    Display 5 more comments
    Limit to the last 5 comments

    Game of the week

    
Dark Romance: Vampire Origins Collector's Edition

    Your Favorite Games edit

    add
    Save links to your favorite games here. Use the Favorites editor.

    Monthly Archives