
Escape from Mr. K's Room 2

![]() It's Wednesday again, and you know what that means. No, not the longest, most boring day at work, school, or whatever, it means it's time for Weekday Escape! Escape from Mr. K's Room 2 is this week's delightful room escape and it's from the twisted brain of Tesshi-e.
It's Wednesday again, and you know what that means. No, not the longest, most boring day at work, school, or whatever, it means it's time for Weekday Escape! Escape from Mr. K's Room 2 is this week's delightful room escape and it's from the twisted brain of Tesshi-e.
 There's not much of a scenario to the game. Mr. K has challenged you to escape his room (again), and you, being the escape fanatic that you are, are happy to give oblige. Oddly bereft of the usual strange setup hijinks, we are left with pure, one-room, four-walled, escape nosh wrapped in a pretty bow.
Navigation is, as per usual, with bars at the sides and bottom of the screen. Tesshi-e still hasn't discovered the joys of the changing cursor, but the space is so uncluttered that the pixel hunting is kept to a minimum. As always the controls are top notch, with easy inventory control, mute buttons, and a save button just in case you need to stop halfway through (or wish to play again to find the happy coin). The music is dreadfully familiar, but that's what the handy mute button is for. As for the space, well, Tesshi-e's rooms are getting more and more realistic with each game. As beautiful as these rooms are, I see a bright future in interior decorating for the game designer.
Let's pause a moment and reflect on the actual premise of room escapes. They've always seemed a bit...well, strange, haven't they? I mean, if you find yourself locked in a room accidentally somewhere, the last thing you'd do is go searching around and solving puzzles. You'd just call someone to let you out, right? Presuming, of course, you remembered your cell phone and you can get a signal, that is. However, the setup for Escape from Mr. K's Room 2 actually explains all the strangeness. Mr. K has prepared the room especially for you to solve your way out, overcoming the awkwardness usually associated with standard room escapes. I mean, seriously, how many places actually have puzzle locks on their doors that can be solved by looking around the room?
Escape from Mr. K's Room 2 might be called Tesshi-e: Greatest Hits. There are a lot of familiar puzzles here, especially the old 'wobbly picture' puzzle which is one of the oldest in the book. However, there are also some fresh new puzzles as well, along with the old standby of 'use of found objects' and Tesshi-e's favorite device, 'construction.' This time, though, the construction is more intuitive and makes a lot more sense than in some of the older puzzles (Escape from the Living Room, for example). And yes, it wouldn't be Tesshi-e without both a regular and a "happy coin" escape.
Now that Tesshi-e has found a competent translator, the escapes just keep getting better and better. This is a perfect break for the mid-week, a chance to stretch the neurons and take them out for a little walk, and enjoy pure room escaping fun. Stripped of all of the extraneous scenarios of how you got in there in the first place, Tesshi-e proves they are masters of the pure, unadulterated basic room escape. Test drive Escape from Mr. K's Room and find out for yourself how much fun escaping a locked room can be.


Walkthrough Guide
(Please allow page to fully load for spoiler tags to be functional.)
Walkthrough for Escape from Mr K's Room 2
My friend Mr K has challenged me to escape another of his puzzle rooms. I don't know why he likes these games so much, but I'll play along.
First things first, I took a look around the room.
Next to the door is a black plate attached to the walls with screws. Above it is a four letter code box.
There is a painting of a girl on a bench, and I can just make out some faint markings, but the lighting is too poor to really see them.
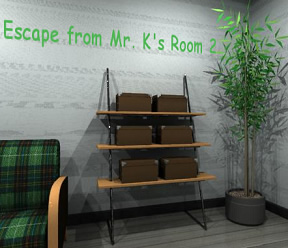
Below that is a set of shelves. Mr K sure seems to like American sports. He's got a soccer ball, a football helmet, a baseball, and a bowling pin!
I turned around and saw a great big tv. The remote was right beneath the tv, and I couldn't help myself. I turned it on.
Strange, the tv doesn't seem to work. There's just a weird picture of a man in green standing next to a man in red, then an X then a man in yellow. So much for taking a quick break.
I try to turn on the radio next, but instead of seeing a radio station, I only see the letters "EMLQ" display.
There's a balancing toy next to the tv, and while I was fidgeting with it, oops! I accidentally pulled off the balls on the ends of the balancing arms.
There's also a post box, but I don't have a key for it, and a cute picture of two children. For some reason the photo says "reoe" in the corner.
Below the painting, there's a martini glass on the table. Empty, darnit, but I take the straw anyway. The bottom of the coaster says "PLHD" -- don't ask me why!
I turn again, and check under the pillows, hoping for a key. No luck, but the letters "GSNX" are stamped on the bedsheet. Weird.
I look at the last wall, and find a wooden knob under the couch.
The painting on this wall is kind of wobbly, but I can't quite pull it loose. The picture of a child eagerly checking the Post box is quite adorable though. It almost looks as if Mr K's toy post box was used as the model.
There are a bunch of locked boxes on the shelf next to the couch. While I'm trying to open them a glint of metal catches my eye. Mr K is so forgetful sometimes -- he's left his scissors in the pot next to the tree.
Now that I've taken a look around, I think I should try to get some of these boxes open.
This one says sports on it, and has a 3x3 grid of buttons.
Hmmm, Mr K does have a lot of sports memorabilia on display
Press the buttons that correspond to sports equipment on the 3x3 shelf
.X.
XX.
..X
I'm not sure about the others, so I glance around the room. The code panel by the door catches my attention.
All the weird sets of random letters around the room can't be a coincidence. This is Mr K we're talking about after all!
I enter the codes into the panel and notice what changes
Each of the three capital letter codes (PHLD, EMLQ, and GSNX) causes an image of a gentleman with a number on his suit tail to appear.
Each gentleman is a different color.
The GREEN gentleman has the number 2
The YELLOW gentleman has the number 38
The RED gentleman has the number 47
Wasn't there a box with a stuffy looking gentleman on the cover?
I head back to the boxes and try to puzzle out what the passcode is.
Those same suited men showed up on the TV. What was the order again?
GREEN RED X YELLOW
The code is 247x38=9386
Got it! I got a spade key and some thin metal sticks. Dunno what I'll use them for yet, but I'll hang on to them.
I've got a key now, and the post-code box has a lock. I bet they fit each other.
There's a screwdriver and a strange note in the mailbox. The note has the word POST and some numbers in the corners.
I wonder if it has something to do with the picture of a post box?
The numbers correspond to the corners of the painting of the boy at the post box. Click the top left, bottom right, bottom left, bottom right, bottom left, and top right corners in that order to remove the painting.
Neat! There's a hidden compartment behind the painting. I can reach the note, but not the key way in the back of the compartment. This note is kind of strange -- it's just a reprint of the four paintings in the room.
Oh, and now that the painting is off the wall, I can see the letters 'oiei' stamped on the top of the frame.
There is a box whose lid is held on by screws. Now that I've found Mr K's screwdriver, I can open it.
There's a magnet inside, but it's not strong enough to pull the key out of the cubby behind the Post painting.
I can remove the plate on the wall now too.
There are three buttons. I press the left one, and realize it's the main light switch!
It's really dark, and I can barely see, but I turn around anyway. The painting of the mysterious woman is glowing with the letters 'uvrn'! I turn around again to get the lights back on.
I quickly turn the lights back on -- don't want to trip over something -- by pressing the middle button. I try the right button, then look around to see what it turned on.
The right button turns on spotlights on the painting of the girl on the bench. The letters "ffzn" are now visible.
Well, now there's just one more box with a passcode on it. The top of the box says 'four pictures.'
And I happen to have a note with four pictures stacked one above the other.
Line up the letters from each of the four pictures in the order shown
ffzn
oiei
uvrn
reoe
Reading down the columns gives four, five, zero, nine. This is the code to the box.
Well that's silly. It's just another knob thing and the key to the other box on this same shelf.
Well, at least I got another knob. And a hook on a chain from the box with a keyhole
I still can't reach the key in the hole in the wall. I found a lot of junk though. Maybe I can build something that will reach it.
I bet I can use this remote as the body of a car, and these knobs and the balls from the balance toy as wheels of a sort.
I cut the straw in half and taped it to the bottom of the car.
I then slipped the two metal rods into the two straw pieces to form an axle.
I attached the balls and knobs to the axle.
I have a car now, but how will it grab the key? Maybe at a closer distance the magnet will be strong enough to grab the key?
I taped the magnet to the car
And then finished it with the chain and hook
Sweet! I have a sort-of car. I can drop it along the rails in the cubby hole, then pull it back with the chain.
I've got a key that fits the main door now, but before I leave, something is bothering me.
There's a painting behind the door. I wonder if it's got a clue, just like the other paintings?
I feel kind of silly, but i turn out the lights anyway. And what do you know? The letters MEHC are written above the painting in glow in the dark paint.
It can't hurt to try it in the keypad can it? I punch in the letters, and the keypad slides up, revealing a secret compartment. . .with a happy coin in it.
Now I can exit happily, and tell Mr K I made it out of his newest room. Maybe he'll take me up to the roof deck for a better view of the skyline.
Posted by: MmeTurbulence |
October 6, 2010 1:52 AM
|
October 6, 2010 1:52 AM
Walkthrough
Let's check out the painting in front of us. Something behind the water? The protagonist has better eyes than I. We'll come back to that. Back up.
Ooh, those cube shelves always have stuff to pick up! Hmm, nope, not this time. Sure looks like someone's into a variety of sports. Oh well, back up.
You can check out the door (won't open), the 4-digit alphabetic pad (no code yet) and the black panel (Phillips head screwdriver required) if you want. Otherwise, turn right.
I bet if we check the bottom shelf, we'll find... yep! Grab that remote control! Click it to flip it over. (I suppose it's still usable upside-down, right?) Note the notch on the end. Back up.
Check the left speaker and nab a balancing toy. In close-up, you can click the balls on the end to take them off. I guess the protagonist has decided that they're the only part that matters already? Back up.
Click the TV screen. No battery cover this time, so equipping the remote and clicking on the screen provides immediate satisfaction. (Ahhh.) Not that seeing a green mustachioed gentleman, a red mustachioed gentleman, a big black X and a yellow mustachioed gentleman provides any particular satisfaction to me. Note them and back up.
Click the stereo system for a close-up. The post box is locked for now, but you can turn on the stereo to reveal [EMLQ] on the digital display. Hey, now we're talking something useful - that pad near the door took 4 letter combinations! Note, turn off the amp (we're saving energy here, guys!) and back up.
Let's check out this painting now. Looks like the letters [reoe] up in the top-right - otherwise, nothing much going on there. Note that the 4 letters are lowercase here.
Clicking the delicious drink on the table causes the protaganist to apparently consume both contents and glass, leaving a straw in our inventory and a coaster on the table. Clicking the coaster reveals a new capital letter code - [PLHD]. Note both codes, back up and turn right.
Click the painting to reveal... a painting. How MYSTERIOUS. Back up.
Beds are usually good for stuff! Clicking the bed after closing in reveals a third capital letter code - [GSNX]. Note, back up, turn right.
A fourth painting, eh? (This one reminds me a little of Holly Hobbie from my childhood.) Note that click the corners causes the protagonist to misalign the painting like the jerk they are. Back up.
The sofa looks like a likely place to look. Nothing on top, but checking underneath reveals a knob of some sort! Back up twice.
Lets zoom in on the boxes. First, check the planter for a pair of scissors. (Of all places, I mean, really?!) Then click the boxes individually to check each.
Upper left reveals a 4 digit numeric pad and a pair of embossed mustachioed gentlemen. Upper right reveals second 4 digit numeric pad and the bold statement of "4 pictures." Hey, we found four pictures here! Not much good we can do with them yet, though. Middle left is empty already. Middle right requires a Phillips head screwdriver. Bottom left calls for a key. Aaaand bottom right has a binary 3x3 pad and the word SPORTS.
Sports, eh? I recall that shelving unit having quite a few sports items, and it was 3x3, too! Checking the shelves reveals sporting goods in the top middle, middle left, middle and bottom right shelves. Light up those buttons on the bottom right box to reveal a tape dispenser.
Alright, let's make use of those 4 letter codes. Head to the pad next to the door and punch in the code from the stereo [EMLQ], turning the little light yellow. Back up for a... yellow mustachioed gentleman, of all things! Note the 38 on his jacket, then zoom back into the pad and punch in the coaster code [PLHD]. The light glows green, and backing up reveals a green mustachioed gentleman with a 2 on his jacket. Zoom into pad view, punch in the bed code [GSNX], make sure the light's red and back up for a red mustachioed gentleman with a 47 on his jacket.
Now, the TV had these mustachioed gentlemen organized in a particular manner, didn't they? Almost... mathematical. By placing the numbers from the green and red mustachioed gentlemen together, we get 247. Multiply that by the yellow mustachioed gentleman's number to get 9386.
Slide on over to those boxes, click the upper left box and punch in 9386 to obtain a spade key and and a pair of thin metal sticks.
Keys are usually good! Doesn't seem to work in the lower left box, so let's check the post box next to the TV. It works! Now we've got the ubiquitous screwdriver and a hint sheet.
My fingers are itchin' to drive some screws, so we'll worry about the hint later. Using the screwdriver on the black panel next to the door reveals light switches. The middle is currently active.
Let's try clicking the left switch. The lights come off. Backing up turns us around, giving us a view of the darkened opposite wall. Glowing letters [uvrn] have MYSTERIOUSLY appeared on the MYSTERIOUS painting. How does the occupant sleep under such MYSTERIOUS circumstances? It is a MYSTERY... Back up.
Click the right switch turns the lights back on. I wonder if anything else has changed. Back up twice.
Oh look, the track lighting is on. Zooming in on the painting on the girl in blue reveals what the protagonist spotted with their infrared vision - the letters [ffzn] have appeared.
Time for more screwdriving! Head for the middle right box and unscrew to reveal a bar magnet. (Apparently our protagonist can also determine magnetic strength by merely looking. I. Want. Those. Eyes.)
Now, I think that's all the screws we can drive. How about that hint?
Looking at the hint reveals the word POST in the middle and four corners with numbers. Sounds like a painting is in serious need of re-adjustment! The numbers from 1 to 6 are represented here, so let's click the corners that represent those numbers. The pattern is top left, bottom right, bottom left, bottom right, bottom left, and top right. Bam, down goes that painting, revealing a new hint memo and a tunnel with two tracks leading to a key.
This new hint sheet has organized our four paintings vertically. Let's try doing that with the letters we've... oh wait, we don't have anything from the post box painting yet.
Backing up and clicking on the painting behind the bed reveals the letters [oiei]. There! We've got all four combinations.
Arrange the four codes vertically, starting with the girl in blue at the top, then the post box, then the MYSTERIOUS woman and finally the cliff. You should get this array:
[ffzn]
[oiei]
[uvrn]
[reoe]
So our code is 4509! Pop on over to the top right box and punch it in for a second knob and a club key.
I bet that key will work on the bottom left box. And it does! Now we have a chain with a hook on it.
Alright, I think it's time to start using this assortment of items to get that key out of the tunnel. Maybe with some kind of car...?
Let's start with the scissors. The only thing here I see worth cutting is either the memos (nope) or the straw (yep). Alright, we've got two smaller straws. I think they'd look very fetching on the bottom of the remote, don't you? Very nice, and now some tape to secure. Those sticks will fit nicely in the straws. Those two knobs would make a fine pair of wheels, as would the balls from the balancing toy. Turn it over - yes, it's all coming together. Let's place that strong magnet on there and tape it in place. And now, for the finishing touch, we attached the hook. Voila! The perfect key catcher!
Place our little key catcher onto the tracks, push it forward and pull it back. You've got a heart key! Bet it works on the door.
Using the key on the door not only unlocks it, it also reveals a lovely painting of a small boy in an aquarium window - very nice! Now we can just walk on through the door and enjoy a drink at the bar!
...Oooooor we could look for a certain COIN. I wonder if THIS painting glows in the dark, too. Click the left light switch reveals that it does! Looks like the letters [MEHC] have been revealed at the top, too. Turn the lights back on and punching that code in on the door pad to reveal the HAPPY COIN! Now we can waltz through that door as smug as can be 'cause we found the HAPPY COIN!
Posted by: OKtomcat |
October 6, 2010 2:09 AM
|
October 6, 2010 2:09 AM
Complete walkthrough
Collecting items and also some clues
1st wall
If you click in next to the door you will notice a panel with a 4 letter combination and a black panel with screws below it. Also on this wall is a 3x3 grid of shelves. It has a curious placement of items.
Turn right - 2nd wall
Get balance toy from top left of entertainment center. Examine toy and click to get the balls from it. Click on bottom of entertaiment center to get remote. Use remote on television to get a screen with a 3 man code; Green Red X Yellow. Now, click on the stereo to get the following code - EMLQ. Click on the painting on the wall to get the code - reoe. Get the straw from the glass. Also, click on the coaster to get the code - PLHD.
Turn right twice - 3rd wall (4th if you're counting but you never need to work directly with the other wall.
Click on the pillows to get the code - GSNX. Click under the couch to get a brown knob. Click on the bottom right box on the shelves. The box has a 3x3 grid with the word SPORTS under it. Where have we seen a grid before?
The shelves with various items from the first wall. The correct buttons to push are top middle, left two on the second row, and bottom right on the third row. Collect the tape.
Get scissors from plant.
Time for some discoveries
Turn Right
Enter the three capital letter codes. When you enter each one correctly the light will change color. Back out and a familiar looking gentleman will be displayed on the door with a number.
If done correctly the Yellow will give 38, Red 2, and Green 47. Now use these numbers with the code from the television.
247 X 38 = 9386
Use the code on the upper left box on the shelves. You will obtain a metal stick and the spade key.
Use spade key on the POST box on the entertainment center to get a clue paper and a screwdriver. The paper tells you how to
Move the painting with the boy and post box on it.
Upper left, lower right, lower left, lower right, lower left, upper right.
From behind the painting you get
another clue paper and a key at the end of two rails. If you back out then click on the painting you get the code - oiei.
The screwdriver can be used on the middle right box to get a magnet. It will also open the black panel next to the door to reveal three switches. If you click the left switch the lights will go out. Back out and on the picture of the lady will be revealed the code - uvrm. Now, click the right switch and back out to get a code on the picture with the girl - ffzn.
It seems that the four codes from the paintings are used with the second hint page, but I only wound up using the first of the codes in the order.
The code from the painting with the girl is ffzn.
I simply used these as hints for numbers - 4509. This opens the top right box on the shelves. I'm not sure why the other pictures and the arrow are given on the page.
This will open the top right box from the shelves and give you a club key. That key can be used on the bottm left box to get a chain.
Time to put all those pieces together and get out of here.
Cut the straw to get two pieces. Turn over the remote by clicking on it in the closeup view. Use the straw pieces with the remote and then tape them. Use the metal pole with the remote, then add both sets of balls. Now, use the magnet on the remote and tape it on. Finally, put the chain on it to complete the cart. This can then be used to get the final key, the heart key. Use this on the door to get a nice picture on the door. Click on the door to get the first ending.
Happy Coin Ending
If you turn out the lights and back out you will get another code - MEHC. Turn the lights back on and then enter the code in the panel above. This will reveal the happy coin.
I hope I typed this up correctly. It's my first walkthrough and it was late.
Enjoy!
Posted by: cdeanoh |
October 6, 2010 2:29 AM
|
October 6, 2010 2:29 AM