

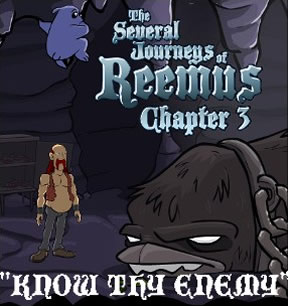
 The cry goes out across the land for a hero! Someone stalwart! Someone true! Someone with a really awesome 'stache, and some... little... purple dude, we guess! That's right, true believers, the only one who can save us now is none other than the devastatingly handsome Reemus! And thanks to the combined talents of Jay Ziebarth and his team, Reemus is back for the third chapter in his several journeys: Know Thy Enemy. Will Reemus ever become a hero? Will Liam ever get his own matching vest? Why don't more people have gelatin pools in their underground lairs? These, and many other questions, will not be answered in this installment! Luckily, it's just as slyly fun as the rest.
Things get even stickier in The Several Journeys of Reemus: Chapter 3, as Reemus and Liam race to deliver an important message to the castle. Or, um, not race, exactly, since Reemus's trademark unimpressed stare and casual lope is still firmly in place. Click on objects on the screen to interact or move the two would-be heroes around. You can play as either Reemus or Liam, and clicking on the appropriate icon in the upper left corner will swap who you have control over. As you progress, you'll find you need to do that quite a bit. Reemus is stronger, while Liam is smaller and more agile, so neither is suited to every task.
This time around, after an initial puzzle that looks pretty familiar, you're presented with a problem that has our heroes split on how to handle it. Depending on which solution you go after, you'll be faced with a different set of puzzles, and a different ending. It adds a nice chunk of replay value to a game that would otherwise be pretty short.
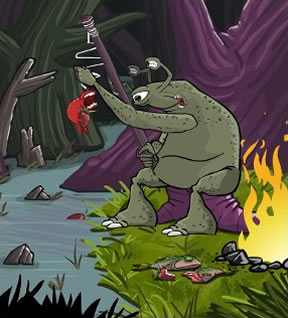 Analysis: Part of what makes Reemus so enjoyable is the bizarre world in which he lives. The strange plants and animals there are as weird as they are wonderful, and there's always a certain amount of anticipation involved in each new installment, as you discover just what Zeebarf has dreamt up this time. Somewhere, Tim Burton looks up at the vast inky bowl of fathomless night sky, and senses he has a kindred spirit.
Considering that their realm is so far removed from our own, the puzzles in this latest chapter are surprisingly logical. All it takes is some clicking around to figure out how each strange beast or item reacts, and the pieces typically fall into place with little prodding. They make their own queer sort of sense once you stop trying to apply silly things like "the laws of nature" to them. Oh, of course you can lead the bees around like little balloons! Why wouldn't you? It's all so obvious!
Even with two paths to explore, however, Chapter 3 is pretty short. The areas are so small and well designed that you won't spend a lot of time aimlessly clicking about, searching in vain for whatever magical MacGuffin could be hidden behind a pixel. The ending will leave you wanting more, but in a good way. After all, the greatest compliment a chef can get is the sound of someone scraping for the last bits at the bottom of a bowl. If you're looking for an hour or so of Zeebarf's signature sense of humour and a good deal of questing, then look no further. Reemus is here, and he polished his paunch just for you!


Walkthrough Guide
(Please allow page to fully load for spoiler tags to be functional.)
Text Walkthroughs:
- Path Of Least Resistance
Scene 1:
1. When the bug stops in front of the broken tree, click it to let the bug walk on it.
2. Click the spider web to change the body from a bug to a spider. When you're a spider, click the bird to get eaten by it!
3. Once you're a bird, click the bush at the edge of the hill. You will reveal a snake and get eaten by it.
4. When you're the snake, click the animal in the hole to get to the next scene!
Scene 2:
1. Click on the golden colored thing with the flies flying around it to move it!
2. When the frog jumps out of the lake, onto the stone. Click him to eat him and change into a frog!
3. Click on the rock on the middle of the screen. On the right-side for the first purple tree, to let the frog jump on it. Click on the next stick to jump on it and then the third one. Once you're near the fruit, click it to let it fall down!
4. Jump in the lake again and click the fish to eat it.
5. Once you're a fish, click the thread at the edge of the fish stick to proceed!
Scene 3:
1. Choose Liam!
2. Go to area 2 by clicking the right-arrow and carry the yellow mushroom back to the 1st area. Place it on the tree with torns on it.
3. Go to the 3rd area and change character to the Reemus. Walk Reemus to the 3rd area.
4. Command Reemus to stand on the steaming plant.
5. Swap Character. Click the one of the bees to carry it. Go back to Area 1 and attach it to the purple torned log. Repeat this 3 more times!
6. Once there are 4 bees attached to the purple torned log, let Liam sit on the Golden Mushroom.
7. Watch Liam as he saves the politician!
Scene 4:
1. Click on all of the 4 Rocks on the ground to get all the pegs for the puzzle, and note that all of the rocks which contains pegs are similar to each other!
2. Once collected all of the pegs, click the puzzle to enlarge it!
3. Think of the Food Chain.
Solution:
Top: Owl
Middle: Snake - Rabbit
Bottom-Left: Frog - Rat
Bottom-Right: Carrot - Grass
Owl Eats Snake & Rabbit. Snake Eats Frog & Rat. Rabbit Eats Carrots & Grass!
Scene 5:
1. You're still Liam! Open the box near the lake and get some strawberry gelatin. Throw the gelatin in the lake to make a spring.
2. Click on the second stalactite from left to make Liam jump on it. Click the one right to it to make Liam change his position all the time.
3. Once the beast awakes, choose Reemus and get the first Green Mushroom. Feed it to the Beast!
4. Let Liam continue his climbing! Once he reaches the exit, make him throw a rope down to Reemus by click on the green thing!
5. Swap Characters and make Reemus climb up to Liam!
Scene 6:
1. Choose Liam and go to Area 2. Get the piece of the paper-like thing on the tree and go back to Area 1.
2. Use the Parchment on the Pink Liquid.
3. Choose Reemus and goto Area 3. Talk with the Guard and play Rock-Scissor-Paper with him. Once you lose twice, take the keys on the ground and get back to Area 2!
4. Use the key on the only box on Area 2.
5. Choose Liam, and make him use his Parchment on the uniform to get a Royal Mark on the Parchment.
6. Go to the Guard and you're finished!
- Path Of Aggression
Scene 1:
1. When the bug stops in front of the broken tree, click it to let the bug walk on it.
2. Click the spider web to change the body from a bug to a spider. When you're a spider, click the bird to get eaten by it!
3. Once you're a bird, click the bush at the edge of the hill. You will reveal a snake and get eaten by it.
4. When you're the snake, click the animal in the hole to get to the next scene!
Scene 2:
1. Click on the golden colored thing with the flies flying around it to move it!
2. When the frog jumps out of the lake, onto the stone. Click him to eat him and change into a frog!
3. Click on the rock on the middle of the screen. On the right-side for the first purple tree, to let the frog jump on it. Click on the next stick to jump on it and then the third one. Once you're near the fruit, click it to let it fall down!
4. Jump in the lake again and click the fish to eat it.
5. Once you're a fish, click the thread at the edge of the fish stick to proceed!
Scene 3:
1. Choose Reemus!
2. Go to Area 2 and get the stick on the left-side of the screen. Go the Area 3!
3. Choose Liam and get him to the 3rd Area. Make Liam stand on the Big Steam Plant!
4. Swap To Reemus and use the stick in the Bee-House to get something like glue on it.
5. Go to Area 2 and use the Glue-Stick on the sharp-edged stone on the right-side of the ground. Now, you've got an Axe!
6. Go back to Area 1 and use the Axe on the tree. Once tree falls down, click it to proceed!
Scene 4:
1. Go to Area 3 where the Orange Bird is and talk with it. When the bird starts to smash you, swap to Liam!
2. Go to the 3rd Area where Reemus is, and take the flag.
3. Go back to Area 1 and put the flag on the stone!
4. Go to Area 2 and take the White Flower near the stone with the O-logo on it.
5. Go back to Area 1 and use the White Flower on the flag to paint the O-logo on the stone!
6. Once the bird leaves the place to fight with the orange bird, swap to Reemus and proceed!
Scene 5:
1. The Puzzle! This is a group puzzle and the pegs needs to be in certain groups. It doesn't matter on which color or order you do it, just get them in groups!
Group 1: Bat - Whale - Human
Group 2: Kangroo - Koala - Rat
Group 3: Crab - Lobster - Shrimp
Group 4: Penguin - Kiwi - Ostrich
Group 5: Fish - Shark - Dolphin
Group 6: Parrot - Hawk - Duck
Hope you understand it. If not, then watch the Video Walkthrough!
Scene 6:
Note: There are 3 Areas. On Area 1, there is a spring and some colors on it which shows the right combination for the puzzle in the 3rd Area. On the 2nd Area, there are 2 stones which you can let Reemus stand on. When he stands on one of the stones, the three colors shown in the pipes are the colors that will be available in the spring. On Area 3, there are 2 statues, and the three colors shown in the 1st Area are the one that you should pour into the statue's bottles and feed them to proceed!
If you wanna try by yourself, you're welcome. But if you can't do it, follow me!
1. Choose Reemus and walk him to the 2nd Area. Let him stand on the first stone!
2. Choose Liam and go to the 1st Area. Take the bottle and pour Yellow Juice in it.
3. Go to the 3rd Area and give the Juice to the Left Statue!
4. Change to Reemus and make him change his position from the left stone to the right one.
5. Choose Liam and go back to the 1st Area. Pour Blue Juice into the bottle and get back to Area 3!
6. Give the Blue Juice to the Left Statue. You'll see that he now has 2 colors on his bottle!
7. Choose Reemus and make him change his position from the right stone to the left one!
8. Choose Liam and goto Area 1.
9. Pour Red Juice into the bottle and get back to Area 3. Pour the Blue Juice into his bottle. Now that the statue has 3 colors, press the button under it. If the it turns green, you've done it RIGHT. But if it turns red, you've done it WRONG! If you've done it right, proceed the walkthrough ;)
10. Choose Reemus and change his position from the left stone to the right one!
11. Choose Liam and go to the 1st Area. Pour Green Juice in the bottle and get back to Area 3. Pour the Green Juice in the Right-Statue's bottle!
12. Choose Reemus and make him change his position from the right stone to the left one!
13. Choose Liam and goto Area 1. Pour Orange Juice in the bottle and get back to the 3rd Area. Give the Right-Statue the Orange Juice!
14. Choose Reemus and make him change his position from the left stone to the right one!
15. Choose Liam and go to Area 1. Pour Purple Juice in the bottle and get back to Area 3. Give The Purple Juice to the Right-Statue and press the button. If the button changes it's color to green, you've done it right. But if it turns red, you've done it wrong! If you've done it right, proceed the walkthrough!
16. When the stones open and form a stair, click'em to go up!
Congratulations! You WON the GAME!
Please tell me if this was helpful or not, it was a pain to write all that, PUH!
Prid
Posted by: Prid | July 1, 2009 2:23 PM
@ JIGuest: Sorry! I recognized it now, what a shame...
The Squirrel Scene:
1. Choose The Bold Guy and Goto Area 3 where the edge is.
2. Click the first end of the tree to let The Bold Guy hold it, so that the other end raises!
3. Swap To The Blue Guy and Goto Area 3!
4. Once you're there, take the nut on the other end of the tree to get it!
5. Goto Area 1 and stay there, and DON'T do anything!
6. Choose The Bold Guy and take up one of the stones on Area 3.
7. Goto Area 2 and put the stone on the LEFT squirrel apartment...
8. Go back to Area 3 and take the other stone.
9. Go back to Area 1 and put the stone in the RIGHT squirrel apartment!
10. Goto Area 2 and click on the Left hole on the blue tree to let The Bold Guy guard it!
11. Choose The Blue Guy and make him place the nut on the "Bird Spring" ( don't remember what it is called )!
12. Goto Area 2 and then back to Area 1. You'll see the squirrel run into the LEFT aparment, and come out of the RIGHT apartment on Area 2. Then he'll jump into the RIGHT hole on the blue tree and come out the other way, and get caught by The Bold Guy!
13. Goto Area 3 with both, The Blue and The Bold Guy! Let both of them stand on the edge of the ground.
14. Choose The Bold Guy and click the squirrel on his hand!
15. Watch Them Fly!!!!
Hope this helped!
Prid
Posted by: Prid | July 2, 2009 10:40 AM
this is an amendment to prid's walkthrough, for the path of aggression,
for the grouping door puzzle in the path of aggression, it's not a rat, it's a opossum... so the group is opossum, kangaroo, koala... all of which are marsupials, which means that they have pouches...
Posted by: heather | July 8, 2009 9:59 PM