
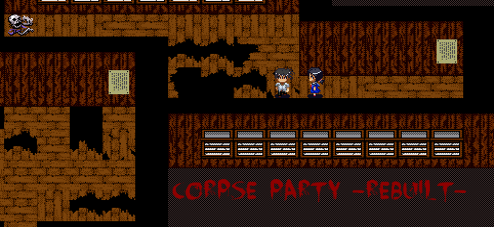
![]() Ain't no party like a Corpse Party, 'cause a Corpse Party don't stop 'til everyone is dead or driven insane by vengeful demonic spirits! Originally released in Japanese by Makoto Kedouin and later re-released as a completely remastered commercial title, the free version of this dark and fraught-with-freakiness horror adventure has been remade and re-released by an anonymous message board member and now finally translated into English by Memories of Fear. In Corpse Party Rebuilt, a group of students who stays after school to help with preparations for a festival wind up attracting the attention of a malevolent forces bound up in urban legend. Proving, of course, that no good deed goes unpunished. Trapped in a twisted nightmare version of their school where the rules of survival seem to change without warning, will they get to the bottom of the mystery and make it out alive? Please be warned that this game alludes to an implied incident that may upset some readers.
Ain't no party like a Corpse Party, 'cause a Corpse Party don't stop 'til everyone is dead or driven insane by vengeful demonic spirits! Originally released in Japanese by Makoto Kedouin and later re-released as a completely remastered commercial title, the free version of this dark and fraught-with-freakiness horror adventure has been remade and re-released by an anonymous message board member and now finally translated into English by Memories of Fear. In Corpse Party Rebuilt, a group of students who stays after school to help with preparations for a festival wind up attracting the attention of a malevolent forces bound up in urban legend. Proving, of course, that no good deed goes unpunished. Trapped in a twisted nightmare version of their school where the rules of survival seem to change without warning, will they get to the bottom of the mystery and make it out alive? Please be warned that this game alludes to an implied incident that may upset some readers.
 Move with the [arrow] keys and interact with the [spacebar] (hold the [spacebar] while walking to move faster). You can save and load your game at any time by opening the menu with [ESC], and since, uh, stuff can happen, you may want to save in multiple slots. Stuff like drowning in blood or being set on fire or choosing a really bad time to have an argument about feelings when trapped for all eternity. You'll notice your characters have hitpoints, and that's not just for show. Things can happen to hurt them (though you do have a few opportunities to heal) so you'll want to keep an eye on those numbers. Early in the game, your students will split up into two groups. You can only control one at a time, but you'll often have to work together to solve puzzles, or even save each other's hides. The game has several different endings depending on who survives and the choices you make. Choices like not drowning in blood or not being lit on fire by a mannequin.
Corpse Party Rebuilt is sort of bananas, the insane hybrid of what feels like the overactive and dramatic imagination of a kid telling a scary story and every bloody trope from a straight-to-VHS horror movie in the '80s. And largely this is a good thing. It's campy, cheesy, and full of surreal and bizarre circumstances that can often prove fatal, so saving frequently and in different slots is a good idea. The problem is that the game often feels like it's operating on its own logic (crazy), and that (crazy!) logic typically comes down to trying everything until something happens. Whenever you make some progress or trigger an event that allows you to go somewhere you couldn't previously, there is rarely even a hint of where you should go next, so you'll often wind up swapping back and forth between parties and going back over everything else to see what's changed. More creepy and gory than actually scary (though there are a few loud noises some might consider jump scares), Corpse Party Rebuilt may be a little silly, but it's also a lot of fun, with a climactic final battle to boot. A perfect blood-soaked homage to urban legends everywhere, it's just the ticket for a few hours of crazy carnage and spooks.
Note: You must install the free RPG Tkool XP Runtime Package in order to play Corpse Party Rebuilt.
![]() Windows:
Windows:
Download the free full version
![]() Mac OS X:
Mac OS X:
Not available.
Try Boot Camp or Parallels or CrossOver Games.


Walkthrough Guide
(Please allow page to fully load for spoiler tags to be functional.)
Corpse Party Rebuilt walkthrough:
General Hints and Walkthrough Notes:
* Read everything you can. If reading something isn't a good idea, the game lets you know beforehand.
* Save frequently. You can save any time you want, so take advantage of it!
* Notice that the classrooms have little signs next to the doors that give their name or number. If you want to check what room it is before you go in, this is a way that you can sometimes do so.
* It's possible to reach the final confrontation without losing any health. If you think you have to do something risky, maybe there's a safer way you're overlooking.
* The game seems unsure sometimes what counts as the Inner Wing and what counts as the North Wing. In one case, a single area was labelled differently depending on which party you're controlling, even though they could both be in the same room. (That area was either North Wing-2F or Inner Wing-2F. I'm referring to it here as North Wing-2F because Inner Wing-2F is already a place that is not particularly connected to the area in question.) The first floor is a bit more confusing. I think it's supposed to encompass all three wings, but the labelling is a bit odd. I've tried to mostly refer to it as "the first floor", or go by landmarks.
* This is a walkthrough for the Good End. Many of the choices are just for flavor. I'm not entirely sure what's necessary and what's not. When I'm unsure, I specified what I did.
First time with Satoshi's party- Looking around:
After the prologue, take the loose board on the lower left side of the classroom. There's nothing important to find in this area, so go ahead and leave through either door to the first floor hallway.
Outside the classroom, Yuka offers Satoshi her good luck charm. In my good end run, I took it. Then, go to the lower right and use the loose board to cross the gap.
Go up the stairs to Inner Wing- 2F. The first classroom you'll come across is Classroom 2-1. There's nothing to see in there, and the lights go out almost instantly anyway. Next is Classroom 2-2. There's nothing you can do for now, but note the long, crossable gap. Classroom 2-3 is locked by a "Forbidden Door". Keep going right down the hall. You'll come to an open classroom (you can't read the sign, but it's 2-4.) Go inside.
Approach the skeleton, and you'll have a cutscene. In my good end run, I was polite to the skeleton and nice to Yuka. Again, there's nothing important to find here, so make your way out the upper door.
You'll be back in the Inner Wing-2F hallway, but now on the other side of the gap. Note the short crossable gap. Go down. Keep going until you touch the pentagram.
First time with Yoshiki's party- Getting back into your classroom:
Go outside the classroom to the first floor hallway from before, and you'll trigger a cutscene. The lower half of the room collapses, so you can't follow Satoshi's party, but now you can leave through the upper exit.
Optionally, you can cross the bridge and go up to a trap room, to see Yoshiki's party discover a skeleton. Examine the skeleton and the lower poster. If you want, you can approach the poster to the right, and let Yoshiki's party become trapped. (Don't worry, you'll be able to get them out.) You'll lose an item that helps a lot at the end of the game, but you'll get a scene that gives you some characterization for these two. If you don't have a lot of experience with turn-based RPG battles, or if you're not going for ending A1, I'd advise against trapping them. If you'd like a challenge, and you're trying to get the best end anyway, go ahead.
If you want to get them trapped, approach the poster to the right. If you don't want to get them trapped, don't go anywhere near the poster, because you don't have to actually read it in order to trigger the trap event.
Once trapped, read the poster. Go back and examine where the door used to be. Examine the skeleton, the poster, and the door until Ayumi comes out and starts talking to Yoshiki. After the cutscene, you'll switch parties again.
At any time after trapping them, but before the other party completes the necessary conditions to set them free, you can switch back to Yoshiki's party and see a little more of what they're getting up to in there.
If you didn't trap them, continue on to the next section.
If you did trap them, skip to "Second time with Satoshi's party", and continue this section once they're free.
After the trap:
If you were trapped, go through the cutscene (the poster's changed, if you want to examine it.) Examine the skeleton and leave the room. Once you're past the bridge, it'll disappear. You don't have to go back in that area, so don't worry about it.
To the left, there's a blocked off door, a staircase, and a hall leading down. Cross the room, and a bloodstain will appear on the window. Examine the bloodstain. Now you have access to the Science Lab.
The Science Lab is risky, and there's nothing to find in there, as far as I can tell. It's okay to just skip out on that room entirely. If you want to do the science room event anyway:
Save before you go in there. When you approach the loose board, the anatomical model will come after you. Grab the loose board, and put it over the gap on the right side of the room. Make sure not to place the board when the anatomical model is standing next to the gap, or it'll cross over and grab you! Once the board is there, get the anatomical model to chase you back down, and with it following you, take the other path up and out of the room.
There's going to be a short cutscene, and then the anatomical model will come out and keep chasing you. It'll chase you through the screen you're currently in, and then the next one. To make it stop, you'll have to return to the room outside the Science Lab. You can leave in any direction, but if possible, go to the right- there's more open space, and it really helps to have room to run.
Going down, there's a hallway with a long gap (that leads to the South Wing), two locked Security Guard Rooms, and a pentagram. Nothing you can do here for now, so go back outside the Science Lab and go up the stairs to North Wing- 2F.
The first classroom you'll come across is Classroom 2-9. Take the long board, and go inside. After the cutscene, you'll be kicked out.
Continuing to the right, you'll see a gap. If you've already done "Second time with Satoshi's party", you might recognize this place. Satoshi's party can access the right side of the gap, and Yoshiki's party can access the left side. If Satoshi's party is currently there, you can talk to them from across the gap. You can use the gap to hand over items. If Satoshi's party has the Blessed Shoes, they'll give the extra pairs to Yoshiki's party when you talk to them. In the cabinets on the left side of the screen are Letter 01 and Letter 02.
Now that you have the long board, you can get to the South Wing. Go back to the room with the locked security guard doors, and use the board on the gap. Go down, then right. You'll find yourself in front of Classroom 1-1. Go inside.
In the cabinet near the upper right corner of the room, you can find Letter 03. There's also another long board in this classroom. Take it, but if you try to take it back outside, it'll break. Instead, take the upper exit to Classroom 1-2. Use the board to bridge the gap at the top left corner to reach the cabinet. Inside is Letter 04.
Look around if you'd like, then leave through the upper door. There's a blue ghost that offers to take you somewhere else, but for now we want to stay here. To the right is a hall full of green bile. Let's come back to that later. Go back inside Classroom 1-2. Approach the blackboard, and you'll get a cutscene.
Go back outside and talk to the blue ghost. Answer "yes", and you'll end up back in the starting classroom. Go back to Classroom 2-9, and you'll see a cutscene. Go outside the classroom, and use the pentagram.
Second time with Satoshi's party- Finding an item that helps you safely explore, and an incident:
To the left, there's a hallway covered in green bile. If you talk to the blue spirit next to the green tiles, it'll explain what the green bile does. Best to avoid it for now!
Go back up to the hallway. If you got Yoshiki's party trapped, the torn poster is now changed. Examine it.
Make your way back to the first floor hallway where the floor collapsed. Your loose board from before is still there, and now that the gap is uncrossable, you can take it again. Use it to cross the short gap on the right side of Inner Wing- 2F. Then go down the stairs, and you'll find yourself on the right side of the first floor.
Exit upward. You'll be in a part of the hallway with some more green bile. Navigate around it and go up the stairs.
You'll be on the right side of North Wing- 2F (it's mislabelled in the game as Inner Wing-2F. See the walkthrough notes.) Examine all the shelves, and get the Forbidden Key. Go back to Classroom 2-3, and open the door.
Read the poster- you can cross the dark gap to get the item on the other side. Five tiles straight down from the poster, you can enter the gap. Two tiles right of the item, go up. Then go left, and down. You now have the Blessed Shoes, and can cross the green bile. Remember, though, that only Satoshi's party can cross the green bile for now. Yoshiki's party is just as vulnerable to it as they were before.
When you leave, something stops you from going the way you came. After the blue force pushes you back, go one tile to the left, then down as far as you can, then right as far as you can.
If Yoshiki's party is trapped, then now is the time to free them. Let's return to the right side of the first floor, to the room with the bile. Cross to the left, and go up into the Infirmary. There's a Crystal Cluster in the drawer. Get it. Finish your business in the infirmary (you can rest here if you're injured, though you most likely don't need to.) Go left outside the infirmary, and with the Crystal Cluster in your inventory, approach the orange flame. Once you go back to Yoshiki's party, they'll be able to get out.
Even if Yoshiki's party isn't trapped, you should pick up the Crystal Cluster anyway. It's a very useful item for the end of the game.
If Yoshiki's party was trapped, go ahead and switch now, and finish their first bit of exploration. If not, continue on.
Exploring with the Blessed Shoes:
Return to the right side of Inner Wing-2F, and go down and to the left. Now you can cross the green bile, so go and do that. Follow the hall down, and you'll come out in a room with a poster, some doors on the left (to the Lavatories) and a board to cross at the right. The poster is an important clue for later, so read it and remember what it says- there's bloody halls, the father wants his bones, and the mother wants her "ensanguined child".
To the right, there's nothing right now, but you can talk to the ghost. You can also explore the Lavatories if you want. Once you're done, turn back the way you came. Keep going until you get a cutscene.
In my good end run, I chose to:
accompany Yuka. When you get back control, try to talk to Yuka through the stall. When the stall starts flooding and you hear Naomi scream, prioritize saving Yuka. I tried to kick the door, but I don't think kicking or climbing has any effect. However, I do think it's important to tell the ghost that you'd die to save Yuka, both times. Once Yuka is safe, go after Naomi. She's in the area directly to the right, once you're outside the bathroom. After that cutscene, I asked about Naomi, though I doubt it matters.
After the event, go right again, and the hall will have expanded. Another screen to the right, there's a bloody room. Examining the wall, there's a crack, but there's nothing you can do for now. Return to North Wing-2F (Remember the gap where the parties could meet up?). On the way, you'll find a Lever hanging out of the gap one screen up from the area with the Lavatories. Take it.
Second time with Yoshiki's party- Solving the letter puzzle:
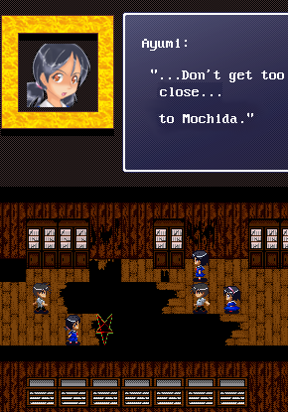
Walking around in the halls, you'll hear Ayumi scream. Go back in the classroom. When you have control again, talk to Ayumi. Go through the cutscene. In my good end run, I said "yes", though it might not be vitally important.
Once you're out, go to the left, until Sachiko stops you and gives you a Marble Statue. Then, go back to the gap one screen to the right. Satoshi's party should be there. If not, switch back and bring them there. Talk to Satoshi's party across the gap. Yoshiki's group will give Satoshi's group the Marble Statue, and if they didn't already, Satoshi's group will divide up their Blessed Shoes.
You can do these parts in any order, but I'm doing the part with Yoshiki's party first.
If you go back to the classroom you started in, you can see Sachiko again, but it's not mandatory. Go back to the South Wing, past Classrooms 1-1 and 1-2, and into the hall covered in green bile. Since you have the Blessed Shoes, now you're safe to cross.
This hall is a bit tricky. Go to the poster in the middle, and examine it. Then, try to go left instead of right, and you'll be pushed right. Letter 06 is in the cabinet on the right. (You might have noticed that we skipped Letter 05, but you can't actually find that until later.)
Now you're in the incinerator room, but you can't light the incinerator just yet. Go right to trigger a cutscene where Sachiko gives you the Security Guard Key. Go back and unlock the Security Guard Rooms. When you're going through the bile hall outside the furnace and leaving to the left, you're going to want to go left to the gap in the bile, then right, then examine the poster, then go right, and then you can leave.
First, go to Security Guard Room 1.
It's dark inside. Go one step to the left, and one step up. Go three steps to the left, and one step up. Examine the wall, and the switch should be there. Open the drawer, and you'll get the Yellow Ribbon. Letter 07 is in the cabinet.
That's all there is to see here, so go to Security Guard Room 2. This time, the light switch is four steps to the left and one step up. Examine the wall, same as before, and the lights will go on. Letter 08 is in the cabinet. Press the other switch, and you'll open up a secret passageway.
At the end, there are two cabinets. In the left one is Letter 05. In the right one is Letter 09 and Letter 10.
With this new information, you can now go back and do what you need to do with the furnace. Note that it can be a little difficult to tell which switch you're pressing, because Yoshiki doesn't stand directly in front of every switch, he stands a little bit to the left. It helps to remember that when he's facing the switches, his right hand lines up with the switch he's pressing.
In what order should you press the switches?
Hints:
Have you read the letters?
04 and 05 in particular?
Solution:
Press the right switch, the left switch, the center switch, the center right switch, and then the center left switch.
What do you do after that?
Hints:
Some of the letters might have the answer.
Those letters are 06, 07, and 08.
Solution:
Hold out the yellow ribbon and put it into the incinerator.
When you're ready, go into the newly revealed passage, and keep going until you switch parties. This will end this portion of the game on Yoshiki's party's side, so if there's anything else you want to do, like searching for any letters you missed, turn back and do that first.
Third time with Satoshi's party- Solving the statue puzzle:
Go back to the bloody room and use the lever on the door. Go up. You'll come out in the Music Hall of Rotten Flesh. At the top left corner is a door. If you go around to the bottom right corner, there's a piano, but the game won't let you touch it yet.
Go through the door at the top left corner, to a room with statues. One statue is female, and the other is male. You can place the marble statue with one of them.
Where should you place the statue?
Hints:
Do you remember a note that might help you solve this puzzle?
A note mentioning a man, a woman, bloody halls, ensanguined children, and bones?
Remember the note from the lavatory area?
Remember what the marble statue was made of?
Solution:
Give the marble statue to the male statue.
After that, go back out to the expanded hall- now it's expanded again. Go right, then up and through the door to the Principal's Office. Examine the flame. Make whatever choice you want. After, go back in. Get the embryo statue from the desk, and make note of the chart.
Go back to the statue room through the Music Hall of Rotten Flesh. Pick up the marble statue.
What should you do now?
Hint:
You've already done this puzzle.
Solution:
Give the marble statue back to the male statue, and give the embryo statue to the female statue.
After, go through the new exit. Get the shining object (a Small Gold Key) from the corner, and go back out. Go to the piano- now you can get through. Examine it and use the small gold key. Play the piano.
When you're ready, walk down the path. This will end this portion of the game on Satoshi's party's side, so if there's anything else you want to do, like healing, you should do that first.
Endgame:
You'll be controlling Satoshi's party, in the Underground Passage. Go down three times, until you reach a room with a set of stairs in the middle. Go down the stairs.
This next area seems like it's supposed to correspond with the chart from the Principal's Office. However, you don't actually need the chart in order to get through! Keep going through doors, and eventually you will find Yoshiki's party.
Once you do, say what you want in the cutscene. When you have control again, go forward for another cutscene. When you have control again, go forward and move to the next room. Examine the body.
After the cutscene, you'll have to pick between 2-3 characters to take on the ghost in an RPG battle. Examine the desk at the bottom right corner to check their abilities. I recommend having at least one healer, and bringing along Yoshiki for his magic. Pay attention to who you're taking with you- it's easy to confuse the two boys, and the two older girls. I also recommend saving before the battle.
My preferred party was Yoshiki, Satoshi, and Yuka. Satoshi deals a good amount of damage, Yuka is the best healer, and Yoshiki's buffs were very useful. If you don't have Yuka, Ayumi can probably fill in. If you don't have Yoshiki, use whoever you like.
If one of your characters isn't a strong attacker, they can use the Iron Lever to deal 25 damage. Also, if you still have the Crystal Cluster, then you can use it to restore the MP of the character using it, and it's reusable. This makes it much easier to use MP-heavy characters like Naomi and Yuka.
After the battle, save as soon as you can. I'm not sure if this event is actually timed, but it's in the spirit of things to go quickly. Then, examine the leftmost place on the top wall. Break it, and go up.
Go to the right at the first intersection. Follow the path up, until you come out at the incinerator. Go left, then follow the hallway up when you can't go left anymore. Go up past the Security Guard Rooms, then up the stairs. Go right to the open door. This is your classroom. Go inside!
It's possible to do this if you take the upward path at the fork, but it's much more difficult.
Once you go through the door, keep going up, no matter what. When you hear voices telling you to go in a different direction, keep going up. When the room gets darker, keep going up. When you see your classmates, KEEP GOING UP. When you get to the classroom bit, you might have to examine it from the side. If you turn to the side but don't turn back, and then examine the classroom area on the left side, you should be okay.
Talk to everyone if you want, then head for the top of the classroom to leave. You'll get a cutscene with Naomi. Tell her whatever you want. After some more cutscene, the game ends.
Congratulations! You're done.
The Ten Letters:
01.
Where can you find it?
North Wing-2F, by the gap. Cabinet on the left.
What does it say?
"By the basement, there is an incinerator."
"There is? So what should we do?"
02.
Where can you find it?
North Wing-2F, by the gap. Cabinet on the right.
What does it say?
"On the wall, next to the poster, there is a secret button."
"...Next to the poster? What..."
03.
Where can you find it?
Classroom 1-1, upper right cabinet.
What does it say?
"...on earth is this secret?"
"Uhm, yeah... There is a lot of them, but I think..."
04.
Where can you find it?
Classroom 1-2, upper left cabinet. You'll need to use the Long Board from Classroom 1-1 to get there.
What does it say?
"...you have to press them in a certain order."
"You know which ones to press? Tell me!"
"Alright, uhm... First you press the right-most one..."
05.
Where can you find it?
Security Guard Room 2 secret passage, left cabinet.
What does it say?
"After that, left-most, center, then the second one from the right, and finally the second one from the left."
06.
Where can you find it?
Incinerator Hall, right cabinet.
What does it say?
"What now?"
"After that, you need to hold onto the ribbon and--"
07.
Where can you find it?
Security Guard Room 1, cabinet.
What does it say?
"Ribbon? What ribbon? You mean ours?"
"That's right. With your yellow ribbon in..."
08.
Where can you find it?
Security Guard Room 2, cabinet.
What does it say?
"...hand, stick it into the incinerator."
"EH?! But isn't that dangerous!?"
"Yeah, it is. But it's what we have to do."
09.
Where can you find it?
Security Guard Room 2 secret passage, right cabinet.
What does it say?
"Wh-what just happened?"
"Like I said... ...zaki from Class 2-9 suddenly appeared!"
"Ahh...you mean that girl who went missing a year ago? She..."
10.
Where can you find it?
Security Guard Room 2 secret passage, right cabinet.
What does it say?
"...told you her name?"
"Her body... it was burnt up..."
"I'm asking you who she is! Did you get her name!?"
"You really want to know?"
"Y-yeah..."
"It was... Class 2-9's... Shino..."
Ending guide to come!
Posted by: Alice |
January 27, 2013 6:49 PM
|
January 27, 2013 6:49 PM
Ending Guide (with battle strategies):
A note about potentially upsetting content in the endings:
In some of the bad endings, it's implied that a character dies by suicide. In another bad ending, a character talks about planning to commit suicide, though it's unclear if they ultimately go through with it. If this type of content is not for you, then you might want to avoid endings
B1, B2, and D1.
Ending A1:
Conditions:
Everybody lives.
How to make that happen:
No casualties in the Science Lab.
Successfully run from the anatomical model, or just don't go into the Science Lab at all.
No casualties in the Lavatory.
When Yuka has to go to the bathroom, accompany her and stay with her.
Recommended battle party/strategy:
Satoshi, Yoshiki, and Yuka. Have Yoshiki buff Yuka until she's faster than the ghost (or debuff the ghost until she's slower than Yuka), then concentrate on attacking and debuffing the ghost's defense. Have Yuka heal whenever anyone's poisoned or below 20 HP. If it's safe to have Yuka use the Crystal Cluster to heal her own MP, do it. If not, have Yoshiki do it on the same turn that Yuka uses up the last of her MP. Yuka can also use the Iron Lever when nobody needs healing or MP healing. Whenever anyone dies, have Satoshi or Yoshiki bring them back, and Yuka heal them on the next turn. Satoshi, of course, attacks. You may want to have Yoshiki buff Satoshi's attack as well.
The ending:
All the students get to live, and they go home. Naomi and Satoshi stay behind for a moment, and she alludes to having feelings for him. It's up to the player whether he returns those feelings. She invites him over to hear her play piano. Then, the group discusses the ghost story and how it was possible for anyone to know what happened.
Ending B1:
Conditions:
Only Ayumi dies.
How to make that happen:
Ayumi dies in the Science Lab.
When Ayumi gets caught, have Yoshiki run away.
No casualties in the Lavatory.
When Yuka has to go to the bathroom, accompany her and stay with her.
Recommended battle party/strategy:
Satoshi, Yoshiki, and Yuka. See the battle strategy for ending A1.
The ending:
Everyone else lives, but Ayumi is gone, and Yoshiki is a wreck. He asks to be left alone, and that's the last anyone ever saw of him. Then, the line "What do we become in death...?". And that's it.
Ending B2:
Conditions:
Only Yoshiki dies.
How to make that happen:
Yoshiki dies in the Science Lab.
When Ayumi gets caught, have Yoshiki attack the monster until Ayumi tells him to leave her. Then, have him examine the burner instead of continuing to attack. Don't have Yoshiki leave the room.
No casualties in the Lavatory.
When Yuka has to go to the bathroom, accompany her and stay with her.
Recommended battle party/strategy:
Satoshi, Naomi, and Yuka. Naomi should use her weaker spell when she has MP, and use the Crystal Cluster when she doesn't. Yuka should heal, and use the Crystal Cluster whenever nobody's injured. Don't bother making her attack with the Iron Lever- she's better able to contribute by helping Naomi attack more often. Satoshi can attack.
The ending:
Everyone else lives, but Yoshiki is gone, and Ayumi is grieving. The next day, she finds a mark on her neck and tries to scrub it away. When it won't come off, she keeps scrubbing, and scrubbing, and eventually loses a lot of blood and passes out. It's not clear whether she's still haunted or just feels horribly guilty, or if she even survives this experience.
Ending B3:
Conditions:
Only Yuka dies.
How to make that happen:
No casualties in the Science Lab.
Successfully run from the anatomical model, or just don't go into the Science Lab at all.
Yuka dies in the Lavatory.
When Yuka has to go to the bathroom, accompany her, but leave when Naomi screams.
Recommended battle party/strategy:
Satoshi, Ayumi, and Yoshiki. Have Satoshi attack, and Yoshiki buff Ayumi (or debuff the ghost) until Ayumi is faster. Meanwhile, have Ayumi heal whenever she can. It helped me to get everyone's defense buffed once. I split it up between Ayumi and Yoshiki, having Ayumi buff when she didn't need to heal, and Yoshiki buff once he was done with getting Ayumi up to speed. Have either of them use the Crystal Cluster when Ayumi needs it- if she can do it, great, but if she has to heal, it's safer to waste one of Yoshiki's turns than to waste one of Ayumi's. If Yoshiki has a free turn when everyone's buffed and has enough MP, have him buff Satoshi's attack.
Another option is Satoshi, Ayumi, and Naomi, if you'd rather have Naomi's magic than Yoshiki's buffs. See the battle strategy for ending D2.
Either way, without Yuka you're going to need a little more luck than otherwise. Don't be discouraged if you don't win at first.
The ending:
Everyone else lives, but Yuka is gone, and Satoshi breaks down. Back home, Satoshi has to lie to his parents about Yuka's whereabouts, and finds that Yuka's room is haunted. He receives a message from Yuka, and hears knocking coming from Yuka's room. He looks through the keyhole, and sees Yuka looking back at him.
Ending C:
Conditions:
Naomi doesn't make it. It doesn't matter what happens to Yoshiki and Ayumi.
How to make that happen:
Leave Naomi alone with the ghost.
When Yuka has to go to the bathroom, let Naomi take her.
Recommended battle party/strategy:
Depending on who's left, you might not have much of a choice. If Yoshiki is alive, take Satoshi, Yuka, and Yoshiki. See the battle strategy for ending A1- they're a good enough party that I pick them even when I have everybody to choose from. If he's dead, then you're stuck with Ayumi.
Fortunately, Satoshi, Yuka, and Ayumi work decently well as a party, too. Have Ayumi heal when only one person gets injured, and Yuka heal when everyone's injured. Apart from that, they can take turns using the Iron Lever and the Crystal Cluster. It'll take a while, but you can do it.
The ending:
Satoshi, Yuka, and Ayumi and/or Yoshiki make it to the end, but before they can go inside, they run into Naomi. Satoshi, who admitted earlier that he loves Naomi, approaches her... but it's clear to everyone else that she's possessed. Yuka protects Satoshi, but at the cost of her own life. Before she dies, she confesses that she loves Satoshi in a not-so-sisterly way, and asks him to tell her he loves her too, even if it's a lie. He can't tell her that he loves her romantically, and tells her that he loves her as a sister. She seems okay with it, and dies. Satoshi and Ayumi and/or Yoshiki are the only ones to go back. Back home, Satoshi has to lie to his parents about Yuka's whereabouts, and finds that Yuka's room is haunted. He receives a message from Yuka, and hears knocking coming from Yuka's room. He feels like the deaths of Naomi and Yuka are his responsibility, so he opens the door to confront the ghost. It's Naomi, and she attacks him.
Ending D1:
Conditions:
Yuka and Ayumi die.
How to make that happen:
Ayumi dies in the Science Lab.
When Ayumi gets caught, have Yoshiki run away.
Yuka dies in the Lavatory.
When Yuka has to go to the bathroom, accompany her, but leave when Naomi screams.
Recommended battle party/strategy:
The only characters left are Satoshi, Yoshiki, and Ayumi- you don't have a healer, so you're going to need a LOT of luck. Apart from that, if you have any healing items, use them sparingly. Don't bother buffing speed, but have Yoshiki buff Satoshi's attack repeatedly. Have Naomi attack with her weaker spell for as long as she can, then alternate between attacking and using the Crystal Cluster. The point is to get this battle over with as quickly as possible.
The ending:
Satoshi, Naomi, and Yoshiki make it to the end, but before they can go into the classroom, Yuka's ghost comes to say goodbye. She tries to tell Satoshi something, but he can't hear her. She fades away, and Satoshi and Naomi wonder what it was she tried to say. Back home, Satoshi has to lie to his parents about Yuka's absence. Then, Yoshiki calls for him outside his window. He's been drinking, and he tries to attack Yoshiki. He then reveals he was planning to take his own life.
Ending D2:
Conditions:
Yuka and Yoshiki die.
How to make that happen:
Yoshiki dies in the Science Lab.
When Ayumi gets caught, have Yoshiki attack the monster until Ayumi tells him to leave her. Then, have him examine the burner instead of continuing to attack. Don't have Yoshiki leave the room.
Yuka dies in the Lavatory.
When Yuka has to go to the bathroom, accompany her, but leave when Naomi screams.
Recommended battle party/strategy:
The only three surviving characters are Satoshi, Naomi, and Ayumi. Ayumi's not as good of a healer as Yuka, so this is going to be more difficult. Have Satoshi attack, Naomi alternate between casting her weaker spell and using the Crystal Cluster, and Ayumi heal. I also had Ayumi buff everyone's defense once at the start, which seemed to help. Ayumi can't heal everybody, so don't worry about poison until somebody's HP is under 20. Prioritize healing Ayumi, then Naomi, then Satoshi. If Naomi or Satoshi dies, remember, Ayumi can revive them, so take care of the remaining party members first. It's better to have one dead and one healthy than two barely alive. Ayumi can use the Crystal Cluster when there's absolutely nothng else for her to do, so Naomi can get another attack in. But don't get too greedy! Ayumi's first responsibility has to be healing.
The ending:
Satoshi, Naomi, and Ayumi make it to the end, but before they can go into the classroom, Yuka's ghost comes to say goodbye. She tries to tell Satoshi something, but he can't hear her. She fades away, and Satoshi and Naomi wonder what it was she tried to say. Back home, Satoshi has to lie to his parents about Yuka's absence. Then, Ayumi comes to visit. Something is very wrong with her, and she talks about using black magic to revive Yuka and Yoshiki. Satoshi realizes he can't accept Yuka's death, and starts to consider it.
Posted by: Alice |
January 29, 2013 3:07 AM
|
January 29, 2013 3:07 AM