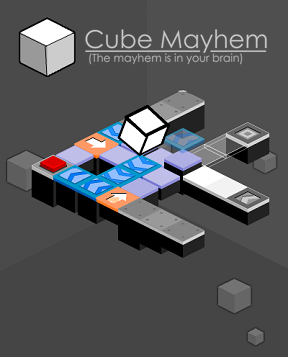
JayisGames.com is now available ad-free!
Jay is Games recommends Cheat Happens with 8,000+ games and 35,000+ trainers!

Cube Mayhem


  • Currently 4.7/5
  • 1
  • 2
  • 3
  • 4
  • 5
Rating: 4.7/5 (181 votes)
Comments (22) | Views (7,616)

Cube MayhemBryanIt's time to see if your brain is up to snuff and solve some tough isometric programming puzzles in Kevin Gu's Cube Mayhem. The cube does only what it is programmed to do by the tiles you place along its path towards the exit portal. The game's focus is all about the cube's safe travel and brings the mayhem later so you can get shown the ropes of the different programming tiles and how to use them efficiently. Don't worry though; there is plenty of chaos and brain-bending challenge to make you grind your teeth at a few puzzles for quite some time.

The cube is your friend and key to winning, so left-click with your mouse on the particular programming tile you want from your inventory and place it on any white tile. You can press the "done" button when your tiles are all used up and it will release the cube onto the map. Whether your cube makes it successfully to the end, gets stuck in a loop of teleporters, or plummets off the map, it will follow your path blindly until you stop it or it fails. You can re-edit your tile positioning by left-clicking on a used tile to send it back into your inventory. The limited number of tiles you start with restricts the creative freedoms in your programming, but this constraint produces a degree difficulty and element of fun that attracts most logic puzzle gamers.

Cube Mayhem has a simple premise, but makes you muster up all your problem solving knowledge to utilize each of the various tile pieces effectively in a small level. You wouldn't think that moving a cube around is mentally stimulating, but when thirty minutes pass by for one level, your tune will change. A lot of the time spent on the game grid will be testing out your tiles' location and adjusting when necessary. The twenty two levels of changing difficulty introduce unique, new tiles for a few levels and then throw you into challenge levels to test your new skills out. They will boggle your brain and turn the map into a colorful mess of every tile you have seen up until this point. If you can crunch these puzzle solutions out in one sitting, congratulations! The more casual gamer would rather solve a few and save the puzzle pleasure for another time. Let the sharp graphics and single click interface draw you into a wonderful hexahedron hysteria of a game.

Play Cube Mayhem

Walkthrough Guide


(Please allow page to fully load for spoiler tags to be functional.)

And here are the first ten levels:

Preliminary information:

I'll be explaining what each new tile does as it comes up, but two you should definitely know. When you start a level, there's one grey tile with arrows on it--that's the start, and the arrows are the direction the cube comes out. There's also one with shrinking squares; this one is the finish.

Level 1:

Arrow blocks turn your cube to go in the direction they point. Click the block, click the tile it should go on, then click the arrow that points in the direction you want.
To beat level one, just put an arrow at each corner of the spiral. Easy!

Level 2:

Shifter tiles move the cube one space in the direction they point, but they don't turn the cube. It will continue on in its original direction.
To beat level 2, just shunt the block over with shifter tiles so it goes around the big hole.

Level 3:

Use an arrow to turn the cube to the southeast when it reaches the fork. Use shifters to get it around the winding bit, then use the other arrow to turn towards the finish.

Level 4:

Teleporters are placed in pairs. When the block lands on one it teleports to the other and continues on in its original direction.
Just place a teleporter to the southeast of the start and to the northwest of the finish.

Level 5:

Here's the first real level. Not so simple this time! Place the teleporters at the far southern and northern corners of the level, and place a southwest-facing arrow at the eastern corner. The block will take the teleporter to the arrow, then take the teleporter again to the finish.

Level 6:

Place the teleporters two blocks from the start and finish, then place a shifter on the far southeast corner of the island with the finish, and an arrow in the same place on the island with the start. Point both towards the teleporters.

Level 7:

Metal blocks don't let you place tiles on them. Put one shifter on the block three northeast from the start, then place the arrow one block northeast and one block northwest of that. You don't need all the shifters for this level.

Level 8:

Buttons make blocks appear on the marked spaces. Usually you have to hit them to beat the level.
Put a teleporter one space southwest of the button, and another one space northeast of the start. To prevent an infinite loop, use a southeast-pointing shifter one space southwest of the start, and a northwest-pointing shifter two blocks northeast and one block southeast of the start.

Level 9:

Here's where it really gets complicated! Put a shifter pointing northeast in the alcove, and another right behind it. Put one pointing northwest to the southeast of the latter shifter, and another northwest-pointing shifter immediately northeast of the start (southwest of the second shifter). Then put a teleporter southwest of the start, and its twin behind the button. Place a southeast-pointing arrow just northwest of the central shifter, and a northeast-pointing one on the far southern corner. Done!

Level 10:

New block time! Right turn tiles do exactly what their name suggests: turn the cube right.
Put one in the middle of the level, then put an arrow pointing back towards it in the two eastern arms of the level.

Levels 11-20:

Level 11:

Looks easier than it is. Place your shifter in the west corner pointing southeast, then put right turn tiles in the spaces next to it.

Level 12:

Woah this one's complicated. Put an arrow at the end of the arm with the button pointing northwest. Then put a teleporter in the middle of each island. On the upper island, you need an arrow pointing northeast on the west corner, and one pointing northwest in the center of the southeast face. Then put a southwest shifter on the east corner, and a northeast one on the southwest face. And finally put your two right turn blocks on the remaining two spaces on the northwest face.

Level 13:

The purple blocks disappear when your cube leaves them.
Put a right turn tile immediately after the start, then put a clockwise loop of arrows to get it to the button and back.

Level 14:

Tiles placed on purple blocks protect the block from vanishing, but the tile will vanish instead.
Place shifters pointing toward the button on the purple blocks, then place an arrow pointing back towards the start on the last block.

Level 15:

Starting from the switch and going northeast:
Switch, blank, blank, blank
northwest shifter, empty, southeast arrow, southwest shifter
northwest shifter, southwest shifter, southwest shifter, blank
northeast arrow, blank, blank, northwest shifter.

Sorry, there was no simpler way to explain it unambiguously.

Level 16:

Pink clone tiles create another block traveling in the direction they point. These blocks can press switches but cannot win the level. You don't lose if they fall off.
Put a clone tile at each fork, sending the clones to press switches.

Level 17:

Put the three clone tiles in the first three spaces after the start, all pointing southeast, then put a diagonal of right turn tiles from the north corner to the south corner. Then put the arrow, pointing northwest, in the east corner.

Level 18:

This is complicated, so pay close attention:
Put inward-pointing arrows in the centers of the northwest and southeast faces of the square island. On the bottom one, put three northeast-facing shifters on the three adjacent blocks. Put southwest-facing ones on the blocks adjacent to the upper arrow. Put a northwest-facing shifter one space southeast and one space southwest of the upper arrow, and a southeast-facing one one space northeast and one space northwest of the lower one. Then put a clone tile pointing southeast one space northeast of the start, and one facing northwest two spaces northeast of that. Put the final arrow at the bend in the other island, and put the teleporters in the alcove on the first island and at the end of the second one.

Level 19:

This time your cube explodes if the flashing side is ever on the bottom. Don't put the flashing side on the bottom.
Put a southwest-facing arrow immediately after the start, then a northwest-facing one southwest of that. Put another southwest arrow one space northwest of that one, and a southeast one a space southwest of that one. Down at the bottom, put a northeast-facing arrow in the middle space, then a southeast-facing one northwest of that, and a northeast-facing one southwest of that one.

Level 20:

Still explosive cubes. Note how the right turn tiles rotate the cube, moving the trigger face.
Put a northeast-facing arrow just below the start, and put a right turn tile northeast of that. Put a northwest-facing clone tile southeast of the right turn tile, and another right turn tile two spaces northeast of the original right turn tile. Down at the bottom, put another right turn tile at the base of the hole, and in northeast-facing arrows southeast and southwest of it.

The final two levels (really, that's it? They just introduced a new tile! I thought for sure I'd be unlocking more, else I'd've posted in sets of 11)

Level 21:

Paint tiles color the TOP face of the cube blue when it lands on them. Blue finish tiles require the cube to be entirely blue when it reaches them.
Just put four paint tiles before the turn, a southwest-facing arrow on the turn, then a paint tile immediately after that and another two blocks from that one.

Level 22:

Note that shifters do not rotate the cube.
Put a right turn tile immediately after the start, and a line of three paint tiles going southeast from there. Put a northeast-facing shifter at the end of the line, then a northwest shifter to the northeast of that, and a southwest arrow to the northwest of the latter shifter. Place a right turn tile two spaces southwest of that arrow, and a northeast shifter to the northwest of the right turn tile.

22 Comments

Ruesiken May 10, 2012 1:52 PM

I don't know why, but level 5 doesn't register as being completed with a gold star

Reply

I liked that, just the right difficulty for me. Made me think a bit but was able to get there in the end.

Reply

Now THIS is a puzzle game. I must say, I had a LOT of fun with this one.
Although I had the same problem with #5 not giving a star, I really enjoyed it.
The first really challenging level for me was appropriately #12 (Challenge #2).

There have been a LOT of games where I just get frustrated and resort to looking at a walkthrough to figure it out. This is the first game in a long time where I refuse to "cheat" and actually try to figure it out on my own. Kudos to the developers!

Reply

Is anyone else having an issue with level 15 "Fish", where the box goes the wrong direction at the start?

Reply

Instant favorite added to my permanents list. Great production value, challenging logic puzzles. Thanks so much for reviewing it!

Be well,

- Satori

Reply

Nevermind. After reloading the level a few times, the cube finally started going the right way.

Funny thing is the solution I thought would work, but couldn't test because of the bug, turned out to be totally wrong. Perhaps the game was secretly telling me that I needed to input something else. ;-)

Reply

Excellent game, and one of my favorite kinds of grid-based puzzle, partly because it gets so much mileage out of a few deceptively simple building blocks and some very well thought-out level design.

I agree with Cornelius that level #12 is where it starts to get tricky...so many possibilities! (Sadly, my browser crashed for unrelated reasons right at that point, and I discovered that there was no IP- or cookie-based autosave of my progress. That or at least a manual save feature would be a welcome addition.)

Reply

Bug Spotted : ex lvl 20 : if button is activated just when a cube falls, the game is wrong but the button (and associated platforms) are still activated.

Reply
Walkthrough101 May 12, 2012 8:51 AM

Yes,Level 5 has been rendered uncompleted after 5 tries,yes contact the developer.

Reply

Do you realize the picture associated with the review is a spoiler? I can see wanting to show more than a blank puzzle... but maybe show a wrong solution or a simpler puzzle? Oddly, I only noticed it after I had solved it another way.

[I think it's ok, especially since you didn't notice it until after you had completed the level a different way. :) -Jay]

Reply
Asthanius May 12, 2012 3:08 PM

Apparently, level 12 has multiple solutions. I solved it, then when I needed help on another level, I watched the video. I was curious, so I watched all the levels, and they solves level 12 differently than I did. I solved it without using both greens.

Reply

Update: Version 1.2 is now uploaded, which should fix the Level 5 bug. Just reload the game page to get the new version.

Reply

just completed all of them~
really enjoy the puzzles, but more will be better?
hope that there will be something like Cube Mayhem 2 with more puzzles and more tile types @@
is it just me or anyone else think that challenge 2 is the hardest?
i got stuck for a few hours while challenge 4 just took me few minutes =D

Reply

Good level of difficulty!

Reply

A good game, nice and puzzling. Working on a walkthrough now, since we seem to be lacking in that department!

Reply

And here are the first ten levels:

Preliminary information:

I'll be explaining what each new tile does as it comes up, but two you should definitely know. When you start a level, there's one grey tile with arrows on it--that's the start, and the arrows are the direction the cube comes out. There's also one with shrinking squares; this one is the finish.

Level 1:

Arrow blocks turn your cube to go in the direction they point. Click the block, click the tile it should go on, then click the arrow that points in the direction you want.
To beat level one, just put an arrow at each corner of the spiral. Easy!

Level 2:

Shifter tiles move the cube one space in the direction they point, but they don't turn the cube. It will continue on in its original direction.
To beat level 2, just shunt the block over with shifter tiles so it goes around the big hole.

Level 3:

Use an arrow to turn the cube to the southeast when it reaches the fork. Use shifters to get it around the winding bit, then use the other arrow to turn towards the finish.

Level 4:

Teleporters are placed in pairs. When the block lands on one it teleports to the other and continues on in its original direction.
Just place a teleporter to the southeast of the start and to the northwest of the finish.

Level 5:

Here's the first real level. Not so simple this time! Place the teleporters at the far southern and northern corners of the level, and place a southwest-facing arrow at the eastern corner. The block will take the teleporter to the arrow, then take the teleporter again to the finish.

Level 6:

Place the teleporters two blocks from the start and finish, then place a shifter on the far southeast corner of the island with the finish, and an arrow in the same place on the island with the start. Point both towards the teleporters.

Level 7:

Metal blocks don't let you place tiles on them. Put one shifter on the block three northeast from the start, then place the arrow one block northeast and one block northwest of that. You don't need all the shifters for this level.

Level 8:

Buttons make blocks appear on the marked spaces. Usually you have to hit them to beat the level.
Put a teleporter one space southwest of the button, and another one space northeast of the start. To prevent an infinite loop, use a southeast-pointing shifter one space southwest of the start, and a northwest-pointing shifter two blocks northeast and one block southeast of the start.

Level 9:

Here's where it really gets complicated! Put a shifter pointing northeast in the alcove, and another right behind it. Put one pointing northwest to the southeast of the latter shifter, and another northwest-pointing shifter immediately northeast of the start (southwest of the second shifter). Then put a teleporter southwest of the start, and its twin behind the button. Place a southeast-pointing arrow just northwest of the central shifter, and a northeast-pointing one on the far southern corner. Done!

Level 10:

New block time! Right turn tiles do exactly what their name suggests: turn the cube right.
Put one in the middle of the level, then put an arrow pointing back towards it in the two eastern arms of the level.

Reply

Levels 11-20:

Level 11:

Looks easier than it is. Place your shifter in the west corner pointing southeast, then put right turn tiles in the spaces next to it.

Level 12:

Woah this one's complicated. Put an arrow at the end of the arm with the button pointing northwest. Then put a teleporter in the middle of each island. On the upper island, you need an arrow pointing northeast on the west corner, and one pointing northwest in the center of the southeast face. Then put a southwest shifter on the east corner, and a northeast one on the southwest face. And finally put your two right turn blocks on the remaining two spaces on the northwest face.

Level 13:

The purple blocks disappear when your cube leaves them.
Put a right turn tile immediately after the start, then put a clockwise loop of arrows to get it to the button and back.

Level 14:

Tiles placed on purple blocks protect the block from vanishing, but the tile will vanish instead.
Place shifters pointing toward the button on the purple blocks, then place an arrow pointing back towards the start on the last block.

Level 15:

Starting from the switch and going northeast:
Switch, blank, blank, blank
northwest shifter, empty, southeast arrow, southwest shifter
northwest shifter, southwest shifter, southwest shifter, blank
northeast arrow, blank, blank, northwest shifter.

Sorry, there was no simpler way to explain it unambiguously.

Level 16:

Pink clone tiles create another block traveling in the direction they point. These blocks can press switches but cannot win the level. You don't lose if they fall off.
Put a clone tile at each fork, sending the clones to press switches.

Level 17:

Put the three clone tiles in the first three spaces after the start, all pointing southeast, then put a diagonal of right turn tiles from the north corner to the south corner. Then put the arrow, pointing northwest, in the east corner.

Level 18:

This is complicated, so pay close attention:
Put inward-pointing arrows in the centers of the northwest and southeast faces of the square island. On the bottom one, put three northeast-facing shifters on the three adjacent blocks. Put southwest-facing ones on the blocks adjacent to the upper arrow. Put a northwest-facing shifter one space southeast and one space southwest of the upper arrow, and a southeast-facing one one space northeast and one space northwest of the lower one. Then put a clone tile pointing southeast one space northeast of the start, and one facing northwest two spaces northeast of that. Put the final arrow at the bend in the other island, and put the teleporters in the alcove on the first island and at the end of the second one.

Level 19:

This time your cube explodes if the flashing side is ever on the bottom. Don't put the flashing side on the bottom.
Put a southwest-facing arrow immediately after the start, then a northwest-facing one southwest of that. Put another southwest arrow one space northwest of that one, and a southeast one a space southwest of that one. Down at the bottom, put a northeast-facing arrow in the middle space, then a southeast-facing one northwest of that, and a northeast-facing one southwest of that one.

Level 20:

Still explosive cubes. Note how the right turn tiles rotate the cube, moving the trigger face.
Put a northeast-facing arrow just below the start, and put a right turn tile northeast of that. Put a northwest-facing clone tile southeast of the right turn tile, and another right turn tile two spaces northeast of the original right turn tile. Down at the bottom, put another right turn tile at the base of the hole, and in northeast-facing arrows southeast and southwest of it.

Reply

The final two levels (really, that's it? They just introduced a new tile! I thought for sure I'd be unlocking more, else I'd've posted in sets of 11)

Level 21:

Paint tiles color the TOP face of the cube blue when it lands on them. Blue finish tiles require the cube to be entirely blue when it reaches them.
Just put four paint tiles before the turn, a southwest-facing arrow on the turn, then a paint tile immediately after that and another two blocks from that one.

Level 22:

Note that shifters do not rotate the cube.
Put a right turn tile immediately after the start, and a line of three paint tiles going southeast from there. Put a northeast-facing shifter at the end of the line, then a northwest shifter to the northeast of that, and a southwest arrow to the northwest of the latter shifter. Place a right turn tile two spaces southwest of that arrow, and a northeast shifter to the northwest of the right turn tile.

Reply

I'd like to point out you put only my first post (a partial walkthrough) up there; there are two more parts to it. I really should have just made it all at once, though....

[Thanks, walkthroughs bumped. :) -Jay]

Reply

I liked it. The game was well put together, it did not malfunction. There were some great ideas and ones that had not been done before in a game like this (such as the clones).

The only disadvantage I would say is all of the activity of the background, pieces you are going to place and the ones on the board; when you are stuck that constant activity is distracting. Also if you were able to turn that off then it would run better on less powerful computers. Still a good game and does not have errors or get skippy when you have a level with lots of pieces. It ran very nicely.

Reply

^ Scroll Up | Homepage >

Leave a comment [top of page]

Please consider creating a Casual Gameplay account if you're a regular visitor here, as it will allow us to create an even better experience for you. Sign-up here!
  • PLEASE UNDERSTAND SITE POLICIES BEFORE POSTING COMMENTS
  • You may use limited HTML tags for style:
    (a href, b, br/, strong, em, ul, ol, li, code, spoiler)
    HTML tags begin with a less-than sign: < and end with a greater-than sign: >. Always. No exceptions.
  • To post spoilers, please use spoiler tags: <spoiler> example </spoiler>
    If you need help understanding spoiler tags, read the spoiler help.
  • Please Preview your comment before posting, especially when using spoilers!
  • No link dropping, no domains as names; do not spam, and do not advertise! (rel="nofollow" in use)
chrpa Jayisgames needs your help to continue providing quality content. Click for details Welcome to the Roundup 66 - Retro with four games! After you find the ten monkeys in the chapter, look in the inventory. You will find a...  ...
chrpa Jayisgames needs your help to continue providing quality content. Click for details Welcome to the Roundup 65 with three games! As mentioned in the previous roundups, only odd-numbered episodes are featured since even-numbered are for Robin Vencel's patrons (the...  ...
chrpa Jayisgames needs your help to continue providing quality content. Click for details Hi! Weekday Escape and Weekday Puzzle are here! First we have two new cans from tomoLaSiDo and then two small rooms from isotronic. That's all for this...  ...
6,365 Views
0 Comments
chrpa Jayisgames needs your help to continue providing quality content. Click for details Welcome to Mobile Monday! We have another beautiful game from Nicolet and it's a winter game as it should be. Tasuku Yahiro have released another of their...  ...

HELP Jayisgames.com

Recent Comments


Display 5 more comments
Limit to the last 5 comments

Game of the week


Dark Romance: Vampire Origins Collector's Edition

Your Favorite Games edit

add
Save links to your favorite games here. Use the Favorites editor.

Monthly Archives