

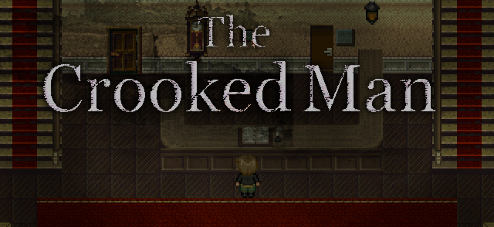
![]() David Hoover has been going through a tough time lately. His fianceé left him, his ailing mother can't remember who he is, and when his friends think he's not listening, they bicker over the difficulties they've faced in trying to help him out. To make things worse, there's been a series of strange happenings in his new apartment. It quickly becomes clear that something happened here, and now the place is very, very haunted. Maybe David just wants to get a good night's sleep, maybe this provides him with some sick new sense of purpose, but either way, he's off to track down the previous tenant and solve the mystery. Thus begins The Crooked Man, a free indie horror adventure game made by Uri and translated by Vgperson, who brought Ib and The Witch's House to the English-speaking side of the internet.
David Hoover has been going through a tough time lately. His fianceé left him, his ailing mother can't remember who he is, and when his friends think he's not listening, they bicker over the difficulties they've faced in trying to help him out. To make things worse, there's been a series of strange happenings in his new apartment. It quickly becomes clear that something happened here, and now the place is very, very haunted. Maybe David just wants to get a good night's sleep, maybe this provides him with some sick new sense of purpose, but either way, he's off to track down the previous tenant and solve the mystery. Thus begins The Crooked Man, a free indie horror adventure game made by Uri and translated by Vgperson, who brought Ib and The Witch's House to the English-speaking side of the internet.
 Take control of David as his investigation leads him to new places, exploring and solving puzzles along the way. You'll run into other people, all searching for something, just like him. How do you help them? Is it just a coincidence that everyone you meet carries a very familiar sort of hurt, or is there something more sinister afoot? But people aren't the most pressing concern—the Crooked Man is ready to rip you to pieces at a moment's notice, and you'd better be ready. It's very easy to die or get a sudden bad ending, so it's a welcome relief that the game allows you to save (almost) anywhere.
Analysis: The Crooked Man turned out to be a surprisingly solid game. The characters and environments are mostly the standard RPG toolkit pixel fare; fortunately here they serve as proof that the right developer can create a cohesive, unsettling atmosphere with those types of resources. Certain events are illustrated, which looks great and brings out a dirty, gritty feel that really emphasizes the story's essential... crookedness. The sound isn't especially notable, but it's nice enough and usually appropriate. But, the best part of The Crooked Man is probably its big, detailed levels. No complaints about games that need to flesh out their concepts here—each location is expansive enough to feel plausibly real, and stuffed with just the right amount of puzzles (which themselves are, while not extremely difficult, fun and consistently well-done). For those who like horror, Uri's world is a treat to explore. There aren't many jump scares or cheap ways to die, but it's still so deliciously eerie, almost reminiscent of early Silent Hill in pixels. Besides the Crooked Man himself, the people, the places, and even the protagonist are just a little bit off in the best kind of way.
 Failure, depression, what it means when your life doesn't measure up to your own expectations... The Crooked Man explores some uncomfortable subject matter, but does so thoughtfully. There's nothing wrong with the trend of using wide-eyed young girls in frilly outfits as horror game protagonists, but The Crooked Man does something more original for the genre by casting the player as an adult that, for adult reasons, it can feel vulnerable to play. He's been through a lot, and maybe he hasn't come out from those experiences entirely unbroken. Many of you have probably felt like David at some point. He's the kind of player character that's difficult to trust, the kind that leaves you preparing yourself for the inevitable twist where he's not only a failure, but but a monster himself. It's not easy to be David, and though the best ending resolves on a high note, The Crooked Man as a whole is very aware of this. There have been games solely about these unhappy places in life, and those games have their place, but it's also nice to see these topics worked so well into a greater story.
 Some players, however, might find the happy ending too happy. The Crooked Man will take you to some deeply dark places in David's life, and perhaps such a unilaterally positive outcome doesn't do those dark places justice. Hope at the bottom of Pandora's Box is one thing, but sunshine and rainbows are really another. And speaking of endings: hope you find the best one satisfying, because that's the only one with a sense of closure that you're going to get. The others, all bad ends, are reached instantly by a single wrong choice at various points in the game. While it solves the problem some games have where you need to replay something with little replay value again and again just to see all the endings, it also makes the bad ends feel a bit shallow and random. Points for rethinking that tired structure, but perhaps a compromise between the two extremes would have been best?
The Crooked Man has a few other problems, too-- the combat is better than most attempts to fit non-turn-based combat into a game made with an RPG toolkit, but it's still a little shaky. Sometimes the excellent atmosphere is broken by a line of awkward dialogue or a truly silly name (why would a little boy go by "Fluffy"?) But even with its flaws, The Crooked Man is still a smart, well-made game that stands up well among others of its type. It paved its own way instead of following the crowd, and hopefully other developers can take that and learn from it. The Crooked Man is creepy, memorable, and original, with great locations and characters it's easy to care about. If you're a fan of horror games, this one comes highly recommended.
![]() Windows:
Windows:
Download the free full version
![]() Mac OS X:
Mac OS X:
Not available.
Try Boot Camp or Parallels or CrossOver Games.


Walkthrough Guide
(Please allow page to fully load for spoiler tags to be functional.)
The Crooked Man Walkthrough:
Prologue- David's Room:
Once David's friends have left, pick up Paul's license from the table. Try to leave your apartment (2 screens down). After, go back to the main room and answer the phone, then go to bed. When David wakes up, knock on doors until someone answers. The correct door is the one on the far right. Go back inside your apartment (205, second from the left), and to the bathroom (one screen right from the entryway). Examine the sink. Get back in bed, and David will look underneath.
Get up and answer the phone. Leave the apartment. Paul will be there-- talk to him. You'll arrive at the hospital. Go in the room on the far right side of the hall. David will talk to his mother. After, talk to the doctor on the left side of the hall. Go back inside your apartment. When David stops and hears a noise, go into the computer room (one screen left from the entryway) and examine the drawers. Go back to the main room and answer the phone again. After, attempt to go to bed, then examine the TV. Go investigate the sink (the kitchen sink in the main room, not the bathroom washbasin.) Try to go to bed again, and when David wakes up, leave the apartment. After he hears the sound of something breaking, go back inside.
After the phone call with Paul, go talk to the landlady. She's on the leftmost door of the first floor (outside the apartment, down the stairs, and directly to the left of the crack). After speaking with her, go back into David's apartment and follow the tracks to the main room and the crack on the wall. Examine it, then when you have control of David again, try to go to sleep, then go to the computer room and investigate the wardrobe. Go back to the main room. After the scene, the chapter will end.
Scene 1: Hotel Ruhenheim- Sissi
Go inside the hotel. The two doors behind the counter (one locked, one wired off) are inaccessible for now. The two doors up the stairs lead to a music room and a dining area, but there's nothing to do there yet.
Let's explore the halls. On the lower left are rooms 101-107 and a passcoded storage room of some sort. 107 is locked and 105 contains a puzzle clue: a child's treasure map. On the lower right are rooms 108-115. 109 and 113 are locked. On the upper left are rooms 201-206. There's a locked library (with a notice on the door that the key is lost), and 203 contains a notebook scrap by the mirror. On the upper right are rooms 207-210 and a bar. The bar and 210 are locked. Every other numbered room is inaccessible from the hall.
Time to solve the treasure map puzzle (clued in room 105).
Hint:
What room does the map resemble?
Solution:
Go to the dining area and inspect the upper right table.
You'll get a gold key, which unlocks the library. Go inside. Get the key to room 109 from the left table, read the book on the right table, and move toward the window until David hears a sound. Leave.
Go unlock room 109. There's a shiny object on top of the wardrobe. Move a chair in front of it, and pick it up. Get the wire cutters. Before you cut the wire on the door in the main area, you need to go to the music room to investigate the piano playing and meet your new friend, Sissi. After, go cut the wire and go through the door to the staff room. Examine everything (there's a puzzle clue on the bulletin board), but especially the book on the table, since it contains the key to room 107.
Go unlock room 107. Go into the bathroom (other door in the room) and get the doorknob. Go back to the staff room and use the doorknob on the door with no knob. Examine everything (there's a puzzle clue on the bulletin board again), then take a look at the lighter-colored tile and choose to stomp on it. Go down the trapdoor. Check your items screen and use your lighter to see in the dark. It's a good time to save your game. Examine the shadowy figure.
What to do:
As soon as you have control again, run for the ladder as quickly as you can. When prompted, mash the spacebar to shake your attacker off.
Let's check back on Sissi- she's in the upper left hall, in room 203. After, go back to the staff rooms. Go back down the trapdoor. Use the lighter again, and look for the sparkle behind the crates on the left side of the room. Pick up the bronze key.
The bronze key unlocks the bar (in the upper right hall). Examine the blue journal on the table for a puzzle clue.
Time to solve the passcode puzzle. Before you leave the library, it's a good time to save your game.
Hint:
Books are categorized by title in this library, not author.
There are three clues to this puzzle: the two notices in the staff area, and the journal in the bar.
Or, the missing chapters, the title of the book, and the passcode being book related.
Some of you might enjoy this book on your own time, but you do NOT need to read the chapter text to solve the puzzle.
Solution:
The passcode is comprised of the four missing chapters in The Strange Case of Dr Jekyll and Mr Hyde...
...3, 6. 7, and 9.
Or, 3679.
After examining the book, leave the library and go down the hall until you're interrupted by the Crooked Man. David will run into room 203.
What to do:
Examine the pit, and David will push the Crooked Man down. Don't bother trying to examine the Crooked Man himself, you'll just die.
Let's go use that passcode! Go to the lower left hall, examine the door, and input the solution you found. Examine the sparkle on the crates, then examine the ladder, and David will move it. Get the key to 210, and go unlock it. Examine the ash. After the scene, leave. When you go through the hall and pass the bar, David should hear a noise. Go inside. Before you examine the red message, it's a good time to save.
After you see the message, the Crooked Man will show up again.
What to do:
Examine the nearest table of drinks, and David will smash a bottle of brandy on the Crooked Man. Quickly go to your inventory screen and use the lighter to set him on fire.
Go back to the passcoded food storage room and get the knife. Leave, and follow the trail of blood to room 113, which is now unlocked. Talk to Sissi. After the scene, she'll give you a key, which unlocks the other door behind the front desk. Leave the room, watch another scene, go unlock the door, and go through it to the courtyard. Examine the sparkle in the fountain to get Sissi's box. Go back to 113, then up the stairs to the music room. The game will prompt you to save before the fight-- do it, because this next section is difficult and you'll probably die more than once.
What to do:
Use the space bar or the Z key to swing the knife at the Crooked Man. There's more than one working strategy, but what helped me was to lead him in a straight line toward David, swing the knife until I got a hit, and then run away quickly. It's not really worth it to try to get in two hits in a row-- it'll save you time, but you'll get hurt. The game's visuals can be a little confusing about combat, so if you can, listen to the sound effects. A swishing noise means that David swung the knife but didn't hit the Crooked Man, a smacking sound means that David did hit the Crooked Man, and a smack with a breathy, gasping noise means that the Crooked Man hit David. Try to save your health, and if you survive with low health and think you could do better, it might be a good idea to try again.
According to Vgperson, the Crooked Man takes 15 hits to go down at this stage.
After, you'll get a scene with Sissi, and you'll get to choose what to say to her, but choosing wrong can get you a bad end.
Think about:
Sissi is a sensitive person, and she's not only upset by her breakup and by seeing the monster-- she seems to feel really guilty about being sensitive, too. How would you best help someone like that?
To avoid the bad ending:
Say "What's wrong with being a wimp?"
Watch the scene, and then you're done with the chapter.
Scene 2: Julius Stone Law School- D
Go inside the school. Let's take a look at our surroundings-- the law school is mostly divided into three floors, and thankfully, this time more of the rooms are named. If you're confused about a room's name, there's usually an examinable plaque by the door.
You enter the school on the first floor. Directly down the screen is the lecture hallway, currently locked. Down the stairs is the basement, with a looked door to a storeroom and a blocked door to the basement bookshelves. From the very left end to the very right one, the rooms are: the infirmary (locked), the janitor's room (unlocked, so read the memo about the basement repairs, and the list of faculty), the women's and men's bathrooms, and the faculty room (with two doors.) In the faculty room, examine the sparkle at the bottom left desk, and get the infirmary key. If you'd like, read the notice-- it'll hint at which keys can be obtained where, but I didn't find it particularly useful. Unlock the infirmary, and examine the shelves to find a parlor key.
Go to the second floor. You'll see a shadow move right, but there's nothing we can do about it now. Instead, let's take a look at the rooms. From the very left end to the very right one, the rooms are: the parlor (locked, but you should have the key), the computer room (locked), the reference room (locked), Leftie Lewis' office (unlocked), and Euge McGuire's office (unlocked.) Unlock the parlor and examine the wire sculpture on the desk, which is a puzzle clue. Note the shape of the sculpture and the professor who made it. Next, go to Leftie Lewis' office. Examine the toolbox- you can take any two tools with you at a time, but in case you need a tool that you don't have, remember all three of them: the screwdriver, the hammer, and the crowbar.
Take:
A screwdriver. Either of the other two tools is unimportant right now.
Examine Eugh McGuire's office if you'd like, but for now, there's nothing to find there.
Go to the third floor. From the very left end to the very right one, the rooms are: John Keith's office (unlocked), Andrew Robinson's office (locked with a passcode), Cyndi Peterson's office (unlocked), Ray Twain's office (unlocked), and Franz Moore's office (unlocked.) Go to John Keith's office. Read his journal, which is a puzzle clue. Note the person mentioned inside. Also of note: John Keith's combination-locked security box, which most of the professors have. Get John Keith's room key off the desk, and go look at Cyndi Peterson's office. Read her journal, and note what she says about her security code, what she has in common with a student, and that student's name. Next, go to Ray Twain's office. Examine his journal and his shelves for some more puzzle clues. Then, go to Franz Moore's office. Note what he says about where his security code might be, and a different professor's password-keeping behavior.
We're now ready to solve for the first professor's security code.
Hint:
Remember who made the wire sculpture in the parlor?
One professor had an interest in art.
Thinking about that professor's other interests, what might the sculpture be depicting?
The sculpture is made up of numbers.
Thinking about that professor's other interests, how might you convert those numbers to something you can use?
Solution:
That professor is Ray Twain.
The sculpture is made of the binary numbers 10, 101, and 1111...
...which convert to the decimal numbers 2, 5, and 15.
Ray Twain's security code is 2515.
Take the reference room key, and go use it. On the way, you'll end up meeting your second new friend, D. Once you've arrived at the reference room, note the elevator in the back, read the book, and examine the picture of George Wythe-- pay attention to the way he's described. David mentions needing the right tool to unscrew it. If you have the right tool, use it, and if not, go get the right tool. Note the number. You're ready to unlock one of the professor's security boxes.
Hint:
George Wythe himself is significant here, as is one professor's journal.
Wythe wasn't referred to by name, but based on how he's described, what professor might have an interest in him?
Solution:
One professor mentioned "wanting to surpass the "father" of our law", and Wythe's picture calls him the father of American law.
That professor is John Keith...
...whose security code is the number behind the painting, 1647.
Go to that professor's office and input the code. Take the lecture hallway key, but it's a good idea to save before you try to leave the room.
What to do:
First, you need to get out of there. Lead the Crooked Man around the middle desk, then run for the door. Once you're in the hallway, remember-- you have this professor's office key! Use it to lock the door and trap the Crooked Man.
Go back to the first floor, and unlock the lecture hall (remember, it's straight down from the entrance). There are three doors in the first floor of the lecture hall. From left to right, the first is locked, the second is inaccessible, and the third is unlocked. Go inside the unlocked door, and watch the scene with D. After, examine the sparkle on the bulletin board to read a newsletter about a student. Note the information about this student, and the student's name. We're ready to unlock another professor's security box, but before leaving the lecture hall, go up the stairs and get the notebook scrap. You can go inside the auditorium, but for now, it's locked.
Puzzle-solving time!
Hint:
One professor's journal mentioned a student...
...and certain information they shared with that student...
...and how that information was relevant to their security code.
Solution:
That professor is Cyndi Peterson...
...whose security code is her birthday, which she shares with Michel...
...and both of them were born on 6/19.
Cyndi Peterson's security code is 0619.
Go to that professor's office, input the code, and get the lecture room key.
Go back to the lecture rooms, and open up the locked door. Examine the seminar notice on the blackboard, and note the professor who left it. Read the notebook scrap on the floor, too. After the scene, go to the infirmary and rest. Then, let's solve the next professor's security code.
Hint:
One professor's journal mentioned losing their security code somewhere...
They also might have done something recently involving a specific discipline...
...such as giving a seminar.
Solution:
That professor is Franz Moore...
...who lost his security code in the reference room...
...and gave a seminar on criminal behavior.
Search the Criminology section of the reference room, and you'll find his security code written down on a slip of paper.
9981.
Go to that professor's office, input the code, and get the computer room key. Go unlock the computer room. Examine the sparkle, and you'll see a paper written by a professor. Watch the scene. After, you'll get an energy drink from D.
You can solve the last professor puzzle now.
Hint:
What's the only code we haven't solved? We just heard about it...
One professor said something about what another professor does for their password...
Specifically, that they use their ID.
Solution:
Obviously, we'll be unlocking Andrew Robinson's door.
His ID was written on the paper in the trash can.
144246.
Go input the code. Then, leave the room. David will notice the Crooked Man, and decide to go find D. First, go to Leftie's office if you want to change the tools you're carrying.
Take:
The crowbar and the hammer this time.
Then, go to the basement. The locked door is now unlocked, and you'll be prompted as to whether you want to go in. Before going in, it's a good idea to save.
What to do:
First, examine the sparkle to get the iron pipe. Remember the janitor's notice about the east basement wall by the bookshelves? Examine the bookshelves along the right wall, and you'll be able to move one aside a bit. Examine the wall. Use either a hammer or the iron pipe to break the wall-- if you have it, the hammer is more efficient. Then, examine the elevator, and use the crowbar. Move up through the elevator shaft as quickly as you can.
Watch the scene, then go find D. He's in the auditorium. It's a good idea to save before you talk to him.
Like with Sissi, you'll get a scene with two ways to respond, and also like with Sissi, one response leads to a bad end.
Think about:
Not everyone is qualified for every profession. Is achieving a specific dream more important than achieving something? D would like to be a lawyer very much, but what if he just isn't able to do it?
To avoid the bad ending:
Say "That's life, isn't it?"
Again, the game will prompt you to save before the fight, and again, you should.
What to do:
If you're low on health, use D's energy drink-- it'll restore 30 HP. Use the same method as before, leading him away, smacking him, and running. Since there are so many possible pathways for him to go, you might want to concetrate on attacking him while on the left and right sides.
According to Vgperson, the Crooked Man takes 15 hits to go down at this stage. Also according to Vgperson, if you're stuck on this fight, there are several cheap ways to win:
Like steering him so there's a desk between you, with him on the top side of the desk. Or leaving the room and coming back to hit him. Or even pausing the game, going to an unusable (darkened and blue) item, and pressing space or z exactly 19 times (plus the one where you selected the item menu.) All of these are cheating, but all of these are also tested and confirmed to work.
After, watch the scene, and the level will end.
Scene 3: Central Hospital- Fluffy
Go inside the hospital. Again, let's explore our surroundings. At the bottom of the room is a door to the outpatient clinic, but it's locked with a combination and also the batteries are dead. There's an elevator, but it's not operational. Note that it seems to have stopped on the fourth floor. Behind the counter, an unlocked door goes to a room that appears to be a nurses' station.
Go to the nurses' station. Note the one locked locker, and what David says about it. Then, examine the keybox on the top right corner. Switch on all the lights to unlock it. Selecting a light and pressing space switches that light (whether from off to on, or from on to off), but also switches whatever lights the selected one touches.
Hint:
There are multiple ways to solve this puzzle, but you can do it in only 5 moves...
...and with four-way symmetry.
Solution:
Switch each corner, and then the middle light.
Get the cafeteria key and the elevator trunk key.
Let's move up to the second floor. At the top left, there's an elevator (still not accessible on this floor), and rooms 205 (unlocked, with blood), 203, 202, and 201-- all but 205 seems to be busted. On the left wall, there are four doors that seem to be busted, and on the bottom wall, there are five. In the middle island, accessible from the bottom, is the cafeteria (locked). Go in room 205 if you like, and examine the bloody message. Then, unlock the cafeteria, and go inside. Examine the cans, then walk away. One can will fall over. Examine it to get a small wire.
Move to the third floor. At the top left, there's the elevator (still can't access it, sorry) and rooms 305, 303, 302, and 301 (all of which seem to be busted). Every door on the left side but the bottom one seems to be busted, and when passing the bottom one, a cat noise plays. All of the bottom doors are busted. In the middle island, accessible from the bottom, is the dayroom (unlocked). Go through the bottom door on the left side, examine the cat, and "take what's inside" to get the bloody key. Then, go to the dayroom if you'd like. You can read the book on the table, but there's nothing to do here yet.
Move to the fourth floor. At the top right, there's the elevator again (finally accesible from this floor) and rooms 405, 403, 402, and 401. All the doors on the left wall seem to be busted, and all the doors on the bottom seem to be busted except the one below the stain (second from the right.) In the middle island, accessible from the bottom, is the counseling room (locked). Go to the elevator, and pry open the doors. Unlock the trunk in the back to get the AED. Go through the bottom door with the stain and read the notebook scrap.
Go back down to the third floor. Go inside the dayroom, and meet your third new friend, Fluffy. Then, go back down to the nurses' station on the first floor. Use the small wire to open the locked locker. Get the number lock note, and look at it in your inventory to get the combination for the outpatient clinic.
Solution:
4489.
With the combination and the AED, you can now unlock the outpatient clinic. Use the AED in your inventory to get the battery, then go back and examine the outpatient clinic lock. Enter the password, and go through the door.
Explore the first floor of the clinic. On the top wall, there's the staff room, the director's room, and an elevator that won't open. On the right wall, there's an exit to Emergency Patient Transport, but it also won't open. On the bottom wall, there are men's and women's bathrooms, which won't open either. Go in the staff room. Note the locked cabinet and the big hammer. Examine the sparkle to get the key to the counseling room. Next, go in the director's room. Note the locked safe, and read the diary to get the scrap of paper with hints. You'll need solve each clue to get a letter piece. Let's look for the first letter piece right now.
Hint:
It can be found right in this room.
It's the first clue on the list.
Spoiler:
Examine the flowerpot.
Get the Y piece. Next, let's explore the basement. There's a locked medicine room and a door with a faded plate that won't open.
Not much there, so let's go to the second floor. On the top wall. there's a pediatrics department (unlocked), a surgical department, an ENT, and an elevator, but the latter three are all inaccessible. On the bottom wall is a pair of inaccessible bathroom doors and a door that leads to a long hallway. The hallway contains three rooms on the left that currently don't contain anything to do, and a door at the end of the hallway supposedly goes to the emergency stairs, but the stairs are inaccessible. Go to the pediatrics department for a scene with Fluffy.
Then, continue on to the third floor. On the top wall, there's an inaccessible "orphamology" (intended to be opthamology, I believe) room, an unlocked maternity and gynecology room, and an inaccessible dermatology room. Like the second floor, there are two bathrooms and a long hallway leading off to three rooms, but this time, the bathrooms are accessible and unlocked, and the door at the end of the hallway is locked with a three digit code.
There's also another letter piece here.
Hint:
Have you examined everything?
It's the fourth clue on the list.
Solution:
Examine the phone.
Get the F piece. Go to the maternity and gynecology room. Examine the shelves for a small key, then leave.
Move up to the fourth floor, and take the notebook scrap. On the top wall, there's a radiology room (inaccessible), a cranial surgery room (inaccessible), a psychiatry room (locked), and the elevator, which still won't open. There are two bathrooms that don't open, and a long hallway leading off to three rooms and to an emergency stairs door that doesn't open.
Go back to the fourth floor of the regular (non-clinic) wing and to the counselling room. Unlock it. Examine the left cabinet, read the diary, and get the psychiatry key.
Before going back to the clinic wing, there are two more letter pieces to find in the regular hospital.
Hint:
There are two clues on this list that obviously reference places you've been before on this side of the hospital.
Clues three and five on the list.
Solution:
Examine the dirty teacup near the bottom wall of the cafeteria, and the cardboard "Lost and Found" box in the nurse's station.
Now with the L and I pieces, go back to the fourth floor of the clinic wing, and unlock the psychiatry room. Read the diary, then examine the memo on the bulletin board, a puzzle clue. You should now be able to solve the puzzle.
Hint:
Have you seen anything around that fits the picture, and comes in both 2, 3, and 4 variants?
How about a group of rooms?
Solution:
The picture maps to the long hallways, each with three rooms, on the second, third, and fourth floors of the clinic wing.
Examine the bed on the middle hallway room on the second floor, the trash in the top hallway room on the third floor, and the bulletin board on the bottom hallway room on the fourth floor.
The numbers you get are 7, 1, and 6.
Combine what you find, and open the door to the emergency stairs in the long hallway on the third floor (still in the clinic wing).
Go up the stairs to the fifth floor, the roof. There's a wire wrapping around the door, so you can't go out just yet. Go back down to the third floor of the clinic.
While we're here, let's find another letter piece.
Hint:
Out of the two remaining clues, which one could apply to something in this area?
It's the second clue on the list.
Who made the clues, and which room would they use?
Solution:
Examine the sinks in the women's bathroom.
Fluffy will go to use the bathroom, and become trapped. Go to the women's bathroom and examine the damaged section of wall. Then, go get something that will allow you to break in from the women's bathroom to the men's.
Solution:
Get the hammer from the staff room on the first floor of the clinic.
Come back with the item, go to the women's bathroom, and use it. Go to the stall, and talk to Fluffy.
Go back to the staff room, and use the small key on the locked cabinet. Get the key to the medicine room. Go to the basement, and use it. Read the diary, then look on the shelves for the hydrogen bromide. It's on the top left shelf. Take it, and go back to the emergency stairs. Use the hydrogen bromide on the fifth floor door, and go outside. After the scene, examine the old newspaper at the bottom left corner of the roof. Then, find the last letter piece.
Hint:
Just one clue left.
If you're going to get close to the sky, you should get as close as you can.
Solution:
Climb up the ladder on the right side of the roof, and examine the sparkle.
You should have all 6 letter pieces by now. Go back down the stairs, to the third floor of the clinic. You'll hear a sound coming from one of the rooms. Go inside the maternity and gynecology room. After the scene, it's a good time to save. Go to the fourth floor to find Fluffy.
What to do:
Go left until you see the fire extinguisher. Quickly examine it.
After another scene, return to the director's room on the first floor of the clinic. Examine the wooden box, and solve the puzzle.
Hint:
The letters form the director's favorite word, which is also the most important thing to him.
Search his room, and read his diary again. What seems like something he'd find important?
His daughter, for one...
Solution:
�Family."
Get the safe key, open up the safe, and get the revolver and pistol ammo. After the scene, go to the roof. The game will prompt you to save, and you should.
What to do:
The hard part here is not shooting Fluffy. The Crooked Man won't kill Fluffy, and won't directly chase you. There's a bit of luck involved because Fluffy runs so randomly, but basically, just wait for Fluffy to run away a little before you shoot the Crooked Man. Even if you have a clear shot, don't risk it if it looks like Fluffy might get in the way.
According to Vgperson, the Crooked Man takes 10 shots to go down at this stage.
After the scene, go down to the entrance in the main hospital, then go back to the clinic. The other door in the basement is now open. Go inside. After another scene, the level will end.
Scene 4: Central Hospital- Paul
Go to the fourth floor of the regular wing of the hospital, and after the scene, go to the clinic wing. After the second scene, go to the third floor of the clinic. After the third scene, take the stairs to the roof, but it would be a good idea to save before you go out the door.
Paul will talk to David.
Think about:
David's a pretty reasonable guy when he's in his right mind... but is he in his right mind currently? Also, Paul's safety is important, too. Even now, David doesn't seem to be aggressive, but accidents can always happen...
To avoid the bad endings:
Choose "Punch".
Note that each wrong choice gives a separate bad end, so you might want to go back and see them both.
After the scene, the level ends.
Final Scene:
Unlock the front door of the house with the Bloody Key.
There's nothing to find through the bottom two doors, but if you'd like to explore, feel free. Through the top left and right doors, there are notebook scraps. Get them and read them, then go up the stairs.
There's another notebook page in the main hall by the top right door. Through the bottom right door, there's yet another notebook scrap, and through the top right door, there's the notebook itself. Save, then go through the door on the left. After the scene, you'll need to fight the Crooked Man one more time.
What to do:
As before, run from the Crooked Man, attack when he comes near you, then run again. He seems a little faster in this stage, and has a new attack-- when he screams, you lose a little health each time, so try to finish up somewhat quickly. Fortunately, you still have a gun. It helped me to run him in a loop around the table, firing twice when I was going vertically and using the horizontal runs to get more space between us.
Vgperson didn't give a number for how many shots it takes to bring him down in this round, and I couldn't get an exact count... but it seems to be somewhere between 10 and 15.
Go up the stairs and open the door. After the scene, the game ends. Congratulations! You might want to play again to see the extra content.
Posted by: Alice |
April 6, 2013 1:24 AM
|
April 6, 2013 1:24 AM