

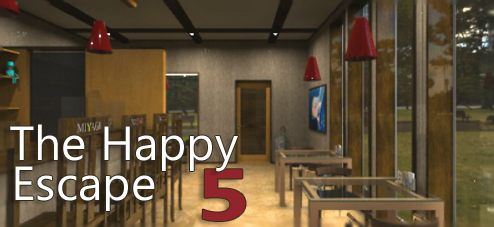
![]() When you live in Tesshi-e's world, the best way to cap off a relaxing stroll through the park is to find yourself locked inside a deserted cafe—Miyagi, the famous escape café—searching for cleverly construed ciphers and solving them to gain your freedom. Then, when you title this excursion The Happy Escape 5, you have the added delight of gathering up a ten shiny happy coins, some well hidden but unguarded by mechanisms and others secreted away behind riddle-locked doors. The day is made even better after you find and use the heart-shaped key to the exit door, when the proprietor presents you with a well-earned treat.
When you live in Tesshi-e's world, the best way to cap off a relaxing stroll through the park is to find yourself locked inside a deserted cafe—Miyagi, the famous escape café—searching for cleverly construed ciphers and solving them to gain your freedom. Then, when you title this excursion The Happy Escape 5, you have the added delight of gathering up a ten shiny happy coins, some well hidden but unguarded by mechanisms and others secreted away behind riddle-locked doors. The day is made even better after you find and use the heart-shaped key to the exit door, when the proprietor presents you with a well-earned treat.
 You already know this is not your usual café and it's also more complicated in terms of how you'll navigate because it's not a standard square space. Sometimes a grey bar appears at the edge of the screen when you hover your cursor there, then you can turn around or change your angle. Other times a large arrow will appear in the center of the screen so you can move forward along the narrow aisle. Click on an area, such as a table or door, to get a closer look at it. The cursor won't change over active spots or obtainable items, so click everywhere you can think to look or grab an item. Use the "about item" button to inspect your inventory and highlight the item you want to use before clicking where you want to use it. Choose your language (English or Japanese) before you start; messaging when you click prompts you away from fruitless efforts and often gives a hint about what a puzzle needs to be solved.
The convoluted layout can be a bit of a headache to make your way around, yet it does add an extra dimension of challenge and enjoyment for those who don't mind all the backing up and moving forward and turning around. Another disappointment is the lack of an extra ending—not too bad since you're sure to exit with those happy coins or not at all. We're talking Tesshi-e, though, which is a magic word for escape fans because it means good stuff abounds at every turn—wobbly picture frames, peppy music, clever clue presentations, an infectiously upbeat personality and all the usual charming characters. That unique Tesshi-e brand is the best part: you know upon entering this lovely café that you'll be served up a full course of fun.


Walkthrough Guide
(Please allow page to fully load for spoiler tags to be functional.)
The Happy Escape 5 Walkthrough
Starting Out: Exploring and Gathering Clues
You begin with the front door to your back. You're facing a line of tables on the left and the dining counter on the right with the bathroom door straight ahead.
Let's take a look at each table:
Click on the table nearest to you; this is table 3:
Here you see the #3 placard, some packets of sugar and a napkin holder.There is nothing else to see or pick up.
Back out to the original view.
Click the middle of the screen (an arrow appears) to move forward. Then, zoom in on the next table in line, which is nearest to you; this is table 2:
Here you see the #2 placard, some packets of sugar and a napkin holder.
There is something else in the napkin holder: a ROUND-SHAPED KEY. Take it.
Back out again.
Now examine the table in the corner by the bathroom door;this is table 1:
Once again notice the #1 placard, packets of sugar and napkin holder on the table.
Back up.
Examine the bathroom door and find out that the round-shape key won't open it.
So, turn right to face the counter. Here there are six tall chairs which all have "Miyagi" painted on their backs:
Notice how one letter on each chair is a different color?
Zooming in on groups of two, examine each chair make a note of those differences:
From left to right, the color differences are...
BLUE-GREEN-YELLOW-RED-RED-GREEN
Now, as you were looking at the first two chairs on the left, you might have saw a menu on the counter in front of them...
Open up the menu and you just see a set of six quartered squares.
After checking out the chairs, try to get a good look at what's behind the counter:
Click on the shelves behind the counter and you'll stretch in for a closer look; it just won't be close enough to reach anything, including that KEY hanging up on the left side.
Make a note of what you do see, though, including the four colored dolls in each corner of the shelves.
Turn right from the counter area and go forward once to face the exit door directly. You'll see a wobbly picture frame on the right which you could probably solve, but let's explore the rest of the room first.
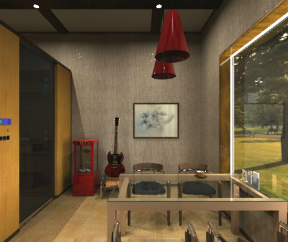
Turn left and now you find another corner of the cafe, including a fourth table:
Examine this table to see the #4 placard, some sugar packets and a napkin holder...
...there's also a cup and saucer here; examine them to get another clue:
"F" inside the cup and three stars on the saucer.
Beyond table 4 is a wonderful picture of flowers. Get a little closer to admire it better...
What's this resting on the lower edge of the frame?
Get HAPPY COIN 1/10!
Back up and check out the cool guitar.
Look what is under the fret strings (upper neck) of the guitar:
HAPPY COIN 2/10!
Then examine the buttons on the guitar stand: "G-U-I-T-A-R." There's a slot where something might come out if you press the correct buttons.
Next to the guitar is a small red refreshments case...
Looks like you need a 4-letter code to get inside. Notice also the stars on either side of the letter boxes.
Back up a couple times from the cake case. Then, click the charcoal-tinted glass door next to it.
Once you're facing it directly, you can click the blue placard to see what it reads:
"Staff Only." It needs a key (the round one won't work) and there is a place for a 4-digit code below that.
Click on the "Staff Only" sign to get another clue:
Sugar
423x1
Back up twice and turn left twice.
You're now ready to start solving puzzles.
The Wobbly Picture
Examine the water nymph painting next to the front door:
As you click its corners, it wobbles. The trick is to click the corners in the correct order and make it open up.
SOLUTION:
Use the colors from the backs of the chairs plus the colors of the dolls in each corner of the shelves. Each doll represents a corner of the picture while the series of Miyagi letters colors indicates which order to click each corner...
Top Right
Bottom Left
Bottom Right
Top Left
Top Left
Bottom Left
When you use the correct sequence, the picture lifts up to reveal a hidden niche. Now you can get:
the SUPER AVERAGE STICK (notice the hole at the end)
and HAPPY COIN 3/10.
The Guitar
Take the STICK you got from the wobbly picture and go over to the counter.
Look at the shelves behind the counter and use the STICK to knock over the cans stacked up on the middle shelf:
Make a note of the words that are revealed.
Go back to the guitar and examine the buttons on its stand.
Press the buttons in the correct order according to the clue you just saw.
SOLUTION:
T-U-G-A-I-R
With the correct button code, something will pop out of the slot:
Get the TUNING FORK.
The Kitchen Door
Attach the TUNING FORK you got from the guitar to the end of the STICK.
Go back over to the counter and use the FORK/STICK combo to reach the SPADE-SHAPED KEY hanging next to the green doll.
Return to the back corner of the cafe and click on the charcoal-tinted glass door, the one by the "Staff Only" placard.
Use the SPADE KEY to turn on the code box.
Now you can enter a 4-digit number to unlock the kitchen door.
SOLUTION:
The clue tells you to count the sugars on tables 4, 2 and 3 to get a 3-digit number. Then multiple that number by the sugars on table 1 to get a 4-digit number... 452x3=
1 3 5 6
You'll know you have the correct code because the tinted glass will slide open, giving you access to the kitchen area behind the counter.
Exploring the Kitchen Area
Once you get the door open, go on inside the area behind the counter.
Click the shelves on you right to explore them first.
On the middle shelf to the left of "TUG AIR" you see two more cups and saucers.
Make a note of the information they contain:
"A" two stars
"E" four stars
On the next shelf is a Mr. Birdy; his stand has a slot for happy coins. Enter the coins you have and an icon lights up for each one.
Beside Mr. Birdy is Mr. Hippo; his stand has a 2x6 button grid on it.
Below Mr. Birdy and hippo are three drawers; check them out:
There is nothing in the right drawer and middle drawer needs a screwdriver to get open.
But, the left drawer takes a key...the ROUND KEY. Open it up and get:
a scrubby SPONGE.
Finally, look at the boxes below the shelves:
Move each box over to the right then grab another HAPPY COIN 4/10.
Go further into the kitchen area to look inside the sink:
There's a dirty cup in the sink and running water alone won't clean it.
Use the SPONGE to clean the cup and now you have another clue:
"C" one star
Now you're ready to solve more puzzles.
Refreshments Case
Back out of the kitchen area until you can see the red refreshments case next to the guitar. Zoom in on it:
Enter the correct 4-letter code to get the case open.
SOLUTION:
The answer is in the cups and saucers. The number of stars the order while the letters will also spell a (unfortunately obvious) word...
C A F E
When correct, you can click on the door and it will open.
Get the HAPPY COIN 5/10
and take the EGGS BOX
Look also in the eggs to get the CLOVER-SHAPED KEY.
The Bathroom and the Sink Code
Once you get the key from the refreshments case, back up, turn left, then go forward to the bathroom door on the other end of the cafe.
Use the CLOVER KEY on the door to unlock it and go inside.
Turn left to face the mirror:
Under the mirror is a spot for a 3-digit code. You don't know it yet. But notice you can see the reflection of the area behind you.
Turn around twice to face the toilet stall.
You can see a pattern on the door.
Close the door and it's still hard to make out the markings. But, when you turn back to face the mirror, it all makes sense.
Zoom back into the code box under the mirror.
Enter the correct 3-digit number.
SOLUTION:
When the toilet stall door is closed, you can see the answer in the mirror...
6 2 3
Get the SCREWDRIVER.
Before leaving the bathroom, explore a couple more areas...Open the door and go inside the toilet stall:
Look under the TP dispenser to find HAPPY COIN 6/10
Then look at the cubby above the toilet to see a square quartered into four buttons.
Turn around so you're facing the sink while standing by the toilet.
Close the stall door again.
Here on the back of the door! It's HAPPY COIN 7/10
Leave the bathroom.
Mr. Hippo and the Screwed Drawer
Go back into the kitchen area once you get the screwdriver from the bathroom mirror.
Examine the hippo:
Light up the correct pattern on the hippo's 2x8 base and he'll open wide.
SOLUTION:
Look at your box of EGGS for the answer...
O - O O - O
- O O - O -
...enter that pattern on the hippo's base.
Take HAPPY COIN 8/10 from the hippo's mouth.
Examine the middle drawer under Mr. Hippo. Use the SCREWDRIVER to unlock the drawer and look inside:
Get HAPPY COIN 9/10
and get a CLEAR SHEET with RED DOTS.
The Cubby Over the Loo
When you get the CLEAR SHEET WITH RED DOTS from the screwed-closed drawer, go back over to the first two tall chairs at the left side of the counter.
Open the menu that's on the counter.
Put the RED DOTS in the menu and note what you see.
Now go back into the bathroom and into the toilet stall. Examine the cubby with the four squares:
Press the buttons in the correct sequence to unlock the cubby.
SOLUTION:
When you put the sheet in the menu, a red dot appeared in one of the four quadrants. Reading from left to right gives you the sequence of which button to push...
Top Left
Bottom Left
Bottom Left
Top Right
Bottom Right
Top Right
The cubby door automatically opens when you're correct:
Take HAPPY COIN 10/10.
Exiting
Bring all your HAPPY COINS to Mr. Birdy behind the counter.
When you've put all ten coins in Mr. Birdy's coin slot, he'll smile and give you some gifts:
All your happy coins back
and the HEART-SHAPED KEY.
Back out of the kitchen and turn to face the exit door.
Use the HEART KEY to unlock the door and that's the end!
Congratulations!
(There are no other endings to this escape; you already have the happy end!)
The Ten Happy Coins, by Location:
Resting on the lower edge of the flower picture's frame.
In the strings of the guitar (upper neck).
Behind the wobbly picture.
Behind the boxes in the kitchen.
On the cake in the refreshments case.
In the toilet paper dispenser.
The bathroom stall door (close it and look from the loo side)
In the middle drawer in the kitchen area.
Mr. Hippo's mouth.
Inside the cubby above the loo.
Posted by: elle |
June 5, 2013 1:50 AM
|
June 5, 2013 1:50 AM
Wow. I get to write the walkthrough for a Tesshi-e game! So there is an upside to insomnia!
Warning, the navigation in this game is a bit... fiddly, compared to some of Tesshi-e's other games. Even with the giant navigation arrows in some of the views, you still might stumble onto some big move-forward spaces and not even realize it. But I'll try to be as clear as I can.
GETTING STARTED:
From the opening view, you can click the giant forward arrow, the right sidebar, or the table in the lower left corner. Click on that for a closeup of Table 3. Click the table number and note that beside the table number, are two sugar sticks in a holder.
Click back to the first view, and move forward. Now you can click on either of the two tables in the lower left, or on the chairs lined up along the bar to the right, or move forward again to the door.
For now, let's look at the tables. You will notice that on Table 2, there are five sugar sticks in the holder, and in the napkin holder on the right, you will find the Round Key.
Back out and click on the other table. It is Table 1, and you will see three sugar sticks.
Now let's look at the six chairs along the bar. Click between each pair for a closeup of the backs. Each one has the name of the MIYAGI caf�, and each one has one letter highlighted in a different color. The chairs are arranged in numerical order, thankfully. So, going along, you'll see that it's:
M. Blue
I. Green
Y. Yellow
A. Red
G. Red
I. Green
(Also, between the first two chairs, you will see a menu on the bar. It shows four four-squares, all blank)
Now, back out to a view of the bar with all 6 chairs, and click on that colorful shelf to see it from afar. You will notice that the dolls in the four corners of that shelf correspond to those colors. In the top left we have red, in the top right we have blue, in the bottom left we have green, and in the bottom right we have yellow.
So, the chairs, in that sequence, seem to indicate a sequence of: Top right, bottom left, bottom right, top left, top left again, bottom left.
If you've played a Tesshi-e game before, you can probably guess what this is a clue to. But for now, let's move on...
There's also some writing on the shelf in the center, but you can't see it... and some cute gadgets on the bottom shelf that you just know we're going to be playing with once we finally get over there. Also, there's a dark line on the wooden left edge of the cabinet. Click on that for a view of a spade-shaped key, but you can't reach it.
So, back out to your view of that door ahead. Surprising no one who has ever played a room escape game before, it's locked.
To recap, you should have so far:
ITEMS:
1. The Round Key
INFORMATION:
1. The solution to a certain future puzzle: up right, down left, down right, up left (twice), down left.
2. Tables 1, 2 and 3 have 3, 5 and 2 sugar sticks respectively.
EXPLORING, PART 2
Back out to your first view and click on the right side of the screen, to explore what's off to this side.
Here, you can see Table 4, with four sugar sticks. Also, it has a coffee mug on a little plate. The cup has the letter "F" written in the bottom, and if you click on it, it will temporarily lift up and you'll see three stars on the plate.
Back out once and see what is on that far wall. Ooh, there's a nice picture of flowers. Click on that for a close up. Click the corners... is this the wobbly-picture puzzle? Nope. But if you'll look along the bottom edge of the picture frame, a bit to the right of center, you'll see a little blotch. Click on that to get your first Happy Coin (#1)!
Back out and click on the red box and the guitar. Near the top of the guitar neck you should see a bright dot. Click on that for a close up to get the next Happy Coin (#2)!
Nothing else on the guitar is clickable, but under it there's a box, with the letters GUITAR spelled out on six clickable buttons, and a slot that presumably dispenses something.
Back out and click on the red box. You will notice some things in that case, but it's locked. There are four buttons on top that have letters, which cycle through as you click (though oddly, they only go up to K). You will notice, also, that there are dark yellow stars on each side of the letter bar at the top, like the three gold stars on that plate. And if there were three gold stars under the letter F, does that mean the third letter is F? Probably.
(I was able to guess the four-letter word just from the third letter, but if you can't, don't worry, there are other clues coming up)
Now, let's back out and click on that black glass door to the side. It will lead you to behind the counter with that colorful shelf, but it's locked. On the wall to the side is a blue and green sign saying STAFF ONLY, a keyhole, and four black squares that presumably will become number counters later on. If you click on the green slider that says STAFF ONLY, it will pull back and reveal a code "Sugar 423 x 1." But multiplying something by 1 isn't really multiplying it, so what does this mean? Well, remember the sugar sticks? Tables 1, 2, 3 and 4 have 3, 5, 2 and 4 sugar sticks respectively, so substitute those numbers in for the table numbers, and the equation becomes "452 x 3," which is 1,356. So, presumably "1356" is meant to be entered on those four black squares... except they're not clickable. And the Round Key you have doesn't fit in that keyhole. Will another key activate them?
To recap, here's what you should have:
ITEMS
1. The first two Happy Coins.
INFORMATION:
1. Table 4 has 4 sugar sticks.
2. 1,356 will be the solution to some later puzzle.
3. The third letter in the four-letter word to open the red display case is F.
EXPLORING, PART 3:
Back out and click right, to see an umbrella stand and a locked door. If you're expecting the umbrella stand to be relevant, prepare for disappointment.
But what's this? On the right side of the screen we see another hanging picture! Click right and click for a close up, and it's an anime mermaid! And yes, the corners wobble.
So, remember the color-letter-doll puzzle, and wobble the top right, bottom left, bottom right, top left, top left (again), and bottom left corners, and sure enough, it opens, to reveal another Happy Coin (#3!), and what the flavor text describes as "a super average stick," with a small hole at the end.
Okay, final recap of the opening search. You should have:
Gotten the first 3 Happy Coins, acquired the "super average stick" and Round Key.
Time to start solving puzzles!
GETTING BEHIND THE COUNTER
Head back to the bar, and look at that shelf from afar. Select the stick in your inventory and click on the cans in the middle of the shelf. They should be brushed aside to reveal "TUG AIR" written on the wood.
Huh, that looks like an anagram of something.
Back out and return to that box under the guitar. Enter in "TUGAIR" on the six buttons that spell GUITAR (so, 4,2,1,5,3,6) to get a tuning fork.
Select the "super average stick" (I love that title) in your inventory, select "About Item" and while it's up, select the tuning fork in your inventory and click on the stick to insert the tuning fork in the stick.
Return to the bar, and that view of the shelf. Click on the left edge of the cabinet to see the spade shaped key. Select the forked stick in your inventory and click on the key to acquire it.
Head back to the STAFF ONLY door and use the spade key on that keyhole. The four buttons should light up with numbers. Remembering the sugar puzzle, enter 1,356, then back out and click on the door to enter.
Now that you're behind the counter...
Click on the cabinet you could formerly see only from afar. On the bottom shelf there are three boxes. Slide them all right, one by one, to reveal Happy Coin (#4).
Back out and click the middle shelf to the left of where TUG AIR is written. You will see two more cups and saucers, which you can pick up like you picked up the one on table four. Here, they reveal an "A" on two gold stars, and an "E" on four. So, the four-letter word ends with "-AFE."
Back out once again and click on those three drawers on the second-from-bottom shelf. The drawer on the right has nothing. The one in the middle is secured with screws, and the one on the left needs a key. Fortunately that Round Key fits here, so you can open it and grab a Sponge.
Also on the cabinet are a Mr. Hippo sitting on top of 12 toggle-able buttons arranged in two rows of six... and a Mr. Birdy coin machine that will take your Happy Coins and light up the ten lights beneath it. I like to keep all my Happy Coins together until the end, but that's entirely optional.
Back out and click left, over to the sink. The drawers under the sink have nothing in them, but the sink itself? It has another cup. Unfortunately it's stained and you can't read it, but click on it with the sponge and that will change. Click on it and you will see a "C" cup on top of a single gold star.
The star word is CAFE.
That's all you can do here for now.
You should have, so far:
4 Happy Coins
The word "CAFE."
Now what?
Well, let's put "CAFE" into that word maker on the display case. It'll open. Click the cake on the second shelf for a Happy Coin (#5!), and the bottom shelf to pick up the eggs. The eggs have a clover key on them, so take that... but also notice the configuration of the eggs in the carton? Where have you seen two rows of six before?
Head back to the Mr. Hippo behind the counter and light up the buttons corresponding to the eggs in the carton. That's the 1st, 3rd, 4th and 6th buttons on the top row, and the 2nd, 3rd and 5th on the bottom row (the eggs are large enough that you can see them in the thumbnail on your inventory screen). This will open the Mr. Hippo's mouth to reveal Happy Coin (#6).
Now, let's put that clover-shaped key to use. Does it fit the locked door by the umbrella stand? No, no it doesn't. So, turn around and try the other door. Ah yes, this one opens. So, let's enter the bathroom...
By now you should have:
gotten 6 Happy Coins in total
unlocked the display case with CAFE
gotten the clover-shaped key and unlocked...
The bathroom
You are greeted with a wall. Click left to see a mirror, and click that mirror to get a close-up of a three-number counter. What to enter? Hmm...
Back out and turn around to see a doorway into a toilet stall. Click the toilet paper dispenser for a close up, click it again to open it, and get Happy Coin #7.
Back out and click the cabinet above the toilet. The one on the right has nothing, and the one on the left is locked with a four-square keypad. Hmm... enter the solution to the wobbly-picture puzzle? Nope, nothing happens. You know, that keypad looks oddly like the symbol we saw 6 times in that menu on the bar, but all those symbols were identical and blank, with no indication of what to click.
For now, turn around. Hmm, the design on that door looks funny. Click on it for a close-up, and... oops, we closed it. Oh well, there's Happy Coin #8 taped on the back of the door.
Open the door, go out, turn around, and close it again. It looks like... a capital E, S, and lowercase a?
Leave it closed, and turn to face the mirror, where ESa is revealed as 623. Enter that on the number-counter, click the mirror, and it will open to reveal the screwdriver.
Almost done...
Head all the way back out of the bathroom, and go behind the counter of the bar once again. Remember that drawer that you couldn't open because it was screwed shut? The one in the cabinet with the colored dolls and TUG AIR message?
Open that. You will get Happy Coin #9, and also a clear sheet with dots on it. Head back around to the counter, between the first two chairs in the MIYAGI sequence, and open that menu. Lay down the clear sheet to indicate which buttons to press on the square keypad... upper left, lower left, lower left again, upper right, lower right, upper right.
Head back into the bathroom and enter that code on the square keypad, to get the final Happy Coin (#10).
To recap, here are the locations of the TEN HAPPY COINS:
1.
on the frame of the picture of flowers
2.
on the neck of the guitar
3.
behind the wobbly picture
4.
under the boxes on the bottom shelf of the cabinet behind the counter
5.
on top of the cake in the display case
6.
the mouth of the mr. hippo on the shelf in the cabinet
7.
in the toilet paper dispenser
8.
on the back of the bathroom stall door
9.
in the screwed-shut drawer
10.
in the cabinet above the toilet
So, go...
back to the Mr. Birdy with the coin slot, put in all ten coins, to get your coins back, AND the heart-shaped key, which will unlock that still-locked door and allow you to escape!
Posted by: Sylocat |
June 5, 2013 2:58 AM
|
June 5, 2013 2:58 AM