

![]() Script Welder's point-and-click horror adventure games Deep Sleep and its sequel Deeper Sleep couldn't be more ironically named if they tried, since they're not so likely to bring about restful slumber so much as nightmare fuel intent on keeping you awake. In the first game, you found yourself trapped in a literal nightmare and struggling to wake up, while in the sequel as you researched lucid dreaming you discovered you hadn't ever actually awoken. Now, in The Deepest Sleep, as the title implies you find yourself going even deeper into your nightmare in order to find a way out, while at the same time trying to stay one step ahead from the creatures who want to keep you asleep... for good. To play, just click when the cursor changes colour to interact, and use items from your inventory at the top of the screen as you find them in order to solve puzzles and proceed.
Script Welder's point-and-click horror adventure games Deep Sleep and its sequel Deeper Sleep couldn't be more ironically named if they tried, since they're not so likely to bring about restful slumber so much as nightmare fuel intent on keeping you awake. In the first game, you found yourself trapped in a literal nightmare and struggling to wake up, while in the sequel as you researched lucid dreaming you discovered you hadn't ever actually awoken. Now, in The Deepest Sleep, as the title implies you find yourself going even deeper into your nightmare in order to find a way out, while at the same time trying to stay one step ahead from the creatures who want to keep you asleep... for good. To play, just click when the cursor changes colour to interact, and use items from your inventory at the top of the screen as you find them in order to solve puzzles and proceed.
 This series has always been one of those rare batches of games where "weird and disorienting" is both point and attraction, since they capture the surreal and unsettling atmosphere of dreams so perfectly. Even when it isn't throwing jump scares at you, The Deepest Sleep keeps you on your toes with some superb use of lighting and sound. Most of the items you'll find have a fairly logical implementation, even if you'll need to be wearing you back-trackin' boots for a lot of it, and some scenes will definitely make you squeal as you scrabble to survive. That said, however, some of the puzzles are also more frustrating this time around, in particular a timed, multi-room puzzle in growing darkness where you have to remember the correct sequence you used to get through to get back out of once you find the item you need. Though technically the last game in the series, The Deepest Sleep still feels like it leaves a lot of questions unanswered, and the concept itself still offers fodder for more great ideas that could be played with down the road. On its own, however, The Deepest Sleep is still a great example of a horror game that knows how to keep you on the edge of your seat, and exactly when to try to make you spring right off it.


Walkthrough Guide
(Please allow page to fully load for spoiler tags to be functional.)
The Deepest Sleep: Walkthrough
by Fenrisle
NOTE: This walkthrough only lists the essential steps, with a few additions to make your life easier. Examine everything you can to understand more of the story, to spot Easter Eggs, to possibly find a secret ending, and simply for greater immersion and enjoyment!
Part One: The Paralysis
Click the shadowed figure slightly to the left. Click twice more to continue the dialogue, and one more time to recommence with the game.
Part Two: Dark Church
Click on the light. Purloin A SEALED VASE from the bottom-left corner.
Go through the door in the center; click the twin lights, and then again.
Go through the portal on the right. Open the door in the center and go up to access the room.
Take A SCREWDRIVER from the center part of the top shelf and A HAMMER from the right part of the middle shelf.
Exit the room by going down. Go to your right.
Scrutinize the statue. Use A SCREWDRIVER on the statue to take A SHINY GEM.
Note “a red rope hanging from the ceiling” above the doorway to the right.
Return to the room with the three portals (left twice), then go up twice.
Examine the stone skull, then insert A SHINY GEM into an eyehole of the skull. Use A HAMMER on A SEALED VASE to obtain A SHINY GEM; insert this into the other slot.
Go through the opened door on the left. Act quickly while in the puzzle rooms!
Take A SMALL GEM from its position between the two pillars, closer to the right one. Examine “a small hole” near the currently-closed portal to the left. Insert A SMALL GEM into this hole and go left.
Take the gems and switch their position on each side; the left side of the room changes from bottom to top, and the right side of the room changes from top to bottom. As a guide, the grey holes are where you take the gems from and the blue ones are where they belong. Go left.
Take the three gems and place them to the blue holes to the left of each location you received the gems from. (Again, taken from grey and placed in blue.) Go left.
Take A HANDLE from the table. Go right.
Return all gems to their original positions in all three rooms. Take the gems from where they are (blue sockets) and restore them to the grey sockets; remember to go right when finished with a chamber. Return to the room with the skull.
Go down twice. Go left.
Examine “a reel with no handle.” Insert A HANDLE into place, then pull the rope down by winding the handle. Go right thrice.
Part Three: Sewers
Go right twice. Enter the hollowed alcove in the wall to your right. Take A STOOL. Examine the poster attached to the wall in the center of the room, and take note of the information. Leave the clown’s room (go left) and go left.
Place A STOOL in the doorway. Return to the room with a winch (left four times). Pull the handle to ensure the rope goes up again. Go right thrice.
Go right twice. Go up once past the opened (raised) grate, then go right. BEWARE! Transiently release the mouse so you don’t accidentally make a sudden movement.
Moving very slowly to avoid being devoured by the monster, pull the lever down. Do not let the bar at the top fill completely (and become bright red); take small pauses if necessary. However, once you pull the lever, you will have to move as quickly as possible to the right and enter the safe room before the switch automatically flips down and the entryway closes. I suggest allowing the bar to drop to a minimum once your cursor is on the lever, then clicking it and moving steadily but carefully to the right.
Part Four: Safe Room
Examine the piece of paper on the table; you will need this pattern later, but you don’t have to memorize it yet.
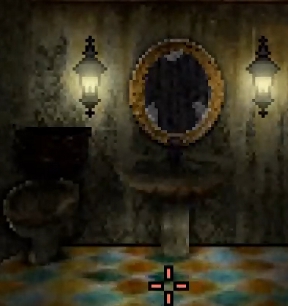
Go right, then up into the bathroom.
Take A GOLDEN KEY, go down, then unlock the door to your right with it. Click the door to open it and proceed.
Go right thrice, then go up into the entrance surrounded by the blue wall.
Take AN EMPTY GREASE CAN, go down, then enter the area in the top left.
Part Five: First Stone – Mushroom
Take A STONE TABLET from near the center of the room. Examine “a fat, oily mushroom,” then take A HAMMER to it. Yuck! Collect the oil with AN EMPTY GREASE CAN to obtain A FULL GREASE CAN. Go right thrice.
Examine the rusty trapdoor. Oil the lock with A FULL GREASE CAN. Open the trapdoor and enter (going “down”). Be warned that you will once again dance delicately with the sewer monster.
Part Six: Second Stone – Cellar
Place your cursor on the second stone tablet and immediately go right. Examine “a pile of plates.” Smash them with A HAMMER, go left, quickly take A STONE TABLET, then go up the ladder (to your left).
Part Seven: Third Stone – Ruined Safe Room
Go left, then up towards the semicircular nook. Examine the third stone tablet on the bottom part of the wooden shelf, then take A WIND-UP KEY from the sill somewhat to the bottom right of the screen. Go left to exit.
Go to your left, to the bottom left, and left another three times.
Examine “a music box” on the table. Wind it with A WIND-UP KEY.
Go left, open the curtain to your left and exit the area, and take A STONE TABLET from the bottom left.
Go right six times.
Part Eight: Fourth Stone – Kitchen
Go up. Examine the lid in the center of the room, slightly nearer the top. Lever it with A SCREWDRIVER, and jam the gears with the same item. Go down.
Go left through the bottom doorway, then go left another three times. Go up into the ruined bathroom. Go up, right, then up (through the doorway to the right).
Take A STONE TABLET from the bottom shelf of the bookcase on your left. Go down, left, and down twice.
Part Nine: Stones Puzzle
Go left, then click the piece of paper (now on the floor). Note the pattern; it is randomized per game.
Go “down” to exit, then go right thrice. Place the stone tablets appropriately to match the pattern you saw.
Turn the wheel near the bottom in the center of the screen repeatedly to bring down the ladder, ignore the sewer monster, and immediately go up into the attic when given the message.
Part Ten: Finale
Close the trapdoor.
Click the mirror to your left and examine your reflection. Click again to watch the cutscene.
ENDING ONE: Go to your right, and continue to go up (clicking through the screens of text when you are finished reading) to capture the Traveler. This continues the endless series and introduces chaos into our world as a result of the player saving themselves.
ENDING TWO: Go to your right, and allow the Traveler to escape by doing nothing after the first screen of text. This breaks the vicious cycle at the cost of the player remaining in the Deepest Sleep forever.
ENDING THREE: ???
Posted by: Fenrisle |
September 3, 2014 6:50 PM
|
September 3, 2014 6:50 PM