

![]() Pencil Kids' point-and-click puzzle Monkey GO Happy stars are terminally miserable, and that's just the way we like them, because it means we get to play games like Monkey GO Happy Dragon to cheer them up. Which... sort of makes us sound like terrible people, when you think about it, so if nothing else these games prove Schadenfreude is alive and well. To balance that karma out a bit, in each of the game's seventeen stages you'll need to solve puzzles to cheer up your sulky simian. Use the big yellow arrows to move around locations, and click to interact with anything whenever your cursor changes, dragging items from your inventory at the top of the screen when you need to use them. Keep your eyes peeled for secrets, and click your mini monkeys if you want to dress them up in different costumes because of reasons.
Pencil Kids' point-and-click puzzle Monkey GO Happy stars are terminally miserable, and that's just the way we like them, because it means we get to play games like Monkey GO Happy Dragon to cheer them up. Which... sort of makes us sound like terrible people, when you think about it, so if nothing else these games prove Schadenfreude is alive and well. To balance that karma out a bit, in each of the game's seventeen stages you'll need to solve puzzles to cheer up your sulky simian. Use the big yellow arrows to move around locations, and click to interact with anything whenever your cursor changes, dragging items from your inventory at the top of the screen when you need to use them. Keep your eyes peeled for secrets, and click your mini monkeys if you want to dress them up in different costumes because of reasons.
Monkey GO Happy Dragon's seventeen stages probably won't take you long, since each one is short and compact in design, though scaled somewhat in difficulty as you progress. Some of them are straight-forward puzzles, while others actually incorporate minigames, and the typical Monkey GO Happy trend of hiding clues in your surroundings returns, which is always a nice touch. One of the issues some players may have with it is that Monkey GO Happy Dragon can expect you to use items to do things they aren't normally used for... it's not an enormous sticking point since the constrained level design means there aren't so many options that you won't end up trying what the game wants you to do sooner rather than later, but it's still sort of counter-intuitive in a way the series isn't typically known for. Where the game shines, however, is in the variety it has to offer, perfectly sized for a coffee break with enough content and creativity that it won't wear out its welcome. Considering the title you might expect the dragon to pop up, well, sooner, but Monkey GO Happy Dragon is still a welcome addition for fans with just enough complexity in later stages to make you feel you've earned those tremulous little grins.


Walkthrough Guide
(Please allow page to fully load for spoiler tags to be functional.)
Walkthrough: Monkey Go Happy Dragon
STAGE 1:
Pick up the LADDER (near side of barn)
Go right.
Use LADDER on side of house to enter attic:
Click panel on left side to get a KEY.
Click panel in back of attic to find a SECRET MINI MONKEY.
Back up and go left to the barn view again.
Use the KEY on the barn door to open it…
Take the PITCHFORK.
Go right and re-enter the attic…
Use the PITCHFORK on the hay to get PITCHFORK with HAY.
Go down and left.
Put the HAY in the hay trough causing the cow to leave the barn, be abducted by aliens and returned as a space cow. This makes your monkey very happy!
STAGE 2:
Pick up the STAMP near the “1498-2014” sign.
Go right.
Click the bush on the right side of the house to find a SECRET MINI MONKEY.
Examine the padlock on the door to find a code is needed….
Use the clue near the logger mechanism in the first scene to solve the code:
SOLUTION:
Derive from the clue the different in time between the years 1498 and 2014:
516
Enter that code to unlock the padlock and open the door.
Get the SAW.
Go back to the first scene and give the SAW to the logger animatronic.
A round piece of wood will be sawed off.
Use the STAMP on the wood round. “Happy”!
STAGE 3:
Click the panel in the lower right corner under the puzzle grid to find a SECRET MINI MONKEY.
Arrange the tiles in the proper order, creating a path for a train to travel from the upper left corner to the lower right corner…
Look at the map sketch behind your monkey for the clue.
When you place a tile in the proper location, it should stay…
Screenshot: Stage 3 Solution
STAGE 4:
Click the GAS CAP on the back of the van to open it, then click the GAS PUMP to put gas in the van.
Open the van door and get the TIRE IRON.
Go right.
Click the bush next to the “gas” sign to find a SECRET MINI MONKEY.
Use the TIRE IRON on the manhole grate to open it…
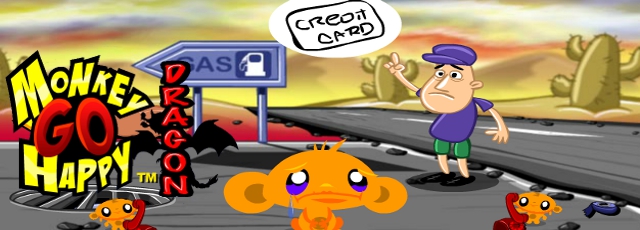
Get the CREDIT CARD from inside the manhole.
Give the found CREDIT CARD to the lost looking tourist.
Pick up the TAPE from the lower right corner of the scene.
Go left.
Use the TIRE IRON to break open the panel in the bottom left corner of the scene. Now you see the broken wires…
Use the TAPE on the broken wires.
After the van is filled up with gas, click the GAS PUMP NOZZLE again to return it to the pump. The van will drive off and your monkey will be glad about that!
STAGE 5:
Click the lower right corner of the tablet to find a SECRET MINI MONKEY.
Go right to see the wiring for the tablet is all messed up. Fix it by clicking each tile until the wires are correctly oriented:
Screenshot: Stage 5 Solution
Click the power button on the left side of the tablet to turn it on.
Click the “TAP TO PLAY” to begin Aztec Escape…
Click the hazards before they damage the running aztec.
There are five levels to complete.
As they get more difficult, it’s easiest to keep your cursor closest to the aztec’s head so you need only make small movements, repeatedly clicking quickly to destroy the knives, arrows, etc. before they take down his health bar.
Once you successfully complete a level, your progress is saved. You get as many attempts as needed to clear each level.
When you successfully complete Aztec Escape, your monkey will dance for joy.
STAGE 6:
Note the number over the house door.
Go right.
Click the panel near the upper right side of the window to find a SECRET MINI MONKEY.
Notice the number on the mailbox.
Examine the lock on the shed door. You need to enter a four-digit code:
Use the clues from the house number and the mailbox number….
4233
Enter the correct code to unlock the shed.
Open the shed door and take the DOOR KEY.
Go left.
Use the DOOR KEY to open the house…
Get the CAR BATTERY from inside the house.
Open the hood of the repairman’s truck….
Put the CAR BATTERY inside the truck.
Click the crane basket twice to lower it to the ground. The repairman will climb inside of it.
Click the repairman when he’s inside the crane; it’ll raise up to the power line and he’ll fix it. That makes monkey ecstatic.
STAGE 7:
Go left twice until your reach a room with a large box with a mountain design on it.
Click the panel on the left side of the room to find a SECRET MINI MONKEY.
Complete the puzzle in this room…
The display is of mountains, to change the images in each of the three panels to match the kind of wildlife you’d find in the mountains:
SOLUTION:
BEAR - EAGLE - RAM
The display flashes when the images are correct.
Move right to the next room, where the box has an African plains image. Complete the puzzle….
Change each of the three panels to animals you’d find in Africa:
SOLUTION:
RHINO - GIRAFFE - ELEPHANT
Move right to the first room…you should see the device swirling with colors now, but it’s not ready. Continue on…
Go right to a room with a sea wave display. Complete the puzzle here…
Change the images to animals you’d find in the ocean:
SOLUTION:
LOBSTER - OCTOPUS - FISH
Return to the first room. Enter the time machine to go back in time. Yay!
STAGE 8:
Click on the panel in the back wall (just to the right of the TV) to find a SECRET MINI MONKEY.
Go left.
Notice the “One Button Frenzy” poster.
Click on the code panel on the cabinet….
Use the clue from the poster to solve the color code:
SOLUTION:
The colors in the word “PLAY”…
BLUE, WHITE, YELLOW, GREEN
When the code is correct, the cabinet doors will unlock and open.
Get the GAME CARTRIDGE from inside the cabinet.
Go right.
Put the GAME in the console slot on top of the TV.
Play the game by clicking the button….
Level 1: shoot down the plane.
Level 2: jump over the chasms.
Level 3: eat the flies (but not the bees)
Level 4: retrieve the sword then run back to the left side of the screen without the shurikens getting you.
STAGE 9:
You start out by a pirate.
Click on the pirate….he tells you about a chest with “HOOK” written on it.
Notice the clue written in the sand.
Go left twice until you reach a waterfall.
Take the BERRIES from on top the bush.
Note the clue on the side of the cliff.
Go all the way right, back to the seashore.
Give the BERRIES to the parrot in the boat.
Take the MACHETE from the boat.
Go left once to the campfire.
Note the clue written in the sand.
Use the MACHETE on the bamboo stalks to open a new pathway north. Go up.
Move the plant on the left side of the scene to find a SECRET MINI MONKEY.
Use the MACHETE to open the crate.
Take the DYNAMITE from inside the crate.
Move down to the campfire..
Light the DYNAMITE on the campfire to get LIT DYNAMITE.
Go left to the waterfall.
Use the LIT DYNAMITE on the pile of rocks on the right side of the screen…
The rocks will be destroyed, revealing a chest:
Open the chest using the clues found in 3 different scenes….
H=2, O=3, K=5…you need to spell “HOOK” so the code is:
II, III, III, V
When the code is correct, the chest will open.
Take the HOOK from inside the chest.
Go right twice.
Give the HOOK to the pirate.
STAGE 10:
This stage is like a tower defense. You need to quickly do the following things, in succession and repeatedly, to prevent your tower from being destroyed:
Pick up the SHELL from the right side of the scene.
Put the SHELL in your cannon.
Press the red button to fire.
When needed, move the cannon so it’s aimed at the attacking warship.
Destroy six warships to win.
When you move the cannon to the right, click the grey half circle on the platform to find a SECRET MINI MONKEY.
STAGE 11:
Move the rock in the lower left corner of the rock pile to find a KEY.
Make a note of the design in each of the three windows in the background.
Go right.
Click on the panel at the bottom of the left tower to find a SECRET MINI MONKEY.
Notice three more windows here in this scene.
Click on the 3x3 grid on the box to solve the puzzle….
Use the clues from the windows in two scenes:
SOLUTION:
Going by the greyed-out panels on the windows, you need to push the buttons in this order….
1, 3, 5
6, - , 4
- , - , 2
When the correct six buttons are pushed in the correct order, the box opens.
Get the YELLOW, RED and BLUE SPRAY PAINTs from the box (note the colors on the front of the box).
Use the KEY on the BULLDOZER.
Click on the bulldozer to send it westwards.
Go left.
Click on the bulldozer so it’ll continue west, pushing the rock pile out of the way…
”FUN” is written on the wall.
Color in the word “FUN” with the spray paints…
Use the clue from the box in the other scene:
BLUE, YELLOW, RED
STAGE 12
Go up and notice there are four missing fuses. Go back down.
You need to travel through a maze to collect the needed items…
Notice where you are in relation to your map in the upper left corner of the screen.
Go RIGHT, UP, and LEFT:
Pick up a FUSE.
Go RIGHT, DOWN, RIGHT, RIGHT, UP, UP:
Pick up another FUSE.
Go DOWN, LEFT, UP, UP….
Click the panel in the back wall to find SECRET MINI MONKEY.
and then go RIGHT once more:
Pick up the third FUSE.
Go LEFT, DOWN, LEFT, UP, LEFT, DOWN…and then go UP the ladder. Here you see a lever that doesn’t work.
Get the last FUSE.
Travel back to the start:
DOWN, FORWARD, DOWN, RIGHT, DOWN, RIGHT, DOWN, LEFTx4, then go UP the ladder.
Place each of the 4 FUSES in their slots on the right side of the room.
Now return to the room with the lever:
RIGHTx3, UP, LEFT, UP, LEFT, UP, LEFT, DOWN and up the LADDER.
Pull the LEVER.
STAGE 13:
Move the snow to find a SLEDGEHAMMER.
Go right.
Use the SLEDGEHAMMER to break off the statue’s arm. Pick up the ARM.
Go left.
Use the ARM in the pipe to find a RED KEY.
Unlock and open the door with the RED KEY.
Go inside the prison vault.
Click the panel in the lower right corner of the back wall to find a SECRET MINI MONKEY.
Pick up a BONE from the skeleton.
Go right x2.
Use the BONE as a lever at the base of the statue…
That opens a secret panel in the statue’s dais. Get the CHAIN HANDLE.
Go left once…
Note the patterns on either side of the door.
Continue left into the prison vault.
Replace the missing CHAIN HANDLE.
Click on each of the four chains until each is the correct height, according to the clue outside:
SOLUTION:
X o o o
o o X o
o X o o
o o o o
o o o X
When each of the chain handles are at the correct height, a panel on the back wall opens…
Take the FLUTE.
Go outside and give the FLUTE to the piper.
STAGE 14:
Make note of the clues on the back wall.
Go right.
Click the panel in the wall under the frog/jar shelf to find a SECRET MINI MONKEY.
Notice the number to the left of the small hatch door.
Move the brick under the hatch door to find a RED KEY.
Go left.
Use the RED KEY on the red door lock to open it…
Take the HANDLE.
Go right.
Use the HANDLE on the star box and turn it to make the jack-in-the-box pop up.
Get the bow tie ORNAMENT from the jack-in-the-box.
Go left.
Put the ORNAMENT on the butterfly box.
Get the BLUE KEY.
Go right.
Use the BLUE KEY on the blue door lock. Open the door…
Get the KNIFE.
Go left.
Use the KNIFE on the portrait to cut it open…
Get the GOLD KEY.
Use the GOLD KEY on the gold door lock and open it…
Take the KNOB.
Go right.
Put the KNOB on the safe. Now click the safe to solve a code…
Use the clues on the walls in both rooms to decipher the code for the safe:
SOLUTION:
Translate 254 using the numbers in the first room to get…
347
When the code is correct, the safe will open:
Get the SLINGSHOT.
Use the SLINGSHOT to break open the frog jar.
STAGE 15:
Lift up both rocks to find 2 BUGS. Catch them!
Go right.
Look under two more rocks and catch 2 more BUGS.
Pick up the PETROL can.
Go left twice.
Lift up another rock and catch 5th BUG.
Also up a piece of FLINT near the radio.
Click on the radio and note the clues it gives.
Go left
Make a note of the design etched on the side of the cliff (right edge of the scene).
Use the PETROL and then the FLINT on the log pile.
When the logs burn down, a new path opens…
Go forward.
Collect two more BUGS from under the rocks here.
Go left to an area with a door on the left and three orb designs in a circle…
Collect an 8th BUG from under a rock.
Click the panel under the circle design to find a SECRET MINI MONKEY.
Examine the circle design to begin a puzzle…
Solve the puzzle by turning the tiles until they match the clue on the canyon wall:
SOLUTION:
Turn the round tiles under the design forms a sort of inverted triangle with a circle in the middle.
When the design is correct, the door in the mountain will open…
Get the ROVER CLAMP and ROVER HYDRAULICS from inside the door.
Go right 2x.
Turn over two more rocks here to get BUG #9 and BUG #10.
Give 10 BUGS to the alien.
Now you can get the ROVER ARM.
Go left, down, down, and right to return to the rocket.
Notice the four colors of the round window on the rocket.
Click the 6-button panel on the bottom left side of the rocket….
Using the clues from the two scenes, solve the color puzzle:
SOLUTION:
RED, RED, YELLOW, BLUE, RED, WHITE
When done correctly, the rocket’s door opens up and the rover comes out.
Put the ARM, CLAMP and HYDRAULICS back on the ROVER.
When it’s repaired, click the ROVER to send it east.
Go right.
Click the rover twice and it will remove the rock from the crater.
STAGE 16:
Note the clues in this scene.
Go left and view the clues on the rock near the pond.
Go right twice to another scene where you see clues. Make notes.
Go forward and grab the SPEAR.
Go down, left, and left.
Use the SPEAR to catch the FISH.
Go right, right, and forward…
Give the FISH to the TRIBESMAN.
Open the tent and get a KNOB.
Go down, right, and down…
Use the KNOB on the stone idol.
Pull the knob once…notice the symbol it changes to.
Go forward…You’ll see the panel matching the symbol on the idol has opened:
Take the STONE.
Go down, pull the knob on the idol again to change the symbol…
Return to the temple in the first scene to see another panel has opened…
Take another STONE.
Go back to the idol…
Click the lever again, changing the symbol.
Go forward and left…
Get a third STONE.
Return to the idol, click the lever….then from there go forward and right, to the place just before the tribesman’s tent.
Get a fourth STONE.
Another trip to the idol….this time click the lever twice to change the symbol to a drum. Then go back to the pond and see another panel has opened:
Get the fifth STONE.
When you go back to the idol and pull the handle a seventh time, a panel in the idol opens and….
…you can get the sixth and final STONE
Now click the idol’s lever until the symbol changes to a bird.
Go forward and enter the temple.
Click the panel to the left of your monkey’s head to find a SECRET MINI MONKEY.
Place the 6 STONES in order, as shown on the clue south of the tribesman’s tent.
SOLUTION:
6 - 1
5 - 3
2 - 4
FINAL STAGE:
Pick up a MARBLE from the wall (left side) and from the ground (to the right of your monkey).
Go left…
Pick up a MARBLE from the window pane and another MARBLE from the top right corner of the safe.
Then get a TOY MOUSE from the floor.
Go right 3x.
Pick up a 5th MARBLE from the right side of the door and then a 6th MARBLE from the left side of the door.
Click the panel below the lantern to find a SECRET MINI MONKEY.
Then, click the panel hidden in the shadows to the right of the door to find another SECRET MINI MONKEY.
Go up the stairs to the rooftop…
Pick up 2 more MARBLES (from middle of scene and from bottom right corner of scene).
Get the CAGE KEY from the grey chimney.
Go back downstairs then go down to a room with a black cat.
Give the MOUSE to the cat.
Pick up 3 more MARBLES (left, middle, and right sides of the scene).
Use the CAGE KEY on the locked cage. Go right…
Take the CHIMNEY BRUSH.
Click the panel on the right side of the room to find yet another SECRET MINI MONKEY.
Go left two times…
Get the CLOTH from the clothesline.
Use the CLOTH to clean the black smudge on the wall…
Click the symbol to light it up.
Pick up 3 more MARBLES.
Click a panel in the shadows under the clothesline to find a SECRET MINI MONKEY again.
Go right…
Use the CLOTH to clean the smudge here and click the symbol.
then forward then up the stairs to the rooftop….
Use the CHIMNEY BRUSH to clean the chimney.
Go downstairs, down, and right to see a happy prisoner…
Pick up the 15th MARBLE from the stove.
Go left, forward, and left…
Give the 15 MARBLES to the man in the black robes.
Get the SAFE HANDLE.
Go left…
Use the CLOTH on the stone wall’s smudge. Click the symbol to light it.
Go left to the room with the safe….
Put the SAFE HANDLE on the safe.
Click the three symbols on the left wall (activated by the three symbols that were hidden under smudges elsewhere) to open the safe….
SOLUTION:
UP, DOWN, LEFT
When the symbols are correct, you can spin the safe handle and it will open.
Get the DRAGON RUNE from inside the opened safe.
Go right 3x then upstairs to the roof.
Put the DRAGON RUNE in its niche on the side of the roof.
A dragon shows up and your monkey is thrilled!
Posted by: elle |
September 6, 2014 6:00 PM
|
September 6, 2014 6:00 PM