

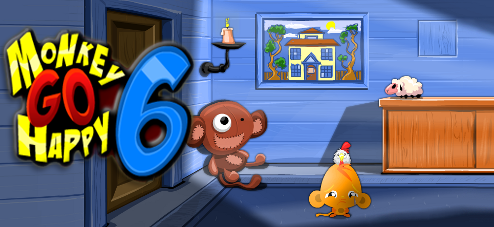
![]() Sad monkey, happy monkey, little monkey, tiny monkey... these are monkeys of many hats but can you figure out what will make these weepy-eyed simians jump up and down in glee? You're tasked with doing just that, and in as few clicks as possible, in Happy GO Monkey 6, the wonderfully interactive continuation of Pencil Kids' popular point-and-click puzzle game.
Sad monkey, happy monkey, little monkey, tiny monkey... these are monkeys of many hats but can you figure out what will make these weepy-eyed simians jump up and down in glee? You're tasked with doing just that, and in as few clicks as possible, in Happy GO Monkey 6, the wonderfully interactive continuation of Pencil Kids' popular point-and-click puzzle game.
 In many of the 15 self-contained stages, something about the scene isn't quite right—at least not in the viewpoint of the unhappy monkey. Scan the scene to find usable objects and clues to the puzzles. The cursor usually changes over action spots but doesn't always; still, solutions are easily thought up. Frustration might rear up when you realize not all tasks are easily done in one fell swoop... or are they?
Some ingenuity and careful planning should help your click economy even as certain mini-games demand more. Unlock the 16th level and your treat is a short adventure to collect 30 coins that feels like a true bonus. Although the challenge is minimal, the interactivity is tremendous, plus there's something about the pathos of Robin Vencel's adorable primates that cannot be resisted. After all, the joy on those sweet faces is all the reward that's needed.


Walkthrough Guide
(Please allow page to fully load for spoiler tags to be functional.)
Monkey GO Happy 6 Walkthrough
Stage 1
Click the garden gnome to knock him over then get the KEY.
Use the KEY to unlock the house. Inside you find a SICKLE. Take it.
Cut down the bush under the window using the SICKLE.
Open the window and get the VALVE.
Place the VALVE on the faucet and turn it on to fill up the pond.
Pick up the FISH IN BAG and put it into the pond.
Stage 2
Pick up the METAL BAR from the floor.
Then use the METAL BAR to pry open the box in the lower left corner of the room. Get the WIND ELEMENT.
Open the small chest in the back of the room. Get the FIRE ELEMENT.
Pick up the WATER ELEMENT from under the large basin on the right side of the room.
Now place each of the three elements in the correct spot:
The FIRE ELEMENT goes on the yellow crest in the center of the wall.
Put the WATER ELEMENT on the purple crest on the left.
The WIND ELEMENT goes on the white crest on the right.
Next, pull down each of the three rings hanging from chains above each crest.
Stage 3
Pick up the red CIRCULAR GEM from the left side of the stove.
Open the stove to find a green TRIANGLE GEM. Get it.
Click once on the pile of coal to reveal a purple SQUARE GEM. Take it.
Place each of the three gems in their proper place above the door, in the same order as they appear in your inventory, and the door opens.
Get the SHOVEL.
Now use the SHOVEL to move coal into the stove.
You can do this in a single click by simple dragging the shovel back and forth between the coal pile and the stove.
Continue filling the stove with coal until the gage bursts.
Stage 4
Open the side door of the van then take the CAR KEY.
Use the CAR KEY to unlock the back of the van.
Click the cans of paint and all four will line up by your monkey (from left-to-right: red, yellow, blue and orange).
Get the PAINT BRUSH from the back of the van.
Now set about coloring the "Happy Monkey Land" billboard to match the image on the side of the van:
Dip the brush in the red paint and color the north, east, south and west stripes of the picture (it takes 4 clicks to do this: after dipping the brush in the paint, don't release but drag it over to the area you want to color).
Then dip the brush in the orange paint and color the remaining stripes (another 4 clicks).
Next, make the monkey face yellow (1 click).
Finally, color "Happy" and "Monkey Land" with the blue (2 clicks).
Stage 5
Click to knock over the sheep and reveal a DOOR KEY. Pick it up.
Use the DOOR KEY to open the closet door.
Take the candle and put it inside the closet.
Get the BUTTON off the coat that's hanging inside.
Click crow's head lever above the door to open the panel above the cabinet.
Click on the numberpad that's revealed and solve the secret code:
The answer is in the painting on the wall...look at the windows of the house. Each has a different pane lit up, which tells you where to press on the number pad (read the answer from left to right, top down, as if you'd read a book...)
5 2 3 7
With the correct code, the cabinet opens; get the NEEDLE AND THREAD.
Use the BUTTON to replace the missing eye on the stuffed toy monkey and secure it with the NEEDLE AND THREAD...
You have a few seconds to sew on the button before it falls off, so don't hesitate.
Stage 6
Pick up the CANE that's leaning against the tree.
Use the CANE to knock down the bee hive.
Click the tree branch in the top right corner of the scene: leaves will fall to the ground.
Take the LEAF RAKE from by the fire and use it to rake up the leaves...giving you LEAFS.
Place the LEAFS over the fire to cause it to smoke. This drives away the bees and brings the bear out for a honey snack.
Stage 7
Click the boat to reveal a NET. Take it.
Click the red sea anemone and it will release a puff which attracts a FISH.
Very quickly use the NET to catch the FISH before it swims away.
Give the FISH to the squid in the cave and he'll bring an oyster shell.
Open the oyster and get the PEARL.
Place the PEARL on the red sea anemone. Click the sea anemone again to make the pearl shoot up and break the glass to the crab can have water.
Stage 8
Pick up the NEWSPAPER then place it in the bin.
Get the GLASSES from the ground and put them over the newspaper in the bin.
The sunlit heats the newspaper, starting a fire and the fire service arrives.
Now click the lever at the base of the fire truck's ladder to raise the ladder to the tree branch.
Click the kitten so he'll use the ladder to climb out of the tree.
Stage 9
Assemble the plane by dragging each piece (above) to its proper place...it doesn't matter which order you do this in.
After that, the pilot does all the work for you. :)
Stage 10
Zoom in on the code panel next to the maintanance room door...
Enter the code by pressing the three buttons in the correct order:
The answer is on the calender. December is the 12th month. So if you write out 12 31, it tells you the order in which to press the buttons. Numbering them 1, 2, 3 from left to right, press them in this order:
1st-2nd-3rd-1st
When the maintanance room door is open, get the BATTERY.
Pick up the wrench (aka SPANNER) from the left side of the video game.
Use the SPANNER to undo the bolt on the right side of the video game. Then click the panel to open up the side compartment.
Put the BATTERY inside the video game to turn it on. Click the button to start the game.
Now you need to shoot the invaders, completing three levels to win (the invader gets faster and more evasive with each level).
Stage 11
Open the panel under the conveyor belt and take out the PAINT BOTTLE.
Click the drop icon to reveal the paint slot. Put the PAINT BOTTLE inside.
Zoom in on the 3x3 button grid above the red lever...
Press the buttons to make the needed pattern:
Form an "H" such as on the side of the conveyor belt by clicking every button except the top middle and bottom middle buttons...
X - X
X X X
X - X
When correct, the door opens to reveal turning gears.
Pick up the OIL CAN from on top of the machine.
Use the OIL to lube the gears.
Pull the big red lever.
Stage 12
Get the STICKS from the right side of the screen and place them in the circle of rocks to begin a fire pit.
Pick up the PAPER IN BOTTLE from the shore and break it across the sharp rocks on the left side of the stage so you can reach the paper.
Take the roll of PAPER and put it in the fire pit.
Next, pick up the MATCHES and use on the paper and sticks to light a fire.
Click the palm tree to send smoke signals to the rescue plane.
Stage 13
Pick up the gargoyle head that's on the ground to the right of the mausoleum.
Get the PICKAXE from on top of the crypt on the left side of the screen.
Use the PICKAXE to break up all the rocks inside the crypt then take the RUNE.
Using the PICKAXE again, break the large rock between the crypt and the mausoleum.
Pick up the GARGOYLE HEAD that was hidden in the large rock.
Now replace each of the GARGOYLE HEADS that are missing from the gargoyles atop the mausoleum roof. This causes the door to open up.
Put the RUNE on the orb inside the mausoleum.
Stage 14
Click the red lever on the bottom right side of the screen.
Click the cart on the upper rail then click the red lever that is revealed.
Click the large cart on the lower rail and grab the DYNAMITE that was behind it.
Place the DYNAMITE in the rocky side of the mountain. It'll blow up revealing a puzzle. Click it to begin...
Solve the puzzle by turning each of the rings to line up properly:
Click each ring, starting with the ring closest to the inner circle, this many times to turn them to where they go...
first inner ring = 4 turns
second ring = 3 turns
third ring = 7 turns
outermost ring = 4 turns
Stage 15
Pick up the PIPE from the left side of the machine and then put it where it's missing along the right wall.
Now you're going to play a minigame where you need to press the red button on the machine, then quickly find the yellow button where it's hiding behind each door...
Each time you find the yellow button, be fast to press it then continue looking for the next yellow button (there's 9 all together) until all the doors are opened:
Here's the order and location of where each yellow button appears...
1-top center
2-top left
3-bottom right
4-middle center
5-bottom center
6-top right
7-middle left
8-bottom left
9-middle right
Final Stage
When you first begin, there are 6 COINS right in the open to be picked up:
On the very top of the roof.
A bit lower from #1.
On top of the chimney.
On the eaves next to the chimney.
On the edge of the grass to the left of the monkey.
The bottom right corner of the screen, on the grass.
Open the attic window to get a PLUNGER...
and another COIN.
Get the STATUE from on top of the roof.
Follow the arrow to the next scene. Here you can see 5 more COINS out in the open:
On top of the hut.
In the grass by the edge of the hut.
In the lower right corner of the scene.
Next to the monkey's ear (left side).
Near the fence post by the cow's head.
Click the cow and very quickly grab the DOOR KEY from around the cow's neck before it turns back around.
Return to the first scene by clicking the arrow in the lower left corner. Use the DOOR KEY to unlock the house and go inside.
Grab the BRANDING IRON that you can barely see in the beam of light through the doorway.Go back outside.
Open the door in the fireplace and heat the BRANDING IRON over the flame.Move to the scene with the cow and use the hot BRANDING IRON on the cow. It'll move out the way.
Put the STATUE on the roof of the hut and a door will open to reveal a puzzle. Your clues to the puzzle are found in two places:
First, read the stone marker that's on the left side of the pasture.
Then, before zooming in on the puzzle's buttons, read the note etched above them.
Solve the puzzle by inputting the correct code:
Click each button, from left to right, this many times...
4x-9x-14x-3x
When correct, the door to the hut opens up.
From inside the hut, you can get...
2 COINS
a HAMMER AND NAILS
and a WHEEL BIT.
Go back to the first scene. Place the WHEEL BIT on the broken wheel in the lower left corner of the screen. Use the HAMMER AND NAILS to secure it. The wheel will turn so the lights go on in the house.
Enter the lit-up house. Pick up 3 COINS in plain sight:
At the base of the oven.
Next to the tea pot on the shelf.
In the flower pot.
Open the oven door and get 4 COINS.
Move the table then use the PLUNGER to lift up the hidden panel in the floor. This reveals another puzzle...
Change the time on the clock three times to light up all three buttons:
The answer is written on the wall. The numbers on the wall are 24hr clock times. Adjust the hour and minutes hands on the clock accordingly....
1345 = 1:45
2130 = 9:30
1610 = 4:10
When you've solved the clock puzzle, the panel opens again to reveal...
another 5 COINS
Pick up the SPOON from the shelf. Use the SPOON to dig in the flower pot and find a TINY KEY.
Click on the picture hanging on the wall until it falls down and reveals tiny door. Use the TINY KEY to open it.
Get 3 COINS.
The last COIN is hiding on the windowsill. Get it and win!
Congratulations! Happy monkey dance!
Posted by: elle |
May 9, 2013 3:31 AM
|
May 9, 2013 3:31 AM