

![]()
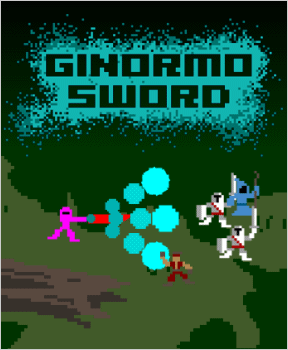 Welcome to my player's walkthrough guide for Babarageo's Ginormo Sword.
In general, this game can be played through using either superior skill, or through just overpowering everything in your path with massive stats. At least, that's the case for about 98% of the game. Whatever path you choose, this game does require an enormous amount of patience, and a finger that can tolerate millions upon millions of mouse clicks for long periods of time.
What I intend to provide in this walkthrough are a series of helpful hints that you can employ to maximize your potential as you take on this game. There are cheats that can be used, and some have apparently used an auto-clicker, however; I "beat the game" using nothing but my work computer, my mouse, and a lot of caffeine.
You can too, and ultimately, I think doing so really adds to the sense of accomplishment.
To make this easier for you, I've broken this walkthrough up in sections separated by spoiler codes. Having a problem with a boss? Check out the Boss Section. Want some tips on where the best grinding spots are? See the section on Grinding.
I have shied away from dropping stats for specific challenges in the game, though. This is because each player is different, and thus everyone's going to have differing stats at different points in the game. While killing monsters and filling your library is a large part of the game, so is growing your character, and choosing what level your sword is before you take on a certain boss is something I think is best left up to you.
Equipment
Swords
There are a total of six available swords in the game. One you start off with, one you can buy in the first screen, three available for purchase on the fifth screen, and one that you can only get by winning a special fight later in the game.
Dagger-Your starting weapon. This rinky dinky level one starter doesn't appear to be much, but hey, it's free, so who are you to complain? Even better, like any other sword in the game, it too can be upgraded to maximum potential.
Katana-At 250 gold, this level 2, +1 Fire blade is an absolute steal.
Claymore-One of three swords available on the fifth screen for purchase. Price tag- 100,000 gold. Starts off at level one.
Scimitar- The second sword you can buy on the fifth screen for 100,000 gold. Has a curvature to it that has to be compensated for early in development, but you won't have to worry about it much later on.
Zweihander- A big old rectangle also for purchase on the fifth screen for the same 100,000 gold. Thanks to its shape, it's probably the best buy, though, like its two predecessors, it also starts at level one.
Energy Sword- This sword looks like a lightning bolt when you first get it, and though it starts off as a level one weapon, it also seems a little longer than the rest of its mates. You can't buy this sword, you must get it by defeating the Doppelganger which exists in the pyramid called the "Temple of the Moon" on the Poseidon level.
About swords-Frugality is the key to a successful existence in the Ginormo world. To be perfectly honest, you do not need all of the swords, and when you first come across them, 100,000 gold is a lot of money that could be better spent elsewhere. You will want to buy the Katana, and I bought the Zweihander primarily because of its shape meaning that no correction for contour was ever necessary. Later on, I would use the Energy sword after I got it for one purpose and one purpose only.
Multiple swords is handy, though, for elemental enchantments. While six elemental enchantments are available in the game, only four are absolutely necessary. Those four are composed of opposing elements (which goes without saying I suppose). So, if you were being exceptionally frugal, you could probably get by in the game with only three swords, doubling up either your fire enchanted or water enchanted sword with the white enchantment as well.
I do not recommend double enchanting the sword with the black enchantment on it.
Armor
Unlike Swords, there are only five types of armor that are attainable. There are six slots, but the sixth slot is used for something else that we will discuss in the "Helpers" section. Again, frugality is the key, especially in the early offing, and while there are five sets of armor available, I only bought one, and you should be able to get adequately by on three.
Leather Armor-This is your starting armor, and only gives you level one protection. I do not recommend putting any money into upgrading this armor for any reason. By the time you can afford to upgrade this armor, your money will be much better spent buying a different type of armor.
Scale Armor-Purchasable at the same place you can buy the three swords on the fifth map, this armor gives you level two protection. Costs 250,000 gold.
Chain Mail-Purchasable at the same place. Level three protection, costs 1,000,000 gold.
Plate Armor-Purchasable at the same place. Offers level four protection, costs 2,000,000 gold. If at all possible, I suggest waiting until you can afford this armor as opposed to buying any of the lower level armors available.
Hyper Armor-Available only by defeating the Golden Knight which is a random spawn. Starts out as a level nine armor, has +9,999 against Fire, but has -9,999 against all other elements making it virtually worthless against all enemies except one which will be discussed later.
Considering how much it costs to buy and upgrade armor, I only bought the Plate Mail, which automatically bumps you up to level four protection, and is all the defense you should need through at least the first three quarters of the game. Since enchanting your armor is not really a big necessity until later in the game, there's really no use in having multiple armor.
However, you will want to eventually get your hands on the hyper armor.
Until you meet and beat Death, it is advised that you enchant your plate armor with Onyx.
Magic
There are six different spells to be learned in this game. Most of these spells can be purchased at the same board, though a different shop, as you purchased your sword and armor.
Again, because frugality is so important (note, this is the third time I've mentioned this) you should avoid buying all the spells in the game, and instead using only what you need.
Magic Missile-Your first spell. Two energy bullets are fired and entwine around each other as they travel in a straight path parallel to your sword strike. Can be purchased on the fourth board for relatively cheap. Not exactly a great spell, but it gets the job done and is a mandatory buy. You will not be able to proceed beyond the fourth board without it.
Wide Shot-This, and the next two spells can be attained at the magic academy on the fifth board. It costs 30,000 and fires three bullets in a spread pattern. For the most part, this spell is worthless, and you should try and do without.
Napalm-For 50,000, you can purchase this spell which I do recommend. It fires four bullets in an opposing diagonal pattern, and if it connects with a target, will spread into four more diagonal shots. Very handy, especially for a cluster of enemies.
Circler spell- For 70,000 you can buy this spell that sends two bullets spinning around your character for a few seconds. In my personal opinion, this spell is worthless and requires you getting within a certain distance of the target. Skip this spell.
Shockwave- Defeating the Abyss Worm in the Sun Temple found on the Necromancer level gets you this spell. It sends out a single shockwave missile. Frankly, I've never used it in battle.
Chaser- Six magic missiles fire out after one of your enemy targets when you cast this costly spell. Found on the eighth board, it costs 100,000,000 gold, but is most definitely worth the price when you can scratch together that much change. It's located in a named city that usually just shows a small group of people dancing around. Randomly, however, those people will be replaced with a shop where the only thing for purchase is the spell.
Accessories
There are six accessories to be had in the game, and most of them can turn out to be VERY handy. Four of them can be purchased where you bought your sword and armor, the final two must be won in battle.
Gauntlet-This little doodad can help prevent carpal tunnel. It does this by extending the amount of time your sword is held in attack mode. Definite must have when you can afford 150,000 gold without putting a strain on your upgrading regimen.
Winger Boot-This footwear makes you faster on the overworld map. Not a necessity in the beginning, but when you are grinding to upgrade, this is going to be a godsend as it greatly reduces the amount of time spent between your favorite grinding grounds and whichever place of upgrading you prefer. Costs 50,000 gold.
Buckler Shield-This supposedly "neutralizes counter damage". As far as I understand, if you are hit while actually attacking, you will take on more damage than normal. At 250,000 gold, this is probably the best investment you can make to your defense in the first half or so of the game.
Coin of Bravery-This prevents you from leaving the field of battle until either all the enemies are dead, or you are dead. It's not necessary, however, can be useful in boss fights by allowing you to hang around on the outer fringes without leaving the game. In my second run through, I did not buy it, so it's up to you. If you can hang with the bosses just fine without worrying about running off the board, don't worry about it. If you can use the extra help, by all means, spend the 5,000 gold.
Trophy-You will be awarded this sparkling beauty when you beat the False God. It serves two purposes. The first is that it turns all the stat shrines into traps that must be negotiated in order to open up the final area in the game, and once that is done, you must MAKE SURE IT IS ACTIVATED TO ACTUALLY LEAVE EARTH! This was my problem during my first run through, and it frustrated me to no end before I dumped my game.
NOTE: There may be a glitch in the game. In my first walkthrough, I beat the shrines multiple times and couldn't use the trophy to leave Earth. I thought I had done something wrong, however; a commenter seems to have come across a similar problem. I'll follow up when I can.
Order of the Star-This is won by beating the Avatar. As far as I can tell, the only thing it does is make the enemies MUCH harder (as in my swords leveled up to the thousands still take multiple hits to kill NEKOS!), and makes them drop much higher amounts of gold. This walkthrough does not cover playing the game with this item equipped.
Jewels
There are six types of jewels in the game. You can take these jewels to the enchanter on the fifth board and he will use them to imbue either your sword or your armor with the element attached to that jewel. For the most part, neither Green nor Yellow will make much difference in the game, though the other four will, throughout various portions, become absolutely vital.
Most of your enchanting will be for your swords, though it is recommended that you enchant your armor with Black until you have beaten Death. Also note that each jewel will increase the elemental enchantment for that element, but decrease the enchantment for the opposite element. Thus, do not use opposing elements on the same sword, or else you're just throwing jewels away.
Ruby-red-Increases fire enchantment, decreases water enchantment.
Aquamarine-blue-Increases water enchantment, decreases fire enchantment.
Emerald-green-Increases wind enchantment, decreases earth enchantment.
Topaz-yellow-Increases earth enchantment, decreases wind enchantment.
Diamond-white-Increases light enchantment, decreases dark enchantment.
Onyx-black-Increases dark enchantment, decreases light enchantment.
For more on elemental enchantments, see stat management and most specifically the boss fights where elemental enchantments tend to play a bigger role.
Helpers
There are three helpers whose services you can purchase for varying prices. The only one I ever really used was Indigo Rogers, but it's up to you to decide if the services offered are worth their price. These helpers will stay with you until they die, you quit the game, or you hire a different helper. Note, they do actually stay with you should you die.
Indigo Roger-This little guy runs back and forth throwing daggers at the enemy. Doesn't do a whole lot of damage, but for only 100 gold, his help may just be the bargain of the century. You can get him at the oasis on the sixth board-the desert level.
In the "secret paradise" of the twelfth level you can hire NIN NIN for 2222 gold. Again a bargain, and a handy little helper for the bosses that really know how to dish it out. This little kitty will cast a green circle that will heal you so long as you are in it.
WAN WAN-After you have beaten the False God you can find WAN WAN hanging out back on the very first board. But you can't hire him yet. WAN WAN will only enter your employ if you can bring him a yummy bone. The only way to get a yummy bone is by beating one of the Hellhound incarnations that pop up after beating the False God. Once hired, WAN WAN will run back and forth much like Indigo and NIN, but instead he shoots out a powerful beam that is analogous to the size of your sword. In other words, he essentially emulates the hellhound main attack.
STATS
Player stats
The first way to upgrade you character is by doing so at a shrine. Later in the game, when you come across the Trent family of mobs, and Yggdrasil the boss, they will drop fruit which add +1 to one of your stats based upon color.
Your first level increase at each shrine will cost you 10,000 gold, and goes up by 10,000 gold each level.
On the second board you will find the Strength Shrine, which allows you to boost up your player's strength (attack power) by 1 point.
The sixth board provides you with the endurance shrine which increases your vitality or hit points. Since you use a visual gage without numbers, increasing your hit points is no different than increasing your armor. While I don't recommend pumping up your player stats early, endurance can be the one exception seeing as how it is far cheaper to increase your vitality than it is to increase your armor level.
The ninth board is the location of the knowledge shrine which increases your intelligence level. Increasing your intelligence increases how powerful your magic is when it hits an enemy.
The twelfth board is home of the shrine of fate where you can increase your luck. Luck isn't going to help you in battle, but it will increase the likelihood of jewels being dropped, better gold totals being dropped, and I think higher level mobs appearing which will be good for filling your library, and grinding later on.
Weapon Stats
You will upgrade your weapon early and often in this game, and thus, the blacksmith on the third board will be one of the most frequent stops for you. The first level increase of your weapon costs only a grand, and goes up by a thousand each level. This makes upgrading your sword more economical than upgrading your strength.
On top of this, each upgrade gives you a bonus point that can be used to increase your sword's width or length.
Armor Stats
Upgrading your armor is a relatively minor part of the game. Like your swords, you can enchant your armor with any of the six gems available, making it better able to defend against that elemental attack, while at the same time making it more susceptible to attacks from the opposing element.
Also, you can upgrade your armor's level at a blacksmith found on the eighth board. Unlike your sword which is one of the cheapest upgrades in the game, your armor is among the most expensive with an upgrade from level 1 to level 2 costing you a million gold. Each successive level will cost you an extra million on top of that.
Happily, the highest level any set of armor can reach is only level 9.
Stat Management
This is one of the most vital aspects of the game, and effective stat management can cut the amount of time spent grinding and burning through the game by a great amount.
For the first three quarters of the game, your primary method of upgrading your character should be by leveling up your sword, no questions asked. Leveling up your sword is the cheapest method of upgrading available. For a frame of reference, I went through the first ten boards without upgrading a thing other than my sword.
How should one upgrade the sword and when?
For one, until you reach level 9, your Katana will be your chief weapon. As long as you continue to pump points into it you won't need another weapon until you reach Efreet on Level 9 that can only be damaged by a weapon with a water charge on it. So pump up that Katana as much as you can until then.
As for size, I tended to focus on length first; this allows you to be on the opposite side of a screen compared to the enemies your fighting-think of it kind of like turning your sword into a gun. Once you get a sword that reaches all the way across the screen or at least close, then start focusing on width, which allow you to go after enemies above and below you.
Also, you should designate from moment one which sword will carry which enchantments, and when you get a chance infuse your sword with plenty of jewels. Many monsters with elemental weaknesses can be taken out much quicker with a heavily enchanted weapon than they can with a heavily leveled up weapon.
Thus, focus on the Katana first, as it will be handy to use against Poseidon, and already starts out with an enchantment and a level of two. When it comes time to fight the Efreet, that's when I started working on building up my dagger for the fight. Lots of Aquamarines (get these by farming or camping Poseidon), and lots of levels will turn a very tough boss into a quick work. Once Efreet is good and dealt with, you'll want to switch back to your Katana because there are still two bosses to deal with that are weak against fire.
It's at this point that you should buy your third sword and start working on charging it with White as well to help you out with the Necromancer on the eleventh level, and Death on the fifteenth. By the time I got to Death, my white sword (the zweihander) became my stock grinding sword. Somewhere along the way you will face the Doppelganger, and gain the energy sword. This sword I infused with black, early and often. You will need that for the Avatar.
Eventually you will want to start pumping up your player stats, and here's a general guide when to start doing what.
Strength-I didn't start working on strength until it got to the point where Strength would be cheaper to pump up than my sword. This I didn't do until I had gotten to the last four boards, at the very earliest.
Endurance-Armor is expensive to level up, so, until picking up a couple of million only took me a little bit of time, I pumped up my endurance and saved upgrading my armor for later.
Eventually you do want to max out your armor (the highest level you can get is only nine, meaning that if you followed my advice, you will only have to pay about 30 million to max it out), but until you even get there, just focus on your endurance. A good rule of thumb here is if you can damage a boss pretty easily, but he or she is killing you too quickly to finish the bout, go ahead and work on your endurance until you can survive long enough to kill him.
Intelligence-Magic really doesn't become much of an issue until about level 11, the Necromancer level. There you will find two battle areas containing monsters that can only be affected by magic, and the Necromancer himself summons these mobs as well as skeletons, zombies, and mummies. When you get to level 11 is the time to start pumping up your INT to make these battles easier.
Luck-Luck I leave to your discretion, but in general you shouldn't need to worry about this until you get to late in the game grinding. Leave luck alone until you have at a minimum uncovered the fourteenth board.
As for jewels, I'll repeat one more time. Only infuse your plate armor with black, this is primarily for the Death battle which involves some pretty heavy dark attacks that can be tricky to dodge. Outside of that, as mentioned above, put your jewels in your swords. Yellow and Green don't matter much, but the other four are important. Remember, black in your energy sword after you've beaten the reaper to help you out with the Avatar. Rubies go in your Katana to help with the Lizard Assassin, and the Ice Queen. Aquamarine in your dagger to help with Efreet and the Great Dragon, and Dragon family, and White to help with Death and the Necromancer should go in the one sword you buy from the fifth level sword shop.
Finally, when it comes to stat management, you know your playing style the best, and what you need the most. In my first run, I was pretty clumsy against a lot of the bosses and attacks, however, in my second run, I was far more adept at maneuvering and fighting, and thus was able to fight more accurately. As a result, in my first run, it was smarter for me to spend money on defense, but in my second run, offensive spending tended to be the smarter bet.
The key to good stat management is assessing what your weaknesses are, and building your character to compensate. Also, it's a matter of how patient you are as well. If you don't mind sitting for hours on end clicking away, then you may not want to pump up your sword, but instead go after your endurance and armor, so that you don't have to worry so much about dodging attacks.
Oh, and one more thing. At some point you will be well stacked in everything. At that point I just put myself on a rotation, trying to keep in mind the enemies I had left to defeat. For further guidance, see the monster and boss sections below.
GRINDING
Just in case some may not know what I'm talking about; Grinding is simply killing a bunch of regular monsters or mobs, for the sole intent of building up money so you can build up your levels. This instead of fighting to beat a boss or clear an area so you can proceed.
If you are skillful and careful, you'll make it through the first bit of the game without too much grinding. A lot of this is simply playing through the game and getting a feel for what's coming next and focusing our efforts to dealing with it. For this reason, I was much more successful in my second run than in my first.
Still, there are some basic tips that even the most uninitiated can benefit from, which I provide below.
-Grind for a goal. When you set about grinding, know what you are grinding for. Do you want to throw a million gold into your sword? How about Ten mill in your INT? When you set about grinding, there should be a specific reason, and a methodology about going about it. That way you can, at least for the first three quarters of the game, keep things moving along.
For instance, you've finally come to board eleven, but you have virtually nothing in your INT. Now's a good time to start grinding for your Intelligence considering that many of the mobs you see will only be hurt by magic. Set yourself a goal, say 100 INT points, figure out how much that is going to cost, and then go after it.
-Stay away from hard mobs. This is tempting because the longer you spend fighting a monster, often times, especially at lower levels, they'll drop more money. The temptation gets even worse once you open up your library because filling your library is definitely one of the driving points of the game.
DON'T DO IT! Early on, killing even simple weak monsters will take time, but as you get on a little bit, you'll have the luxury of clearing a room in an instant. This may not necessarily drop as much cash as a monster that takes five minutes to kill, but believe me, more often that not you'll get more money quicker in the long run (and probably reduce your risk of Carpal tunnel by a lot!). The five minutes it takes you to kill a high level high classification mob is five minutes you could have spent in HUNDREDS of fights, some with higher level but lower classification mobs that would yield just as much if not more money.
Even if getting a new monster in the library is tantalizing, I'm not kidding, refrain. A monster that takes you five to ten minutes to kill now, can be a one shot drop later on when you've built up a bit, and this is true for most monsters with the exception of a handful that you'll want to go after later on.
This is ESPECIALLY true once you've beaten Avatar. Avatar drops about a dozen billion gold (along with lots of stat increasing fruit, and jewels), which means that once you've beaten Avatar once, you can make some seriously impressive changes to your stats that will make that seemingly invincible mob a walk in the park later on.
There are high level mobs you'll want to go after, but set yourself a limit now. Do not bother with anything that takes longer than thirty or so seconds (unless you are at the very beginning of the game when most monsters take at least a little bit of time to kill).
-Choose your hunting grounds carefully. There are obviously some places better to farm or camp than others. Ideally, wherever you choose to camp should A)be full of monsters that are easy to kill and B) reap lots and lots of cash. Sometimes, though, you'll want to grind for jewels as opposed to cash, so also having a good working knowledge of what drops what is good too. I have four general tips on where to go.
1) Mixed mob areas. Many of the areas available in this game only yield one kind of monster. For instance, on the first board, the left most area will always yield Nekos, the second skeletons, and the third, orcs. On the second board, however, you will see that the second area (left to right) yields goblins only, the third, Harpies only, but the first yields a variety. Areas such as this provide perhaps the best grounds for grinding, and in fact one of these four suggestions will be about just such a place.
Why are these great for camping? Because they often yield very low end monsters, but keep the gold amount won from killing them relatively on par for that section of the map.
Case in point; an orc killed on the first board will net you about 50-100 gold, but in the mixed mob area on the eighth board (just above the first), the same monster will drop a thousand gold. It's just as easy to kill, but you get far more money for doing so. On the twelfth board (Yggdrasil's level) an Orc Commander, the second level of orc, drops an impressive 80,000 gold or so.
Thus, by confining your killing to these, go after the easy mobs, and if a monster is taking too long to kill, just skip it and come back a second later and take the easy ones again.
2) Old Boss fights: Bosses will be very tough to beat the first time you meet them, but eventually they will become big old pushovers. Still, they tend to drop lots of cash, and lots of jewels, and thus makes some of them very good for grinding. Perhaps one of the first examples of this will be Poseidon on level seven. Poseidon you will have to go back to camp because he drops lots of aquamarines that will make your fight against Efreet much easier.
Likewise, Efreet is also a great boss to camp because he drops lots of cash as well as rubies you can use to pump up your water sword.
3) Frozen Waste "secret" Area on board 14. This area is "secret" because you don't need to beat it to get to the boss. It is located on the white continent just before the water, and is one of the BEST places to camp. Enemies from even the very first board will drop very respectable sums of money.
In fact, until you beat Avatar, once you uncover this area, you'll likely spend more time grinding here than doing anything else anywhere else. Key things to look for here are high level, low powered mobs. That's to say, level 3 and 4 orcs, skeletons, mummies, Harpies, Goblins, etc. A level four orc, Geldra, for instance, shouldn't take but a couple of hits, and will drop HUNDREDS of millions of gold. The Orc Chief (blue orc), likewise should die much faster, and still manages to leave behind upwards of ten to twenty million gold. As you go up in levels, more enemies will be "farmable", that's to say, they die quick enough to make killing them worth the time, and by the time you get to where I beat the Avatar, getting a billion gold will only take you fifteen minutes or so.
-AVATAR. Avatar is the ULTIMATE grind spot. Once you figure out how to beat him, which I'll tell you in the bosses section. After the rather pathetic haul from False God, he better drop some goodies, and boy does he. It takes me only a minute or two to beat the Avatar now, and for my efforts I get about a 11-13 billion gold, plus plenty of fruit and jewels. For any monster that you are trying to get in your library, but just takes too long, you should most definitely wait until you can start farming the Avatar regularly, and your stats should be easily built up to make that one time forty minute fight turn into only a minute or so tussle.
So that's my take on grinding. Of course, change it up some, just to keep things from getting boring. Go on a boss hunt every once in a while, or, if you're really that hurting, go try and track down some monsters you might be missing from your library just for the heck of it, but always remember to grind to a goal, stay away from anything that takes longer than thirty seconds to kill, find the right spot to camp, and, as always, assess the situation to see if it is right for you. For instance, yes, we have a thirty second time limit, but say you come across a level four harpy that might take forty five seconds to a minute. Should you stick with it? Sure, why not, she'll probably drop a whole ton of cash. But try and determine it will only take that long to kill her early on or else you may find yourself committed to a fight that you should have steered clear from.
MONSTERS
Regular Monsters or mobs.
For the most part I'm just going to address these by family. Here's the basic breakdown. With the exception of a few outliers, most monsters are categorized by families. Each family usually has four levels, though a couple have only two levels, and one family has three. Each higher level is typically defined by a color swap (with some extra pixilated flourishes in many cases), and each higher level drops significantly more money than the previous though they are also increasingly more difficult to kill. It should also be mentioned that while higher level monsters are harder to kill, and do more damage, they do not have any other added abilities or attributes. Thus a fourth level goblin, Mabu, will be as fast and shoot the exact same type of missile as the most common first level goblins.
In this monster guide I will tell you how each monster attacks, what gems it drops, and I'll probably add some thoughts on grinding possibilities as well. I'll also give an idea of where each can be found in their native habitat, that's to say, which section of the map has an area dedicated only for that family. So, without any further ado:
Neko Family- These little slimes are found on the very first board, and are incredibly easy to kill. They simply just hop around with smiles on their faces. They are easy to kill, but they also are not exactly known for their cash either, making most Neko's hardly worth the effort as far as grinding is concerned. However, do be sure to kill mithril (bright greenish blue) and platinum (flashing yellow blue), when they arise as they can drop some respectable sums of money for very little effort. Drop diamonds.
Skeleton Family-Another set of pushovers. Most commonly you'll see the white and the red versions, both of which are not worth the kill unless you have to progress. The yellow heroes can drop some good change, and the blue Arthur skeleton should not be missed. Drop black.
Orc Family-Yet another set of creatures that can be first found on the first board. These guys have a lot of hit points compared to the first two, but are still very much pushovers. Drop green gems, and when you see them later on, they tend to be good creatures to farm, keeping up well with more current monsters on cash. Orc Chiefs were for the longest time some of my favorites to farm for cash in the area on level 14. Geldra, the fourth level orc, is simply awesome when it comes to cash. No special attacks to speak of.
Goblin family-Essentially no more than the orc family except these guys shoot little red balls at you. While they do aim for you, the balls only maintain a straight path, making them easy to avoid. Drop green gems, and found on the second board, the red and white (lvl 3 and 4 respectively) goblins are GREAT for farming cash once you've gotten up a little bit in levels.
Harpy family-Early on, for the first four boards or so, these winged ladies can be tough. They take a good amount of hits, and have a slow moving heart that seeks you out. It does no damage, but it does freeze you, leaving you open for attack for a few seconds. Once you've gotten up in levels a bit, though, all four levels are good for grinding, with the Valkyrie (green, third level) proving to be a good source of cash for hardly any work at all. First found on the second board, and drop diamonds.
Troll family- This family is the first of the lumbering slow movers that you're likely to face. They have a lot of hit points, but move slow and have no special attacks. Trolls and Ogres, the first two levels, tend not to be worth it, but the minotaurs and Ettins are great for cash, though the Ettin can take some time to kill. Found on the third board. Drop yellow gems.
Golem family-Note, the SAND golem is not part of this family. This family makes its first appearance on the fourth board, and has even more hit points per level than the troll family. Also, Colossus looks awfully familiar. Not the first time a monster bears a striking resemblance to a comic book character. As far as farming goes, early on just skip these guys, but when you get a little on in levels, they can be a good source of cash and red gems.
Cloud family-Found on the fourth board, these clouds with eyes can only be hurt by magic, and thus are a terrible option for grinding. By the time you get your INT up to where they are easy to kill, they don't drop the cash to be worth it. This is especially true since there are only two levels of clouds, gas and death, and thus they never drop a whole lot of coin. Drop red gems.
Gargoyle family-Very tough and relatively quick moving to boot. Shouldn't be farmed until considerably later in the game when you can take out the first two levels in one hit and the third level in two or three. They shoot fireballs similar to those of the Goblin family, but their speed and toughness make them much more difficult to fight. When clearing their area to progress for the first time, do yourself a favor and try and only attack when you get a set of only one to three goblins. Drop red gems.
NPCs-I hate these guys. You first encounter them on the fifth board, and periodically only see them in their own designated areas throughout the map. They drop TERRIBLE change, yet they manage to go up in levels as you do (the last time I fought some NPCs, they had their levels in the thousands). They consist of a fighter (slow moving, high hit points, no special attacks), thief (slightly faster than the fighter, slightly less hit points), Mage (low hit points, fires a spiraling quad shot similar to the Maze Minotaur's attack. For more description see the Maze Minotaur in the bosses section), Priest (low hit points, slow moving, casts a green circle of healing you can use as well), Ranger (fast, low hit points, shoots red fireballs in straight horizontal line), and the Ninja (fast, shoots ninja stars at you that can kill you with one hit when you first meet him). Kill them once to clear their area, and then never speak of them again.
Sand Golem-No family, and no need worrying about this guy much. He first shows up in the third area, and is very much a pushover. Just like any other old golem, only weaker.
Mimic-Found first on the sixth board. Looks like a bag of gold. Doesn't drop much cash, and doesn't belong to a family. Kill it and move on. Note, you will know it's dead if it comes to you when you get close enough. If it doesn't, it's likely still alive and needs to be killed first. Also, when you do the shrine traps, the fate shrine is not filled with mimics, but we'll talk about that later.
Zombie-These little blue guys I thought first were part of the mummy family because of their location in the library, and they have the same basic shape as mummies. But they aren't. You find them in the sixth area and later in mixed mob areas. Not fast moving, not hard to kill, not really worth farming unless you're going after onyx gems.
Mummy family- The first two aren't so bad. Pharaoh (gold), and Ptolameaus (black), can take a while to kill and shouldn't be farmed until you're decently high in levels. Once you are, though, they can drop some very nice change for your efforts. First found on the sixth board in the pyramid, and drop onyx.
Naga family- Unusually tough family first discovered on the seventh board. These half snake half women can be tough to kill, unless you use fire enchantment that makes them a little easier. No special attack to speak of, but not exactly worth farming either. Drop aqua marines.
Kraken family-Giant octopuses that drop aquamarines and are first found on the seventh board. They shoot whirlpools at you which are a little bigger than the red dots that most creatures fire in this game. Still, both them and their whirlpools are pretty easy to dodge, and a fire enchanted sword (hint: Katana) makes them pretty easy. Drops aquamarines, but not a great camping creature until later levels.
Giant family-cousins of the trolls and golems, these are some tough slow movers. They don't have any special attacks, but the amount of time it takes to kill them make them unworthy to farm. Drop rubies, and are also very resistant to fire attacks. First found on the eighth board.
Wyvern family-Now the mobs are getting tough. These little dragons aren't great for camping, but do drop red gems. They are, for all intents and purposes, a fire based version of the kraken, and a water based sword works well for them. They do shoot the red dots a la Gargoyles.
Lizardmen-Found on the tenth board, these guys don't have special attacks, but killing them is slow going. Use a fire sword, and pick up the aquamarines. I've never particularly liked camping these guys.
Slimes-Another high hitpoint water based creature found on the tenth board. Bermuda drops an absolute TON of cash, but takes forever to kill. Use fire. No special attacks and drops aquamarines.
Will-o'-Wisps-Only damaged by magic, and found on the eleventh board. If you're INT isn't pumped up by now, it needs to be. Because there is only one level to these guys, and they are only hurt by spells, there's just not that much farming potential here, but they do drop onyx. Their special attack is the Maze Minotaur style quad spiral shot, making these little monsters even trickier. The quad spiral is an easy enough attack to dodge when only one is coming at you, but when you have four or five of these guys each launching a quad spiral at once, dodging can quickly become very difficult.
Ghosts-Essentially the same thing as Will-o'-Wisps, only a little harder to kill, and shoots goblin-esque missiles as opposed to the quad spiral.
Werewolf family-Found on the twelfth board, these guys can be tough to kill, but thankfully don't have much in the way of special attacks. Not good for grinding.
Trent Family- The only three member family, these slow movers have an unusual attack in that they form a circle of whirlpools that stays in place. Thus, you should avoid getting too close to these guys. I've mixed feelings on camping Trents in that they tend to be too tough to kill to make grinding worth while, and as a three member family, only the Hamadryads (pink leaves) really drop the cash to make it worth it. On the other hand, they drop fruit, and each fruit is worth a stat point. Once you get up there, that fruit can be worth up to ten million, so I leave it up to you.
Imp-No family to speak of, these guys are very similar to gargoyles only tougher, and drop onyx's instead of rubies. Found on the thirteenth board, these are not a very farmable creature, given their non family status.
Succubus family-Among the hardest regular mobs in the game. These winged ladies have two attacks and a ton of hit points. They also drop a variety of gems, and are difficult when it comes to nailing down a weakness. Their first attack is a lightning bolt a la the eighth level boss (that is, it is a straight line that is aimed at you, and holds for a few seconds. Only shoots in the direction she is facing, but she can change direction a lot, especially if you are attacking her). The second attack is a Harpy heart. Not good for farming given how tough they are.
Vampire family-A tough family, with Methuselah a difficult fourth level to take down. They are weak against light, and travel in packs. They also shoot out a triple grouping of red dots that take practice to avoid. Luckily, that's their only attack. Yield onyx when killed. Not a good monster to camp. First found on the thirteenth board.
Lych family-While these guys are not the hardest mobs in the game (that distinction I believe goes to the Demons), they are probably the hardest mobs you'll see in any mixed mob area. They have a ton of hit points, are questionably weak against light, and have two attacks that can be a major pain. The first is a Succubus style lightning attack, while the second is a bit tricky to describe. First they form a ring of fireballs, and then each fireball comes after you in succession. You have to keep moving when they come after you as each ball adjusts based on your new location. Yields onyx upon dying and first found on the fourteenth board.
Vortex family-Only two members to this terrible sea storm family, they are only harmed by magic making them terrible for camping, but do yield aquamarines. First found on the fourteenth board. They do shoot kraken like whirlpools at you, though by the time you get to them, these should be very easily avoided.
Living Armor family-The last and toughest of the slow lumbering giants. These four armors have very high hit points, and no weaknesses that I discovered. Found on the fourteenth board, your best bet is to clear them, and forget them other than to finish your library. At least, I wish I could tell you this except before you fight Avatar, you must kill the Golden Knight who drops hyper armor. With the living armor area cleared and the hyper armor in hand, you can NOW forget these guys.
Invisible-Another no family class, these mischievous little guys can't be seen unless they are being attacked, and lurk in a single area on the fifteenth board. Bring a big sword, the chaser spell, and dispatch them quickly. No real point in camping them, even if they are pretty easy to kill once you've found them.
Dragon family-When you find their home on the fifteenth board, you'll have already faced the Guardian Dragon on level fourteen. There's many similarities between the 14th boss, and these mobs, but there are some differences. For one, these guys are a little tougher, and Tiamat is one of the hardest mobs in the game (with all my stats in the thousands, it still took me upwards of twenty minutes to kill him). They are marginally weak against water, and drop rubies, but aside from clearing their area and filling your library, there's not much point in farming them. Also, they thankfully do not share the Guardian Dragon's deadliest fill-the-room-with-a-bunch-of-explosions attack. On the other hand, they still have the other two attacks. A broad and deadly beam that lasts for a while in the direction they are facing, and the broad triple shot at a wide angle. The best bet in fighting these guys is attacking from directly above or below, and a little bit behind to steer clear of its attacks. All of its attacks tend to only go in the direction it is facing, so if you stay behind it, you'll be fine.
Demon family-the HARDEST mob in the game. They look and attack much like Efreet, but to date I'm still unsure as to their weakness. I used light, which seemed to do the best, but even then it wasn't that much better than without. They have a TON of hit points, drop diamonds, and have two attacks that can ruin your day. The first is the vampire-esque narrow triple shot. Stay far away, and let some space grow between the bullets and you should be able to dodge. The other is a spiral quad shot that just takes practice to avoid. The best bet is keep reentering their area on the fifteenth board until you only see one gray demon, kill it, and then use the avatar to do some serious leveling up to come back and get the rest for your library. For both these and Tiamat, it may be best to pump up your endurance so that all you really have to do is sit there and click away until they are done.
Bosses
We're almost there. Bosses are the true challenge for a good portion of the game, at least until you get to a point where you are trying to fill out your library. I'm going to try and give the best advice I can for all the bosses, but keep in mind, some bosses it's just a matter of getting some good grinding going on to make them easier. You'll find it funny that some of the bosses will feel like they take forever to beat, but once you've gotten two or three boards down the line, you'll come back to that boss and find it easy as all get out to take down.
Oh well.
Orc Leader-This red color swap is just like the rest of the orcs, only with higher HP. Sometimes drops an emerald. Buy a katana, and use that to whack away at him.
Elvish Ranger- Considering how easy the Orc Leader was, this guy is a huge step up, and a stumbling block for many starting out. He moves fast and shoots out three rapid fire missiles. He only shoots in the direction he is facing, but can change direction pretty rapid. Your best bet is to stay out of his way, and move in just as he finishes a triple shot, whack at him, and back out. To facilitate this, try and stay relatively close but above or below. Keep out of his line of fire, and when he takes a break, go to work.
For many, this can be a frustrating fight, and it's tempting to try and grind your way up and buy a few levels of strength at the shrine. However, I suggest doing this only as a very very last resort. The next screen provides a much better method of upgrading your attack abilities if you can just make it through this fight.
In retrospect, much of the frustration with this guy is likely due to a lack of familiarity with how to move your character around. This is only the second board, and the control in Ginormo Sword can take a lot of getting used to. So stick with it, and keep in mind that the maneuverability that you are forcing yourself to learn here will help you later on in the game.
Maze Minotaur-Not much more than a color swap of the regular minotaur (Not that you've gotten that far yet, but trust me it is), and actually quite a bit weaker than the regular minotaur. Big, lumbering, this guy would be a piece of cake, except there's a catch.
He has a projectile attack.
This comes in the form of those annoying red dots, four to be exact, that move outward in a widening spiral pattern. It's good to get a lot of exposure to this now because you're going to see it a fair amount throughout the rest of this game, so get used to it now.
The best way to deal with the Maze Minotaur is to power up your sword a little bit, and increase its length so that you can give yourself a little space when the attack comes. When it does, watch it, and dodge. These aren't too hard to avoid, it just takes a little practice, and the further away you are, the easier it gets.
Dark Mist-This guy is terribly easy, just keep in mind that your sword can't hurt him. Instead just stay away, and hit him with the magic that you had to get to get past the gas clouds. He does have one special attack; a narrow three missile shotgun style attack. Dodging this is easy so long as you are far away. The further away you are, the large the gap between missiles will be. You better get used to this attack as you'll see it pretty often throughout the rest of the game.
Mutant Cyclops-Not only does this monster look familiar, it has to be dangerously close to copyright infringement. Like the Maze Minotaur, this is a color swap of one of the big lumbering slow creatures, in this case, the Giant family. Likewise, he's just about the same with a catch.
He too has a projectile weapon, and one that you'll come in contact several times later, so it's good to get a grasp on dealing with it now. It starts out with a red circle forming at his eye. After a very short amount of time, that red circle will shoot out a laser that does tons of damage. The trick is, that laser will aim for wherever you were when the red circle first popped up. Also, if he changes the direction he is facing, the laser will also do a mirror flip, thus shooting out at the same angle but on the opposite side of the monster.
If you are remaining still, its easy to gage where the laser will shoot to, and to move accordingly. If, on the other hand, you are moving when the red orb pops up, things can get tricky.
My advice is to, once the orb pops up, keep moving in the same direction. Staying still risks getting hit, and doubling back could move you from safety straight into the blast. Moving in the same direction, on the other hand, should steer you free and clear.
Other than that, when he's not laserfying you, start pounding the heck out of him.
Sand Worm-In the land of deserts and pyramids (actually, just pyramid) this beast blocks your way forward. He moves fast, and while touching any part of him will do damage to you, you can only hurt it by hitting its eye. On top of that, he has a projectile attack that shoots eight red missiles in an opposing octagonal pattern.
This attack's not hard to avoid, and just requires that you stay just a little off center when you are attacking. Depending on how pumped up your sword is, now is a good time to add a little width to it which will let you attack it from a slight angle.
Also, you can hire Indigo Roger to help you too. It's debatable how big of a help he can be, but at only 100 gold, which should be chump change at this point, the price is right.
Not a particularly difficult boss, really.
Poseidon-Up until now, you should have been using your Katana pretty much exclusively, and there's no need to change that now that you face this massive aquatic beast. You're not likely to have come across too many rubies at this point, but whatever Rubies you have found, now would be a good time to put them in your sword if you haven't already.
Also, if you're having a particularly rough time, you may want to consider putting a few points in your endurance, or if you have the patience, grinding enough money to buy plate armor.
Either way, this boss can be tough.
Again, the more fire enchanted and leveled up your sword the better. He's huge, so width isn't important, but length can be a big life saver, allowing you to put more distance between you and it, and thereby giving you more room to dodge his devastating whirlpool attacks.
He launches whirl pools exactly like the Kraken did, only he has two patterns.
The more common pattern is the quadruple spiral shot exactly like the Maze Minotaur's (see, I told you to get your practice on that one while you had the chance). But also, this beast will occasionally send three whirlpools directly your way. Each of these three will track your position, but they don't curve so they can be avoided pretty easily. The trick part is when you got a spiral and a triple shot coming your way at the same time.
The best advice is to stay as far away as possible, which will make dodging easier. Once you've beaten him once, you may want to consider hanging around to farm him for a bit as he drops aquamarines a lot which will come in handy two bosses down the road.
Sorceress-All things considered, she could be one of the hardest bosses in the game in relation to your levels when you get to her. Of course later on in the game she becomes ridiculously easy, but when you first get there she is a nightmare.
She moves slow, but is small, which means you should put some width into your weapon.
But the really killer thing here are her three attacks. Her first attack is to shoot out a slew of whirlpools in a shot gun like pattern. If you're far away, this one is easy to dodge, but if you're too close, that can be difficult.
Her second attack is another that you'll see later and should be practiced now. Just like the Lich, she starts off by forming a ring of red missiles around her, then, one by one she sends one of the after you in rapid succession. These bullets will track your position with each successive missile, but the individual missiles do not swerve to hit, so it's merely a matter of dodging in one direction and not doubling back.
For the best results, the longer you can stay still before moving to avoid, the better, as most of the missiles will hone in on that first spot. In any case, it's good to get a feel for this attack and how to dodge it.
The final attack is her dreaded lightning attack. She aims for you and creates a steady lightning bolt in your direction. Her changing direction will result in a mirror flip of the beam, and repeated hits will result in her changing directions a lot.
When you first meet her, this will likely kill you in one direct hit, so it's best to keep moving without doubling back. The one nice thing is that she never uses this attack twice in a row, so when she's done with it, move in for the kill until one of the other, easier to dodge attacks come.
If you simply CAN'T avoid the lightning bolt, try pumping up either your armor (it's upgradeable here), or, cheaper, picking up some points in the Endurance Shrine.
Efreet-This is another boss that tends to really trip a lot of people up, that's because this is the first boss that you must have the opposing enchantment on your sword in order to harm him. Up until now, you've probably been focusing solely on your Katana, which is fine, but now it's time to show your dagger some love too.
Now is the time to start camping Poseidon. Alternately, you could go back and camp the krakens, however at this point your luck is going to be so low that they are not likely to drop enough gems to make it worth it. At this point, you are camping to build up your dagger, so at least temporarily stop building up your katana.
I don't like posting stats for when to face certain monsters, that's truly up to the player, but putting over a hundred aquamarine into your dagger should make Efreet pretty easy. You're also going to want to put some length on your now water enchanted dagger to make it easier to dodge Efreet's fire attacks.
He can definitely make it feel like it's raining fire, employing the Maze Minotaur quad spiral attack, and also shooting a narrow shotgun like three shot at you. It can be frustrating at first, but take the time to get used to dodging them as these are very common attacks that you'll see again. As always, keep your distance to make dodging the attacks easier, and hit him from afar with your water enchanted dagger, and this chump will drop in no time.
Lizard Assassin-And once you've killed Efreet once, why not just go ahead and kill him again and again. This because the very next boss, the LIZARD ASSASSIN, is a very tough boss that simple camping can turn very easy.
He's water based, so we know we want to use a fire based katana. He's fast, which means we want to add width to our sword, but he shoots projectiles, which means length as well. And this should be about the mindset when you grind to prepare yourself for a duel with the Lizard Assassin. Also, if you're still not feeling totally comfortable controlling your guy, now might be a good time to get the coin of bravery.
The big thing with the Lizard Assassin is the copies of himself that he throws up on screen, with only one being the real one. From what I've been able to observe, the newest copy is the real one until you hit it, which usually spawns a new copy which is itself now the real one. That's how it generally works.
So here's how you want to approach this fight. Bring a sword that is charged high with rubies, this shouldn't be a problem considering that at this point the Efreet should be a simple ten second fight that yields both rubies and money like crazy. Stay on the edges. If you try and leap into the middle of the fray, the Assassin will only start surrounding you and confusing you. Keep everything to one side of you.
Dodge the ninja stars, and simply move up and down, swinging at whichever assassin you think is the real deal. As I said, it should be the newest copy, but that can be a pain to keep track of as well. Stay to the side, attack from afar, and keep your head, and you should win the day.
Necromancer-Curious thing about the Necromancer is that he himself doesn't actually hurt you. He does have a slow moving projectile weapon that is this big dark moving string of black and blue circles, but as far as I can tell, all they do is push you off the screen. These are very easy to avoid, but in case you are having trouble, a coin of bravery should negate their effect. What makes this guy a challenge is that he spawns hordes of undead. Nothing to worry about if he sticks to skeletons and zombies, but he usually also enlists the help of Ghosts and Will-o'-Wisps as well, which throw some missiles into the mix.
This fight is all about preparation. There's no real methodology to beating the Necromancer beyond stick and move style tactics once you're in the arena, but what you do outside the arena can make a MAJOR difference.
First, Napalm is key. You should do what you can to pick up the Napalm spell by now. This shouldn't be a problem considering that at this point the 50,000 price tag should be a pittance.
Second, pump your INT up by visiting the knowledge shrine. This is something you've likely already done considering the enemies that you had to get through just to get to the Necromancer fight.
Third, put diamonds in your sword. You probably don't have a lot of diamonds at this point, but you should have at least managed to pick up a couple. The Necro is weak against light, and thus a light enchanted sword should make this battle significantly easier. This does pose a potential problem, buy a new sword, or dual enchant a single sword. I can't vouch for the latter, but in either case you better get SOME sword working on white, this is not the last time you'll need it.
Once you have these three things (and of course, the bigger your sword the better), this fight should be pretty easy. Let your magic take care of the Necromancer's pets, focus your sword strike's on the boss himself, and keep your eyes open and your little dude dodging and you should make it out pretty fine.
Yggdrasil-Easily one of my least favorite bosses. I've even tried using elemental attacks on her, and nothing. This boss is all about some solid grinding and stat inflation, and good old fashioned skill.
This giant walking tree moves slow, which is good, and is big, which is also good as it makes her easy to hit. But she has three attacks that are each pretty damaging and tricky to avoid.
First, if you're having issues dodging Ygg's attacks, you may want to start investing in upgrading your armor or your endurance. Not too much, but enough to let you survive.
Second, NIN NIN is available for the cheap price of 2222 gold. It may well be worth the price to bring the cat along. These two things combined should help you survive Yggdrasil's attacks.
Which is the name of this game. Yggdrasil is a battle of endurance for the most part, and I suggest you use whichever sword is strongest at the time. If you are willing to grind to improve a sword, any of the three enchanted swords you should have by now (fire, water, and light), should work just fine considering you will need each sword in at least one boss battle after Ygg.
And then it's just a matter of being able to anticipate Ygg's attacks.
The first attack is a narrow triple shot of lightning bolts. You should be at least moderately familiar with this pattern by now , and capable of dodging it.
The second attack is really the tough one since it happens so fast. This is a straight up vertical bolt of lightning that extends the length of the battlefield. Yggdrasil particularly likes to drop these just as she's trying to hit you with the three-shot. If you're not paying attention to the top of the screen these things can be next to impossible to dodge, and will get you every time. But while they are fast, they are not instantaneous, and so as long as you keep one eye at the top of the playing field, you should be able to see when this attack is coming. Move just a hair out of its way, and keep on going. Be careful, though, Ygg likes to throw a second one your way very shortly after, so stay alert.
The final attack is that Yggdrasil will drop a bunch of apples on the ground. Do not touch them, they will explode if you do. In fact, do not go near them because they will explode eventually even if you don't touch them. Just steer clear, and let them do their thing.
The key to beating Yggdrasil is grinding, and serenity. She has a lot of attacks, but they don't take a lot of movement to dodge. Instead they require precision. Precise movements of the mouse will allow you to minimize movement, and thusly minimize dead time between your assaults against her. Depending on your stats, this battle can be long and grueling, or relatively quick and painless.
Snow Queen: She's actually a pretty easy boss once you get to know her. Also, this is probably the last time you'll need your fire enchanted Katana, so when grinding for this fight, take care to not over do it. Get your katana up in level and rubies enough to beat her, but anything beyond that is kind of a waste of time.
Okay, so there's your first big hint against the Snow Queen, she's weak against fire. Beyond that, it's just a matter of avoiding her three attacks, two of which you have seen before, and the third being something new.
Her primary method of attack is the shiny new attack on the scene, and one that can seem overwhelming at first. The Queen sprouts little icicles like a porcupine, and then shoots them in all directions like javelins. Because there are so many, this may seem impossible at first, but the little spines that first pop up telegraph where the javelins will go making them easy to avoid. Just keep your eyes on where they are pointing, and don't be there when the javelins arrive.
The second attack is the Mutant Cyclops laser. You should have little to no problems dodging this.
And finally there's that Harpy Heart freezing attack again. Unless your endurance and armor are way pumped, and you can withstand a barrage of lasers and javelins, do try and avoid these as much as possible.
As always, the bigger the sword, the better. She is pretty slow moving, so the best plan is to focus on the length of your sword, and keep her on the other side of the screen so that it's easier for you to dodge her projectile attacks.
Guardian Dragon-Okay, this could be a pretty intimidating looking boss. The biggest boss you've seen thus far, and this guy actually has SHADING, something of a first so far in the game. On your side, by beating the Snow Queen, you've also opened up the best grinding spot in the game!
The Guardian Dragon is also a sucker for a water enchanted sword. Now, with the best grinding spot in the game opened up I leave the upgrading of your character up to you. But while I'll leave it up to you to decide what you need to take this guy down stat wise, we can talk about his three attacks that you'll need to watch out for.
The first is this huge stream of flame that launches out horizontally in the direction he is facing. The second is a wide triple shot not unlike the wide shot spell available to you. The third is similar to the spiral shot that we see in the Maze Minotaur and Poseidon fights, however the missile is much wider, and it leaves explosions in its wake making this a very difficult attack to dodge.
Aside from this last attack, the other two attacks are pretty simple to dodge. One of the biggest things to keep in mind is that the first two attacks only go out in the direction that he's facing. Thus, as long as you stay behind him, you should be fine. This may not always be possible, but do the best you can. Also, you can generally get a feel for the angles that are developed in his attacks, and can mount a more face to face attack.
As for that third attack, your best bet is to stay far away and try to anticipate where the safe spots are.
But you should be good so long as you keep up the press with your water based sword and dodge his attacks. In truth, this is not a very tough boss to beat.
Death-This, on the other hand, can be a VERY tough boss. First and foremost, you want to definitely put some dark enchantments on your armor, this will help withstand Death's deadly attacks.
Death has two attacks, and both are very tricky to avoid. First he flings a storm of scythe like blades at you. These are huge, about the same size as the Guardian Dragon's projectiles. They do not chase you, happily, so aside from getting out of the way of something big, dodging them is not too hard. Unfortunately, they travel in a curved pattern that does take some getting used to.
What is hard is dodging Death's little black streamers which do hunt you down. The best bet here is to cut perpendicularly to their path which will create an angle too difficult for them to keep up with.
Death himself acts as a third attack. He's not particularly fast, but faster than a lot of the bosses you meet in the game, and he's very big, making him difficult to get out of the way of if you let him get too close.
On top of that, he "phases out", or in other words, there are brief periods where you simply can't do damage to him.
So how do we beat this guy?
Grinding up your stats is key. You'll want plenty of INT because you're going to be doing a lot of dodging, and good intelligence will allow your chaser spell to keep the heat on this guy even when you're running away (you do have the chaser, right? If not, I recommend not getting into this fight without it). You'll want some strength because at this point putting some money in your strength may be as economical if not more than putting it into your sword. You'll want to beef up your endurance so that dodging the attacks aren't as important, and you'll definitely want to keep putting white gems and money into your sword.
If your sword isn't taking up the whole screen at this point, you are screwing up.
Now, diamonds and onyxes can be very helpful. For onyxes, and you're going to want a lot for when you face the Avatar anyway, can best be farmed from the Necromancer on level 11. He should be a one hit kill with your white sword by now, and even if he isn't, he spawns a bunch of other dark creatures that also drop onyxes, so the more the merrier. Until you beat Death, put the onyxes on your plate armor.
Diamonds are trickier, and you may want to put some money into luck before you start farming them. This will increase the likelihood of diamond dropping creatures to actually drop diamonds. With luck on your side, you have three choices on where you can go to farm diamonds. You can pick the very first Harpy area on level 2, or you can camp the Snow Queen boss on level thirteen, or you can just go back to the secret area on Level 14 and camp for them there.
My preference is level 14 because you can get white gems, black gems, and money all in one spot.
These you put into your white sword, of course.
With your stats and enchantments suitably high, Death should be pretty easy. Staying as far away as you possibly can to make avoiding his attacks easier, and just click away. When he phases out, use that time to focus on dodging but sending chaser spells his way as an early warning as to when you can start hitting him again.
Good luck.
False God-You may think this is the last boss, but you'd be wrong. He's still a very difficult boss that requires a lot of grinding. I'm also not sure as to his elemental weaknesses, but I used my white sword to beat him.
Just like Death, you're going to want to grind up your stats heavily before even stepping into the ring with him. Especially beef up your armor/endurance as his attacks are pretty crazy and will keep you moving.
And that is the key to beating the False God, coping with his attacks. Sure you want to beef up your offenses in order to shorten this battle, but primarily you are going to want to shore up your defense, and get a good feel for how to dodge and avoid his attacks. Once you have this aspect down, you should be able to make quick work of the False God.
His first attack is a wall of flame that he shoots out in the direction he is facing. It reaches pretty decently high above his head, but stops at his feet. Thus, generally, the best position to fight False God from is underneath and a little bit behind him.
Do not let this attack catch you. Most the rest of the attacks you face from him you can probably survive a few hits from, but unless you are majorly stacked, you're not going to survive a full frontal attack of the flame wall.
His next two attacks are essentially the same, they just come from different hands, and come in different colors. These are Red and Blue Mutant Cyclops lasers, and you should be well experienced at dodging them. Just be careful because he can stack these one on top of the other, and pin you down; making you dodge the first, and then slamming you with the second.
Next up he has the spiral quad exploding shot that the Guardian Dragon has. You've either learned how to cope with this attack, or you've beefed up your defenses to withstand it.
Finally (yes, he has one more attack), there is the lightning shot, and it can be a killer. This shot of lightning starts from the False God and actually curves in order to try and catch you.
Your best bet here is a hard perpendicular turn away from it at the last moment.
That brings the final total of attacks to four or five (depending on if you want to count the lasers separately or not), which means that any one attack can lead you dodging straight into another attack.
Remember, the chief attack to avoid is the firewall. The rest of the attacks, simply do your best to avoid, and if your stats are high enough, you should live long enough to kill him before he kills you.
When you kill him, you get a surprisingly pathetic amount of money, and a trophy which we'll talk about when we get to the Avatar fight.
Hellhound family-I've debated on whether to count this as a regular mob or a boss. It shows up as a boss fight on the map, but like other mobs, there are four variations of this monster, and it takes a little more thought and strategy to take this guy down compared to other mobs.
Thus we've opted to put this family in the Boss section.
He doesn't look like much, some weird hybrid between a pig and a dog, and if you beat him, he will drop a yummy bone that you can use to hire WAN WAN (actually, for beating hellhound, all you get is a yummy bone, orthos drops a yummy bone and a 100 million gold, and cerebus and Anubis drop multiple yummy bones with huge amounts of cash). But beating him can be a chore if you don't know what you are doing.
The Hellhound has three attacks and all of them hit very, very hard. For a frame of reference, even with my armor at level 9, and my vitality in the 1600's, just six to eight missiles from this guy will put me down.
The first two are pretty simple, and you should be so well versed at dodging them that they shouldn't be a problem. The first is the Maze Minotaur style spiral shot. No explosions, no whirlpools, just the basic four red dots spinning out over the screen.
His second is the gargoyle style missile.
Now, these are just as easy to dodge as the same attacks as those used by the lower level monsters, but they hit MUCH MUCH HARDER, so don't think you are going to get away with just taking them. When I first reached the hellhound, these missiles could put me down in one hit, two if I was real lucky.
It's the Hell Hound's third attack that is the real beast in this fight, and takes some real strategy to get around.
Whenever you swing your sword, the Hell Hound unleashes a mighty laser in the direction it is facing. This laser will kill you in one hit if you aren't extremely stacked on your stats, and its width is directly proportional to the width of your sword. Thus, if you have this huge thing that takes up the whole screen, chances are the first time you swing it, you are going to die.
So how do we beat the hellhound? This is a very simple fight.
Shrink your sword down to its minimum size.
Pump your intelligence up massively.
Make sure you are using the chaser spell.
Stay as far away from him as you can and kill him with magic only.
As I've said, this guy's other two attacks should be like second nature to avoid, so moving over to magic only essentially mitigates his most powerful weapon. Note, however; that even if you shrink your sword all the way down, his laser still reaches across the screen. It also forms a kind of ring at the outset that reaches all the way up and down the screen. So you never want to be directly to the left, or right of the hellhound, nor directly above or below.
Stay out of these rather narrow regions, and you can hit him with the chaser spell with hardly any resistance, and he'll be dead before you know it. This leaves you your yummy bone and just one other boss to beat.
AVATAR!-Before you get to the Avatar, you first have to beat all the bosses, and be awarded the trophy from the False God.
With the trophy in hand, you need to make sure that it is activated by going to your little home base and ensure it is turned on. This turns all the shrines into traps. I will discuss beating these shrine traps in the final section of this walkthrough (see below). Once they are beaten, you must make sure that the trophy is activated (it describes itself as a key to other worlds), and once it is activated, you can walk right off the overworld map.
There you will see the planet and the moon, walk over to the moon and click on it, and this puts you into the fight with the Avatar.
And the Avatar will completely and totally pwn you.
This because nothing you do will hurt it, while it proceeds to launch just about every attack ever encountered in this game upon you all at once.
Pretty much what you would expect from the final boss of the game, but there is a way to turn this fight from impossible into an incredibly easy tussle that will end in just a couple of minutes.
First thing, you need the right armor. While the Hyper Armor is worthless 99 percent of the time, when you wear it against the Avatar, all of his attacks become worthless. They barely hit you.
Getting the Hyper Armor is a major pain though because it is only dropped by the Golden Knight, which is the fourth level member of the Living Armor family. The Golden Knight also has a metric ton of hit points. So before you even think about killing the Avatar, hunt down the Golden Knight. You can either do so by camping out the Living Armor area in level 14, or you can camp the secret area on level 14. He's very rare, so either choice will still likely result in quite a bit of time entering and exiting, so you may want to use the secret area so you can both hunt for the Golden Knight, and pick up some cash and onyxes while you're at it.
Once you've beaten the Golden Knight, you now need another sword. I used the energy sword which is received from beating the Doppelganger in the Temple of the Moon on the seventh level. But that's because I beat the Doppelganger much earlier than facing the Avatar, and I'm cheap and didn't feel like buying another sword.
You can probably get away with just buying another sword; by this point they are dirt cheep compared to what you can earn from grinding, but I leave it up to you. The energy sword worked rather well for me.
This final sword needs to be pumped as full of Onyx as you can. Camping out the Necromancer is a great way to continue to infuse this sword with Dark Enchantments. I wouldn't worry over much on the sword's level, though. This because I have not noticed much of a difference in doing so. Adding onyxes has a definite noticeable effect, but when it comes to the sword level, I wouldn't spend more than enough money needed to make this sword big enough to encompass the whole screen.
You can also increase your endurance, but you shouldn't need to. The Avatar appears to be an equipment based fight.
With Hyper Armor and a highly enchanted black sword, the Avatar becomes a piece of cake. You don't even have to try and dodge his attacks (I do dodge the harpy hearts though, just because I don't like wasting the time not being able to attack). All you have to do is click for a couple of minutes, and you will be rewarded with a screen full of money, jewels, fruit, and on your first go, a flashing star.
This star is your final accessory, and unless you are seriously masochistic, I suggest turning it off the moment you get back to Earth.
Other than that, congratulations. Use your billions of gold to pump up whatever stats you need, and at this point the only thing left for you to do should be to finish out your library!
Pyramid Fights
You'll come across two pyramids, one on the seventh level where you meet Poseidon, and one on the eleventh where you meet the Necromancer. Initially, they will be inaccessible, appearing to be no more than merely scenery. However at some point (I'm not exactly sure), they may be enterable with the northern pyramid being the Temple of the Sun, and the southern being the Temple of the Moon.
The Sun Temple fight yields the shockwave spell the first time you beat it, and each successive victory here will net larger and larger sums of cash. Likewise, the Moon Temple fight yields the energy sword first, and then larger sums of cash.
Neither item is absolutely necessary to beat the game, however the monster fights are required to fill out your library, so let's get it done.
Temple of the Moon-Doppelganger-Energy Sword
This guy looks just like you. His sword's even as big and powerful as yours, only with the opposing elemental enchantment. Unlike you, though, his only attack is the sword, which gives us the key on how to beat him.
Just like the fight with the hellhound, the best way to beat this wannabe is to shrink down your sword to minimum size, pump up your INT, and kill him using nothing but napalm or chaser spells. It'll take a while unless your INT is very high, but it beats dying an awful lot, doesn't it?
With magic proving to be the master here, claim your energy sword and be on your way. You can come back to pick up bigger sums of cash, but I've noticed that each time you beat the Doppelganger he gets a little bit stronger, thus making this not an ideal to camp for cash.
Temple of the Sun-Abyss Worm-Shockwave
This looks like a black color swap of the sand worm, and for all intents and purposes, this is very similar to the sand worm fight only this guy's attack is a little different, and it's much much harder to kill.
Luckily, your sword should be so big that you can, um, compensate.
I used a white sword on this enemy, and that seemed to work just fine. It's still a long battle, but that's no big deal. With a sword that takes up the whole screen, you really don't have to be overly concerned with its movements, just it's attack.
That attack is very similar to Yggdrasil's triple lightning bolt attack, and if you stay suitably far away, it's a cinch to avoid.
Again, not a hard battle, but a long one based on the creature's hp.
SHRINE TESTS
There's only really one reason to go through all four shrine tests, and it's NOT for the money. Of the four shrines, successfully completing only three of them will yield a single bag worth 100 gold. The other one yields nothing.
No, the only reason anyone would put themselves through these tests is to unlock the Avatar.
In order to activate the Shrine Tests, you must beat the False God, and take the trophy. With trophy in hand, the shrines will no longer offer a place to increase your stats, but instead the tests that will be detailed individually below. Don't worry, you can turn the trophy off if you want to increase your stats, and then turn it back on to take on another test or two.
With all four shrines successfully completed, you can now visit the Avatar by making sure that the trophy is activated (I think you have to turn it off and then back on, but I'm not sure. Note: I suspect there may be a glitch here. In my first run through, I beat each shrine multiple times and could not leave Earth; on my second time around I had no such problems. I thought I was just being stupid in my first run through, but I've read other players having similar issues, so I'm not sure.).
The Strength Shrine. At first you enter a seemingly empty room, but soon enough you will see a giant wall with a weird flashing eye thingy in the center coming to crush you.
You're goal is to kill this thing.
The big thing to do here, though, is you must deactivate all of your magic when facing this wall. Magical attacks heal it. With your magic turned off, don't even bother waiting for the thing to enter the screen, just keep swinging away until it's dead.
Endurance Shrine-Oh look! A Fairy! This fairy isn't as nice as the one that hangs out in your house, though, as it keeps shooting a barrage of missiles at you.
Your goal? Do nothing. You should be able to survive the assault, and if you can't you need to put more money in your endurance and armor. She will shoot at you for a few minutes, and then just disappear, leaving a 100 gold bag in her wake. Get the bag, and never come back here again.
Knowledge Shrine-Here you're greeted with a bunch of slimes. Killing them reveals that they are "multiple slimes". Killing them also reveals that killing them makes them multiply. In order to beat this test all you have to do is kill the multiple slimes by STEPPING on them instead of slashing at them.
Note: This comes directly from the designer. In order to successfully pass this test you must stomp on at least ten slimes. This trips up a lot of people because only seven or eight slimes spawn in the Knowledge Shrine to begin with. Thus, in order to successfully make it through the Knowledge Shrine, you have to slice a few to make at least ten, then get to stomping.
Shrine of Fate-Of the four shrines, this one can be the most frustrating. You are presented with a room full of money bags. One of those money bags contains 100 gold, the rest contain explosives.
The trick to this is remembering that real gold comes to you, while fake bags stay still no matter how close you get. As a result, carefully navigate your way through the maze of bags until you here the familiar "chink" of you collecting a bag of gold, and then carefully navigate your way out of this room.
Thankfully, the hit detection is pretty forgiving here, and you can navigate your guy through some surprisingly narrow gaps.
And that is just about it.
Everything I can think of to pass on to you to help you through this game. I hope this helps, and I welcome any commentary that can help make this walkthrough even more helpful.
Thanks for using this guide.


Nice walk through, the spoiler tags really helped navigate compared to the original blog that I posted!
I think that Lichs should be added into the family section. I have fought a normal lich, an arch lich, an undead king (also a lich), and a lycurgi (highest lich). I REALLY, STRONGLY think that any type of monster with 4 variations passes as a family.
I have a lot of things to say about this game, don't I? Oh well, here's something else. Apparently, using the Chaser spell in the Shrine of Fate will direct you towards the "real" money bag, because it flies towards the real one.
Be ready for more comments!
I cant get to the avatar :(
I have beaten the false god, the hellhound and all the shrine tests. But i still cant walk of the map...
I havent beaten the golden god, because the only time he appeared my level was WAY too low.
What else am i missing?
Please help me Arkiko, you're my only hope!
Well, I haven't even beaten the False God, but if the golden god was a golden knight, then you'll have to beat that first. Apparently, it drops Hyper Armor (9999 fire -9999 all other), which will turn Avatar's attacks useless. Unfortunately, it is VERY RARE to get the golden knight, but that would be the best investment of time.
Also :
1) Is your trophy turned on? If not, turn it on by clicking on it.
2) Do you have any "pets" with you? Fire them.
3) Apparently, onyxes help your sword for Avatar.
And also, how am I your only hope? I've been feeling invisible these past few days, but now I feel important! Yay!
Yeah Golden god = Golden knight sry :p
I've beaten him now, and i got the Hyper Armor
Just tried beating the shrines again without any pets. Still nothing :(
I was trying to make a StarWars reference :p
oh, I didn't even know this went up. I have a pretty big update to post on this.
For those having a problem getting to the avatar, here's the one major thing I forgot to put in here.
the knowledge shrine test, the one where you have to stomp on slimes, there's a trick that you might not stumble upon, especially if you are getting advice from someone as opposed to getting through the game using serendipity.
You have to kill at least eight multiple slimes. The only problem is that no more than seven or eight originally spawn when you enter the test.
So, make sure that you use your sword to make at least more than ten, and then get to stomping!
Hope that helps.
And, A, I do have the Lychs classified as a family.
hmmm Still no luck :(
i made about 128 slimes before i stomped them and still nothing :(
to get to the avatar you just move your character off the map right?
Thanks, Grimmrook! I didn't see it! LOL I'm dumb. :P
Hippo. Check to make sure you have your trophy activated before trying to walk off the map. If it's not activated, you can't leave the map.
As a last resort, if you are sure that you have done everything you need to and you still can't figure it out, you can email your .sol file to me at (grimmrook (at) casualgameplay (dot) com) and I'll check it out.
Hippo, is your coin of bravery equipped? If so, that might be the problem. I couldn't leave the map either, until I removed the coin.
that golden knight is annoying..it took me forever to kill him...i'm glad he's dead though, i feel the world is better without him
Hey there... I'm having trouble figuring out what the heck is going on with this game AT ALL. There's no text, everytime I go to what I presume is the blacksmith (towards the 'help' sign in the inn), he apparently just eats my brand new katana, it disappears. Is there something I'm missing? Should there be dialogue or something? I'm playing on the developers site.
Also, I have no idea how the heck to view my stats, or really how to do anything at all other than buy swords or fight, since I can't see anything. It's a little frustrating, and any advice would be mucho appreciated.
Hey Harley. I've got to apologize, I meant to respond to you a few days ago, and got caught up with something else.
Now, there may be a flash problem going on, and if that's the case, I'll defer to someone else who may know more what they are talking about.
But I think the first thing that I would have to ask is that you say there is no text, but when you first load the game up, the title screen, is that in Japanese or English?
If you are playing this game directly from Babarageo's page, the default is set to Japanese, and you may be playing the game in Japanese. If this is the case, in the upper right hand corner you will see some Japanese Characters/"English". Click on English, and try loading the game up again. You should have the game load up with an English title screen with all of the requisite text you are lacking.
If this works for you, well, most of the advice I could give would be covered in this walkthrough (hence the reason I wrote it). On occasion, though, there have been some people that have remained stumped despite this walkthrough, and for those folks, I'll answer more specific questions, and even check out your .sol file to see if there's something you're missing that you may not have even thought of.
Hope that helps!
how do you get the hyper armor? and how do you get past all the shrines? please don't make it sound like a show spoiler
Hey, your guide is really helpful and the game is very addicting despite it being a bunch of pixels. I just wanted to know, since I've noticed that some fire monsters GAIN health when I hit them with my 200+ fire katana. Would that mean I would gain health too if, let's say death hits me with a dark attack, but my armor is 200+ darkness?
In my opinion, it is absolutely necessary to get the
Buckler Shield
as early on as possible. Otherwise, some enemies (read; most) will be able to 'counter one-hit' you if you are attacking.
I wouldn't put money on it, but I'm fairly certain that
the Pyramid Challenges open up when you beat Yggdrasil.
Also, for grinding, an easy general rule is that you can easily beat any monster two areas back from where you are. For example, if you're training up to beat the 15th area boss (good luck, you'll need it...), 13th area monsters are a pushover, but still yield enough money to make them worthwhile farming.
In other news, I have no idea where to find some of the level 4 monsters... Can you always find them in the same places that you find the lower levels of their type?
Thanks
POD
Hey POD.
Yeah, pretty much level four monsters can be found in any of the places that their level one counterparts spawn at. If you are just camping them to fill your library, then you want to camp a spot specifically designated for that creature's family as opposed to a mixed mob area; that's just playing the numbers.
Though, if you are trying to fill your library and do some grinding at the same time, I would say stick to the mixed mob areas, particularly the one on board 14.
Also, luck will help you a little bit, but not much in this area as well. The higher your luck, the greater the chance you'll meet higher level mobs.
In general, though, I suggest sticking with mixed mob areas until AFTER you've beaten the avatar for the first time. Once you've gotten avatar out of the way, he becomes your prime source of grinding, and library filling can now be restricted to a more localized search.
Thanks Kyle! You get tons of money from that area. Nekos are worth fifty thousand each, it's ridiculous. Anyways,
after pumping up my stats and my sword I beat Death, meaning I'm now even more stuck for ideas because I'm up against the False God... would the Hyper Armor help against him, or is it an Avatar-specific item? And are there any elements that are useful in this battle?
Thanks,
POD
Hey, POD.
I think you're safe not using spoiler tags here... I mean, this is the walkthrough, so I'm pretty sure that if someone's here, they aren't worried about having something ruined for them.
Anyway, to answer your question, the Hyper Armor is an Avatar specific item. I've yet to come across a single creature in which the hyper armor isn't a disastrously bad choice. Strangely enough, even fire based creatures will pwn you if you are wearing the hyper armor, even though it has maxed out fire defense stats.
Now, for Death. I cover him in the main walkthrough, but I'll see if I can't give you some more advice. What makes Death so hard is that not only does he have some solid stats, but he's also one ofthe most articulate and versatile bosses you have met so far. As a result you're going to be doing a lot of dodging in this fight, and so having your chaser spell pumped up with stats would be a great idea so that you can attack on the run.
Also, you want your armor (not hyper) charged up with as much black as you can get your hands on, and your sword charged with as much white as you can manage.
Another thing, if you are going to be leading with magical attacks, you may want to consider removing your gauntlets as that will allow you to increase the frequency of your attacks.
Tip: to avoid a thousand of clicks when raising weapon level o stats, you can press tab to select the raise weapon level / raise stat button and press (and keep pressed) space bar instead of clicking on it.
Please i need some help
i want to know how to auto click cause im sick of left cliking a million times.
any help would be awsome
Odd. The walkthrough says that the best way to beat the Lizard Assassin is to stay on the side, but...
I find it easier to get kinda-thick-but-mostly-long sword (rubies, of course) and just attack ALL the copies, real or not. This usually ends the fight (first time) within about 10 seconds. O.o
I am so happy I finally beat the Golden Knight. It literally took me an hour
What I'm having trouble is acquiring rubies so that I can up my sword's fire stat and beat Poseidon. But the problem is that I have not seen a single one
What is the library? I'm on the Sorceress' level and I'd just like to know.
how much strength should you have when versing yggdrasil
i was wondering how do you beat the avatar? and i dont know where goldon knight is anybody know?
the two pyramid temples for the quake and the e-sword are not usable even after killing world tree. something wrong or should i be playing the game on this site instead?
nevermind found my answer
have to kill ice queen to get access to the two pyramid temples
Wow! I was playing against the NPCs, and one of them(a fighter, I believe)dropped fruit(apple,strength)! Please add that to your walkthrough!
Yep jiguest2 npc don't drop gems they drop fruit
i have a question:
How many strenght you should have when you are facing the golden knight so it doesnt last 1 hour?
Death drops topas and emerald??
i think that dont fit to him...
for some reason I can't do the pyramid at poseidon. does anyone know why?
Do you get chaser spell from abyss worm? And I found the answer to my last question.
How much strength and stuff should I have when I beat the abyss worm?
where do you get charger spell
I found geldra on the first board
But he doesn't drop very much cash
I was fighting the elven archer with my dagger when i killed him way faster than with katana! (yes, i had only lvl 1 both just killed him now)
You can use a sword against Doppelganger without any problem - you just have to use an asymmetrical sword (I used Dagger). Because of the shape of the Dagger, you can poke him with the triangular area at the tip while you are safely down below his Dagger's hitbox. You do need to move to stay in the safe area, but he's so slow that this is no problem. Useful if your sword is stronger than your magic, and this game isn't called Ginormo Magic for a reason. :)
Please help I can't defeat the False God these are my stats:
Str: 216 Int: 142 Vit: 235
Equipment:
Plate mail, lvl 9, light -21(from beating death)
Dagger, level 950, fire-30, water 30, light 16.
Please help me?
The Shockwave spell doesn't count as a spell against the Great Wall or the Dark Mist, does count as a spell for every other enemy hit only by magic, and while it's hard to be certain, it might not be doing intelligence-based damage.
Hey where can I find my .sol file?
When fighting the Abyss Worm, a white sword didn't help me at all. Only when I swapped it for a yellow/earth one, the worm lost energy.
One of my preferred ways to get money post-Avatar, is activate the star and go to the Frozen Waste. Yea. You won't be able to kill about 85% of anything you find there, but the few very low leveled monsters (Nekos, skeletons, harpies start to take a bit longer, etc) drop millions upon millions of gold. You are able to get a billion if you're decently lucky (even more if you're luckier!) per screen, and seeing as how it takes all but a few seconds, compared to the Avatar fight (which is technically easier, seeing as how its pretty hard to die...), it's a great spot to grind money. Be prepared to die a lot/quit screens a ton.
Im at avatar and still havnt defeated him. what are the minimum stats you need to beat him in at least 10 minutes (i really dont have much free time :P)
if you are wondering my stats are:
STR:287
VIT:337
INT:138
ENERGY SWORD:LVL:2057
DARK:23
HYPER ARMOR:(obvious >_>)
Put it this way, my stats are:
Strength: 4,510
Vitality: 5,152
Intelligence: 5,681
Luck: 2,225
Zweihander Lv20,000 with 1939 Dark Enchant
This generally beats avater in ~20 seconds. I also don't need the hyper armor now as even without avoiding the harpy hearts, he never gets me down to 50% health anyway.
You'll need to farm onyx gems to make it easy for you, and before you can do that effectively you should pump your luck up. Onyxs are best farmed from either the sorceress or necromancer bosses or the mummies in the pyramid on screen 6 (with high enough luck).
I currently am considering trying to farm enough cash to bulk my stats up high enough to defeat the avatar with Order of the Star equipped. So far it seems like it will be impossible as even with the hyper armor he one shots me.
As a little update to the guide (if anyone still plays this), there is a limit on the number of gems you can hold, although it is quite generous - you can hold a maximum of 999 of each. Why this is I'm still trying to figure out.
On a side note, I finally have 100% library complete! Asmodeus (the highest level Demon mob) took a little over 5 minutes to beat. Tentatively, it seems as though Demons are weak to dark, backed up by the fact that they drop diamonds. I'm now gem farming to beef the hyper armour up some more for Avatar on Star mode. I've seen a lot of people say it starts off at +9999 fire protection and -9999 everything else, but this is NOT the case - it actually starts off with +9999 fire, earth and light protection, and -9999 water, wind and dark. I'm thinking a good baseline to go for is +25000 of each protection, but this is going to take a while and still might not be enough.
"If your sword isn't taking up the whole screen at this point, you are screwing up."
XD So true......
@bren / Kyle's Walkthrough
You actually don't need your sword to take up the entire screen to beat Death :P
My stats and strategy when beating Death were
Str: 47
Vit: 47
Int: 47
Luck: 26
Katana Lv. 267
1310 Fire
118 Light
Its length was nearly that of the screen's, and its width was
a little less than 1/3 of the screen (about the size of Death).
Collected rubies from Efreet (Lv. 100, 200 Water sword)
Collected some diamonds from Snow Queen / Harpies / Nekos (Katana)
Plate mail Lv. 9
no enchantments
Cross Napalm (didn't buy the Chaser yet)
It took a few minutes to beat Death. Had NIN NIN in battle,
kept the gauntlet on, and stayed fairly close to Death the
whole time (like fighting the Doppelganger with your sword).
I didn't worry about whether the Cross Napalm hit Death, and
just kept striking with my sword, making sure to dodge Death's
attacks as much as possible and stay in NIN NIN's healing circles
whenever they were cast.
The battle probably would've gone by faster if I raised my
Katana's Light enchantment more, but I didn't want to make
it harder to kill the Snow Queen with my Katana, so I focused
on raising the Fire enchantment first and never got to raising
the Light enchantment more before beating Death.
Tips to beating the Golden Knight quickly the first time:
(especially if you're grinding in the Frozen Waste)
Use a sword that does not have Fire, Earth, or Light enchantments.
If you like using a Fire, Earth, or Light sword,
make sure you have the Chaser equipped, and
boost your INT stat as high as possible.
(I beat the Golden Knight in a little over 30 minutes using magic alone (760 Intelligence). So, having around 6100 Intelligence should take him down in 4 minutes.)
These are my last observations about swords, Golden Knights, and Demons:
At some point, sword level outweighs enchantments.
(Fire sword vs. fire strong monster, sword wins)
6131 Intelligence killed Golden Knight (GK) in about 2 minutes with magic alone.
Later killed GK again (INT 6285 STR 6274) in about 3 minutes with Dark sword.
It'll be impossible (or take forever) to get 6100+ INT before defeating Avatar,
so you just have to persevere the first time.
Didn't do very thorough testing, but it seems Demons are indeed weak to Dark.
With strength and intelligence stats similar to above, using lvl 11073 swords
(one around 2000+ Dark enchanted):
Greater demon
Non-enchanted sword 10 hits
Dark enchanted sword 8 hits
Chaser magic alone 10 hits
Lesser demon
Non-enchanted sword 2 hits
Dark enchanted sword 1 hit
Chaser magic alone 1 hit
Update