

 After a long hiatus, Zack Livestone is back to take us deep within his chalky, imaginative world filled with perplexing puzzles and captivating characters. Enter the stark world of Deep Chalk 4, the latest installment in his Deep Chalk series and arguably the most elaborate and deep experience yet.
As with the previous games in the series, make sure you have either headphones or a good sound system at the ready for your adventure because Zack puts as much emphasis into the ambience of his monochrome worlds as the puzzles that will impede your progress, thus making each moment rich with texture.
Check out all the Deep Chalk games and experience one of the Web's most endeared point-and-click puzzle series.
Play the entire Deep Chalk series...


Walkthrough Guide
(Please allow page to fully load for spoiler tags to be functional.)
Deep Chalk 4 Walkthrough
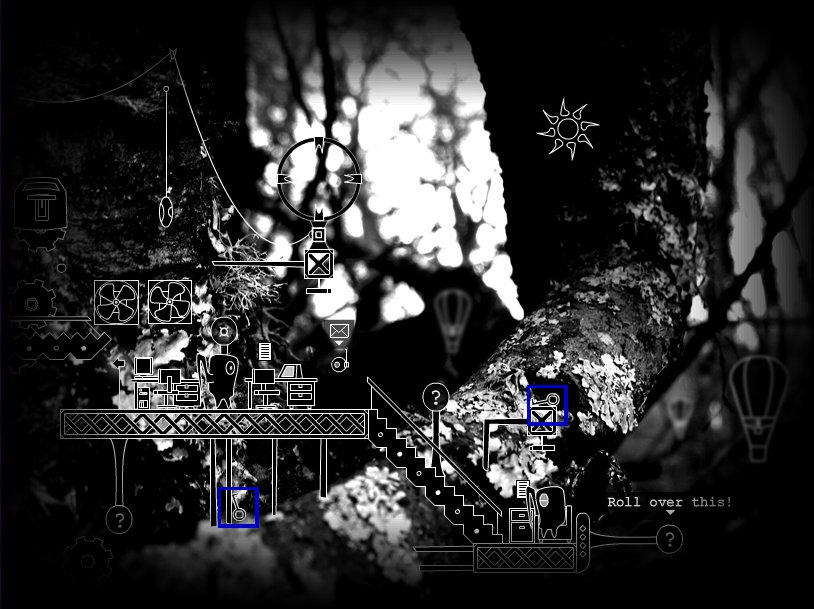
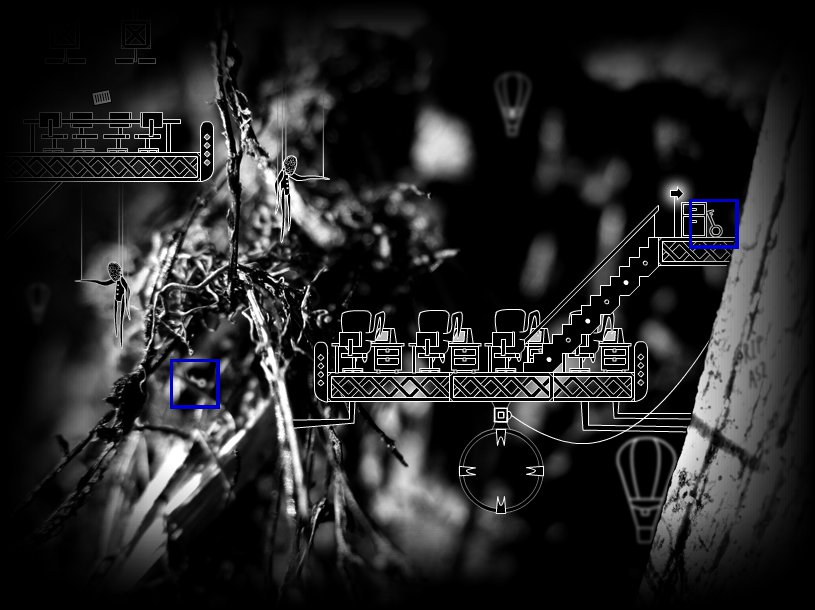
Screen 1: Sun Area
Your goal is the get the stairs on the left to lower.
Click the gear in the lower left.
Pull the lever down on the toaster looking device.
Click the left arrow at the bottom of the stairs that just dropped.
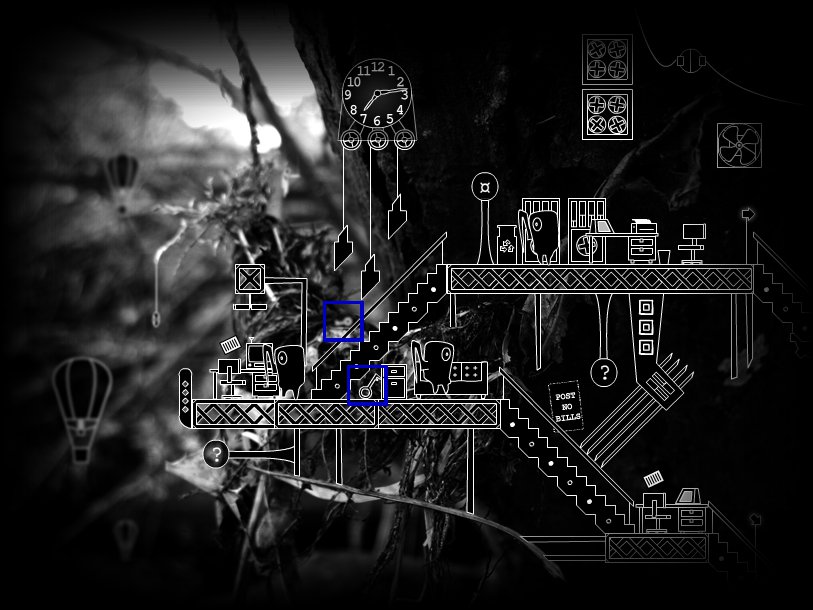
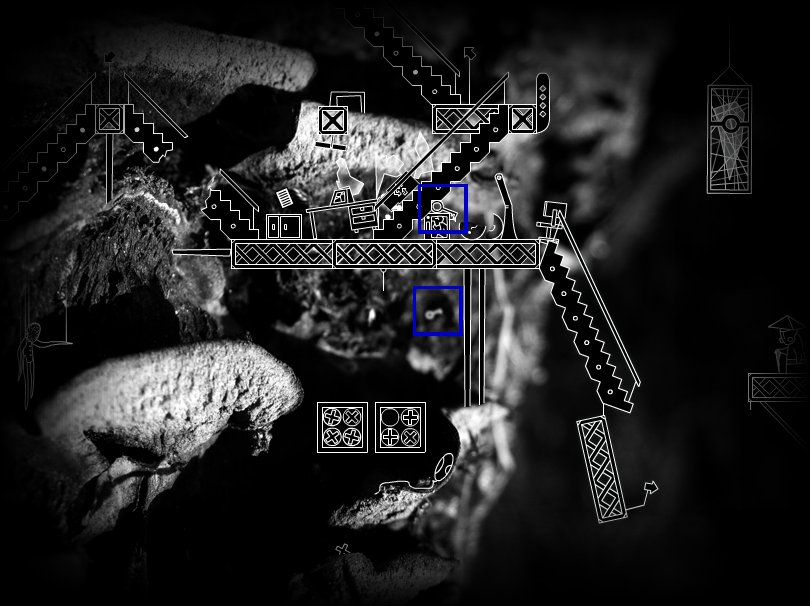
Screen 2: Clock Area
The next goal is to get the weights on the clock to all be at the top at the beginning of an hour.
Click the right weight to hold it until it lines up with the middle weight.
At the top of the left weight's cycle, hold it until the other two weights are at the top of theirs.
If this does not line up at the right time, restart the process.
Your goal now is to raise the bars blocking the bottom stairs.
The square buttons attached to them control their movement.
Push the buttons in this order: bottom, middle, top, bottom, middle, top.
Click the lower right arrow.
Screen 3: Elevator Area
Now you need to power the elevator.
The box hanging at the bottom of the first stairs is your power meter. Perhaps what it is attached to can give you power?
Click the crank above the first desk until the meter is full.
Hit the square button by the meter to raise the elevator.
Repeat this process to lower the elevator, this time using the lower button
Click the downward arrow to go to the next screen.
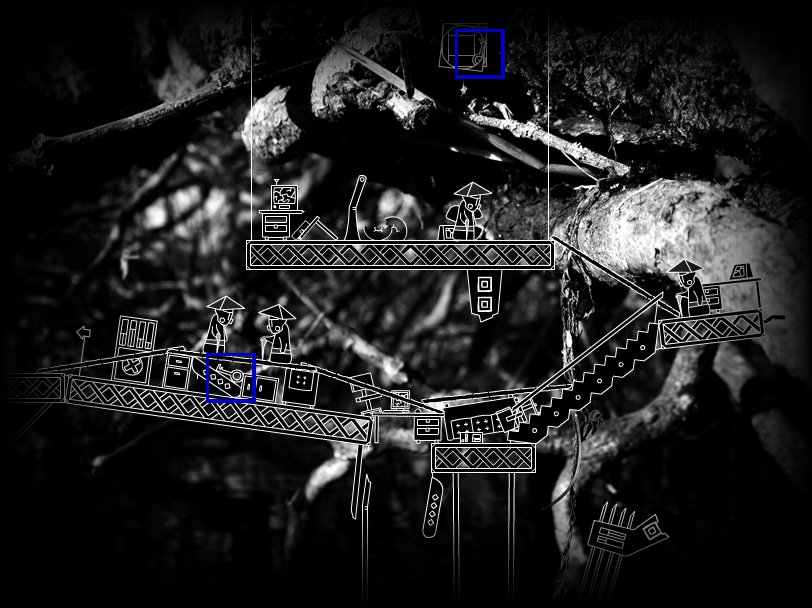
Screen 4: Synchronize Area
Your first goal is to synchronize the concentric circles blocking the bottom of the first staircase.
Click the innermost level to pause it. Release when it is lined up with the middle level.
Repeat this process with the outer level to line up with the other two.
The circles must be perfectly lined up, so you may have to repeat the process to get it to work.
Next, you have to piece together the broken stairs to go down.
There are three clear pieces in the vicinity (on the fans, on the bottom landing, on the last bit of stairs). Run your mouse over them in quick succession to get them to stick together.
Click the bottom arrow to go down to the next area.
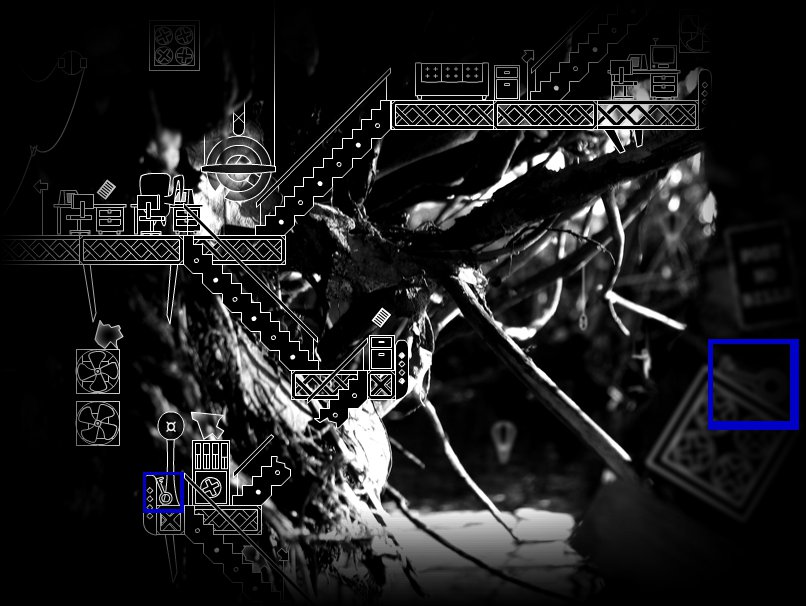
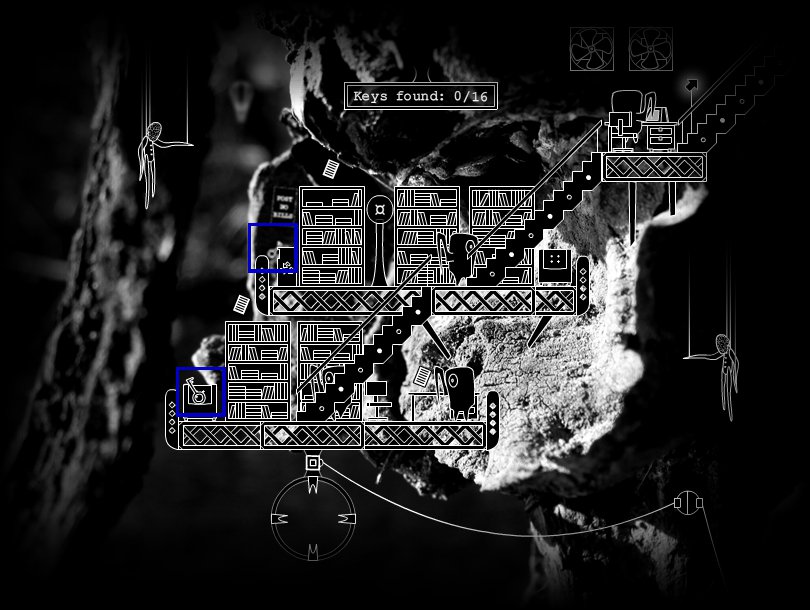
Screen 5: Broken Pieces Area
Again, you must reassemble the staircase to move on.
Run your mouse over the three clear pieces blocking the first staircase.
Next we have to guide energy from three generators and bring them to the crystal.
The Three Generators
Click the arrow at the top of the stairs you just put together to get to the next screen.
The generator is at the bottom, but the connection is broken, so click the circle along the wire to give it power.
Next, click the square button above the generator to make the dark energy.
Now you must follow it with your mouse to guide it back to the crystal (you don't have to be perfect, you just have to hit it at stopping points). Be careful, you have to go back to Screen 5 in a timely manner after the energy does to continue following it.
Next, go back to Screen 4. Click the wire connection in the upper left corner, then the left arrow to the screen with the 2nd generator.
Again, hit the square button above it and follow the dark energy back to the crystal.
It will take you across to Screen 4 then down to Screen 5.
Next, go back to Screen 2 and reconnect the wire at the top of the screen.
The generator is on Screen 1, so go there and click the square button to follow the dark energy.
This time you will find yourself following it with your mouse across Screens 1-5.
Click the righthand arrow to the final screen. You've made it!
Screen 6: Uranium Area
Your only goal on this screen is the detonate a bomb.
Using the code on the upper right area of the schematic, you must insert the bars to the left and below in the correct order.
The beta code is to the left, alpha below.
The number of lines on the bar correspond to the number of the code.
312/middle-bottom-top for the left.
132/middle-right-left for the bottom.
Congratulations! You're done!!
Posted by: Kyh |
August 11, 2011 2:58 PM
|
August 11, 2011 2:58 PM
Deep Chalk 4: Finding All 16 Keys
Included are shots of each screen with the keys in blue boxes. The names of the screen correspond with those from the walkthrough. Finding all the keys does not affect the ending.
General Help
There are two keys per screen.
If you've checked all the areas of the drawn foreground, where else is there to look?
Some of the keys are out of focus and in the background.
Screen 1: Sun Area
Screenshot
Screen 2: Clock Area
Screenshot
Screen 3: Elevator Area
Screenshot
Screen 4: Synchronize Area
Screenshot
Screen 4A: To the Left of 4
Screenshot
Screen 5: Broken Pieces Area
Screenshot
Screen 5A: To the Left of 5
Screenshot
Screen 6: Uranium Area
Screenshot
Posted by: Kyh |
August 11, 2011 4:41 PM
|
August 11, 2011 4:41 PM