

Cryptic Kingdoms
Platform: iOS, Android

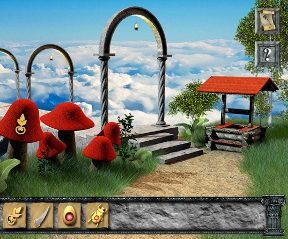
![]() Cryptic Kingdoms is a casual point-and-click adventure game similar to The Haunt, Forever Lost, or the often cited Myst series. Featuring a semi-surreal Earth-like world packed with locked devices, mysterious locations, and a striking lack of living creatures, you'll explore scene after scene as you attempt to make sense of the puzzles and mystical contraptions.
Cryptic Kingdoms is a casual point-and-click adventure game similar to The Haunt, Forever Lost, or the often cited Myst series. Featuring a semi-surreal Earth-like world packed with locked devices, mysterious locations, and a striking lack of living creatures, you'll explore scene after scene as you attempt to make sense of the puzzles and mystical contraptions.
 Simply tap the touch screen when you want to take a closer look at something, pick up an item, or use an object from your inventory. Traveling is accomplished in much the same way, though a convenient "back" button serves as a movement tool in most locations. Puzzles are of the "figure out what's missing, find it, use it, get a clue for another puzzle" variety. Nothing too intricate, which makes Cryptic Kingdoms an almost relaxing point and click romp.
There's a growing selection of adventure games on mobile devices, and Cryptic Kingdoms steps in to some high expectations. It succeeds in most areas and falls just a bit short in a few others, but the net result is definitely a positive one. No haunted houses, insane puppeteers, or spooky children, which is a nice change of pace. The visuals are a bit dated and the loading screens are a little annoying, but otherwise, Cryptic Kingdoms presents a solid set of puzzles and an intriguing world to immerse yourself in!
NOTE: This game was played and reviewed on an iPad. Game was available in the North American market at the time of publication, but may not be available in other territories. Please see individual app market pages for purchasing info.


Walkthrough Guide
(Please allow page to fully load for spoiler tags to be functional.)
Cryptic Kingdoms Walkthrough
General Tips/Info
While the game includes a hint function, it simply tells you what you need to do and not necessarily how to solve the puzzles.
The walkthrough below will give you a step-by-step guide to completing the game and include and explanation for each of the puzzle solutions.
The item and Location names are taken directly from the game (the inventory and map, respectively).
If you still find yourself confused or see an error, don't be afraid to leave a comment about it!
Cryptic Keep
Head through the gate, then tap the rock to examine it.
Now tap the rock to move it and collect the Onyx Key.
Back up and examine the gate.
Use the Onyx Key on the lock and head through to the Wood Bridge.
Collect the Hook off the bridge.
Head across the bridge to the Cathedral.
Examine the Shack to the left.
Collect the Empty Bottle and make note of the roman numerals.
Back up to the Wood Bridge, then head left to the Lion Vault.
Collect the Empty Bottle, then use the Hook on the handle to the left.
Examine the statue and tap the numerals from the Shack.
II, III, V
Now collect the Ornate Key and back up to the Wood Bridge.
Examine the clock and use the Ornate Key on the lock.
Collect the Citrine Crystal and make note of the symbols on the door.
Back up and head to the Cathedral.
Examine the pillar to the right.
Collect the Empty Bottle by the tree and back up.
Examine the door, then tap the fixture above the door.
Use the Citrine Crystal on the opening.
Tap the three buttons to match the symbols on the fixture to the ones on the clock door.
Head through to the Inside Cathedral.
Examine each of the sets of crystals and fill an Empty Bottle at each pool to acquire the Bottle of Spirit, Bottle of Strength and Bottle of Honor.
Make note of the number of crystals at each pool.
Back up to the Entrance Gate.
Examine the pillar on the right and use the Bottle of Strength (based on the number of runestones matching the number of crystals at the pool).
Now back up and head forward to the Wood Bridge.
Examine the pillar on the left and use the Bottle of Spirit.
Back up and head to the Cathedral.
Now examine the pillar and use the Bottle of Honor.
Head to the Inside Cathedral.
Examine the statue and tap the head to speak to Telvonus.
Choose the option "What is the Kingdom?" (you may read through the others for more info) to receive the Key to the Kingdom.
Back up and examine the red crystals.
Collect the Lustrous Key to the right.
Head outside to the Cathedral.
Examine the Shack and use the Lustrous Key on the chest.
Tap the chest to collect the Shard of Strength.
Back up and head to the Kingdom Entrance.
Use the Key to the Kingdom on the gate and head through.
Mushroom Kingdom
Head to the Well and collect the Mushroom Key.
Back up and head through the arch to the Honor Gateway.
Examine the pedestal and collect the Horn.
Tap the walkway to make your way to the Tunnel Entrance.
Enter the Tunnel and head further in.
Collect the Golden Egg in the lower right.
Back up to the Tunnel Entrance, then head up the stairs to the Mushroom House.
Examine the door and use the Mushroom Key, then head through into the Inside Mushroom.
Now examine the cabinet on the right and collect the Knife.
Back up and examine the top of the pillar.
Use the Golden Egg on the nest.
Now back up and examine the safe.
Make note of the pattern on the floor, then return to the Arch Bridge.
Examine the mushrooms and use the Knife on the golden object to acquire a Charm.
Collect the Scarab, then head to the first screen of the Tunnel.
Now examine the panel on the right wall and tap the gems to emulate the pattern on the floor in the Mushroom House.
Tap the far left gem.
Now tap the upper left gem twice.
Return to the Inside Mushroom.
Examine the safe and collect the Bucket.
Back up and examine the cabinet on the right.
Use the Charm on the impression, then collect the Tome Page.
Now use the Horn on the helmet.
Examine the tome and use the Tome Page on the right.
Make note of the symbols on both pages, then back up to the Tunnel Entrance.
Now examine the pattern on the ground and make note of the positions of the shapes and colors.
Back up and return to the Mushroom House.
Examine the pillar and tap the center until you get the correct position based on the pattern at the Tunnel Entrance.
Yellow at: the top, on either side of the pole below and just above left.
Go to the first screen of the Tunnel.
Now examine the panel on the left and tap the center to rotate the leaves until it matches the pattern at the Tunnel Entrance.
A leaf just above and just below both left and right with an additional leaf below the pair on the right.
Back up to the Honor Gateway.
Examine the pillar on the left and tap the center to rotate the flowers until it matches the pattern at the Tunnel Entrance.
The three flowers centered on the top with the lone flower just left of the pole at the bottom.
Return to the Tunnel Entrance.
Now examine the pattern on the ground and make note of the new symbols that have appeared in the center.
Back up and examine the stand.
Turn each of the four handles until the symbols on the stand match the ones on the pattern.
(clockwise from the upper left)
Sun with the bird-shape in the middle.
Sun with flares.
Sun with flat edges.
Sun shaped like a snowflake.
Use the Scarab on the impression.
Collect the Rope, then back up to the Well.
Now use the Rope and Bucket on the well.
Tap the well several times to lower and raise the bucket.
Collect the Key of Spirit.
Back up and head to the Honor Gateway.
Examine the pedestal on the right and use the Shard of Strength.
Now back up and head to the second screen of the Tunnel.
Turn each of the shapes so the green node is facing the correct direction, using the clues from the tome at the Inside Mushroom.
(using the relative positions of the symbols on the left tome page and the arrows on the right page)
Left triangle - down
Right triangle - up
Left pentagon - left
Right pentagon - right
Once the central circle lights up, tap it to enter the Spirit Gateway.
Use the Key of Spirit on the stand, then enter the portal.
Kingdom of Spirit
Head up to the palace doors, tap them and go to the Exhibit Room.
Examine the table on the left and collect the Token of Life.
Back up and head into the doorway to the Symbol Room.
Now examine the globe and collect the Token of Solace behind the vase to the left.
Again, back up and head into the doorway to the Triad Doorway.
Collect the Token of Devotion above the middle doorway.
Enter the middle door to the Tomb.
Now collect the Ladder on the left.
Back up to the Symbol Room.
Use the Ladder on the ledge to the right, then tap it to climb up.
Open the cabinet and collect the Fossil.
Make note of the symbols, then back up to the Exhibit Room.
Examine the dinosaur and use the Fossil on the empty peg.
Collect the Token of Wisdom from its mouth.
Head forward to the Triad Doorway and through the middle door to the Tomb.
Examine the pillar on the right, make note of the symbols and back up.
Enter to the Inside Tomb and make note of the symbols and lines on the back wall.
Examine the right wall and use the Token of Wisdom and Token of Life on their corresponding impressions.
Tap the lines to match the top half of the pattern on the back wall.
Tap the right line on the fish to create a connecting one between the two symbols.
Back up and examine the left wall.
Use the Token of Devotion and Token of Solace on their corresponding impressions.
Tap the lines to match the bottom half of the pattern on the back wall.
Tap the left line on the archer to create a connecting one between the two symbols.
Back up and collect the Earth Relic off the back wall.
Now back up to the Triad Doorway and head through the door on the right to the Mausoleum.
Examine the doors and make note of the symbols and colors.
Back up, then solve each of the pillars, rotating the white symbol to the correct position and tapping each central flower to the correct color.
The white symbol should be pointed at the leaf that matches the colored symbol on that pillar.
The central flower should match in color based on the relative positions of the door pattern (as if you were viewing the pillars from above).
Near left pillar: moon up at yellow, flower yellow.
Far left pillar: eye up at red, flower red.
Near right pillar: star up at green, flower blue.
Far right pillar: butterfly up at blue, flower green.
Head through the open doors to the Inside Mausoleum.
Collect the Hammer and Star Relic.
Make note of the symbols, then back up to the Exhibit Room.
Examine the table on the left and use the Hammer on the vase.
Collect the Talisman, then head back to the Triad Doorway.
Go through the left to the Courtyard.
Using the clues from the Symbol Room, Tomb and the Inside Mausoleum; correctly turn each of the vases.
I: Star - yellow/blue
II: Leaf - blue/red
III: Duck - red/yellow
Examine the chest and tap each of the bars to match the colors of the symbols from the vases.
(left-to-right)
yellow/blue/blue/red/red/yellow
Collect the Moon Relic, then back up to the Symbol Room.
Examine the globe and use the Talisman on the impression.
Tap through the symbols, and for each one, back up, examine the wall above and place the Star Relic, Earth Relic and Moon Relic in turn.
Collect the Shard of Spirit and return to the Inside Mausoleum.
Now Collect the Key of Honor and enter the portal.
Mushroom Kingdom
Head to the Honor Gateway and examine the pedestal.
Use the Shard of Spirit and back up.
Examine the gateway and use the Key of Honor on it.
Step into the portal.
Kingdom of Honor
Go forward to the Temple.
Examine the crystal and make note of the symbols and dots of each side.
Back up and examine the pillar, making note of the symbols and corresponding colors.
Solve the dragon puzzle by changing the color of each dragon and have the correct dots on the scrolls for each symbol on the pillar.
First, you must rotate the crystal to show the symbol you're going to match.
Then, change the color of each dragon by tapping its nearby scroll.
Lock-in the dragon's color by tapping it to make its eyes glow.
Then you can tap the scrolls for the correct dot pattern.
Finally, examine the pillar and tap the matching symbol. It'll glow red to show you've done it correctly.
Tentacles: left dragon blue, right dragon green, top two dots of the right scroll.
Wings: left dragon green, right dragon yellow, all three dots of the left scroll.
Leaves: left dragon green, right dragon blue, bottom two dots of the right scroll.
Once all three symbols are red, collect the House Key.
Head forward to the Residence Entrance.
Examine the gong on the left and collect the Safe Key hanging on the right.
Back up and use the House Key on the door.
Enter to the Display Room.
Collect the Sword on the table, then examine the counter to the right.
Open the left door and collect the Lantern.
Now open the right door and collect the Umbrella.
Use the Safe Key on the safe and collect the Figurine.
Back up the the Residence Entrance.
Examine the gong again and use the Sword on the lantern.
Collect the second Lantern, then head back to the Display Room and onward to the Shrine Room.
Use the Umbrella on the light over the shrine.
Examine the shrine and use the Figurine on the open slot.
Tap each of the figurines and make note of which gems light up.
Solve the shrine puzzle by getting each of the gems to light up permanently, using the scroll to the left.
Tap a particular figurine.
Back up and examine the scroll to the left.
Now tap the circles (they'll become red) that correspond with the gems position, using the lines on the shrine.
Go back to the shrine and tap the central gem. If done correctly, the outer gem will stay lit.
Do this for each of the gems to get the safe on the right to open.
(going clockwise starting with the upper left figurine)
lower right gem, right dot of top set, bottom dot of middle set
lower left gem, left dot of top set
upper left gem, left dot of bottom set
upper right gem, top dot of middle set, right dot of bottom set
Back up and examine the safe to collect the Mask.
Go to the Display Room and examine the suit of armor.
Use the Mask where the head would be, then back up.
Head through the now-open door into the Lantern Room.
Now use the star-shaped Lantern on the empty string at the ceiling to the left and the other Lantern on the string to the right.
Tap each of the lanterns on the left and make note of their colors.
Examine the panel on the left and tap the handle until each of the symbols match in color to the lanterns.
(top-to-bottom)
yellow, green, red, blue
Drag the symbols to the right/left so their positions match how they hang from the ceiling.
(top-to-bottom)
left, right, right, left
Back up and tap each of the lanterns on the right, making note of their colors.
Examine the panel on the right and make note of the colored blocks.
Go back to the panel on the left and tap the revealed handle so the colors on the left and right match the symbols of their side.
red/green on the left, yellow/blue on the right
Tap the symbols to move them up/down so they're on their corresponding colored block.
Back up and head through to the Zen Garden.
Examine the stone pillar and make note of the column of shapes.
Now back up and examine the blue pillar.
Make note of the symbol on top and head back to the stone pillar.
Tap the top symbol and note where the circles are to the sides of the shapes.
Now tap that shape to match the color of the corresponding pillar.
Do this for each of the three pillars.
blue circle
red square
green triangle
Examine the far left pillar and make note of the color that each symbol is in.
Return to each colored pillar and tap the symbols above and below the main one to match the stone pillar.
Now tap the colored sphere to get the colors of the symbol to match the far left pillar.
(top, then bottom)
Blue pillar: blue upward E, purple leftward T
Red pillar: purple leftward T, red downward E
Green pillar: red downward E, green rightward T
Examine the far left pillar and collect the Mallet.
Now examine the stone pillar and collect the Shard of Honor.
Back up to the Residence Entrance.
Examine the gong and use the Mallet on it.
Enter the portal to the Mushroom Kingdom.
Mushroom Kingdom
Examine the pedestal and use the Shard of Honor.
After the dialogue, enter the portal.
Congratulations! You've beat the game!
Posted by: Kyh |
October 29, 2012 12:46 AM
|
October 29, 2012 12:46 AM