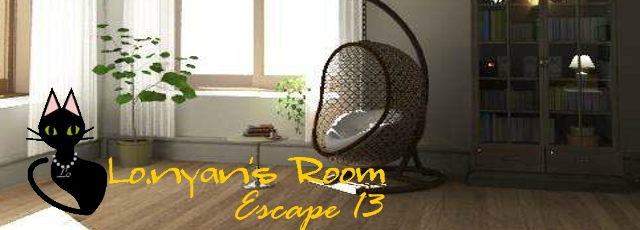
JayisGames.com is now available ad-free!
Jay is Games recommends Cheat Happens with 8,000+ games and 35,000+ trainers!

Lo.Nyan's Room Escape 13


  • Currently 4.5/5
  • 1
  • 2
  • 3
  • 4
  • 5
Rating: 4.5/5 (107 votes)
Comments (15) | Views (14,643)

Lo.Nyan's Room Escape 13

DoraLo.Nyan, Lo.Nyan, wherefore art thou, Lo.Nyan? We've been hankering for one of your escape games, so thank goodness you're here with Lo.Nyan's Room Escape 13. As usual, you're locked in a room somewhere, but also as usual, it's just a bit too stylish and cozy looking for you to want to realistically escape from. A hanging basket chair, a cup of your favourite beverage, a bright and airy view, and all the books you could want? Colour me hermited! Still, if you want to play, you have to try to find a way out, so it's time to ferret out all the puzzles and the items needed to solve them. Just click around to move and interact, using the directional arrows that appear and your changing cursor for guidance. To use an item, click it once so it highlights green, then click where you'd like to try to use it. Want to get a closer look at something? Click the object in your inventory, then the "about item" button, which will allow you to manipulate it up close and personal. Oh, and if you hate having to take screenshots of clues or write them down, don't worry... you can pick up a camera you can use to take photos of important things to carry with you!

While some of the clicking and navigation is a little clunky, if you want clever and logical puzzles, Lo.Nyan's name should always be up at the top of your list. The camera is such a welcome tool, as is the way the game allows you to "stick" certain clues to the top or sides of the screen (an arrow will appear beneath them when viewed up close if possible), making the game feel user-friendly in the way few other escapes ever are. Lo.Nyan knows how to make puzzles that are clever without being obnoxiously obscure and this game is no different, though perhaps not as difficult as some other games from the developer have been in the past. Lo.Nyan's Room Escape 13 is smartly constructed and a near perfect balance between light whimsy and smart puzzle design, combining for one excellent escape to kick back and escape your own day with.

Play Lo.Nyan's Room Escape 13

Walkthrough Guide


(Please allow page to fully load for spoiler tags to be functional.)

Lo.Nyan's Room Escape 13 Walkthrough

Exploring the sofa view

Zoom in on the end table.

There's a code panel that needs four colored shapes.

Luckily, the drawers will open without the code, so open each of them and take the "A" TILE, HOURGLASS #1, and ENVELOPE #1.

Each of the drawer bottoms is a different color. Perhaps that will be significant later?

Open ENVELOPE #1 and take the SMALL KEY.

Hourglasses are made to be flipped, right? Open HOURGLASS #1 in your inventory, flip it over, and zoom in to reveal a red number 6.

Zoom in on the sofa.

Lift the cushions and take the RED BOOK.

Open the RED BOOK and take the "D" TILE.

Finish exploring the view.

There are a couple significant-looking pictures above the sofa: a picture of a robot, and a painting with a bunch of colored shapes.

It's always a good idea to look under the sofa, but so far, there doesn't seem to be anything there.

Exploring the chair view

Zoom in on the chair and small round table.

Take the LETTER CODE BOX from the chair and open it in your inventory.

Do you recognize anything significant about this sequence of letters?

They're the first letters of the numbers one through ten.

Fill in the missing letters "FSN," open the box, and take the TAPE.

Take the CAMERA from the small round table.

Zoom in on the large vertical cabinet.

It's locked.

The SMALL KEY won't open the top part, but it will open both bottom drawers. Take HOURGLASS #2 and the TRANSPARENT BOX.

Manipulate HOURGLASS #2 in the usual way to reveal a blue number 8.

Open the TRANSPARENT BOX and take the BROWN HANDLES.

Exploring the desk view

Zoom in on the small table with the lamp.

Open the drawer and take the "H" TILE.

Zoom in on the desk.

The top part of the desk is locked with a code panel. It looks like your letter tiles will fit there, but you don't have them all yet.

You have what you need to open the desk drawers, though.

Insert the BROWN HANDLES into the desk drawers and open them to take HOURGLASS #3 and ENVELOPE #2.

As usual, manipulate HOURGLASS #3 to reveal a yellow number 2.

Open ENVELOPE #2 and take the NOTE.

The NOTE refers to the hourglasses and tells you that red plus yellow equals green.

Take a closer look at the art on the wall.

There's a frame with a picture of the Lo.Nyan kitty and what looks like another letter tile, but it's screwed shut.

There's also a picture with four stars of different types, superimposed on a pattern of five horizontal stripes. If that isn't a code clue, I don't know what is.

Finally, there's a pair of pictures on the desk, similar to the ones on the opposite wall.

Exploring the cabinet view

The large horizontal cabinet appears to be locked with a code consisting of four colored numbers. You may already have a pretty good idea how to solve this! If not, we'll come back to it in a moment.

There's a stereo on top of the cabinet as well, but it looks like it won't turn on until you enter a yellow/red/blue code.

Finally, there's a slightly dull-looking picture of a landscape on the wall.

The horizontal cabinet code

You'll need three HOURGLASSES and a NOTE before you'll be allowed to solve this puzzle.

The HOURGLASSES themselves contain three of the numbers, and the NOTE tells you how to calculate the fourth.

Green = red + yellow = 6 + 2 = 8.

Enter 6288 and open the cabinet.

Open the square box on the middle left shelf of the left half of the cabinet and take the "E" TILE.

Open the round box on the lower right shelf of the right half of the cabinet and take the "F" TILE.

The inner drawers of the horizontal cabinet

These drawers are locked, but it looks like they can be opened if the switches above each drawer are set correctly. (Incidentally, the navigation can be a bit awkward here. To take a closer look at the switches, don't click on the drawers first: click on the switches themselves while viewing the cabinet head-on.)

If you've taken a good look around, those stars next to each switch may look awfully familiar by now.

The picture above the desk is your clue. From left to right, and with "1" as the top position and "5" as the bottom position, you should set the switches like so: 4, 1, 5, 2.

As you set each switch correctly, its drawer unlocks. (So you could have just brute-forced the sequence, but oh well.) Take the SCREWDRIVER, the "G" TILE, and the FLASHLIGHT.

A colored symbol has also appeared on each of the four cabinet doors, and the picture above the cabinet has suddenly become a lot more interesting.

The end table, stereo, and wobbly picture puzzles

If you've solved the previous puzzles correctly, the horizontal cabinet should have a colored symbol on each door. Also, the picture on the wall above the cabinet should now be wobbly and contain a colored symbol in each corner.

The code from the cabinet doors can be used on that panel on the end table. (For the color-blind: the sequences are in the same order from left to right, so you don't need to worry about the colors.)

Red club, orange pumpkin, white snowflake, yellow smiley face. Press the button to reveal your next clue!

The drawers of the end table open in sequence: red, yellow, red, blue, blue, yellow.

Enter this same code to activate the stereo on top of the horizontal cabinet. (For the color-blind: center, left, center, right, right, left.)

If the game has been a bit too quiet for you, you can now hear some music by pressing the power button, but that's not all you've just accomplished.

Some text has begun to scroll on the stereo display: "TMHSMH," with each letter a different color.

You may have guessed the significance here, but if not, the pattern will become more explicit if you watch the display for a few repetitions.

The letters, colors, and symbols all match the four objects on the wobbly picture.

Click the corners of the wobbly picture in this sequence: tree, moon, house, stars, moon, house. Take the LARGE KEY.

The vertical cabinet

You'll need the SMALL KEY to unlock the bottom drawers of this cabinet (if you haven't already done so), and the LARGE KEY to open the upper doors.

Take the "C" TILE from the round box on the bottom shelf.

Take the GREEN BOOK from the second shelf from the top. Those letter tiles should look familiar!

There are four robots on the middle shelf, and each of them wants a colored letter. You probably have a good idea where that code will come from, but there are a few more things to do first.

The desk and letter grid puzzle

By now, you should have at least seven letter tiles in your inventory. A couple other inventory objects will help you get the last two.

Use the SCREWDRIVER to open the framed picture of the Lo.Nyan kitty and get the "B" TILE.

Use the FLASHLIGHT to look under the sofa and get the "I" TILE.

Place the nine LETTER TILES where they belong in the grid on the desk.

Alphabetical order doesn't work, but the GREEN BOOK will point the way: there's only one way to make all of those patterns show up on the grid. (To make things easier, you'll find that you can make the letter tiles pop up on the left side of the window, and the book pages pop up on the right.)

Place the tiles as follows: HBE, DFA, GCI. Open the top of the desk and take the SCISSORS and a PHOTO that should look familiar.

The four colored letters

In order to proceed from here, you'll need some SCISSORS, TAPE, and a PHOTO.

As you may have guessed, the colored shapes in those four pictures you've found make up the clue for the robots, but first you'll need to get them all in the same format.

Go around to all three pictures and take a PHOTO of them with the CAMERA.

Open the four photos in your inventory and use the SCISSORS to trim them.

Use the TAPE to assemble the photos into a single COMPLETED PHOTO.

Getting out

Warning: this is the point of no return! If you want to experience both endings, you should save your game now.
Regular ending

Enter the colored letter code from the COMPLETED PHOTO into the panels on the robots in the vertical cabinet. From left to right: blue I, yellow A, green B, red E.

The green robot hands a BLUE KEY to the yellow robot, who offers it to you.

You can figure it out from here, right?

Perfect ending

For this ending, make sure there isn't anything left in your inventory apart from the CAMERA and COMPLETED PHOTO.

In particular, if the LETTER CODE BOX is still there, make sure you've examined it thoroughly.

Click the green four-leaf clover inside the box, and a clover icon will appear by the save button to indicate that perfection is just a few clicks away.

Enter the code just as you would for the regular ending. This time, the robots will take to the sky!

Well, sort of. Looks like they couldn't quite make it out the door, because they're not quite tall enough...

...but I'm sure you can help!

15 Comments

Note that there are both regular and "perfect" endings, so if you're not sure you've done enough to deserve the "perfect" one, make sure you save your game before heading out the door. :)

Reply

Lo.Nyan's Room Escape 13 Walkthrough

Exploring the sofa view

Zoom in on the end table.

There's a code panel that needs four colored shapes.

Luckily, the drawers will open without the code, so open each of them and take the "A" TILE, HOURGLASS #1, and ENVELOPE #1.

Each of the drawer bottoms is a different color. Perhaps that will be significant later?

Open ENVELOPE #1 and take the SMALL KEY.

Hourglasses are made to be flipped, right? Open HOURGLASS #1 in your inventory, flip it over, and zoom in to reveal a red number 6.

Zoom in on the sofa.

Lift the cushions and take the RED BOOK.

Open the RED BOOK and take the "D" TILE.

Finish exploring the view.

There are a couple significant-looking pictures above the sofa: a picture of a robot, and a painting with a bunch of colored shapes.

It's always a good idea to look under the sofa, but so far, there doesn't seem to be anything there.

Exploring the chair view

Zoom in on the chair and small round table.

Take the LETTER CODE BOX from the chair and open it in your inventory.

Do you recognize anything significant about this sequence of letters?

They're the first letters of the numbers one through ten.

Fill in the missing letters "FSN," open the box, and take the TAPE.

Take the CAMERA from the small round table.

Zoom in on the large vertical cabinet.

It's locked.

The SMALL KEY won't open the top part, but it will open both bottom drawers. Take HOURGLASS #2 and the TRANSPARENT BOX.

Manipulate HOURGLASS #2 in the usual way to reveal a blue number 8.

Open the TRANSPARENT BOX and take the BROWN HANDLES.

Exploring the desk view

Zoom in on the small table with the lamp.

Open the drawer and take the "H" TILE.

Zoom in on the desk.

The top part of the desk is locked with a code panel. It looks like your letter tiles will fit there, but you don't have them all yet.

You have what you need to open the desk drawers, though.

Insert the BROWN HANDLES into the desk drawers and open them to take HOURGLASS #3 and ENVELOPE #2.

As usual, manipulate HOURGLASS #3 to reveal a yellow number 2.

Open ENVELOPE #2 and take the NOTE.

The NOTE refers to the hourglasses and tells you that red plus yellow equals green.

Take a closer look at the art on the wall.

There's a frame with a picture of the Lo.Nyan kitty and what looks like another letter tile, but it's screwed shut.

There's also a picture with four stars of different types, superimposed on a pattern of five horizontal stripes. If that isn't a code clue, I don't know what is.

Finally, there's a pair of pictures on the desk, similar to the ones on the opposite wall.

Exploring the cabinet view

The large horizontal cabinet appears to be locked with a code consisting of four colored numbers. You may already have a pretty good idea how to solve this! If not, we'll come back to it in a moment.

There's a stereo on top of the cabinet as well, but it looks like it won't turn on until you enter a yellow/red/blue code.

Finally, there's a slightly dull-looking picture of a landscape on the wall.

The horizontal cabinet code

You'll need three HOURGLASSES and a NOTE before you'll be allowed to solve this puzzle.

The HOURGLASSES themselves contain three of the numbers, and the NOTE tells you how to calculate the fourth.

Green = red + yellow = 6 + 2 = 8.

Enter 6288 and open the cabinet.

Open the square box on the middle left shelf of the left half of the cabinet and take the "E" TILE.

Open the round box on the lower right shelf of the right half of the cabinet and take the "F" TILE.

The inner drawers of the horizontal cabinet

These drawers are locked, but it looks like they can be opened if the switches above each drawer are set correctly. (Incidentally, the navigation can be a bit awkward here. To take a closer look at the switches, don't click on the drawers first: click on the switches themselves while viewing the cabinet head-on.)

If you've taken a good look around, those stars next to each switch may look awfully familiar by now.

The picture above the desk is your clue. From left to right, and with "1" as the top position and "5" as the bottom position, you should set the switches like so: 4, 1, 5, 2.

As you set each switch correctly, its drawer unlocks. (So you could have just brute-forced the sequence, but oh well.) Take the SCREWDRIVER, the "G" TILE, and the FLASHLIGHT.

A colored symbol has also appeared on each of the four cabinet doors, and the picture above the cabinet has suddenly become a lot more interesting.

The end table, stereo, and wobbly picture puzzles

If you've solved the previous puzzles correctly, the horizontal cabinet should have a colored symbol on each door. Also, the picture on the wall above the cabinet should now be wobbly and contain a colored symbol in each corner.

The code from the cabinet doors can be used on that panel on the end table. (For the color-blind: the sequences are in the same order from left to right, so you don't need to worry about the colors.)

Red club, orange pumpkin, white snowflake, yellow smiley face. Press the button to reveal your next clue!

The drawers of the end table open in sequence: red, yellow, red, blue, blue, yellow.

Enter this same code to activate the stereo on top of the horizontal cabinet. (For the color-blind: center, left, center, right, right, left.)

If the game has been a bit too quiet for you, you can now hear some music by pressing the power button, but that's not all you've just accomplished.

Some text has begun to scroll on the stereo display: "TMHSMH," with each letter a different color.

You may have guessed the significance here, but if not, the pattern will become more explicit if you watch the display for a few repetitions.

The letters, colors, and symbols all match the four objects on the wobbly picture.

Click the corners of the wobbly picture in this sequence: tree, moon, house, stars, moon, house. Take the LARGE KEY.

The vertical cabinet

You'll need the SMALL KEY to unlock the bottom drawers of this cabinet (if you haven't already done so), and the LARGE KEY to open the upper doors.

Take the "C" TILE from the round box on the bottom shelf.

Take the GREEN BOOK from the second shelf from the top. Those letter tiles should look familiar!

There are four robots on the middle shelf, and each of them wants a colored letter. You probably have a good idea where that code will come from, but there are a few more things to do first.

The desk and letter grid puzzle

By now, you should have at least seven letter tiles in your inventory. A couple other inventory objects will help you get the last two.

Use the SCREWDRIVER to open the framed picture of the Lo.Nyan kitty and get the "B" TILE.

Use the FLASHLIGHT to look under the sofa and get the "I" TILE.

Place the nine LETTER TILES where they belong in the grid on the desk.

Alphabetical order doesn't work, but the GREEN BOOK will point the way: there's only one way to make all of those patterns show up on the grid. (To make things easier, you'll find that you can make the letter tiles pop up on the left side of the window, and the book pages pop up on the right.)

Place the tiles as follows: HBE, DFA, GCI. Open the top of the desk and take the SCISSORS and a PHOTO that should look familiar.

The four colored letters

In order to proceed from here, you'll need some SCISSORS, TAPE, and a PHOTO.

As you may have guessed, the colored shapes in those four pictures you've found make up the clue for the robots, but first you'll need to get them all in the same format.

Go around to all three pictures and take a PHOTO of them with the CAMERA.

Open the four photos in your inventory and use the SCISSORS to trim them.

Use the TAPE to assemble the photos into a single COMPLETED PHOTO.

Getting out

Warning: this is the point of no return! If you want to experience both endings, you should save your game now.
Regular ending

Enter the colored letter code from the COMPLETED PHOTO into the panels on the robots in the vertical cabinet. From left to right: blue I, yellow A, green B, red E.

The green robot hands a BLUE KEY to the yellow robot, who offers it to you.

You can figure it out from here, right?

Perfect ending

For this ending, make sure there isn't anything left in your inventory apart from the CAMERA and COMPLETED PHOTO.

In particular, if the LETTER CODE BOX is still there, make sure you've examined it thoroughly.

Click the green four-leaf clover inside the box, and a clover icon will appear by the save button to indicate that perfection is just a few clicks away.

Enter the code just as you would for the regular ending. This time, the robots will take to the sky!

Well, sort of. Looks like they couldn't quite make it out the door, because they're not quite tall enough...

...but I'm sure you can help!

Reply

After opening the large desk by placing the wooden blocks, there were 2 flip-open drawers on the right. The top one was empty. The bottom one had some red box in it and when I clicked on it the only thing that came up was a description in Japanese. Anyone know what it said?

Reply

How the heck can you get the perfect end? I have the photo parts, the LETTER CODE BOX open, and the camera. Dora says to examine the box "thoroughly", yet there is nothing to click on. When I click the tape, it takes the spot to the left of the LETTER CODE BOX and the box disappears. What Next? What am I doing wrong?

Reply

Did you check the

letter code box

?

Reply
Patreon VIP abfdrumz November 17, 2014 3:46 PM replied to Nathaniel Shaw

Hmm, that's weird. I played through a few times while writing the walkthrough and never had the box disappear after taking the tape. Is anyone else seeing this?

Reply

I can confirm that the box disappeared for me as well upon grabbing the tape.

Reply
Patreon VIP abfdrumz November 18, 2014 2:41 AM replied to funnyguts

Too weird. I'd definitely like to update the walkthrough if there's a trick to getting it to work properly, but I can't seem to get it to work improperly. Whenever I play, I get this sequence:

http://i.imgur.com/fhywumA.png
(Tape removed from box, box still in inventory)

http://i.imgur.com/kyflXbR.png
(Box with tape removed and clover visible inside)

http://i.imgur.com/l11zrvi.png
(After clicking on clover, with clover now visible in "Save" icon and box about to disappear)

Unless we're playing different versions of the game, which doesn't seem likely since all of JIG's links are pointing to the same place.

Reply
Patreon VIP abfdrumz November 18, 2014 3:54 AM replied to funnyguts

@Nathaniel, @funnyguts:
Too weird. I did a few more experiments and managed to get the box to disappear prematurely as you guys say. From what I can tell, it seems to happen if you pick up and/or open the box late in the game, though I wasn't able to narrow down exactly what "late in the game" means (due in part to my save states not being restored reliably) before I lost patience. ;)

This seems to be a bug. The best I can suggest for now is to open the box and grab the tape early: where I mention it in the walkthrough, or even very first thing. I've never seen the box disappear before I can click on the clover when I do that.

Reply
kathleen.indie.gee November 18, 2014 4:57 PM

A perfect escape game.

Reply

So there's a bug with the letter code box?

THAT's why I couldn't get the perfect ending!!! >:(

Reply

Fun and cute game but I happened upon more than one bug.

My hourglasses didn't show any numbers. I could flip them one way or another but that was it. The sand remaining would be red, green, and yellow for the different hourglasses, so maybe I was playing another version of the game where colors were codes instead of numbers?

Also, I had no transparent box and no brown handles to open the desk drawers with. I *think* I opened them with a key, or they were not locked. I have a feeling the game designer removed that element.

Also, with the 9-letter puzzle on the desktop, I found a combo that matched every stipulation of the green book, yet it wasn't "the combo" so I wasn't granted access to the desk!

Reply
Patreon VIP abfdrumz November 25, 2014 5:23 AM replied to fontless

Hmm...I just rechecked the current version of the game (as linked from JiG to lonyans.yukishigure.com), and it's working just as I described in the walkthrough. Could you have been playing an earlier or later version on a different site?

The red/green/yellow "sand remaining" after you flip the hourglasses is actually the numbers, but you'll need to click on it to see this (where the walkthrough says to "zoom in").

There's a key to open the cabinet drawer that contains the transparent box with the wooden handles, which are still needed to open the desk drawers.

I'd be curious to see your alternate solution for the nine-letter puzzle. In the version I played, the solution in the walkthrough is definitely the only valid one.

Reply
elle December 3, 2014 1:15 PM replied to abfdrumz

You can get the clover for the perfect ending only if you solve the red box before you acquire the piece of paper, which is an additional clue actually...

...the first clue is the box itself, where you must out what the sequence means. Because the paper gives the answer, it spoils the puzzle and the implication is: You didn't solve the puzzle without a spoiler, so that's not a "perfect" escape.

Reply

^ Scroll Up | Homepage >

Leave a comment [top of page]

Please consider creating a Casual Gameplay account if you're a regular visitor here, as it will allow us to create an even better experience for you. Sign-up here!
  • PLEASE UNDERSTAND SITE POLICIES BEFORE POSTING COMMENTS
  • You may use limited HTML tags for style:
    (a href, b, br/, strong, em, ul, ol, li, code, spoiler)
    HTML tags begin with a less-than sign: < and end with a greater-than sign: >. Always. No exceptions.
  • To post spoilers, please use spoiler tags: <spoiler> example </spoiler>
    If you need help understanding spoiler tags, read the spoiler help.
  • Please Preview your comment before posting, especially when using spoilers!
  • No link dropping, no domains as names; do not spam, and do not advertise! (rel="nofollow" in use)
chrpa Jayisgames needs your help to continue providing quality content. Click for details Hi! Weekday Escape and Weekday Puzzle are here! First we have two new cans from tomoLaSiDo and then two small rooms from isotronic. That's all for this...  ...
6,365 Views
0 Comments
chrpa Jayisgames needs your help to continue providing quality content. Click for details Welcome to Mobile Monday! We have another beautiful game from Nicolet and it's a winter game as it should be. Tasuku Yahiro have released another of their...  ...
6,161 Views
2 Comments
chrpa Jayisgames needs your help to continue providing quality content. Click for details We've got a new game from Rinnogogo's magical world and this time it really is magical.. Not only do you get to meet cute animals that express themselves...  ...
chrpa Jayisgames needs your help to continue providing quality content. Click for details After a few weeks of patient waiting, we have been rewarded - the new game from Ichima Coffeedo is here. We got a wonderful new game - it's...  ...

HELP Jayisgames.com

Recent Comments


Display 5 more comments
Limit to the last 5 comments

Game of the week


Dark Romance: Vampire Origins Collector's Edition

Your Favorite Games edit

add
Save links to your favorite games here. Use the Favorites editor.

Monthly Archives