

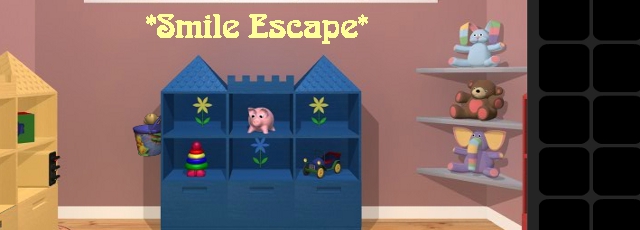
![]() If there's a better way to brighten your day than a TomaTea escape game, I don't know what it is. Some people might tell you the sound of a child's laughter would do the same thing, but personally I'd rather have the unexpected joy of finding an extra Jolly Rancher in my jacket pocket. Speaking of ankle-biters, Smile Escape takes place in a playroom, and let's face it... there's only so much time you can spend stacking rubber rings and driving a toy car around while making brrrrrrrmmmm noises, so it's time to find a way out. Just click to interact with things, using the glow at the tip of the cursor as a guide to find things you can use or take a closer look at, and hover over inventory items to get a closer look at them by clicking the little "i" that appears. Like most TomaTea games, solving puzzles means finding clues to their solutions, so if the message "I have no clue how to solve this!" appears when you're examining something, you know you haven't yet spotted something crucial. I mean, you couldn't just experiment or try to figure it out on your own, after all... this is a game, and games are serious business!
If there's a better way to brighten your day than a TomaTea escape game, I don't know what it is. Some people might tell you the sound of a child's laughter would do the same thing, but personally I'd rather have the unexpected joy of finding an extra Jolly Rancher in my jacket pocket. Speaking of ankle-biters, Smile Escape takes place in a playroom, and let's face it... there's only so much time you can spend stacking rubber rings and driving a toy car around while making brrrrrrrmmmm noises, so it's time to find a way out. Just click to interact with things, using the glow at the tip of the cursor as a guide to find things you can use or take a closer look at, and hover over inventory items to get a closer look at them by clicking the little "i" that appears. Like most TomaTea games, solving puzzles means finding clues to their solutions, so if the message "I have no clue how to solve this!" appears when you're examining something, you know you haven't yet spotted something crucial. I mean, you couldn't just experiment or try to figure it out on your own, after all... this is a game, and games are serious business!
 If you're like me, Smile Escape's sleepy lullaby soundtrack will have you scrambling for the mute button under the game menu after just a few repetitions, but that's a minor complaint all told. Smile Escape actually focuses more on puzzles than using items to make progress, with a lot of the puzzles holding clues to the next rather than something for your inventory. Based on the room and decoration it seems like the sort of place you'd put a toddler so they didn't chew the wires or scratch the furniture or whatever it is babies do, and it seems to me like you're asking a lot of someone who can't go to the bathroom on their own when they have to solve complex grid puzzles just to open cabinets. It actually offers a nice progression in difficulty, a balance between simply being enough aware of your environment to spot hidden solutions, and having to crack codes. It's definitely a lot more devious than it may appear despite its cuddly style, and hopefully you're familiar with a certain of visual logic puzzle to know it when you see it. Smile Escape is just challenging enough to kick your brain into gear so you'll be raring to go for the day... providing the soundtrack doesn't have you down for a nap.


Walkthrough Guide
(Please allow page to fully load for spoiler tags to be functional.)
TomaTea's Smile Escape: Escape Guide
This is not a step-by-step walkthrough.
Guide to Item Locations
Each of the four room views is named for the color of the "Castle" shelving unit against its wall. I tried to make the hidden object names obscure so as not to spoil for those who haven't found them yet.
A * indicates a puzzle that needs to be solved first.
Red View
WOODEN BLOCK 1, beside the stuffed bear on the shelf
RED DUMBBELL inside the left door behind the *shape puzzle
ELECTRONIC inside the middle door behind the *Goldilocks puzzle
COLORED CARS inside the right door, behind the *left-right puzzle
FISHY CLUE inside the *balloon.
Blue View
COIN inside the *piggy bank.
WOODEN BLOCK 4 inside the middle door behind the *nonogram
SHARP TIP inside the middle door behind the *nonogram
BATTERY from the car on the right shelf (you have to *unscrew the battery cover)
MOBILE inside the right door. You have to solve the *Pooh puzzle
Yellow View
WOODEN BLOCK 5, inside the left door, behind the *3 animals puzzle.
WOODEN BLOCK 6, inside the middle door, behind the *four letter puzzle.
BLUE FISH hanging above the unit. You have to solve the *four letter puzzle and the *ring puzzle.
Green View
POOH BUCKET, on the floor to the right of the unit
WOODEN BLOCK 2, on top of the unit above the clock
WOODEN BLOCK 3, inside the right door
TAIL inside the middle door (you have to *unscrew to open)
SCISSORS inside the left door behind the *Ring puzzle
Guide to Puzzle Solutions
Nonogram
On the middle Blue door. This puzzle requires no in-game content to solve it. Here is the Wiki article on how to solve nonograms. http://en.wikipedia.org/wiki/Nonogram
Once you have the solution, make sure all the blocks are either blue or empty, no question marks. Press the button to open.
Make the following squares blue.
Row 1: 1, 3, 5
Row 2: 1/2/3/4/5
Row 3: 1/2/3/4/5
Row 4: 2, 4
Row 5: 2, 4
Row 6: 2/3/4, 6, 8, 10
Row 7: solid blue
Row 8: solid blue
Row 9: 1/2, 4/5/6, 9/10
Row 10: 1/2, 4/5/6, 9/10
It's a castle!
Piggy bank
Shake the pig until the coin falls out. Then zoom in on the carpet.
Screws without Screwdrivers
Use the coin as a screwdriver to unscrew the underside of the car on the right Blue shelf, and to unscrew the middle Green door.
Balloons Were Meant for Popping
Pull open the red dart TAIL from inventory and attach the SHARP TIP. Use your new DART to shoot the string-less balloon floating in the corner. Then zoom in on the carpet.
Three Animals
The left door on the Yellow unit has three animal faces and a down arrow. For the clue, note the top-to-bottom order of the three stuffed animals in the corner of the Red/Blue views.
rabbit, bear, elephant. Press the button.
4x4 Grid
The right Yellow door has a 4x4 grid. The clue is on the unsolved block puzzle on the middle Red shelf. The pattern of the empty block slots is your solution.
Four Letter Word
For the middle Yellow door with the four-letter code. For your clues, note the four symbols you found in the right Yellow door, and note the tic-tac-toe format of the "YES ONE TOY" blocks above the clock. For example, a " ] " symbol would indicate the middle left on a tic-tac-toe grid, indicating the letter "O" on the blocks.
The tic-tac-toe symbols are "center" "bottom middle" "bottom right" "upper left" so the letters are N E S T
Goldilocks
Zoom in on the Red middle shelf. Place your six WOODEN BLOCKS that you have collected into the puzzle, and swap them around until the picture is right.
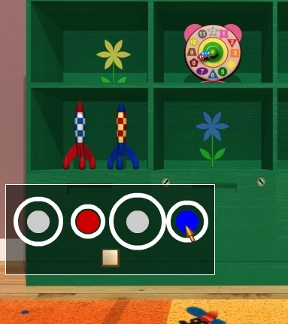
Four Colored Rings
The left Green door requires a four-circle color code with each of the circles having a different sized-ring around it. For your clue, note the toy on the left Blue shelf. Note sizes and colors of the rings.
For example, the first circle on the door code has the second-largest ring around it. If you look at the toy, the second-largest ring on the toy is blue. So, the first circle of the code is blue. And so forth.
blue, red, green, yellow
Four Colored Numbers
The left Blue door requires a color-coded four digit number. For your clue, note the clock on the top Green shelf.
Note the colors behind each number on the clock face. For example, the color yellow corresponds to the number 4.
red, green, orange, purple indicates 2 5 3 7
Four Little Shapes
The left Red door needs a four-shape sequence. For your clue, note the four-digit number on your coin (pull up the coin in your inventory and click it to turn it over), and note the shapes on the clock for each of those digits. For example, the digit "7" would indicate the oval shape.
the number on the coin is 1986, so the corresponding clock shapes would be flower, trapezoid, pentagon, triangle
A (Pooh) Bear of Very Little Brain
Zoom in on the left side of the Blue unit. Hang the POOH BUCKET on the bear lever, and insert the RED DUMBELL into the bucket.
Too High!
Is that fish still too high to reach? You have to open the middle Yellow door first by solving the four letter puzzle. Once the door is open, zoom in on the inside of the cabinet and push the red button to activate a ladder. Use the SCISSORS on the string.
Fishy Business
Pull up the FISH MOBILE from your inventory and add the BLUE FISH. Hang the MOBILE on the string over the Yellow unit. You need to swap the fish around until they are in the right order. Use the 6-digit FISHY CLUE and the colors/numbers on the clock to determine the order of the colored fish.
For example, the first digit on the fishy clue is 3, and the clock's 3 has orange behind it, so the first fish on the mobile needs to be orange. And so forth.
3 5 2 6 4 1 indicates orange green red blue yellow pink
Left Right Left
The right Red door requires a left-right sequence. Your clue is the result of the Fish Mobile puzzle. Note the directions that each of the six fish is facing.
R R L R L L
All Aboard!
Place the COLORED train CARS on the track at the base of the Yellow unit. Put the BATTERY into the ELECTRONIC controller, and use the controller on the train. A close-up view of the controller will appear allowing you to control the colors of the traffic lights on either side of the Yellow unit. You need to arrange the colors on both traffic lights in the proper sequence. Your clue is in the abacus beads on the bottom left Blue shelf.
There is no clear clue for which beads to note, other than the fact that the traffic lights are on the far edges of the Yellow unit. Note the three beads in the middle of the far left column and the three in the middle of the far right column of the abacus.
left side, top to bottom: green, green, yellow
right side, top to bottom: green, yellow, red
Push the red button
That's an elaborate door key. And you earned it.
Whew, all that escaping was hard work! I feel like a Naptime in the sun on that picnic blanket. :)
Posted by: JudyJetson |
July 1, 2014 1:45 PM
|
July 1, 2014 1:45 PM