

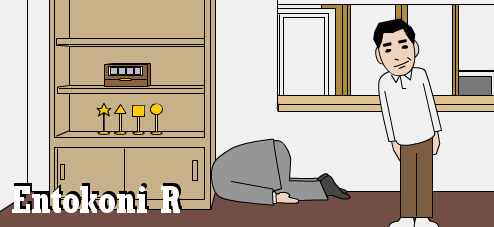
![]() If your escape game looks a little... weird... there's a good chance Detarou is the culprit, but hey... that's the way we like it. Entokoni R follows the usual formula as you find yourself trapped in a puzzle-laden apartment full of people who seem to have a tenuous grasp on reality and social graces at best. To play, you just click around, using the bars that appear at the edges of the screen to change views, and remember to double-click any items you find in your inventory to check them close-up since clues can be hidden in unexpected places. There are three endings to find, so make sure you use the save function if you don't want to start over should an unfortunate fate befall you.
If your escape game looks a little... weird... there's a good chance Detarou is the culprit, but hey... that's the way we like it. Entokoni R follows the usual formula as you find yourself trapped in a puzzle-laden apartment full of people who seem to have a tenuous grasp on reality and social graces at best. To play, you just click around, using the bars that appear at the edges of the screen to change views, and remember to double-click any items you find in your inventory to check them close-up since clues can be hidden in unexpected places. There are three endings to find, so make sure you use the save function if you don't want to start over should an unfortunate fate befall you.
 Detarou games are always best when they focus on clue interpretation and combination over item puzzles, and Entokoni R is no different. It does feel like some of the puzzle solutions are slightly less intuitive than we've seen from Detarou before, and since some clues may be spread across multiple screens you may want to write them down or copy-paste the image in a paint program for easier reference to figure them out. The potential gross-out factor is also a little toned down here... where previous Detarou games had bordered on over-the-top when it comes to, ehhhh, suggestiveness, Entokoni R is mostly just a little creepy and a lot strange, though there is a frog that's arguably a little risque, and a panda ending that's just... unnerving. (Though an unexpected cameo should make you laugh!) You'll need to pay close attention to your surroundings to escape Entokoni R, but you're up to the task... right?
Game not loading? Try this alternate link.


Walkthrough Guide
(Please allow page to fully load for spoiler tags to be functional.)
Entokoni R Escape Walkthrough
General Information
Pay special attention to pattern and color, both play a big role in the puzzles.
There are three endings.
There will be directions for the colorblind in this walkthrough.
Good luck!
Exploration
You begin looking down the entrance hallway to this house of madness. To your left is a guy in a costume that is either a pickle or a soy bean, or something else round and green. He keeps dancing back and forth in front of a switch that you cannot touch.
Click on the hallway to go down.
To your left is a doorway to the bathroom. Inside is a guy with a massive fro doing another dance.
In front of you is the door out. Note that it has a gold lock.
To the right of the door out is a cabinet. The lock on the cabinet is a series of black/white buttons (eight of them) surrounding a ninth red button.
Back up until you see the dancing pickle, then turn right.
You are now facing the bedroom door. Click on it to enter.
That bed has a lot of stuff going into it from the floor, doesn't it? Click on the bed for a close up.
Click to pull down the covers and notice the three-prong thing in the middle of the bed. Restful!
Back up and click on the wall socket just to the left of the bed for a close up.
There's an electrical outlet here, and a plug hole in the bed. Looks like we need a cord. Back up.
Click on the closet for a close up, then click again to see the puzzle. The puzzle is a four color lock.
Back up twice to the main room.
Turn right.
You are now facing an alcove with a little old lady sitting at a kotatsu, carving strange things onto oranges. You can explore the strangeness in close ups, but it doesn't seem to have anything to do with the main game. Turn right.
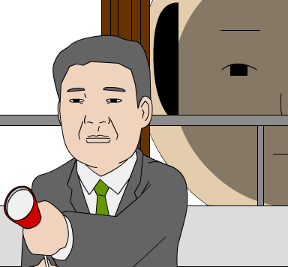
You are now facing the balcony, where a giant doll head is watching the proceedings. Note the nervous man kneeling in front of the balcony doors, holding a party cracker. Turn right.
You are now facing a large bookshelf. Note the kneeling guy who appears to have his head in the bottom shelf.
There is another guy here, swaying back and forth. Ignore him.
Click on the bottom shelf of the bookshelf for a close up.
Open the right door of the bottom shelf, yep, there's his head.
Open the left door of the bottom shelf. Click on the vase to move it and take note of the vertical clue. Yes, you just smashed the guy with the vase, you can open the right door again to see the damage.
Back up once, then click on the shelf just above the doors for a close up. Note the four gold symbols (star, triangle, square, and circle) and back up once.
Click on the shelf above the symbols. Here is a box with a four button lock. Each button is another set of symbols. Note that the lock is gold with a red dot in the middle.
Back up twice and turn right.
You are now facing the entrance to the kitchen. Yes, the bobbing guy is following you. Click on the entrance to the kitchen to go in.
The only thing of interest in here is the refrigerator, which has a gold four digit lock.
Back up twice and turn right.
There is a locked door here (silver lock) and a low cabinet with a clock on top of it. Above the cabinet is a painting. Note that you can see the dancing pickle guy on the right.
Click on the painting for a close up.
This painting is very important, it contains clues for the majority of puzzles in the room. Note the shapes, colors, and numbers.
For the colorblind: The M-shaped double triangle thing with the 0 in it is blue, the triangle with the 6 is red, the circle with the 5 is black, the upper triangle with the 1 is purple, the D-shaped thing with the 9 is white, the star is brown, the L-shaped thing with the 2 is yellow, and the small square with the 7 is green.
Back up and click on the cabinet for a close up.
On the left are two doors, click on them twice to open and you will see a little diagram. This shows the possible endings of the game (one "bad" ending, two "good" endings). Back up.
To the right of the doors are three drawers, click on each of them to open them.
Each drawer has a series of dots, either black or red. Make note of the colors and patterns.
Back up.
Click on the clock for a close up. Note that you can use the buttons to move the hour, minute, and second hands.
Back up twice and turn right.
You should be back to the beginning, facing the dancing pickle and the entrance hall.
Time to solve some puzzles!
The Three Drawer Clue
Let's start with the clues in the three drawers.
Each clue was a bunch of dots, black surrounding red.
Maybe each one was part of a solution for something that involves black buttons surrounding a red one.
Click on the entrance hall to go down, then click on the cabinet three times for a close up of the lock.
Yep, there's buttons that turn either black or white, surrounding a red one.
The clues in the drawers show which buttons to push.
The first drawer shows that you should push the upper left, upper right, middle left, and lower left buttons.
The second drawer shows that you should push the middle right, lower right, and lower middle buttons.
The third drawer shows that you should push the middle left, middle right, and lower left buttons.
What you are left with should look like this: Upper row (from left to right) black, white, black.
Middle row: white, red, white.
Lower row: white, black, black.
Once the buttons are the proper colors, push the central red one, then open the cabinet and take the electrical cord from the dude who is trying to snort it.
Back up three times.
The Refrigerator
Turn left twice to face the kitchen entrance.
Click on the kitchen entrance, then click twice on the refrigerator to see the lock in close up.
Have we seen the clues for this gold lock?
Yes, the four gold symbols on the bookshelf.
Each symbol has a number in the painting, so the symbols star, triangle, square, and circle give you a number value of 4675.
Enter the code into the lock then push the large button below.
Click on the door to open it and take the party hat from the dude inside.
Back up twice.
The Bedroom Closet
Turn right three times to face the bedroom door.
Click on the door to open it and click on the closet door twice to see the lock.
This is a vertical lock with four colors. Have we seen the clue?
Yes, we saw the clue in the bottom shelf of the bookshelf, the vertical symbol clue revealed by moving the vase.
What we saw was an L-shaped symbol, a D-shaped symbol, an M-shaped symbol, and a square.
Refer back to the painting again, but this time look at colors.
The L-shaped thing is yellow, the D-shaped thing is white, the M-shaped thing is blue, and the square is green.
For the color-blind: click the right button of the top color three times (yellow), don't click the next one (keep it white), click the next one four times (blue), and click the bottom one five times (green).
Enter the colors into the lock and press the large button below.
Open the right side of the closet and take the robot head.
Open the left side of the closet and notice the dude dressed like a snowman.
Click on the snowman for a close up and note the clue: upper triangle, 8, colon, L-shape, M-shape, colon, circle shape, circle shape.
Back up three times.
The Party Hat
Turn right twice to see the nervous dude kneeling in front of the balcony doors.
Click on him twice for a close up then place the party hat on his head.
Click once to pull back the elastic, then click again to snap it. Note that the cracker explodes.
Click on the cracker for a close up and take the silver key.
Back up.
The Clock
Turn right three times to face the cabinet with the clock.
We've seen the clock clue, remember?
The clock clue was inside the closet.
The symbols and numbers give the clue. Again use the numbers from the picture to represent the symbols.
So upper triangle, red, colon, L-shape, M-shape, colon, circle, circle translates to 18:20:55.
This is the time you need to set on the clock.
Use the first button to move the hour hand to the 6.
Use the second button to move the minute hand to the 4.
Use the third button to move the second hand to the 11.
Once you have the clock properly set, click the large button below.
Note that the picture has moved up. Click on the picture for a close up.
Take the hammer, then click on the picture to close it. Back up.
The Silver Lock
Click on the door to the left of the cabinet with a clock. It is locked.
Use the silver key you got from the nervous guy on the lock.
Click on the door to open it. You are now in a room with a lot of humidity.
In front of you is a door-shape in the wall, click on it for a close up.
Click on the sticker to see the crack.
Use the hammer on the crack to remove the plaster.
Open the door and go forward twice.
Note the door on your left. It has a panda symbol on it.
DON'T OPEN THE DOOR. The panda is death.
Okay, if you want the bad end, go in the door, click on the panda guy for an extreme close up, and play with whatever is coming out of his nose. The minute you back up from that he will kill you. Hope you saved before you did that.
Go forward one more time until you see a frog rather...enthusiastically toweling himself off.
To the left of the frog is a bath, click on it for a close up and take the robot legs. Back up.
To the right of the frog is a sign on the wall, click on it for a close up.
On the sign are some numbers, 210912, and arrow going right, and a symbol of a gold rectangle with a red dot in the middle. Also note that the sign is screwed to the wall.
Back up five times to the main room.
The Box
Turn left twice to face the bookshelf.
Click twice on the box on the second shelf down for a close up.
This box has four symbol buttons on it. Also note the gold rectangle with the red dot.
Didn't we just see this clue?
Yes, we just saw this on the sign in the room with the frog.
The numbers 210912 are the clue. Remember the picture?
These numbers correspond to symbols in the picture, the 2 is the L-shape, the 1 is the upper triangle shape, the 0 is the M-shape, and the 9 is the D-shape.
The numbers give the pattern to push the buttons.
The sequence is: L-shape, upper triangle, M-shape, D-shape, upper triangle, L-shape.
Once you push the buttons in the proper sequence, the box will open.
Inside you will find a screwdriver and another clue.
This clue is circle, L-shape, star, circle, L-shape.
Back up twice.
The Screwdriver
Turn right twice to face the cabinet with the clock.
Click on the door next to the cabinet to open it and keep going forward until you get to the frog.
Click on the sign on the wall to the right of the frog for a close up.
Use the screwdriver on the sign to remove it. Inside is a robot body, take it.
While the robot body is in close up click on it to turn it around. Note the three prong connector in the back.
Close down the robot body. Hey, Bruce Willis is in the vent!
Back up five times to the main room.
Now what?
Getting Out (Regular End)
Turn right twice to face the bedroom door.
Click on the door to open it and click on the bed for a close up.
If you haven't already, pull down the covers to reveal the three-prong thing.
Time to make a robot!
Pull up the robot torso from your inventory.
Add the head and the legs.
Once you have a complete robot, put it on the bed.
Back up once, then click on the electrical outlet for a close up.
Use the power cord on the outlet and back up once.
Note that the head of the bed and the robot's eyes are glowing green.
Click on the bed for a close up, then click on the robot's chest panel for a close up.
Click to open the panel.
Looks like we need a number code.
We saw the clue in the box where we got the screwdriver.
The clue was circle, L-shape, star, circle, L-shape.
Once again remember the painting and the numbers, circle is 5, L-shape is 2, and star is 4.
This makes the clue 52452.
Plug in the final number clue and push the arrow button at the bottom.
Note that the robot's groin has opened up. Yay?
Click on the groin for a close up and take the gold key. Back up three times to the main room.
Turn left to face the entrance hall.
Click on the hall to go forward.
Click on the door twice to bring up the gold lock into close up.
Use the gold key on the lock. Yay, the door is open!
Go out the door to face the dude who was snorting the electrical cord.
Getting Out (Good End)
Follow the regular end until the door opens. Do not go out the door!
Back up twice to the main room and turn left.
Click on the clock twice for a close up. NOTE: The picture should be closed over the alcove before you do this. If it is not, click on the picture to close it.
The clock should still be on the proper time, 18:20:55. If it is not, reset it, then click on the large button.
The picture will move up, revealing a large stamp. Take the stamp.
Turn right to face the entrance hall. Click on the open door to escape.
The Three Ends
The bad end is the panda. If, when you go through the tunnel to the frog, you go into the panda door and mess with the panda, he will kill you.
The regular end is escaping without the stamp.
The good end is escaping with the stamp.
Posted by: grinnyp |
January 1, 2014 4:21 PM
|
January 1, 2014 4:21 PM