

![]() Over the past few years, fans of Tesshi-e have admired the view from a wide array of whimsical rooms, woobled the frames of numerous artworks and met many charmingly coy friends who want nothing more than to lock us up. All in good fun, of course! Along the way, the joy of playing a Tesshi-e escape game has always been happily punctuated by the exclamation: "Out, and with the happy coin!" Now, experience memories of happy coins past. Search through two windowless rooms, solving puzzles and gathering seven different coins in order to Escape from Happy Coin Room.
Over the past few years, fans of Tesshi-e have admired the view from a wide array of whimsical rooms, woobled the frames of numerous artworks and met many charmingly coy friends who want nothing more than to lock us up. All in good fun, of course! Along the way, the joy of playing a Tesshi-e escape game has always been happily punctuated by the exclamation: "Out, and with the happy coin!" Now, experience memories of happy coins past. Search through two windowless rooms, solving puzzles and gathering seven different coins in order to Escape from Happy Coin Room.
 It's the usual scenario and mode of play: you're stuck in a room without a key to the door so click around to investigate everything you see. Click the sides and bottoms of the screen to turn or back up. Although there is no changing cursor, you shouldn't experience any "pixel hunts," just keep a sharp eye out for suspicious looking objects and areas. Once you acquire an item, use one click to ready it for use, then click where you want to put it, or double-click to open its detail screen and examine it more closely or use other items on it. All this will be second nature for anyone who's familiar with point-and-click games.
Your biggest trouble, if it comes, will come early on. Tesshi-e uses a rather sneaky tactic for presenting a clue, one that may be predicated on frustration or, perhaps, stubborn clicking. The concept itself isn't a bad one; it's kind of clever, really, like a little wink and encouraging smile. Truthfully, a toddler presented with such a device could discover quickly, through experimental playing, just what needs be discovered. But in this case, the trick feels a bit unfair. So here's your hint: don't just poke once or twice, shrug and move on. Play it up! After overcoming those sly parts, your Escape from Happy Coin Room will be smooth going. Puzzles are tinged with just enough difficulty to intrigue while being intuitive enough to keep things so enjoyable, you'll forgive Tesshi-e's little shenanigans by the time you leave. When it's all between good friends, after all, who can hold grudges?


Walkthrough Guide
(Please allow page to fully load for spoiler tags to be functional.)
Escape from Happy Coin Room Walkthrough
Starting Out: Exploring Upstairs
When you begin, you're locked facing double doors. There's a ficus tree to its left and a little drawered-table on the right...
Inspect the little table to see a device topped by a Mr. Birdy.
You can poke around on the squares to change the numbers.
Is this a puzzle? Do we just move on since we don't have a code for it?
Keep poking this sly little device. Experiment with it to see what you discover.
There is also a locked drawer on this table: a key is needed here.
You can zoom in closer to see the pebble-covered soil in the tree's planter, but it'd be too messy to dig up with bare hands.
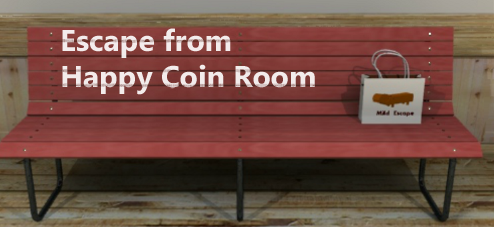
Go left. Now you see a pretty red bench. Let's get a better look at it...
"SINCE2008MILDESCAPE" is written on the bench. Are those four numbers useful?
There's also a gift bag here. Pick it up and look inside:
A BOX CUTTER.
Examine the bag in your inventory to see if there's anything else ...
a multicolored series squares on its other side.
One other thing to note: one of the grommets on the bench is actually a screw.
Leave the bench view and turn left to face the wall with the stairwell...
On the left side and right side of the railing, you'll see some Mr. Birdy stickers; zoom in and make a note of their number and placement.
From the left side of the railing, get A COIN!
Back up from the railing and click on the floor on the right side of the stairwell, as if to go downstairs. It's too dark down there!
Back up. Look high up near the ceiling. There is a button or switch of some sort; you need a way to reach it.
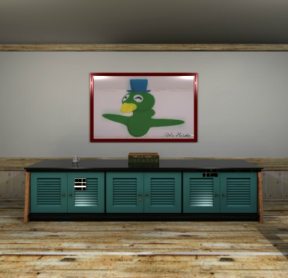
One more left turn takes you to a long green cabinet and a giant picture of Mr. Birdy...
Mr. Birdy's picture frame is wobbly.
Unfortunately, the stickers on the stair railing don't hold the solution...at least, not all of it.
Pick up the COFFEE MUG from the left side of the cabinet.
Examine the box on the center: it looks like 7 coins could fit here.
Then, look at the locks on each of the cabinet doors:
The door on the left has a 3x3 grid of buttons; a certain sequence of clicks is needed to unlock it.
The middle door needs a key.
The door on the right side of the cabinet needs a 4-digit code:
The "2008" from the bench, though, does not help.
If you have fully explored this room and have experimented with everything you've seen as much as possible, then you are ready to solve your first puzzle.
The Wobbly Picture Frame
This is the first puzzle you must solve in order to go on. There are two clues in the upstairs room to help you do it:
Both the needed clues have Mr. Birdies on them. There is a third Mr. Birdy item here that has nothing to do with the wobbly picture frame, though.
Go back over to the Mr.Birdy device on the small table...
Keep clicking on each number. Notice that, once you've clicked so many times, the numbers keep changing. So, keep clicking on each number until it's as high as it can get.
Now focus on the giant picture of Mr. Birdy:
Click the corners of wobbly picture frame in the correct order.
SOLUTION:
The decals on the stair railing indicate how the corners are numbered. The mr.birdy device by the door gives you the order on which to click the corners...
TR, BR, TL, TL, BL, TL, BR
TR=top right; etc.
When you've clicked in the proper order, the picture will raise up, revealing a hidden niche in the wall.
Examine the picture of the two dolls...note which cup is associated with which doll.
Get the LONG NOTE.
Rightside Door of Long Cabinet: 4-digit Code
Take the LONG NOTE found behind the wobbly picture and examine it in your inventory:
There are faint outlines on it. Use your BOX CUTTER to cut out spaces on the note.
The "S" and "E" are the clues where to use it...
Go over to the bench...
Place CUT-OUT STRIP on bench over the words "SINCE2008MILDESCAPE" and note what you see.
Go back to the long cabinet and zoom in on the code box for the right side doors:
Enter the correct 4-digit code.
SOLUTION:
1 2 8 1
Open the cabinet doors and get the:
SCREWDRIVER.
Lights On and Exploring the Basement
Go over to the bench and zoom in on the right side.
Use the SCREWDRIVER acquired from the last puzzle (see above spoiler) to remove the screw:
get a BOARD, one of the bench slats.
Now turn and face the stairwell. In the upper left corner of the wall in this view, you can see a green glowing switch high up...
Use the BOARD to flick the switch. Now the lights are on downstairs.
Turn back to the stairs and walk down to the basement.
When you get to the bottom of the stairs, head toward the wall with the cask and table first. Examine the cask:
It's missing a tap head.
There's also something written on the right side of the cask:
179
365
842
Then, look at the three green boxes on the table:
Inside the boxes you see: pliers, a happy coin, and a spade.
You can only take one item out at a time because, as soon as you take one item, the other lids close.
Choose the item you know you could use right now:
The SPATULA (spade)
Turning left from the table, you see two dolls on shelf in the wall...
These dolls look like the ones in the snapshot behind the woobly Mr. Birdy picture, but you have only one mug.
In the meantime, see if you can find anything else about these dolls.
Look under the hat of the doll on the left: a Christmas Bell HAPPY COIN (#3 of 7)!
Take another left turn and you'll be facing the stairs. There's also a safe in the wall under the stairwell and two wooden chairs...
The safe needs a 3-digit code. You'll have to come back to it later.
Let's look around these chairs here...
Like the Mr.Birdy device upstairs, they seem like they might be a puzzle but...are they?
Jiggle them around a lot and see what happens:
A first edition HAPPY COIN (#1 of 7) will fall out from under the chair on the left if you click it a few times repeatedly.
Before going back upstairs, turn to left look at the last wall...
Here is a "Happycoin Manufacture Machine." The buttons on its 2x5 grid light up when you press them.
Key to Middle of Cabinet and the Green Dolls
Take the SPATULA from the three lidded boxes downstairs and go upstairs. Examine the pot of the ficus tree:
Use the SPATULA to dig in the dirt, get SPADE KEY.
Turn around and focus in on the middle doors of the long cabinet:
Use the SPADE KEY to unlock the doors.
Get the red HAPPY COIN MUG CUP.
Look inside the mug to find something else: a modern HAPPY COIN (#2 of 7).
Turn around, go back down to the basement and go over to the two green dolls on the shelf:
Place each of the two MUG CUPS next to the dolls, as shown in the snapshot seen earlier.
Red happy coin mug on the left;
blue and pink mr birdy mug on the right.
When the mugs are placed correctly, the glass panel behind the dolls will open:
Get the WINE GLASS.
Leftside of Cabinet, Hippo and Cask
Return upstairs. Now focus on the left side of the cabinet:
You need to press each button on this 3x3 grid in the correct order.
Use the clue you found downstairs...
SOLUTION:
The answer is on the side of the cask...
179
365
842
When the correct sequencd is used, the cabinet doors open. Inside, you see a hippo and shiny silver item:
Get the TAP HEAD PART.
The hippo is a puzzle:
Light up each of the six buttons with the correct color.
The clue is on something in your inventory.
SOLUTION:
Look on the other side of your mild escape bag...
RED, YELLOW, GREEN, RED, YELLOW, GREEN
When you correctly solve the hippo's color code, his mouth opens:
Get the new Mr. Birdy HAPPY COIN (#4 of 7).
Once again...downstairs. Zoom in on cask:
Use the TAP HEAD PART on the nozzle of the cask.
Place the WINE GLASS below.
Pour some wine into the glass.
Two new things happen after you fill up your wineglass:
First, look at your GLASS OF WINE to see a new number.
Next, back up to see the plunger on the box under wine cask has been depressed by the full glass of wine:
Get the Halloween HAPPY COIN (#5 of 7)
Downstairs Safe, Small Drawer and Last Two Coins
Fortunately, if you just completed tasks in spoiler above, you're already downstairs. Turn around and face the safe under the stairs:
Enter the correct 3-digit number to unlock the safe doors.
SOLUTION:
The answer is on the full glass of wine...
7 1 4
Look inside the now open safe to find two things:
A significant-looking series of green squares, arranged in a particular pattern on the wall.
A DIAMOND KEY hanging from a metal cord.
Go back to the three boxes on the table...
Replace the spatula and get the PLIERS.
Turn back around. Use the PLIERS to remove the DIAMOND KEY from the cord in the safe.
That done, you can replace the PLIERS in the green box and take:
the Santa "Merry Christmas" HAPPY COIN (#6 of 7)
Upstairs again: go to the small table by the exit doors and use the DIAMOND KEY to unlock the drawer...
Get the LEVER.
Downstairs: face the "Happycoin Manufacture Machine"
Input the correct pattern of green squares on the 2x5 button grid.
SOLUTION:
As seen inside the safe...
XX-X-
--X-X
When the pattern is correct, the machine opens...Now to operate it:
Insert the LEVER (found in the drawer upstairs)
The, place A COIN (found on the stair railings upstairs) under the press.
Pull the lever: get the final HAPPY COIN (#7 of 7).
Escaping
After collecting all seven HAPPY COINs, go upstairs and put the coins in the coin display case.
With all seven coins in it, you can now get the HAPPY COIN COLLECTION.
Look inside the box where the collection used to be mounted:
Get the HEART KEY.
Turn, face the door, use the HEART KEY, and escape!
COINS LOCATIONS
Under chair downstairs (jiggle it).
Inside the red happy coin mug cup.
Under the hat of the doll on the left, downstairs.
Open the hippo's mouth.
Inside box under wine cask (after pouring wine).
In the middle green box downstairs.
Made in the Happycoin Manufacture Machine.
Posted by: elle |
October 21, 2013 6:10 PM
|
October 21, 2013 6:10 PM