

![]()
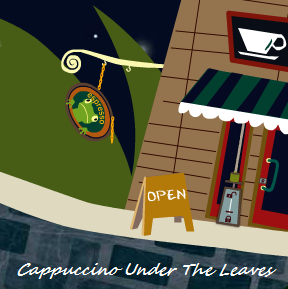 Finding a good cup cup of coffee, late at night, is difficult enough for us mammals. For this here frog, it's an epic adventure! Cappuccino Under The Leaves, a point and click puzzler from Japanese developer Karabina-7, shows how the desire for a caffeine fix will drive even the smallest of amphibians through the most devious of obstacles. Just click around to solve puzzles. Your cursor will change when you place it over an interactive area. Cappuccino Under The Leaves is kind of a bizarre experience, but its puzzles are logical and are very satisfying to plow through. As a whole, the work is an interesting spin on the "player character figuring out alien machines" theme so often found in the escape genre: here, the machines are just human enough to be recognizable, but, when seen through the eyes of a frog, seems like things those trapped in the Submachine probably have to put up with whenever they want a little java. In short, Cappuccino Under The Leaves's cuteness and challenge forms an excellent blend that's good to the last drop.
Review
- Walkthrough

15 Comments
Stuck on the puzzle with the arrows and numbers -- a hint?

stuck there too! i'll let you know if i figure something out. I think it has to do with
the board on that room with capital A and B, and spirals. I though it had to do with some spiral plants growing on main island where coffee shop is. 7 to one side, 2 to the other. Can't figure the direction of the arrows though...
Oh got it!
Go up and open the umbrella. It'll give you directions of arrows. I was right about the spiral plants....
FINISHED! Cute and simple game!! Loved it!
about the umbrella:
you need to pull the lever on the pipes, on the top-left corner
I got it as well. Kicking myself for overthinking the puzzle.
That was a cute game.
It could have an escape tag except its sort of break in rather than out !
Any hints for the triangle/star puzzle by the train tracks?
Cappuccino Under the Leaves Walkthrough
Scene 1 - Cafe Entrance
-
Start by pushing the blue button in the lower left corner to flip the switch and light the area.
-
Click the broken espresso sign hanging from the side of the building to zoom in.
-
Replace the chain at the side to fix the sign.
-
Click the frog in the middle of the sign to make him jump out.
-
Click twice on the corner of the blue book sticking out of the bushes to remove it.
-
Read the book in the frog's hands for instructions on making coffee.
-
Move left to travel to the next scene.
Scene 2 - Pier
-
Pick up the sack of white coffee beans beside the crates, the frog will also discard the blue book onto the ground.
-
Click the lower right corner of the full crate to view the telephone number for the blimp: 47-152.
-
Zoom in on the telephone at the left side of the area.
-
Remove the receiver from the side of the phone.
-
Press the buttons on the dial to call the blimp number.
-
If dialed correctly, the blimp will take the frog and white coffee beans to the next scene.
Scene 3 - Island
-
Click the road sign at the water's edge to flip it around.
-
View the reflection of the numbers in the water to find the combination: 8195.
-
Read the back of the rabbit's newspaper to find the clue for the manhole.
-
On the paper are two pictures, one with a 3x3 square of dots and lines and one with a 3x3 square of numbers.
-
In the middle box of the bottom row in the first picture is 1 red dot.
-
At the same place in the second picture is the number 1, indicating that each dot has a value of 1.
-
The right box at the top row of the first picture has 4 dots and 3 lines while the same box in the second picture has the number 7, indicating that each line also has a value of 1.
-
Using this information you can find the rest of the numbers in the second picture by counting the dots and lines in the first picture.
-
Row by row, the final order is:
-
5-3-7
-
9-6-2
-
8-1-4
-
Click the manhole cover on the ground to view a 3x3 square identical to the one on the newspaper.
-
Now that you know the location of each number on the 3x3 square, you can use that information to enter the numbers from the combination found on the sign: 8195.
-
8 is the left box in the bottom row, 1 is the middle box in the bottom row, 9 is the left box in the middle row, and 5 is the left box in the top row.
-
Click those spots on the grid to light them; it should look like an L shape when you are done.
-
Go down the ladder in the opened manhole to travel to the next scene.
Scene 4 - Oven Room
-
Click the plug at the back of the machine to insert it into the socket.
-
Click the bag of white beans the frog is holding to toss them into the machine.
-
Turn the white valve next to the gas tanks to turn on the gas.
-
Press the button under the white square at the lower right corner of the machine to start the fire.
-
Raise the heat of the fire by clicking the right side of the dial under the flames.
-
Lift the blue lever to drop the heated coffee beans into the mixer.
-
Flip the blue switch at the side of the mixer to drop them into the bucket.
-
Click the crowbar sticking out of the bottom of the chalk board to drop it onto the ground, then click it again to pick it up.
-
Take the bucket full of dark coffee beans at the bottom of the machine.
-
Pull the red lever in the middle of the pipes to direct the steam to the right.
-
If you have a look at the chalkboard, you'll see a message written sideways with the letter A and a swirl facing left, two perpendicular lines, and the letter B and a swirl facing right.
-
Go up the ladder to travel back to the Island.
Scene 3 - Island
-
Make sure that the steam from the Oven Room is flowing out of the pipe in the ground.
-
Click the umbrella to open it and find the hidden message.
-
A = right and B = left.
-
Move right to return to the Pier.
Scene 2 - Pier
-
Count the number of swirl plants you can see around the scene that are facing left and right.
-
In this scene there are 2 right swirl plants and 5 left swirl plants.
-
Continue right to the Cafe Entrance
Scene 1 - Cafe Entrance
-
Again, count the number of swirl plants around the scene.
-
In this scene there are only 2 swirl plants facing left.
-
Return to the Oven Room.
Scene 4 - Oven Room
-
Click the door on the right side of the room for a close-up view.
-
To open the door you must enter in the number of A swirls in the top white box and the number of B swirls in the bottom white box, then turn the arrows.
-
Turn the arrows according to the directions on the umbrella: top arrow facing right and bottom arrow facing left.
-
If you combine the number of left-facing swirls from both scenes 1 and 2, the final number is 7.
-
The number of right-facing swirls is 2.
-
Enter 7-2 from top to bottom in the combination lock.
-
Go through the opened door to the Conveyor Belt.
Scene 5 - Conveyor Belt
-
Click the bucket the frog is holding to pour the beans into the coffee grinder.
-
Lift the stand at the bottom of the coffee grinder.
-
Turn the red crank to grind the beans.
-
Pick up the dish full of ground coffee.
-
Inspect the area of the machine where the dish was to view two symbols, a triangle and a star.
-
Turn over the empty bucket on the table.
-
Click the underside of the bucket to read the note.
-
There are four symbols on the piece of paper, two of which you've already seen on the coffee grinder machine: the triangle and star.
-
If you follow the path of the lines from the start at the triangle to the numbers at the bottom, taking a turn each time there is a fork in the path, you will arrive at the number 4.
-
Repeat the same process starting at the star and you arrive at the number 1.
-
Click the sign at the side of the conveyor belt to zoom in.
-
Enter the numbers 4-1, then press the top of the button on the right to start the machine.
-
Hop on the moving conveyor belt to return to the Cafe Entrance.
Scene 1 - Cafe Entrance
-
Use the crowbar to pry open the crate with the music note symbols.
-
Take the trumpet out of the opened crate.
-
Click the doors to the cafe to zoom in.
-
Use the trumpet to lift the section of the awning with the music note.
-
Pull the revealed lever to unlock the door to the Cafe.
Scene 6 - Cafe
-
Pour the bottle of milk into the red cup.
-
Click the bottom lever at the left side of the machine to place the scoop of ground coffee over the white cup.
-
Turn the dial at the lower left corner of the machine from the blue icon to the yellow icon.
-
Flip the red switch at the bottom right corner of the machine to fill the blue bar.
-
Rotate the round knob at the top of the blue bar to raise the pressure gauge to 1.5.
-
Rotate the knob in the middle of the machine to pour the cream into the red cup.
-
Lift the top lever on the left side of the machine to drip the coffee into the white cup.
Most complicated espresso... EVER!
Can someone help me find the song that plays at the thank you at the end? I'm assuming the links at the bottom are for the music (BGM). But my search is not helping me at all. Thank you.
Very entertaining way of making coffee.
@Tofuninja5489,
The BGM's been credited to MusMus, so the music they used is probably listed on this page: http://musmus.main.jp/music.html
This is a great little game. Nice touch with the realistic rotary telephone.
Great game apart from the conveyor belt puzzle.
@bandsix
Oh man! That page has all the greatest hits from all our favorite escape games!
Great find, thanks for pointing me there.
Leave a comment [top of page]

Game of the week

Walkthrough Guide
(Please allow page to fully load for spoiler tags to be functional.)
Cappuccino Under the Leaves Walkthrough
Scene 1 - Cafe Entrance
Start by pushing the blue button in the lower left corner to flip the switch and light the area.
Click the broken espresso sign hanging from the side of the building to zoom in.
Replace the chain at the side to fix the sign.
Click the frog in the middle of the sign to make him jump out.
Click twice on the corner of the blue book sticking out of the bushes to remove it.
Read the book in the frog's hands for instructions on making coffee.
Move left to travel to the next scene.
Scene 2 - Pier
Pick up the sack of white coffee beans beside the crates, the frog will also discard the blue book onto the ground.
Click the lower right corner of the full crate to view the telephone number for the blimp: 47-152.
Zoom in on the telephone at the left side of the area.
Remove the receiver from the side of the phone.
Press the buttons on the dial to call the blimp number.
If dialed correctly, the blimp will take the frog and white coffee beans to the next scene.
Scene 3 - Island
Click the road sign at the water's edge to flip it around.
View the reflection of the numbers in the water to find the combination: 8195.
Read the back of the rabbit's newspaper to find the clue for the manhole.
On the paper are two pictures, one with a 3x3 square of dots and lines and one with a 3x3 square of numbers.
In the middle box of the bottom row in the first picture is 1 red dot.
At the same place in the second picture is the number 1, indicating that each dot has a value of 1.
The right box at the top row of the first picture has 4 dots and 3 lines while the same box in the second picture has the number 7, indicating that each line also has a value of 1.
Using this information you can find the rest of the numbers in the second picture by counting the dots and lines in the first picture.
Row by row, the final order is:
5-3-7
9-6-2
8-1-4
Click the manhole cover on the ground to view a 3x3 square identical to the one on the newspaper.
Now that you know the location of each number on the 3x3 square, you can use that information to enter the numbers from the combination found on the sign: 8195.
8 is the left box in the bottom row, 1 is the middle box in the bottom row, 9 is the left box in the middle row, and 5 is the left box in the top row.
Click those spots on the grid to light them; it should look like an L shape when you are done.
Go down the ladder in the opened manhole to travel to the next scene.
Scene 4 - Oven Room
Click the plug at the back of the machine to insert it into the socket.
Click the bag of white beans the frog is holding to toss them into the machine.
Turn the white valve next to the gas tanks to turn on the gas.
Press the button under the white square at the lower right corner of the machine to start the fire.
Raise the heat of the fire by clicking the right side of the dial under the flames.
Lift the blue lever to drop the heated coffee beans into the mixer.
Flip the blue switch at the side of the mixer to drop them into the bucket.
Click the crowbar sticking out of the bottom of the chalk board to drop it onto the ground, then click it again to pick it up.
Take the bucket full of dark coffee beans at the bottom of the machine.
Pull the red lever in the middle of the pipes to direct the steam to the right.
If you have a look at the chalkboard, you'll see a message written sideways with the letter A and a swirl facing left, two perpendicular lines, and the letter B and a swirl facing right.
Go up the ladder to travel back to the Island.
Scene 3 - Island
Make sure that the steam from the Oven Room is flowing out of the pipe in the ground.
Click the umbrella to open it and find the hidden message.
A = right and B = left.
Move right to return to the Pier.
Scene 2 - Pier
Count the number of swirl plants you can see around the scene that are facing left and right.
In this scene there are 2 right swirl plants and 5 left swirl plants.
Continue right to the Cafe Entrance
Scene 1 - Cafe Entrance
Again, count the number of swirl plants around the scene.
In this scene there are only 2 swirl plants facing left.
Return to the Oven Room.
Scene 4 - Oven Room
Click the door on the right side of the room for a close-up view.
To open the door you must enter in the number of A swirls in the top white box and the number of B swirls in the bottom white box, then turn the arrows.
Turn the arrows according to the directions on the umbrella: top arrow facing right and bottom arrow facing left.
If you combine the number of left-facing swirls from both scenes 1 and 2, the final number is 7.
The number of right-facing swirls is 2.
Enter 7-2 from top to bottom in the combination lock.
Go through the opened door to the Conveyor Belt.
Scene 5 - Conveyor Belt
Click the bucket the frog is holding to pour the beans into the coffee grinder.
Lift the stand at the bottom of the coffee grinder.
Turn the red crank to grind the beans.
Pick up the dish full of ground coffee.
Inspect the area of the machine where the dish was to view two symbols, a triangle and a star.
Turn over the empty bucket on the table.
Click the underside of the bucket to read the note.
There are four symbols on the piece of paper, two of which you've already seen on the coffee grinder machine: the triangle and star.
If you follow the path of the lines from the start at the triangle to the numbers at the bottom, taking a turn each time there is a fork in the path, you will arrive at the number 4.
Repeat the same process starting at the star and you arrive at the number 1.
Click the sign at the side of the conveyor belt to zoom in.
Enter the numbers 4-1, then press the top of the button on the right to start the machine.
Hop on the moving conveyor belt to return to the Cafe Entrance.
Scene 1 - Cafe Entrance
Use the crowbar to pry open the crate with the music note symbols.
Take the trumpet out of the opened crate.
Click the doors to the cafe to zoom in.
Use the trumpet to lift the section of the awning with the music note.
Pull the revealed lever to unlock the door to the Cafe.
Scene 6 - Cafe
Pour the bottle of milk into the red cup.
Click the bottom lever at the left side of the machine to place the scoop of ground coffee over the white cup.
Turn the dial at the lower left corner of the machine from the blue icon to the yellow icon.
Flip the red switch at the bottom right corner of the machine to fill the blue bar.
Rotate the round knob at the top of the blue bar to raise the pressure gauge to 1.5.
Rotate the knob in the middle of the machine to pour the cream into the red cup.
Lift the top lever on the left side of the machine to drip the coffee into the white cup.
Posted by: Trinn |
May 25, 2012 3:35 PM
|
May 25, 2012 3:35 PM