


![]() The Fancy Pants Adventures is now available for iPhone and iPad! Usually referred to as simply Fancy Pants, this is the fast-moving blur of an action/platform browser game we've all come to worship over the last few years, including the more recent and feature-filled XBLA and PSN releases. Tons of levels, tons of extras, and tons of creativity. It's so much Pants, you'll barely be able to contain yourself!
The Fancy Pants Adventures is now available for iPhone and iPad! Usually referred to as simply Fancy Pants, this is the fast-moving blur of an action/platform browser game we've all come to worship over the last few years, including the more recent and feature-filled XBLA and PSN releases. Tons of levels, tons of extras, and tons of creativity. It's so much Pants, you'll barely be able to contain yourself!
 Mr. Pants' girlfriend, Cutie Pants, has been kidnapped by pirates (brb lol!), so it's your job to race across Squiggleville and beyond to save her. Gameplay is about one thing: speed. Ok, speed, and finding cool secret stuffs. Move with the controls on the left side of your iOS device, and jump, duck, or attack using the controls on the right. Build up speed and run smoothly along hills, loops, and more, hopping back and forth like a hypersonic little money (with nice pants). Beyond the main levels, which are elegantly and intelligently designed, Fancy Pants comes with a whole lot of bonuses. The wardrobe alone allows you to customize Mr. Pants with over 140 accessories, and the Fancy Arcade allows you to play a handful of mini-games.
Ready for the bad news? You probably worked this one out already, but because the mobile version of Fancy Pants uses only a touch screen for control, it lacks the precision of physical buttons, making it a challenge to run around without any tactile feedback. Some folks can manage just fine with virtual buttons, but others (like most people on the JIG crew) crave real buttons when it comes to fast moving games of this nature. To each his own, but it says a lot when the game's only drawback is a hardware restriction and not part of the game itself. Fancy Pants for iOS is a stellar release, no matter your control preference!


Walkthrough Guide
(Please allow page to fully load for spoiler tags to be functional.)
Fancy Pants Adventures iOS Walkthrough
Chapters 1-5
General Info
If you haven't played the game before, there is a detailed "How to Play" section in the "Help & Options" section of the main menu. It tells you everything from movement to attacking.
Fancy Pants can also do a backflip if you jump and press the directional button that is opposite to the direction he is facing.
When you are sticking to a wall, pressing a different sideways direction can change your trajectory. Pressing the direction away from the wall and jumping lets you jump far horizontally. Pressing the direction into the wall allows you to jump higher vertically than horizontally.
Fancy Pants' House:
Nothing except self training and changing Fancy Pants' outfit and design
Training Room:
Mister General Bobblehead Man teaches you the basics if you didn't already look them up in the "Help & Options" section.
The first star you collect is right on the way to finishing the stage.
Following the loops is very simple if you follow the instructions. You can do a tuck and roll by pressing the down arrow when you the slope of the hill.
Level 1: Squiggleville
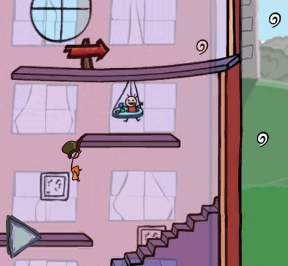
You see the weird special squiggle above the house awning, but you can get them later. Those squiggles are for restoring health.
When using the spring pads that are not angled, the momentum and direction you are moving affect the direction in which the pad sends you.
The First Micro Trial
There are signs indicating where the trial starts if you head right from your house.
Once you start, make sure to keep your momentum up until the third platform. You only have to tap up to jump easily to the second platform.
Keep holding down the right direction once you land on the second pad. After you land, make sure to immediately tap up to jump up to the third platform.
Make sure to hold it down for half a second before you release the up direction.
Once you have landed on the 3rd platform, change direction and hold down jump to make it to the slanted ramp.
Run as fast as you can and make sure to hold down jump once you get to the end of the slanted platform.
Keep your momentum going left and then tap the up direction to land on the final platform without missing any of the squiggles.
To clear the gap to your house's roof, make sure to hold the up direction as you jump from the end of the final platform. You will hit every squiggle and land right on the roof.
Multiple squiggles appear once you clear the trial, but they will disappear once they go off screen. You should grab those first before you grab the weird special squiggle. That will always be sitting there, the others will not.
You can get to the health squiggle by just clearing the micro trial again. Just be careful not to run off the roof trying to jump down on the awning. The easiest way is to slowly creep to the edge of the roof and fall down onto the squiggles.
After you are done with the micro trial, head to your right and into the buildings.
The First Star in Level 1
The first star is accessible from the same roof you access to get the 2nd health squiggle.
Find a guy on the computer in the red building.
From there, wall jump off the wall nearest him to get onto the roof.
Walk over to the chimney. First, you hold the up direction next to the building's chimney and grab onto its edge.
Press the up direction again to jump onto the chimney. The next part is a little tricky for some people.
Jump the chimney onto the side of the green building, but make sure to never let go of the up direction.
Once you hit the wall, provided you are still holding up, you will run farther up the wall.
As soon as you reach the max height of your wall run, jump from the wall pressing the right directional button to get the star.
After that, you can jump down in between the red and green buildings to continue onwards. Scale the inside of the green building and use the jump pad at the top of the building to progress forward. You can also drop down from the roof and still be able to continue.
The Secret NPC of Level 1:
This mad scientist can be accessed by two possible ways.
First Way:
Either you can access by dropping down in between the green building and the pale yellow building from the green building's roof.
You should not use the spring pad because it will send you into the pale building's oil slick ramp.
There is a tunnel path leading underneath the green building, but you will notice a smaller path leading away from the green building.
Follow it, find to box steps and see the scientist NPC.
Second Way:
The other way is to use the spring pad from on top of the green building. You will get launched towards the pale building and be sent sliding down the oil slick, out and away from the other buildings.
Once you see the arrow signs pointing at an angle and right, you will see a tunnel leading to the left. Follow the tunnel and find the NPC near a door.
The door leads to a bonus trick stage where you need to beat his high score. The key to the stage is to chain as many fancy moves as possible together. There many many different ways to do it, but here are some helpful tips while trying it.
The more different styles of tricks you perform (wall jumps, ledge grabs, rolls, backflips, etc.), the more points you will receive.
If you keep repeating a particular trick, you receive fewer points each subsequent time you perform it.
Save using backflips and spins until you find a spring platform to jump on. You can combine the backflip and spring jump to get thousands of points very easily.
You can grab the squiggles as you perform tricks for even more points. You just need to make sure you try every type of move you can so you can get the max amount of points as quickly as possible.
2nd Star in Level 1:
This star is in the level per say, but you need to reach a door to get access to it. To get there:
You start off at the point where there is the arrow signs pointing at an angle and to the right.
Get a running start from inside the tunnel to the sign's left and jump up onto the looped wall.
Continue up the looped wall and land on the platform to its left.
Head to the right, jump on the top of the looped wall, and wall jump up the bath tub sign onto the next platform.
Go to the left and just run off the edge onto the slanted platform below it and to the left.
Keeping running left so you get a lot of momentum.
Once you hit the grassy loop, keep running so you launch onto the side of the pale building.
You will stick to the side of the building and jump onto the platform with the door.
Once you enter the door, run left up the hill and past the house until you see a bunch of spring pads.
Jump on the middle and lowest spring pad to make your way up closer to the star.
Jump to the other spring pads to the right and once you get to the highest one, jump towards the left and try to grab the star.
It is a trial and error process to get the right momentum to nab the star easily.
Find the King
Once you collect the star, just head to the right until you see a door you can use to head back to the door by the pale building.
To continue onto the king, just scale your way up the purple mountain, past the bath tub billboard, and head right at the top of the mountain.
Once you enter the next area, head right and talk to the king.
After that, jump onto the top of the fire truck and use the jump pad to continue.
3rd star in Level 1:
After you talk to the king and use the spring to move on, you will move to your right and notice an up arrow on a green tube.
From there keep moving left, run off the ramp, and jump right as you are reaching the end of the ramp.
You will be sitting on platform by a giant bathtub where a health squiggle and a star will rest.
Find Captain RainbowBeard
You want to go and follow the platforms with spiders on them. Another good indication that you are going the right way are arrowed signs and hints written on parts of the platforms.
Wall jump off a few blocks, and you will reach the giant bathtub. You must swim to the bottom of the tub, collect any squiggles you want along the way, avoid the NPCs taking a bath, and pull the tub's plug to drain the water.
A spring will appear that you can use to head out of the bathtub to face Captain RainbowBeard.
Tips on fighting Rainbow Beard:
You can only hurt him once he has stars over his head. This happens once he tries to whip you with his beard.
Once he is stunned from his beard whipping, jump on his head.
Sliding tackles do not hurt him.
He will start his beard whipping attack once you are close enough to him and he is walking towards you.
The range of the beard attack is quite long, so you want to dodge the attack by jumping over him.
You can also hurt him while he is in the process of whipping.
It only takes three jumps on the head to defeat him.
Level 2: Outer Squiggleville
You start the level out standing to the right of the spring pad which starts the micro trial.
2nd Micro Trial
Jump on the platform and go straight up until you reach the height of the bounce.
Press right to move towards the first crate and hold down that direction.
Touch down on the crate and tap the up direction to jump to the second crate.
Touch down on the second crate and hold the up direction to jump as high as possible to the third crate.
Touch down on the third crate and hold the up direction to jump and stick to the fourth crate's side.
Press the up direction without any horizontal directional input and stick to the fifth crate's side.
Press the up direction again without any horizontal directional input.
Run to the right edge of the fourth crate and jump onto the spring pad.
Ride the spring pad all the way and run to the left once you land on the slanted ramp.
Keep running left and run off the ramp without jumping.
Land on the sixth crate and hold down the up direction once you reach the end of the crate.
Stick to the wall and press the up direction without any horizontal directional input.
Land on the final pad and grab the final gold squiggle to complete the trial.
1st Star on Level 2:
Once you complete the Micro Trial for the level, the star will appear directly above you on the final pad.
Grab the Pirate's Message in a Bottle
Run to your right from the Micro Trial spring pad and you will come upon the bottle once you pass the sign that says "Pants!"
2nd Star on Level 2:
Run to the right past the "Pants!" sign until you reach an arrow sign pointing down an oil slick and to the right.
Jump over the gap, run past the white warning sign, and stop once you reach what looks like giant steps.
Run to the right and jump onto the slanted ramp.
Run to the very edge of the ramp and hold the up direction to stick to the right red beam.
Keep holding up when you have stuck to the wall in order to run up the wall.
After you reach the height of the wall run, press and hold the up direction without any horizontal directional input to reach the top of the left red beam.
Move to the edge of the slanted ramp attached to the left red beam.
Run to the right and hold the up direction to stick to the right red beam.
Hold the up direction once you stick to the right red beam to begin wall running.
Continue wall running and grab onto the right red beam's ledge.
Tap the up direction to land on top of the beam.
Hold the up direction to grab the star.
The Secret NPC of Level 2:
Head down the oil slick ramp that is near the white warning sign.
Once you reach the end of the first oil slick, do not press any horizontal directional input and ride your momentum until you land.
Scale the platforms above your landing spot until you reach the platform that is crescent shaped and directly below the two gray bars.
Run to the left and jump to the area by the glass window with what appears to have buildings in the background.
Move to the edge by the second oil slick, tap up to jump, and tap the right direction slightly in order to position over the oil slick.
Touch down on the oil slick and hold the right direction button while on the oil slick and after you leave the jump.
Keep holding the right direction until you hit the right gray beam above the crescent platform.
Stick to the wall and wall jump until you reach the top of the gray beam.
Walk to the right and see the door with the NPC next to it.
Tips on the Bonus Room in Level 2:
It is a beat the time limit race; here's how to ace it:
Run to the right until you reach the second building top and hold the jump button to reach the third building top.
Run up the slanted crane ramp but do not jump off the end of the ramp.
Touch down inside the fourth building hallway and press down to slide underneath the obstacle for a speed boost.
Hold down the jump button at the end of the fourth building hall to reach the second checkpoint.
Hold jump at the edge of the checkpoint platform 2 and land on the first tan pillar.
Hold jump and move right to land on the center of each pillar for each of the four pillars.
Land on the fourth pillar, run jump to the top of the downward ramp, and hold the left direction to build up momentum.
Ride out the momentum until you land on the fifth building top.
Hold the jump direction to land on the first platform and hold the jump again to land on the next platform.
Jump down in between the fifth and sixth building and hold right button down once you hit the ground.
Reach the third checkpoint and hold the jump button once you reach the end of the walkway.
Land on the spring pads and ride the jump out by holding down the right button.
Land on the rope and move right until you reach the seventh building.
Jump on top of the building and jump onto the slanted brown platform.
Hold down the right button, do not jump at all, and ride your momentum out until you hit the eighth building's wall.
Wall jump to the top of the eighth building and head towards the spring pads.
Jump on the first spring pad and ride the jump without pressing and directional buttons.
Leave the second spring pad and hold the right direction button.
Keep running until you hit the checkered flag with about five seconds to spare.
Second Secret Room
Use the same directions that were used to get to the 2nd star.
Notice the mouse firing at you and jump towards him.
Jump on the spring pad and stick to the first wall you come in contact with after the pad jump.
Wall jump until you reach the platform with the second mouse and the door.
Enter the door and begin the secret room for more squiggles and fun.
3rd Star in Level 2:
The third star is located in the second secret room by the second star.
Follow the path to the very end of the room, and you will reach the third star easily.
Tips for surviving the room:
Avoid the rotating saw blades, spiked floors, spiked ceilings, and red electrical wires.
The yellow and black bars can be stood on so you do not have to wall jump up and down each little area.
The floor is constantly moving, so be sure not to speed yourself up into an environmental hazard.
There are mice who shoot at you in here, but they can be defeated by jumping on their heads and then kicking them.
Exit the room to continue on your quest to save Cutie Pants.
Leave the First part of Outer Squiggleville
Head to the right of the spring pad, pass the "Pants!" sign, jump past the white warning sign, and follow the signs until you reach the first loop.
Run up the first loop and land on the second one.
Run left on the second loop and move until you can stick to a wall.
Wall jump onto the platform to the right and move towards the shipping containers.
Wall jump up the tall gray beam and land on the rectangular platform.
Wall jump to the arrow sign, jump on the spring pad, and move right once you land on the shipping container.
Move right until you hit the creepy forest.
Level is complete.
Level 3: Canopy Forest
You start the level out with nothing around except a few squiggles.
Grab the Pirate's Second Message in a Bottle
Run from your starting position and head to your right.
Collect the squiggles by power stomping on the frogs' heads if you so desire.
Pass underneath a purple rectangle, and you will see an arrow sign pointing to the right.
Jump from the ledge onto the platform with the bottle on it. Voila.
1st Star of Level 3:
You are going to need the first frog you come across to get this star.
Let the frog jump by you 5 times until it gets close to the tree on your left from where you start.
Jump onto the frog and do a power stomp on it in midair; this will give you the necessary height boost.
Hold the up direction and try to wall run against the tree.
Run as high as you can and wall jump without pressing any horizontal directional input.
You should be able to reach it if you time the frog's jump properly.
If you miss the first frog, more will keep hopping towards the tree.
For quicker retries, restart the level and keep at it until you get it.
Alternate and easier way:
If you do not know where the "flying squirrel" NPC is, refer to that spoiler. Move left from it and run over to the lower left branch.
Jump on the micro trial spring pad and jump along each leafy platform until you get on top of the big tree.
Run along the top of the tree, and when you jump over a little tunnel in the tree top, begin to slow down.
Move as close to the left edge of the tree top and notice the line of white squiggles.
Jump down, follow the line of squiggles and you should hit the star along the way.
Exiting the Canopy Forest
Run to your right until you find an arrow sign that leads to a river and some platforms away from it.
Run over onto the lower platform, jump to the other side of the river, and continue running right.
Run in the grassy loop and up the wooden loop, where you will hit a giant spring pad.
You can follow the arrow sign point right, which will move you onto to the next area of Level 3; or you can scale higher.
To scale higher, jump up the three platforms and onto the crescent shaped loop ramp.
Run up onto the platform that is above the left side of the loop ramp.
Jump off the platform slightly to the right and run along the loop.
Wall run up the big tree and then wall jump onto the purple horizontal rectangle.
Wall run and jump onto the sideways bracket purple platform.
Run and hold jump onto the vertical purple rectangle and then jump onto the tree branch to exit the area at a higher vantage.
The higher exit gives you access to grab more squiggles while the lower exit makes you deal with frogs galore.
Either way, just head to the right and you will exit the stage.
Secret NPC of Level 3:
Run and jump onto the higher platform overlooking the first river by the right arrow sign.
Keep running and hold jump to make it to the tree branch over the next bit of land.
Continue running right once you land on the branch and hold jump once you reach the end of the branch that is inside the tree.
Stick to the inside of the tree's right side and wall run for a bit.
Wall jump twice inside the tree and land on the spring pad outside of the tree's right side.
Ride the spring pad up, and you will land on the branch holding a flying squirrel and a door.
Tips on the Bonus Room in Level 3:
The challenge in this room is to collect fifteen balloons before time runs out.
The trees on the outside of the room are the only solid ones to wall jump off of (I learned it the hard way the first time).
The mice who fire at you can be really annoying in the stage because they will knock you off ledge or wire and you will fall pretty far.
Do not go out of your way to kill monsters because that just wastes time.
Here is my strategy for the room:
Run to the right and use the first spring pad you see to get to the first balloon.
Jump one branch to the right from where you land and jump up to get the first balloon.
Run and jump to the right so you can land on the secon spring pad and grab the second balloon.
Run and hold jump from where you land to get on the branch holding the third spring pad.
Grab onto the rope ladder, scale to the top of the rope ladder, and jump over to the thin branches on the right side of the stage where the third balloon is.
Grab the third balloon as you move up the thin branches and make your way over to the left side of the room where the fourth spring pad is.
Ride the jump up, grab onto the thin wire, and jump up to grab the fourth balloon.
Wall run and jump up to the higher wire, head to the right side of the wire, and jump onto the left most rope ladder on the right side.
Scale as high as you can on that ladder and jump over to the second one where the fifth balloon is.
Make your way back to the leftmost rope ladder, jump onto the platform next to it, and jump over the left most branch where the sixth balloon is.
Grab the balloon and jump up to the spring pad that is angled towards the left side.
Ride the spring pads so you will get the seventh balloon in the process.
When there is a choice to use the left angled or the right angled spring pad, choose the spring pad going to the left side of the level.
Ride the spring jumps, land on the branch, and jump to your right heading towards a spider.
Scale the branches in the middle of the level and grab the eighth balloon.
Be careful of the shooting mice, grab onto the wire, and begin moving towards said mouse.
Jump up to grab the ninth balloon and move over to the right wall of the room.
Wall run and jump up to the next wire where the next two balloons are.
Move along the wire and grab the two balloons without ever jumping or leaving the wire.
Move to the left wall, wall run up it, and jump onto the spring pad.
Land after the jump, run towards the right side of the level, and jump onto the next spring pad on the right underneath three wires and three balloons.
Jump up and down the wires, collecting the three balloons as quickly as possible.
Get up on the highest wire, move as far left as you can on the wire, grab onto the thin branch, and jump onto the final platform with the final balloon.
The squirrel gives you an acorn hat for your troubles.
Third Micro Trial in Level 3:
This is by far the easiest trial so far.
Run from the first right arrow sign by the river, jump onto the higher platform, and run jump onto the tree branch.
Wall jump inside the tree and try to jump onto the spring pad which leads to the squirrel NPC.
Run to the left of it and the door, and you will see the spring pad for the micro trial.
Simply scale the leafy platforms, one at a time without skipping any to grab the golden squiggles.
Once on top of the tree, just run along it and you will get every golden squiggle without any trouble.
Finishing the trial drops a lot of squiggles, so you might want to grab them.
Second Secret Room in Level 3:
Run from the first right arrow sign by the river, jump onto the higher platform, and run jump onto the tree branch.
Wall jump inside the tree and try to jump onto the spring pad which leads to the squirrel NPC.
Run to the left of it and the door and you will see the spring pad for the micro trial.
Simply scale the leafy platforms to get on top of the tree.
Once on top of the tree, run along the tree top until you see a little tunnel inside the tree.
Go into the tunnel, dodge the lone frog, and jump across the exit hole in the tree to reach the other secret door.
The door leads you to an area with spring pads and trees with spiked tops to hurt you.
To scale over top some of the higher trees, you need to wall run up it and jump over it.
The spring pads do not have enough height sometimes.
There is a star in this room, but I will explain the process I used to get it in another spoiler.
2nd Star of Level 3:
This star is located inside the second secret room which can be found inside the tree. For directions how to get there, refer to the "Second Secret Room in Level 3:" spoiler.
When you enter the door, you appear next to a spring pad and notice there are more of them.
Jump on the first spring pad, wall jump off the first tree trunk, wall jump off the left tree wall, and land on the second spring pad.
Follow the spring pads over to the left side of the room where the star is located underneath the exit door.
To get over the trees that are taller than most, wall run up them and leap over to the next jump pad.
When you get to the two spring pads closest to the exit door, the tricky part comes into play.
You want to stick yourself against tallest tree, slide down about half way, and then wall jump with directional input to the right so you will shoot over to the crevice with the star in it.
The other option is you can get hurt on some of the bottom tree spikes and jump over to the star without wall jumping.
The wall jump is much safer obviously.
3rd Star of Level 3:
The star is located near the higher exit of the first area inside of the sideways bracket looking platform.
Grab onto the right side ledge of the horizontal purple rectangle and hang there.
Start sliding down the side of the rectangle by holding the left direction button into the rectangle.
After you fall off the side of the rectangle, keep holding the left direction button because you will hit the loop with a lot of momentum.
Run along the crescent and your momentum should give you enough height to launch right into the star.
Level 4: Rolling Bayou
You start off next to a big right arrow sign and a frog.
Escaping the Bayou
Head right from your starting position just like always.
Run along the loop, climb the little wall, and drop down onto the next little loop.
Wall run and jump off the wall with a door and a frog NPC behind to get onto the platform above.
Wall run and jump off the wall with the big up arrow, land on the platform, and run jump over towards the next big loop.
Run along the loop and let it carry you onto the hooked ramp platform.
Run to the left side of the platform and jump onto the branch platform.
Wall run and jump off the wall with a bat on the left side onto a platform with a spider on it.
Kill the spider if you want. Run and hold jump to make it onto the higher platform.
Run to the right and jump into the giant swamp water pool.
Swim to the right side of the pool, jump out, and fall down towards the platform above a right arrow sign.
Move right until you reach a platform above the river and underneath a spring pad.
Wall run up the wall, climb over the edge, and jump on the spring pad.
Ride the spring pad, run to the left, and jump on the alcoved spring pad to head up.
Land on the platform and run jump onto the slanted ramp with the spring pad.
Jump onto the spring pad and after landing on the the platform above, run left.
Continue running left on the loop and once off the loop, begin to push the right direction button.
Run up to the tree and start wall jumping until you reach the top of the L shaped platform.
Jump and the spring pad and move right to exit the first area.
Grabbing the Third Pirate Message in a Bottle
Head right from your starting position just like always.
Run along the loop, climb the little wall, and drop down onto the next little loop.
Wall run and jump off the wall with a door and a frog NPC behind to get onto the platform above.
Wall run and jump off the wall with the big up arrow, land on the platform, and run jump over towards the next big loop.
Run along the loop and let it carry you onto the hooked ramp platform.
Run to the left side of the platform and jump onto the branch platform.
Wall run and jump off the wall with a bat on the left side onto a platform with a spider on it.
Kill the spider if you want. Run and hold jump to make it onto the higher platform.
Run to the right and jump into the giant swamp water pool.
If you swim down to the bottom of the pool and towards the middle, you can see the bottle sitting in between two squiggles.
Swim to the right side of the pool, jump out, and follow the line of squiggles as you fall.
Land on the platform and run jump onto the platform to the left of it holding the bottle.
1st Star in Level 4:
You can follow the directions to grab the bottle to get close to the star, but here is a refresher.
Head right from your starting position just like always.
Run along the loop, climb the little wall, and drop down onto the next little loop.
Wall run and jump off the wall with a door and a frog NPC behind to get onto the platform above.
Wall run and jump off the wall with the big up arrow, land on the platform, and run jump over towards the next big loop.
Run along the loop and let it carry you onto the hooked ramp platform.
Run to the left side of the platform and jump onto the branch platform.
Wall run and jump off the wall with a bat on the left side onto a platform with a spider on it.
Kill the spider if you want. Run and hold jump to make it onto the higher platform.
Run to the right and jump into the giant swamp water pool.
If you swim down to the bottom of the pool and towards the middle, you can see the bottle sitting in between two squiggles.
Swim to the right side of the pool, jump out, and follow the line of squiggles as you fall.
Land on the platform and run jump onto the platform to the left of it holding the bottle.
Run and jump onto two more platforms before you reach a thin slanted platform that is angled up.
Jump onto the slanted platform and then start wall jumping on the walls inside the narrow tube.
Keep wall jumping until you make it up the platform holding that star and grab it.
Secret NPC of Level 4:
Follow the directions to get the Pirate Message in a Bottle so you can get close to the NPC.
Fall down from the platform with the bottle on it and head to the left.
Swim or run enough and you will reach the door and NPC that you could see on the other side of the wall earlier.
It is a french frog (go figure) that needs your help with the Bonus Room.
Tips on the Bonus Room in Level 4:
The goal of the challenge is to get the snail shell to the flag at the end of the room in under 100 seconds.
It is pretty challenging because it is quite difficult to aim the shell in the right direction sometimes.
The speed of your movement reflects how fast and hard it will fly.
You start off sprinting at the shell to knock well over the first big tree and then you follow it on the jump pad next to the tree.
Let the shell roll around on the other side until rolls through the small gap moving left.
You can help the shell along if it is not moving by slowly walking into it.
Once the shell gets just past the right side of the second tree, sprint at the shell so your kick will help it clear the large stump.
Follow it over by wall running and hop over the ledge.
Get the shell directly underneath the hollow log with wood platforms and run into moderately fast from its left side.
The shell should be sent pretty far up the log, but you can move it up farther by running into it as you jump up the inner platforms.
Once it is at the top of the hollow log, kick the shell into the left wall of the hollow log so it will bounce off and head right towards the horde of bats.
Follow the shell as it takes out the bats and try to avoid them as you fall so it wont eat up your time by bouncing from bat to bat.
Move the shell to the other side of the long tunnel and try to position it in the middle of the passage right before the flag.
Get a moderate amount of speed and hit the shell so it bounces off the nub shaped ground, then into the large wall and subsequently into the goal.
It takes practice: it took me about a good four tries before it was completed.
The 4th Micro Trial in Level 4:
Follow the directions to get the Pirate Message in a Bottle so you can get close to the Micro Trial spring pad.
From the platform to the right of the giant swamp pool, run to your right until you come upon ground that has a spring pad on it.
Wall run and climb up the ground and jump on the spring pad to advance.
Land and begin running to your right, where you will see another spring pad inside a little alcove.
Use the spring pad to get up to the higher platform.
Run and jump onto the next platform with an angled spring pad on it.
Jump off the left end of the platform and land on the angled platform below the spring pad platform.
Run up the ramp and hold jump to reach the next slanted platform with a spider on it.
Kill the spider if you want. Run left and jump onto the dirt rectangle.
Drop down the left side of the dirt rectangle: the spring pad is right there for the trial.
This trial is very tricky because it is very easy to miss one of the golden squiggles. Here is some basic tips and steps to pass the trial:
Ride the spring pad to its height and try to land on the left side of the dirt rectangle.
Run slowly off the right side of the dirt rectangle to the end of the first slanted platform.
Continue running off the first slanted ramp onto the right edge of the second slanted ramp.
Hold jump at the end of the second ramp while still moving right. Make sure your jump lands on the alcove spring pad.
Land on the platform above the the alcove spring pad and run jump onto the slanted spring pad platform.
Ride the spring pad until you land and then begin running left onto the branch loop.
Run up the loop: you will complete the trial if you hit every golden squiggle.
The finish of this trial ends right by the exit to the first area of Level 4.
Second Secret Room in Level 4:
Follow the directions to get to the spring pad for the micro trial.
Wall jump in between the dirt pillars until you can land on top of the left dirt pillar.
Bounce on top of each bat, and when you get to the fourth, make sure you power bounce on its head to reach the platform to the left of it.
Run to the left side of the platform and hold jump to reach the dirt L platform.
Wall jump in between the dirt environment to land on the dirt square with a spider on it.
Run and jump onto the slanted platform to the right, continue running and jump onto the platform with the secret door on it.
The 3rd Star of Level 4:
The star is located inside the second secret door.
Use the "Second Secret Room" walkthrough to get the room.
Once inside the room, just head up to the top where the door is located and dodge/kill any enemies on the way.
Watch out for the spiked areas on the platforms because you will take damage (obviously).
There are some spring pads placed underneath spikes, so don't ever use those.
When you get to this part, wall run up the right side of the right most spring pad pillar.
Jump right and begin wall jumping in between the wall and pillar with two wires connecting them.
Head towards the spring pad and use that to get closer to the door.
Move to get on top of the longest pillar that is also close to the door.
Run and jump to the far left wall, wall jump, and you should be able to grab the star.
The 2nd Star of Level 4:
This star requires the player to exit Canopy Forest at the higher level, using the moving platforms to access this star.
You will start out above the root you see when you enter from the lower tree entrance.
Kill the snail to your right and use its shell to kill the bats blocking the spring pads trajectory.
Use the spring pad after the bats are killed to get through the opening and start running down the grass once you land.
As you run, you can jump off the lip of the path to get on top of the block or keep running to get down the pathway.
As you fall, you will see the star inside of a tight loop de loop.
Run to the wall where a gap is present and what seems to be a lowercase d shape in the root on the other side.
Run to the left and jump at the lip in the path so you get enough to get inside of the small holed area.
Once you are cleared into the hole, stop moving so Fancy Pants can slow down and be able to grab the star without flying back out due to his momentum.
Once you are inside and not moving, just jump and nab the star.
Level 5: Bummin' It Beach
The level starts off with you by a gray pipe and nothing else around.
Leaving the Beach
When you start off the level, follow the surfboard signs, and they will bring you out of the first part of the level.
The Fifth Micro Trial on Level 5:
The trial is not particularly hard, but it is moderately difficult due to the sand platforms dissolving underneath once the trial starts.
Run from where you start at the beginning and stop once you run over the lip of a loop and see a big beach ball in the background.
Scale the platforms near the beach ball: the spring pad will be located on the fourth platform.
Just ride the spring pad's bounce for most of the golden squiggles: once you land, start running left.
You must move quickly if you want to collect all the squiggles because the platforms dissolve. They also shrink in width, so you have less platform to land on.
As you jump from platform to platform, make sure not to hold down the left direction the entire time because you might accidentally run off the edge.
The last platform in the trial has a golden squiggle above it, but you need to wait for the platform to dissolve so you can fall onto the last remaining squiggles.
Once beaten, a boatload of squiggles pops out, so grab them while you can.
Secret NPCs of Level 5:
The First NPCs: Hairy Hippies
The NPCs and room are located in the tunnel opposite of the 3rd star for the level.
Follow the walkthrough to get the 3rd Star, but instead of heading down the right path, choose the left side path.
You will come across to very hairy hippies who want you to break down their sand castles.
Oblige them for a new accessory.
Second NPC: Old Billie Goat
The next NPC is located in the next rocky area of Bummin' It Beach.
Once you exit the first part of level 5, you will see another surfboard sign: follow it.
Notice the little sand bubble above your head as you are running past. Stop once you get to the pathways sign that says Bummin' It Beach on one plank and High Dive Caverns on the other.
Run back down the path you came from and be ready to jump onto the middle dune.
As soon as you pass the tiny upside-down surfboard sign, count to 3.
When you count to three, jump off of the surface to land on the lone sand bubble.
Use the spring pad located on the bubble to launch yourself onto some dissolving platforms again.
Navigate and follow the platforms to reach a secret area of level 5 part 2.
Head to your right and keep going until you see a geyser pushing up some rock platforms.
Get on the third geyser platform and jump over to your right once it has reached its full height.
Start climbing the rock platforms sitting on the pillars and on the fourth one. The other Bonus Room door will be sitting there by an old goat, literally.
Tips on the 1st Bonus Room in Level 5:
You basically have to run into all of the 42 sand castles in under 40 seconds, which is really easy.
The pattern of destroying the sand castles was the way I finished the first time, but the method is up to you. Using this pattern should leave you roughly about 1 to 2 seconds of extra time.
Start the time race off by running left, destroying two sand castles, and running back the other way.
Get the one you missed on the first platform you start on and jump over the next one to destroy three more sand castles.
Drop down a level, run left, and destroy all sand castles on that level.
Turn around once you hit the leftmost sandcastle on the second level and drop down to the next level.
Run to the very end of this platform's right side, turn around and come back for the last sand castle on this floor level.
Run down to the next level of sandcastles, destroy the four on the left, jump to the other side and take out the remaining three on that level.
Turn around, drop down the middle gap, run left to take out three sandcastles, and turn around again.
Run right to get the last sand castle on that platform area and drop down to take out three more sand castles.
Jump across the middle gap and take out the other three sandcastles on the platform.
Drop down to the final area of sand castles, run left, and ride the upside down loop so you have enough momentum to destroy the remaining three.
Tips on the 2nd Bonus Room in Level 5:
The old billie goat wants you to complete his course in under 45 second for a nice little prize.
Start the race off by running as fast as you can right.
As you near the first large checkpoint, crouch down or slide to avoid running into the square platform.
After sliding or tumbling, run right off the lip of the ramp without jumping to clear the small, annoying gap.
Continue running and following the signs. Make sure not jump before the fourth checkpoint because it can mess up the timing of your run.
When you see the fourth checkpoint, prepare to jump right as you pass it, but hold down the jump button to get as much distance as possible.
You will pass one wooden platform, but land on the second one. When you do land, press and hold up to jump and reach the third wooden platform.
Run left onto the lower rock platform, wall run and jump up to the next platform, and wall jump off of the hanging rock pillar to reach the fifth checkpoint.
Run up the loop to land on the upper curved platform.
Once you reach the upward curved part of the ramp, jump and land on the first rectangular rock platform you see.
Jump over to the second rock square and jump towards the wall with the up arrow on it to wall jump up to the sixth checkpoint.
Run to the very edge of this next ramp and when you reach the end, press and hold up to jump and reach the small rock platforms.
From here, the checkpoint is in sight, so scale up the remaining platforms, jump up, and pass the finish line.
Grabbing the Fourth Pirate Message in a Bottle
When you start the level, just follow the surfboard signs.
Once you pass the fourth surfboard sign, you will begin running up the side of a being sand ramp.
Notice the sand platforms to you left as you are running.
Once the last platform is out of sight or just before it is out of sight, hold the up direction to jump from the loop.
Try to land on the last platform you saw so it will be easy to walk to the bottle.
Land on the platform and walk to your left without jumping, and you should fall right on top of the bottle.
1st Star of Level 5:
At the start of the level follow the surfboard signs without really ever needing to jump.
After you rode three different loops and there are two platforms you could use to exit the level to your right, start heading left.
Drop down off of the edge of what is the tip of a very big loop and try to land on a platform below.
Use the big loop that is to your left to propel yourself onto the dissolving platform above you.
From here, follow the path of disolvable platforms where the star will be sitting near some squiggles, at the top of a group of three platforms shaped like a pyramid.
The spot is also advantageous because it leads you right to the second Secret Room in the level.
Second Secret Room of Level 5:
At the start of the level, follow the surfboard signs without really ever needing to jump.
After you ride three different loops and there are two platforms you could use to exit the level to your right, start heading left.
Drop down off of the edge of what is the tip of a very big loop and try to land on a platform below.
Use the big loop that is to your left to propel yourself onto the dissolving platform above you.
From here, follow the path of disolvable platforms where to the left of the final three platforms is a door sitting on its platform.
The room contains a star and more squiggles to pick up.
2nd Star of Level 5:
This star is located inside the second Secret Room, so look to that spoiler if you cannot find the door.
Upon entering the door, you are on a lone sand dune surrounded by water on both sides.
Go into the water on the left side of the dune and begin to swim downwards.
Swim past all the pirates playing with their tub toys and follow the tunnel, grabbing any health or squiggles along the way.
There is only one path to the star, so you cannot get lost on the way there.
You will pass five pirates in a large area, two pirates in a small area, one pirate inside a tunnel, three pirates in a medium room, one pirate in another tunnel, and five pirates right before the exit in that order.
The last batch of pirates are in your way of the exit and the star. Navigate in between them carefully so you do not die before getting the star.
Tapping a direction to move once or very slowly makes it easier to move past the swimming swashbucklers.
Grab the star and be on your merry way.
3rd Star of Level 5:
It is located deep under the sand as you progress through the level.
Run right and follow the surfboard signs. They will point you in the right direction.
Pass the second sign that points down and follow it until you see a third surfboard sign that is pointing right.
Instead of following it, run to your left so you get to an upward tunnel that splits off into two separate paths.
Wall jump up the tunnel walls and head for the right pathway.
Run to the right, and as you keep running, the star will be located in between four health squiggles, two to each side of it.
Stay close by here because the Secret NPC and the Bonus Room are nearby.
Posted by: Bryan Gawinski |
March 19, 2012 4:08 PM
|
March 19, 2012 4:08 PM
Fancy Pants Adventures iOS Walkthrough
Chapters 6-11
Level 6: High Dive Caverns
You start the level off with a rickety bridge and a mallard duck to your right, so why not go right?
Spelunking through High Dive Caverns
Run to your right, avoid/eliminate the deadly mallards along the bridges, and stop near the edge of the cliff where you see a line of squiggles going down.
Jump off the edge, grab any squiggles you like, and land on another platform with a spider and another similar line of squiggles.
Jump again, land on the bat, drop down, and run to your left until you reach a spring pad at the end of a wooden bridge and next to a dirt rectangle platform.
You can either use the spring pad to get on top of those other dirt blocks, or just drop down to the left of the first dirt block you see.
Either way, you need to drop down and continue moving right to escape the caverns.
When you reach the first pool with the NPC on top of it, swim to the right and climb onto the edge of the container, where you will see a bat.
Just drop off of the edge, and you will land in another smaller pool of water.
Swim to either side of the small pool and jump down in the third and biggest pool of water.
Swim to the left side of the pirate pool, walk off of the diving board, and fall down into the last pool of water.
Head down to the bottom of the pool and swim right until you hit a wall.
Jump out of the water back onto land where there is a wooden bridge above you and two ducks blocking the way.
Get past them and head out to the second area of level 6.
Run down the ramp and dive into the pool filled with squiggles.
Swim down and to the right, find the sign under water, and continue swimming the narrow path. The path will widen and you can jump out of the water onto land.
When you land, run to your right and the level is complete. Onward to pirates and battle!
Secret NPC(s) of Level 6:
Run to your right from the starting position and follow the designated path before you until you reach your first spring pad in the level. It should be located on a wooden walkway and next to a dirt rectangle block. The spring pad is also angled up and to the left.
Ignore the spring pad for now and jump off the edge of the dirt rectangle.
Once you land, run right, and you will run into an underground lake. Sitting on the lake is a small platform with the NPC and a door.
The NPC is a woman in a hot spring next to a door to a Bonus Room. Climb up either side of the platform and jump up onto it.
Tips on the Bonus Room in Level 6:
The challenge for this room is another "chain your tricks to get a max high score".
The room, if you cannot find it, can be located from the "Secret NPC(s)" spoiler section.
The room is filled with water for underwater tricks and minimal walls for wall jump tricks.
Most trick combos can be pulled off by sprinting off a platform and diving into the pool.
Another nice combo is to run to the end of a platform, do a backflip, dive to the bottom of the pool, then cling to the bottom of the pool, and dart back up to the surface. This is the combo that got me the most points if done correctly.
The backflip can be done by jumping and pressing the direction opposite in which you are moving.
Clinging to underwater surfaces is as easy as holding down the direction in which the wall is relative to you. So if the wall is below you, hold down and press up to dart up the bottom of the pool.
Going from a wall jump into a dive can get a lot of points too.
The easiest trick to get in this room is the Dolphin Jump, in which you just jump out of the water, no matter the height. Make sure you combo those Dolphin jumps out of darting motions for a lot of points.
Second Secret Room in Level 6:
Follow the path from the starting position of the level until you reach the first pool.
You will pass two ducks, two spiders, a bat, and a spring pad before you get to the pool.
You can use the spring pad to grab some squiggles and squash some bats, but you need to mainly head down and to the right.
Drop below where the spring pad is, and you will come across a pool of water with a lady NPC over top of it.
Swim to the right side of the pool, climb on top of the containing edge, and notice a bat a little bit away from you.
Run and jump onto the bat, because you will need to chain a bunch of power stomps to make it to the door.
Remember, to power stomp an enemy, just hold down the down direction button when you land on an enemy for greater jump height.
Make sure to power stomp on each bat as you go along because if you mess up, there is no way to get back up to the first pool without restarting the level.
There are four bats to jump off of to get to the door. If you chained the jumps correctly, you will land on the door's platform with ease.
The micro trial for the level and a star can be found in this room.
The room contains a lot of wall jumps and spikes, so be careful as you trek through the room for squiggles and glory.
The Sixth Micro Trial on Level 6:
Use the 'Second Secret Room' spoiler to find out how to get to the door.
Inside the secret room, use the spring pad to your right to progress further into the room.
Be careful, because after the second spring pad launches you, it will send you into a ditch of spikes.
Hold the left direction after the second spring pad jump to not fall into the spikes.
Run right after the landing, jump over the spike pit, keep running up the loop ramp, and wall jump to make it over the next set of spikes.
Once over, you will slide and see a spring pad angled up and to the left. This spring pad starts the micro trial.
The spring pad launches you and makes you immediately cling to a wall.
Press down to stop clinging and drop onto the wire below.
Move to your right, grab all squiggles on the wire, and jump up and to the left to nab the squiggle above the wire and in the middle of the first wall jump section.
Wall jump three times and make sure to grab the third and highest wire, not the small one, and move to your left.
Move along the wire and drop down the middle of the area between the backwards L shaped platform and the I to land on the wire below.
Once you grab the squiggle on the wire, jump to the left wall and start wall jumping up to get back on the highest wire.
Drop down onto the left side of the L shaped platform and drop off the left edge to grab more squiggles.
Land on the ground, run to your right, and do a held jump to clear the spiked pit again and grab the high squiggle as you go.
Run along the loop and do the same wall jump you did to clear the spikes.
Once you land, run right to the spring pad, and you should clear the trial so long as you missed on squiggles.
The trial takes a few times to get used to, but it just takes some finesse to get it done properly.
1st Star in Level 6:
Use the 'Second Secret Room' spoiler to find out how to get to the room's door.
Inside the secret room, use the spring pad to your right to progress further into the room.
Be careful, because after the second spring pad launches you, it will send you into a ditch of spikes.
Hold the left direction after the second spring pad jump to not fall into the spikes.
Run right after the landing, jump over the spike pit, keep running up the loop ramp, and wall jump to make it over the next set of spikes.
Once over, you will slide and see a spring pad angled up and to the left.
This spring pad may start the micro trial, but we will not worry about that now if you haven't done it already.
Once you land on the side of the purple wall, slide down a bit and wall jump on top of the other wall close to the spiked ridge and loop.
Carefully jump over the spiked parts of the curved wall so you can land on the flat surface and get a lot of momentum to reach the star.
Run along the curve so you hit the ramp and fling yourself upwards onto a wire.
As you move right along the wire, you will notice the star is above a line of squiggles.
Grab the star and drop down onto the spinning rock below.
Grabbing the Fifth Pirate Message in a Bottle
Follow the path from the start of the level into the first pool of water.
The first one will have an NPC bathing in a hot spring in the middle of it. Jump onto the right containing edge of that pool, climb on top of the edge, and jump directly down so you land in the second pool of water.
Swim to the right side of this container, and you will notice some purplish platforms with a spider and some health squiggles on them.
Jump onto these platforms and make your way up to the third and highest of the purple platforms.
To get to the bottle from these three platforms, here is what you can do: Run off the right edge of the first platform, wall run up wall of the level, and jump onto the second platform.
From here, you can run jump onto the third platform and grab the bottle.
2nd Star in Level 6:
The star is near the third pool of water you fall into as you try and progress through the level.
For clarification, the pool will have a long angled ramp to the left side of it and an angled spring pad to the right of it.
Head to the left side and stop at the very end of the platform that looks very much like a diving board.
Notice the bat at the end of some squiggles. You will use the power stomp method, as used to get to the 'Second Secret Room'
Go back to the other end of the diving board by the water, run to the left, and hold jump to land on top of the bat.
Position yourself above each bat as you bounce to make sure you do not miss.
The star will be over top of the fourth bat you see, so make sure you power bounce off of him to reach it.
The bats constantly respawn, so you can keep trying until you get it.
If you get hurt or miss the bats altogether, there are spring pads below that will help you reach the first bat to jump on again.
3rd Star in Level 6:
The star is found near the exit to High Dive Caverns.
The star is high enough that you cannot just wall run and jump up to it without a little bit of a speed boost.
It takes practice, but you need to cling yourself to one of the wall underwater, dart off the wall, and shoot out of the water.
The speed will give you enough to wall run and jump up to grab the star.
The wall I used was located on the right side of the widened path you came out of. It is not the flat wall, but the middle of the angled wall. Fancy Pants will be angled roughly at 45 degrees and should be looking to the left.
Press up once you have clung to boost off of the wall, but exit the water a little bit away from the left wall so you do not wall cling to early.
Boosting too close to the wall does not give you enough room to maneuver or area to jump so you get the height necessary.
Make sure to hold the direction you wish to go so you can keep all the momentum going in the right direction.
Level 7: Pirate Cove
You start off the level near some velvet roped poles and some wooden platforms.
Leaving Pirate Cove
Head up the ramps to the pirate ship and jump inside it.
Once inside you will notice a chalkboard with plans on it.
Move right, and a conversation between you and the pirates shall begin. They block your path, so you must get your weapon to clear them out.
Use the spring pad to exit the ship, then head left outside the ship until you reach an underwater tunnel.
Jump in the tunnel and swim through it.
Follow the white squiggles to reach a giant open area where piled ships will be in the background.
Keep swimming downward until you reach a ship with a hole in it and an arrow pointing inside it.
Navigate the ship while following all the red arrow signs until you reach a sign that says 'unassuming closet of epic weaponry'.
Enter the door located in the closet to grab your weapon of power.
Wall jump up the corridor and destory the cracked wall in your way with your new weapon.
There are tutorial walls to tell you how to use your weapon, but just keep heading right and use the spring pad after you destroy the block in your way.
Land on the platform, run left, and run up the loop to land on a platform underneath another block.
Head to your left and run down the ramp to send yourself flying up to a spring pad and another large platform.
If you miss or fall down, just wall jump in between the wooden I beams and then jump over to the large platform.
Use the spring pad furthest to the right and jump on it to head to the exit.
After you leave the spring pad, start moving left so you can actually land on solid ground above you.
Once up on ground, start wall jumping to get into a tiny pool of water that leads back to where the stacked up ships are.
Swim back to where you started the level and take on those silly stacked swashbucklers with your trusty weapon.
Head back into the pirate ship, heavy attack the enemies, and use the door to exit the level.
1st Star in Level 7:
As you reach the first big water area underneath the pirate's boat, swim to the right until you hit a wall.
Once you hit the wall, swim up until you can grab onto a ledge and jump on dry land. >You can see the star above you with two health squiggles placed along the wall.
You need to wall run up the wall as high as you can and jump off to grab the star. To do so, start at the edge of the land closest to the water.
Start running, but before you get too far away, jump and hold the up button.
Attach to the wall so you can start wall running, then jump once you reach the peak of the run.
And there is the first star.
Seventh Micro Trial in Level 7:
The trial is located in the sunken ship with a big wooden arrow pointing inside of it.
Go to your right inside the ship and being to scale the platforms until you reach the red arrow sign pointing up and left.
Wall jump up to the first spring pad you find which starts the micro trial.
Start the trial by riding the jump up, cling to the left wall, and wall jump until you are on top of the wooden plank I platform near the curved track.
Run down along the curved track and run right onto the wall next to three health squiggles.
Wall jump off the wall and back onto the curved track where you will run left.
Run right off the left side of the curved ramp, wall run up the wall a bit, and then jump onto the last platform.
Once completed, the first star of the level will appear as a reward, so grab it.
2nd Star of Level 7:
The star is available and accessible once you beat the micro trial inside the sunken ship.
Look to the 'Micro Trial' spoiler for how to beat the trial and make the star appear
Grabbing the Seventh Pirate Message in a Bottle
The bottle is located inside the sunken ship at the bottom of Pirate's Cove.
Once inside, head up the ramp and to the right.
Start scaling the platforms, where you will get to an arrow pointing up and right.
Follow the arrow up to the spring pad and use it to so you can wall jump between the level and the wooden I beam.
Jump onto the curved crescent ramp and run off the right edge as you continue to follow the arrow signs.
The next arrow sign is hidden behind a group of health squiggles, but you just need to scale up the platforms.
Land on the last curved platform, run left, and run up the loop to land on a platform near two circle windows and some hanging rope in the background.
Run and jump right to land on the platform holding the bottle.
Read the message and be on your way.
Second Secret Room in Level 7:
Go inside the sinking ship, go past the closet where you get your weapon, and stop at the second purple block you see in the level.
Head left of said block and run down the curved pathway.
Ride the curved ramp up over the wooden I platform and use the spring pad you find to get up near the door.
The door is above the area where there is a pirate and a bunch of bats flying around.
Dispose of the pirate and wall jump onto the bat's head.
Use the power stomping method mentioned in the last level to access a secret room to make your way up to the room.
Make sure to hold up as you bounce on each bat so you get the necessary height.
After the fifth bat, you should be able to land on the platform holding the secret door.
There is a star located in this room, but the room is covered in spikes.
3rd Star in Level 7:
The star is located inside of the secret room in the sunken pirate ship.
Use the 'Second Secret Room' spoiler to locate and get to the door.
Once inside, you will notice the view is very far away and there are loads of spiked walls.
When wall jumping here, try to use the jump where you press the direction away from the wall as you jump. This will let you jump farther rather than higher.
Make your way through the room until you are below of the star.
Just wall jump up the passage the star is in, but be careful not to run into any spikes.
Grab the star surrounded by health squiggles, and you can be on your way.
Secret NPC of Level 7:
The little bugger is inside the sunken pirate ship well after you get the sword.
If you know where the spring pad to the secret room is, head right from there and fall down past the other spring pad at the end of the large platform area.
A pirate will be in your way as you go, but you can jump over him and head right to the NPC.
The NPC is a crab, and he is standing next to the bonus room challenge.
You could see the NPC before as you were making your up the platforms in the pirate ship.
Tips on the Bonus Room in Level 7:
The challenge for this room is to kick the crab's shell into th goal, just like a previous challenge on level 4.
The key to complete it quickly is to try and make sure the shell always hits a spring pad so it will get launched throught the level very quickly.
The tricky part is to get the shell out of the first area. First you have to clear out the bats around it and then you want to kick the shell; not really hard, but enough that it makes it up and through the gap.
The shell tends to bounce a lot so you want to scale the first three small platforms as quick as possible so you can block the shell from moving back to where it started.
There is a point where there are five narrow platforms in a tiny space: you need to get the shell up them.
Try to kick the shell as hard as you can up so it can bounce around and destroy some crabs above.
The shell's movement will be slowed down as it hits more enemies.
This challenge definitely takes some finesse to get it done right, but with practice makes perfect.
Keep trying at it because there are multiple strategies you can use. You just need to find the one that works for you.
Level 8: Princess Pirate Ship
You start off by the Pretty Princess Pirate's room. It's locked with keys which you need to find: See "Finding the Keys to Princess Pirate's Room" below.
Go to her room and face her to complete the level and get sent off to the next level.
1st Star of Level 8:
The star is high above the pirate princess's door.
In order to reach it, you must head right from her door and jump from chandelier to chandelier.
Once you land on the third chandelier, you will swing over and jump onto the small wooden platform.
You will notice that is moves when you land on it. Use the movement of the platform to launch yourself up to the next one. Do this by jumping up, landing to make the platform move down, and as it reaches its full movement height upwards, jump at the peak to launch high enough onto the next platform.
Use this process for the remaining two movable platforms so you land on a long beam connected to the ship's sail.
There is room with a disco ball fragment inside as well, but we want the star right now.
Run and jump off the long platform's edge and land on more movable platforms.
Use the jumping process from before to move across these platforms and collect some squiggles.
On the fourth movable platform, you can see the star above a line of white squiggles.
Time the jump properly to grab the star.
Repeat the previous steps if you miss.
2nd Star in Level 8:
The star is only available after you complete the micro trial for the level. For help finding and completing that, look at the 'Micro Trial" spoiler for more information.
3rd Star in Level 8:
The star is located in a little alcove in the level that can only be accessed by use of a cannon on the ship's lower level.
If you are starting from the Pirate Princess's room, move and jump across the chandeliers and stop at the hole the mast.
Navigate the movable platforms to the right of the hole so you get on top of the dark brown platform.
Run right while jumping on the slanted platform, dodging a pirate, jumping onto a flat brown platform, and getting to the blue colored ground.
Keep heading right while dodging the pirate, then go down the stair shaped ground and stop before you go down the ramp.
Run as fast as you can left when you hit the downwards ramp that is below the yellow key door.
When you hit the wall, cling onto it and pull yourself up on top of it.
Move across the chain to your left and drop down to the bottom of the level and ship.
If you drop straight down from the left end of the chain, you will land on a rectangular platform with a spider on it.
Look to your left and a cannon will be sitting on top of a little hill.
Jump inside the cannon and aim it as far as it will go left.
Fire the cannon by pressing the up direction, and it should launch you into the alcove.
All you have to do to get the star now is to wall jump up the alcove to grab the star.
Finding the Keys to Princess Pirate's Room
You need to find the colored keys in order to get inside the Pirate Princess's room to defeat her.
The Red Key
Run off the edge near the Princess's locked room, run past two pirates and two cannons, and find the door with a box over it.
Enter the room and defeat the two spiders and pirate parrot to get the key.
The Yellow Key
Head right from the Princess Pirate's room, jump across the three chandeliers, but land underneath the first set of movable platforms you find.
Go through the hole in the mast and jump onto the movable platforms there.
Make your way up the three platforms and land on a dark brown platform.
Head to your right going across a slanted brown platform, then jumping to another brown platform where you can see the door to the yellow key.
Keep heading right, run by the pirate, jump down, and jump onto the platforms to get to the key's room.
The pot in the middle of the room will shoot out mice, which you must defeat to get the yellow key.
The Blue Key
To get to this key's room you need to find the cannon at the very bottom of the ship.
Jump onto the rectangles that have blue lines painted on them.
Move right as you go, then wall jump in between the upside L shaped platform and the tall I wall.
The door is sitting on top of the upside L along with the Micro trial spring pad.
The room contains more ninjas for you to beat up in order to get the blue.
Grab the key and the Pirate Princess's room should open for business.
Eighth Micro Trial in Level 8:
The spring pad for the trial is located by the blue key door.
You can use the 'Blue Key' spoiler to get yourself or find the blue lined platforms at the bottom of the level to follow.
You get launched on the platform above you and the golden squiggles point right.
Run off the edge of the ramped platform without jumping to hit every squiggle along the way.
Once you hit the ground, begin running left and do not stop holding the left direction until you jump off of the ramp after the cannon hill.
There is a spider there that can prevent you from completing, so be careful.
Once the spider is dealt with or dodged, keep running left without jumping all the way up to the platform where you start.
DO NOT get on top of that platform because the squiggles head back down the ramp.
Reverse direction once you wall slide high enough.
Run right now until you hit the ramp that will launch you up to the platform you used to get to the final disco ball piece.
Your prize for winning the trial is a star. Enjoy!
Find the Pieces of the Broken Disco Ball
First Piece
Start at the Pirate Princess's room and jump across the chandeliers to be able to jump on the movable platforms that are to the left of the hole in the mast.
Use the movement of the platforms to jump up the next few platforms until you are on the dark brown platform with ship's sail in the background.
Enter the room, and you will have to fight three mallard ducks before the piece appears.
Defeat the enemies, grab the piece, and leave the room.
Second Piece
Start at the Pirate Princess's room, move and jump across the chandeliers, and stop at the hole the mast.
Navigate the movable platforms to the right of the hole so you get on top of the dark brown platform.
Run right while jumping on the slanted platform, dodging a pirate, jumping onto a flat brown platform, and getting the the blue colored ground.
Keep heading right while dodging the pirate, then go down the stair shaped ground, and stop before you go down the ramp.
Run as fast as you can left when you hit the downwards ramp that is below the yellow key door.
When you hit the wall, cling onto it and pull yourself up on top of it.
Jump onto the chain and then drop down onto the spring pad which will you send you up to the next piece's door.
The room will shoot out frogs, which you will need to beat in order to get the next piece of the disco ball.
Grab the piece after you beat everything and head to the next piece of the disco ball.
Third and Final Piece
From where the second disco ball piece's room is, drop to the bottom of the level however you see fit.
Look for the cannon on the hill and run to the left of it, where you will see gray platforms.
Get onto the slanted platform with the spring pad on it.
Run up to the left side of the the ramp and jump over to the bats to the left of the ramp.
Power stomp on the bats to get more height and try to land on the lone gray platform up there.
Go to the left side of the platform you are standing on and jump left onto the movable platform.
Use the platform's movement to boost you jump height as you make your way left along those movable platforms.
The third movable platform will be the last before you need to land on the slanted wooden platform above and to the left of the last movable platform.
Move up the ramp and you will see the door to the last piece.
Wall jump up to the door and enter for the last piece.
The room contains ninjas (ninjas vs pirates lol) that you need to defeat for the last piece to appear.
Grab the piece and head for the dance hall room.
Get to the Dance Hall Room
Start from the Pirate Princess's room, jump across the chandeliers, and jump through to the left side of the hole in the mast.
Fall below the movable platforms and head left to find the door.
Enter the room with all the pieces, and you will get a microphone as a weapon.
No stars or micro trial, but still a hidden extra.
Grabbing the Eighth Pirate Message in a Bottle
Start at the Pirate Princess's room, move and jump across the chandeliers, and stop at the hole the mast.
Navigate the movable platforms to the right of the hole so you get on top of the dark brown platform.
Run right while jumping on the slanted platform, dodging a pirate, jumping onto a flat brown platform, and getting the the blue colored ground.
Keep heading right while dodging the pirate, then go down the stair shaped ground, and stop before you go down the ramp.
Run as fast as you can left when you hit the downwards ramp that is below the yellow key door.
When you hit the wall, cling onto it and pull yourself up on top of it.
Jump onto the chain and move yourself over to the wooden plank platform to your left.
Continue moving left onto more wooden plank platforms; the third one will have the bottle sitting right there.
Level 9: Misplaced Cave
After getting sent to the brig, you meet Rainbow Beard again who needs you to get beard dye to gain his crew's trust back.
You must make it through the cave to get the dye and save your sister.
As long as you follow the black arrow signs, you will find your way out of the cave.
Secret NPC(s) of Level 9:
The NPC is located in a little nook that requires a lot of speed to launch and reach him.
As you run from the start of the level and follow the signs, you will notice a menacing bat in front of a door.
You will see it after you pass the third sign and run off the ramp.
You should barely miss grabbing the ledge.
Now to get enough momentum, run left towards the sign with two arrows on it, one pointing right and the other point down and right.
Once you are equal with the sign, jump and hold up to get as high as you can to cling to the wall to the left of the sign.
When wall jumping this time, make sure you are pressing the direction opposite of the wall to jump farther right.
Keep holding right because you will run along the curved ramp and have enough momentum to launch all the way to the Bat creature.
The room next to the "batSpider" is a Bonus Room!
Tips on the Bonus Room Challenge in Level 9:
The challenge for the room is the collect ten health squiggles in under forty seconds.
The only way to get them is to bounce along their heads in order to collect them all.
You start off bouncing all the way to the outcropped platform on the right and grab the three squiggles along the way.
Jump down onto the closest bat in the second row to you and power stomp on him to ensure you make it to the next bat.
Power stomping every enemy will eat up a lot of time since you will be hanging in mid air from how high you bounced.
Only power stomp the first bat and last bat in a row to ensure that you can continue down the line of bats and land on the platform safely.
Three rows of bats goes by quickly. Be careful about adjusting yourself over top of bats since the touch screen controls can be a little difficult.
Completing the room will get you a bat mask from your friendly yet creppy NPC.
1st Star of Level 9:
As you follow the blackened arrowed signs from the start, you want to head down and to the right when you reach the second sign on a hill.
Keep following the arrows, and when you see the eighth one, it will be sitting at the left end of a slanted ramp near the star.
Stand close to the eighth sign at the very edge and jump off.
As you fall, aim for the circular ramp loop that is closest to the archeologist skeleton and press the left directional button once you land.
Land on the very right side of the loop so you will build speed quickly and launch up to the wall closest to the star.
Begin wall jumping once you hit the wall and scale the walls to grab the star.
The star is located underneath a platform that has a mouse standing on it.
Grabbing the Ninth Pirate Message in a Bottle
If you follow the split path downward at the second arrowed sign, stop at the seventh sign you see.
If you follow the upper path, jump across the rectangular platforms, pass a skeleton, and stop at the third torch you see.
Now jump on the slanted platform and wall jump onto the rectangular block near the torch or seventh sign, then make your way onto the platform above the block.
Run up the slanted platform, jump onto the wall, and wall jump up to the platform which holds the bottle at the left edge.
Grab the bottle and continue your epic quest.
Second Secret Room in Level 9:
Start at the two arrow sign on the hill that you see very early in the level.
Go to the right side of the hill and run up towards the sign.
When you reach the top, jump and hold up so you jump high enough that you hit the wall and run up it a bit.
Wall jump from that wall to the solitary pillar near you and climb your way up onto the left wall you first hit.
Run and jump to the taller pillar on your right so you can climb on top of it.
Jump over to the small rocky platform and then onto the spring pad even further right.
Ride the spring jump up, move left, and run left so you run into another spring pad in a ditch.
Use the spring pad the launch up, hit the left wall at the peak of the spring's launch and wall jump up to the platform with a door on it.
The secret room is right there and it has a star waiting at the end...if you complete a challenge inside.
The little challenge is not timed, but it requires you to bring the glowing shell all the way to the end of the room and put it in the designated area.
It is marked with a yellow flag with a star on it (No Way!). It is difficult because of all the bat creatures in the way, but the shell takes them out pretty quick.
2nd Star in Level 9:
The star can be acquired by two different ways:
First Way
Start at the two arrow sign on the hill that you see very early in the level.
Go to the right side of the hill and run up towards the sign.
When you reach the top, jump and hold up so you jump high enough that you hit the wall and run up it a bit.
Wall jump from that wall to the solitary pillar near you and climb your way up onto the left wall you first hit.
Run and jump to the taller pillar on your right so you can climb on top of it.
Jump over to the small rocky platform and then onto the spring pad even further right.
Ride the spring jump up, move left, and run left so you run into another spring pad in a ditch.
Use the spring pad the launch up, hit the left wall at the peak of the spring's launch and wall jump up to the platform with a door on it.
Run off the right edge of that platform and jump down onto the rectangular platform near the glowing gold light.
Move to the right and find that the gold light is a boat load of treasure: the star is above that.
Dodge or beat the pirate standing there, wall run up the wall, and jump off to grab the star.
Second Way
Follow the black arrow signs until you reach a place where a thin piece of platform is shaped like stairs and has health squiggles underneath of it. The point I am refering to is at about the seventeenth arrow sign you see.
Walk over onto the stair-ish platform and move all the way left on it to see bats with health squiggles above their heads.
You must power stomp along the heads of the bats and grab onto the ledge near the treasure after you power stomp on the the third bat's head.
Climb on top of the wall and jump down onto the star.
If you miss, you can wall run up and jump to grab it.
3rd Star in Level 9:
The star is located inside the second secret door in the level. If you do not know where that is, refer to the 'Second Secret Room' spoiler for help.
The star appears over top of the exit door when the glowing shell you have at the beginning of the room is in the ditch, indicated a yellow flag with a star on it.
Grab it if you fulfill the requirement and head out of this god-forsaken cave.
Ninth Micro Trial in Level 9:
Follow the black arrow signs all the way to the end, but stop whenever you see a lone spring pad sitting on a rocky platform somewhere near the eighteenth arrow sign.
Run up the curved platform underneath the eighteenth sign, wall run up a bit, and wall jump up to the spring pad.
Ride the spring pad up, but once you are about land, hold down the left direction button.
Do not jump off the edge of the first platform you land on, but let your speed carry you through the squiggles.
Run for a bit more, but be ready to slide underneath an obstcale to reach more squiggles.
Build up a lot of speed now by continue to run right so you launch up to the last gold squiggle.
Completing the trial drops a lot of squiggles for you.
Level 10: Forgotten Island
You start off the level in the ocean, but if you swim right you will reach land shortly.
Keep running right: the trees will get more dense and you will be in the actual level.
Retrieving the Dye of Norris
Head right up a wooden walkway, fight the pirate, and make your way inside the tree house with a mouse inside it.
An easy way to kill pirates is to just heavy attack them three to four times.
Fall down past the little mouse and run right into a pirate by a big wooden box.
Wall run up the box, wall jump to the platform next to it, and make your way up the right side of the tree house as you follow the big green arrow sign.
Jump on top of the wooden box and jump towards the right so you land on a platform with a spring pad ont it.
The spring pad is used for the micro trial, but you also need to use it to progress in the level.
Shimmy along the pipes, jump onto the tree branch, and go inside the tree house.
Wall jump in between the gray blocks, dodge/beat the mouse gunner, and wall run jump onto the angled platform above the mouse's location.
Run along the platform, wall run jump onto the spring pad block, and use the spring pad to be launched in to the pool.
Swim to the right end of the weirdly shaped pool and jump out of it onto a curved rock platform.
Run up the platform and land on the slanted platform below another platform with a mouse on it.
You can either run and jump from the platform you are onto the ramped surface on your left, OR you can run to the left end of the platform, backflip onto the upper one, and jump onto the ramped surface.
The latter method will give you more speed.
Run along the surface and get propelled into the wall of the level where you can fall down onto another rocky ramped surface.
Run off the edge of the ramp, and you will be in front of an entrance to an ancient temple, or so it seems.
Head inside where you must navigate the temple using the moving ancient platforms.
Grab the dye and exit the stage using the cannon to the very right.
The Secret NPC of Level 10:
The NPC is not difficult to get to. After you enter inside the tree house and run out its bottom right entrance, you will run into your second pirate enemy of the level.
Dodge or defeat him and wall run the side of the big wooden box to get on top of it.
Once you climb the box, head right, and there will be another pirate to deal with.
Deal with him, head right and climb the second smaller wooden box that is next to a thin tunnel filled with health squiggles.
Jump onto the platform to the left of the box and you will be standing next to a guy talking about d-d-d-d-Deals.
The door next to him is the Bonus Room for the level and is a timed race.
Tips on the Bonus Room in Level 10:
The challenge for this room is to race around the island or track in sixty seconds! It sounds daunting, but it is not really very difficult at all.
One little tip is that any time you need to use a cannon, slightly aim it to the right so you will shot a good distance further so it covers more distance.
You start off running right until you hit a broken rope bridge where you must jump and hold the up direction as you start to run off the first broekn section of the bridge.
If you land on the bridge again, be prepared to jump across another gap to land on the grass land.
If you fall down the bridge, just head right so you hit a loop, and the spring pad will send you up in the right spot.
Jump over the first purple turtle, but on the second single turtle, jump on his back so you can jump on each subsequent tower of turtles' backs.
Run off the edge past the three stacked turtles, and jump into the cannon, which will launch you up to a checkpoint and a very long ramp.
As you're falling from the cannon shot, aim yourself onto the ramp so your speed can carry you to the island where the next cannon is.
Use the second cannon to fire onto the tall grassy pillar, where you will jump off to the right and land in water.
Swim right, get on dry land, and use the spring pad to jump on the flying turtle's back.
Jump from the turtle to turtle so you can jump up onto the cliff with the checkpoint.
Land by the checkpoint and run right so you can pass the checkered flag with a lot of time to spare.
Your prize from Crazy Carl is a parrot for a weapon.
The Tenth Micro Trial in Level 10:
The spring pad for the trial is to the left of the tree house you enter and is on a curved wooden platform.
Exit the tree house near the bungalow you run through at the beginning and start navigating up the platforms above your head.
Move left, wall run up the tree house's right side, and wall jump up on top of the wooden box hanging from a chain.
You should be able to see the spring pad to the box's right side: jump down to it.
Once you jump on the spring pad, the first few golden squiggles are located on the pipes you shimmy left along.
Jump onto the tree branch and run inside the upper level of the tree house.
Wall jump in between the gray vertical rectangles until you need to jump over the mouse and wall run up the right inside wall of the tree house.
Wall run up and jump over to the slanted ramp that you must now run along.
Run to the left end, wall run up the wall, and wall jump onto the gray box platform with a spring pad.
Use the spring pad to get launched into the remaining golden squiggles.
Completing the trial rewards you with a lot of squiggles to collect and a chance to grab a star nearby. The end of the trial does conveniently put you next to it.
1st Star in Level 10:
The star is located at the very top of a pool section near the second level of the tree house. To make it there, use the micro trial spring pad to launch yourself onto the pipes and move left towards the tree branch platform.
Run along the tree branch and start wall jumping inside the upper tree house to get where you need to go.
Get onto a gray block with a spring pad on it and use that to get launched into the pool where the star is.
Swim to the right side of the pool and jump inside the little niche where some water is being held. Above the little niche of water, the wall has oil on it.
Cling to the bottom of the little niche pool, launch yourself off the bottom, and wall run up the oiled wall.
You should have enough momentum that you slide all the way up so you can grab onto the ledge of the thin pillar.
Climb on top of it and jump up to receive your star and a bunch of squiggles.
Second Secret Room of Level 10:
You may or may not have noticed a spring pad on top of the bungalow you walk through at the beginning of the level.
That spring pad is used to get to the door of the Secret Room.
You need to make your way up to the second floor of the tree house which is done by using the spring pad on the curved wooden platform by the hanging box.
Wall jump up the gray rectangles and jump to the left where you will see a hole in the tree house's left wall.
Go to that little hole/entrance and drop down onto a slanted platform.
Run to the right along that to land on top of the bungalow.
Use the spring pad to get launched onto a grass platform that you can use to jump and wall run onto the door's platform.
The door is a little out of the way, but a star is waiting for you inside the room.
2nd Star in Level 10:
The second star is located inside of the secret room near the beginning of the level. If you need help finding it, look at the 'Second Secret Room' spoiler for help.
The star is at the very end of the room, so I will just explain how you can get at the star.
You will pass over a water section where the bridge is completely broken, then you will reach a second cannon which you use to launch yourself onto a moving patch of land.
Jump from there onto two pillars of grass and another cannon will be located after the second one.
Use that cannon to launch yourself over or onto the next pillar, for there is another cannon on the other side of it.
That cannon will launch you onto a ramp platform, which will propel you onto a fairly long stretch of grass.
Wait for the moving grass platform to get close and jump on it.
This platform will move towards the star and another moving grass platform.
Jump up to grab the star and some health squiggles, then make your way to the door.
The door is to your right as you grab the star.
3rd Star in Level 10:
The star is very close to the temple near the end of the level.
You need to use all the ramped surfaces near the end to your advantage.
After the little pool area, jump down onto the surved surface and run up it to land on a slanted platform.
Run to the left where a parrot is and do a backflip onto the upper platform.
Beat the mouse before you move on.
Run to the right of the platform and run onto the slanted ramp surface heading to the right.
At the end of the ramp, jump and hold the up direction.
When you come in contact with the wall, wall run up but do not jump at all.
Press and hold the down direction so you stop holding onto the wall.
Keep holding the down direction until you hit the ramp below; you will tuck and roll to gain more speed.
Once you hit the ramp and start rolling, immediately press and hold the left directional button so you can start running.
You will get launched onto the grassy rock platform where you will need to cling onto the edge.
Climb up it and you can jump down onto the star.
If you mess up, there is a tunnel going up you can use to keep trying. It will take a few tries before you get it right.
Grabbing the Tenth Pirate Message in a Bottle
The bottle can be found left of the entrance to the ancient temple.
It is slightly hidden behind some grass, and is to the right of the tunnel you use to scale back up to the curved ramp loop.
To get to the temple, follow the 'Retrieving the Dye of Norris' spoiler for directions.
The bottle can be slightly hard to miss, but when you see a big temple with a big door, just head left and you will see it.
Level 11: Ninfestation
You are back on the pirate ship and are ready to bring Rainbow Beard back in to power.
1st Star in Level 11:
The star is located high above everything in the level and is a tad tricky to get.
If you are starting the level at the very beginning, head to your left.
Dodge or beat the pirate and drop down below the platform he was standing on.
Run left as you pass, or beat up any ninjas that get in your way.
You will pass the old dance hall room, but with ninjas painted over it to make it look like a yin yang symbol.
Continue on and use the spring pad near the wall to jump up through the hole in the mast.
Land on the platform and jump onto the big spring pad to get launched up onto suspended platforms.
Wall run off of the mast and wall jump onto the platform above the one you landed on.
Wall run and jump again to land on the brown wooden platform with a pirate on it and five health squiggles on it.
Beat the pirate and walk to the left side of the platform.
Notice the squiggles that are floating out there without any noticable platforms. There are actually platforms underneath the squiggles, but they are just invisible.
Just try and jump into the middle of the four squiggles for each platform. That will ensure you are hitting the platform.
If you mess up trying to get this star, it will be difficult to keep trying unless you restart the level.
The floating squiggles are important to locating where the platforms are. Once you jump to the third invisible platform with a line of squiggles underneath it, jump up and grab the star.
2nd Star in Level 11:
The star is located inside of a giant purple block that makes faces as you hurt it.
If you are starting the level, head left until you meet a pirate.
Dodge or beat him and then drop down below the platform he was just standing on.
Run to your left and dodge/beat any ninjas in your way as you go.
You will pass the old dance hall room, but the yin yang symbol will be painted over it.
Keep running left and use the spring pad by three ninja stars to jump through the hole in the mast.
Walk left past the giant spring pad and fall down to the next platform.
You will probably land on or by the giant block. The block is situated to the right of another giant spring on a platform, and the area to the right of it leads to an empty niche.
Break the block, and the star will be right in front of you.
3rd Star in Level 11:
This star will only appear if you complete the Micro Trial. It is on the very left side of the ship and is close to where you started off on the Pirate Princess's level.
For directions on how to beat the micro trial so the star appears, refer to the 'Micro Trial' spoiler.
The Eleventh Micro Trial in Level 11:
From the starting position in the level, head to your right and make your way down the stair platform.
Run along the curvy surface, run the ramp, and cling onto the wall.
Climb up and jump onto the chain with the line of squiggles underneath of it.
Drop down onto a chandelier: you will need to jump off that chandelier as well.
Run left until you run over a hill where there are two platforms, one flat and one angled.
Get onto the angled one and jump onto the spring pad there.
You will get launched onto another spring pad; that is the one that starts the micro trial.
Cling to the first wall you hit and wall jump twice to get the first three golden squiggles.
Do not wall run after the second wall jump, so you can start falling down onto more golden squiggles.
You will land on a chandelier. Just ride the chandelier until you have to jump to the next one.
You will ride three different chandeliers, but on the last one, it will bring you to a platform with a spring pad on it.
If you got every squiggle in order, a star will appear above the aforementioned spring pad.
Claim your prize and be on your way.
Tips on Fighting Captain Manly Beard
He uses three different types of attacks: beard whip, beard shockwave, and he summons ninjas from his beard.
When he dives onto the stage, his beard will cause beard shockwaves to appear on the ground. To avoid them, either jump onto a platform above him or just jump over them.
He can also hurt you as he falls down to do the beard shockwave attack.
If you are out of his sight range when he comes in with the beard shockwave, ninjas will appear.
You will have to take care of the ninjas before Manly Beard comes back in to fight. Trying to fight them and Manly Beard at once can be troublesome.
He becomes stunned whenever he does his beard whip attack, and that is the only time you can attack him.
When he is stunned, either use a heavy attack, light attack, or jump on his head to hurt him.
He will be beaten after three hits, no matter what attack you do, and then you can exit the room.
Exiting the room will also complete the level and finish the story mode.
Posted by: Bryan Gawinski |
March 21, 2012 5:44 PM
|
March 21, 2012 5:44 PM