

Escape from the Woody Room

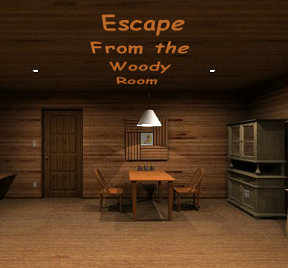
![]() Don't mind the pumpkins and the shambling artwork, this latest room escape from Tesshi-e can be played and enjoyed year round! In Escape from the Woody Room (no inappropriate jokes, please, this is a family friendly site) we are faced with the classic Tesshi-e scenario, to wit: We have been invited by "him" to a cabin somewhere... so let's go to an isolated cabin somewhere in an unspecified place with a guy we only know as "him"! Unfortunately, "he's" already gone and once again we are locked into a gorgeous space, looking for a way out.
Don't mind the pumpkins and the shambling artwork, this latest room escape from Tesshi-e can be played and enjoyed year round! In Escape from the Woody Room (no inappropriate jokes, please, this is a family friendly site) we are faced with the classic Tesshi-e scenario, to wit: We have been invited by "him" to a cabin somewhere... so let's go to an isolated cabin somewhere in an unspecified place with a guy we only know as "him"! Unfortunately, "he's" already gone and once again we are locked into a gorgeous space, looking for a way out.
 Everything you expect is there, as are a few things you might not expect at all. Navigation bars at the sides of the screen let you move around, there are lots of interesting items to examine or pick up, clues and puzzles at every turn, Tesshi-e's classic "happy coin"... and the horror of the zombie wobbly picture puzzle that just... won't... die! Tesshi-e is fast becoming one of the best room escape designers out there, with the stunning visuals, tricky puzzles, and smooth English translation, so don't forget to set your language accordingly at the start of the game for the full experience. There are, as always, some familiar touches like the bird figurines and, of course, the wobbly picture puzzle. But despite the familiarity or, perhaps, because of it, Escape from the Woody Room is a fabulous way to escape your own midday blahs.


Walkthrough Guide
(Please allow page to fully load for spoiler tags to be functional.)
WALKTHROUGH
(with help for the colorblind)
Exploration: Door Wall
You begin facing a locked door and a table. Click to zoom in on the table. There are three jars there. Click the left-hand one and open it. Take the battery. Click the bottom of the screen to put the jar down.
Now click on the middle jar. Notice the blue V on it. Click the bottom of the screen to put it down.
You can click the third jar if you want, but it's just cookies which for some reason game-you does not devour. Back up.
There is a cabinet to the right of the table. Click to zoom in. Notice that both of the drawers are locked. Click on the glass doors on the top half of the cabinet. There are some wooden chickens there, with wine glasses of different heights. Also note the green-colored I. Back up.
Click on the doors on the bottom of the cabinet. They're locked, and there's a 3x3 keypad there. You don't know the code yet.
Back up twice and turn right.
Exploration: Pumpkins Wall
You're facing some cabinets with pumpkins on top. Click the left-hand cabinets. Open them up and take the wine bottle. Back up.
Click the middle cabinets. They aren't locked, but stuck somehow. Back up.
Click the right-hand cabinets. These have a keypad on the as well, but if you zoom in on it and click the buttons, you see that they light up with glass bird statues and the color red. Back up twice.
Click the pumpkins to zoom in. The stems have arrows on them, and rotate when you click them. Zoom out.
To the right of the pumpkins is a strange-looking contraption. Zoom in on it. It has buttons on it with the Roman numerals I-VI. When you push the buttons, some lights come on, but nothing interesting happens. Maybe something needs to go in that middle section?
To the left of the machine, near the front of the cabinet, are a couple of screws. So that's what was keeping those cabinets closed. Back up.
To the right of the cabinets is a little round table. Click on it. It's a compass! Note that it's pointing north. Back up.
Click on the lamp to the right of the compass table. Lift up the lampshade and see that there's no bulb. Back up twice and turn right.
Exploration: Bed Wall
You're facing a bed and a rocking chair. Click the bed to zoom in. Move the pillows aside and take the battery from underneath. Back up.
On the wall above the bed is a picture. Zoom in and click the corners of it to see that it is yet another wobbly picture frame. Back up.
Click the rocking chair. There is a IV in white on it. Back up.
Click the ship's steering wheel to the right of the rocking chair. It says Escape From the Woody Room. If you remember your English classes, you'll notice that it's not capitalized quite correctly. Interesting. Back up and turn right.
Exploration: Jack-O'-Lantern Picture Wall
You're now facing a long shelf with a pumpkin picture above it. Zoom in onthe pumpkin picture. The noses of the jack-o'-lanterns all have different shapes. Back up.
To the far left on the shelf is a pile of magazines. Zoom in on it, then take the paper from in between the top two books. Back up.
Click the contraption to the right of the magazines. Chickens! If you click the chickens, they move up and down. There's also a locked door beneath the chickens. Back up.
Just under the pumpkin picture is another strange contraption. This one looks like you should put some sort of liquid in it. Back up.
Click on the box under the right-hand windows. There are some glass birdies on it, and a button which does nothing when you push it. To the left of the button is a slot for batteries. Back up.
To the far right of the pumpkin picture is a clock-looking thing. Zoom in on it. It's not a clock, but it does have arrows pointing to shapes. It also has the letter N on it, just like a compass. Back up.
The 3x3 Keypad and the Glass Birds
Go to the door view and click the cabinet on the right. Zoom in on the keypad on the bottom. What order to push these buttons in?
Open up the piece of paper in your inventory. Notice anything interesting about those shapes? The blank spots in the black squares tell you where to click the keypad: top right, middle right, middle top, middle bottom, and the center one.
Open up the cabinet and take the funnel. Also note the yellow II.
Go to the box with the glass birds on it. Open up the battery slot and put in the batteries from your inventory. The red button has now lit up. If you push it, the birds light up with several colors. However, if you remember the cabinet on the other side of the room, you'll know that only one color is important.
Click the button and watch which birds light up red. Then turn around twice and go to the right-hand cabinet under the pumpkins. Push the four buttons there in the order in which the glass birds lit up red: 14342.
Open the cabinet and take the box.
Open up the box. Take the prism from inside. Note also that there is a secret bottom in the box; lift it up and take the screwdriver. Also in the secret compartment the number VI in black.
The Roman Numerals, Part I: The Wobbling
Go to the Roman numeral light contraption and put the prism in the stand in the middle. Now if you push the individual buttons, they each light up one corner of the picture on the wall. Make a note of which button lights up which corner.
Go to the wobbly picture frame in the bed view. Click the corners of the painting in the order in which the lights went in the light contraption: top right, bottom left, top left, top left, bottom left, bottom right. Take the lightbulb and wood panel with the letter F on it. Also note the blocks of color, and the arrow.
Go to the lamp beside the bed. Put the lightbulb in the socket, then turn on the light (you have to back up once after you put in the bulb to close the shade). Note the red III.
The Roman Numerals, Part II: In Color!
Go to the Roman numeral contraption. You should now have seen six colored Roman numerals around the room: green I, yellow II, red III, white IV, blue V, and black VI. Behind the wobbly picture, you saw the colors in order: red, white, green, black, yellow, and blue. Taking both of those things into consideration, push the numeral buttons in this order: III, IV, I, VI, II, V. Take the E panel that appears.
While you're zoomed in on the Roman numeral thing, use the screwdriver on the screws in the bottom left. Now back up and open the middle cabinet. There's a model ship in a glass box there, along with a key. It looks like you have to put something rectangular in those slots on the bottom.
Pumpkins!
Remember those pumpkins with the rotating stems? And the jack-o'-lantern picture with the shapes for noses? And the not-clock on the wall with the same shapes? And the compass? They are all related! The shapes of the noses and the not-clock tell you which positions to put the stems in. But if you put them in what seems like the correct order (star on bottom, etc.) nothing happens.
This is where the compass comes into play: Notice the N on the not-clock? The circle is north. Now remember the compass table: when you're standing in front of the pumpkins, you are to the north of them. So the circle would be the bottom position on the pumpkins, and the star would be the top.
With that knowledge, rotate the stems like this: (from the top position) one click, no clicks, five clicks.
Take the R panel that appears.
Chicken and Wine
Go to the row of chickens in the jack-o'-lantern view. Remember the chickens and wine glasses in the cabinet? Click the chickens so they match the wine glasses: up, down, down, up, up, down. Open the door beneath them and take the spade key.
Go to the cabinet in the door view. Use the spade key on the right-hand drawer and take the corkscrew.
Go to the glass contraption under the jack-o'-lantern picture. Use the corkscrew to open the wine bottle. Attach the funnel to the contraption, then pour the wine into the funnel. Take the clover key.
Go back to the cabinet by the door and open up the left-hand drawer with the clover key. Take the W panel.
Normal End, Sans Happiness
Go to the model ship. You need to put the four wood panels in the four slots there. But in what order?
Remember that ship's wheel? Look carefully at the capitalized words. They match the four panels you have in your inventory.
Put the panels in order below the ship: EFWR.
Take the heart key.
Use the heart key on the door, and you're out! BUT!! Remember to save before you leave if you also want to get the Happy Coin ending. (Hit Function, Save, and Yes to save.)
Happy Coin Ending
After you've gotten the heart key, go to the not-clock with all the shapes on it. The shapes have changed spots. Put the pumpkin stems in order according to this change: (from top position) five clicks, four clicks, three clicks.
Take the Happy Coin, unlock the door with the heart key, and you're out!
Posted by: nerdypants |
November 2, 2011 12:36 AM
|
November 2, 2011 12:36 AM
ESCAPE THE WOODY ROOM WALKTHROUGH
FACING DOOR
Zoom in on table. Open left candy jar, take battery. Note blue V on center jar. Back up.
Zoom in on cabinet on right. Bottom is locked with 3x3 button lock.
2 middle cabinets are locked with keys.
Top unlocked. Note position of glasses in front of chickens and green I. Back up.
Done here for now. Turn left.
PUMPKIN POSTER WALL
Click hexagonal clock. Note position of shapes relative to indicated North. Back up.
Zoom in on Mr. Birdy machine. Check slot on left to find it's a battery slot. You need 2 batteries total. Back up.
Zoom in on pumpkin poster. Note the shapes of their noses. Back up.
Note device with nozzle under pumpkin poster. You can't do anything with it just yet. Back up.
Zoom in on chicken device. Note how you can slide them up/down. Slide them to match the glasses clue you got earlier:
From the left, slide 2, 3, and 6 down, then open the bottom shelf. Take Spade Key. Back up.
Zoom in on stack of magazines. Take memo from under top book. Back up.
Done here, turn left again.
BED WALL
Ignore the plant. Zoom in on ship wheel. Note the words on it (game title). Back up.
Zoom in on rocking chair. Note white IV on it. Back up.
Zoom in on painting. Note that it's a wobbly-picture puzzle. Back up.
Zoom in on bed. Get 2nd battery from under pillows. Nothing else there, back up.
Finished there. Turn left once more.
CABINETS WALL
Zoom in on lamp. Bulb's missing. Back up.
Zoom in on end table to find it's a compass. Note which direction North is. Back up.
Zoom in on device atop cabinet. Note that pressing the I-VI buttons doesn't do much at the moment. Also note screws holding center cabinet shut. Back up.
Zoom in on right cabinet. It's locked with a 4-button code. Note how a red Mr. Birdy shows when you press them. Back up.
Skip center cabinet, zoom in on left. Take wine bottle. Back up.
Zoom in on pumpkins. Note that arrows turn to point in 1 of 6 directions like on hexagonal clock.
Solve by using clues form compass and pumpkin poster.
Rotate the arrows so that, on the horizontal clock, they'd be pointing at the symbol matching that pumpkin's nose. Remember to adjust for which way North is.
SOLUTION
Upper Right, Up, Upper Left
Take R block after solving. Back up
Zoom in on multi-drawer cabinet on left again. Time to open a few drawers.
Zoom in on bottom drawer, open using hint from memo.
SOLUTION
Upper Right, Center Right, Up, Down, Center
Take funnel once unlocked, note yellow II. Back up.
Use Spade Key on right middle drawer. Take bottle opener. Back up.
Done on this side of the room. Turn around and solve more puzzles.
PUMPKIN POSTER WALL
Zoom in again on Mr. Birdy Machine. Place batteries inside and press glowing red button. Note position of Red Mr. Birdy in each flash. Back up.
Zoom in on device under poster. Solve using current inventory.
SOLUTION
Attach funnel. Use About Item command on wine, use bottle opener on it. Pour wine into funnel to activate device.
Take Club Key. Back up.
Turn back around.
CABINET WALL
Zoom in on right cabinet. Open using clue from Mr. Birdy Machine.
Press the buttons in the order corresponding to Red Mr. Birdy's positions.
SOLUTION
From left to right 1 to 4: 14342
Open, take chest. Open chest, take prism. Open chest again, pop open bottom, take screwdriver and note black VI. Back up.
Zoom in on light fixture device. Place prism inside. Press buttons I-VI, note which corner lights up. Zoom in on screws, remove with screwdriver. Back all the way up.
Open center cabinet. Note puzzle using 4 wooden blocks and Heart Key within. Back up.
Zoom in on multi-drawer cabinet again. Use Club Key on left middle drawer. Take W Block. Back all the way up.
Done here for now. Turn right.
BED WALL
Solve wobbly picture using clues from light fixture device.
Click the corners in the order indicated by its lights.
SOLUTION
Upper Right, Lower Left, Upper Left, Upper Left, Lower Left, Lower Right.
Take bulb and F block, note order of colors on wall. Back up.
Zoom in on lamp. Lift shade, insert bulb. Back up to drop shade, click shade again to reveal red III. Back up.
Time to solve the last few puzzles. Turn left.
CABINET WALL
Zoom in on light fixture. Solve puzzle using clues from wobbly picture and around the room.
Press the buttons in the order matching the Roman Numerals spotted around the room in the order of their colors listed under the wobbly picture.
SOLUTION
341625
Take E block. Back up.
Zoom in on center cabinet. Solve wooden block puzzle using clue from ship's wheel.
Place blocks in order, from left to right, to match the capital letters on the wheel.
SOLUTION
EFWR, for Escape From Woody Room.
Claim Heart Key and right to escape. Back up.
Decision time.
NORMAL END
FACING DOOR
Zoom in on door. Use Heart Key to unlock, click again to exit.
HAPPY COIN END
PUMPKIN POSTER WALL
Zoom in on hexagonal clock. Note change in position of shapes. Back up.
CABINET WALL
Zoom in on pumpkin puzzle. Solve again.
Remember to adjust answer for new position of shapes and account for North.
SOLUTION
Upper Left, Lower Left, Down.
Take Happy Coin.
Exit as per Normal End.
Posted by: An Onyx Mouse |
November 2, 2011 1:21 AM
|
November 2, 2011 1:21 AM
Escape from the Woody Room Walkthrough
General Information
Don't forget to switch languages before you start the opening.
Examine everything you pick up, you never know what they may be hiding.
There will be directions for the colorblind in this walkthrough.
Good luck!
Exploration
You begin facing the wall that has the out door. To the right of the door is a dining table and chairs.
Click on the table for a close up.
On the table are three jars. Click on the left jar to pick it up.
Click on the jar again to open it. Yummy, chocolate! Click on the jar a third time and you get a battery. Ick, who puts batteries in chocolate?
Put the jar down, then click on the middle jar for a close up.
Notice that on the jar is the letter "V" in blue.
Put down the jar and back up.
You can click on the door for a close up, but it's locked. There's a light switch next to the door, but it won't let you click.
Turn right.
You are now facing a wall with two windows. To the far left is a large cabinet. In the middle is a low cabinet with three sets of doors. There are also several items on top of the low cabinet.
To the right of the low cabinet is a round table of some sort, and to the right of that is a standing lamp.
Click on the large cabinet on the far left for a close up.
The top set of doors to the cabinet are glass, click on them to open them.
Inside the cabinet is a large green letter "I".
There's also an assortment of different sized wine glasses. Behind the wine glasses are two chicken figurines.
Back up once.
The large cabinet has two drawers, but both are locked. The bottom set of doors has a 3 x 3 code key of some sort.
Back up.
Let's turn our attention to the low cabinet now. Click on the left set of doors for a close up.
Open the doors and you find a full bottle of wine. Yay, something to drink! Take the wine and back up.
If you click on the middle set of doors, you will find that they don't open. However, there is no visible keyhole or code key.
If you click on the right set of doors you will find there is a code key with four buttons. Clicking on the buttons reveals a red birdy figurine.
On the left side of the low cabinet is a large object with three pumpkins on it, click on this for a close up.
The tops of these pumpkins have arrows that can move, but we don't know the position to move them into. Back up.
To the right of the pumpkins is another device on top of the low cabinet, click on it for a close up.
This odd device has prongs on top where an item can be placed. There are four small lights, two on each side, and six buttons, labeled in Roman Numerals from 1 through 6.
Hey, if you push the Roman Numeral buttons, lights shine on the picture on the wall. Does that place look familiar? It should, it's a scene from Escape from the Rest House.
Back up.
Now click on the round table to the right of the low cabinet. Hmmm, it's not a table, it's a compass, and North appears to be behind us. Back up.
Click on the lamp for a close up. If you click on the shade you will see that there is no light bulb.
Back up and turn right.
This wall has a bed, a rocking chair, and a large plant. There are also some items on the wall itself.
Click on the bed for a close up.
Click on the pillows to move them and find another battery. Great, now we have two batteries. Anyone have an electric screwdriver?
Back up then click on the rocking chair for a close up.
On the chair is "IV" in white. A clue! Back up.
Click on the picture on the left side of the wall and you will discover that it is the ever-present wobbly picture puzzle. Back up.
On the right side of the wall is what looks like a ship's wheel, click on it for a close up.
How nice, it has the title "Escape From the Woody Room". Back up.
Turn right.
You are now facing two windows and a low shelf that runs the length of the wall.
There's a pile of something on the far left of the shelf, click on it for a close up.
This appears to be a stack of magazines, click on the stack to find a note with shapes on it. Looks like squares with notches cut out.
Back up.
There's an object on the shelf below the left window, click on it for a close up.
Looks like a device with six chickens on it. Back up.
On the shelf between the two windows is some sort of device, click on it for a close up.
Ah, yes, one of Tesshi-e's patented "strange devices". Note that there is a button inside that you can't push. Back up.
Underneath the right window is yet another object, click on it for a close up.
It's our old friends the birdy figurines! There's also a button that doesn't seem to work and a small slot for batteries. Back up.
Between the two windows on the wall is a picture with three pumpkins on it, click on it for a close up.
Nice, jack-o-lanterns! Back up.
To the right of the windows is an item on the wall that looks like a clock, click on it for a close up.
Not a clock at all, but some sort of wall decoration, with six shapes, six arrow hands, and the letter "N". Back up.
Turn right and you're back to the door. Time to solve some puzzles!
The Birdy Figurines
From the door, turn left once to face the windows and the shelf.
Click on the Birdy figurine machine (underneath the right window) for a close up.
Click on the small slot on the left for a close up, then click again to open it.
Place the batteries in the slot and back up once.
Notice that the button is now glowing. Push it.
Cool, the birdies light up in different colors. I wonder how that could be useful?
Remember the low cabinet and the right doors with the four button code?
Back up and turn right (or left) twice to face the low cabinet.
Click on the right set of doors for a close up.
Click on the code buttons for a close up.
Okay, when we push the buttons they show red birdies, so now what?
When you were playing with the birdy figurine device, the birds changed colors five times.
Each time the birds were different colors.
The one that concerns us is the red birdy, since the buttons on this device all show red birdies.
If you need to, go back and push the button on the birdy device again and watch where the red birdy is each time the colors change.
In the first sequence, the red birdy is the far left. In the second it is on the far right. In the third it is in the second from the right. In the fourth it is back to the far right. In the fifth it is the second from the left.
Therefore you should push the buttons in sequence that matches the red birdies.
Number the buttons 1 through 4 from left to right. The sequence to push is 1, 4, 3, 4, 2.
If you push the buttons in the correct sequence, all four will light up.
Back up once and open the doors.
Inside the cabinet you will find a treasure box, take it.
While the box is still in close up, click on the top to open it.
Inside is a prism, take it.
Pull up the box from your inventory again, then click on the top to open it again.
Click on the inside of the box where the prism was and you will discover that it had a false bottom.
Inside is a screwdriver (yay!) and the letters "VI" in black. Take the screwdriver and back up.
The Large Cabinet Bottom Doors
Now click on the large cabinet on the left for a close up.
Click on the bottom doors of the cabinet for a close up.
Looks like we need to solve this 3 x 3 grid puzzle!
The clue is in the note found in the stack of magazines.
Look at the note carefully. See that each shape looks like a square with a notch cut out of it.
The notches are the clues as to which button to push. The first shape (going from left to right) looks like the upper right has been cut out.
The next shape looks like the center right has been cut out.
The third shape has the top middle cut out.
The fourth shape has the bottom middle cut out.
The fifth shape has the middle cut out.
Therefore the button pattern is: top right, middle right, top middle, bottom middle, middle.
Once you push the buttons in the correct sequence you can open the door.
Inside is a funnel (take it) and a large yellow "II".
Back up twice.
The Middle Low Cabinet Doors
You should still be facing the low cabinet.
Click on the device to the right of the pumpkin device for a close up.
Notice on the top of the cabinet, between the pumpkin device and the prong device, are two depressions in the wood. Click on them for a close up.
Screws! Time to use the handy screwdriver on the screws.
Back up twice, then click on the middle set of doors for a close up.
Click on the doors and voila, they will open!
Inside is a beautiful model ship with a key inside. Pity we can't get it yet. Note the four notches below the model ship.
Back up.
The Wobbly Picture Puzzle
You should still be facing the low cabinet.
Click on the device to the right of the pumpkins for a close up.
Place the prism in the prongs on top. Now the device is complete.
Now when you push the Roman Numeral buttons each light highlights a different corner of the picture.
Could that be a clue for the wobbly picture puzzle?
Click the buttons from left to right, I through VI.
The corners highlighted are: upper right, lower left, upper left, upper left, lower left, lower right.
Back up and turn right to face the bed.
Click on the picture above the bed for a close up.
Click on the corners in the order you just discovered with the prism device.
The picture will slide up, revealing a small notch. Inside the notch is a light bulb and a wooden panel (F), take them both.
You will also notice a color bar with an arrow going from left to right.
The colors are: red, white, green, black, yellow, and blue.
Back up.
The Pumpkin Puzzle
Turn left to face the low cabinet.
Click on the pumpkin device on the left side of the cabinet for a close up.
Now if only we could figure out which direction to turn the arrows!
Maybe the picture of the jack-o-lanterns will help?
There are three clues to this puzzle: The jack-o-lantern picture, the wall ornament that looks like a clock, and the large compass to the right of the cabinet.
The first clue is the shape of the noses in the jack-o-lanterns in the picture: triangle, star, and diamond.
Next look at the wall decoration that looks like a clock. There are six figures on this decoration, a circle, an upside down triangle, a diamond, a star, a triangle, and a square.
Notice also that the arrow pointing to the top of the decoration, the circle, has an "N" on it. Therefore the circle is in the North position.
That means that the diamond is in the southeast position, the star is south, and the triangle is southwest.
The third clue is the compass to the right of the low cabinet. It shows that North is behind you, so south would be "forward".
The first pumpkin should be the position of the triangle, so the arrow should be pointing southwest, or roughly the 2 o'clock position.
The middle pumpkin should be the position of the star, so the arrow should be pointing straight up, or forward.
The third pumpkin should be the position of the diamond, which is southeast, so the arrow should be pointing southeast, which is roughly the 10 o'clock position.
Once all of the arrows on the pumpkins are in the right direction, a slot opens up giving you another wooden panel (R).
Back up.
The Prism Puzzle Part 2
You should still be facing the low cabinet wall. Click on the standing lamp to the right for a close up.
Click on the shade to lift it up, then place the light bulb in the lamp.
Click the "back" bar to drop the shade down, then click on the lamp pull to light the lamp.
You should see "III" in red.
Back up.
Click on the prism device for a close up.
We've already used this once, but we've also gotten a lot of colored Roman Numeral clues, so maybe we use it again?
But how do we put together the clues?
The Roman numerals scattered around the room are one clue, the colored bar revealed by the wobbly picture puzzle is another.
Each Roman numeral was a different color, and each of those colors was represented by the color bar.
The bar was red, white, green, black, yellow, and blue.
Red was III, white was IV, green was I, black was VI, yellow was II, and blue was V.
Therefore the combination is III, IV, I, VI, II, and V.
Push the Roman Numeral buttons in the order given by the color clues and you will get a third wooden panel (E).
Back up.
The Chicken Puzzle
Turn right (or left) twice to face the windows with the shelf.
Click on the chicken device underneath the left window for a close up.
Those chickens look familiar, we've seen one somewhere else in the room.
Also, notice when you click on them they go up and down.
So how does this work?
The clue is inside the glass doors of the large cabinet, the wine glasses.
The wine glasses were two sizes, so they were either tall or short.
The size of the wine glasses indicates the position of the chickens in the puzzle, large wineglass means the chicken should be up, small wineglass means the chicken should be down.
The pattern indicated by the wine glasses is up, down, down, up, up, down.
When you've gotten the chickens in the proper positions you can open the little door beneath the device and get a spade key.
Take the key, back up, and turn left (or right) twice to face the low cabinet.
Click on the large cabinet on the left for a close up.
Use the spade key on the right drawer of the large cabinet to open it. Now you've got a corkscrew! Let's have a drink!
Take the corkscrew and back up twice.
Time for a Drink
Turn left (or right) twice to face the windows with the shelf.
Click on the device in the middle of the shelf (between the windows) for a close up.
Use the funnel on the device.
Now pull up the wine bottle from your inventory.
Use the corkscrew on the wine to open it.
Use the open wine on the funnel to fill the device.
The wine will trigger the button and a panel will open up, revealing a club key.
Take the club key and back up.
Getting Out (Regular Escape)
Turn left (or right) twice to face the low cabinet.
Click on the large cabinet on the left for a close up, then use the club key on the left drawer to open it.
Inside is another wooden panel (W). Take it and back up twice.
Click on the middle doors of the low cabinet for a close up.
Open the doors to see the model ship.
Looks like we need to place the panels, but in what order?
The clue for this is the ship's wheel on the wall.
Remember that it said "Escape From the Woody Room".
There are four letters capitalized in that sentence, E, F, W, and R.
Coincidentally, that's the letters on our four wooden panels.
Therefore they should be placed in that order: E, F, W, R.
Place the panels in the notches below the model ship and the glass will open so you can get the key.
Take the heart key and back up.
Turn left to face the door.
Click on the door for a close up.
Use the heart key on the door to unlock it.
Click on the door again to get outside.
Enjoy coffee and cookies with "him"!
Getting Out with the Happy Coin
Follow the regular escape to the point where you get the heart key.
Back up and turn left twice to face the windows and the shelf.
Click on the clock-looking item and notice that the shapes have moved position.
The triangle is now southeast, the star is northeast, and the diamond is now north.
Turn right (or left) twice to face the low cabinet, then click on the pumpkin device for a close up.
Remember that north is behind you.
Position the arrow on the first pumpkin to southeast (roughly 10 o'clock position).
Position the arrow on the middle pumpkin to northeast (roughly 8 o'clock position).
Position the arrow on the right pumpkin to north (the 6 o'clock position).
Out pops the happy coin! Take it and back up.
Turn left to face the door. Click on the door for a close up.
Use the heart key to unlock the door, then click on the door to open it.
Enjoy your night out on the town with "him"!
Happy coin will bring happiness to you!!
Posted by: grinnyp |
November 2, 2011 2:17 AM
|
November 2, 2011 2:17 AM