


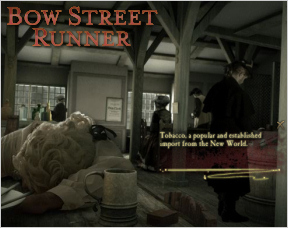
![]() Bow Street Runner is a mystery adventure series created by LittleLoud and commissioned by Channel 4 (UK) to promote the five-part City of Vice programs. Set in London's Covent Garden in the 1750s, crime in the city has risen to such a level that local magistrates were forced to take action. The Bow Street Runners were born, created to instill order in the increasingly crime-ridden city. It's a dark and historically accurate journey through old London, presented with live actors, voice narration and full motion video for an impressive cinematic experience.
Bow Street Runner is a mystery adventure series created by LittleLoud and commissioned by Channel 4 (UK) to promote the five-part City of Vice programs. Set in London's Covent Garden in the 1750s, crime in the city has risen to such a level that local magistrates were forced to take action. The Bow Street Runners were born, created to instill order in the increasingly crime-ridden city. It's a dark and historically accurate journey through old London, presented with live actors, voice narration and full motion video for an impressive cinematic experience.
You play the role of a Runner investigating crime in a series of scenes throughout the town. Using the mouse, examine each area for clues and evidence, some of which is stored in your casebook. You'll also interview witnesses and other townsfolk for information, introducing you to the colorful inhabitants of 18th century London. When you've gathered enough information the game allows you to move on to the next scene, creating a nice (if linear) sense of progression.
In addition to cerebral clue gathering you'll also have to get your hands dirty from time to time. A clever diversion called Slide Thrift is, according to the tavern poster, "a most wondrous test of skill and mettle", and you'll also have the pleasure of digging through wet, rotten meat and vegetables in search of clues.
Analysis: An excellent experience from beginning to end, the only down side of Bow Street Runner is the long load times users with slow internet connections will endure. It's the price we pay for full motion video and voice narration, and it's worth the wait. Bow Street Runner is a visually impressive game, not only for its use of live actors but for a convincingly dark setting that's smoothly integrated with the live action video.
A brilliantly executed game that impresses on all levels.
Update: All 5 episodes are now available to play!


Walkthrough Guide
(Please allow page to fully load for spoiler tags to be functional.)
COMPLETE WALKTHROUGH TO BOW STREET RUNNER, EPISODES I-V
**WARNING: This game includes (but is not limited to) murder, tragic and/or gruesome death, prostitution, smuggling, and blood. This game is definitely not for the squeamish, faint of heart, or the easily offended.**
The full episode walkthroughs are here. However, if you only want the bonus Esteem points found in each episode, or if you just want the answers to the interrogations, they are repeated in their own separate sections below the walkthrough, to aid the reader. :D Aren't I nice?
Episode I
Rose Street, Part One
Talk to the gentleman standing by the victim to not only learn that your new job is extremely hazardous (*gulp*), but that the only reason an established gentleman would be around a slum area is to see a prostitute. Hmm, interesting...
Click to examine the body. Click his head to examine the wounds, which seem to be more out of fun than rushed. Pretty suspicious... a thief wouldn't have that much fun. Click the "Return" tab to get back to the victim's body. Click on his left hand (bottom of the screen) to find a wedding ring. So this couldn't have been a thief, because he would have taken the ring. But we need to find proof that the victim owned the ring. Hmm, where would we find that? Click "Return" and check the open pocket on his hip. There's a piece of paper... pull it out by dragging it to the left. Ah ha! We have found the WEDDING RING RECIEPT. Once your Esteem goes up, click "Return".
Check the middle of the victim's body and note that his watch is missing. Perhaps we can find the watch somewhere? Click "Return".
It looks like the victim's other hand is clenched around something. Click it to examine it. Now, click each of the fingers in quick succession, and while they are all open click to get the LOCK OF HAIR. Your Esteem should raise again.
There's nothing else to be found on the body. Let's examine the surroundings! There's a horseshoe - that can't be of much help. How about we check around the inn? Click the trough outside to get a bit closer. Note the broken gin bottles. Click the trough to get a little closer. Pull the chain to release the water, and sift through the rotting contents on the right side. We've found the murder weapon - a KNIFE. Click "Return" twice.
It seems a new person has arrived on the scene. How about we talk to her? Ask her all the questions. It seems her name is Hester Bradley, and that she knows who the victim is, but won't tell us how she knows. She also didn't get a good look at the perpetrator, but if you are stern with her she will tell you where the perp went - to the Black Bull Tavern on King Street. Click the new button - the "Exit Scene" button - that just appeared in the top right corner to advance.
The Black Bull Tavern
You will be greeted by Ned Roach. Get used to this guy, he'll be in almost every episode. He'll let you into his tavern.
The guy up front is drunk, and passed out next to some tobacco and an empty gin glass. He'll be of no help. Neither will the prostitute in the back or the guy by the back window, so just ignore those guys, even though you'll meet the prostitute and the pawner in later episodes. You'll also see the background guy on the far, far right later on. :)
**BONUS ESTEEM** Slide Thrift, Easy
Click the poster in the back by the window guy and click "Play It Now" to play this minigame. Your goal this time is 40 points. Try not to aim straight up, but slightly to the side of the coin. Also, don't push with all your might - go about two-thirds to three-fourths of the way to full power to shoot. The order of points for each stripe, from bottom to top, is 10, 10, 40, 10, 50, 0, 50, 60, and 0 as the big semicircle on top. If you place your cursor at the top of the screen prior to throwing a coin, you can scroll up to see the board. You scroll back down by placing your cursor at the bottom of the screen. Once you get 40 points and win the extra Esteem, click "Exit" to return to the main screen.
Talk to Ned Roach and ask him all the questions. He knows Joseph Williams - he's from Soho, and is apparently rich. He never technically says his name, though, and he's never seen the blade. Lot of help he is. Return to the main screen.
All that leaves is the one guy reading the paper. You can read the paper to discover that Joseph Williams and his son, Thomas, had a large spat about Miss Bradley, who he ended up taking to the theatre, a PUBLIC occasion, even though she is a prostitute. That ought to cause some strife! Anyway, talk to the guy, who'll you'll notice has the same color in his wig as the LOCK OF HAIR found in the victim's hand. Hmm... he doesn't seem to know anything about a body or the knife, but when you ask Bob Doyle for his name, you'll note that the pocketwatch he pulls out has the initials "JW" written on it. That can't be Doyle's - it has to be the victim's missing watch! But if you ask him about it, he swears it's a family heirloom. Let's try to swipe it for evidence. Return to the main screen to notice Doyle's turned his back on you. Examine him to get closer.
**BONUS ESTEEM** Swipe the Watch (READ BEFORE YOU START!)
You have three tries to get the watch, click'n'drag style. If you lose the second try, you automatically get the watch third try and fail to gain the bonus points. I would suggest practicing slow and seeing how far you get before Doyle moves, then attempt - but be warned, the very end of the curve is a bit glitchy. And DO NOT LET GO OF THE MOUSE BUTTON BEFORE YOU GET TO THE END OF THE CURVE. This goes for ANY curve you EVER get to in the whole game, not just this episode - and trust me, there are a LOT. Make sure you get the sphere to the absolute end of the curve, down to the very pixel, or he'll catch you.
Either way, once you obtain the WATCH, Doyle will drop something on the floor. Let's examine it! Look, it's a SCRAP OF PAPER with Joseph William's address. Suspicious... let's go check his house out, shall we? Click the button to exit the scene.
The William's House
You show up and are told that Thomas Williams already has a visitor. So let's look around, shall we? There's a newspaper that says Thomas Williams has been spending a lot of his dad's money, and a lot of mementos from their slave trade, which is how they got their money. Let's check the desk next. You'll notice a shotglass here, but you can't use it yet. Click the paper right beside it, though, to read about a well-off woman, possibly historical, that was apparently a prostitute by night. Anyway, you'll notice there's a locked drawer - let's try picking the lock!
Do the same thing with the three curves that you (hopefully) did with Doyle's watch. Once it's open, click the left piece of paper and note that Joseph Williams has been paying Hester Bradley's rent for quite some time now. He was apparently very serious about this woman. Return and click the book to find THOMAS WILLIAM'S JOURNAL. Apparently he was very angry with his father for daring to think he could marry Miss Bradley. Also, note the last sentence: "I must take matters into my own hands." Hmm... click return twice.
You'll suddenly hear voices. Click the shotglass to hear into the other room.
**BONUS ESTEEM** Eavesdropping (READ BEFORE YOU START!)
There are generally three zones that the two gentlemen hang out in - the left section, the middle section, and the right section. Generally it will be easier to listen in on them if you place the shotglass higher up on the wall, roughly in the top half, near the bottom of the portrait frame. I find it easier to follow the subtitles as you go along.
For the first two lines, they will be in the left section, Voice One right by the door and Voice Two about an inch to the right of Voice One.
Then Voice Two will move to the middle, then to the right.
Voice One will angrily storm to the right section to yell at him, then when he talks about the harlot not getting a single penny, he will be in the middle.
Voice Two will be on the left section suddenly (he was probably moving while being quiet), and Voice One and Voice Two will start struggling in the lower left-hand corner of the wall. By the time they start struggling, you will have won the points.
A shot will ring out, and Voice Two will run away. You will note BOB DOYLE'S HAT by the wall. Then Thomas Williams will suddenly jolt up, say his last few lines, and die. That sucks. You can examine Thomas William's body before or after he dies, which is a little funny. Exit the scene.
Rose Street, Part 2
Click on the door three times to knock it down.
You can inspect some of the things in Hester Bradley's room, before or after you start the next part. She has potions to keep away some ailments in her profession, a picture of Joseph Williams, and a witch and broom for her more "particular" clients. Oh no! Hester Bradley's been stabbed! Let's try to save her! Click her.
**BONUS ESTEEM** Saving Hester (READ BEFORE YOU START!)
The wounds grow harder in difficulty from the one closest to the bottom of your screen (easiest) to the farthest away (hardest). My honest piece of advice is to start with the one on Miss Bradley's left (top), then the middle, then the right (bottom). Once you've stitched the first one (which I believe has six or seven curves), the middle one (with five curves) and the last one (with four curves) will be easy. And all she does is cough and look around, confused - not even a thank you! It gives you a buttload of esteem though. :D I finished with 2:20 on a touchpad!
If you save her or if you don't, exit the scene.
Bow Street
**BONUS ESTEEM** Interrogation 1
This is the interrogation scene that happens each round. You must give the correct answers to the questions he gives, or you will lose one fourth of the bar at the top. When all of it is gone, you lose! It also affects the ending of the episode. To give evidence, click and drag the appropriate piece of paper with the correct evidence or suspect on it. You may have to dig to find the correct evidence, as there are a bunch of papers.
Who do you believe to be the murderer of Joseph and Thomas Williams?
Obviously, it's BOB DOYLE!
How can you be certain that the suspect is in some way linked to the murder and robbery of Joseph Williams?
The WATCH would prove that, since it says "JW" on it.
What makes you think that the same man who murdered Joseph Williams also killed his son Thomas?
The LOCK OF HAIR is good evidence.
What was the motive for killing the harlot?
THOMAS WILLIAM'S JOURNAL explains the motive to kill Hester.
How can you prove that Doyle was hired by Williams to commit the murder?
The SCRAP OF PAPER.
If you fail, the reputation of the Bow Street Runners will be stained, but Doyle will still die.
Congrats, you just completed the first episode. :D
Episode II
Bow Street, Part One
OK, first click the chair on the left. You'll note some gambling chips and a newspaper article, and it's missing a button. Then look on the floor and click the small piece of paper. It's a SUICIDE NOTE. Apparently the victim is named George Harbottle. Click return.
You'll notice the man's wig, and a pair of shoes. Click the SHOES.
Click the candle to the left of the body, and click his head, then his mouth. His mouth is black, which means he might have been poisoned with arsenic. But we'll have to perform an autopsy to make sure. Click on his stomach to start the autopsy. If you are squeamish, then you can turn the autopsy over to a surgeon.
**BONUS ESTEEM** Autopsy
Simply click and drag along the lines as before, cleaning up blood as needed. Once you've cut into his stomach, move the contents around until you find the evidence.
Either way, you will get a POISON RING. This is obviously the murder weapon. But did he swallow it himself, or did someone stuff it down his throat? Click return and exit the scene.
Covent Garden Gambling Den
On the left, you'll notice the heart-shaped gambling chips found at the victim's home. You'll recognize the guy sitting there as the pawner from the first episode. Talk to him. If you ask about Harbottle, you'll have to play a game with him.
**BONUS ESTEEM** Find the Lady (READ BEFORE YOU START!)
You are looking for the queen. He will shuffle the cards around, then you will have to choose which one is the queen. I would suggest using your mouse to follow the card - it helps me.
Either way, you will eventually get the evidence - a PORTRAIT that Harbottle pawned. Keep talking to the man to find out he sold it to someone, but can't remember who. Click return.
Talk to the woman. Recognize her? She was the lady from the first episode I told you about. This is Miss Butters, and she will come back later. Ask her about the portrait, and if you're gentle, she'll explain that she's her newest employee. And she also tells you the pawner's name - Nathaniel Crouch. You'll be seeing him again. Leave her.
Now, look under the table the three gentlemen are sitting under. You've found the missing BUTTON from the jacket in the victim's house. It proves he was here... but who was he with? Anyway, leave the scene.
Brothel Bedroom
You'll be escorted in and told to wait. Well, we were told to wait last time... let's explore! You'll notice a picture on the wall - probably from the woman's home. Apparently they had condoms back then, because there's one on her table. There's a book of poems on the chair... and a quickly nailed plank. Let's pull it up and see what's under it! Just pull all the nails up as quickly as you can, because they go back down after a period of time. Find the WILL from Sally's (the woman's) father explaining that George Harbottle, her uncle, has custody of her.
Sally will then enter the room. Aww, isn't she pretty? Talk to her. She'll tell you her name is Sally Harbottle, and if you are gentle to her, she will explain that her uncle sold her into a life of prostitution - after taking her virginity for himself. She will then ask you to steal from Missus Butter's office to free her from her contract. Exit the scene.
Bawd's Office
First, click the desk. Examine the LEDGER to discover that Mister Harbottle had run up a considerable tab, and had now way of paying it off. The note next to it shows a couple of the women that work for Miss Butters - including Sally, who apparentl is not even eighteen. Leave the desk.
On the bookshelf, there is a locked box on the middle-left shelf. Click it, then click it again. Pick the lock, and examine the LIST OF SALLY'S BELONGINGS and the ILLEGAL CONTRACT. Suddenly, the suicide note will come up and you'll realize how similar the writing is. Uh oh. Not good. Exit the scene.
Bow Street, Part Two
**BONUS ESTEEM** Interrogation 2
Same as before, answers in spoilers.
Who is the suspect for whom you seek to obtain this warrant?
SALLY HARBOTTLE seems the most likely.
What was the cause of the deceased's death?
Maybe the POISON RING we found in his stomach?
But why would she have wanted her uncle dead?
How about that CONTRACT?
What makes you certain that George Harbottle died at the Bedford?
How about the BUTTON? He had to have been there if his button was found there.
How can you be certain that the girl is the murderer?
Well, the SUICIDE NOTE is in her writing.
This is the only one I didn't really enjoy winning. :c Poor Sally. If you fail, Sally Harbottle will be set free, but the Bow Street Runners have their reputation tarnished. Fielding wonders, however, if Sally Harbottle will ever be free, living the life she's trapped in.
Congrats, you've completed the second episode!
Episode III
Slum House
The lady on the right died in considerable pain. The guy in the middle has vomit on him, which is consistent with poison. But what possibly could have poisoned them? But the one in the back is the one we're looking for. Notice he's missing his shoes - he sold them for gin - and there's a little piece of paper beside him. Pick it up to find the RECIEPT. Poor John Flannery sold the tools of his trade for more gin. Leave the note and his body.
What else is there around here? Well... there's the bed. Go closer to examine it. Click on the green BOTTLE with the three-star label. Now click the bed.
You'll notice a rat running around. It will be in one of four places - by the fire, underneath the sheet on either side, and on the end table behind the bottles. Just keep chasing it, and click it to catch it. I always catch him on the right side of the sheet.
OK, let's try out some different liquids around the shack to see what could have poisoned him. Try the water by clicking it and then clicking the mouse. Nope. Try the beer. No again. Try the gin. Oh no! The rat died! That must be what poisoned the three victims. Exit the scene.
Pawnbroker's Shop
Look around and notice quite a few random items, like shoes, candlesticks, swords, wedding rings, and baby clothes, that have been sold for gin. There's a piece of paper on the floor that talks about a woman name Judith Defor that apparently strangled her child to sell its clothes for gin. There's also a copy of a very famous print called "Gin Lane", which goes with another famous print called "Beer Street", made by William Hogarth to depict how terrible London was at the time. But I digress. Click the paper on the stool to get the ARTICLE that talks about the bad batch of gin. Return.
Hey look, it's Nathaniel Crouch! Told you he'd see you again. Also, there's the drunk guy from the background in episode one. But he won't talk. So how about we talk to Crouch? This time he FINALLY introduces himself and talks about Flannery selling his tools. He asks you to get rid of the drunk guy. So let's do that! Return to the main screen.
Talk to the drunk... er... at least approach him. Slap him a few times and he'll complain, but get up and leave. He says some pretty funny things though!
What's that he was sitting on? Click it. Uh-oh... we've seen that before. Let's go after that guy! Exit the scene.
Gin Shop
You'll see Ned Roach and the proprietor of the gin shop get in an argument, and then note that you've arrived. Look around and notice that none of the drunks will talk to you. Also, there's a game of Slide Thrift on the far left wall.
**BONUS ESTEEM* Slide Thrift, Medium
This time you need 90 points. This one's still pretty easy.
Let's talk to the guy and see what he has to say. His name's Silas Briskett. I LOVE his accent! Anyway, he apparently has nothing to say to you. Well, that was rude, turning his back on you! But what's this? It's a brick wall. Let's look closer. Click around to find a hollow spot near the bottom. Click again to pull away the brick and look in the hole. Click on the paper.
OK, so we found it, and apparently there's nothing on it. But perhaps if we rubbed on the paper...? Click and drag to rub. Look, there's a message. "As previous, once monies all received, consignment can be collected from 4 Maiden Lane. Knock four times on back alleyway door at sunset." Apparently he's been getting it from 4 Maiden Lane. Let's go there! Exit the scene.
Illegal Distillery
OK, there's a big bottle of liquid on the far left, and right next to it is another bottle. You will find it is SULFURIC ACID. Apparently very lethal in high doses. Hmmm... let's keep looking around.
There happen to be some tools on the floor. Click them. Those are JOHN FLANNERY'S TOOLS.
Right above the SULFURIC ACID is a piece of paper. It's a LIST of gin shops in the area that are buying the illegal gin. Return.
To the right of the SULFURIC ACID are those LABELS. So the poison stuff is being made here.
There seems to be a large clutter on the table. Click it. There's a bunch of parts, and some dust... and a picture of the completed machine. Let's put it together! Just drag the parts to their appropriate places and follow the curves until the machine is completed. Then, light the candles under the first part by clicking. This is the machine that makes the poison gin! But who runs this place?
Click the barricaded door. Oh look, a hole! And... is that who I think it is, boxing up all those bottles with the star labels?! We have to get a warrant! Exit the scene.
Bow Street
**BONUS ESTEEM** Interrogation 3
Who do you suspect to be behind the production of the unlicensed gin?
Well, the PAWNBROKER, Nathaniel Crouch, of course!
And what caused the deaths of the unfortunates in the house of Saint Giles?
Well, how about those GIN BOTTLES we found?
And what connects this particular still with the Gin Shops and contaminated bottles at the slum dwelling?
Those LABELS might be sufficient proof.
What proof is there of the pawnbroker's involvement?
The TOOLS were sold to Crouch, and they're on the floor...
How can you prove the scale of his enterprise?
Well, perhaps the LIST of gin shops?
If you fail, Nathaniel Crouch will hide in the London Underground, but will be a free man. Fielding wonders if he's hiding from the families of his victims, or hiding to keep his large criminal enterprise going.
Congratulations, you've completed the third episode.
Episode IV
Crashed Cart
On the ground there's a strange flier for a freak show. Check out the body to see that it is completely crushed under the cart. That does not look comfortable. Well, there's no way we can find out who the victim is... so let's check the cart.
Click the barrel of apples above the victim. Move the apples around a bit until you find a hidden trapdoor. Open it up and find a large amount of CONTRABAND. No wonder the murderer ran away - he wanted to hide the secret smuggling ring he's involved in. Let's take another look around. Return to the main scene.
Click the big barrel to the left of the fallen cart to see wet paint, and a wet barrel. Why on Earth would it have been in the water? Anyway, click the words on the side of the barrel - "Docks Checked Black Rose". This STAMP would be used at the docks to mark imported goods. Ah ha! This is an overseas smuggling ring. So let's check out the ship, the "Black Rose", shall we? Exit the scene.
Customs Shed
All right, let's have a look around this place. Nothing really of note - coconuts, fish, coffee beans, French wines, Oriental silks, and a ship called the "Queen Caroline." No Black Rose. But there IS a sleeping guard next to a locked door... perhaps we could steal his keys?
**BONUS ESTEEM* Swipe the Keys (READ BEFORE YOU START!)
Much like Bob Doyle. Just swipe when you're ready. But you only have ONE chance to grab the keys this time.
If you miss stealing the guard's keys, then you lose the Esteem, but you get to talk to the guard. He tells you to speak with James Ward, and kindly opens the door for you. He's a pretty cool guy. :D His last name is Miller, as we find out later. He has a wife and kids, too! He apparently likes to drink in the morning and sleep in the afternoon.
Either way, once you get in, you'll notice it's just a small room with a desk. There's a newspaper article about the Hawkhurst smuggling gang, and a Jacobite emblem on the floor - an underground group dedicated to restoring the Stuart kings to power in England, Ireland, and Scotland. But there's nothing much else except the desk. Let's check that out shall we? Click it to advance.
Click the log book on the desk to find the SHIPPING LOG, which confirms the smuggled cargo was OK'd by James Ward, the Customs Chief. Let's go see if we can find him! Exit the scene and watch the cut scene. Oh no! The guard was murdered and all the goods are gone!
The Black Bull Tavern
Nothing unusual here. There's the old background drunk from Episode Three, that same guy is passed out in the front, and there's a new guy in the back that won't talk to you. There's a newspaper article about the Jacobites, a cockfighting flier, a lottery ticket, and the ever-popular Slide Thrift game.
**BONUS ESTEEM* Slide Thrift, Hard
This time you must get 110 points. This one's hard, but you can still do it!
Talk to dear old Neddy Roach. He says he's been downstairs all afternoon fixing a leaking pipe, and that the sailors from the Black Rose were here, but left. He points you out to Ward, the fat man sitting at the table.
Talk to James Ward. Basically, you just have to pick all the negative ones to keep advancing. This is the first time you get to punch a guy! I felt so bad playing this section. :c He seemed like a decent-enough guy. Finally, after you punch him around a bit, he'll tell you to examine the ship that was docked. The Queen Caroline? Let's go see if we can catch it! Exit the scene.
Docks
You are immediately greeted by the Queen Caroline. There's nothing to look at except the cannon and the nameplate. Let's check out the nameplate! Click the name.
It seems... fishy. Let's try to scrub it off by clicking and dragging. We've found the real SHIP'S NAME. So this is the Black Rose!
A cutscene will occur, and you will sneak onto the ship. There's a grappling hook, a rope made out of tobacco, and some illegal weights for hiding and retrieving smuggled goods in the sea. Ah ha! So that's why those barrels on the cart were wet. Anyway, it seems to the far left there's some sort of baseball-bat shaped piece of wood. Click to get closer to find a BLUDGEON covered in blood.
All right, what else have we got here for evidence? Let's look at the bottom of the mast. Click the LANTERN with the strange funnel. Apparently this one is used by smugglers! Go back to the main screen.
There seems to be something on the far right of the ship. Click to examine. The BARRELS IN WATER are submerged contraband. This ship is definitely smuggling and up to no good.
Return to the main screen to note that there is a light on. Click to examine and watch the cutscene.
Now we have to barricade the door. See those oars on the right side? Click and drag the top of the second one onto the latches on either side of the door to block them in.
Now you are at that cannon. Click and drag to hover the match over the fuse to light it and sink the ship!
Bow Street
**BONUS ESTEEM** Interrogation 4
As always, answers in spoilers. :D Good luck!
What aroused your suspicions that smugglers were involved in the man's death in the cart accident?
The CONTRABAND hiding behind the apples might have been a tip off. :D
Who should be held responsible for the murder of the customs clerk?
It was the CAPTAIN that killed him.
Turning a cannon on a domestic vessel is a serious course of action. How can you be certain it was the right one?
What about the SHIP'S NAME?
How can you prove it was definitely the Black Rose that was linked to these smuggling activities?
How about the BARRELS IN WATER full of contraband?
What evidence do you have that there is corruption and smuggling on a wider scale?
Well, there's that SHIPPING LOG we found.
If you fail, the crew is set free and the Bow Street Runner's reputation is trampled. But Fielding knows that if they catch the true ringleader, who is somewhere in London, they will regain their reputation in the eyes of the populace.
Congrats on completing the fourth episode!
Episode V
Draper's Shop
You'll be greeted with the image of the burned-down shop. Tragic. All the silks and tools are destroyed. The picture of Mister and Missus Hart on the wall is, surprisingly, still pretty intact. Well, let's look for the body to confirm that someone died in the fire. Look to the pile of debris to the left and sift through it to find MISTER HART'S BODY.
Let's talk to Missus Hart to find out what happened. She tells you outright that it was not an accident that claimed her husband's life, and that she heard glass breaking before the fire. Also, she says they stopped paying protection money and that's what caused the gang to resort to arson. They were almost married 20 years. :c Anyway, let's see if we can try to prove it was arson. Return to the main screen.
There's something on the floor over by the window. Click it. It turns out to be a CHARRED LANTERN with broken window glass beside it. So the gang threw a lantern through the window and started the fire. Return to the main screen.
Look who just walked in! It's old Ned Roach. Talk to him. He says he's here to pick up a few things, but it's too late now, and it's very tragic that it burnt down. He says he knows nothing about a gang, and points out that someone caught the man suspected of committing the crime and sent him to the Bow Street Prison. We should interrogate the man. Leave him and exit the scene.
Bow Street Cells
These cells are much nicer than the ones in Newgate Prison, apparently. Anyway, click on the guy in the cell to talk to him. Like James Ward, you have to pick the negative responses to advance. Though, he says some really funny things to the positive responses. If this guy weren't a bad guy, I think he'd be one of the coolest guys in the game. After you knock him around several times, he'll tell you to go to the Black Bull Tavern. Let's go there! Exit the scene.
The Black Bull Tavern
OK, so there's a dead body in the middle of the room. There's a trapdoor behind the counter, moldy bread on the floor, and a Slide Thrift game.
**BONUS ESTEEM** Slide Thrift, Expert
Now you need 140 points. This is the only one I had to redo a few times to win.
Examine the dead body in the middle of the room. It's old Nathaniel Crouch, with a note on his chest. The NOTE says that there's only room for one "King" in Covent Garden. Return to the main part.
Let's look at that trapdoor. Pick the lock to go downstairs.
OK, we're downstairs now. There's some dried blood, a barrel of contraband from the Black Rose, and a recently lit pipe. So someone was just here! Click the crates on the far right to find SMUGGLED CONTRABAND.
Click the wall on the far right for the LANTERNS - one of them is missing. So Roach started the fire! There's also a desk. Let's check it out.
Now for the hardest lock-picking challenge ever. There are five that you must complete. Once you open the desk, you will notice a large sum of money, a list of people and who they care about, and four pieces of evidence: a LIST of shopkeepers paying protection money, a LETTER from Thomas Williams (remember him from Episode 1?), a LEDGER of smuggled goods, and a bunch of LICENSES for ownership of a brothel house and gambling den (remember the Bedford gambling den from Episode 2?). So Ned has been involved in the crimes that were committed in ALL the Episodes - he's the mastermind! Return to the main screen.
A barrel will fall over, and a woman will be behind it. Click her to get closer. It's Miss Butters from Episode 2! What's she doing tied up? She'll tell you that Ned's the mastermind and that he's at his secret warehouse. Exit the scene.
Warehouse (Read entire section BEFORE you click "Continue" on the loading screen!!!)
You've been tricked! Miss Butters (apparently her first name is Isabella) was working for Roach all along, and he's not very happy with you right now. He orders his men to kill you. Interesting and slightly humorous note: the guy shown with the gun is the same guy you beat up earlier, except with a hat.
**BONUS ESTEEM** Shooting Game
You will now have to shoot down eight snipers, a la any shoot 'em up game I've ever played. Move the mouse to move your crosshair around, and click to shoot; sounds simple enough, right? Wrong. If you die once, you lose the Esteem. I suck at these games. If you're not like me and totally rule at these, then I suggest skipping the spoiler tag below. However, if you aren't as good as some other players at these sort of games, here is the location list of all the shooters.
VERY IMPORTANT TIP: You have only a two-shooter to aid you. If you shoot both rounds, a reload button will appear in the bottom left corner of the screen, and if you click it, it will effectively pause the game. You will have to drag the two orbs straight to "load" another bullet. While this is a curse, this also a blessing. The reload screen is an annoyance, but it also helps you out; the more times you click "reload", the more times you will avoid getting shot if a sniper shoots at you after you click the button. Not only that, but all the Sniper's positions reset! So even if there are four enemies on the screen and they're about ready to fire, you can shoot two bullets into the first man, click "reload", and the other three snipers won't have hit you at all, and be hiding in the same places. Me personally, I got through the second screen with full health. :D So I had plenty of health to get rid of the last four guys.
START OF SHOOTING GAME
The first one will appear behind the stack of crates to the left.
The next will appear from behind the barrel to the right.
NEXT SCREEN
The next will appear from behind the barrel on the far left.
The next will appear from the shelves in roughly the middle of the screen.
NEXT SCREEN
The next will appear behind the barrel in roughly the middle of the screen.
The next will appear from the shelves on the left.
The next will appear from the shelves on the right.
The next will appear in the far back, from the shelves in roughly the middle of the screen.
END OF SHOOTING GAME
Bow Street
**BONUS ESTEEM** Interrogation 5
In your first case, how do you believe Ned Roach was involved in the murder of Joseph Williams by Bob Doyle?
How about the LETTER from Thomas Williams we conveniently found in the downstairs desk?
In your second case, was there anything that connected Ned Roach to the house of ill repute and the sad story of Sally Harbottle?
Well, there were the LICENSES for the whore house and gambling den.
With your third case, what was the connection between our nefarious pawnbroker and Ned Roach?
There's the NOTE we found pinned to his dead body!
With your fourth case, how can you prove that Roach had any involvement with the smuggling ring?
That LEDGER we found would prove it.
What reason would Ned Roach have to burn down the drapers?
What about the LIST of people paying protection money?
If you fail, Ned Roach is acquitted, and the populace of London refuses to believe that the Bow Street Runners are worth anything, and beg the government to disband the Runners. You are also fired. :c
Congratulations, you've completed the game! :D If you followed my walkthrough, you should have gotten an A rank, with an Esteem rating of Commander.
Bonus Esteem Points
Episode 1
Slide Thrift, Easy
Click the poster in the back by the window guy and click "Play It Now" to play this minigame. Your goal this time is 40 points. Try not to aim straight up, but slightly to the side of the coin. Also, don't push with all your might - go about two-thirds to three-fourths of the way to full power to shoot. The order of points for each stripe, from bottom to top, is 10, 10, 40, 10, 50, 0, 50, 60, and 0 as the big semicircle on top. If you place your cursor at the top of the screen prior to throwing a coin, you can scroll up to see the board. You scroll back down by placing your cursor at the bottom of the screen. Once you get 40 points and win the extra Esteem, click "Exit" to return to the main screen.
Swipe the Watch (READ BEFORE YOU START!)
You have three tries to get the watch. If you lose the second try, you automatically get the watch third try and fail to gain the bonus points. I would suggest practicing slow and seeing how far you get before Doyle moves, then attempt - but be warned, the very end of the curve is a bit glitchy. And DO NOT LET GO OF THE MOUSE BUTTON BEFORE YOU GET TO THE END OF THE CURVE. This goes for ANY curve you EVER get to in the whole game, not just this episode - and trust me, there are a LOT. Make sure you get the sphere to the absolute end of the curve, down to the very pixel, or he'll catch you.
Eavesdropping (READ BEFORE YOU START!)
There are generally three zones that the two gentlemen hang out in - the left section, the middle section, and the right section. Generally it will be easier to listen in on them if you place the shotglass higher up on the wall, roughly in the top half, near the bottom of the portrait frame. I find it easier to follow the subtitles as you go along.
1. For the first two lines, they will be in the left section, Voice One right by the door and Voice Two about an inch to the right of Voice One.
2. Then Voice Two will move to the middle, then to the right.
3. Voice One will angrily storm to the right section to yell at him, then when he talks about the harlot not getting a single penny, he will be in the middle.
4. Voice Two will be on the left section suddenly (he was probably moving while being quiet), and Voice One and Voice Two will start struggling in the lower left-hand corner of the wall. By the time they start struggling, you will have won the points.
Saving Hester (READ BEFORE YOU START!)
The wounds grow harder in difficulty from the one closest to the bottom of your screen (easiest) to the farthest away (hardest). My honest piece of advice is to start with the one on Miss Bradley's left (top), then the middle, then the right (bottom). Once you've stitched the first one (which I believe has six or seven curves), the middle one (with five curves) and the last one (with four curves) will be easy. And all she does is cough and look around, confused - not even a thank you! It gives you a buttload of esteem though. :D I finished with 2:20 on a touchpad!
Episode 2
Autopsy
Simply click and drag along the lines as before, cleaning up blood as needed. Once you've cut into his stomach, move the contents around until you find the evidence.
Find the Lady (READ BEFORE YOU START!)
You are looking for the queen. He will shuffle the cards around, then you will have to choose which one is the queen. I would suggest using your mouse to follow the card - it helps me.
Episode 3
Slide Thrift, Medium
This time you need 90 points. This one's still pretty easy.
Episode 4
Swipe the Keys (READ BEFORE YOU START!)
Much like Bob Doyle and the watch swiping. Just swipe when you're ready. But you only have ONE chance to grab the keys this time.
Slide Thrift, Hard
This time you must get 110 points. This one's hard, but you can still do it!
Episode 5
Slide Thrift, Expert
Now you need 140 points. This is the only one I had to redo a few times to win.
Shooting Game
You will now have to shoot down eight snipers, a la any shoot 'em up game I've ever played. Move the mouse to move your crosshair around, and click to shoot; sounds simple enough, right? Wrong. If you die once, you lose the Esteem. I suck at these games. If you're not like me and totally rule at these, then I suggest skipping the spoiler tag below. However, if you aren't as good as some other players at these sort of games, here is the location list of all the shooters.
VERY IMPORTANT TIP: You have only a two-shooter to aid you. If you shoot both rounds, a reload button will appear in the bottom left corner of the screen, and if you click it, it will effectively pause the game. You will have to drag the two orbs straight to "load" another bullet. While this is a curse, this also a blessing. The reload screen is an annoyance, but it also helps you out; the more times you click "reload", the more times you will avoid getting shot if a sniper shoots at you after you click the button. Not only that, but all the Sniper's positions reset! So even if there are four enemies on the screen and they're about ready to fire, you can shoot two bullets into the first man, click "reload", and the other three snipers won't have hit you at all, and be hiding in the same places. Me personally, I got through the second screen with full health. :D So I had plenty of health to get rid of the last four guys.
START OF SHOOTING GAME
01) The first one will appear behind the stack of crates to the left.
02) The next will appear from behind the barrel to the right.
NEXT SCREEN
03) The next will appear from behind the barrel on the far left.
04) The next will appear from the shelves in roughly the middle of the screen.
NEXT SCREEN
05) The next will appear behind the barrel in roughly the middle of the screen.
06) The next will appear from the shelves on the left.
07) The next will appear from the shelves on the right.
08) The next will appear in the far back, from the shelves in roughly the middle of the screen.
END OF SHOOTING GAME
Interrogation Answers
Episode 1
Who do you believe to be the murderer of Joseph and Thomas Williams?
Obviously, it's BOB DOYLE!
How can you be certain that the suspect is in some way linked to the murder and robbery of Joseph Williams?
The WATCH would prove that, since it says "JW" on it.
What makes you think that the same man who murdered Joseph Williams also killed his son Thomas?
The LOCK OF HAIR is good evidence.
What was the motive for killing the harlot?
THOMAS WILLIAM'S JOURNAL explains the motive to kill Hester.
How can you prove that Doyle was hired by Williams to commit the murder?
The SCRAP OF PAPER.
Episode 2
Who is the suspect for whom you seek to obtain this warrant?
SALLY HARBOTTLE seems the most likely.
What was the cause of the deceased's death?
Maybe the POISON RING we found in his stomach?
But why would she have wanted her uncle dead?
How about that CONTRACT?
What makes you certain that George Harbottle died at the Bedford?
How about the BUTTON? He had to have been there if his button was found there.
How can you be certain that the girl is the murderer?
Well, the SUICIDE NOTE is in her writing.
Episode 3
Who do you suspect to be behind the production of the unlicensed gin?
Well, the PAWNBROKER, Nathaniel Crouch, of course!
And what caused the deaths of the unfortunates in the house of Saint Giles?
Well, how about those GIN BOTTLES we found?
And what connects this particular still with the Gin Shops and contaminated bottles at the slum dwelling?
Those LABELS might be sufficient proof.
What proof is there of the pawnbroker's involvement?
The TOOLS were sold to Crouch, and they're on the floor…
How can you prove the scale of his enterprise?
Well, perhaps the LIST of gin shops?
Episode 4
What aroused your suspicions that smugglers were involved in the man's death in the cart accident?
The CONTRABAND hiding behind the apples might have been a tip off. :D
Who should be held responsible for the murder of the customs clerk?
It was the CAPTAIN that killed him.
Turning a cannon on a domestic vessel is a serious course of action. How can you be certain it was the right one?
What about the SHIP'S NAME?
How can you prove it was definitely the Black Rose that was linked to these smuggling activities?
How about the BARRELS IN WATER full of contraband?
What evidence do you have that there is corruption and smuggling on a wider scale?
Well, there's that SHIPPING LOG we found.
Episode 5
In your first case, how do you believe Ned Roach was involved in the murder of Joseph Williams by Bob Doyle?
How about the LETTER from Thomas Williams we conveniently found in the downstairs desk?
In your second case, was there anything that connected Ned Roach to the house of ill repute and the sad story of Sally Harbottle?
Well, there were the LICENSES for the whore house and gambling den.
With your third case, what was the connection between our nefarious pawnbroker and Ned Roach?
There's the NOTE we found pinned to his dead body!
With your fourth case, how can you prove that Roach had any involvement with the smuggling ring?
That LEDGER we found would prove it.
What reason would Ned Roach have to burn down the drapers?
What about the LIST of people paying protection money?
Easter Eggs
1. The papers on the desk at the "Loading" screen are moveable by clicking and dragging, and are also readable, by clicking the bottom right corner of each document. However, the paper titled "The London Courant" in the middle-left section of the desk will be personalized for the last episode you completed (if you succeeded in the interrogation or if you failed), except for in the first episode, which will repeat the full-size document right next to it.
2. Once you complete the five episodes, you are given a code - "SlideThrift" - to play the Slide Thrift game as many times as you want. :) It can be used after completing one episode, and will always be set at 140 points.
List of Ranks
In case anyone wants it as a reference.
Runner (Lowest)
Constable
Sergeant
Inspector
Chief Inspector
Superintendent
Commander (Highest)
I believe I got all the esteem in the game, including bonuses, unless I'm missing some game that's nearly impossible to see. But I think this is it! :D
Posted by: Metanaito |
April 14, 2008 6:32 PM
|
April 14, 2008 6:32 PM