JayisGames.com is now available ad-free!
Jay is Games recommends Cheat Happens with 8,000+ games and 35,000+ trainers!

Weekday Escape N°63


Comments (45) | Views (19,323)

Weekday Escape

elleSo now, this Mardi Gras 2015 business is behind us. Oh, are you not accustomed to this extravagant phenomenon? Well then, here is a brief synopsis: Mardi Gras is, in certain cultures and localities, a time to stuff yourself silly with as much beloved indulgences as you possibly can in preparation for then, during a forty-day season of lent, denying yourself said indulgences. Eh, it makes perfect sense when you think about it. As far as indulgences go, none can be better than logging into JIG and playing games 'til your fingers grow numb and your eyeballs dry out. Or at least until you have to go do more, how do you say? re-spons-ible things. Alright. Enough small talk. Let's get serious here: nobody is giving up games here and escape games ain't going away anywhere. And, as is the Wednesday tradition in these parts, we have three of them for you to escape your weekday worries with...

Button Escape 29
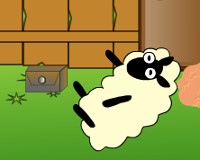
Button Escape 29 - You might be familiar with Tototo Room's stylings by now: search along the multiple scenes to find, and click on, eleven tiny grey buttons. In doing so, you will encounter some logic-based puzzles and a few active spots that are tiny enough to elicit a pixel hunt. The design invites exploration as it will take multiple clicks in the right areas and keen eyesight to successfully work your way out. Because Tototo Room's charming characters and quirky drawings, there is as much enjoyment in the aesthetics as in the hidden object search itself.

Room 4: Cafe
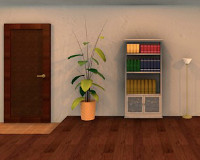
Room 4: Cafe - It took four games before Ichima caught our eyes, which isn't too bad considering how many escape games are released each week. The design will appeal to those who prefer photo-realistic graphics, in semblance to Tesshi-e, Lo.Nyans, Aries Escape, and the like. If you do find fault with this room, it's likely to be the ghost leg (or Japanese ladder game) on the wall. This "very simple yet deep" puzzle construct will be more fun with practice, as all things are more fun when we get good at them. That aside, being stuck in this little cafe should prove just as pleasing as escaping from it.

Girls Room No.3: Nail Polish
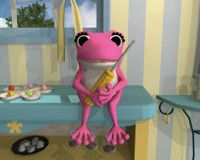
Girls Room No.3: Nail Polish - The title alone offers little in way of hints for what you'll see in this newest FunkyLand creation; think of all the colors you could possibly paint on the ends of your toes. Still, as far as predictability goes, between you, me and the lamp post, FunkyLand is getting a little low on surprises. Good thing! Surprises lead to deep disappointment just as often as to glowing delight. And this third installment of the "girl-themed" (whatever that means) series is sure to delight in all the ways you'd expect from the land of funk. I didn't tell you much about this game, did I? Then something should be left to surprise...

We love escape games, and our readers love talking about them and sharing hints! How about you? Let us know what you think, ask for clues, or help out other players in the comments below.

Walkthrough Guide


(Please allow page to fully load for spoiler tags to be functional.)

Girl Room 3 Walkthrough

Near the Dresser

The Bookcase

Take the Screwdriver from the Frog

Look at the Rings to the left of the Frog, note the position of each colour.

The Dresser

Take the fifth nail polish

The Bedside Cabinet

Turn the Mirror on top

Zoom out and look up at the roof

Note the code

6514

Look inside the cabinet and take the A

The Wall with the Door

The Cuckoo Clock

Enter the code from the mirror and get the key

The Locked Cabinet

Use the key on the cabinet and take the first nail polish

The Credenza

Use the A on the other letters and take the second nail polish

The Bed

The Bedknob

You can zoom in on one of the bedknobs. Do so, and use the screwdriver on it. Take the third nail polish

The Bedhead

Use the colours from the rings in the flower dish to open the lock

The code is Purple-Yellow-Red

Get the jewellery box key

The Table

The Jewellery Box

Use the key to open it and take the fourth nail polish

The Door

You should feel ashamed that you opened this spoiler. Very, very ashamed.

Button Escape 29 Walkthrough:

General Information:

If you haven't played a Button Escape before, the goal is to find and click all the buttons in the game. They look like grey circles. Each time you do, there is a fun sound and a smiley face appears on a button in the panel to the right of the door.

Looking Around:

Sheep scene:
There's a button in the star to the top left. One down! Click on the picture and see that there is a stain over the picture. We'll need to keep an eye out for something to clean it with. Click button number two in the top left corner. Zoom out. Grab the WEIRD BOX on the grass. Click the sheep to hear it baaa. The tan furry thing is a llama. Click its ears until it brings its head up to show its bell. Click it. There are two symbols you can click, but we don't have a code. Back up and turn right.

Tree scene:
Nothing you can do here right now. No key for the box, we can't reach the rag. Turn right.

Windmill scene:
Click the white square in the bottom left. It's a diary. Take note of the pictures. On the last page click the third button. Nothing else you can do here for now. There's an arrow on the bottom, back up.

Grill scene:
The weird blob seems angry. Maybe the grill is off? Click the fourth button on the grass. We should try to help the weird blob. Back up and turn right.

Mole scene:
Click the mole, who informs you he is a mole. There is a place for a four digit code with ABCD written above it. The chest is locked. The fifth button is hidden behind a table leg. Turn right. We're back to the first scene and there should be five smiley faces lit up on the sign. Time to solve puzzles!

ABCD code:

Let's solve the four digit ABCD code on the fence in the mole scene. Remember the sketchbook?

Each page tells you where to look for the number that corresponds with the letter on the top of the page.

A: Circle to the right of the scared face in the scene with the tree.
B: Peak of the cone head of the scary face in the mole scene.
C: First Japanese letter on the bottom row in the windmill scene.
D: Tongue of the screaming blob in the mole scene.

7349. Grab the LADDER.

Llama's bell:

Use the LADDER to get the RAG. Use the RAG to clean the picture. "I want to eat pancakes." Who does? This plea makes me nervous for some reason. Click the bottom left corner to find the sixth button. How does this help us solve the llama's bell?

Look again at the symbols on the bell. They look like lower case "t" and "a".

Click the symbols in the order they appear in "I want to eat pancakes" reading left to right.

a t t a t a a. Grab the MYSTERIOUS BROWN THINGS.

Pancakes and finishing up:

Use the MYSTERIOUS BROWN THINGS on the cabinet door we couldn't open in the tree scene. Open it up. Click the top right corner to find the seventh button. Four left! Use the WEIRD BOX on the hexagonal piece in the bottom of the cabinet. Grab the DARK GLASSES.

Who doesn't like bright light? I think someone informed us that he was a mole. Give the mole the DARK GLASSES. They seem to have made him happy, but he's out without a thank you. Check out the mole hole. Button number eight! The mole left us a note. Turn it over. There's a picture of the weird box we got the glasses from. Did we miss something?

Return to the weird box and click it again. Take the KEY. Use it on the chest in the mole scene and get the EXACTO KNIFE. Use the EXACTO KNIFE on the rope holding the windmill still. Power's on! Click the grey circle on the generator, which is the ninth button.

Go back to the weird blob who wants to cook. Click the button to turn on the grill. Pancakes for everyone! Take the plate the blob offers you. Turn over the fork to click the tenth button. One to go!

Go back to the first scene and see that the sheep was lying on the eleventh button. Click it and go home!

Room 4 Cafe Walkthrough:

You have to click on the blue circled japanese letters to examine an object in your inventory.
Looking around:

Bar scene:
On the table on the left there is a colored circle in a tray that we can't do anything with. Back up. Check out the pretty pictures. Back up. There is a power outlet beneath the lamp. Click on the coffee grinder. Open the bottom to find the BILL. Click the area around the red cups and grab CUP. There is a locked cabinet with a similar pattern as the tray on the table. You can click the right of the bar to go behind it. There is a locked cabinet where you can enter numbers that are situated in various places in the square. Back up and turn right.

Ghostlegs scene:
The only thing on this screen is a ghostleg puzzle with symbols on the top row. Turn right.

Bookcase scene:
The door is locked. Click the plant to see a place for a three digit code with 123 already entered on it. The bookcase has some books with the same symbols we saw on the ghostleg puzzle. You can click on them. The cabinet on the bottom is locked. Click on the mirror to look at the pictures on the opposite wall. Turn right.

Table scene:
Click on the table and check out the weird sphere. Wonder what that's for. Back up. Click on the shelf in the wall. There is a round box which wants a three digit code of different symbols. Click through to see your options. To the right there is a book. Page through it to see a picture of coffee beans and a 3x3 grid of numbers. Time to solve puzzles!

Round box with three symbols:

We've seen the clue for this around the cafe. Have you noticed any series of three symbols where one is larger?

We have a series of three dogs on our BILL. The first dog is largest. In the book, there is a series of three coffee beans, the second is largest. Last, there is a row of three red cups on the shelf, where the last cup is largest.

Enter dog-coffee-cup. Grab the TONGS.

Ghostleg puzzle:

We need to use the ghostleg puzzles to figure out the order to press the books with symbols on the bookcase. Use the TONGS to cut the bottom of the scroll to see the numbers at the bottom of the scroll.

You can go to http://en.wikipedia.org/wiki/Ghost_Leg to learn about how to play a ghostleg puzzle. You start at the top and follow the line down and turn every time you reach a horizontal line. You should end up with a reordered set of symbols, where each symbol corresponding to each number. You will press the symbols in the order they correspond to the numbers.

heart star diamond plus target.

Click the books with the symbols in the order you discovered from the puzzle. The bookcase moves and reveals another box with a three digit code we don't know.

Box behind the bookcase:

Notice that the pattern on the box is the same as on the mirror? Let's go back and look in the mirror.

Do the pictures look weird? Squint.

The white space forms a set of three numbers. 852. Enter this into the box. Grab the SPOON. Check it out. It's actually a KEY! Use it on the bottom cabinet. Get the COFFEE MAKER.

Drawer behind the bar:

Go to the drawer that has places for numbers in odd places. Maybe they could be slots on a 3x3 grid?

Use the 3x3 grid from the book to find the code.

317. Grab the BALL.

Colored circle drawer:

Put the sphere in the middle of the tray with the colored circle. Click it. It will move around the circle. Jot down the pattern and click the regions in the locked color circle in the right order.

red blue yellow red green blue middle. Get the COFFEE PACKET from the jar.

Making coffee:

Plug in the COFFEE MAKER in the outlet by the lamp. Put the COFFEE PACKET in the top, and the CUP underneath. Guess there was water already in it, because we have a CUP OF COFFEE. Place the CUP OF COFFEE on the table. It's too hot to drink, so let's stroll around the room. Come back. I guess someone drank our coffee, but they left a COIN in payment. Use the COIN on the red sphere and get a NOTE with three strings of numbers.

Three number code on the side of the bookcase:

Maybe you guessed that the code has to do with the NOTE. See that the numbers already entered in the lock are 1,2,3. Look at the positions of those numbers in your note. This is a pretty hard puzzle, so don't feel bad if you aren't getting it.

The numbers are usually repeated and separated by a single number.

Look at the numbers sandwiched between 1,2,3. These will be the numbers you put in the code.

642. The bookcase will move again and you find a KEY. Hooray! Use it to get outside and enjoy the weather.

45 Comments

Girl Room 3 Walkthrough

Near the Dresser

The Bookcase

Take the Screwdriver from the Frog

Look at the Rings to the left of the Frog, note the position of each colour.

The Dresser

Take the fifth nail polish

The Bedside Cabinet

Turn the Mirror on top

Zoom out and look up at the roof

Note the code

6514

Look inside the cabinet and take the A

The Wall with the Door

The Cuckoo Clock

Enter the code from the mirror and get the key

The Locked Cabinet

Use the key on the cabinet and take the first nail polish

The Credenza

Use the A on the other letters and take the second nail polish

The Bed

The Bedknob

You can zoom in on one of the bedknobs. Do so, and use the screwdriver on it. Take the third nail polish

The Bedhead

Use the colours from the rings in the flower dish to open the lock

The code is Purple-Yellow-Red

Get the jewellery box key

The Table

The Jewellery Box

Use the key to open it and take the fourth nail polish

The Door

You should feel ashamed that you opened this spoiler. Very, very ashamed.

Reply

thanks Jonathon. hope you'll do the others. and also,to everyone in here, i'd appreciate it if you'd stop giving me negative votes. i'm not doing anything different then the others are doing. thanks.

Reply
argyblarg February 18, 2015 9:30 AM replied to Paul

Paul,

With all respect, I suspect you get down voted because you do primarily (or perhaps only) one thing on this site:

- ask for a walkthrough
- ask for a walkthrough again if you don't see one in a few days

No one else does this. Other people on this site are discussing the games and having conversation.

On other parts of the site, people (those who make walkthroughs, which I don't) have commented on how annoying this is.

Perhaps if you added more to the conversation, you wouldn't get downvoted.

Reply
prairiegal February 18, 2015 9:44 AM

grrrr...! I'm missing the middle button on the top row. I've solved puzzles, fed everyone... any ideas?

Reply
Kheig February 18, 2015 9:57 AM replied to prairiegal

Did you

check the mole hole?

Reply

Room 4 was great! The last two puzzles are tricky! You almost think there's no solution until you sit there staring at them for a couple minutes.

Reply
prairiegal February 18, 2015 10:10 AM replied to Kheig

indeed I did, Kheig! but thanks.

here's where I found 10 of the 11 buttons:

first scene

in one of the stars
under the sheep
dirty sign view

generator scene

in sketchbook

picnic table scene

on the grass

mole scene

under the table with the locked box on it

after solving problems

generator (after I started it up)
fork (after everyone sits down for pancakes)
mole hole (after getting the mole to move)
in the hidden panel in the cupboard

Reply
CJTressler February 18, 2015 10:25 AM replied to prairiegal

There are 2

at the dirty sign.

One above the sign and one on the sign after you clean it.

Reply
prairiegal February 18, 2015 10:26 AM replied to CJTressler

that's it! thanks.

Reply
CJTressler February 18, 2015 10:45 AM replied to prairiegal

I'm stuck in the Cafe. Any hints for the

3 numbers on the side of the bookcase?

I figure it has to do with

the 3 sets of 6 numbers

but I can't figure out how.

Thanks!

Reply

CJTressler:

The hint is in the book with the dog on the front. If you glanced over it, it's next to the box with the symbol code.

Compare the nine number positions with the number positions in the white boxes on the drawer.

Reply
invisiblemonster February 18, 2015 11:32 AM replied to CJTressler

the numbers on the bookcase give you a hint for where to look for the numbers on the paper

Reply

@CJ

There are already numbers on the side

Reply

I have the opposite problem: the 3 sets of numbers and nowhere to put them. I figure they go on

the side of the bookcase

since that's the only place left, but I tried

inputting the first, second, and third numbers in each sequence

and that did nothing.

Also,

does anyone know how the number-coded box was supposed to work? I strong-armed my way in and I still have no idea how to find numbers on or around the mirror.

Reply

For those who may be still hunting for the bottom row, first button, why don't you have a bite to eat?

Reply

She5los:
About that suspicious mirror...

When you look in the mirror, the pictures are arranged on the wall in an odd way.

Imagine the pictures as black boxes. They beige background is what you want.

The code for the box behind the bookcase is 852

But, can anyone help with the 1,2,3 code on the side of the bookcase?
Or maybe with the gumball machine on the table, if they're not connected?
Thanks!

Reply

Trip:

When you've made a cup of coffee, put it on the table. Leave and come back and there will be a coin. Put that in the machine, pull the lever, and you'll get a strip of paper with some numbers. I'm still working out what to do next.

Reply
justkillme441 February 18, 2015 12:42 PM

I actually like Paul's comments. Make me smile every time :)

Reply

the fact is argy, without one I cant even get started. But asking for one is technically asking for help. which again is no different then what everyone else is doing. I would just be randomly clicking just to click and then if I found something, and I post then no one responds for a while, and if the game doesn't have a save, I end up starting all oer. and even if it does have a save and I can't go further after saving, I end up asking what to do oer and oer, then no one will help because they get tired of me asking for help. If this site was not made for walkthroughs, i'd go somewhere else to get them. even the people that run the site said there's nothing wrong with asking for one, unless it causes people to verbally attack each other,etc.

Reply

Found the "long string of numbers" hint for the left side of the bookcase on another site:

What's in between the numbers?

Reply

thanks justkillme. you rock :)

Reply

She5los,

look between the numbers

look between the 1's, the 2's, the 3's

Reply

Thanks, Friar! That one was really cryptic!

Reply

In the cafe, can anybody tell me where to

plug in the coffeemaker? I feel like I've tried everywhere.

Reply

Sorry for double posting!

Reply

POP!

Reply

First time posting -- hi everyone! Am stuck in Cafe Room because there is type of puzzle I have no idea how to solve. It's the one with the wallhanging with the five symbols.

I cut the string on the bottom so I can see the ladder puzzle. Very confusing (for me) to figure out the order of the symbols because it seems that when I follow the lines of the ladders, this does not change the order of the symbols... any help? thanks!

Reply

Never mind, finally got it.

Reply
lynnehammar927 February 18, 2015 5:34 PM

I am pretty dependent on walkthroughs myself - but I prefer to scroll through the comments and see if anyone has the same problems I do - and I appreciate "spoilered" hints.

Typically, I only post to say how much I like a game. (For example, I *love* the button games! That little sound effect is like a dose of adrenaline, for some reason.)

Paul, rather than posting "can someone please do a walkthrough" (which really doesn't add any value to the site because someone will eventually post one), why not do a quick Google search ("game name" walkthrough)? I always do that when I'm in trouble - either in the form of a video WT, text WT, or another message board where people are discussing the game in question.

Thanks, JIG! I almost forgot it was Wednesday!!

Reply

look below the lamp on the bar

Reply

lynne because I can't find any text walkthroughs. I wish more sites had them. all I find are video ones and they go too fast.

Reply

Button Escape 29 Walkthrough:

General Information:

If you haven't played a Button Escape before, the goal is to find and click all the buttons in the game. They look like grey circles. Each time you do, there is a fun sound and a smiley face appears on a button in the panel to the right of the door.

Looking Around:

Sheep scene:
There's a button in the star to the top left. One down! Click on the picture and see that there is a stain over the picture. We'll need to keep an eye out for something to clean it with. Click button number two in the top left corner. Zoom out. Grab the WEIRD BOX on the grass. Click the sheep to hear it baaa. The tan furry thing is a llama. Click its ears until it brings its head up to show its bell. Click it. There are two symbols you can click, but we don't have a code. Back up and turn right.

Tree scene:
Nothing you can do here right now. No key for the box, we can't reach the rag. Turn right.

Windmill scene:
Click the white square in the bottom left. It's a diary. Take note of the pictures. On the last page click the third button. Nothing else you can do here for now. There's an arrow on the bottom, back up.

Grill scene:
The weird blob seems angry. Maybe the grill is off? Click the fourth button on the grass. We should try to help the weird blob. Back up and turn right.

Mole scene:
Click the mole, who informs you he is a mole. There is a place for a four digit code with ABCD written above it. The chest is locked. The fifth button is hidden behind a table leg. Turn right. We're back to the first scene and there should be five smiley faces lit up on the sign. Time to solve puzzles!

ABCD code:

Let's solve the four digit ABCD code on the fence in the mole scene. Remember the sketchbook?

Each page tells you where to look for the number that corresponds with the letter on the top of the page.

A: Circle to the right of the scared face in the scene with the tree.
B: Peak of the cone head of the scary face in the mole scene.
C: First Japanese letter on the bottom row in the windmill scene.
D: Tongue of the screaming blob in the mole scene.

7349. Grab the LADDER.

Llama's bell:

Use the LADDER to get the RAG. Use the RAG to clean the picture. "I want to eat pancakes." Who does? This plea makes me nervous for some reason. Click the bottom left corner to find the sixth button. How does this help us solve the llama's bell?

Look again at the symbols on the bell. They look like lower case "t" and "a".

Click the symbols in the order they appear in "I want to eat pancakes" reading left to right.

a t t a t a a. Grab the MYSTERIOUS BROWN THINGS.

Pancakes and finishing up:

Use the MYSTERIOUS BROWN THINGS on the cabinet door we couldn't open in the tree scene. Open it up. Click the top right corner to find the seventh button. Four left! Use the WEIRD BOX on the hexagonal piece in the bottom of the cabinet. Grab the DARK GLASSES.

Who doesn't like bright light? I think someone informed us that he was a mole. Give the mole the DARK GLASSES. They seem to have made him happy, but he's out without a thank you. Check out the mole hole. Button number eight! The mole left us a note. Turn it over. There's a picture of the weird box we got the glasses from. Did we miss something?

Return to the weird box and click it again. Take the KEY. Use it on the chest in the mole scene and get the EXACTO KNIFE. Use the EXACTO KNIFE on the rope holding the windmill still. Power's on! Click the grey circle on the generator, which is the ninth button.

Go back to the weird blob who wants to cook. Click the button to turn on the grill. Pancakes for everyone! Take the plate the blob offers you. Turn over the fork to click the tenth button. One to go!

Go back to the first scene and see that the sheep was lying on the eleventh button. Click it and go home!

Reply

Room 4 Cafe Walkthrough:

You have to click on the blue circled japanese letters to examine an object in your inventory.
Looking around:

Bar scene:
On the table on the left there is a colored circle in a tray that we can't do anything with. Back up. Check out the pretty pictures. Back up. There is a power outlet beneath the lamp. Click on the coffee grinder. Open the bottom to find the BILL. Click the area around the red cups and grab CUP. There is a locked cabinet with a similar pattern as the tray on the table. You can click the right of the bar to go behind it. There is a locked cabinet where you can enter numbers that are situated in various places in the square. Back up and turn right.

Ghostlegs scene:
The only thing on this screen is a ghostleg puzzle with symbols on the top row. Turn right.

Bookcase scene:
The door is locked. Click the plant to see a place for a three digit code with 123 already entered on it. The bookcase has some books with the same symbols we saw on the ghostleg puzzle. You can click on them. The cabinet on the bottom is locked. Click on the mirror to look at the pictures on the opposite wall. Turn right.

Table scene:
Click on the table and check out the weird sphere. Wonder what that's for. Back up. Click on the shelf in the wall. There is a round box which wants a three digit code of different symbols. Click through to see your options. To the right there is a book. Page through it to see a picture of coffee beans and a 3x3 grid of numbers. Time to solve puzzles!

Round box with three symbols:

We've seen the clue for this around the cafe. Have you noticed any series of three symbols where one is larger?

We have a series of three dogs on our BILL. The first dog is largest. In the book, there is a series of three coffee beans, the second is largest. Last, there is a row of three red cups on the shelf, where the last cup is largest.

Enter dog-coffee-cup. Grab the TONGS.

Ghostleg puzzle:

We need to use the ghostleg puzzles to figure out the order to press the books with symbols on the bookcase. Use the TONGS to cut the bottom of the scroll to see the numbers at the bottom of the scroll.

You can go to http://en.wikipedia.org/wiki/Ghost_Leg to learn about how to play a ghostleg puzzle. You start at the top and follow the line down and turn every time you reach a horizontal line. You should end up with a reordered set of symbols, where each symbol corresponding to each number. You will press the symbols in the order they correspond to the numbers.

heart star diamond plus target.

Click the books with the symbols in the order you discovered from the puzzle. The bookcase moves and reveals another box with a three digit code we don't know.

Box behind the bookcase:

Notice that the pattern on the box is the same as on the mirror? Let's go back and look in the mirror.

Do the pictures look weird? Squint.

The white space forms a set of three numbers. 852. Enter this into the box. Grab the SPOON. Check it out. It's actually a KEY! Use it on the bottom cabinet. Get the COFFEE MAKER.

Drawer behind the bar:

Go to the drawer that has places for numbers in odd places. Maybe they could be slots on a 3x3 grid?

Use the 3x3 grid from the book to find the code.

317. Grab the BALL.

Colored circle drawer:

Put the sphere in the middle of the tray with the colored circle. Click it. It will move around the circle. Jot down the pattern and click the regions in the locked color circle in the right order.

red blue yellow red green blue middle. Get the COFFEE PACKET from the jar.

Making coffee:

Plug in the COFFEE MAKER in the outlet by the lamp. Put the COFFEE PACKET in the top, and the CUP underneath. Guess there was water already in it, because we have a CUP OF COFFEE. Place the CUP OF COFFEE on the table. It's too hot to drink, so let's stroll around the room. Come back. I guess someone drank our coffee, but they left a COIN in payment. Use the COIN on the red sphere and get a NOTE with three strings of numbers.

Three number code on the side of the bookcase:

Maybe you guessed that the code has to do with the NOTE. See that the numbers already entered in the lock are 1,2,3. Look at the positions of those numbers in your note. This is a pretty hard puzzle, so don't feel bad if you aren't getting it.

The numbers are usually repeated and separated by a single number.

Look at the numbers sandwiched between 1,2,3. These will be the numbers you put in the code.

642. The bookcase will move again and you find a KEY. Hooray! Use it to get outside and enjoy the weather.

Reply
ms484 February 19, 2015 4:11 AM replied to elle

elle: Damn I should have read the fine print! I was counting on that fame.

Reply

OMG, it's ms484! Squee! :-)
Seriously, thanks, ms484 - I was getting frustrated at the last puzzle but your first hint about it made me understand how it worked.

Reply
timistheword February 19, 2015 3:25 PM replied to ms484

Thank you for explaining the ghost leg puzzle! I've been doing escape games for years. Years! I've never known about that puzzle format.

Reply
timistheword February 19, 2015 3:31 PM replied to ms484

Next question: what the heck is that big pancake thing? It looks lovely.

Reply

That was my favorite Button Escape yet :)

Reply

OK... that's one I have been thinking of asking about.

I usually have done the funkyland or hottategoya puzzles a few days before they appear on JIG (I'm an addict), so my walkthrough is usually already done by the time the post is made. I usually post the walkthrough when i see the post, but I've been wondering if people would prefer I wait?

Reply

Cheers to everyone that solved the final puzzle in Room 4.

Even after I read the explanation all I could think was...

to have 3 numbers sandwiched you need 4 numbers like 1233, which I might have had a shot at figuring out.

So kudos to you all!

Reply

I have to agree with Paul here, though perhaps for different reasons. Jayisgames used to be the primary site I frequented for games because of the quality of the reviews and walkthroughs. That is no longer the case. I go to other sites first now to see what is new. As the ads have become more invasive, JIG seems to me to have become no better than sites with many fewer ads.

In the past JIG typically posted good walkthroughs, written by the reviewers, not readers, within 24 hours. They were well written, starting with looking around and helping with pixel hunts, which I appreciate, and unfolded in ways that made sense for giving those small hints. (Reader walkthroughs vary greatly in quality. I don't want to suggest all are unhelpful.) Personally, pixel hunts take away from the enjoyment of a game for me. I like having the nudge, not because I am lazy or impatient (as commenters seem to like to assume about people who ask for help) but because this is casual escape for me and I don't have time for things I don't enjoy. I also don't really want to post a question and wait for an answer. I am not looking for a community of people discussing the game, I am looking for that nudge.

JIG can be whatever the powers that be want it to be, but I find it a less helpful, less hospitable place in the last couple of years.

Reply

Coffee packet???!!
I could've sworn that thing was a cupcake!

Reply

^ Scroll Up | Homepage >

Leave a comment [top of page]

Please consider creating a Casual Gameplay account if you're a regular visitor here, as it will allow us to create an even better experience for you. Sign-up here!
  • PLEASE UNDERSTAND SITE POLICIES BEFORE POSTING COMMENTS
  • You may use limited HTML tags for style:
    (a href, b, br/, strong, em, ul, ol, li, code, spoiler)
    HTML tags begin with a less-than sign: < and end with a greater-than sign: >. Always. No exceptions.
  • To post spoilers, please use spoiler tags: <spoiler> example </spoiler>
    If you need help understanding spoiler tags, read the spoiler help.
  • Please Preview your comment before posting, especially when using spoilers!
  • No link dropping, no domains as names; do not spam, and do not advertise! (rel="nofollow" in use)
chrpa Jayisgames needs your help to continue providing quality content. Click for details Hi! Weekday Escape and Weekday Puzzle are here! First we have two new cans from tomoLaSiDo and then two small rooms from isotronic. That's all for this...  ...
6,365 Views
0 Comments
chrpa Jayisgames needs your help to continue providing quality content. Click for details Welcome to Mobile Monday! We have another beautiful game from Nicolet and it's a winter game as it should be. Tasuku Yahiro have released another of their...  ...
6,161 Views
2 Comments
chrpa Jayisgames needs your help to continue providing quality content. Click for details We've got a new game from Rinnogogo's magical world and this time it really is magical.. Not only do you get to meet cute animals that express themselves...  ...
chrpa Jayisgames needs your help to continue providing quality content. Click for details After a few weeks of patient waiting, we have been rewarded - the new game from Ichima Coffeedo is here. We got a wonderful new game - it's...  ...

HELP Jayisgames.com

Recent Comments


Display 5 more comments
Limit to the last 5 comments

Game of the week


Dark Romance: Vampire Origins Collector's Edition

Your Favorite Games edit

add
Save links to your favorite games here. Use the Favorites editor.

Monthly Archives